Learn: Top 11 Tips for Food Photography
Published 16 March 2026 by MPB
What’s the best way to photograph food? Perhaps you’re a casual photographer and you want to take better photos of the dishes you prepare at home. Or you’re an aspiring professional food photographer who wants to learn how to take the next step in your career.
It can be frustrating when you have a delicious dish in front of you, and you take out your camera to take a picture—only to realise that the result doesn’t look quite as appetising. In real life, the aroma of the dish, the sounds and—of course—the flavours all help activate all of our senses. We can only show the recipe's deliciousness through visual details in photography.
In this article, award-winning food photographer and Adobe Lightroom ambassador Bea Lubas, author of How to Photograph Food (2020), reveals the eleven top tips for food photography.
Read on to learn more from Bea’s guide, which includes everything from kit recommendations to controlling light, and find out how you could take better pictures of food.
Bea Lubas | Canon EOS R5| Canon RF 100mm f/2.8 L IS USM | 100mm | f/6.3 | 1/25 | ISO 500
1. Watch out for distortion
The lens you choose will depend on the scene you want to capture and how many elements you want to show in the frame. A wide-angle lens, like a 35mm, or a standard lens, like a 50mm, will be a great choice when photographing a wider table scene. Some distortion might be visible in those wider photographs, but it can usually be a quick fix in post-production.
The closer you photograph your subject with those lenses, the more distortion you will see in your photograph. You might notice that some elements look like they are tilting, out of proportion or distracting, and it might not always be possible to correct them after the photo is taken.
Try experimenting with the placement of the elements. Move the items away from the edges of the frame, move the camera away from the subject, or, if you can, change a lens to a short telephoto lens like an 85mm or 100mm.
Food is a small subject, and capturing closer food portraits with a short telephoto lens will make the composition look more proportional. Plus, these will often create a beautifully shallow depth of field.
Bea Lubas | Canon EOS 5D Mark IV | Sigma 50mm f/1.4 DG HSM ART | 50mm | f/3.2 | 1/25 | ISO 320
2. Use a tripod and tethering for more creative control
A sturdy tripod is a game changer when building a food composition. At first, it might feel like it adds time to your creative process. But it can save time in the long run.
Using a tripod gives you more creative control. While the camera is fixed in the same position, you can build the composition and tweak the details. Some tripods come with a longer horizontal arm for flat lays. But always remember to weigh down the tripod and ensure it is safe and secure.
Another great tool for creating better photos of food is live view tethering. Connect your camera to the tethering software on your laptop, tablet or smartphone via cable or Wi-Fi. You can then see the details of your composition on a larger screen, control your camera settings, take photos and save them directly to your hard drive.
Live view tethering is also helpful for action shots. For example, when you’re in front of the camera, dusting icing sugar on pancakes, you can see the framing of the photo on the screen at the same time.
Bea Lubas | Canon EOS R5 | Canon 24-70mm f/2.8 L IS USM | 70mm | f/10 | 1/30 | ISO 320
3. Select a background that suits your dish
The background can make or break your image. Its job is to highlight and elevate the food you’re photographing. So, you’ll want to choose something with a beautiful texture to add visual interest—but you’ll also need to be careful so that it’s not too distracting.
Colour matters, too. If you ever get stuck on which colour to choose, there are two effective colour techniques that you can keep in your back pocket.
The first one is to choose a background and props that have the same colour and contrast with the colour of your chosen dish really well.
The second is a colour repetition technique, where you choose the background in the same colour as the main ingredient in your dish, and you separate the background and the dish with a differently-coloured ceramic.
Bea Lubas | Canon EOS R5 | Canon RF 24-70mm f/2.8 L IS USM | 70mm | f/7.1 | 1/50 | ISO 250
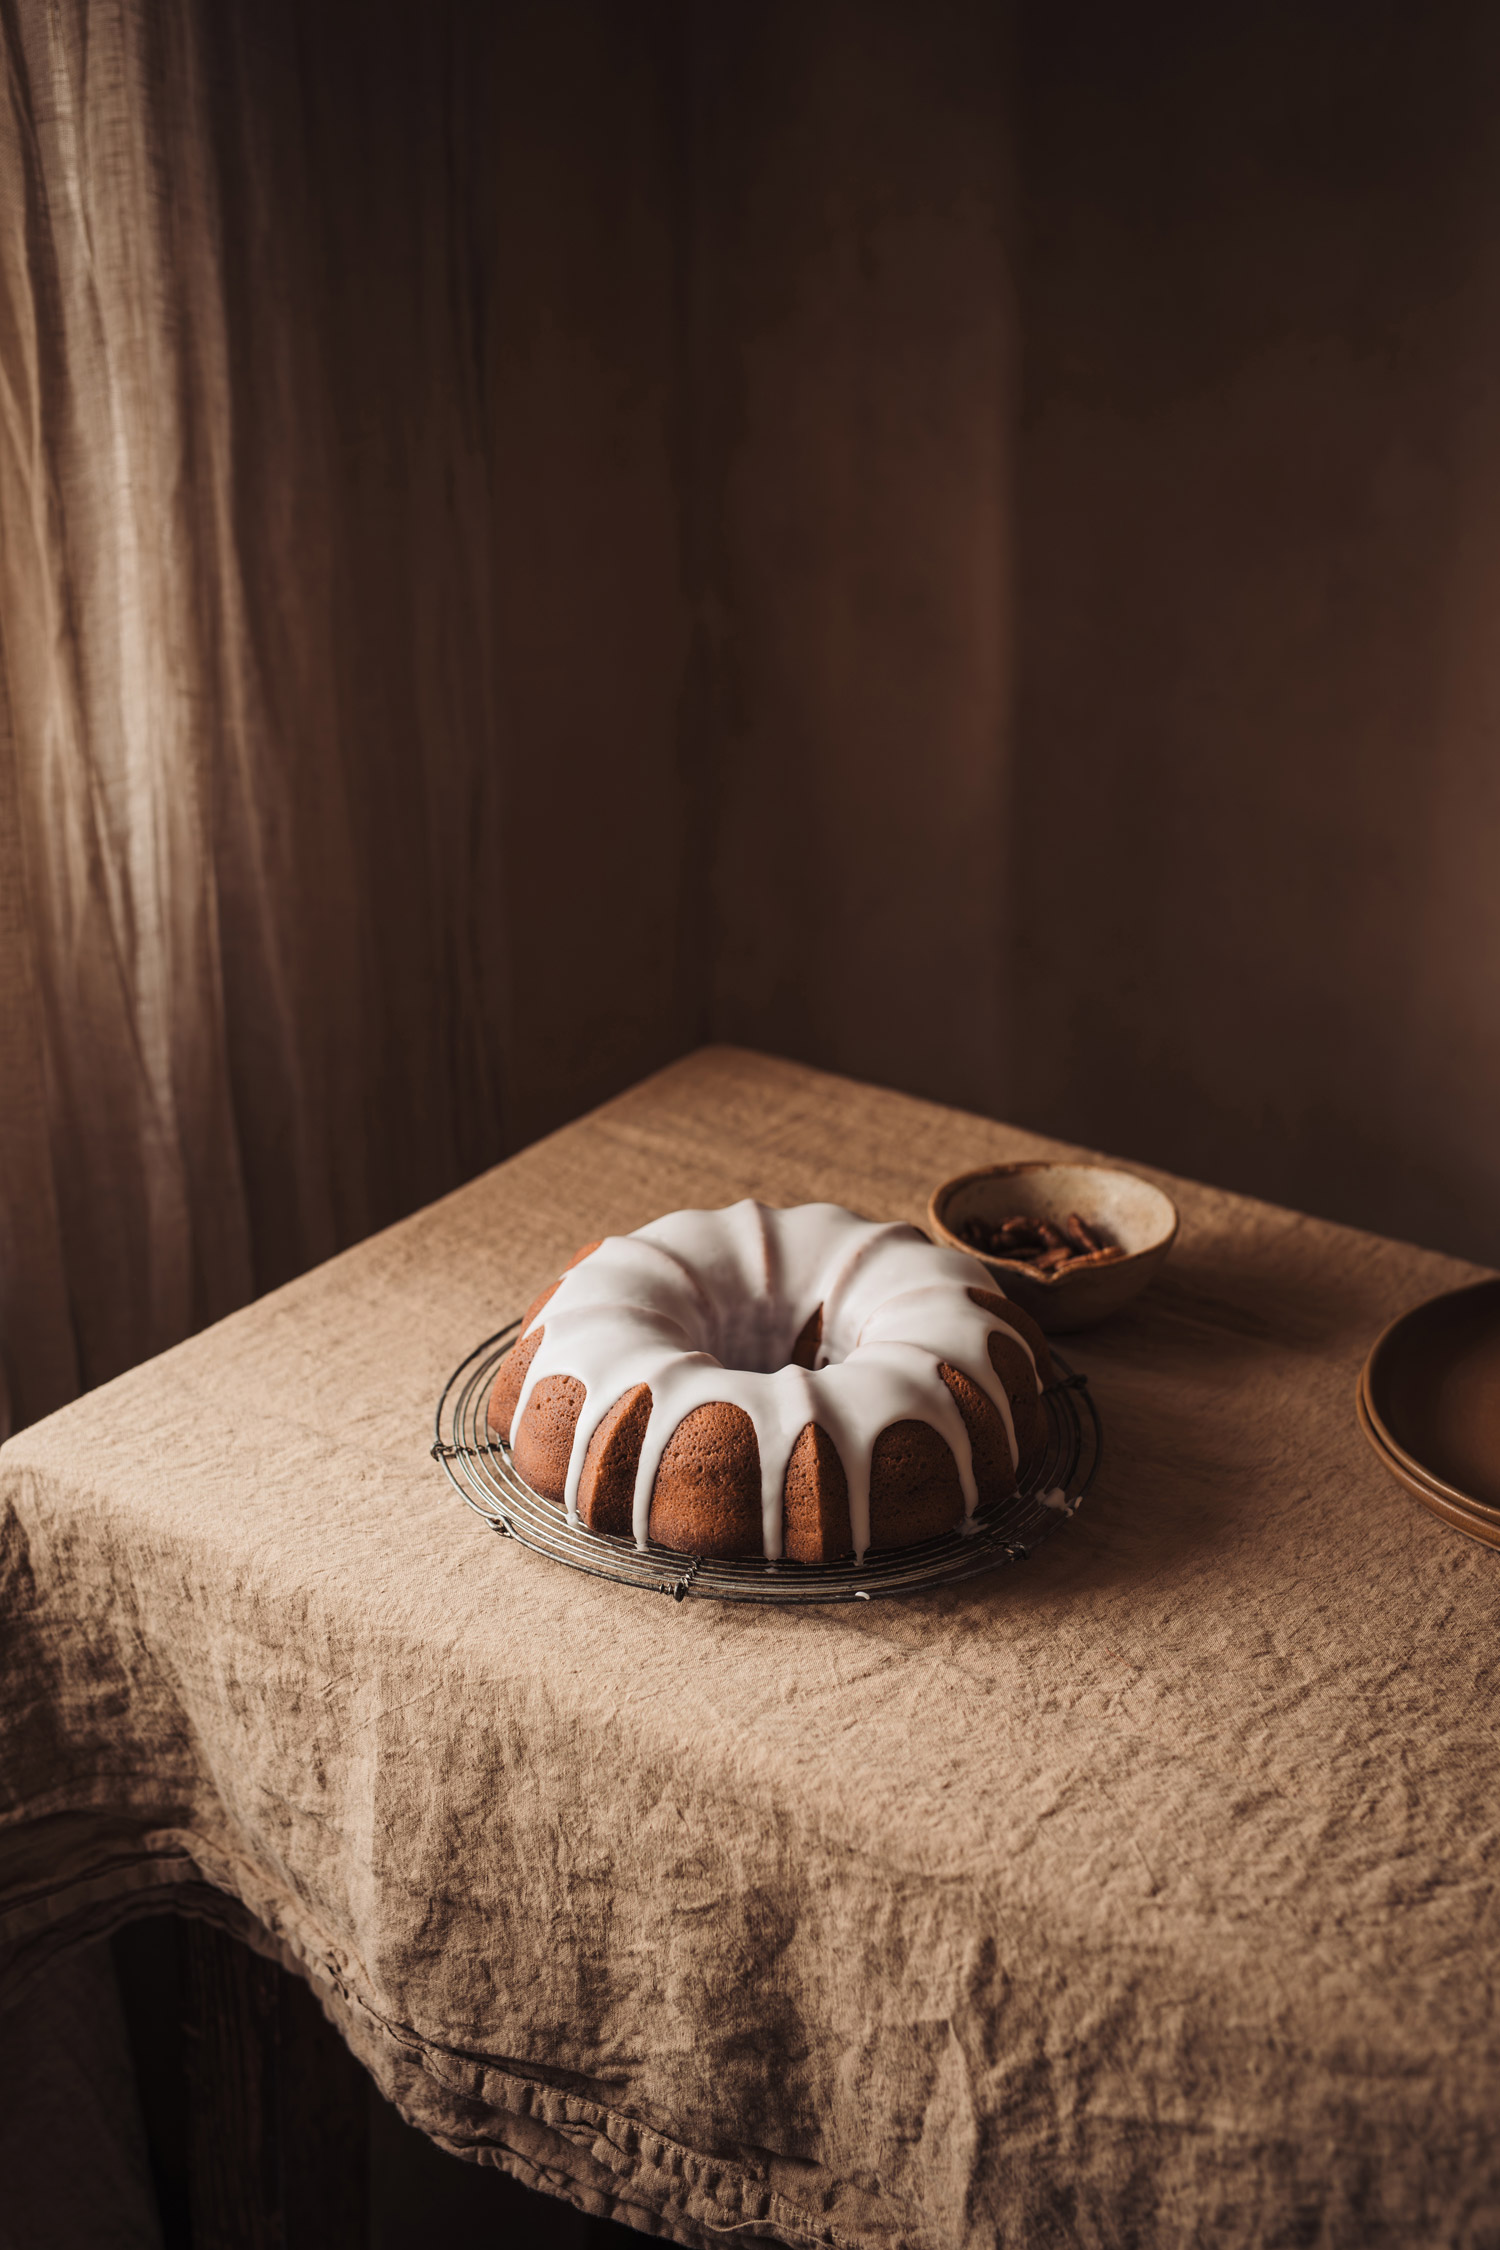
4. Play with shadows to create more depth and dimension
Photographers love light. However, too much light in food photography isn’t always a good thing. Remember that your subject is relatively small. Soft light coming from many different directions in the space, like during an overcast day, can create a lack of shadows, depth and dimension in your frame, resulting in a flat-looking food photograph.
If that’s something that you notice in your photos, and you are photographing with soft light in a space that has a lot of windows or skylight windows, consider drawing blinds and curtains on some of them. Notice how that changes the shadows in your photograph. Photographing food next to one light source, like a medium-sized window, with light coming from the side, usually creates great results.
Pay attention to how the shadows change depending on the weather—if it’s a sunny day and the sun is streaming through the window, or it’s an overcast day—and you’ll notice which light you prefer for photographing certain foods.
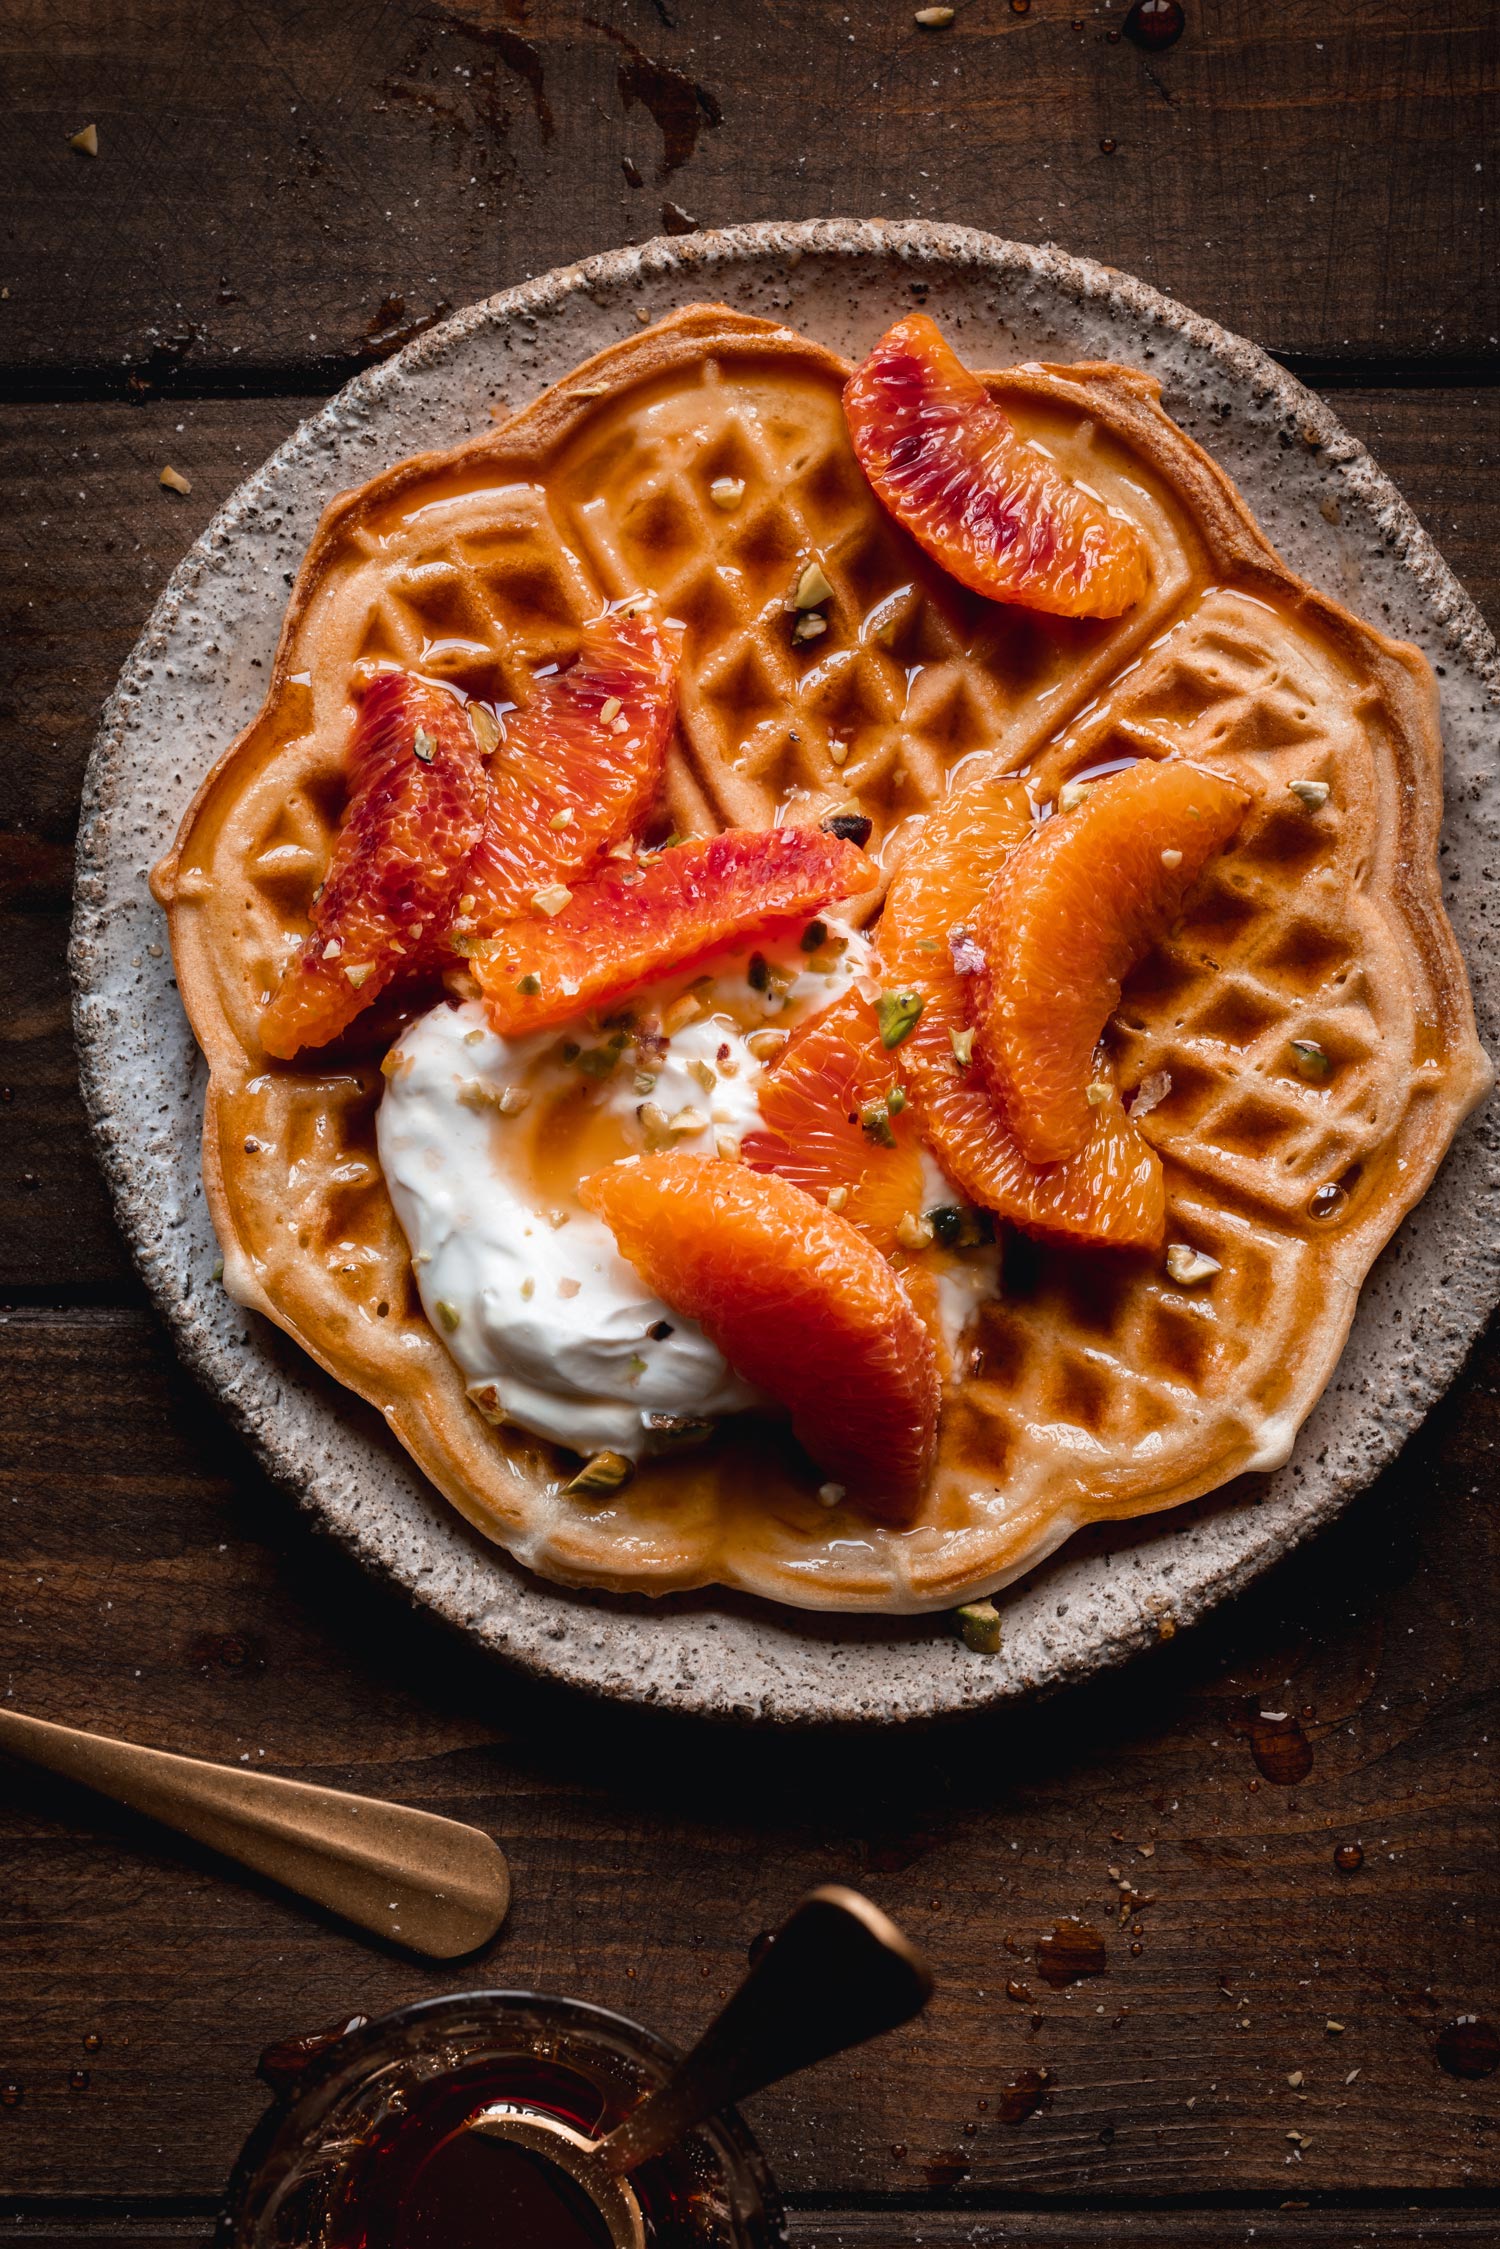
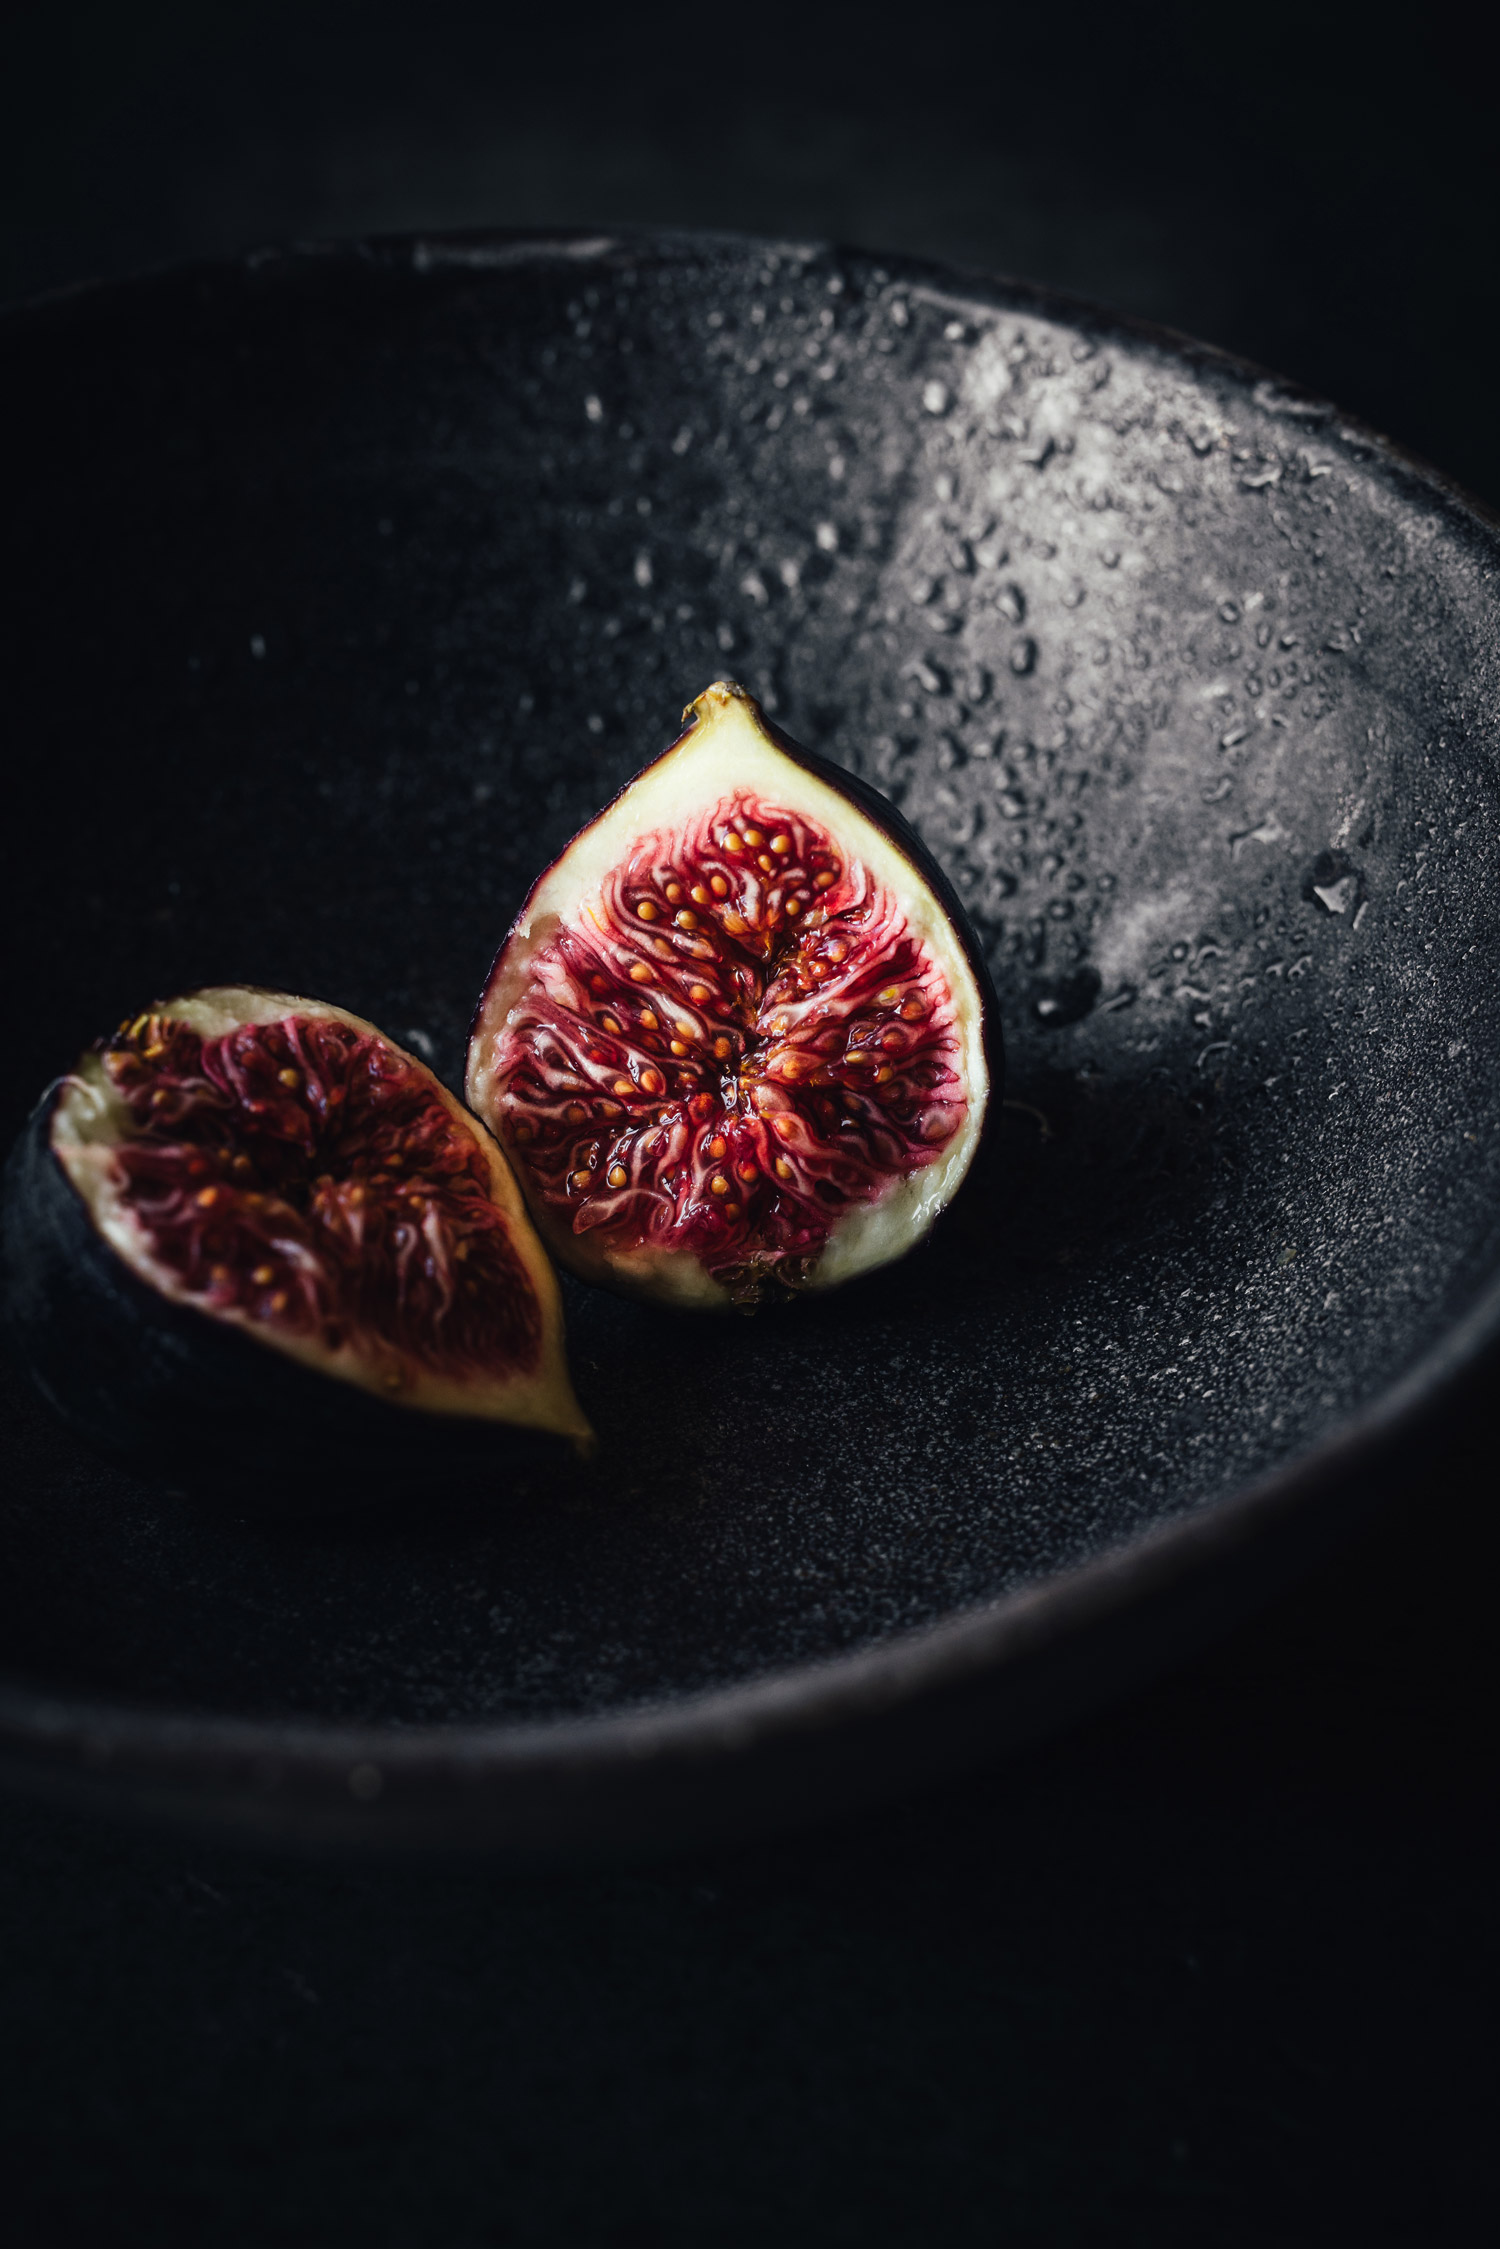
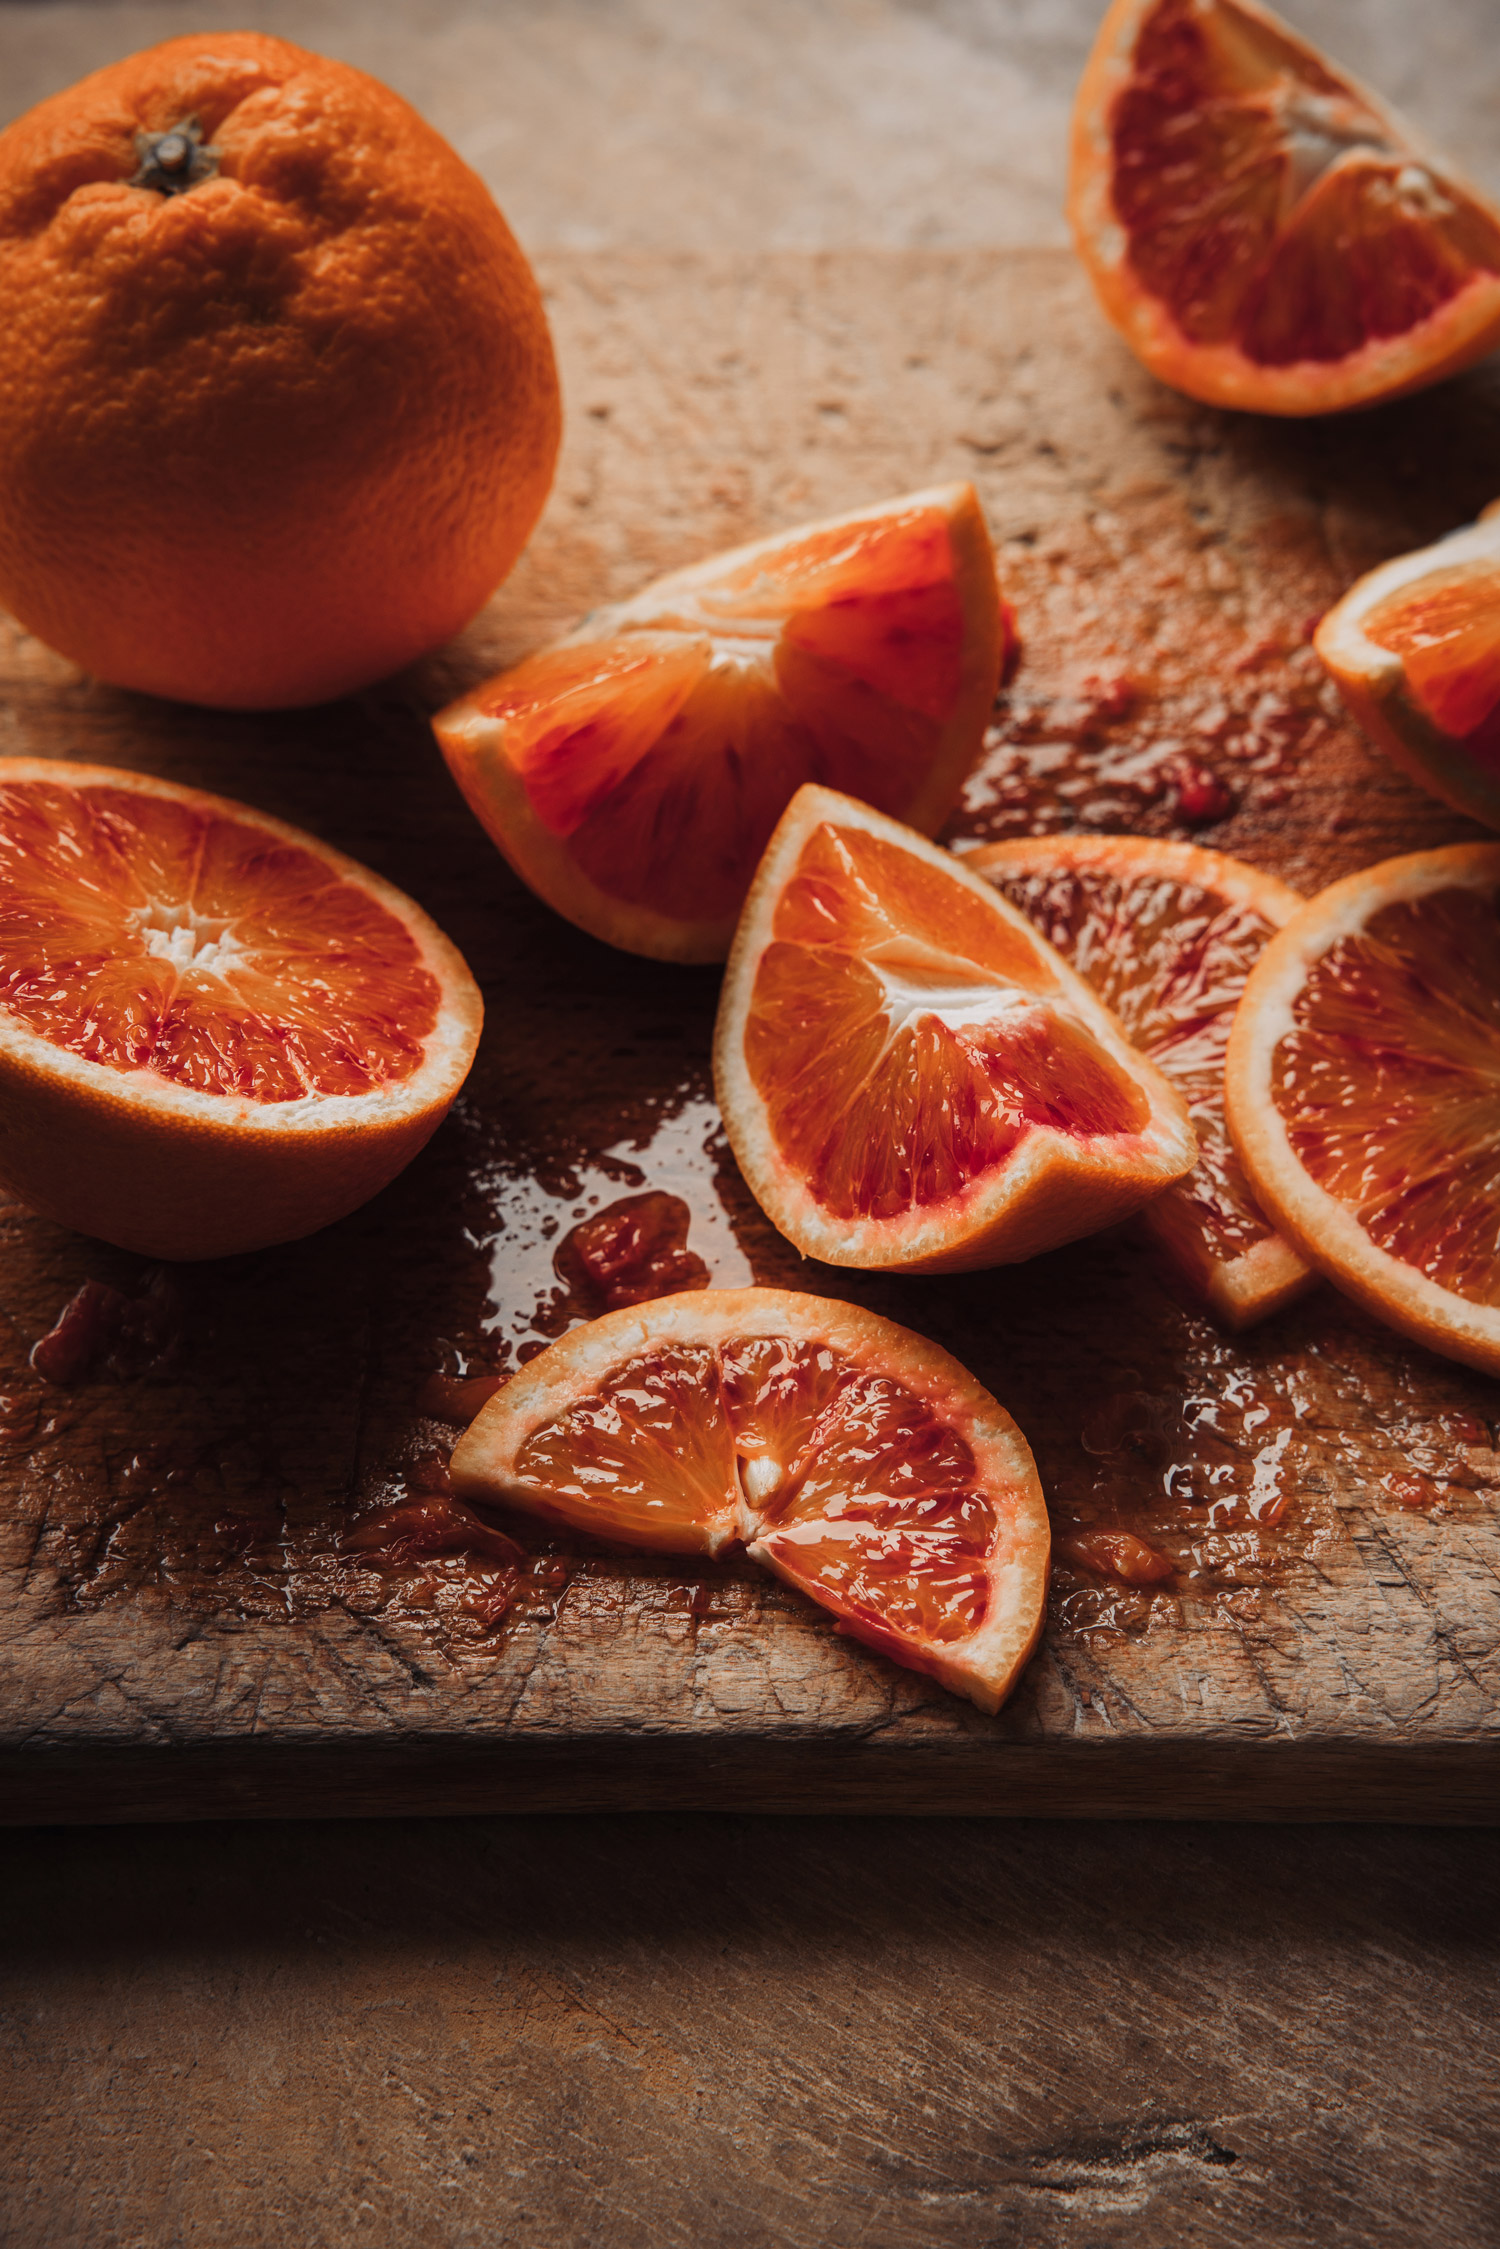
5. Use highlights to add more visual magic
Highlights create a strong visual interest and can be a great strategy to add ‘wow factor’ to your food images. That eye-catching shine is all about how light plays with your subject and its shape, its texture and the way it’s angled.
When it comes to texture, think about how you could add extra shine to your dish. You could add a touch of dressing on the salad leaves, create swirls with the back of the spoon on the cake’s frosting, or even mist some fresh ingredients with water.
For the shape, think about whether the ingredient or dish can be sliced in different ways. Consider how those slices catch the light.
You can also angle elements of your dish, and turn them towards the light to create more highlights. Or photograph some of the recipes, especially those with beautiful smooth textures, with a backlighting technique to add more of that captivating light magic to your frames.
Bea Lubas | Canon EOS R5 | Canon RF 24-70mm f/2.8 L IS USM | 36mm | f/4.0 | 1/160 | ISO 800
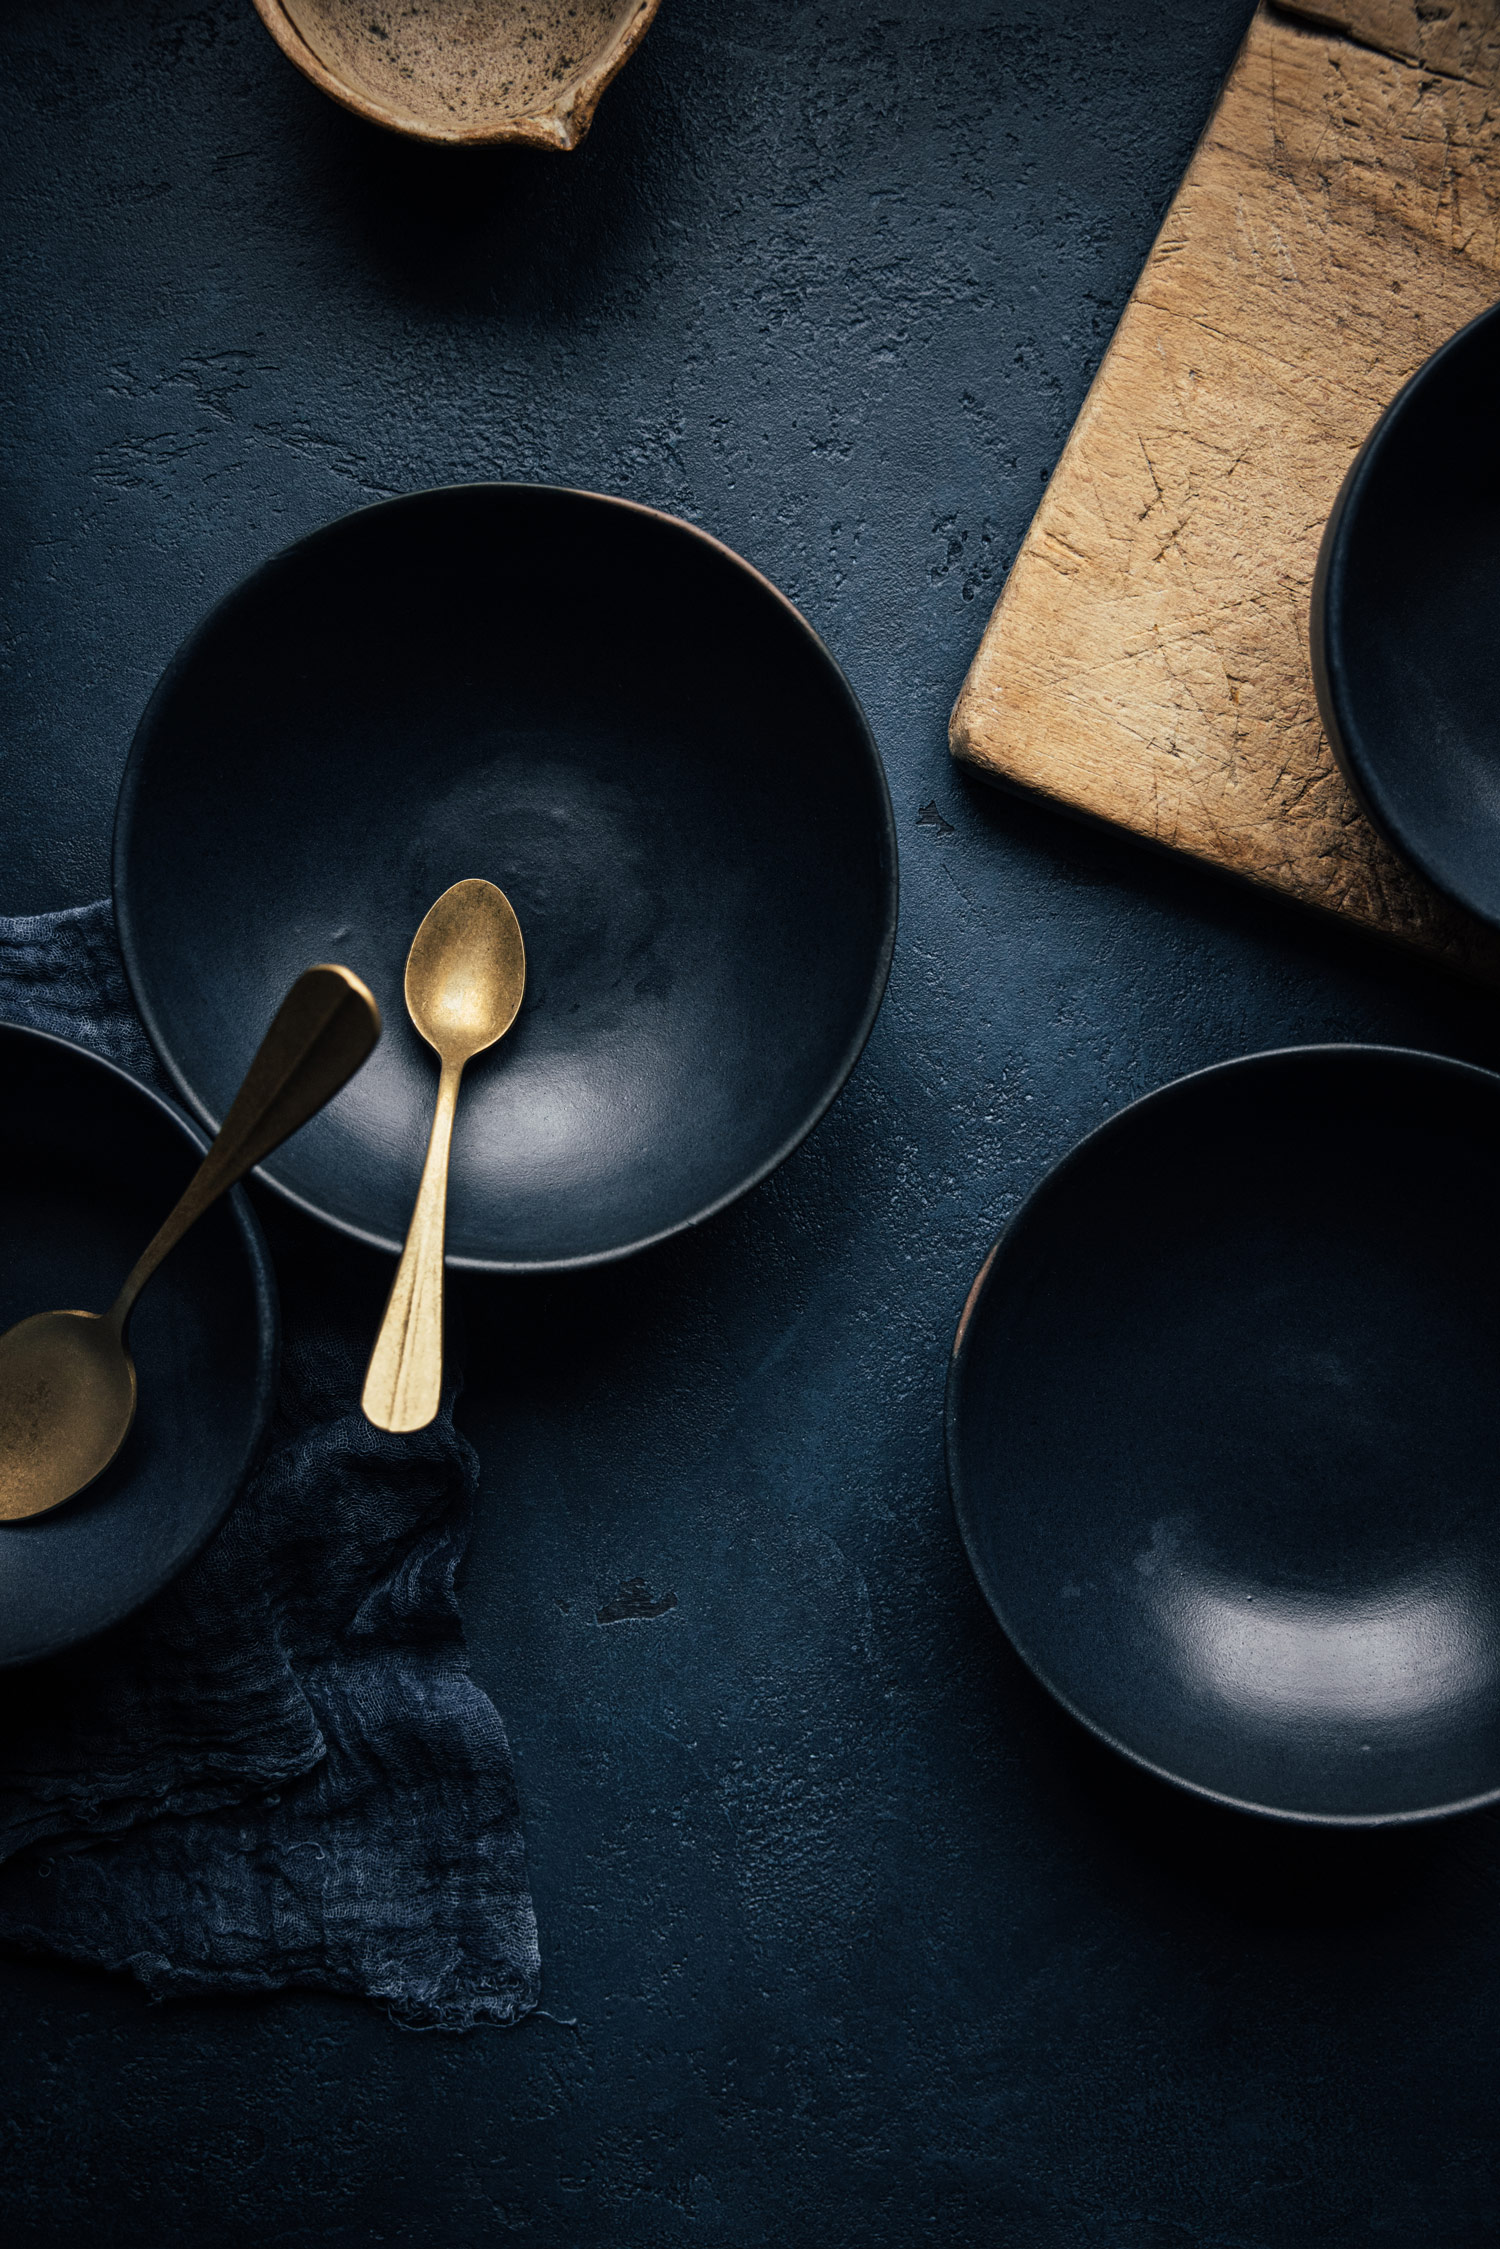
6. Build your composition with empty dishes first
Fresh is the key. That’s why, as a food photographer, you’ll often need to work fast. Some food, when it’s on set for too long, can start to dry out, wilt, change shape and lose its appetising factor. Try working on the composition with empty dishes first, then adding food once you’re satisfied with the placement.
Bea Lubas | Canon EOS R5 | Canon RF 24-70mm f/2.8 L IS USM | 70mm | f/3.5 | 1/30 | ISO 200
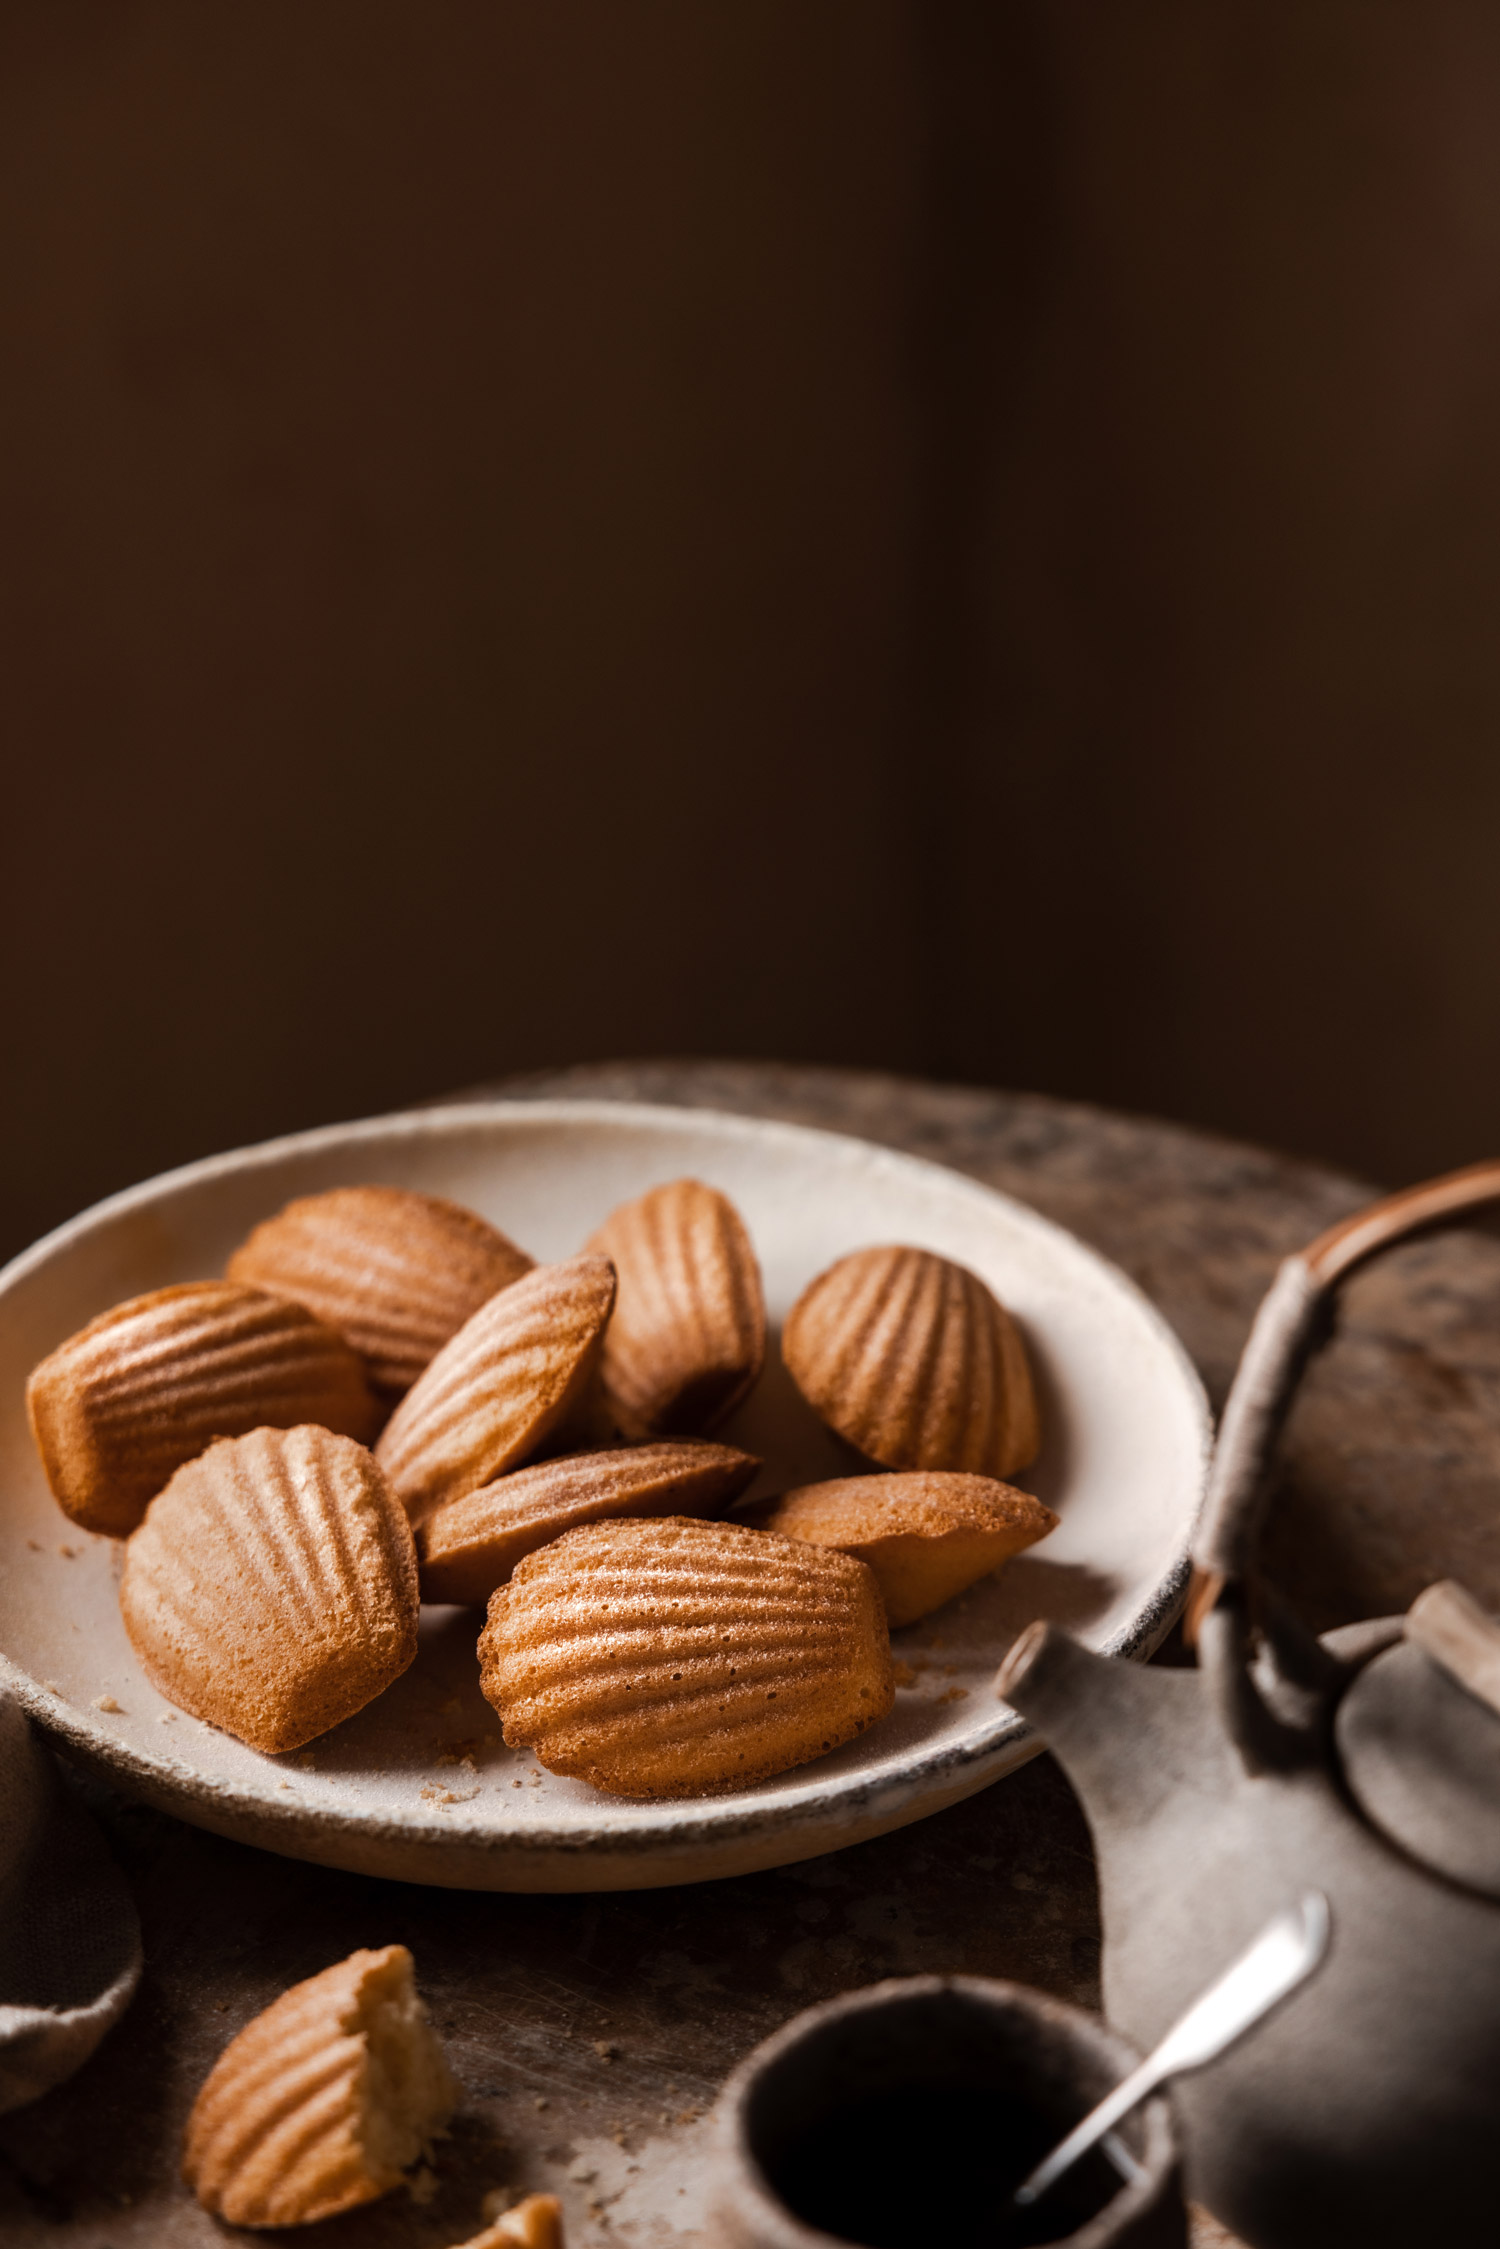
7. Create a sense of depth
When creating a food scene, place the elements on different planes within the image. Try placing some items behind one another. This technique is especially effective when the elements have various textures, shapes and sizes. It helps to draw in the viewer by creating more depth and an organic feel within your composition.
Use a wider aperture—indicated by a lower f-number—to throw the foreground and background elements out of focus. This is a surefire way to draw attention to the main subject and make it pop even more.
8. Make the food scene look natural
When creating a food photograph, one of the trickiest parts is to make sure it looks organic and not too ‘staged’. To keep the scene looking natural and effortless, keep various distances between the subjects—some can even be touching—and crop some of the elements with your framing. Too perfect can often look too placed.
Bea Lubas | Canon EOS R5 | Canon RF 100mm f/2.8 L Macro IS USM | 100mm | f/11 | 1/6 | ISO 400
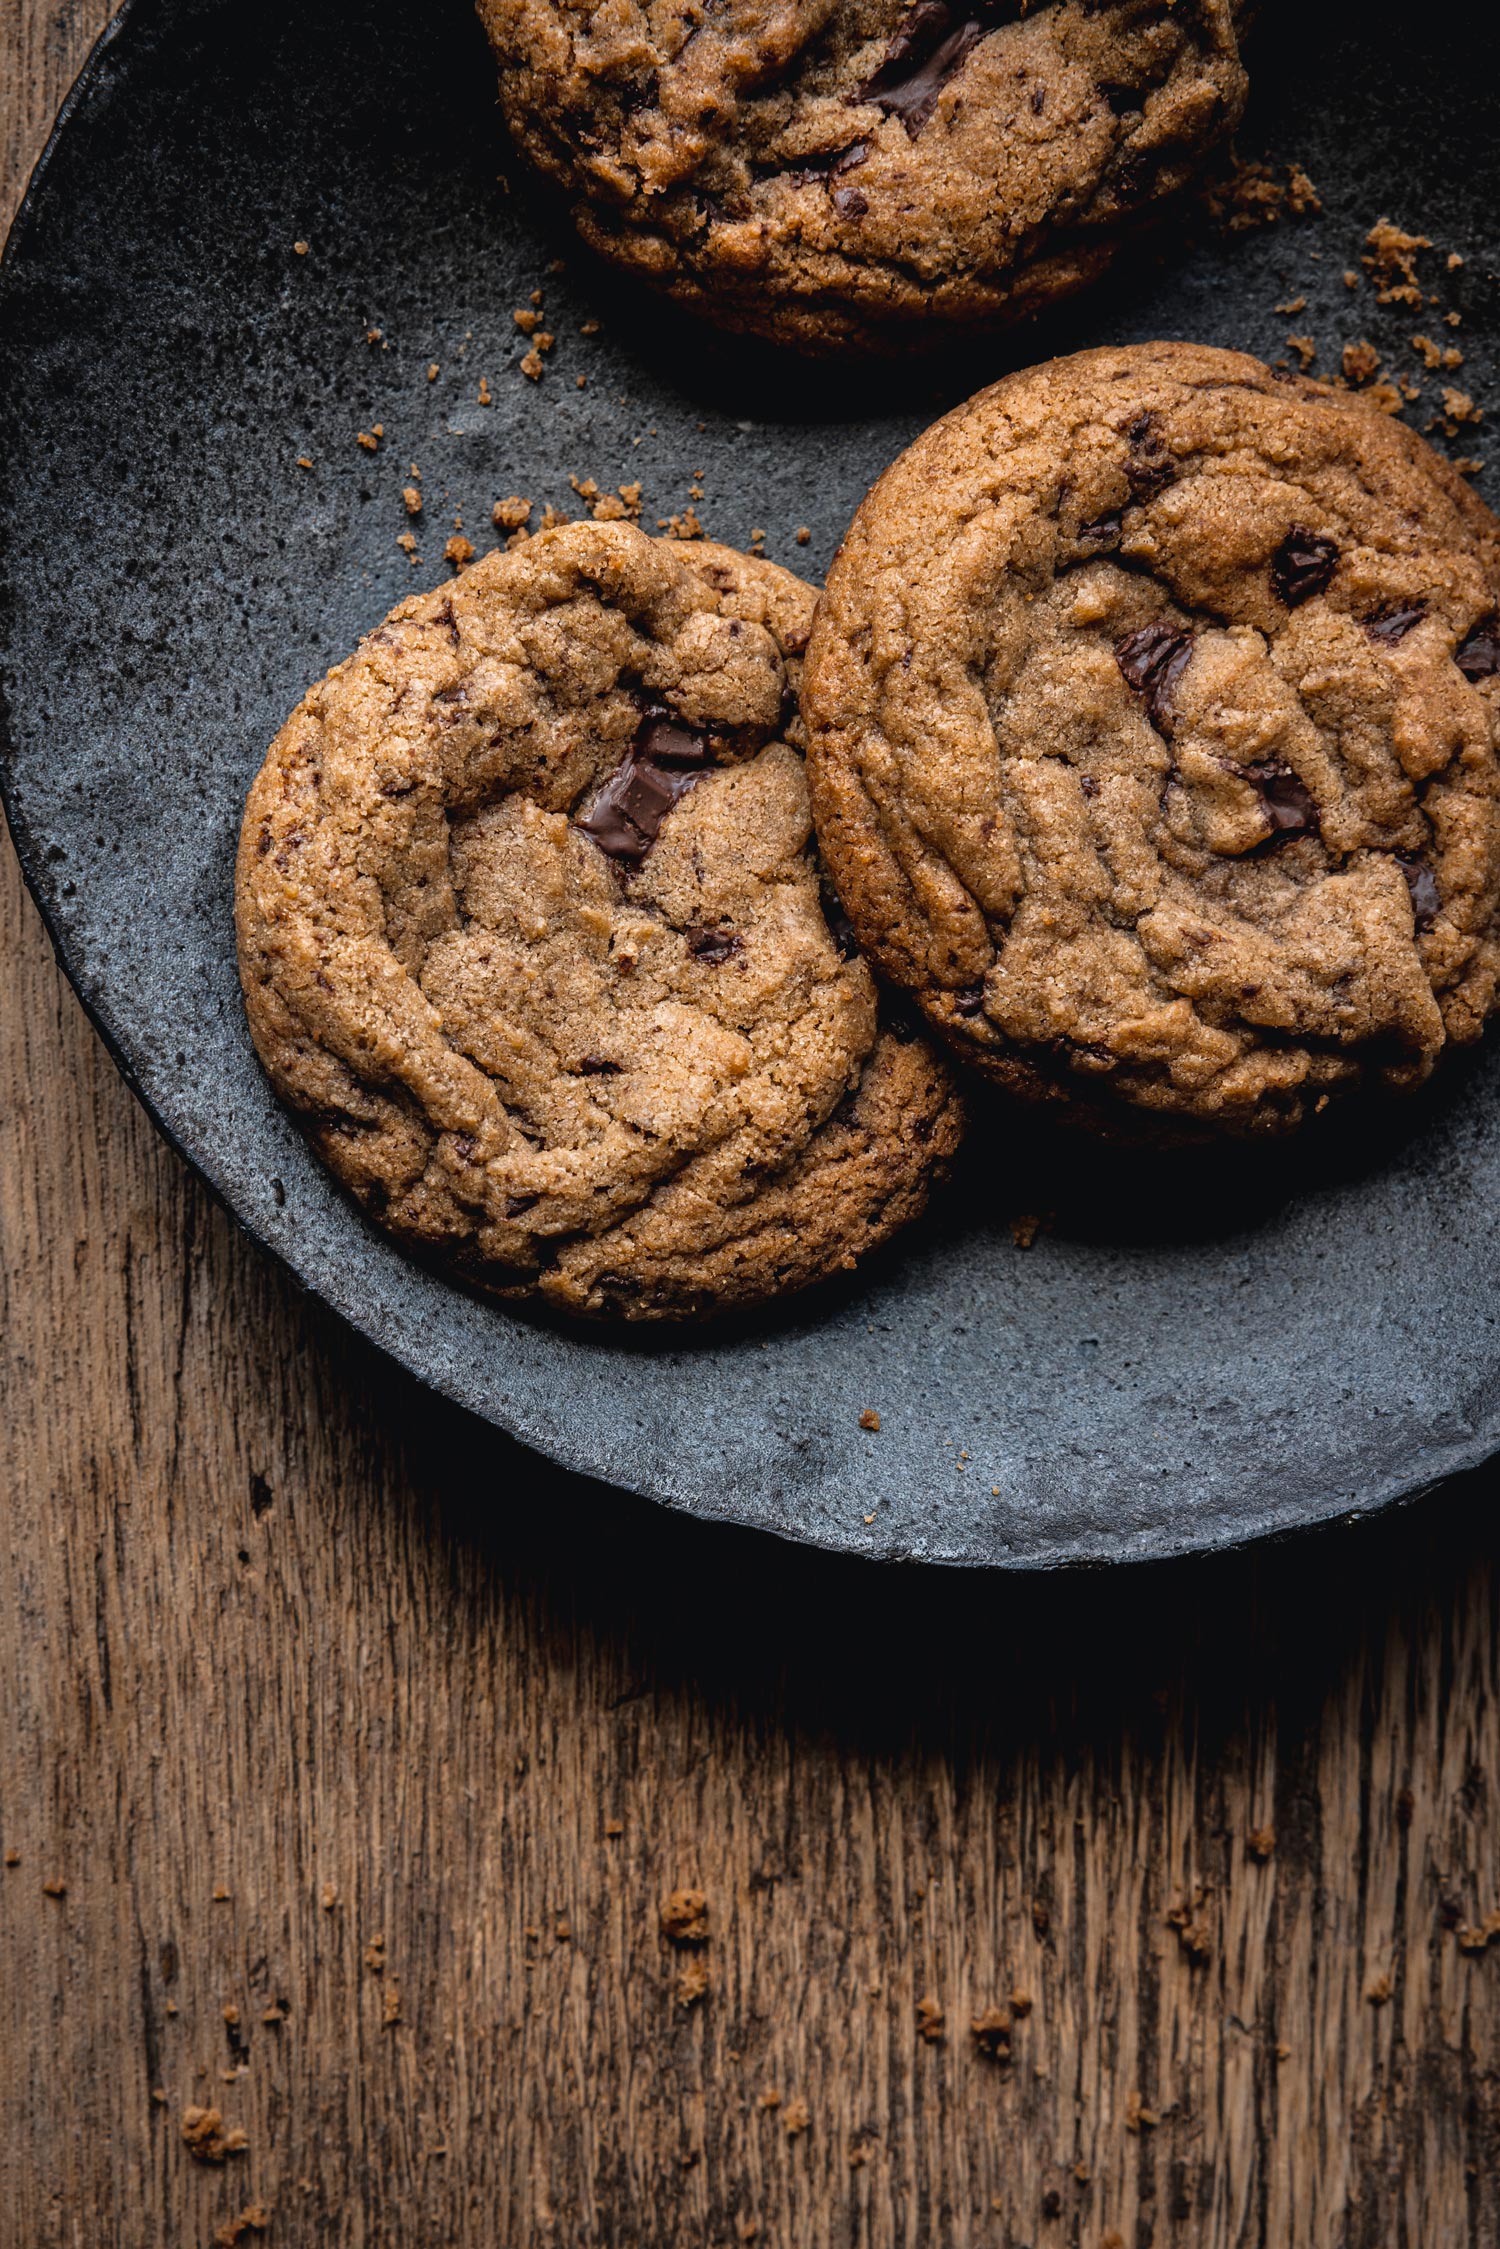
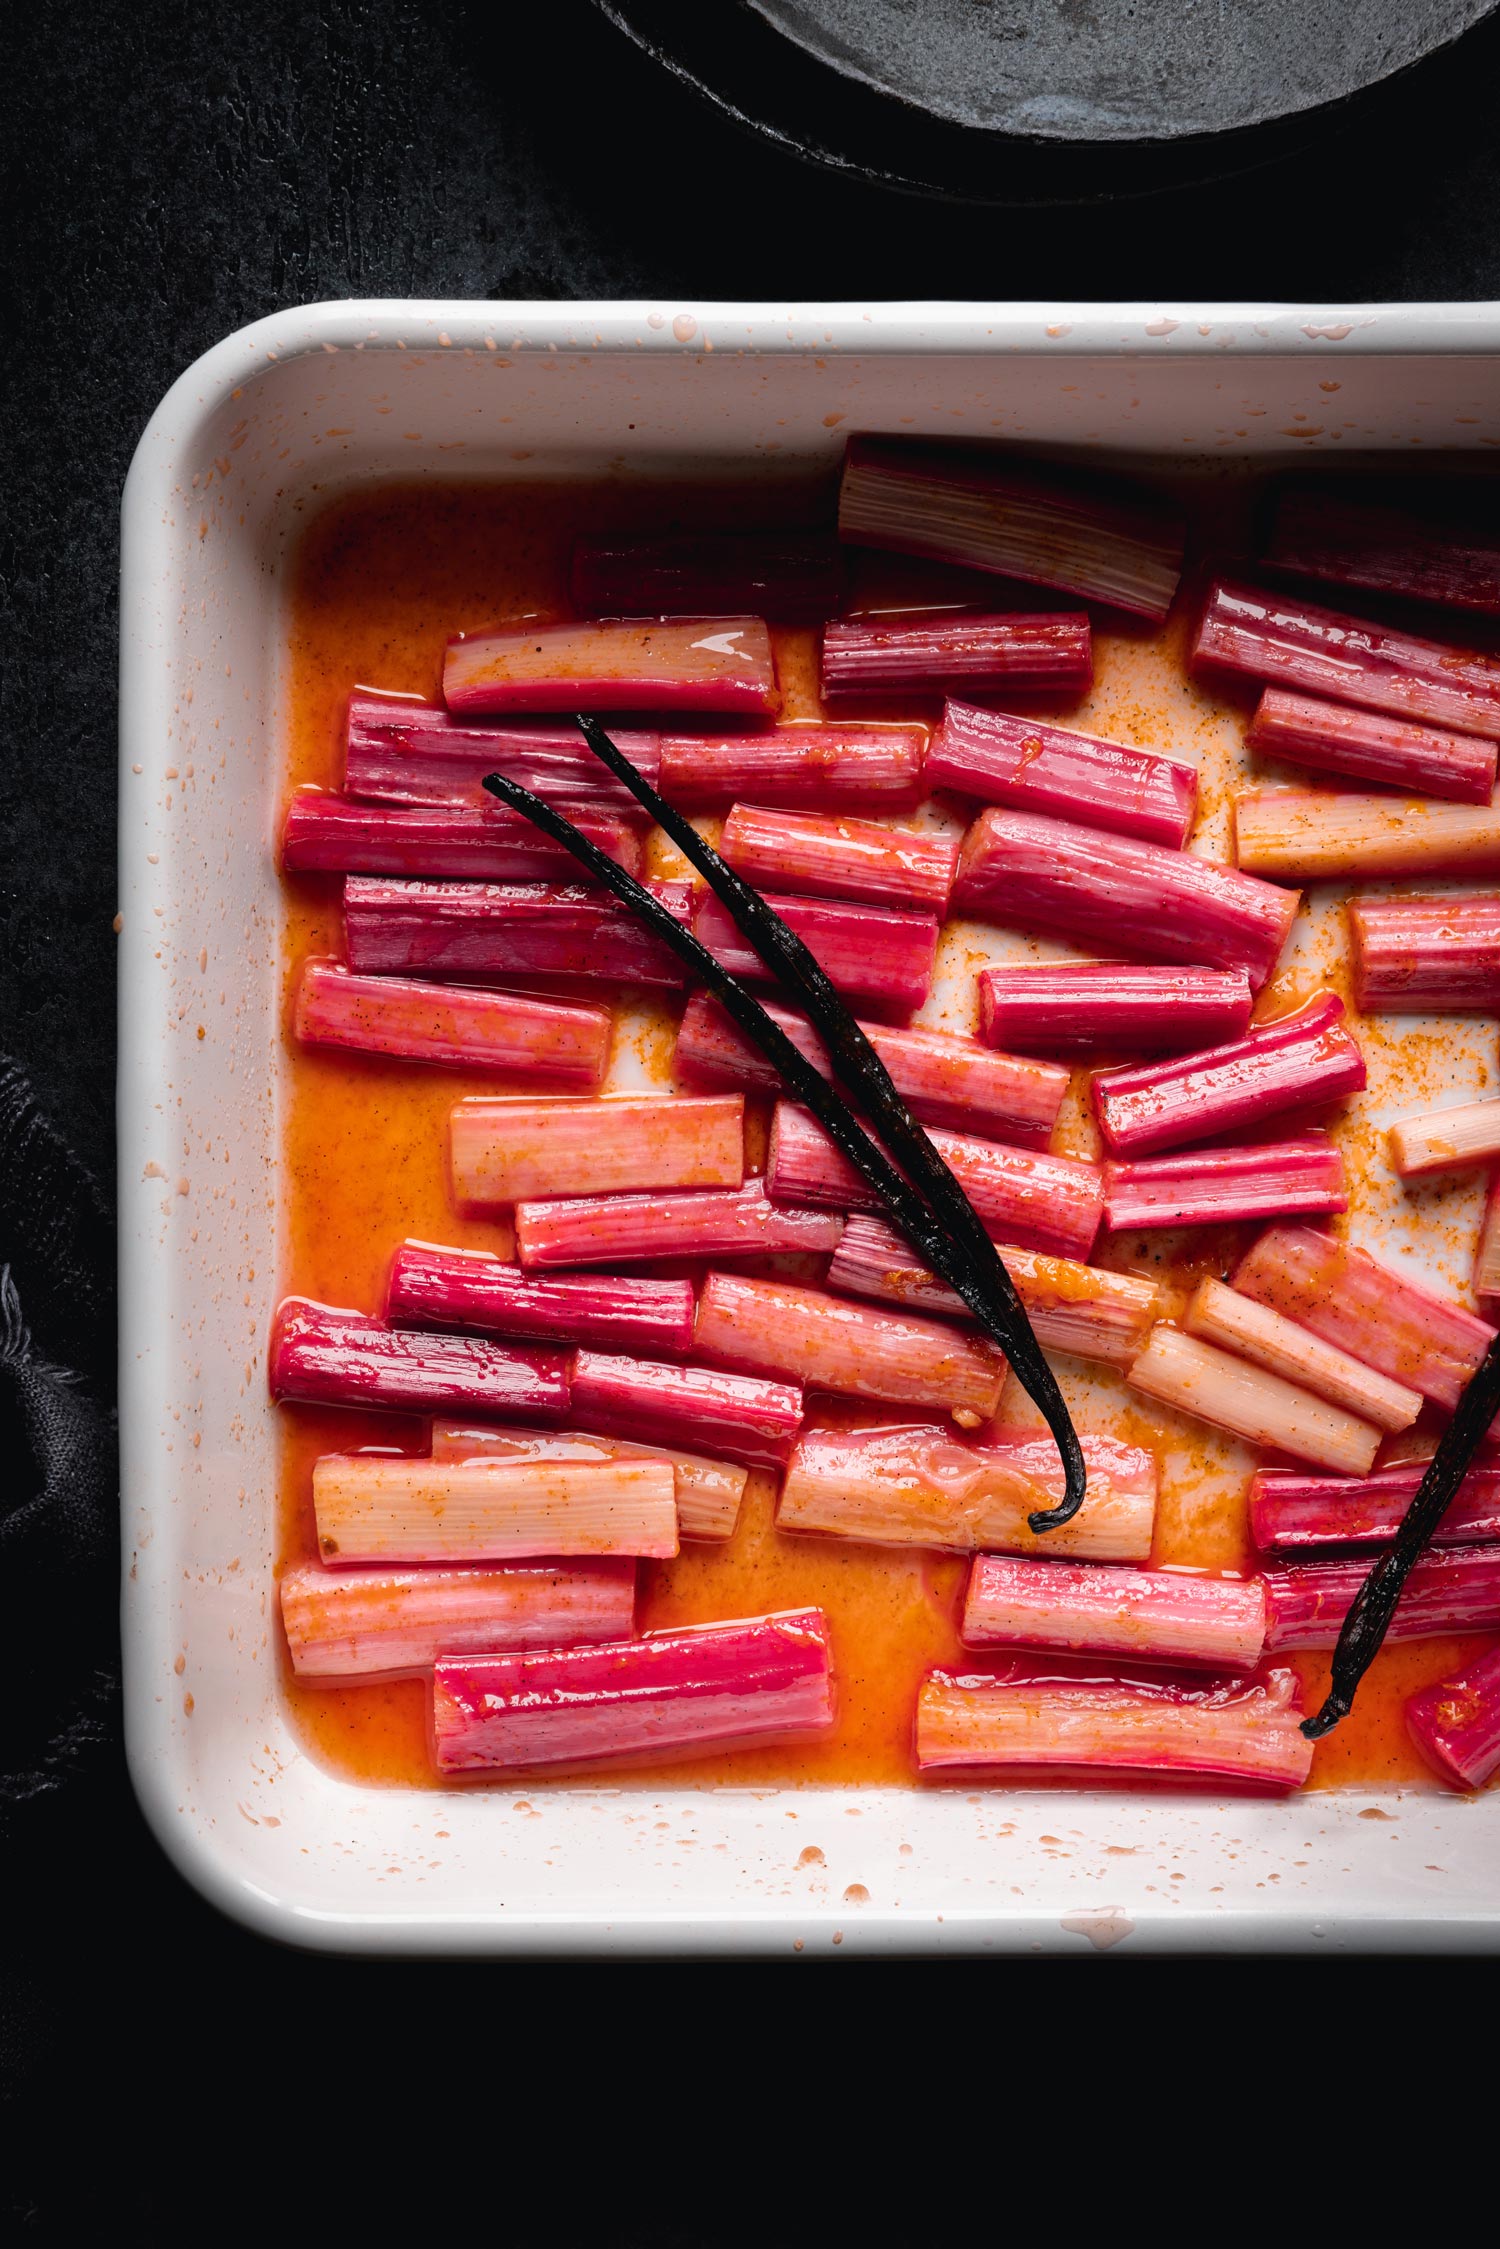
9. Elevate your dish presentation
Photography has no taste or smell, so focus on the visual details. Try capturing the texture—whether creamy, smooth, crumbly, crunchy or gooey—that makes that specific dish delicious. Make sure the colours of each ingredient look fresh and delectable.
Reveal any important ingredients and flavours that might not be obvious, but will help your viewer identify what something would taste like.
Embrace imperfections—spills, juices and crumbs—they can make the composition look more inviting when added in the right amount.
Let’s not forget about a beautiful garnish! It’s a simple and effective way to elevate the presentation and make your images stand out even more.
Bea Lubas | Canon EOS R5 | Canon RF 24-70mm f/2.8 L IS USM | 70mm | f/10 | 1/10 | ISO 320
10. Add contextual clues
Showing a little bit more context can take our images to the next level, and make them more engaging and memorable. Try adding a human element. For example, you could capture hands during the preparation process. Or, you could include more of the environment in your composition to give your viewers more details about the location.
Adding visual clues—about the time of day, the season or a special occasion—can also make your food ‘story’ richer and more captivating.
11. Enhance the details in post-production
Editing is one of the most powerful tools in your toolbox for adding more visual impact to your images. When editing photos of food, it’s important to focus on the visual clues—like colour and texture details—that make food look appetising.
In the editing software, you can adjust the hue (colour), the saturation (colour intensity) and the luminance (colour brightness), each of which gives you a lot of creative control to fine-tune the colours of your food ingredients. I use Adobe Lightroom.
The texture and clarity sliders are great tools for enhancing the details in our food images. Small adjustments will often go a long way. Finally, masking allows you to target and apply adjustments to a specific part or element in your frame. For example, you can choose to add exposure to only one part of the frame, tweak the colour of one of the ingredients, or add texture—or negative texture—to only one element.
Want to learn more about food photography? Check out the best camera gear for food photography and our interview with award-winning food photographer Elisa De Cecchi. Or, discover more tips and techniques on the MPB content hub.