Learn: 10 Tips for Interior Architectural Photography
Published 17 March 2025 by MPB
Just starting out with interior architectural photography or seeking inspiration to improve your indoor imagery? In this guide, award-winning architectural photographer Paul Moore shares his top tips, which cover everything from leading lines and symmetry to focus, framing and flash. Over to you, Paul.
As an architectural photographer, my goal is to accurately capture the design and space of buildings. Unlike other genres of photography, which are more dynamic, architectural photography requires patience and attention to detail when setting up shots. I also collaborate with architects and interior designers on location to ensure I am getting the images they need. My perfect work day is getting a building all to myself, after the cleaners have left.
Here are my top ten tips for getting the most from your architectural photography.
Paul Moore | Fujifilm X100F
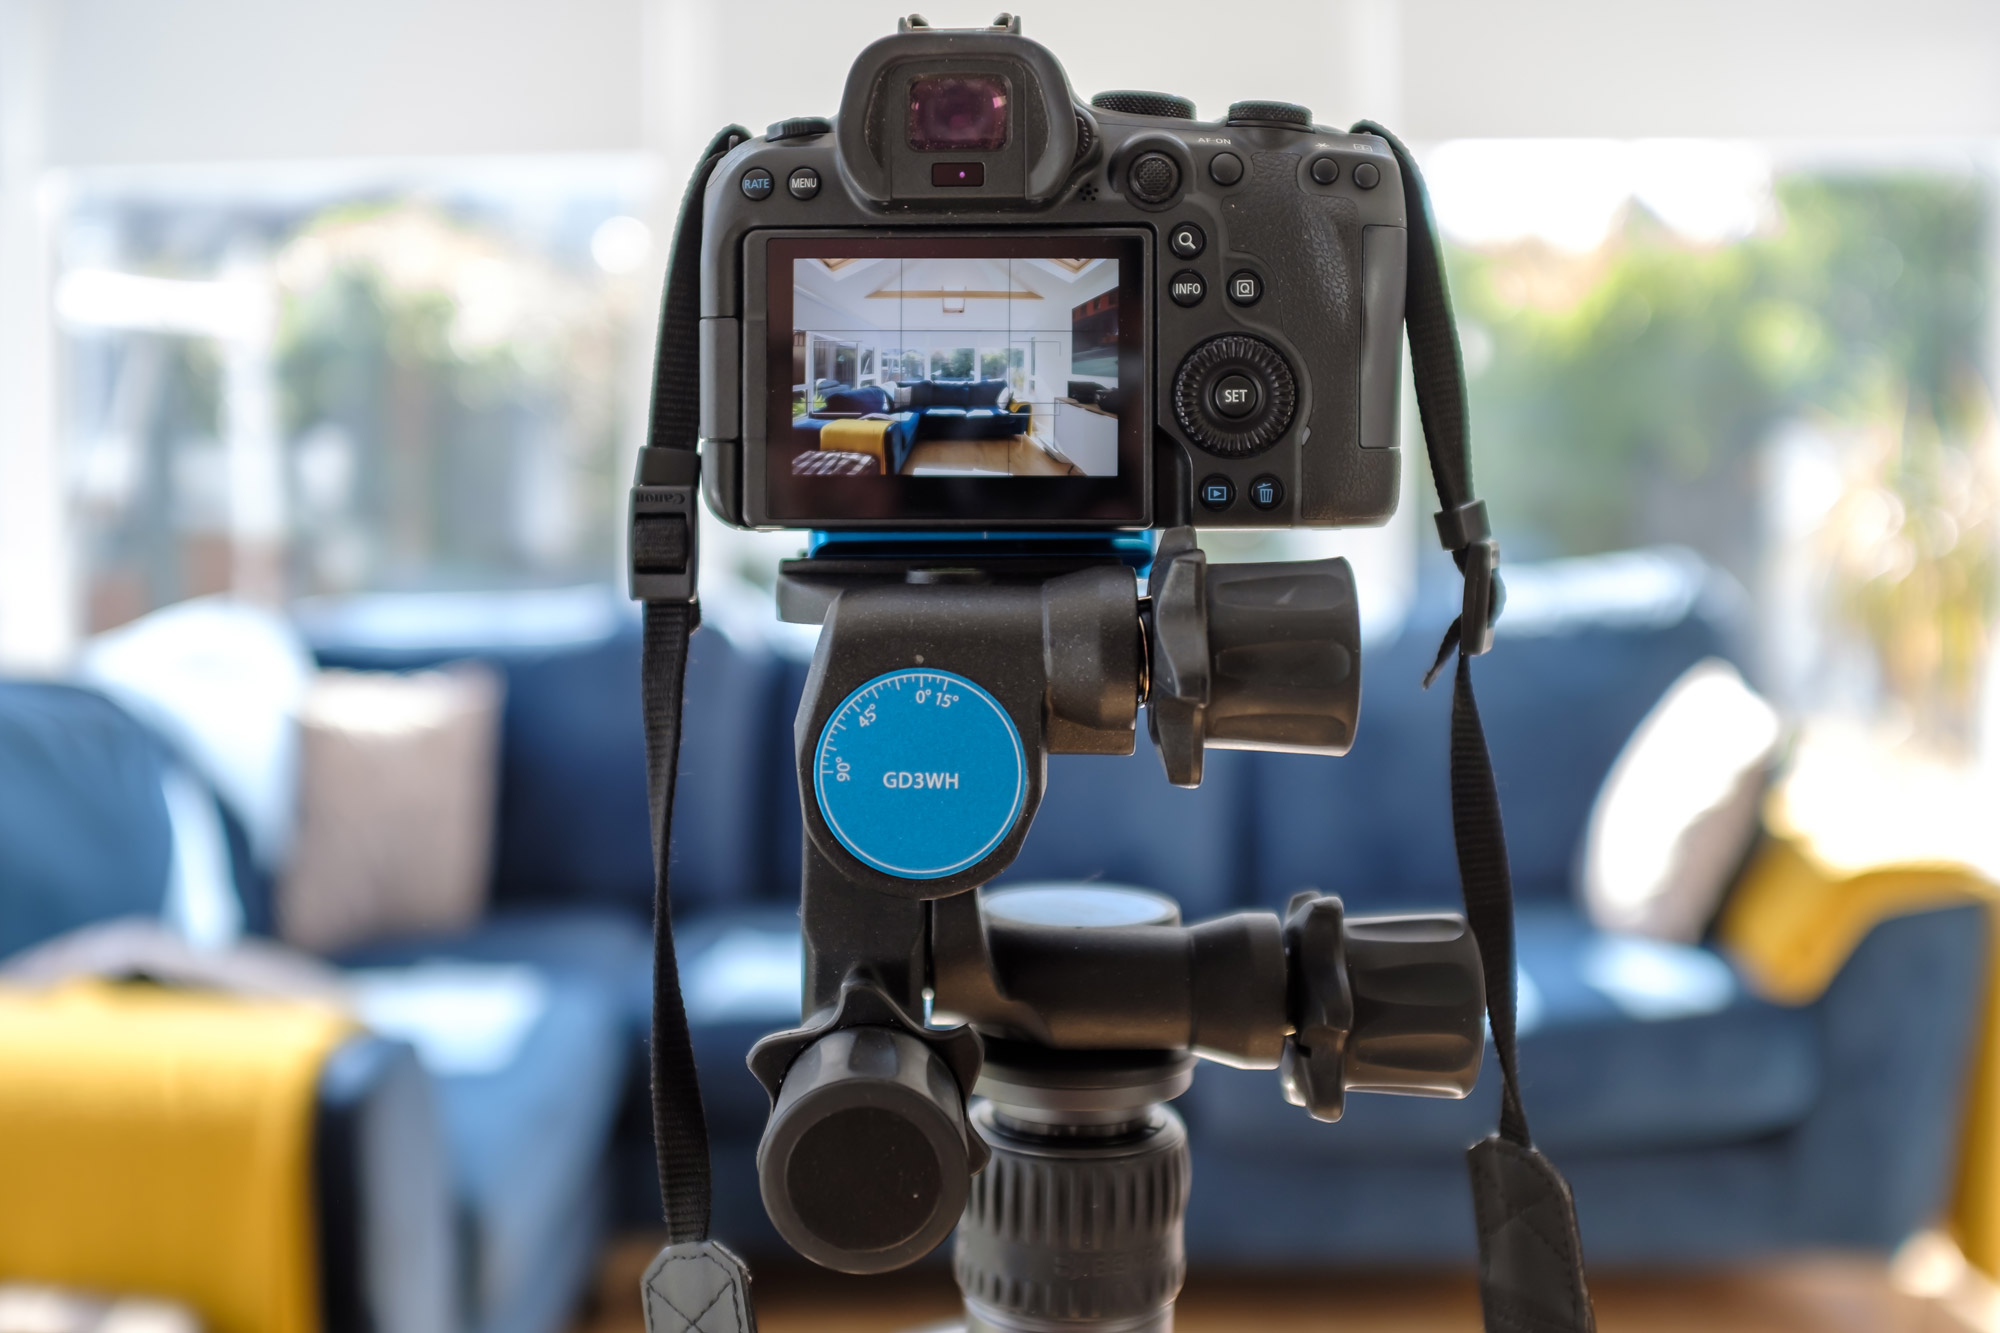
1. Use a tripod
After a camera and lenses, invest in a good tripod. I use a Benro C373F Series 3 Carbon Fibre Video Tripod with BV6H Video Head with its three-way geared head. Once I have the camera in position, a tripod ensures that it won’t move. The geared head allows me to make precise adjustments to make sure all the elements in the scene are where I want them to be.

Paul Moore | Canon EOS R6 | Canon EF 16-35mm f/4 L IS USM | 17mm | f/8.0 | 1/6 | ISO 100
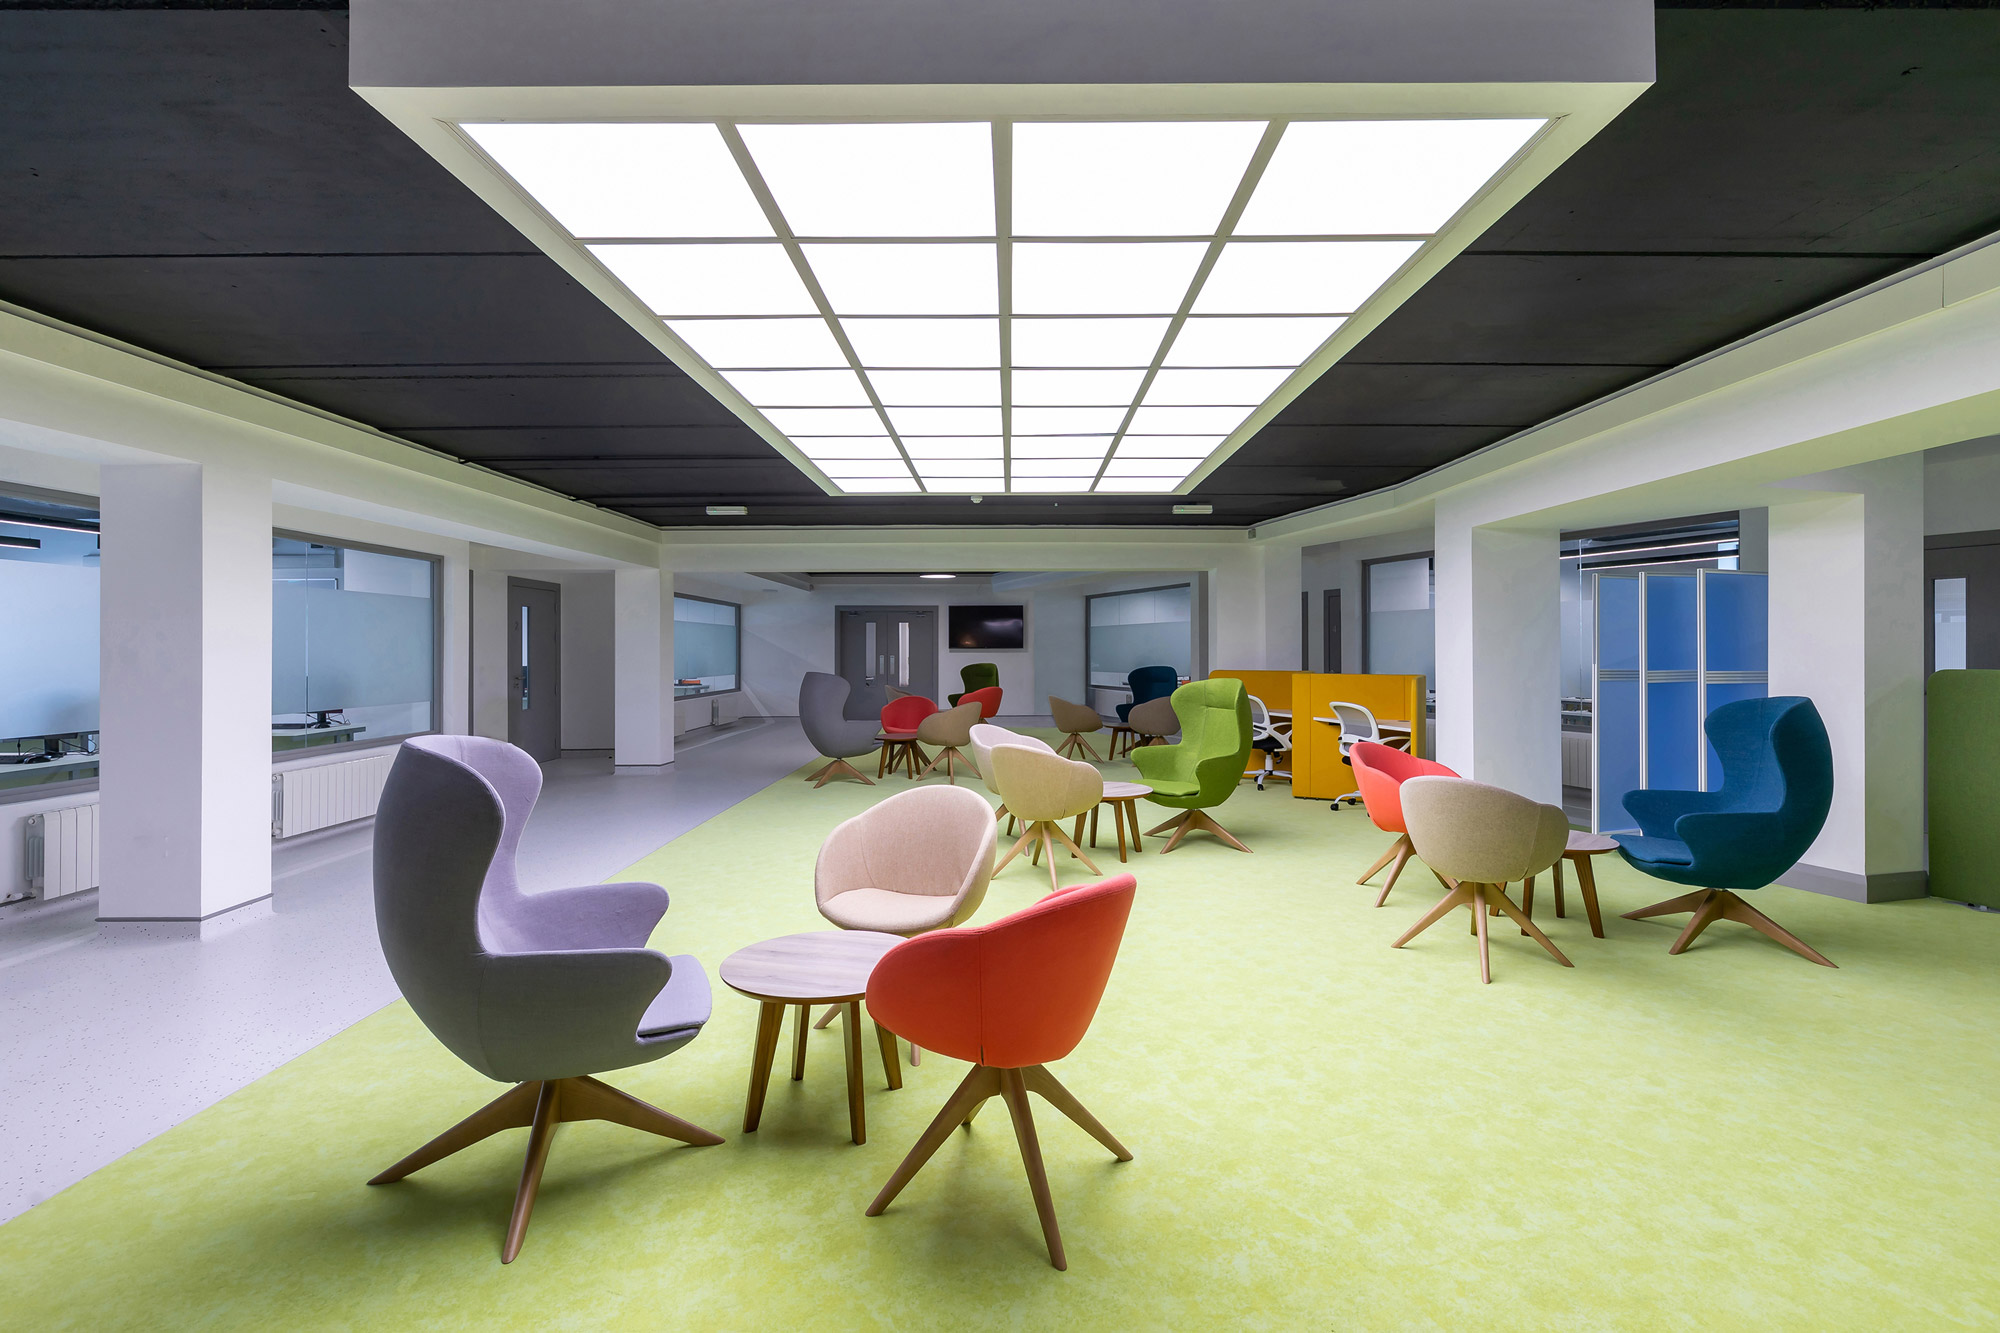
2. Don’t be afraid to rearrange the room
Once I’ve set up the shot, I use live view to review the scene and make sure that I’, happy with the composition—and that there are no distractions. In particular, I keep an eye out for anything that might be protruding into the shot from the edge of the screen.
In the early days, I remember reading an article that said that 90% of architectural photography is moving stuff. It might be a slight exaggeration, but there is a lot of truth to it.
When I was setting up the shot above, I had to remove large black floor mats that were in front of the reception desk. I also moved the plant and the couches on the left so that they were more visible. And finally, as this was taken during the pandemic, I had to remove hand sanitisers and signage. The fun part is putting everything back when I am finished!
Paul Moore | Canon EOS R6 | Canon EF 16-35mm f/4 L IS USM | 18mm | f/8.0 | 1/8 | ISO 100
3. Consider focus and depth of field
When shooting architecture, it’s important to be aware of how depth of field can affect focus. I am often working in low-light conditions.
It’s tempting to open up the aperture as wide as your lens allows to let in as much light as possible. Unfortunately, when using wider apertures, the depth of field can be quite narrow and this becomes more of an issue when shooting large open spaces.
To ensure that the entire space is in focus, from front to back, I usually shoot between f/8 and f/11. With a wide-angle lens, this is usually enough to ensure everything is in focus.
I like to leave my ISO as close to 100 as possible, so getting the correct exposure means using slower shutter speeds—this is another reason why tripods are important.
Paul Moore | Canon EOS 5D Mark IV | Canon EF 16-35mm f/4 L IS USM | 16mm | f/8.0 | 1/15 | ISO 100
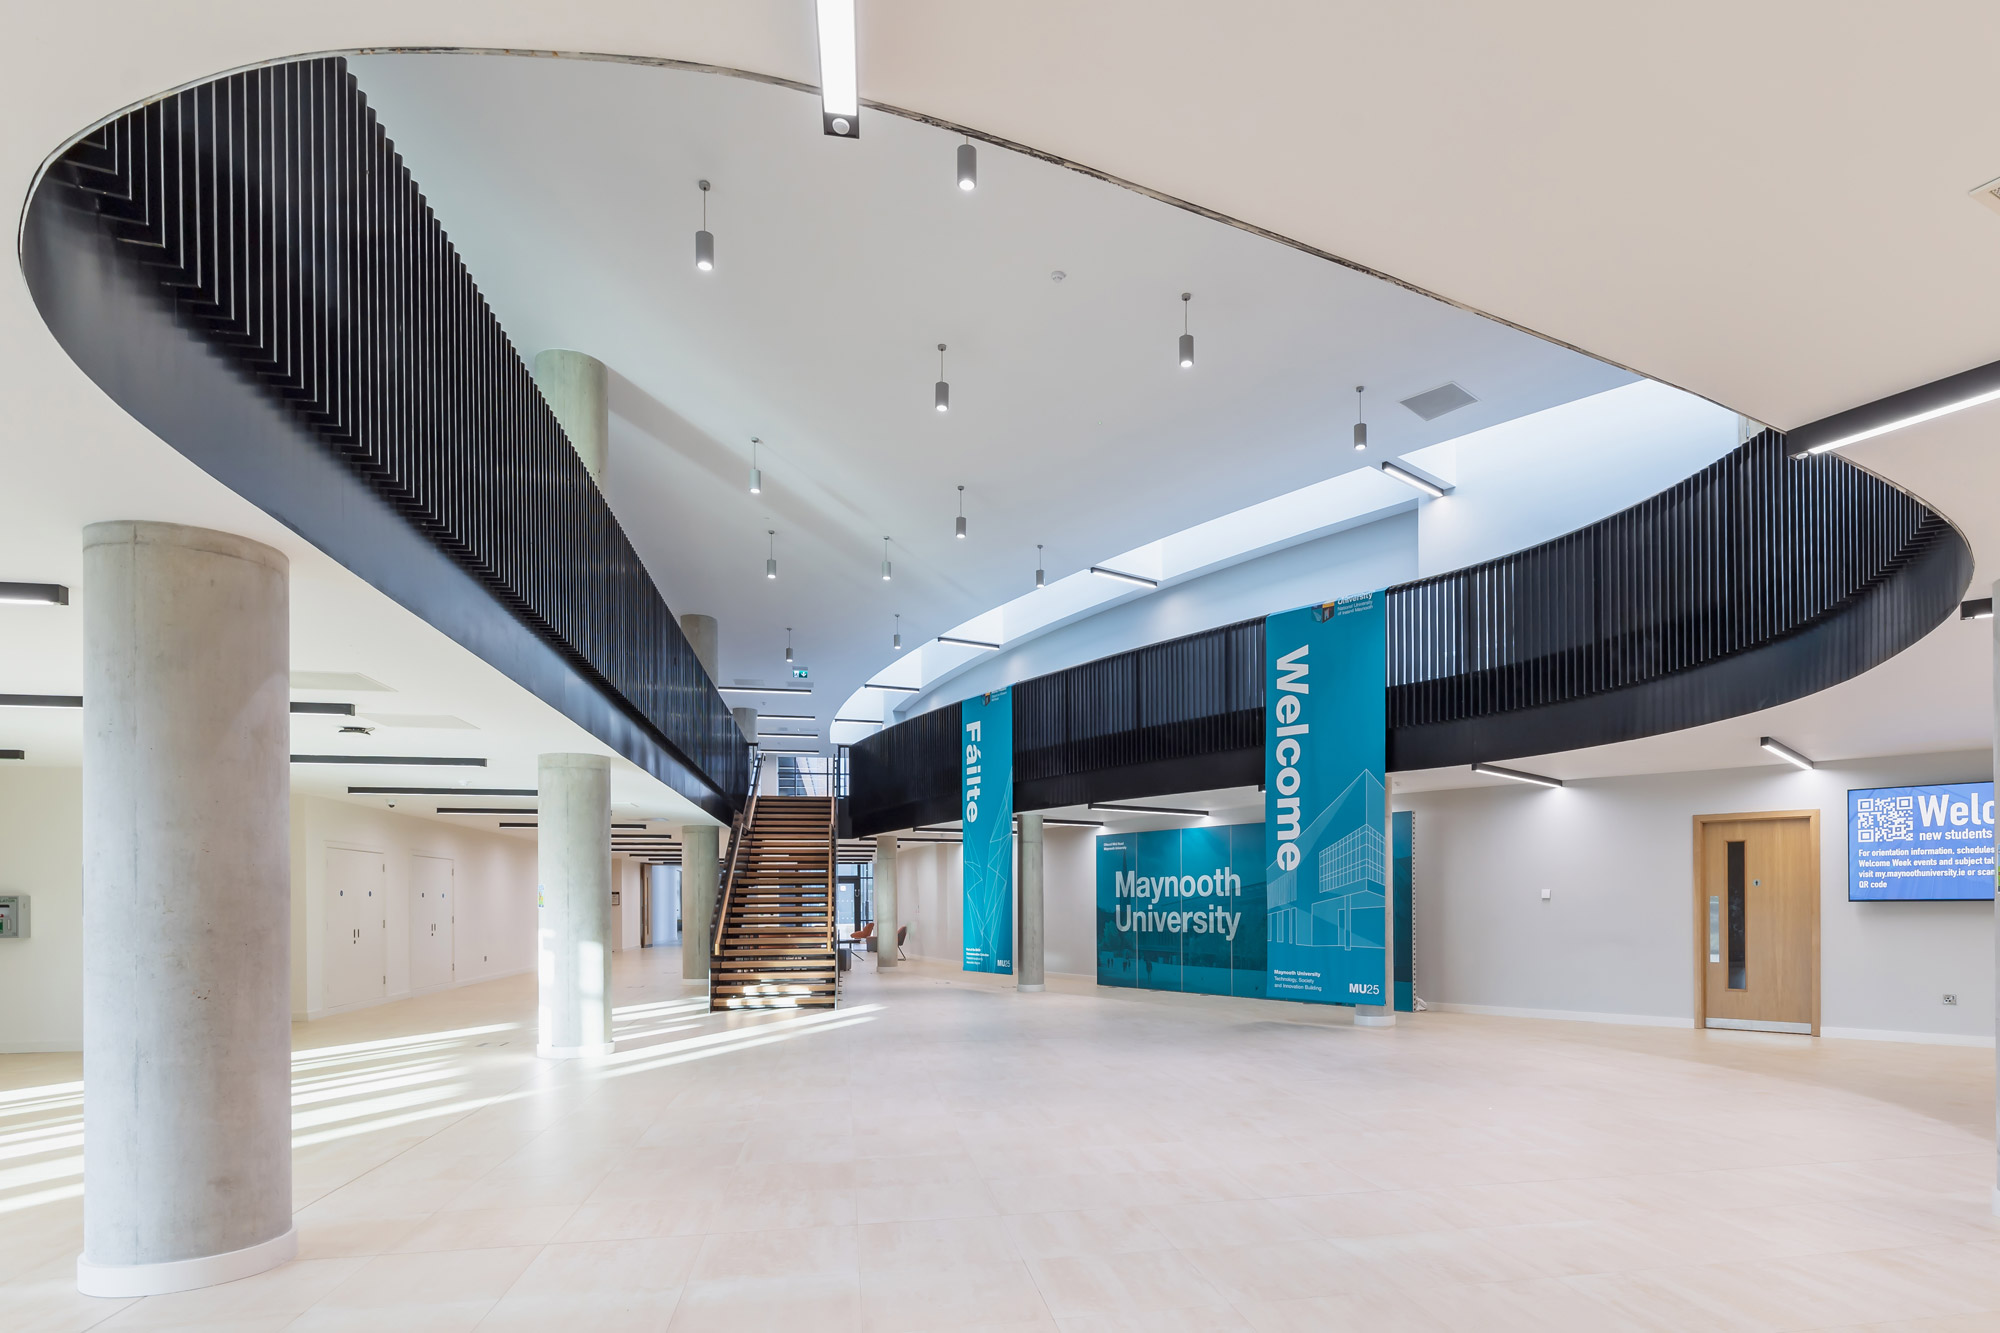
4. Use perspective and leading lines
Perspective and leading lines can be the hardest part of setting up shots. When positioning the camera, make sure that all the horizontal and vertical lines are straight.
Keep an eye on any straight lines that are converging due to perspective. Where possible, position the camera so that these lines are pointing toward the centre of the scene. These lines will then lead the eye into the image and create a sense of depth.
Using the geared head on the tripod is very helpful for making the micro-adjustments required to line everything up.
Paul Moore | Canon EOS R6 | Canon EF 16-35mm f/4 L IS USM | 19mm | f/8.0 | 1/8 | ISO 100
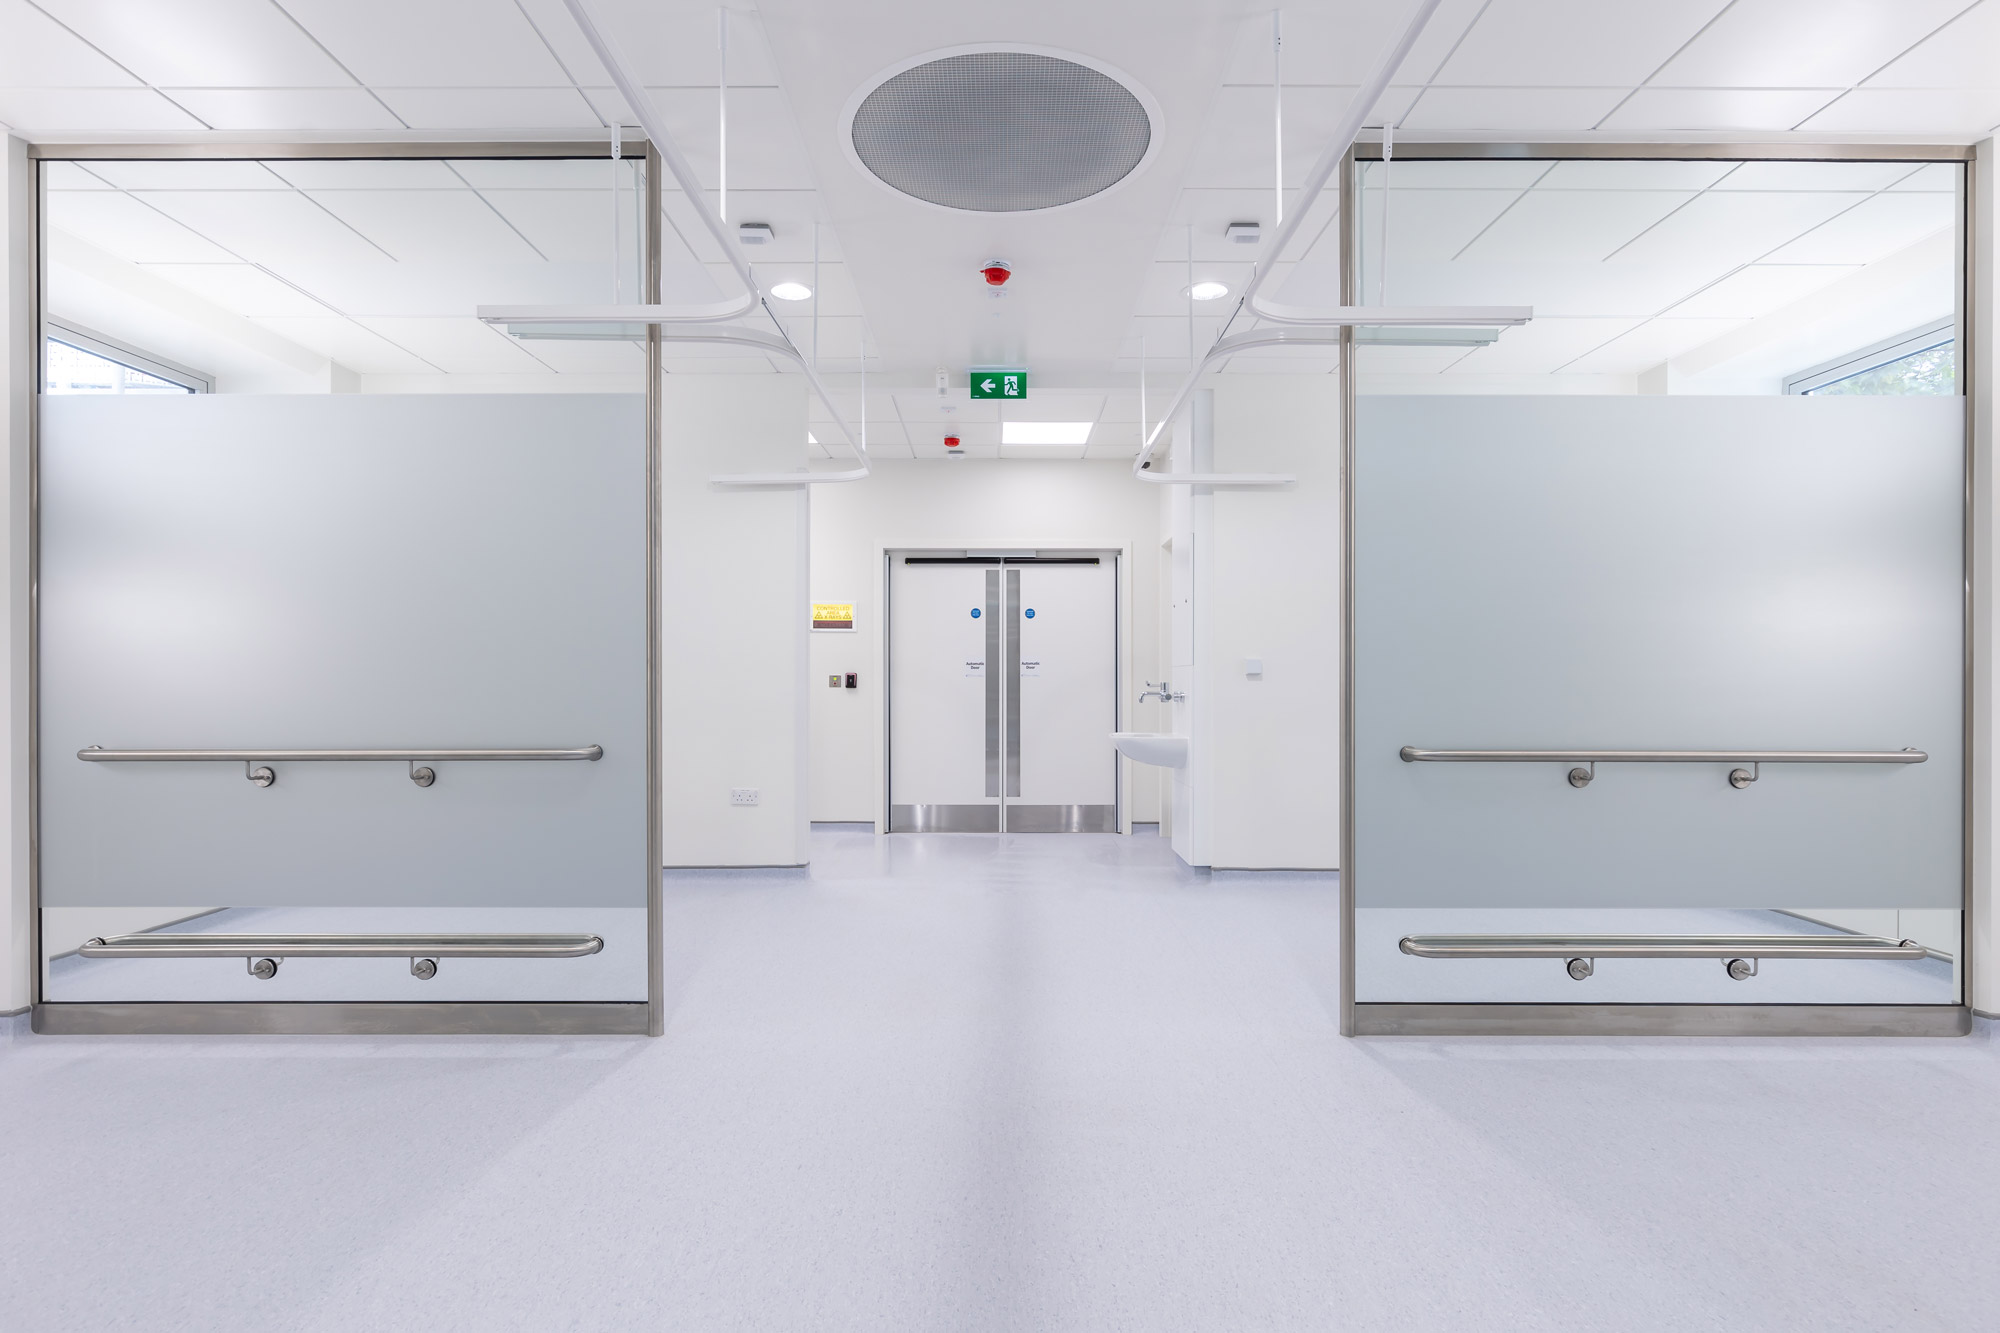
5. Make the most of symmetry
When starting out, photographers are usually told to use compositional techniques—such as the rule of thirds—and to avoid symmetry.
Architects and interior designers put a lot of work into their designs. So, in your composition, using symmetry can showcase this work at its best. The trick is to position the camera in the dead centre of the space so that both sides are equal.
Paul Moore | | Canon RF 15-35mm f/2.8 L IS | 28mm | f/8.0 | 1/50 | ISO 500
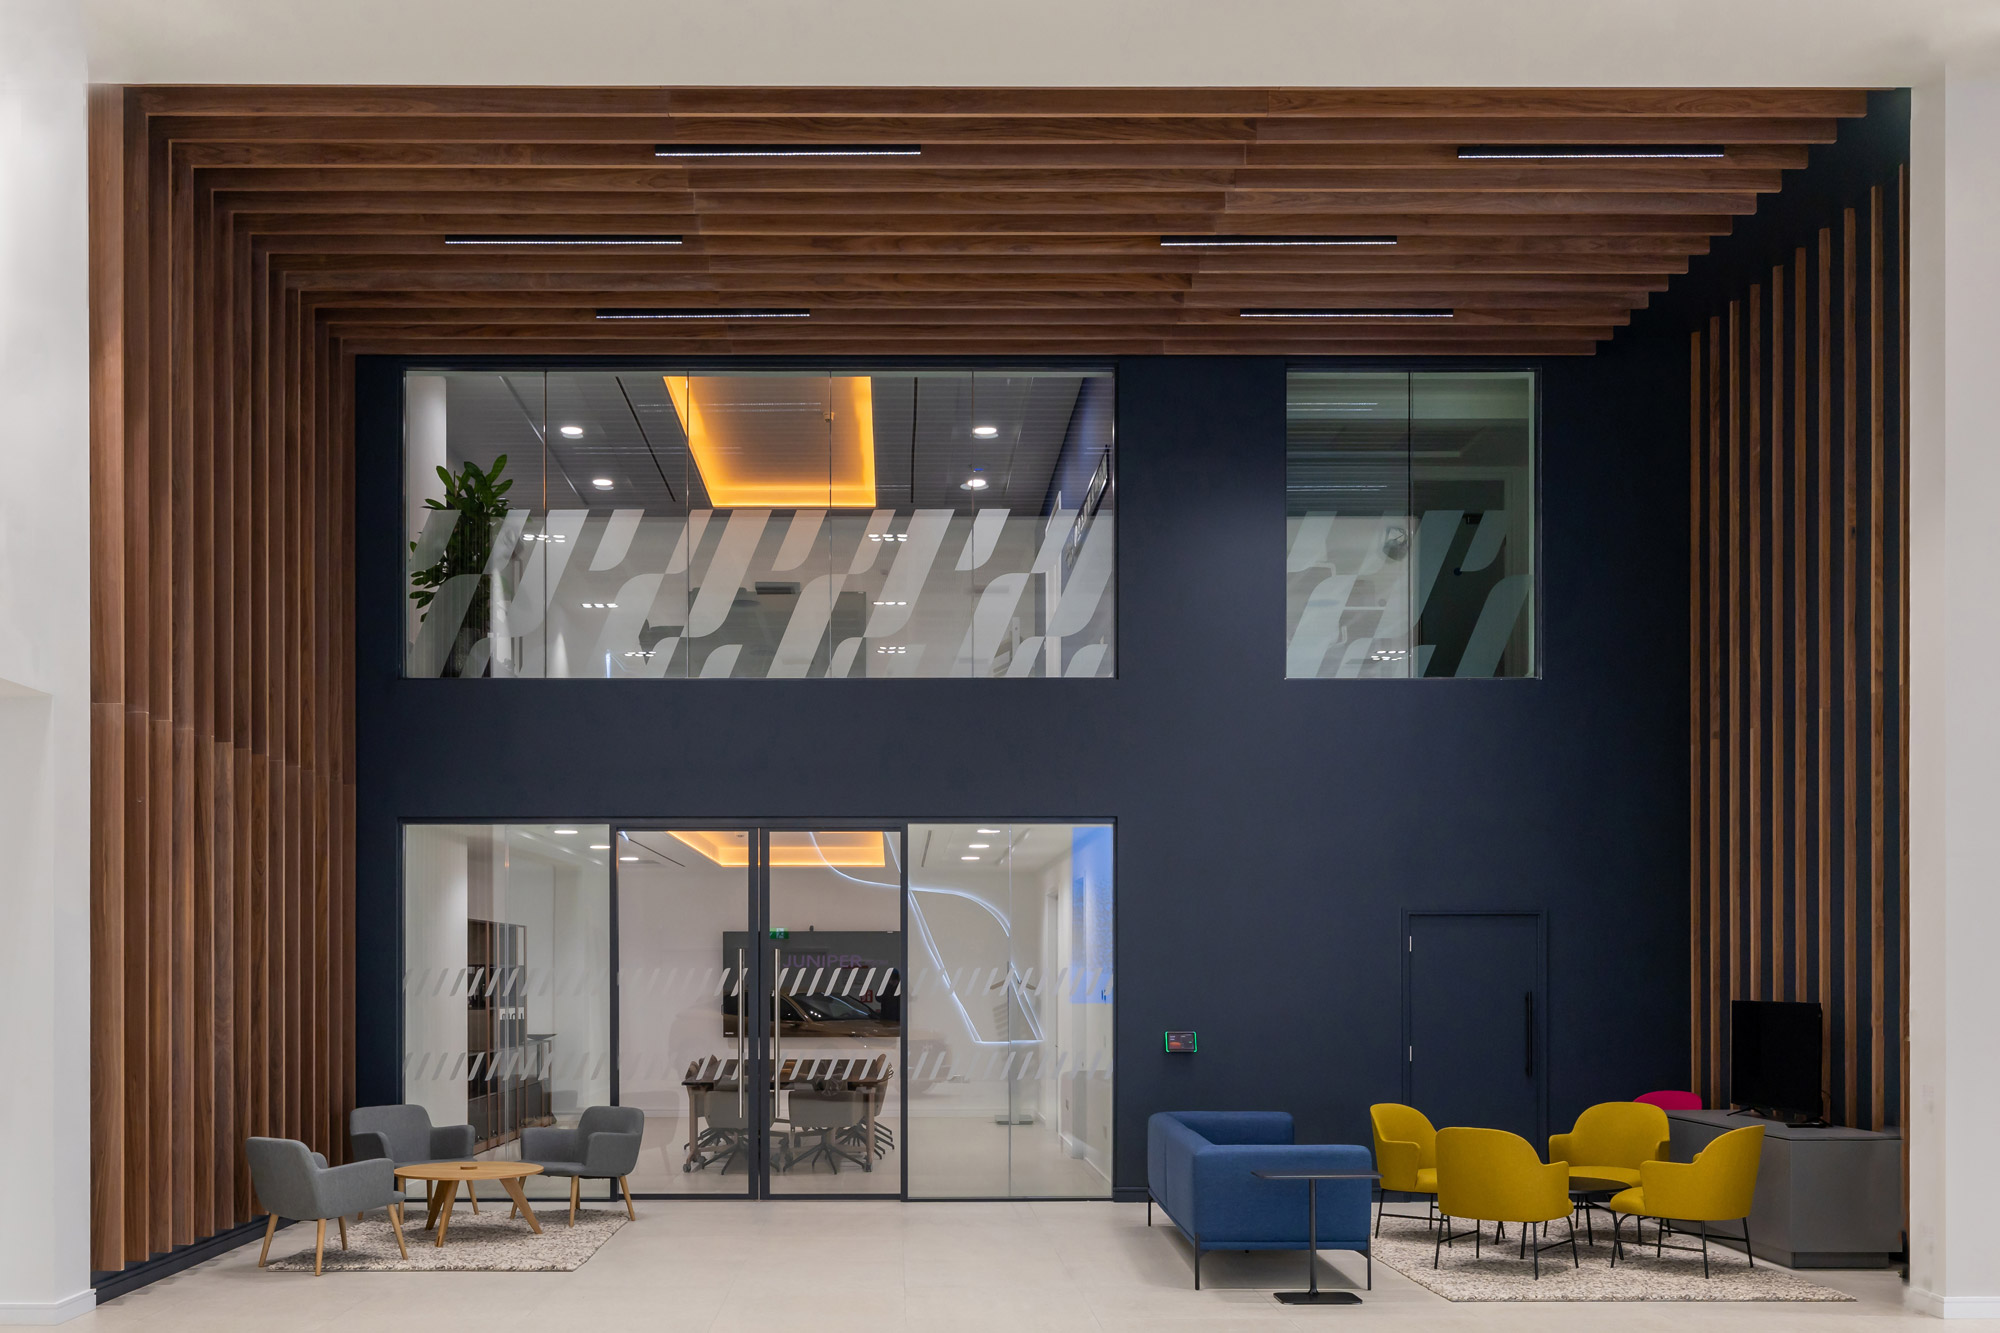
6. Frame using environmental elements
As with symmetry, environmental elements can help to showcase distinct areas in building interiors. In the image above, the waiting area was adjoining a much larger car showroom—painted white. I used the showroom’s white wall to frame the wood panelling, which helped it to stand out and bring attention to it. This technique helps to identify standalone areas within a much larger space.
Paul Moore | Canon EOS R6 Mark II | Canon RF 15-35mm f/2.8 L IS USM | 33mm | f/8.0 | 1/4 | ISO 250
7. Capture the details
Capturing details is particularly true when working with interior designers—but can also be important to architects as well. There will always be small details that are lost when shooting the overall space. So after I am finished with the wide shots, I walk back through the building capturing anything of interest that catches my eye.
Paul Moore | Canon EOS 5D Mark IV | Canon EF 16-35mm f/4 L IS USM | 22mm | f/8.0 | 1/13 | ISO 100
8. Use flash to light interiors
Lighting interiors for photography can be difficult—especially when there are a lot of windows. The dynamic range of a camera is far less than that of the human eye. We can stand in a room and see both the interior and exterior clearly. Photographing the same room, however, is a different story.
If I set the exposure to capture the exterior, the interior will be too dark. And if I set it for the interior, then the exterior will be completely blown out. I used to take a number of shots at different exposures and combine them afterwards when editing—but it was never entirely successful.
I now use the flash-ambient technique, or ‘flambient’ for short. This involves taking two shots of each setup. One where the exposure is set to capture the interior. The exposure is then adjusted for the exterior, and a second shot is taken. This time, I use an off-camera flash to light the interior. I bounce the flash off the ceiling or a wall for more even light.
The light from the flash is still quite harsh and can result in a contrasty image with a lot of shadows. So, in the edit, I bring both images into Photoshop as layers and use the brush tool to paint the ambient shot over the flash image where needed. This results in far softer and more realistic lighting.
In order to line up perfectly when editing, the images have to be taken from the exact same spot—so using a tripod is vital.
Paul Moore | Canon EOS R6 Mark II | Canon RF 15-35mm f/2.8 L IS USM | 17mm | f/7.1 | 1/5 | ISO 100
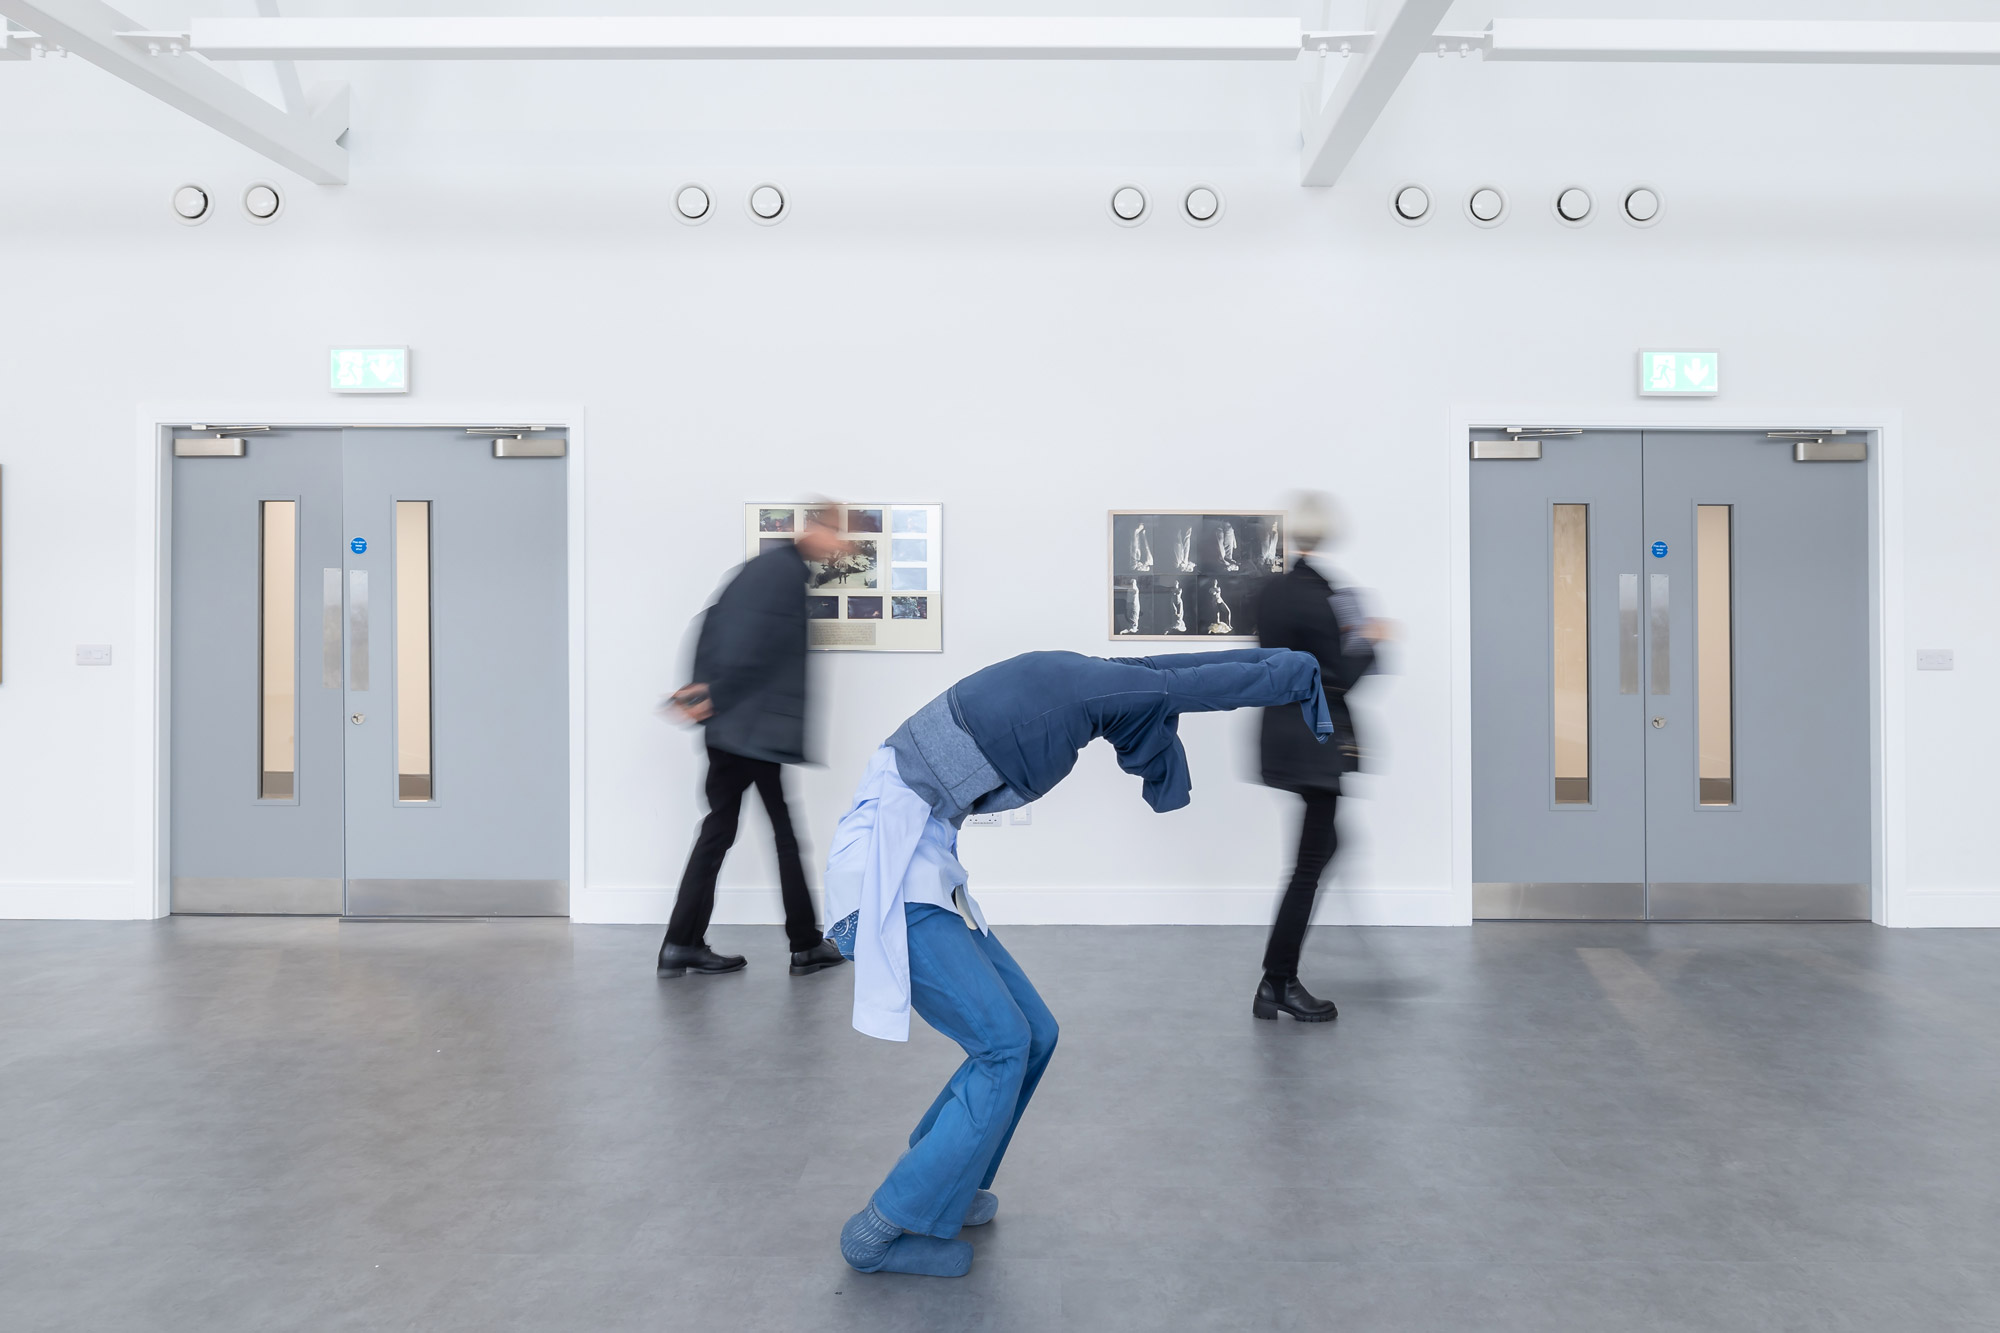
9. Try adding people
In my architectural photography, I rarely include people as they can add a random element to a precise environment. But sometimes, I will use them to add life or a sense of scale to a photo.
I will still shoot the images at the slower shutter speeds to create motion blur, which can make a static scene more dynamic. It also gives the viewer a better understanding of the size of the space.
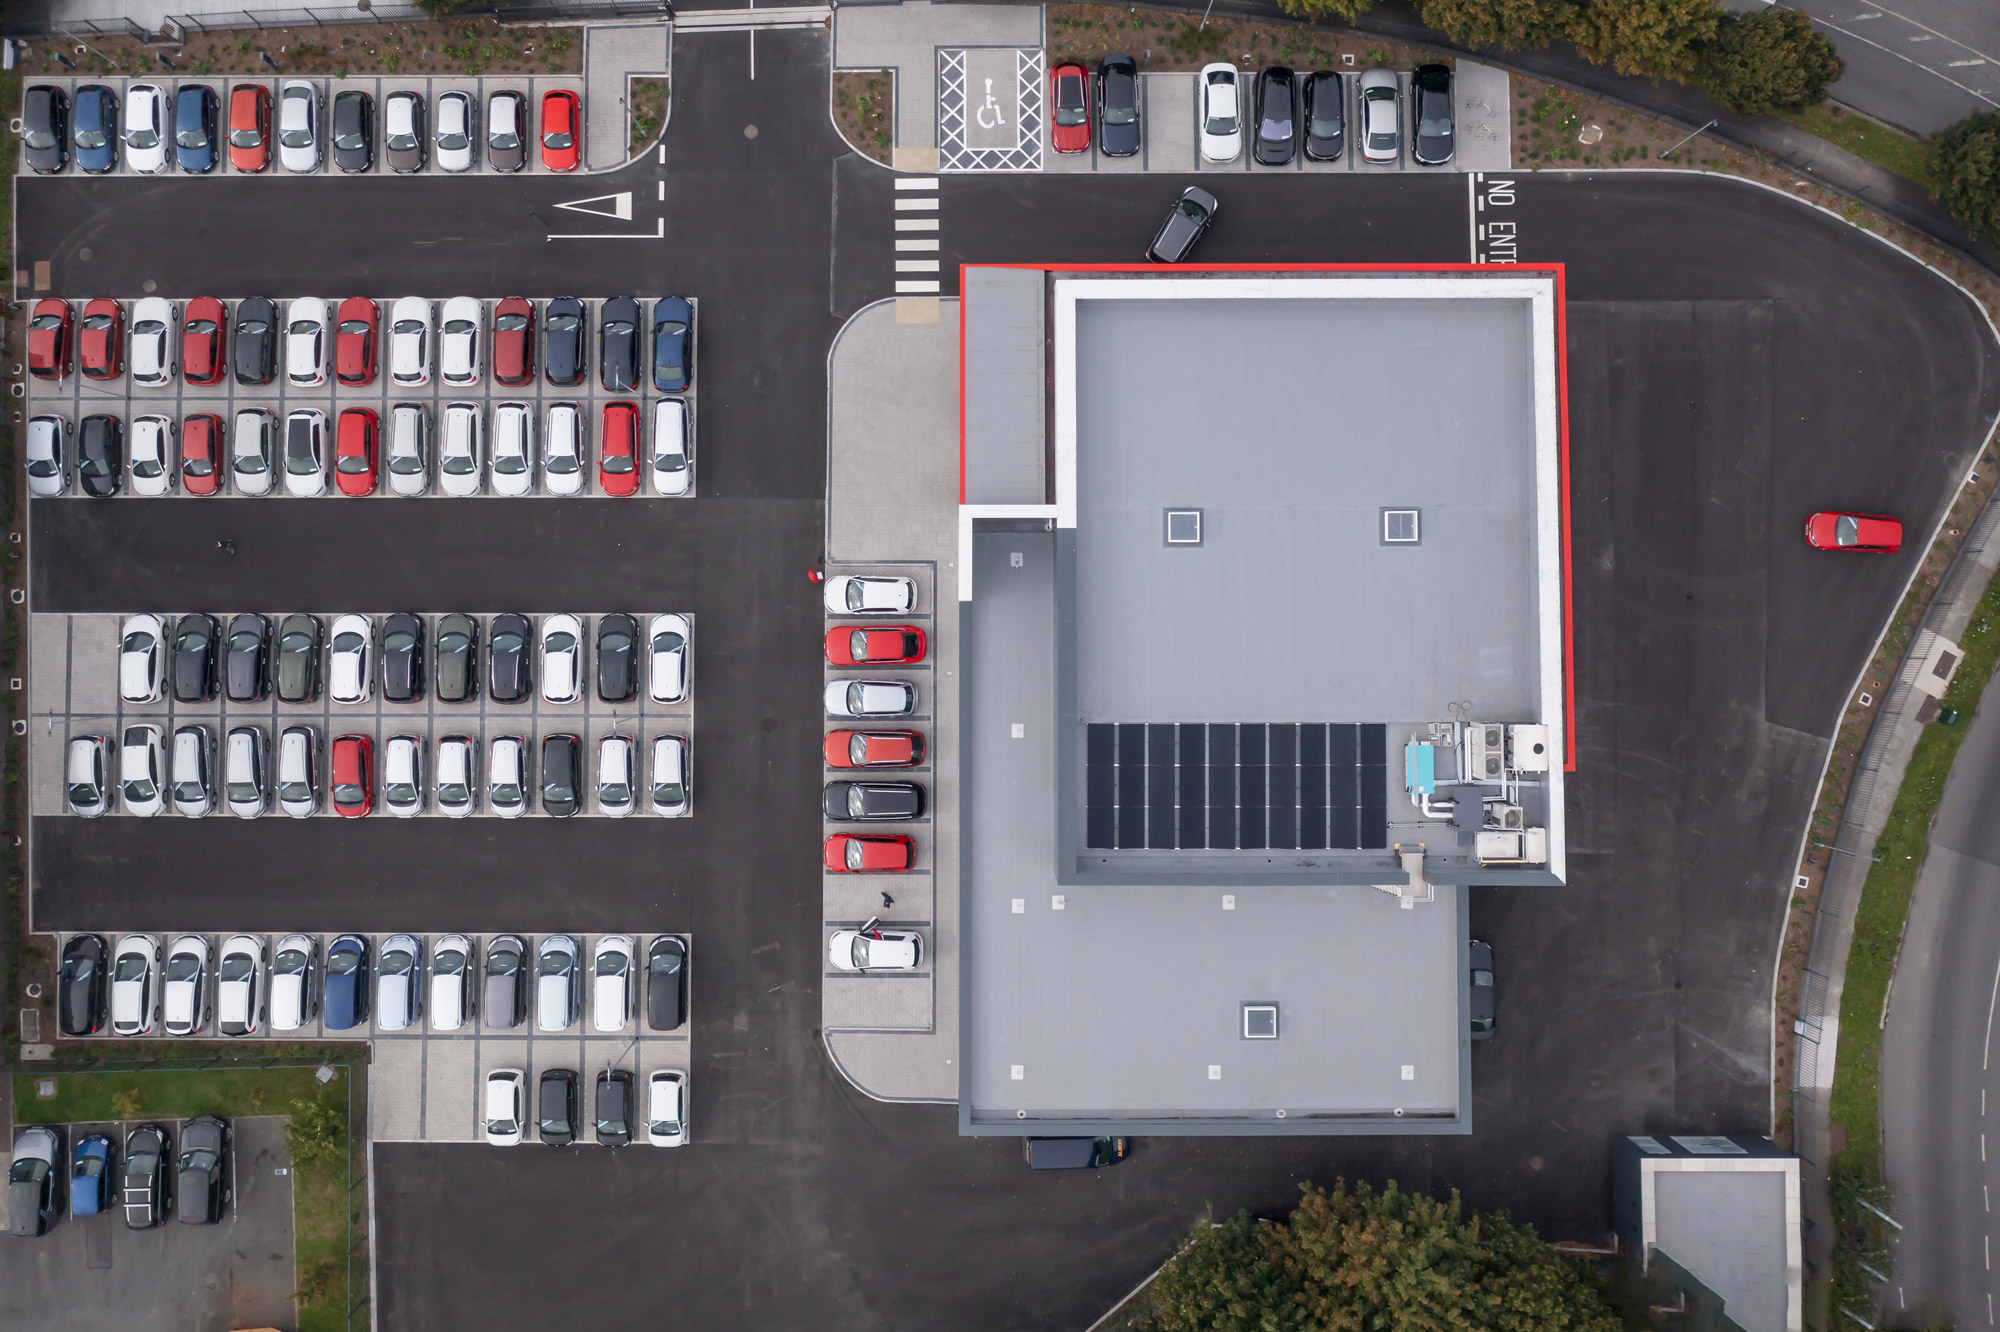
Paul Moore | DJI Mavic 2 Pro | 10.3mm | f/2.8 | 1/3200 | ISO 100
10. Use drones for exteriors
A drone is one of the best investments I’ve made as an architectural photographer. When capturing the exteriors of buildings, a drone allows me to get a unique viewpoint.
Drones are particularly useful for capturing the scale of larger projects. I’ll always try to get a straight-down view of the overall site. But the drone also allows me to get close to any exterior details that might be out of reach from the ground.
Always make sure that you’re complying with all current laws on drone operation in your country. I have undertaken training and am licensed by the Irish Aviation Authority as a drone operator. I also check airspace maps to ensure that drone use is allowed before offering it as an option to clients.
Always ensure that you comply with all regulations regarding construction. A few years ago, I undertook site safety training and now have a ‘Safe Pass’, which allows me access to worksites. This has proved invaluable in getting work.
If you’re just starting out in architectural photography, try approaching local construction companies and ask to photograph newly completed buildings. Ultimately, the main thing is to keep practising and training.
Want to learn more? Check out more camera gear guides on the MPB content hub.
You can sell or trade your camera kit to MPB. Get a free instant quote, free insured shipping to MPB, and get paid within days.