How to get the Kodak Aerochrome look using digital infrared
Published 28 August 2025 by MPB
Kodak Aerochrome, a film stock discontinued in 2009, is renowned for its ability to transform the rich greens of trees and plants into vibrant pinks, reds and purples. But, with expired rolls now costing hundreds, the original process of shooting Kodak Aerochrome film is prohibitively expensive for most photographers. Is there a way to recreate that stunning Kodak Aerochrome look using digital methods?
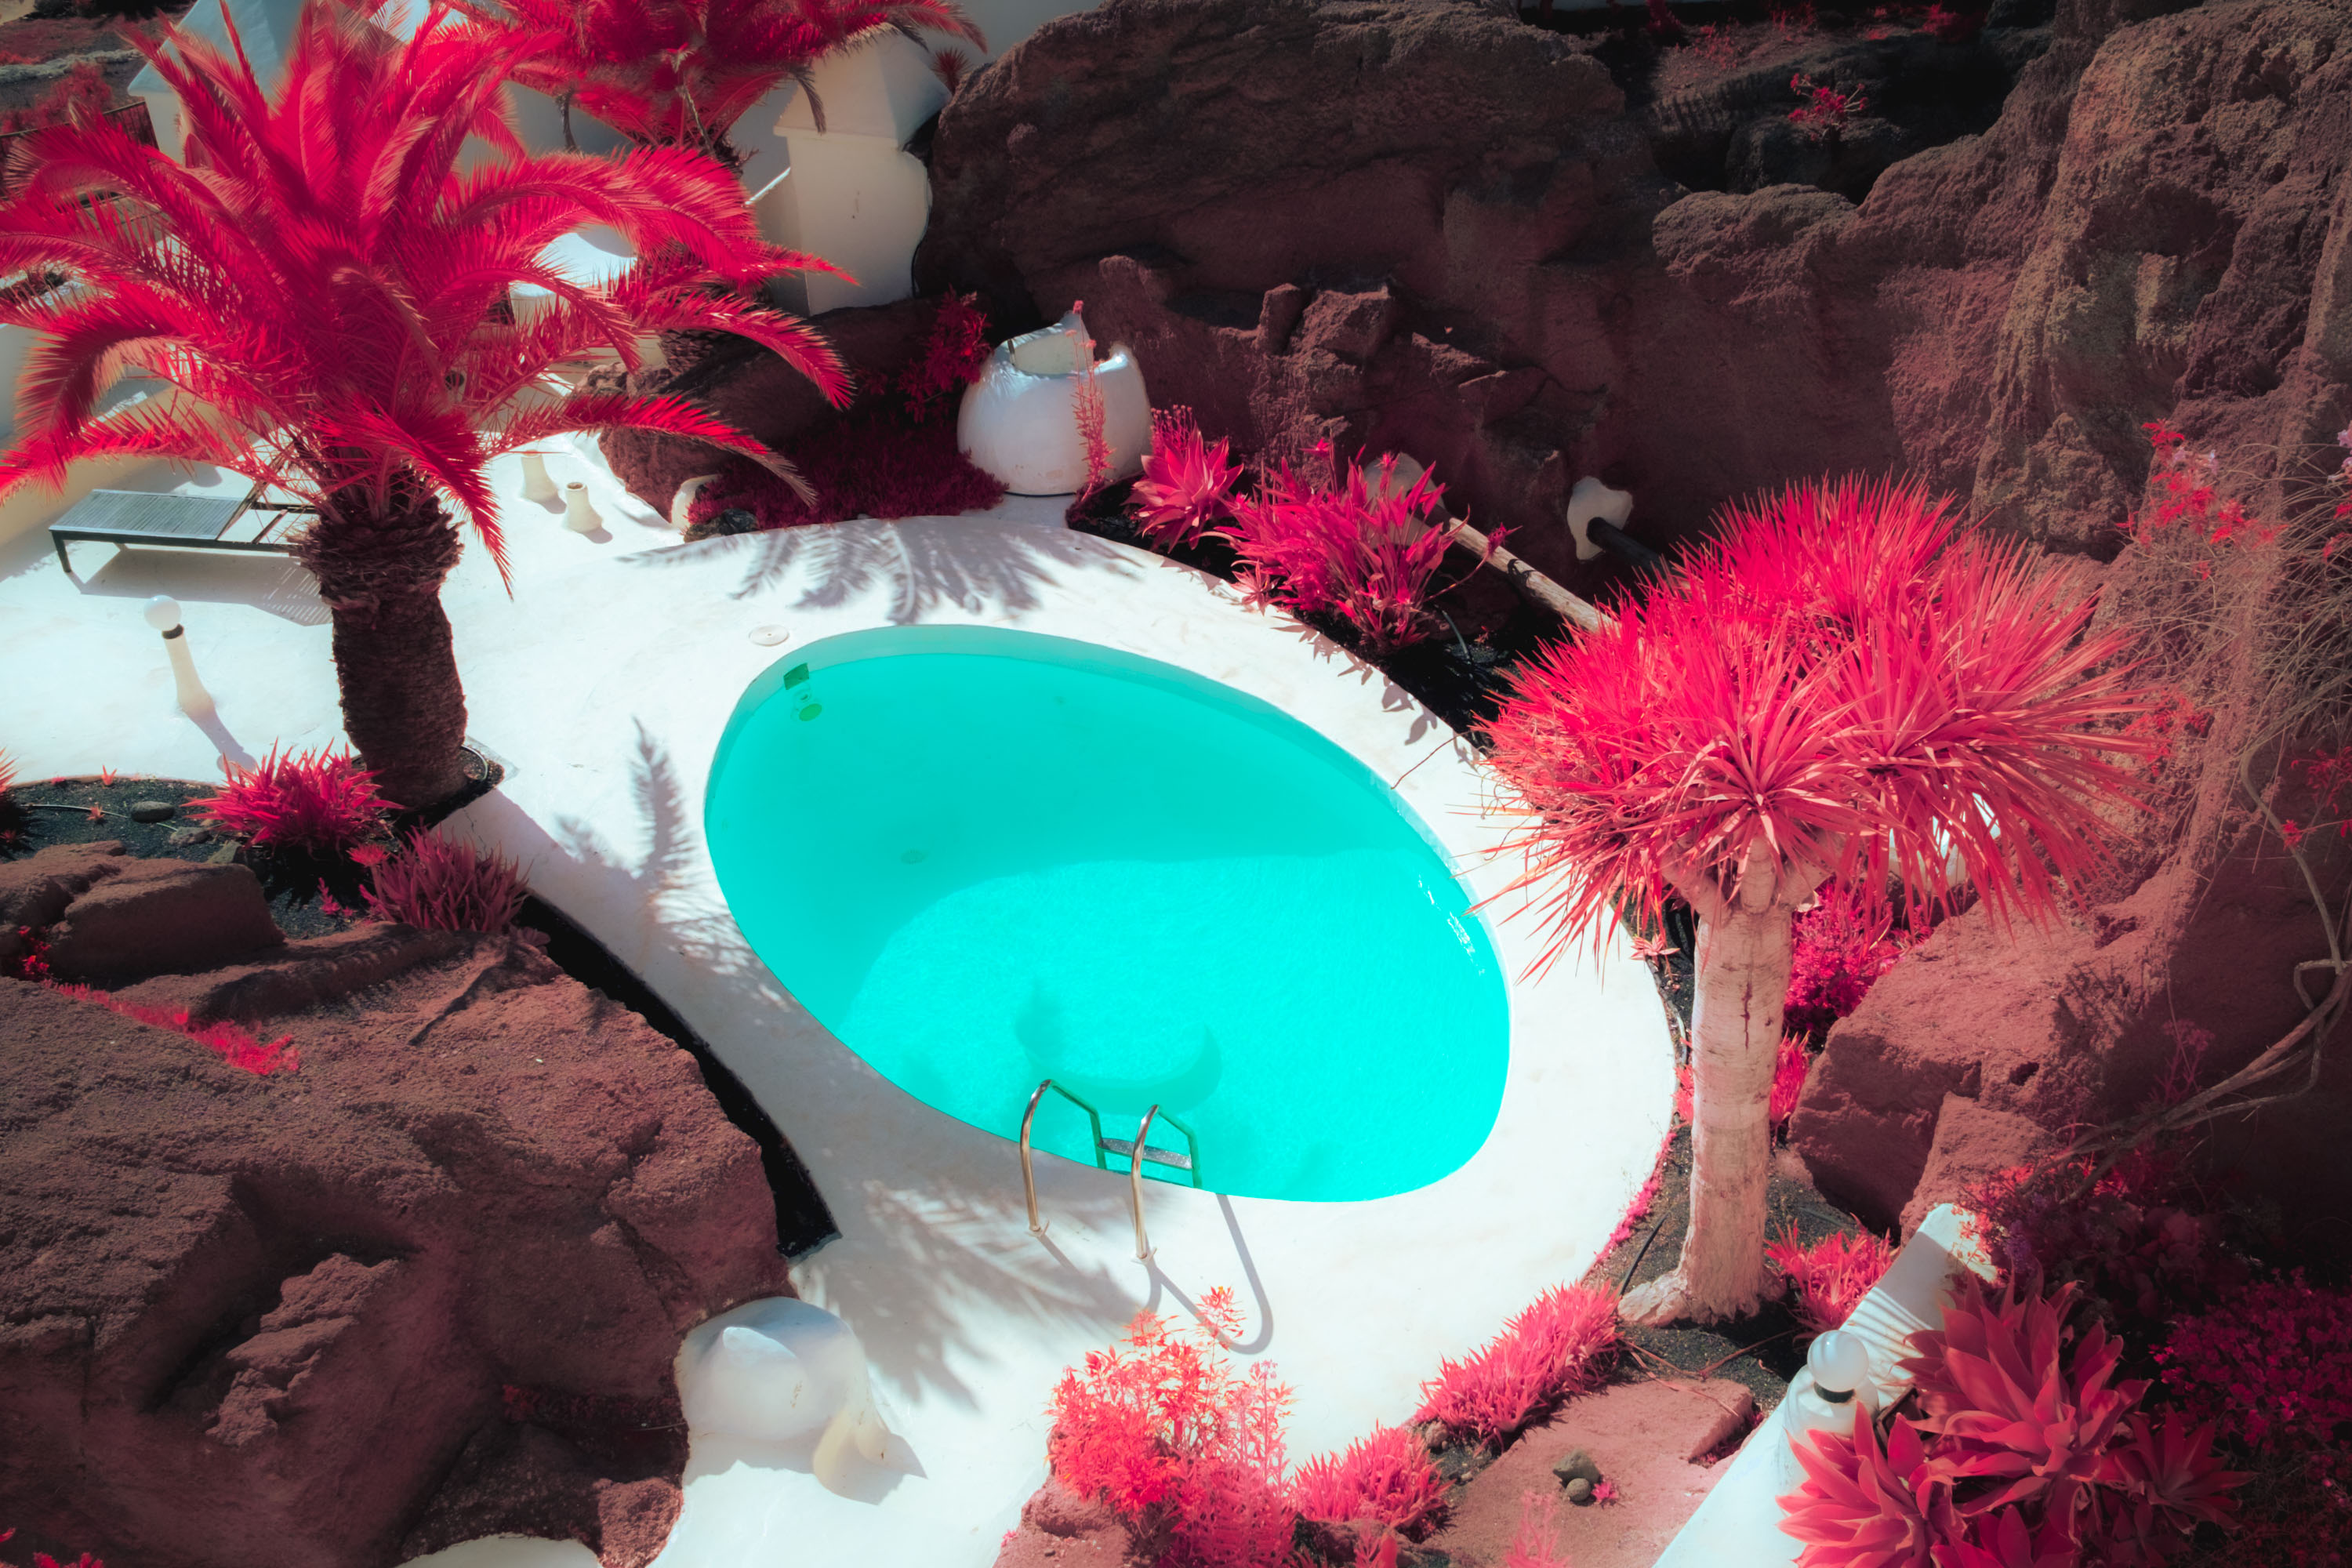
Equipped with an IR-converted Fujifilm X-T1 and Kolari IR Chrome filter mounted to Fujifilm XF 23mm f/1.4 R , MPB resident photographer Ian Howorth ventured to Lanzarote to show us how to harness the power of infrared digital photography. Over to you, Ian.
Additional imagery by Ben Anderson and Keiran Tutt
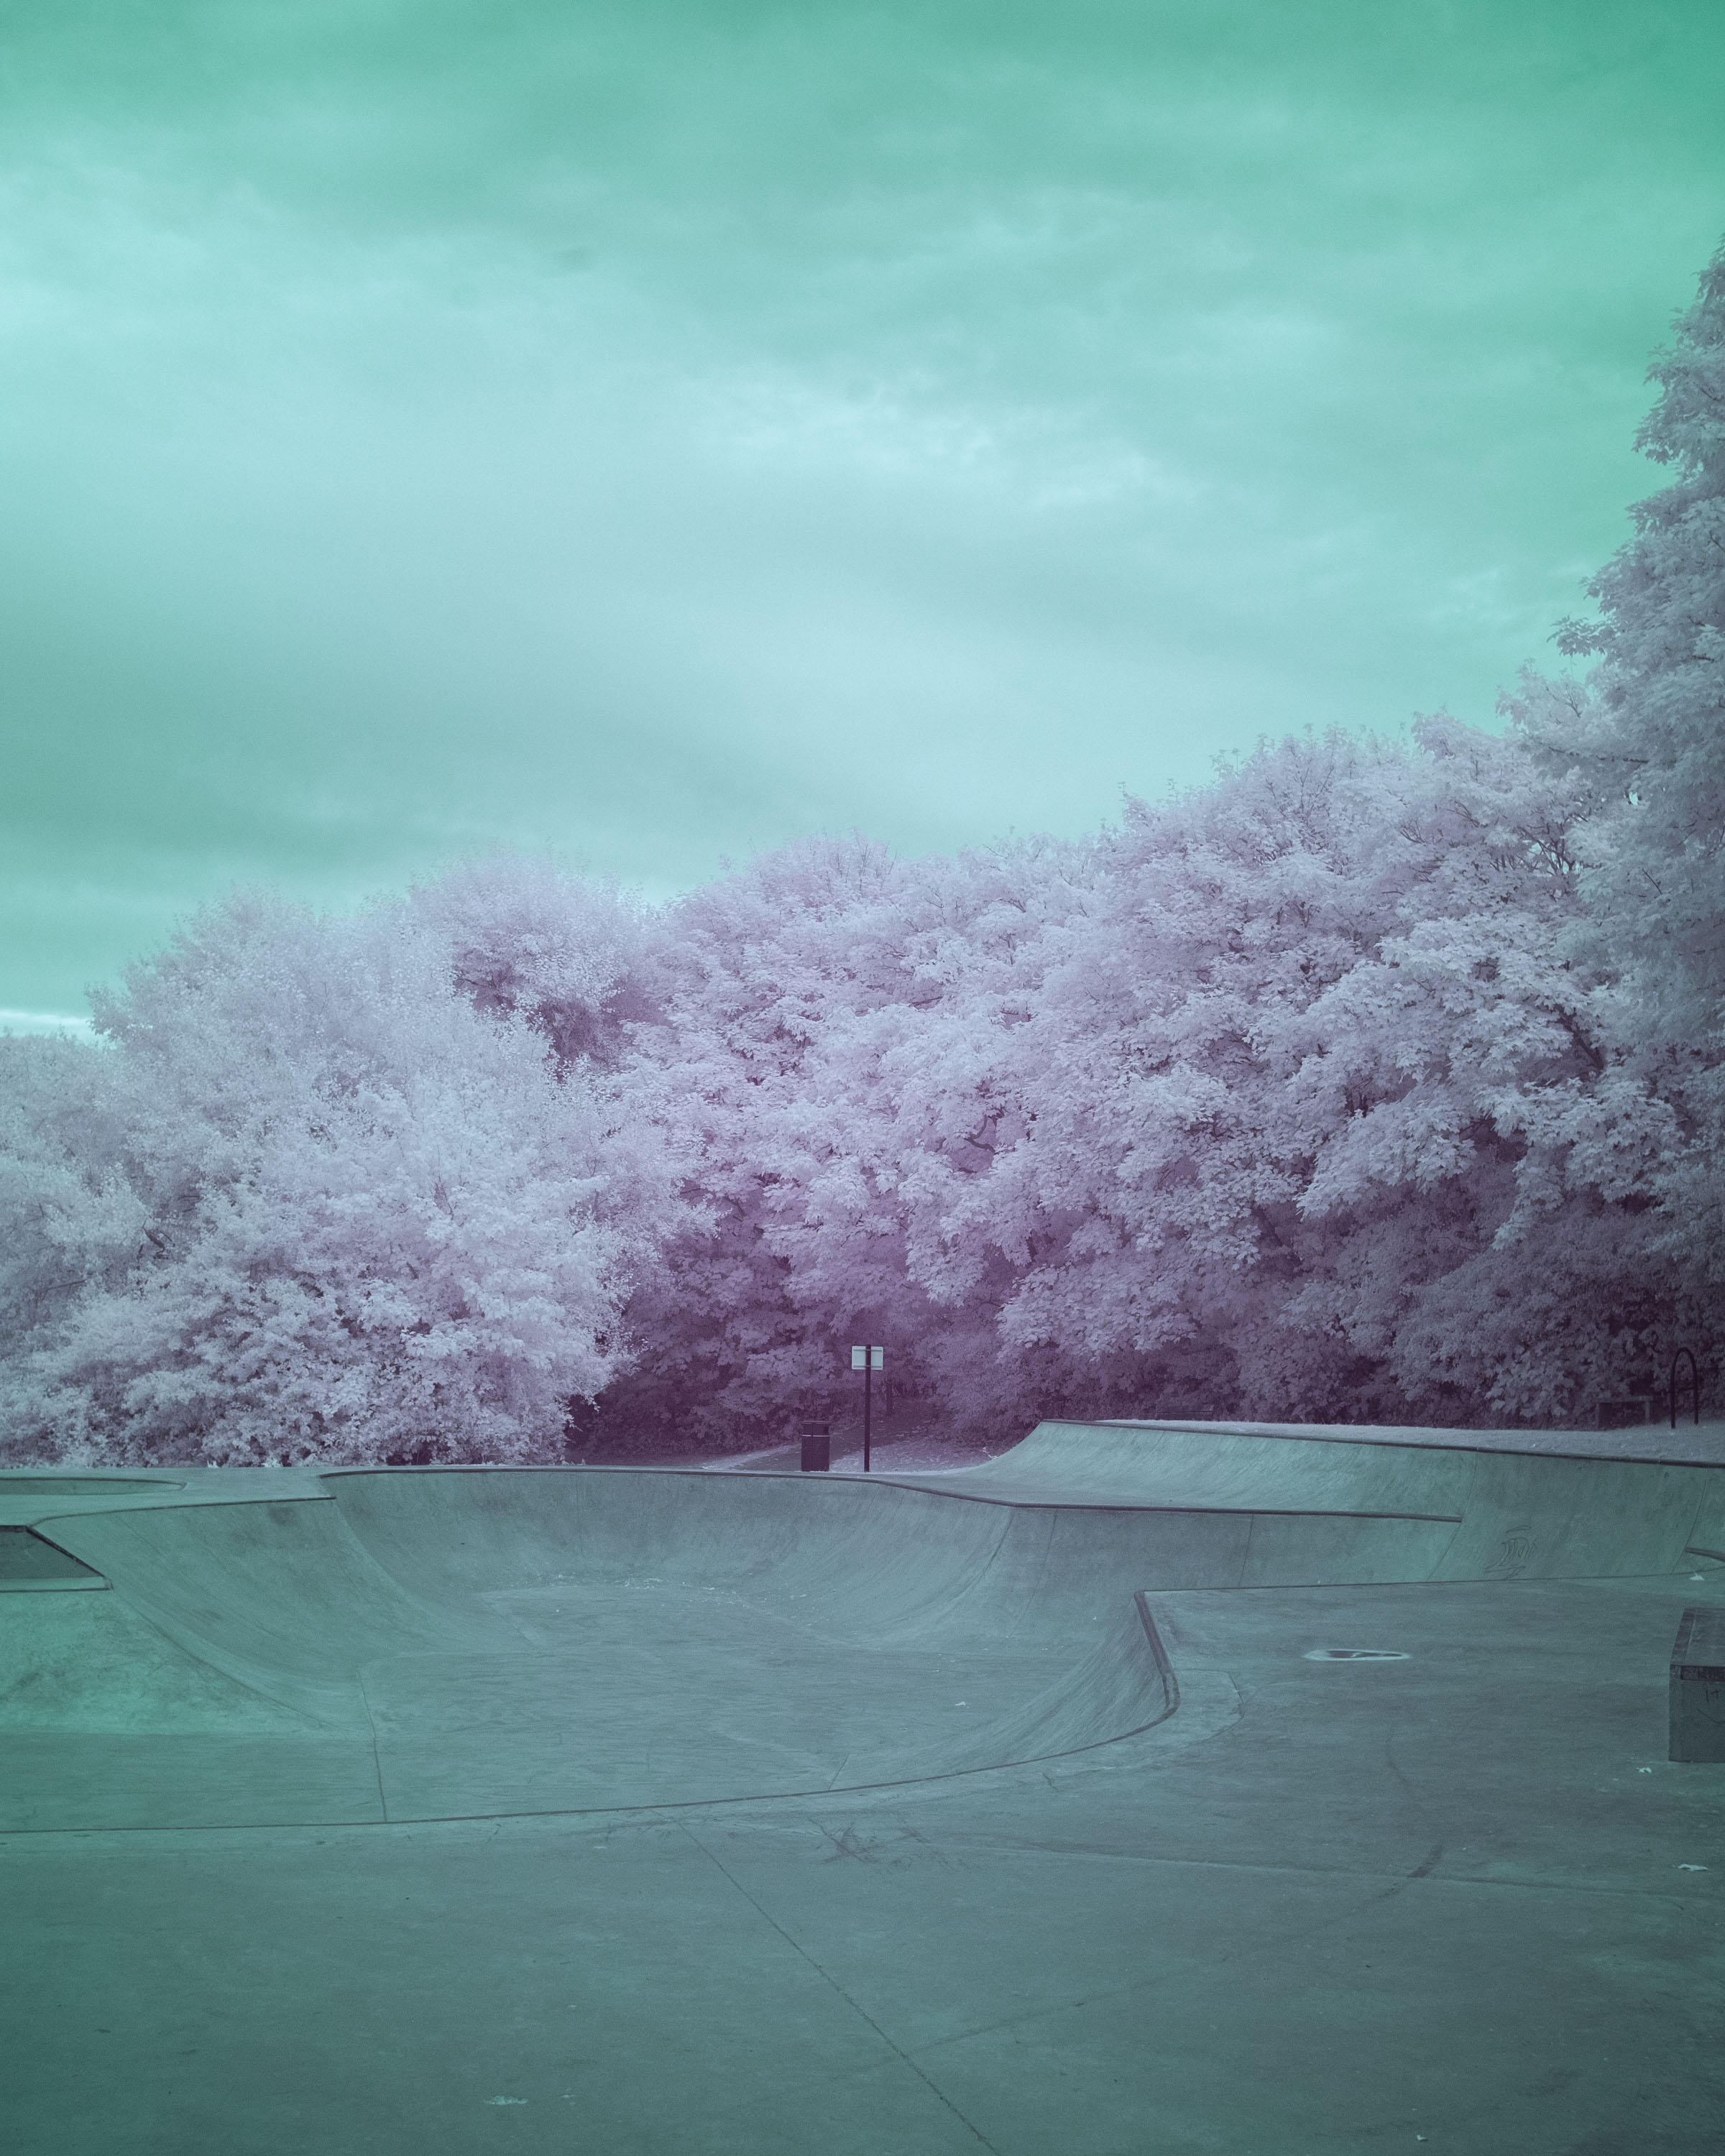
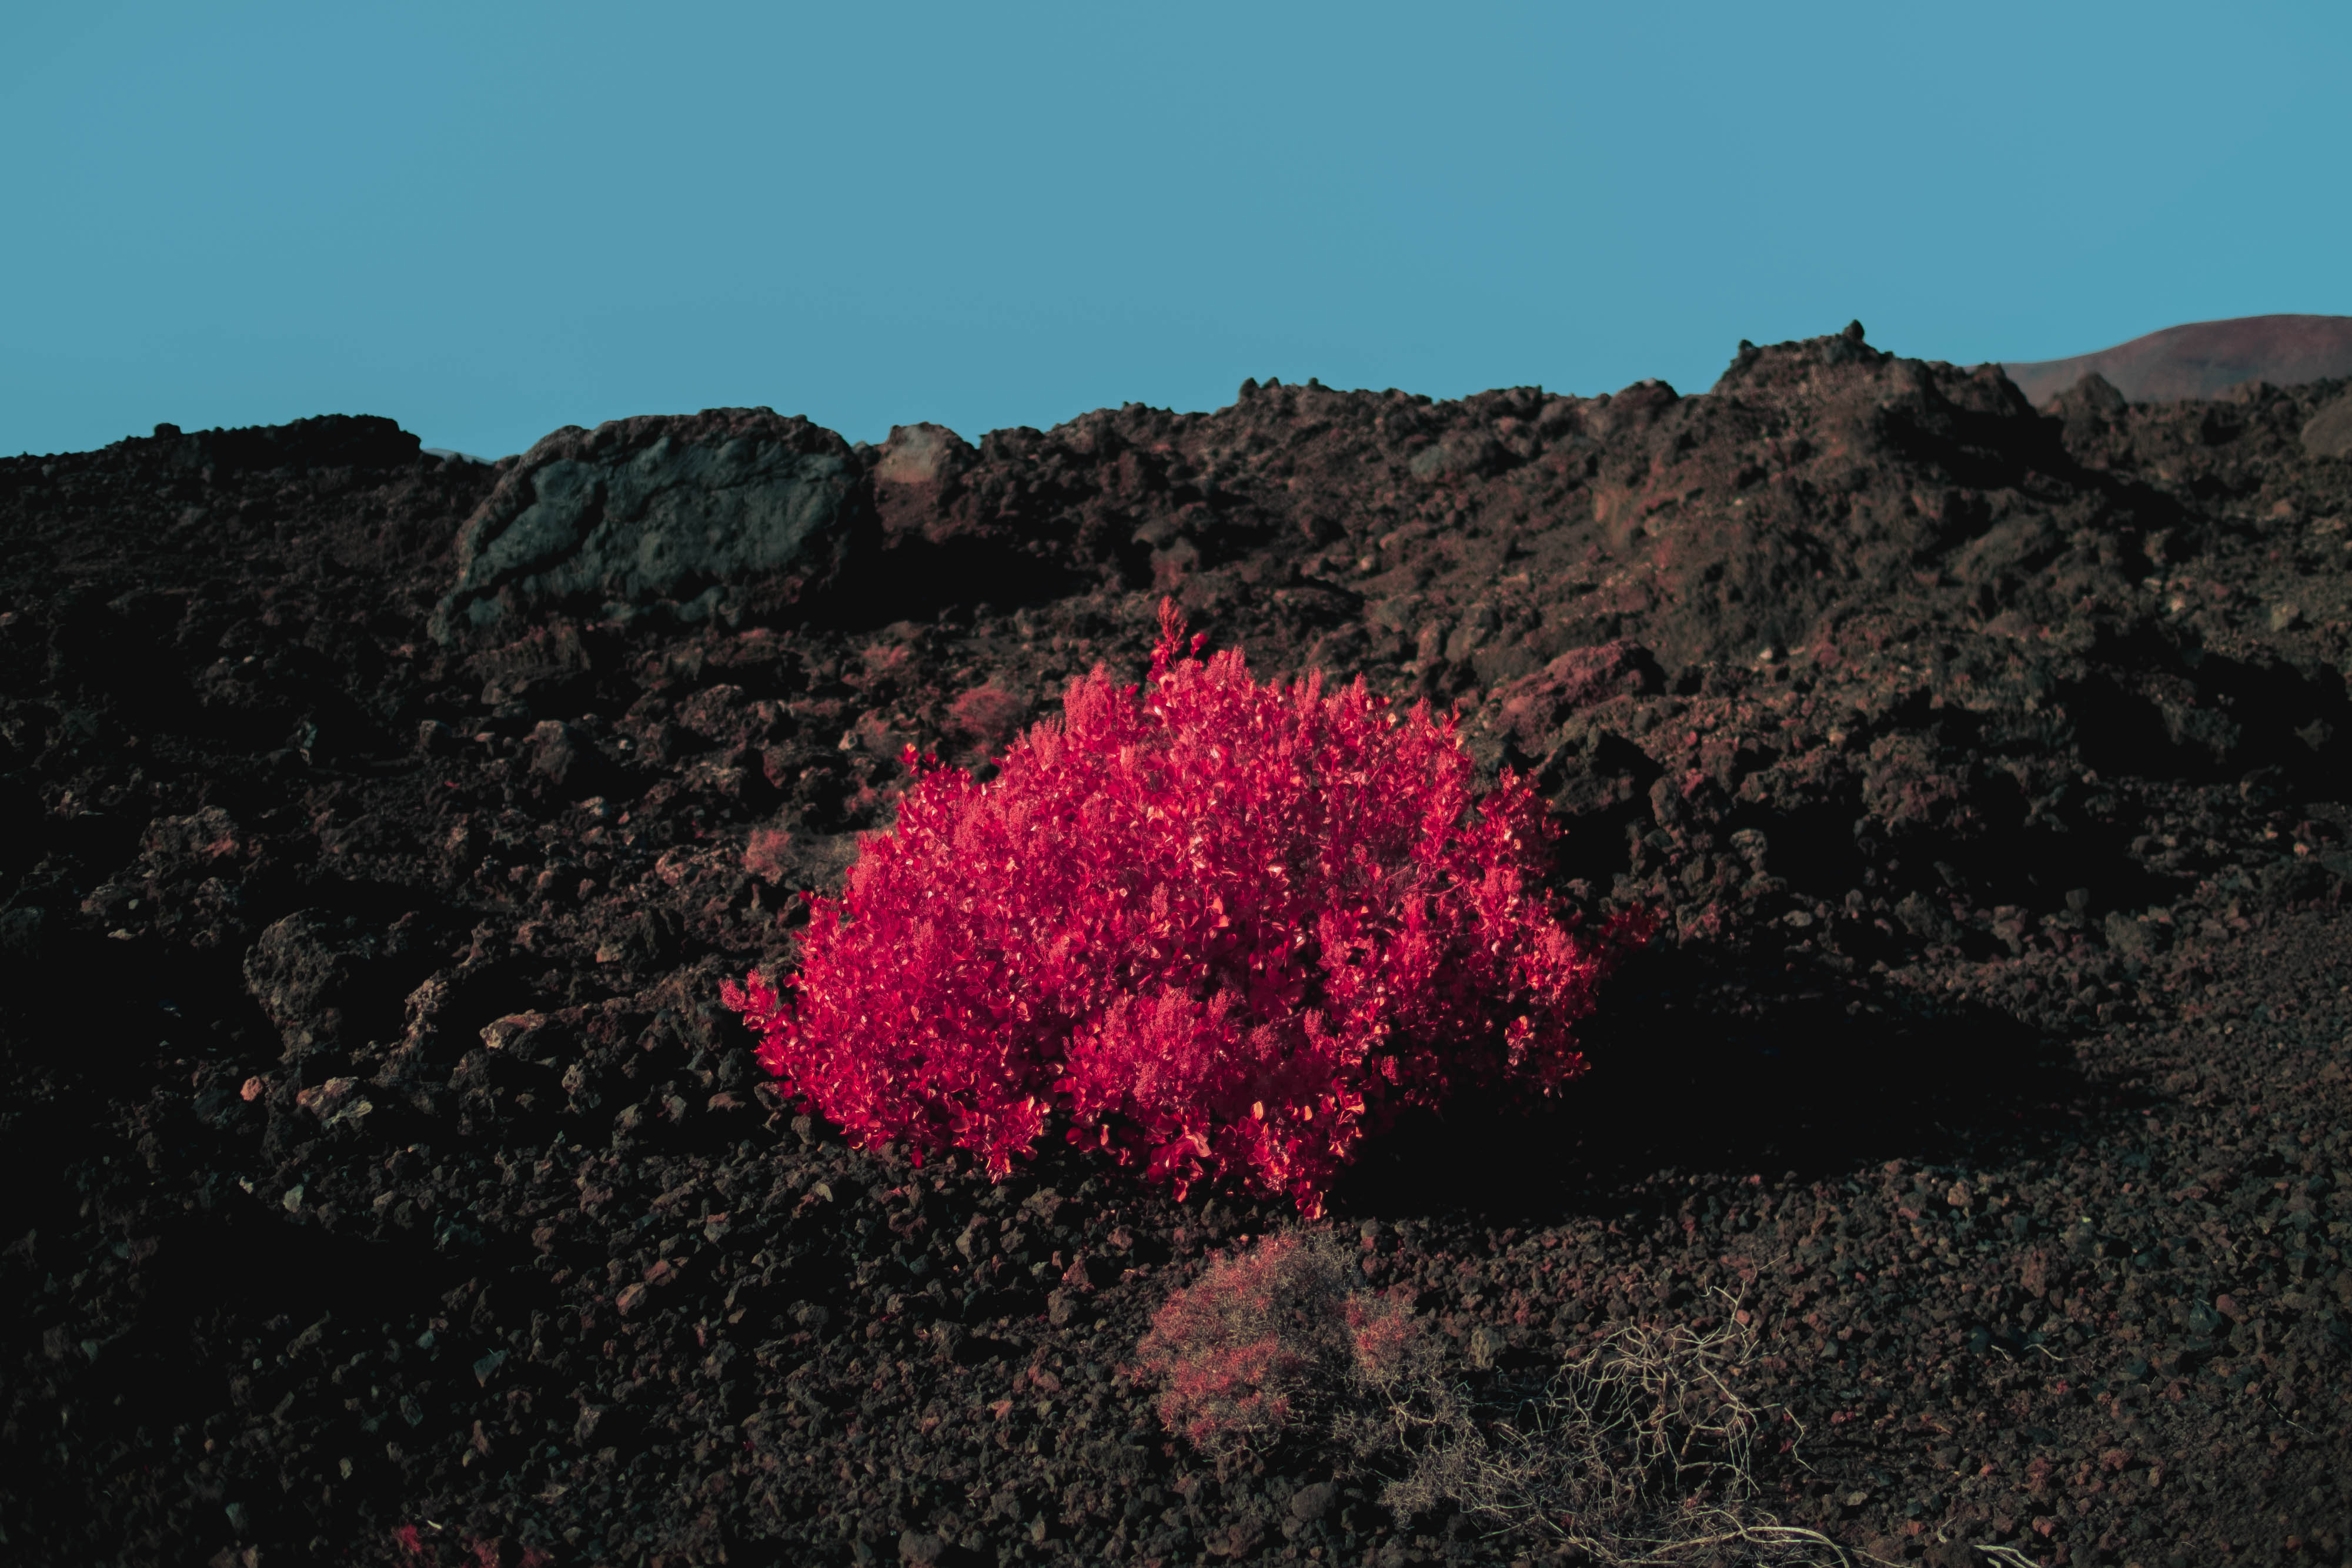
Ian Howorth | Fujifilm X-T1, IR Converted | Fujifilm XF 23mm f/1.4 | f/8 | 1/500 | ISO 400
What was Kodak Aerochrome used for?
Kodak Aerochrome has slightly nefarious beginnings. It was originally invented by Kodak in response to the US military’s need for surveillance in dense flora, before becoming available on the open-market as Kodak EIR. It differs from normal film as the film stock’s infrared light sensitivity means it can capture the light frequency emitted by the chlorophyll within plants—giving it its distinctive pinky/red hues—and helping distinguish plant life from artificial camouflage.
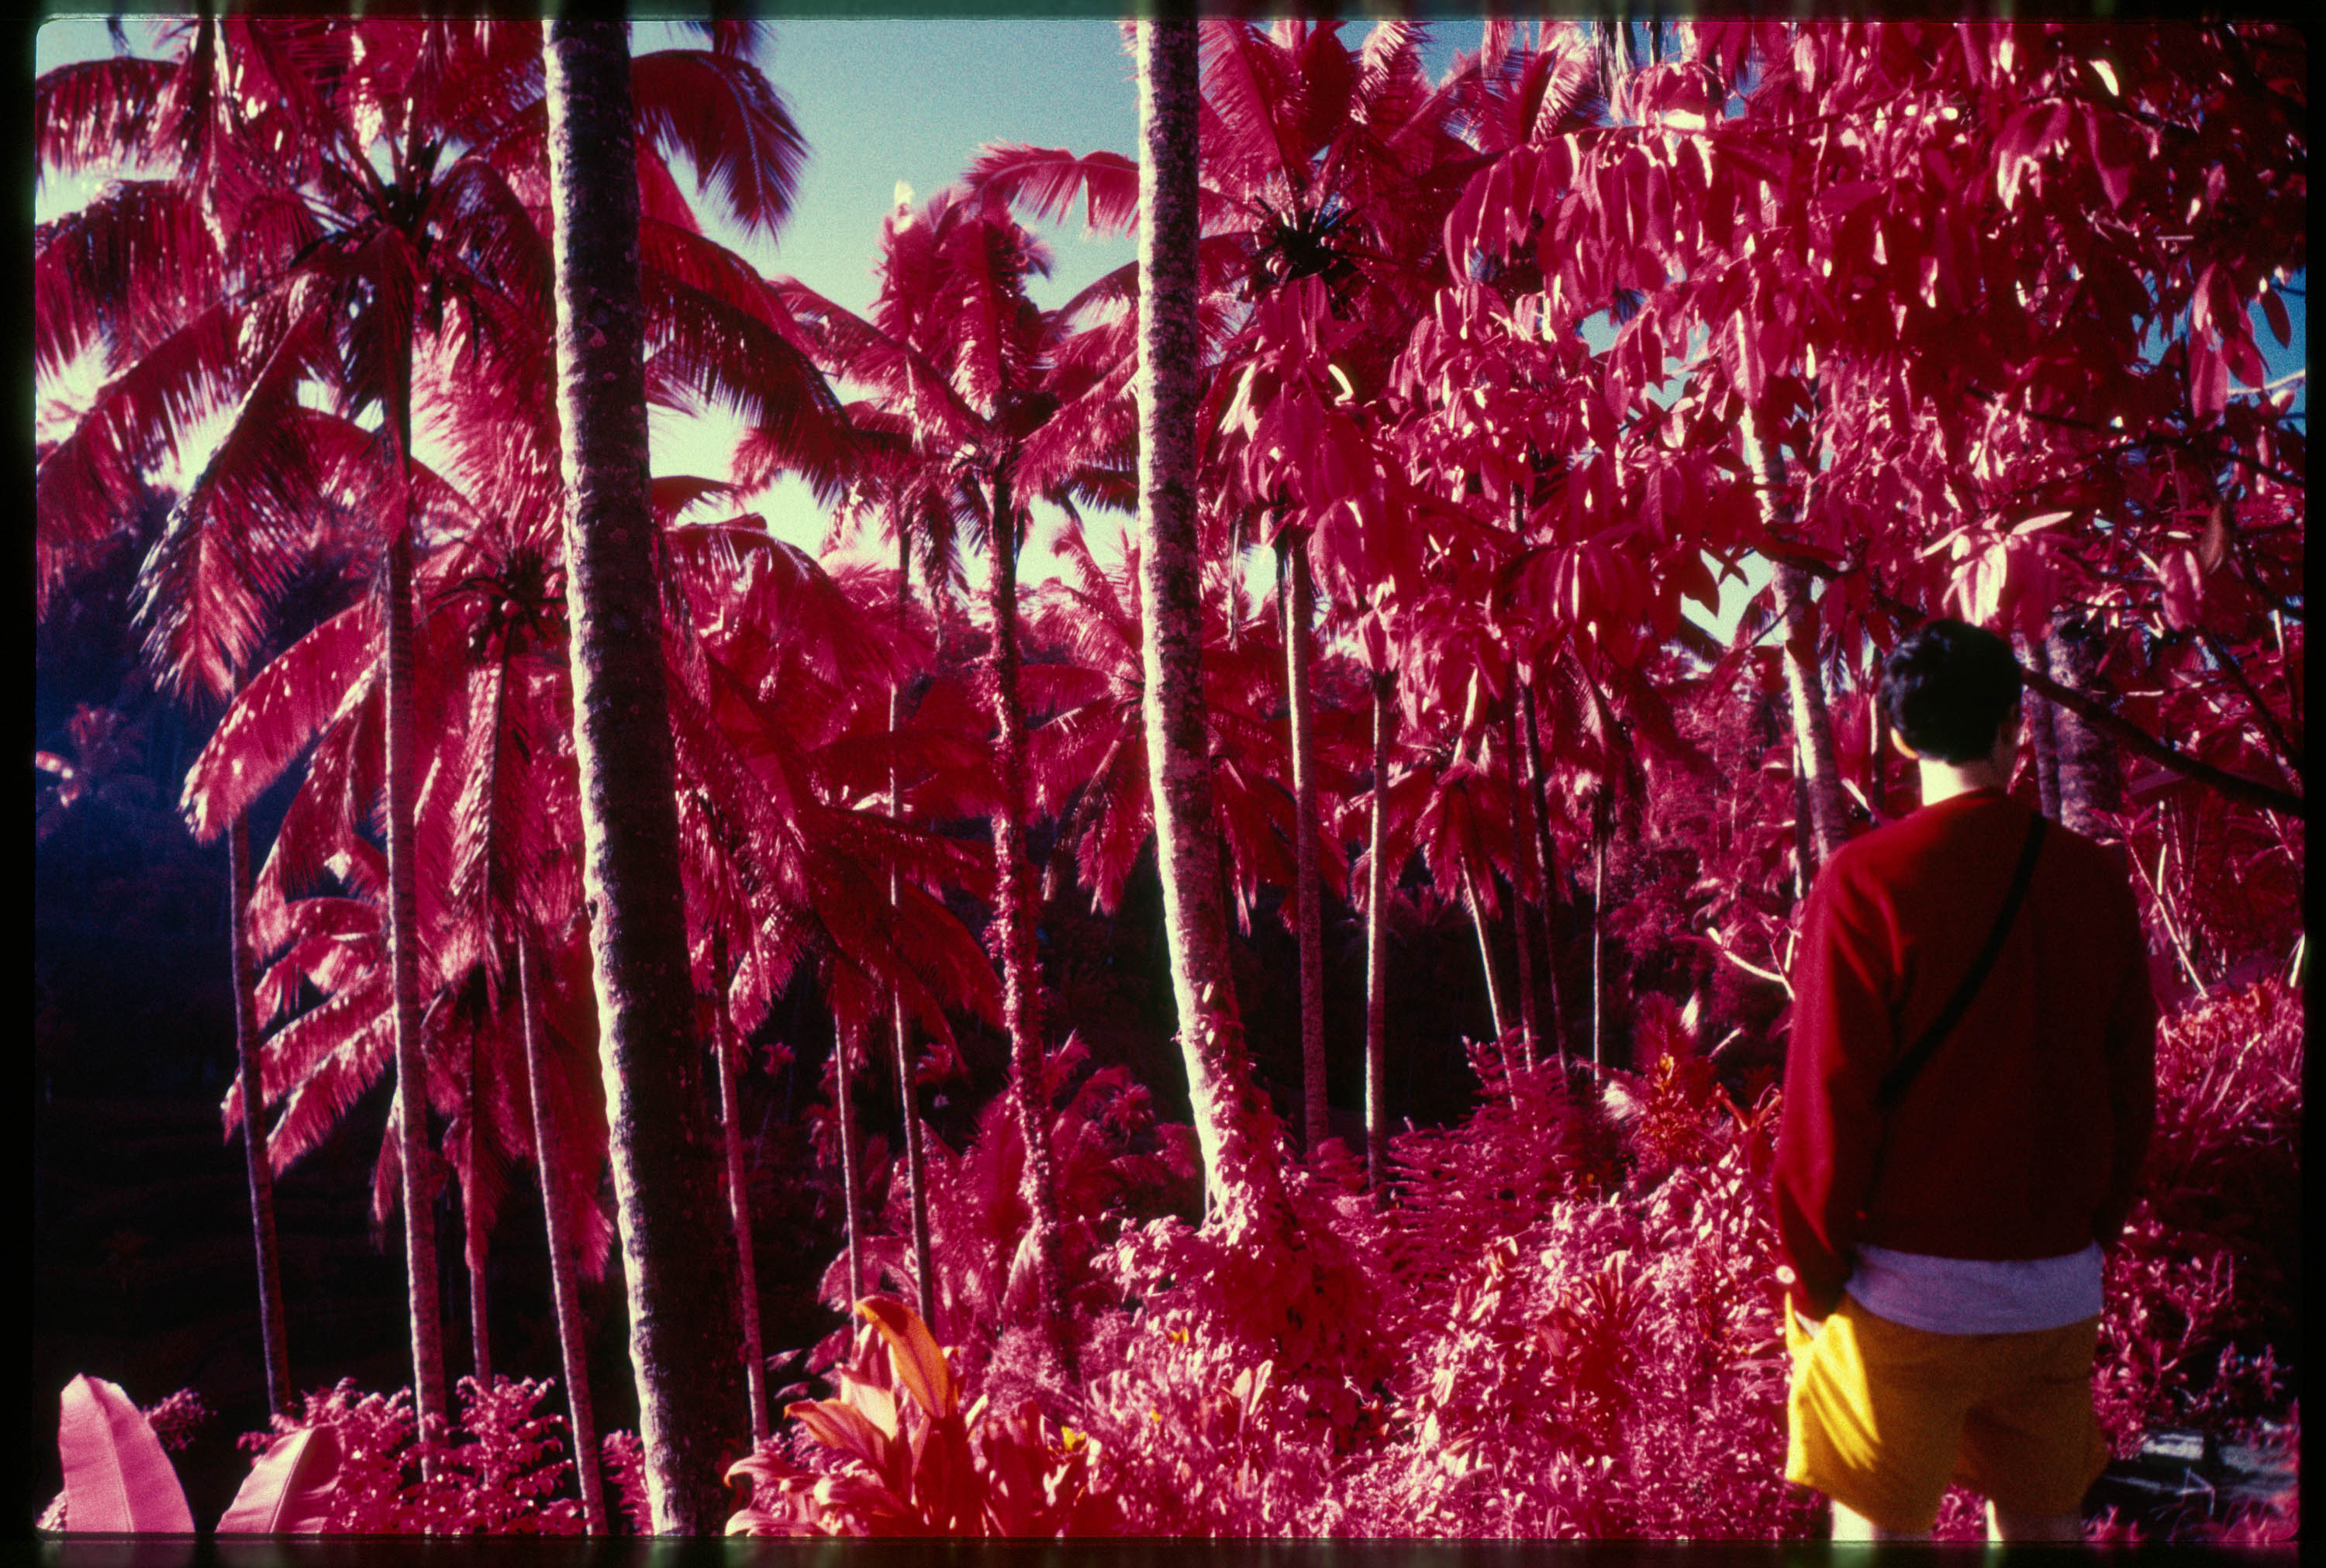
Ben Anderson | Kodak Aerochrome
With the scarcity and the rising cost of Kodak Aerochrome film, it makes sense to try and replicate its look digitally. Infrared is nothing new on digital cameras. Various sensor conversions are able to record different light frequencies, decreasing or increasing the intensity of the light emitted by certain colours.
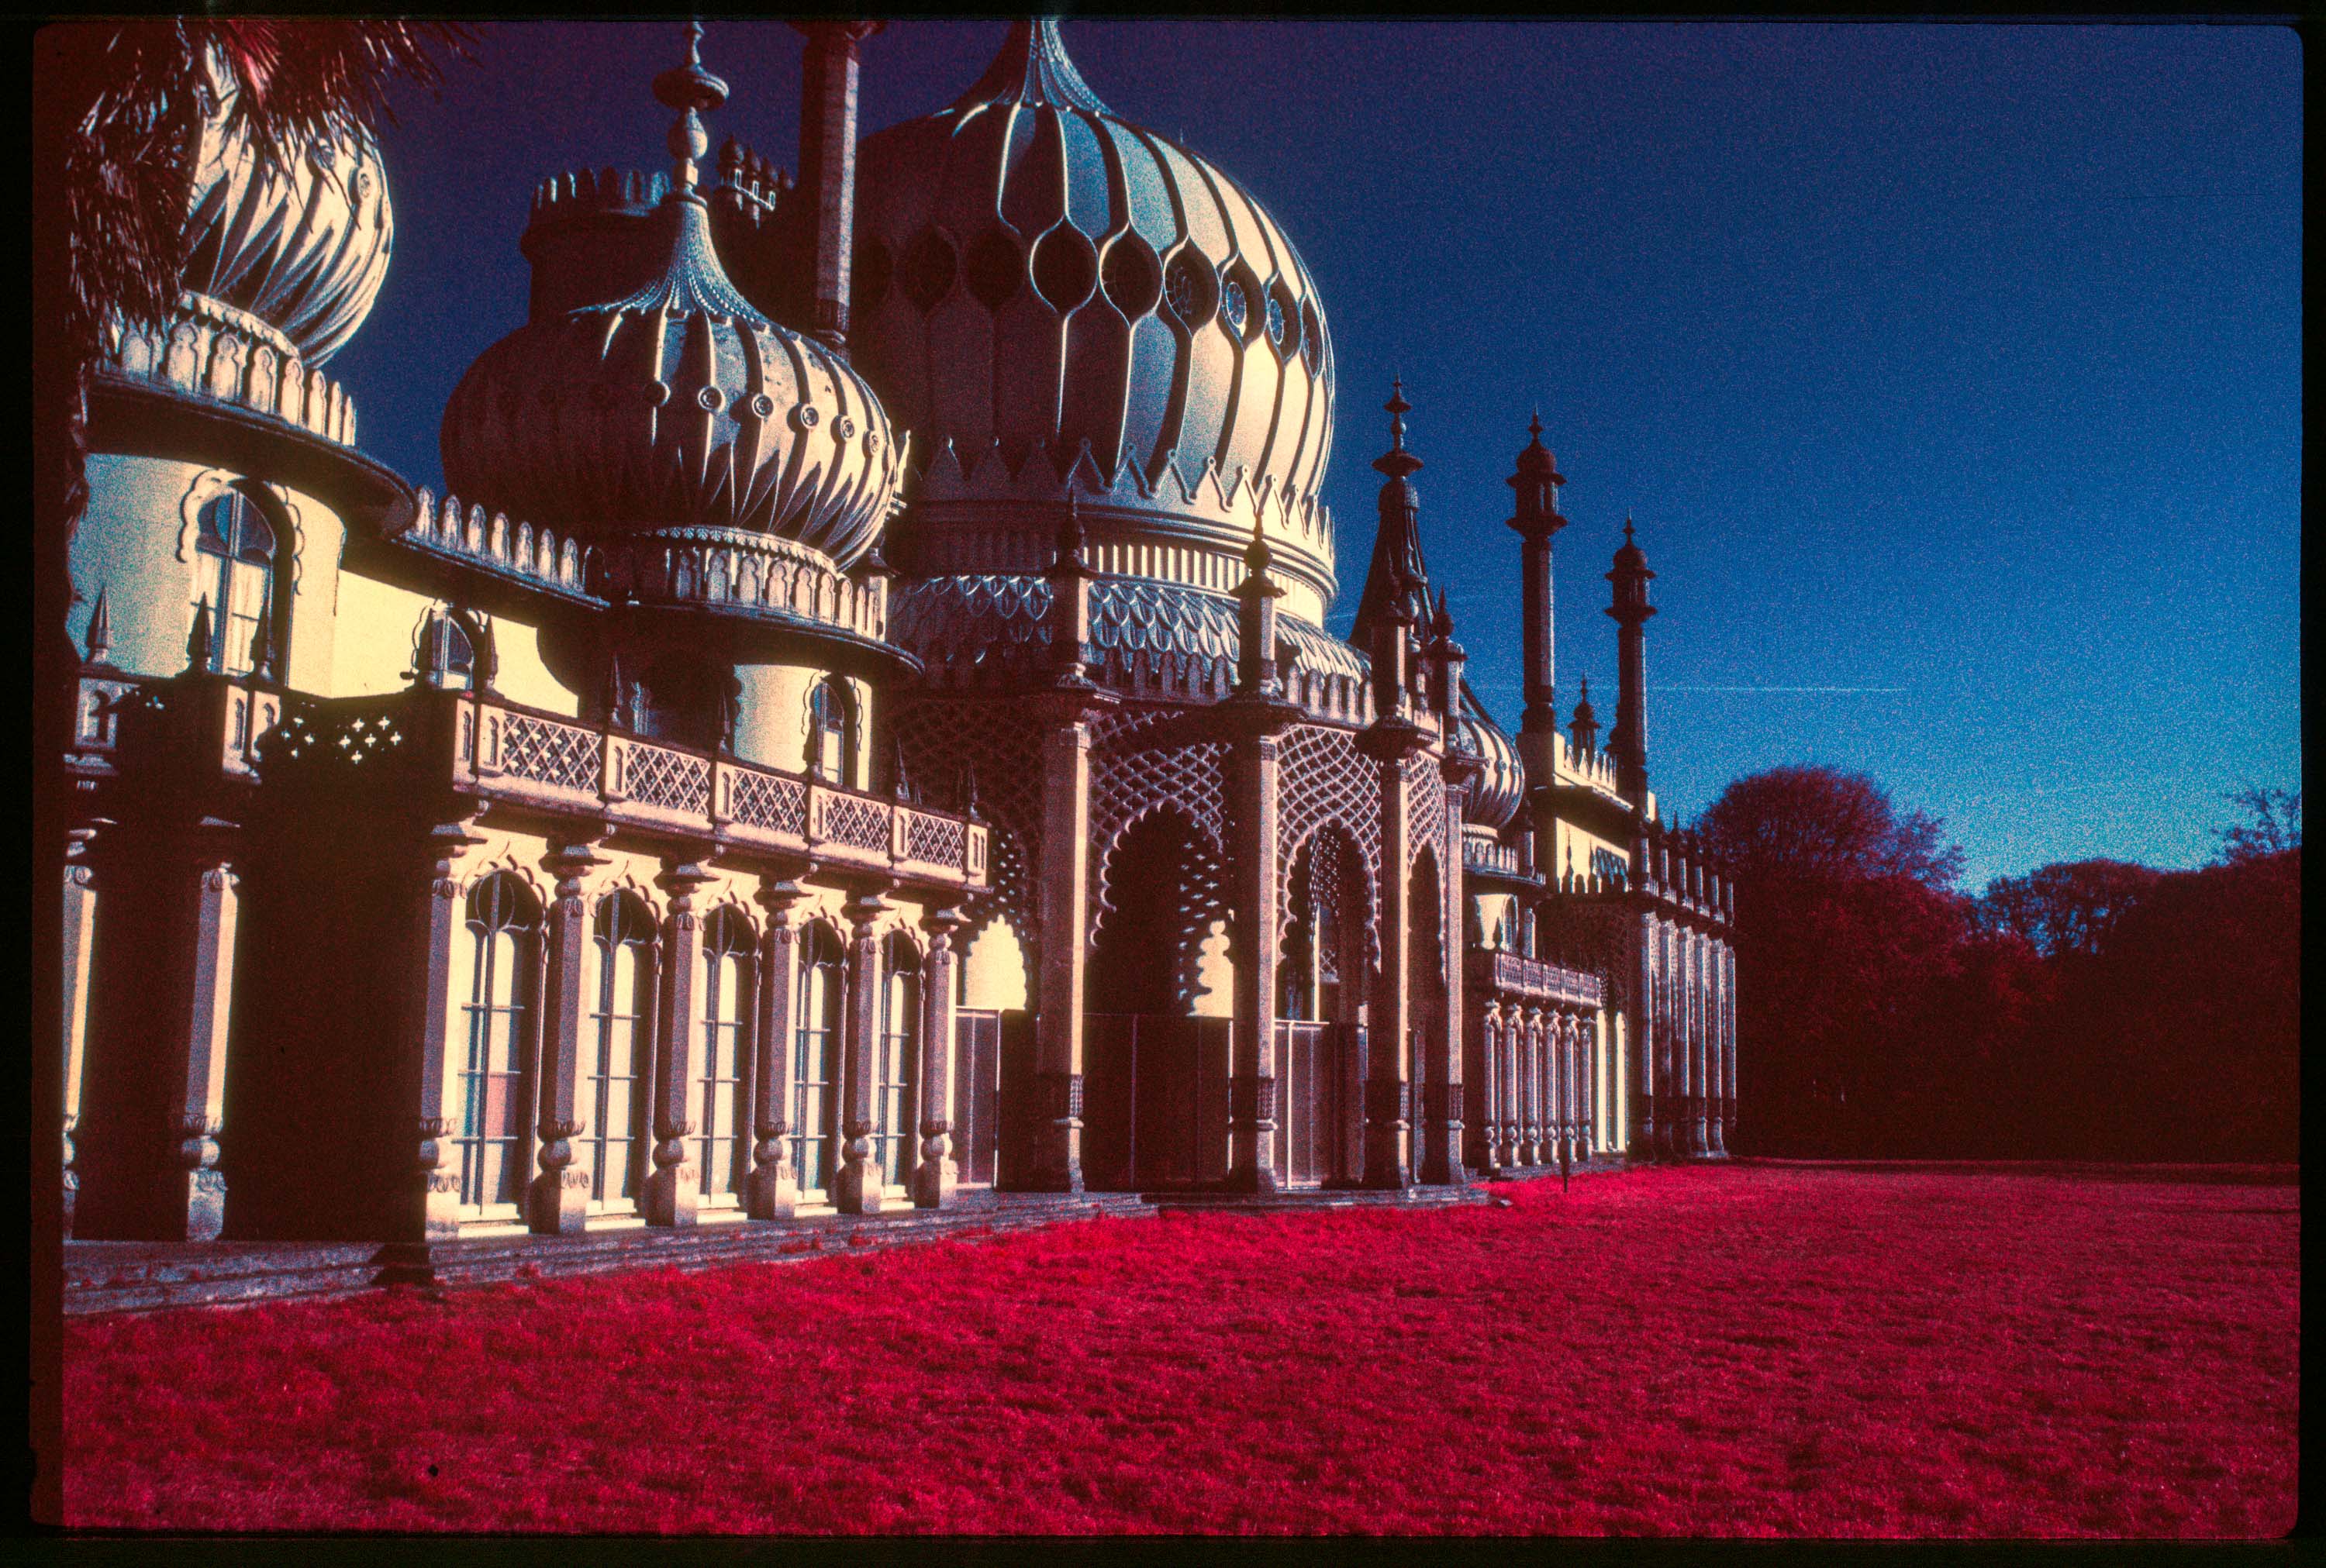
Ben Anderson | Kodak Aerochrome
Depending on your tastes, this would be done to create otherworldly colour images or to add a different dimension to black-and-white conversions. Various filters are available—ranging from 590nm to 850nm—which dictate the amount or type of light that is allowed to pass through the filter. Nm stands for nanometers, the measurement used for the wavelength of infrared light.
Generally speaking, the lower the nm number, the more ‘false colour’ is produced and the better it is for colour infrared photography. The greater the number, the better it becomes for black-and-white photography—as less visible light comes through, therefore less colour.
Keiran Tutt | Infrared 590nm
However, a true infrared—similar to what Aerochrome does—as close to ‘straight from the camera’, still eluded digital photography. At least, until the folks at Kolari decided to do something about it.
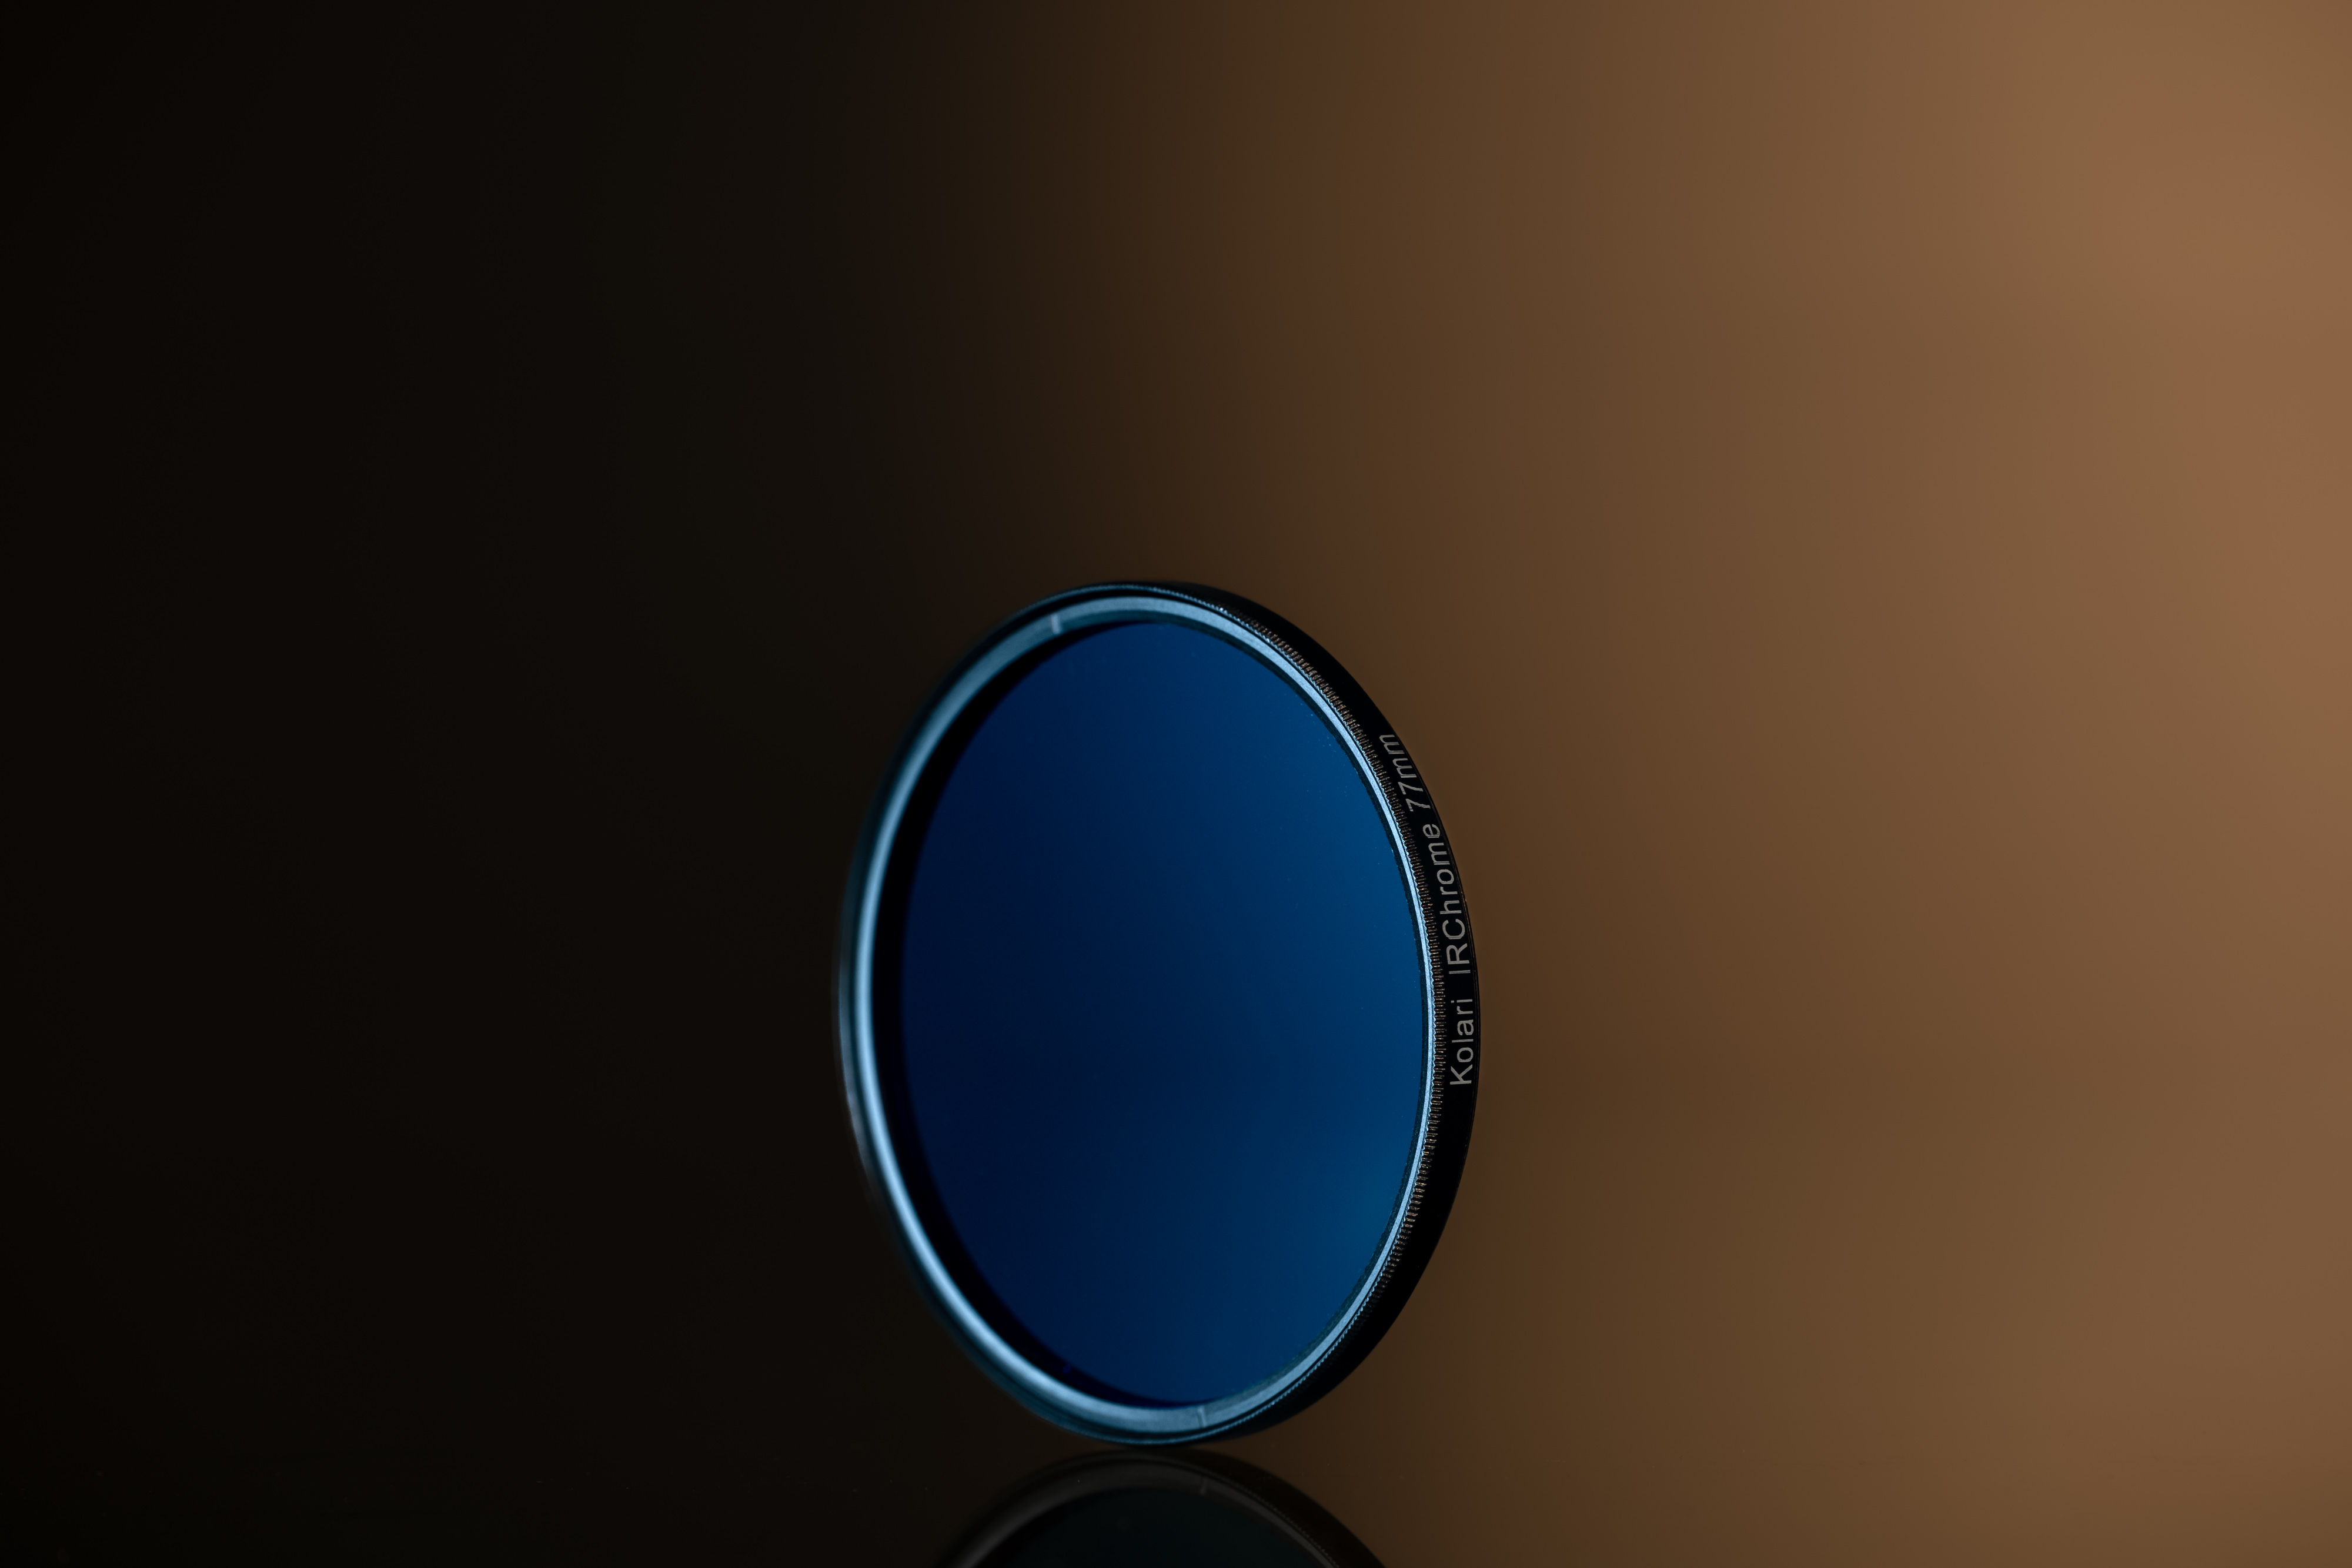
Kolari IR Chrome filter
Enter the IR Chrome filter, which is designed to work with a full-spectrum infrared-converted camera. You simply screw the infrared filter to your chosen lens. With a few white-balance tweaks, it is intended to give a true infrared image—albeit slightly different to the colours that Kodak Aerochrome can yield, at least straight-out-of-camera.
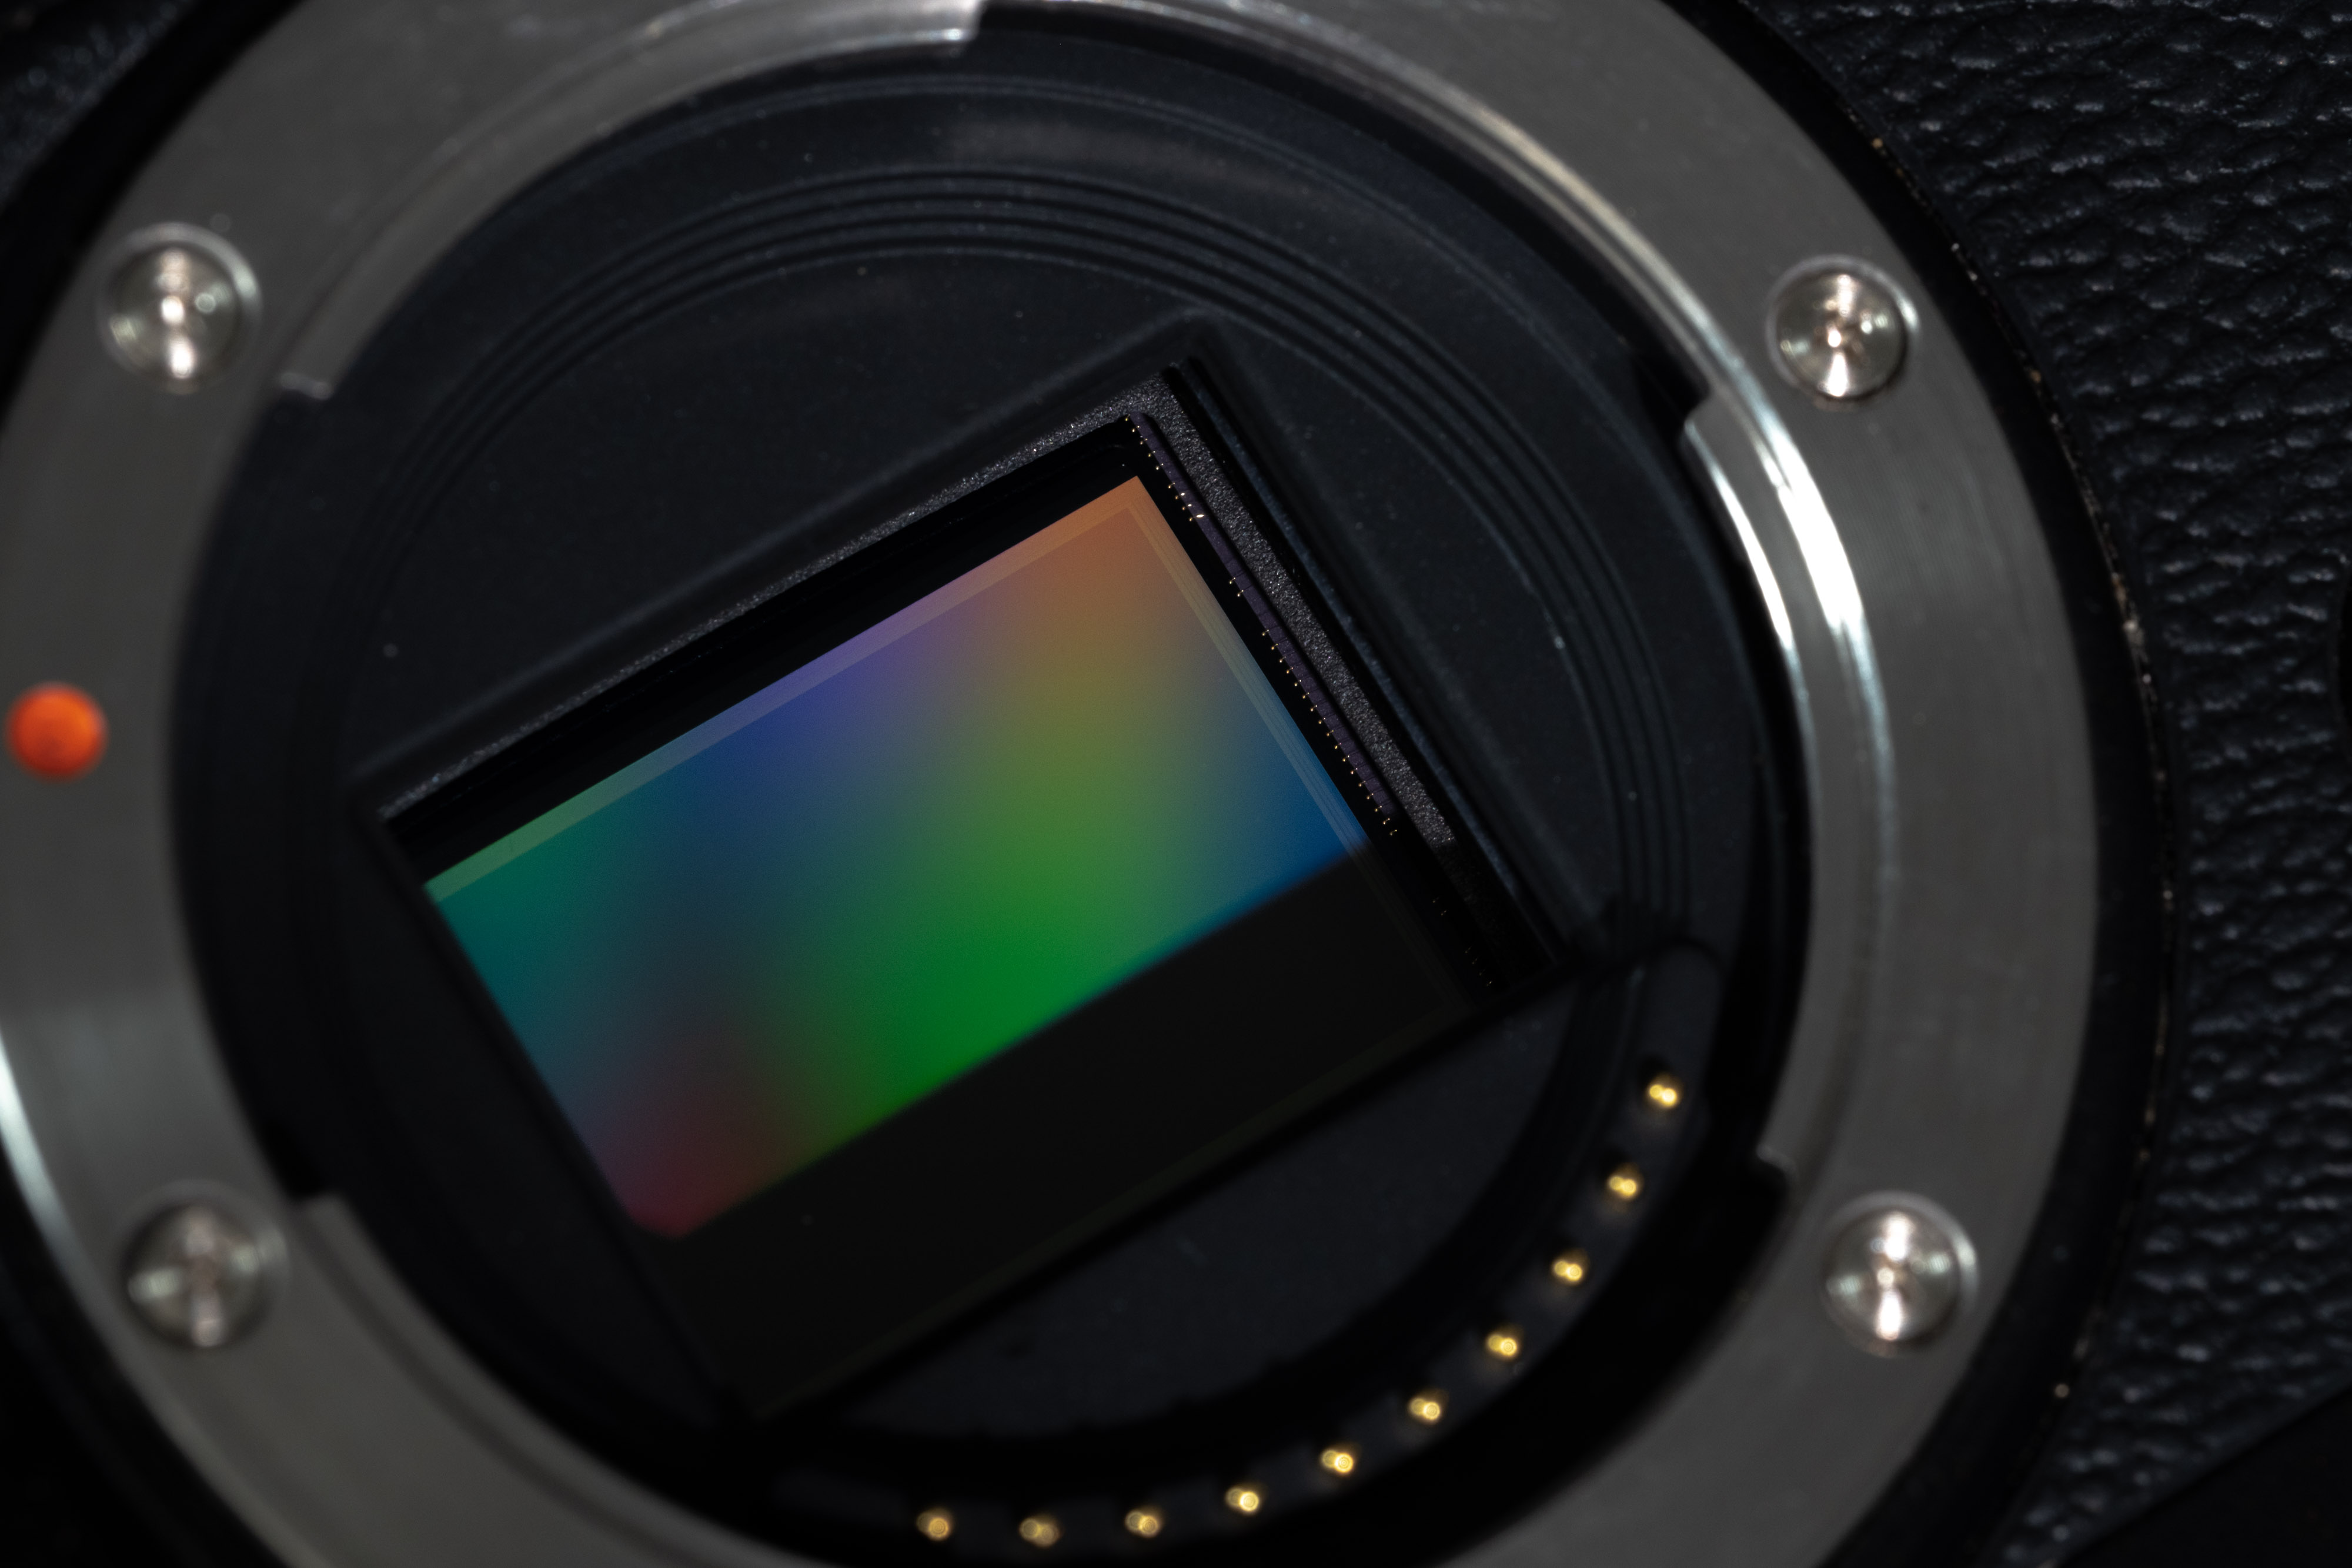
Full-spectrum conversion allows the camera to ‘see’ a larger spectrum of light, from visible to infrared. This equates to roughly 280nm all the way to 1200nm. The filter works in tandem with the full-spectrum conversion to get as close to the look of Kodak Aerochrome film without having to spend too much time in post-production.
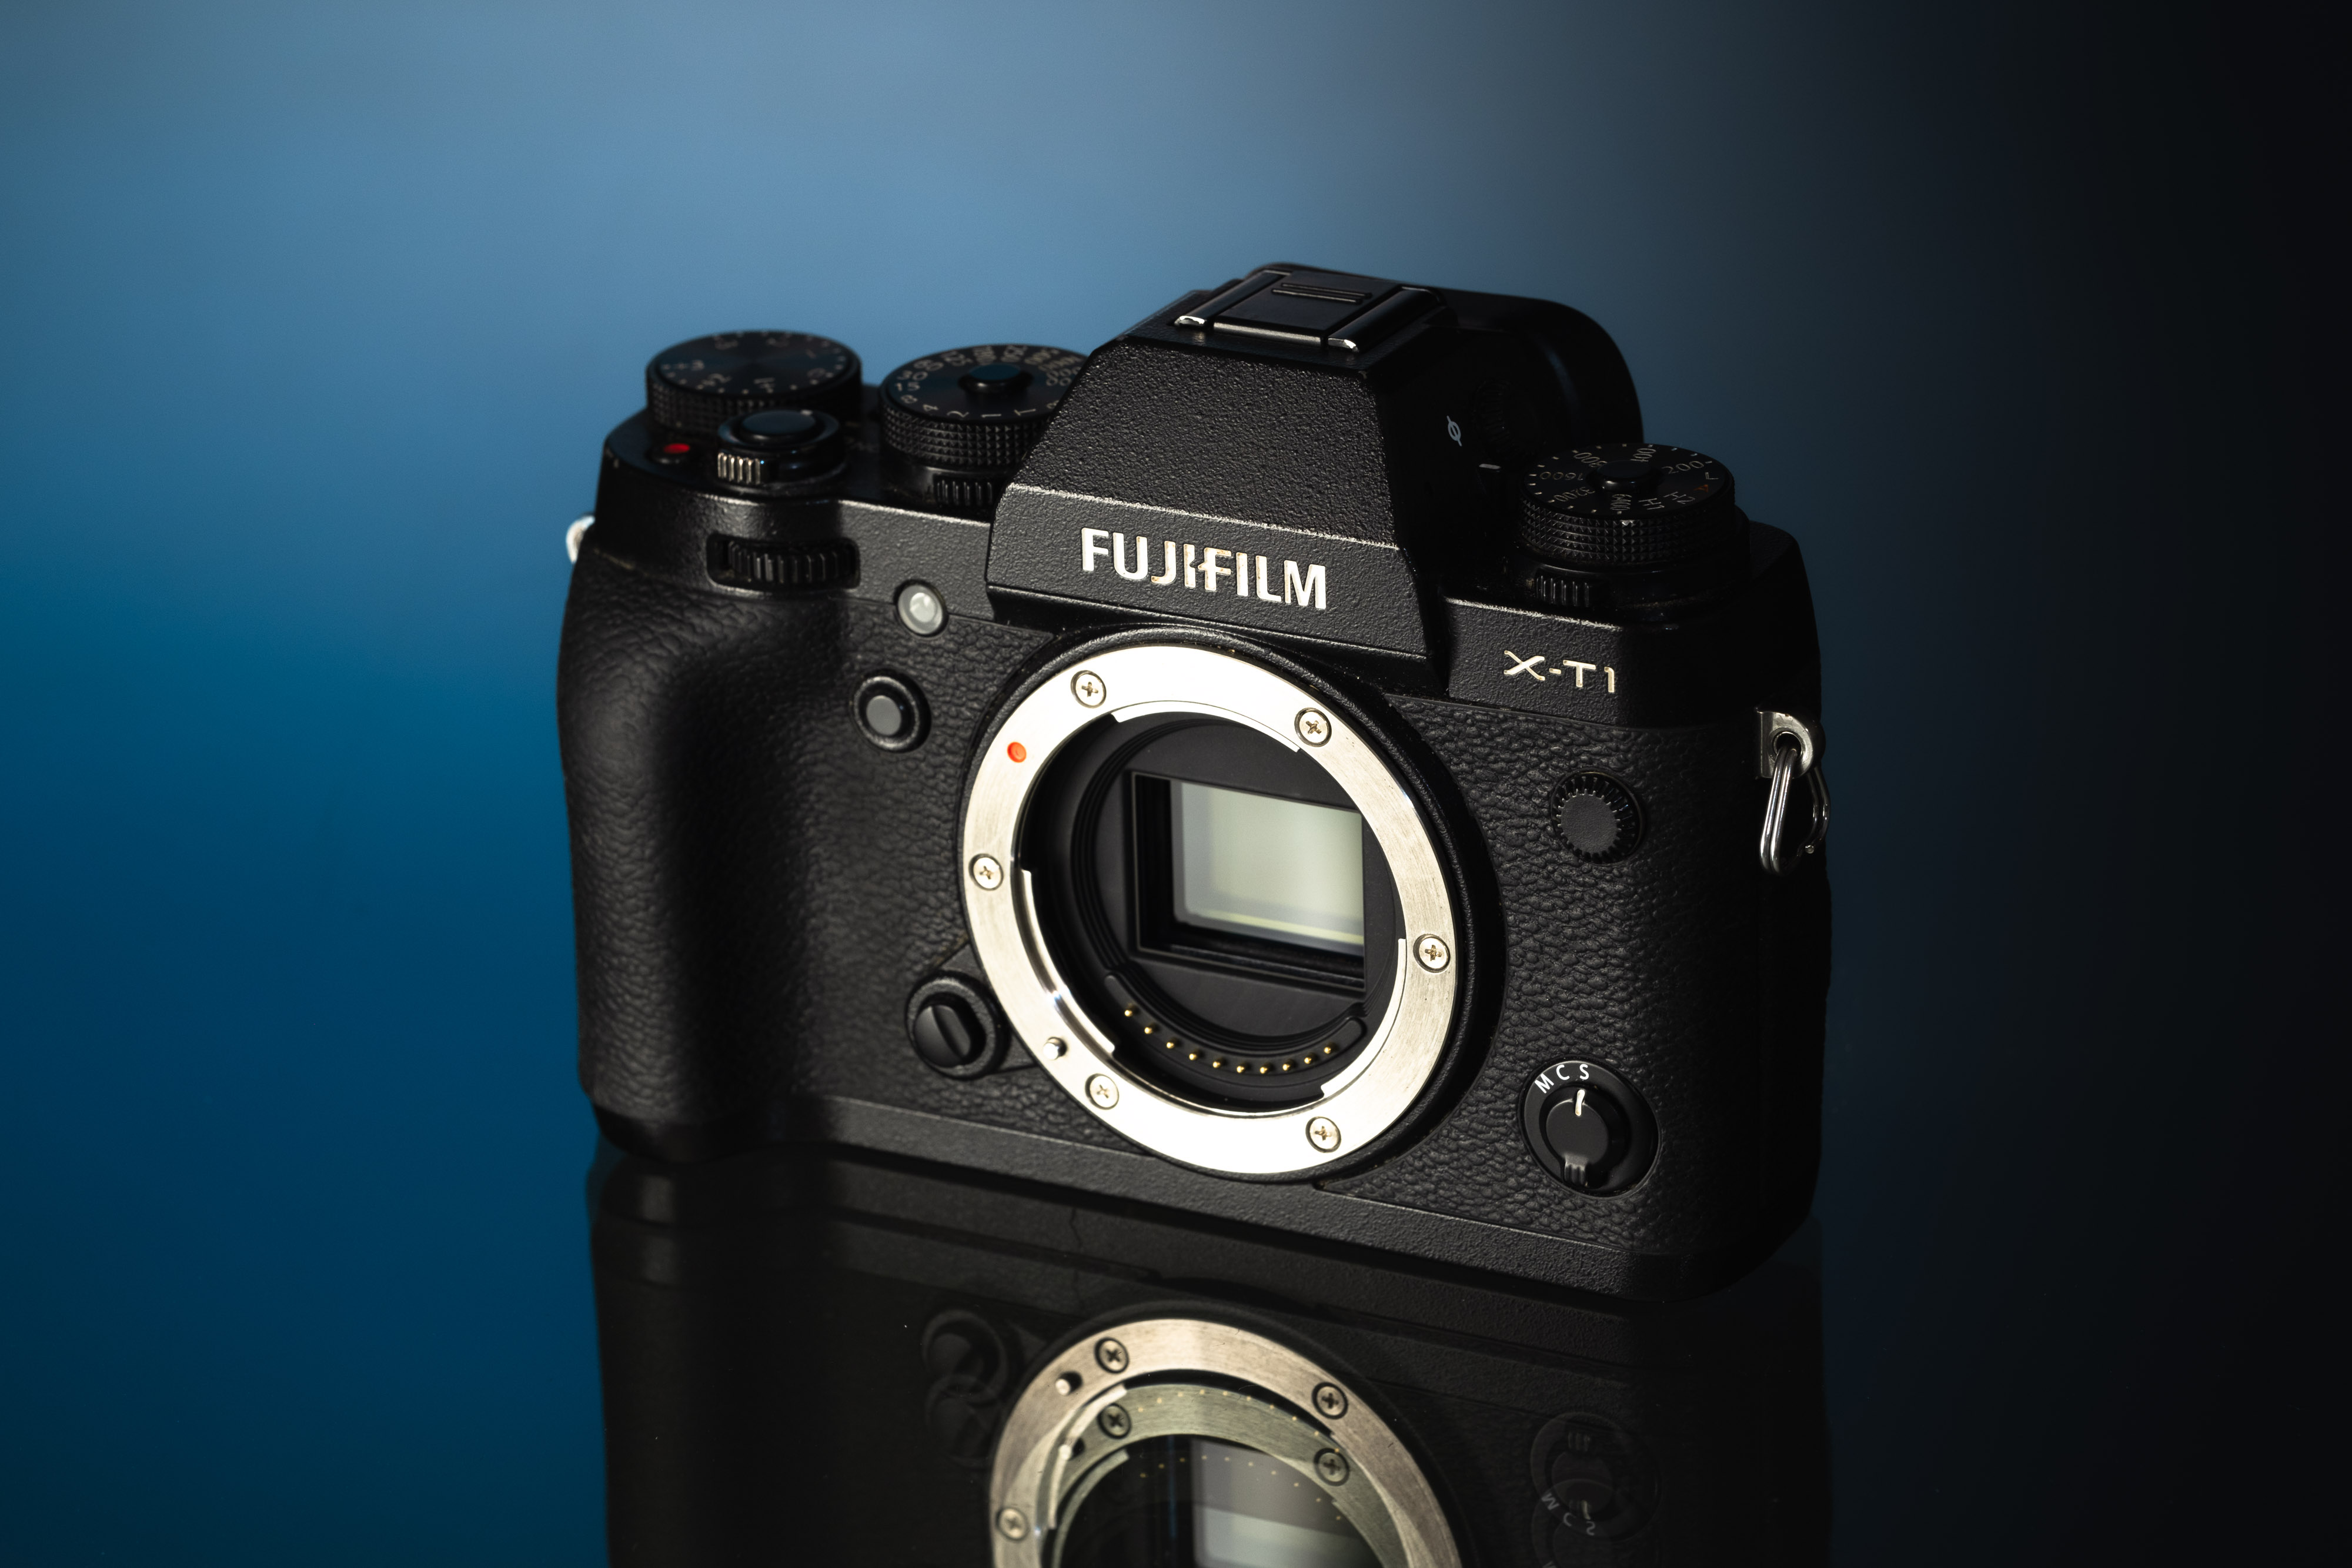
You can either find a camera that has already been converted to full-spectrum infrared or convert a camera you already own. We used a Converted Fujifilm X-T1 IR.

Full-spectrum converted Fujifilm X-T1
I’d suggest using a mirrorless camera, if possible. Infrared can affect focus and not all lenses have IR focus marks on them. Mirrorless will allow you to nail focus via focus peaking if you want to shoot at smaller apertures.
There are other articles that show you have to get Aerochrome-like images, but many of these involve heavily editing images that are not infrared at all. But they do involve changing colour channels to achieve the look. I wanted to start with a true infrared image and get as close as possible to that Aerochrome look—bluey/green shadows and vibrant red flora.
Here’s an Adobe Lightroom screen recording of the process I used on a RAW infrared file to create the final look.
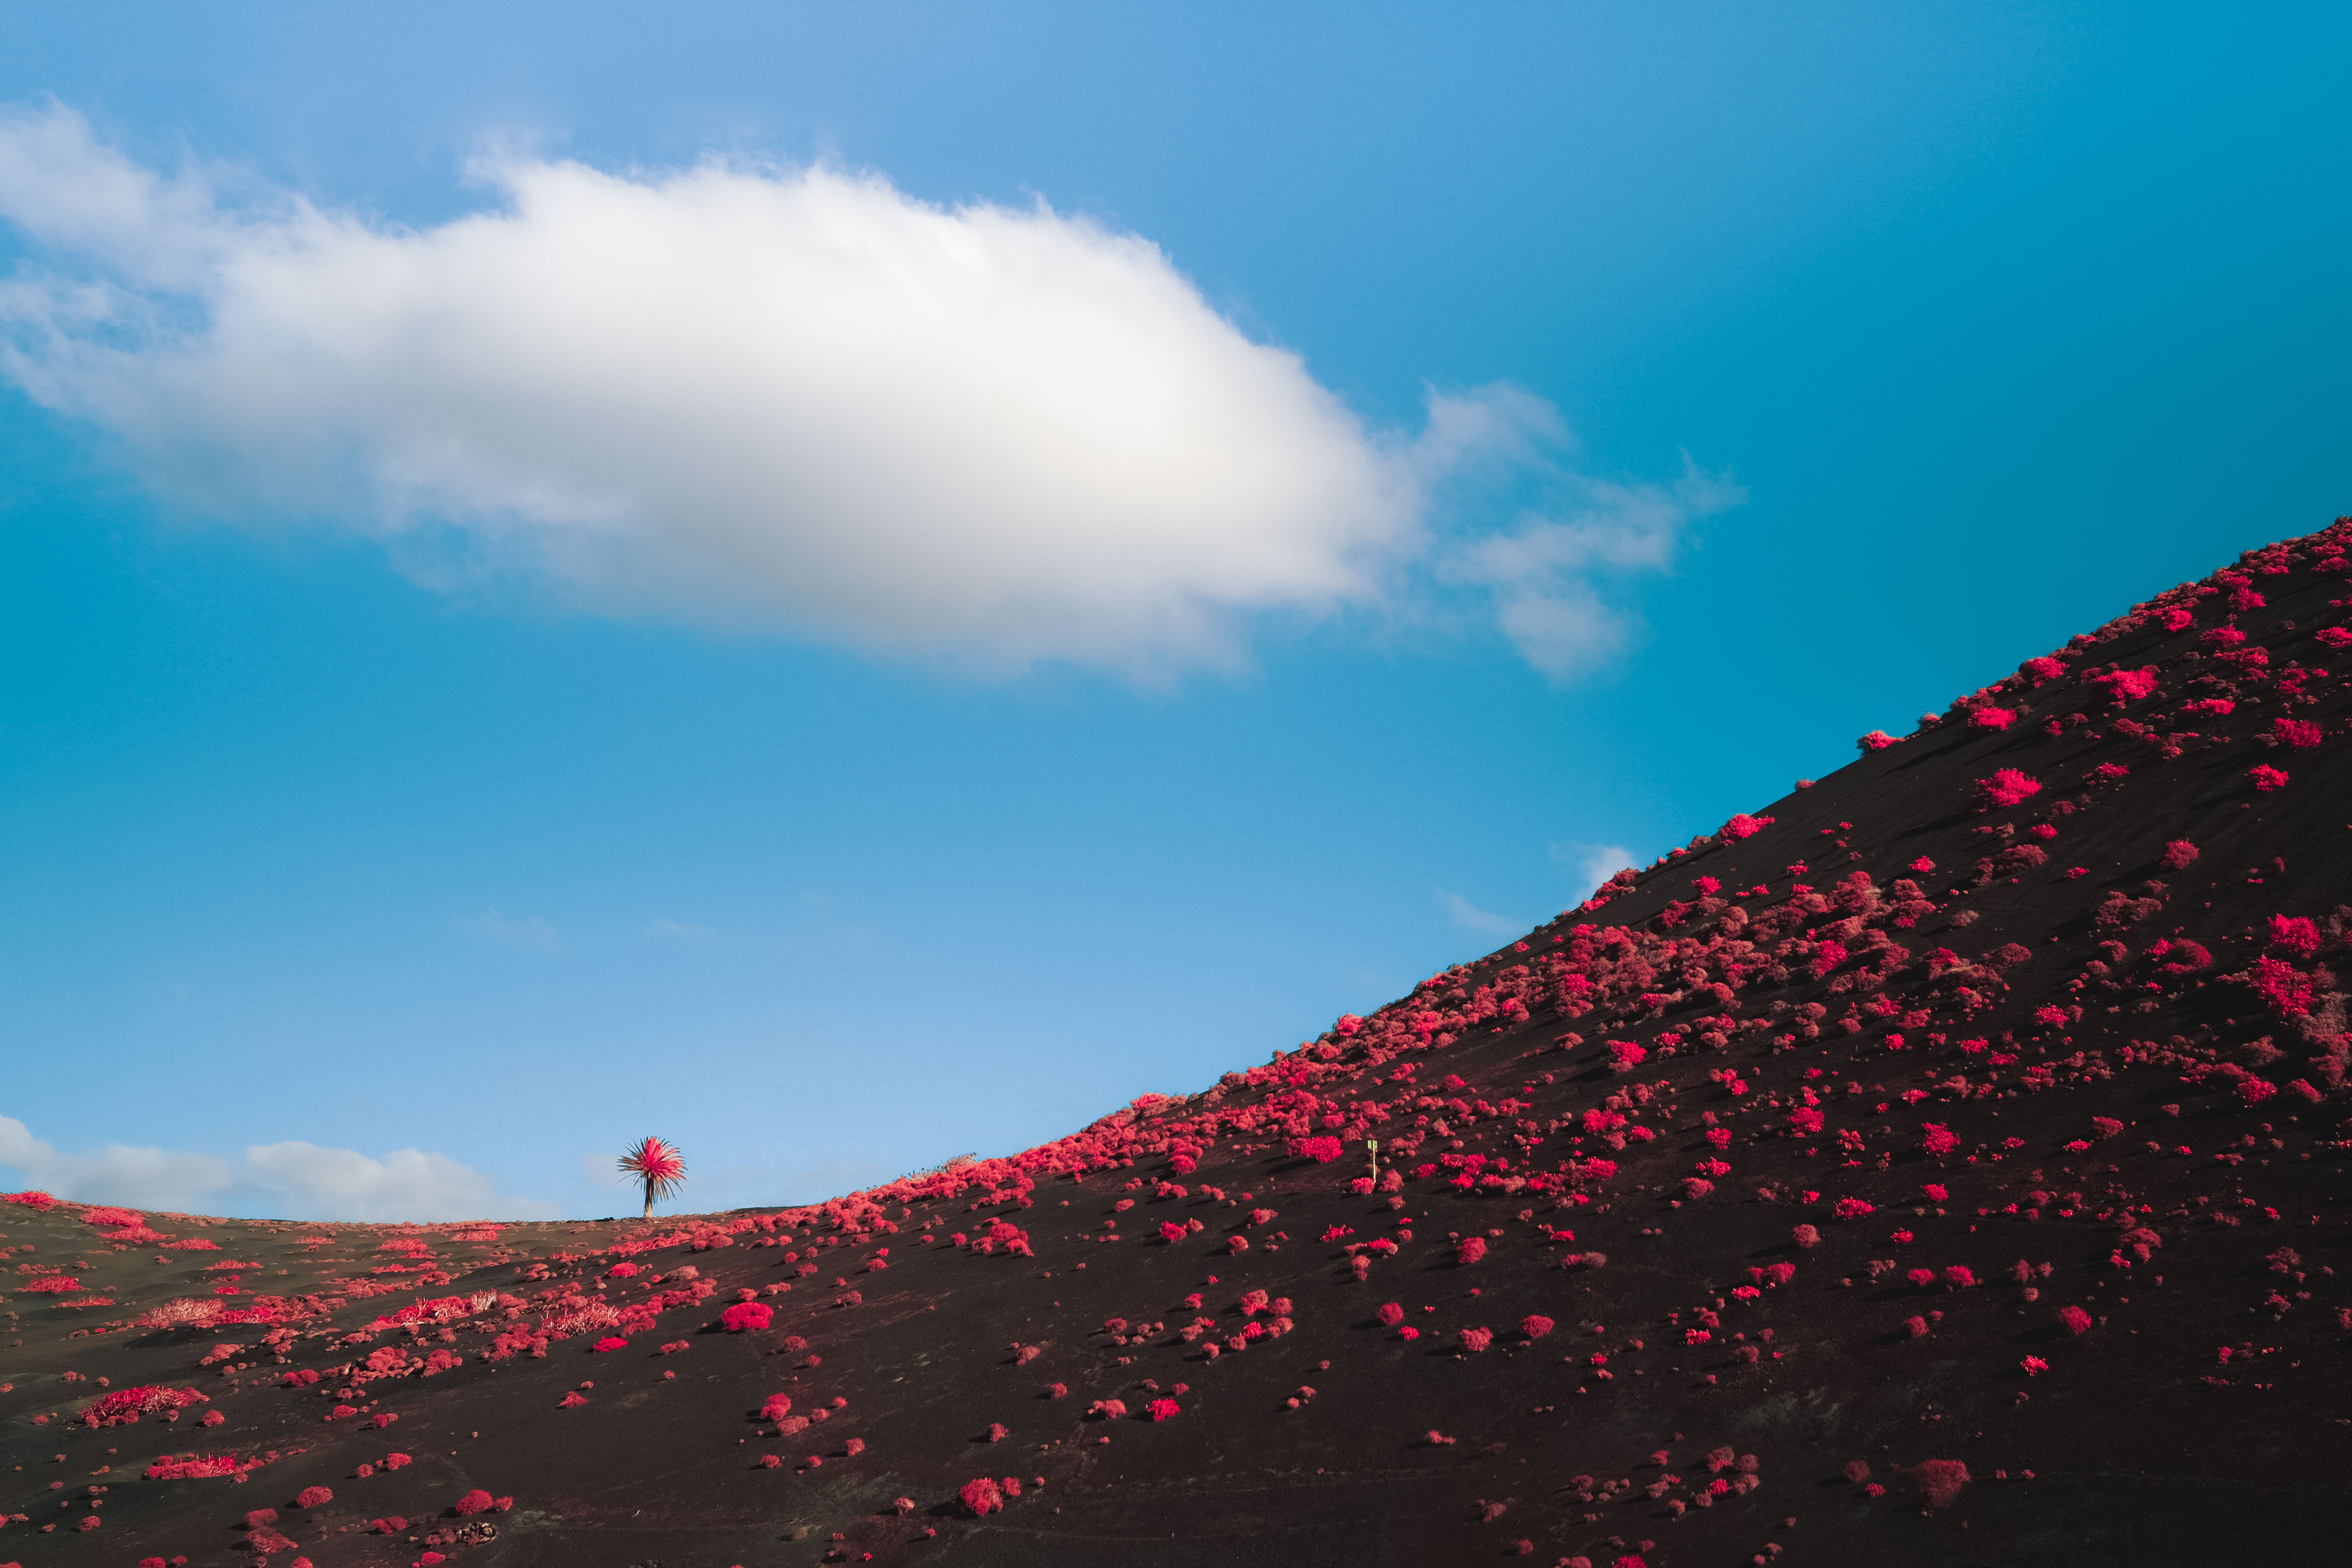
https://youtu.be/M4aGXd6wfPM?rel=0In the middle of winter, the UK isn’t the best place to shoot infrared. I’d need plenty of healthy flora and a generous helping of sun. Lanzarote, with its cacti and saguaros, would create a great contrast against its dark volcanic soil. Sun was forecast for the entire duration of my week-long stay, so we were to arrive in the perfect conditions for shooting infrared.
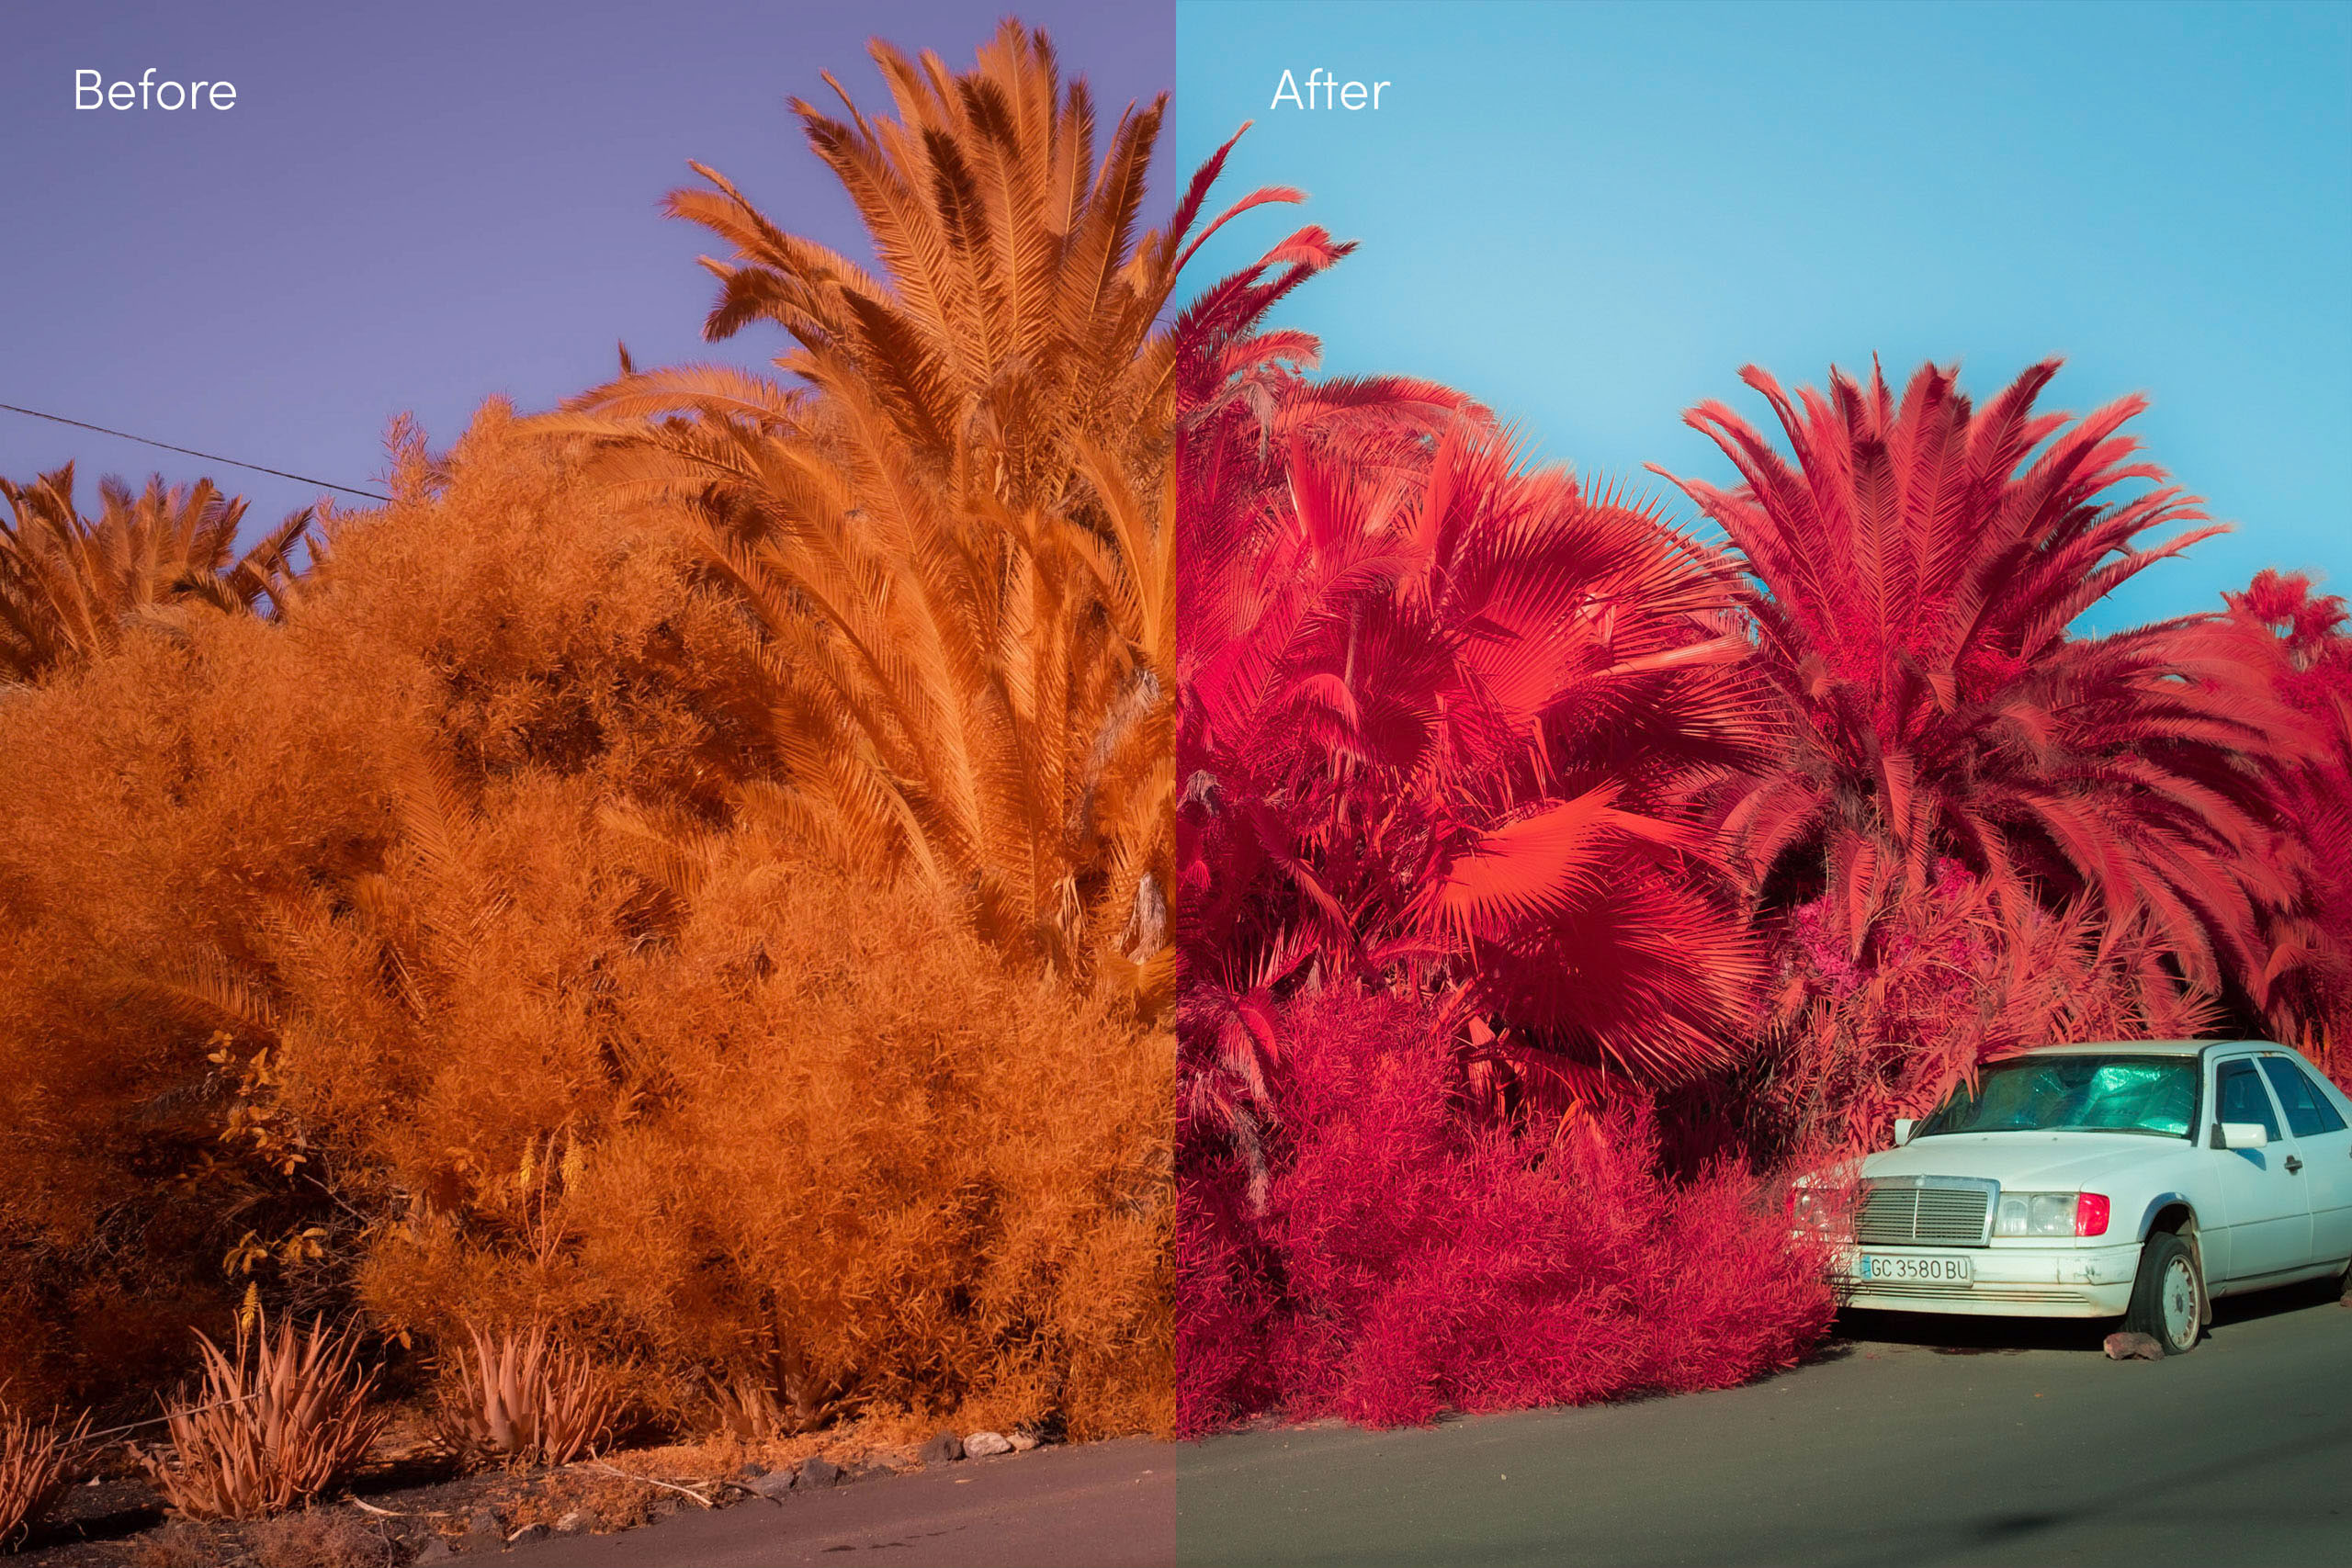
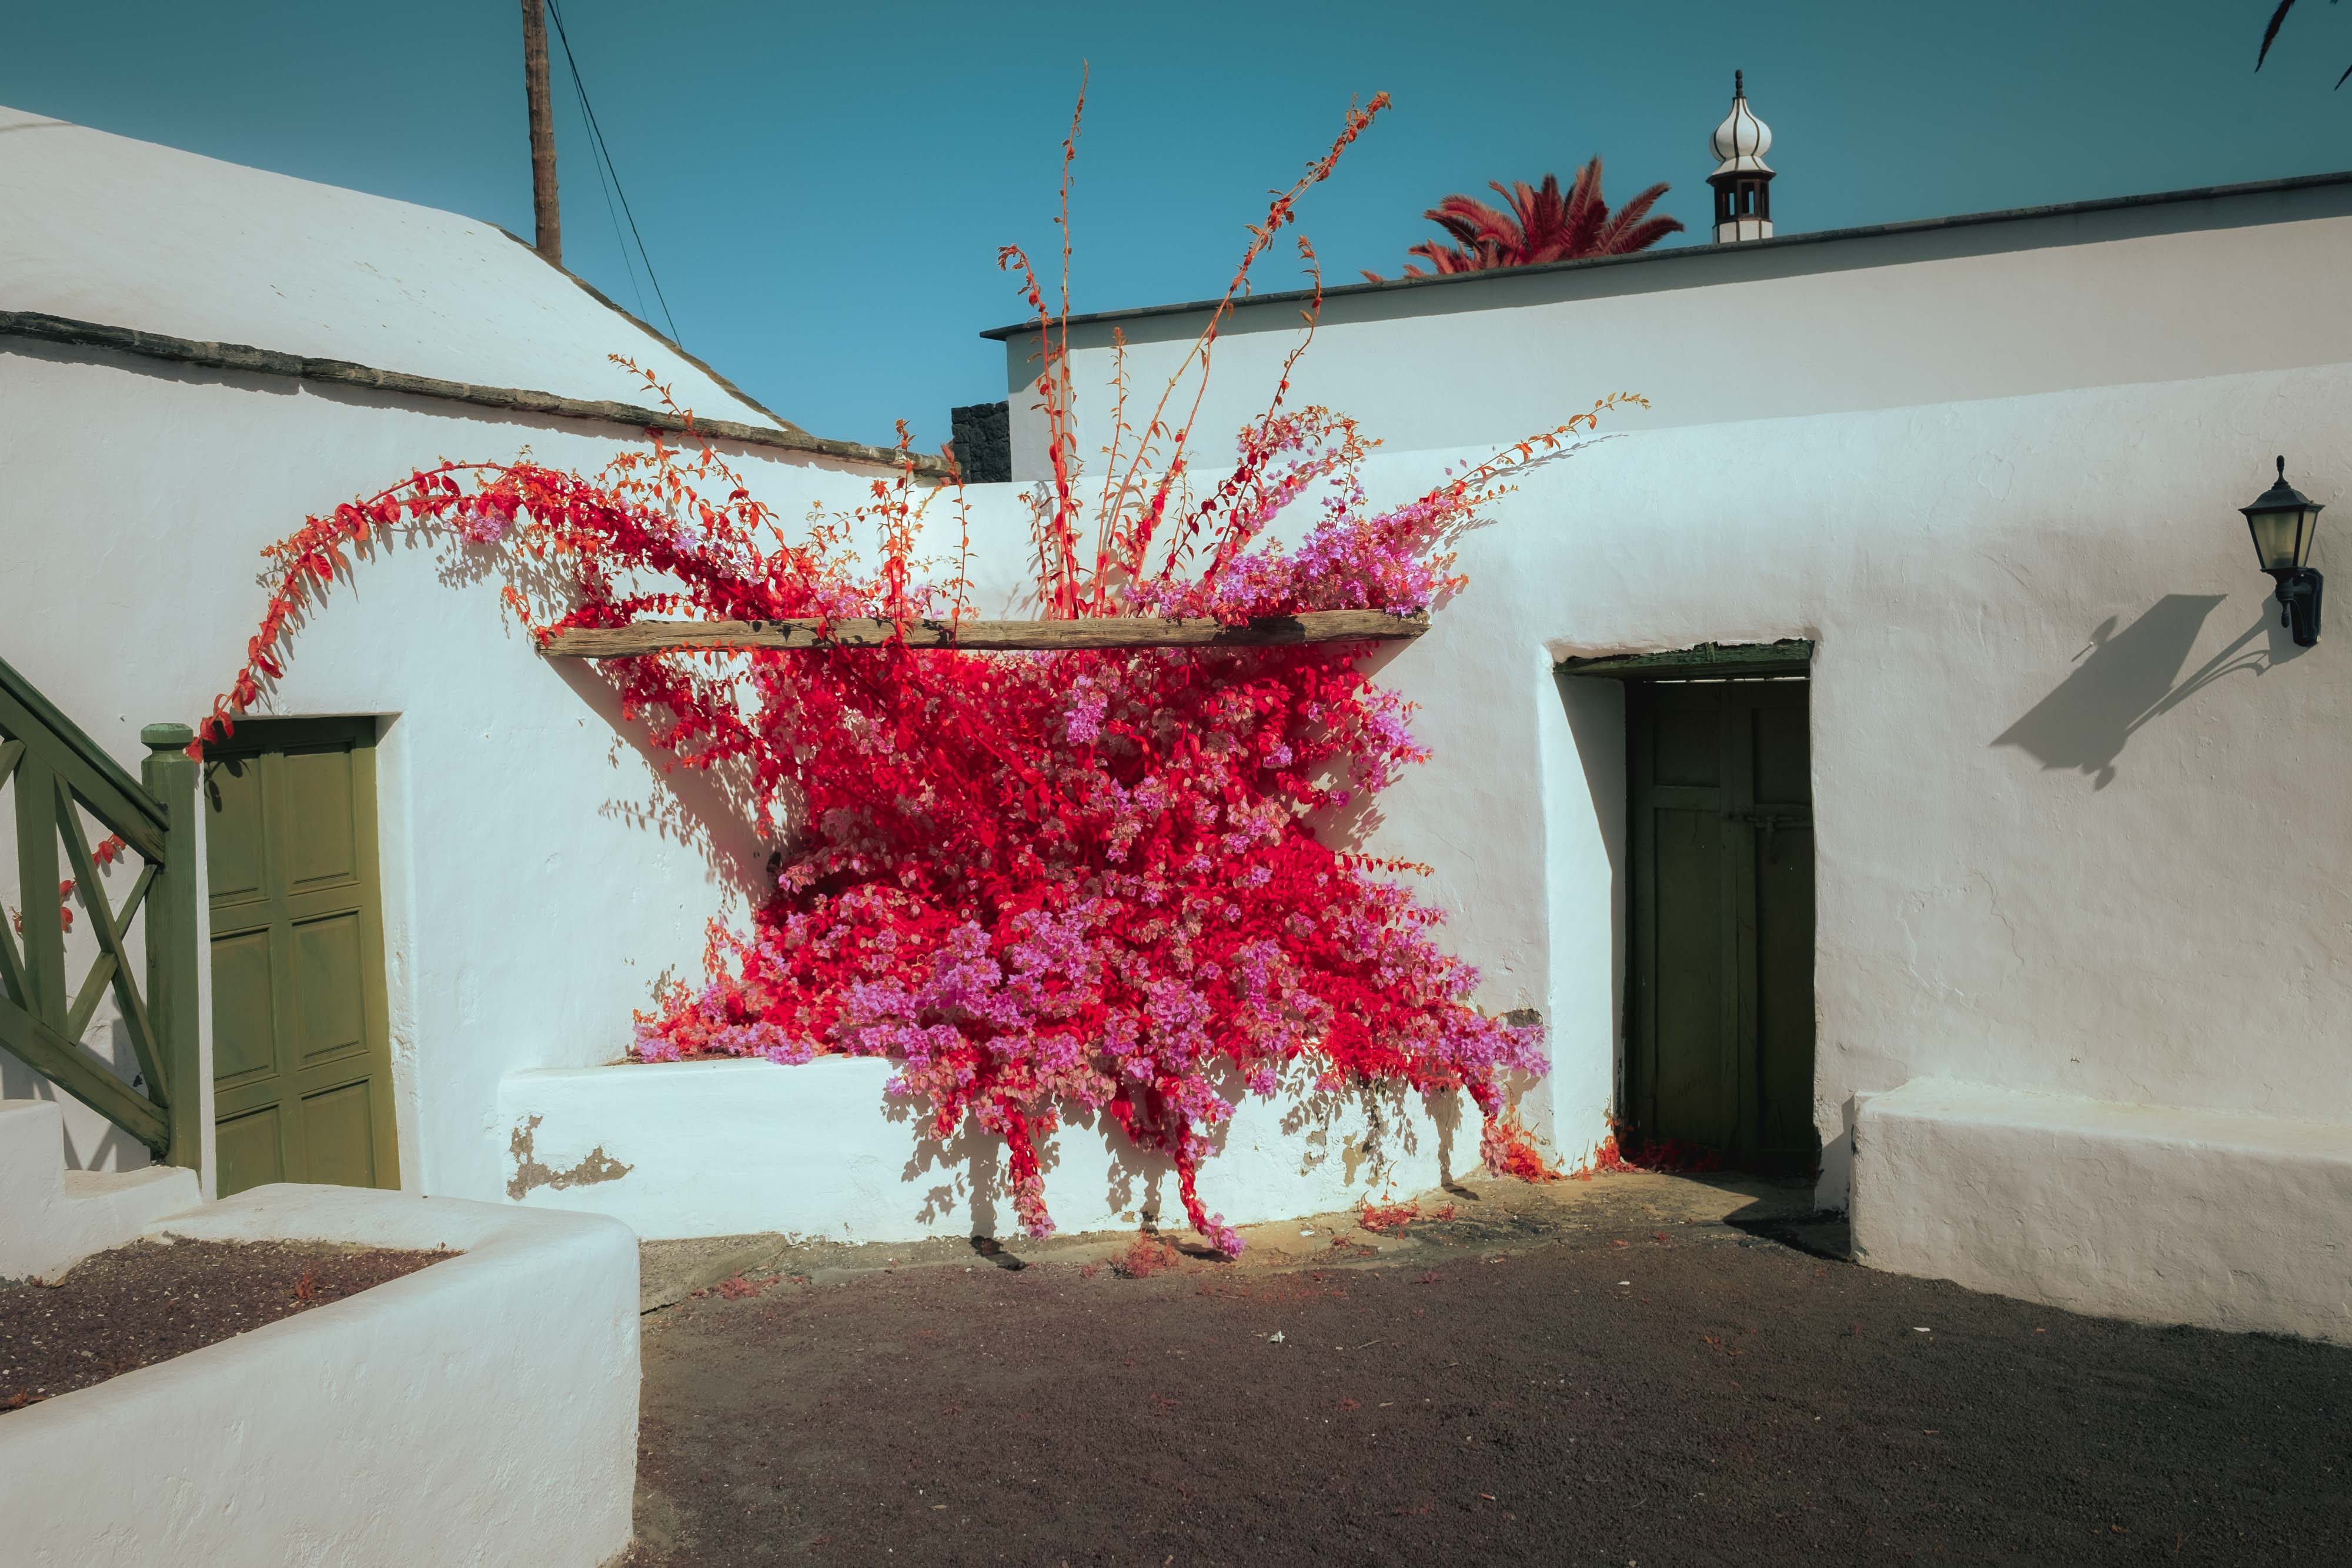
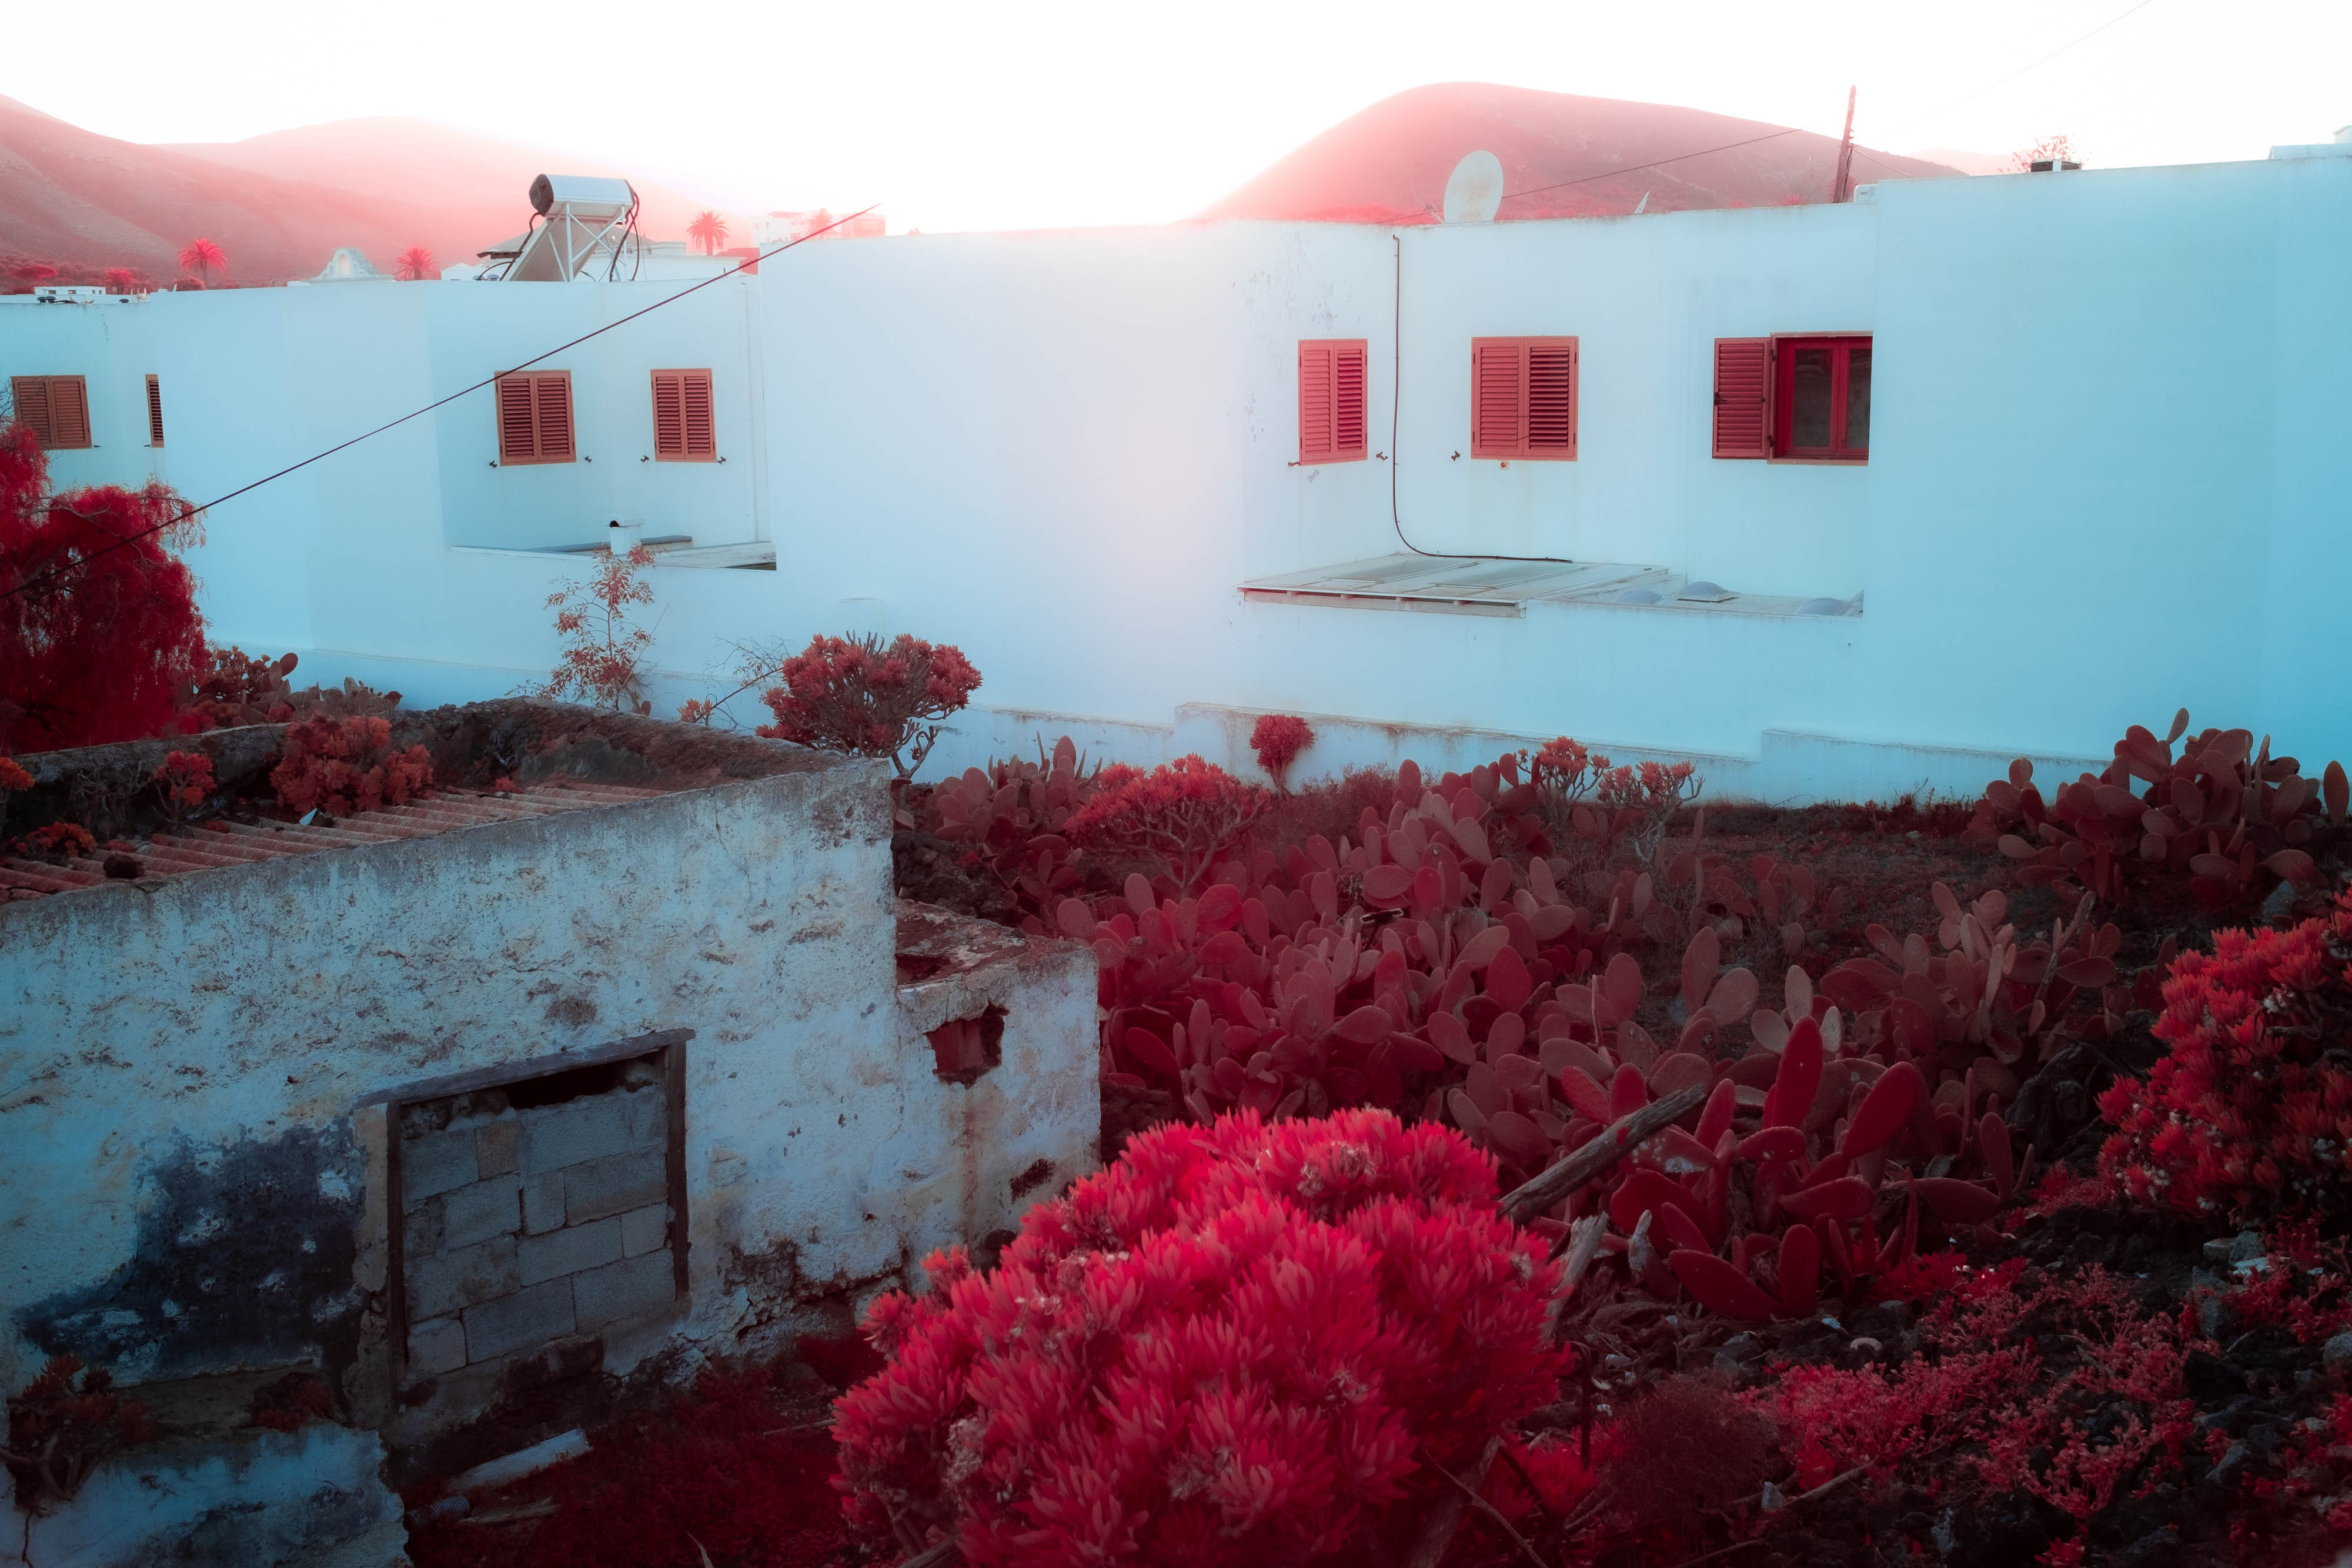
My first impressions of the Kolari IR Chrome filter and the converted sensor were mind-blowing. The colours it yielded, straight from the camera, were incredible. Flora yielded a lovely soft orange. So, even though this wasn’t the look we were after, I knew the change to red would not be too difficult in post.
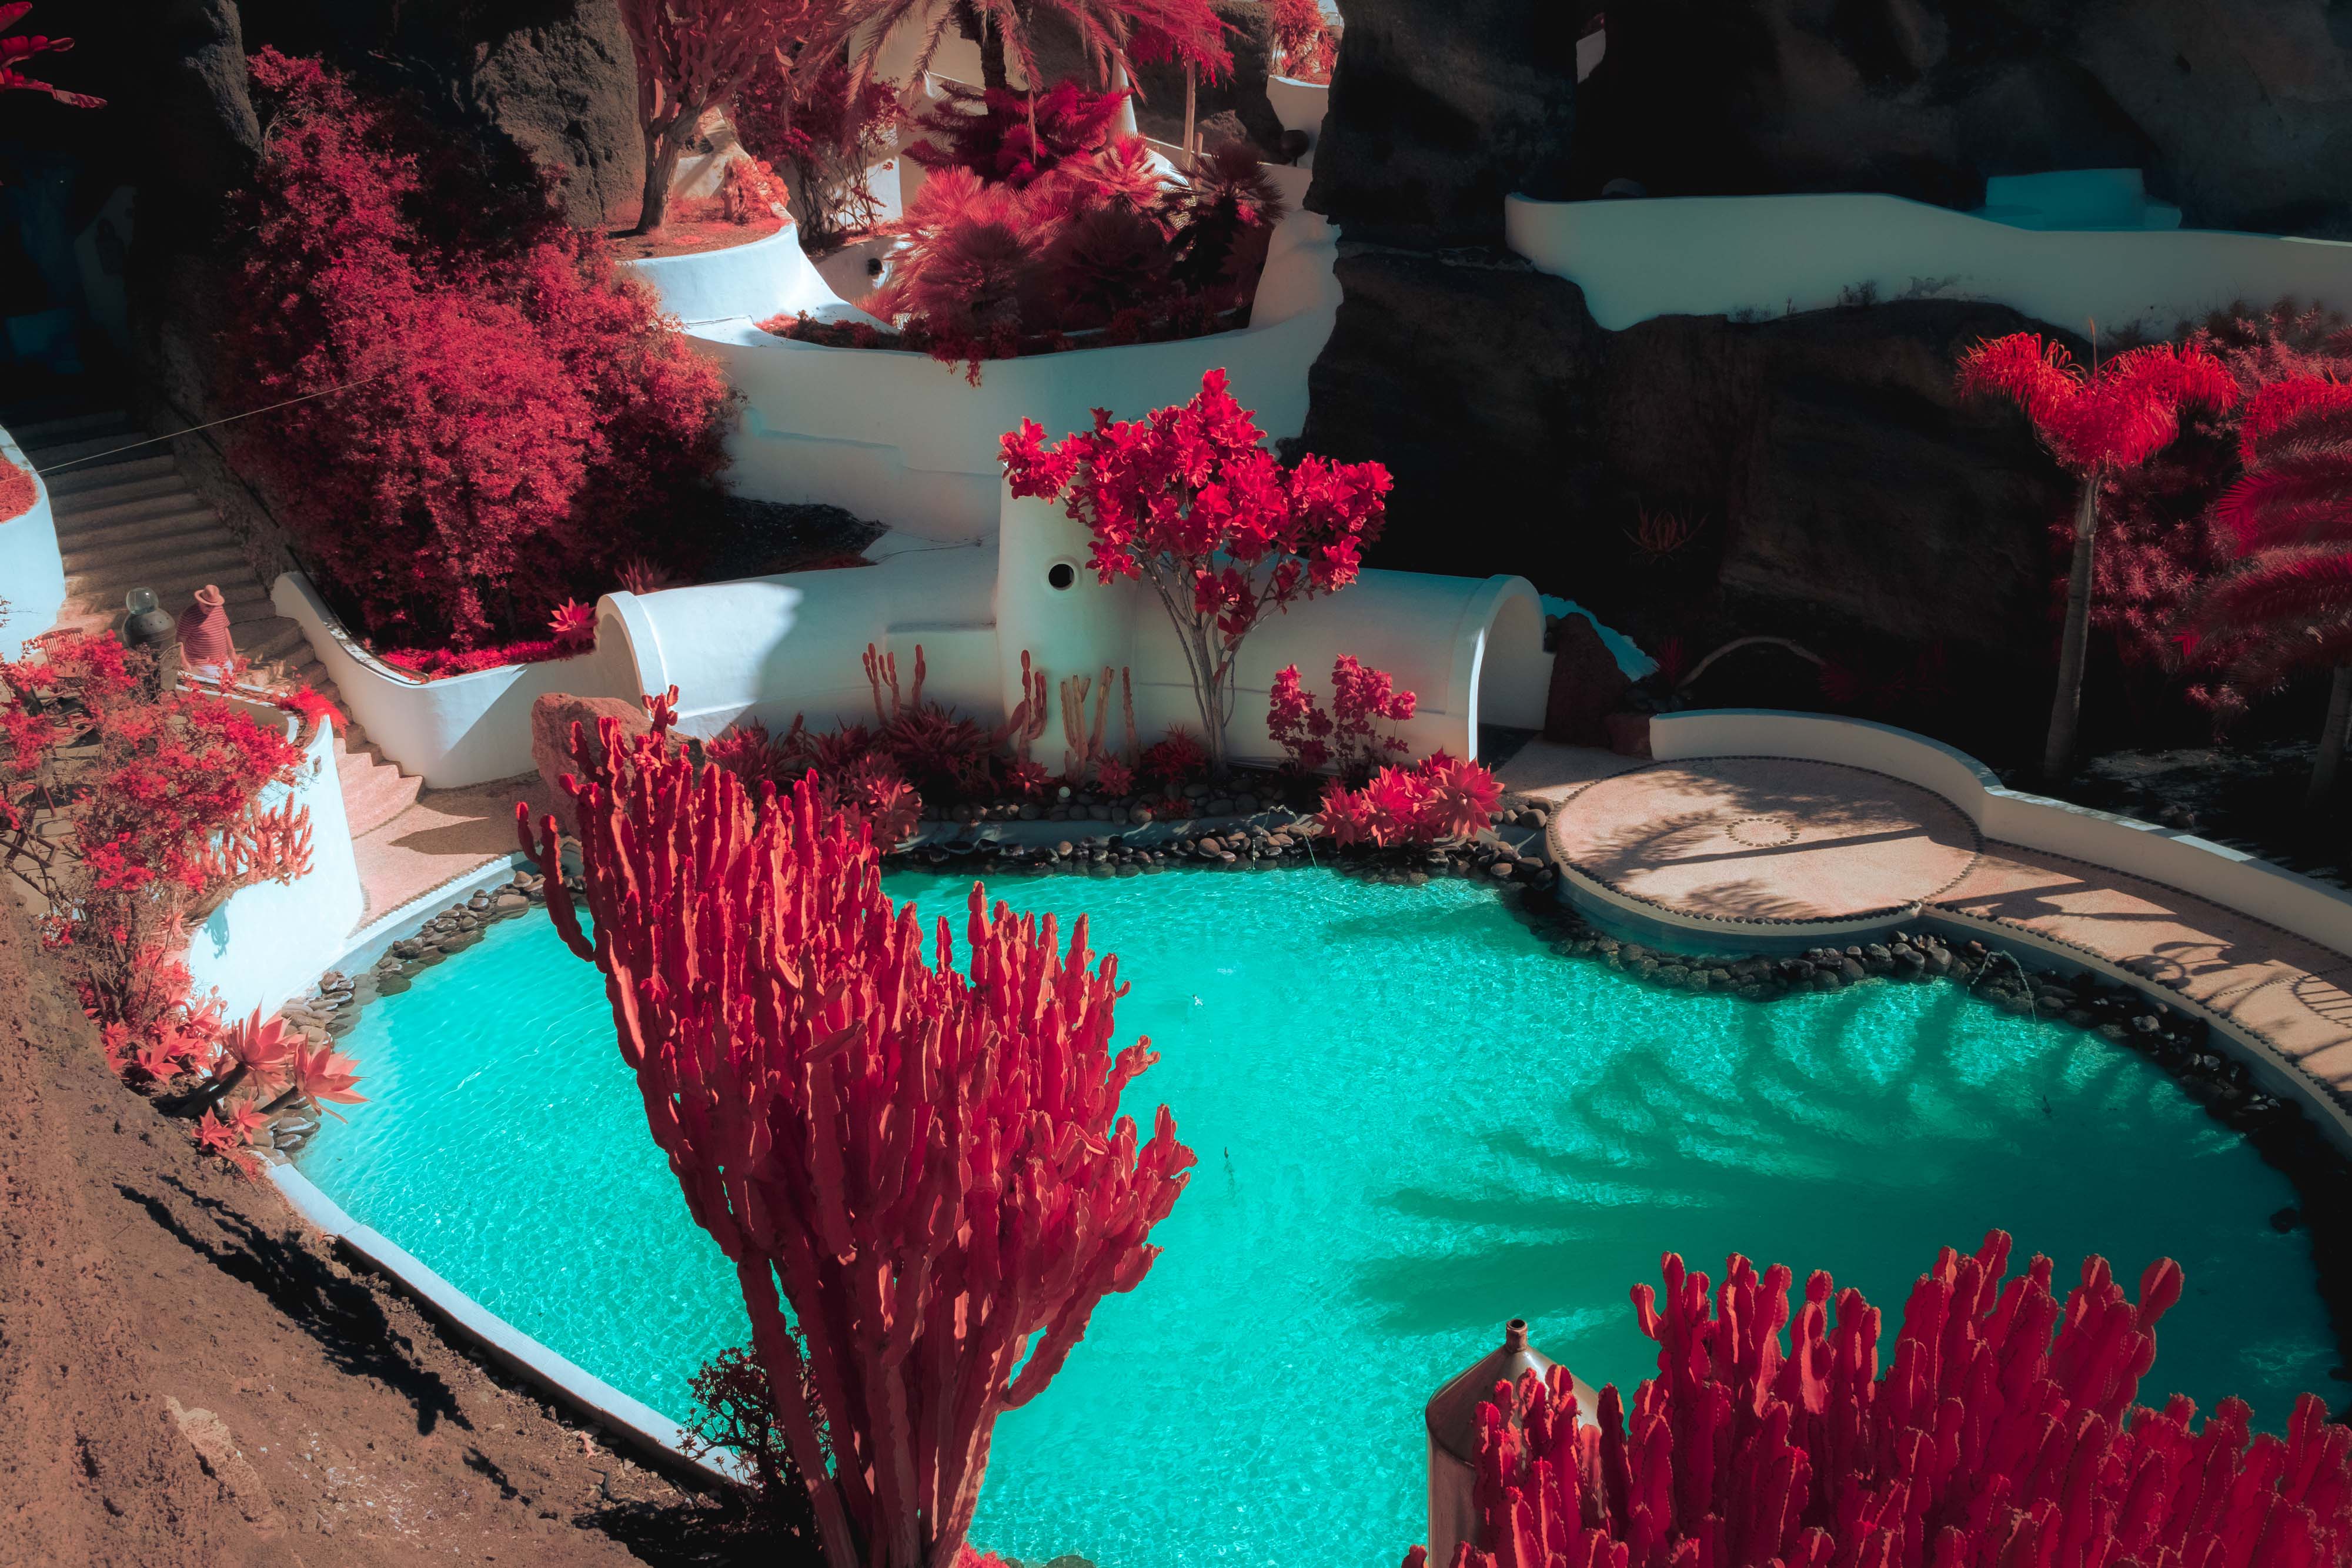
Ian Howorth | Fujifilm X-T1, IR Converted | Fujifilm XF 23mm f/1.4 | f/5.6 | 1/500th | ISO 200
What IR needs the most is sunlight—and plenty of it. I realised very soon not to be afraid of shooting in the harsh midday sun. The more sunlight the trees and plants were able to absorb, the stronger the infrared effect.
Ian Howorth | Fujifilm X-T1, IR Converted | Fujifilm XF 23mm f/1.4 | f/8 | 1/400th | ISO 200
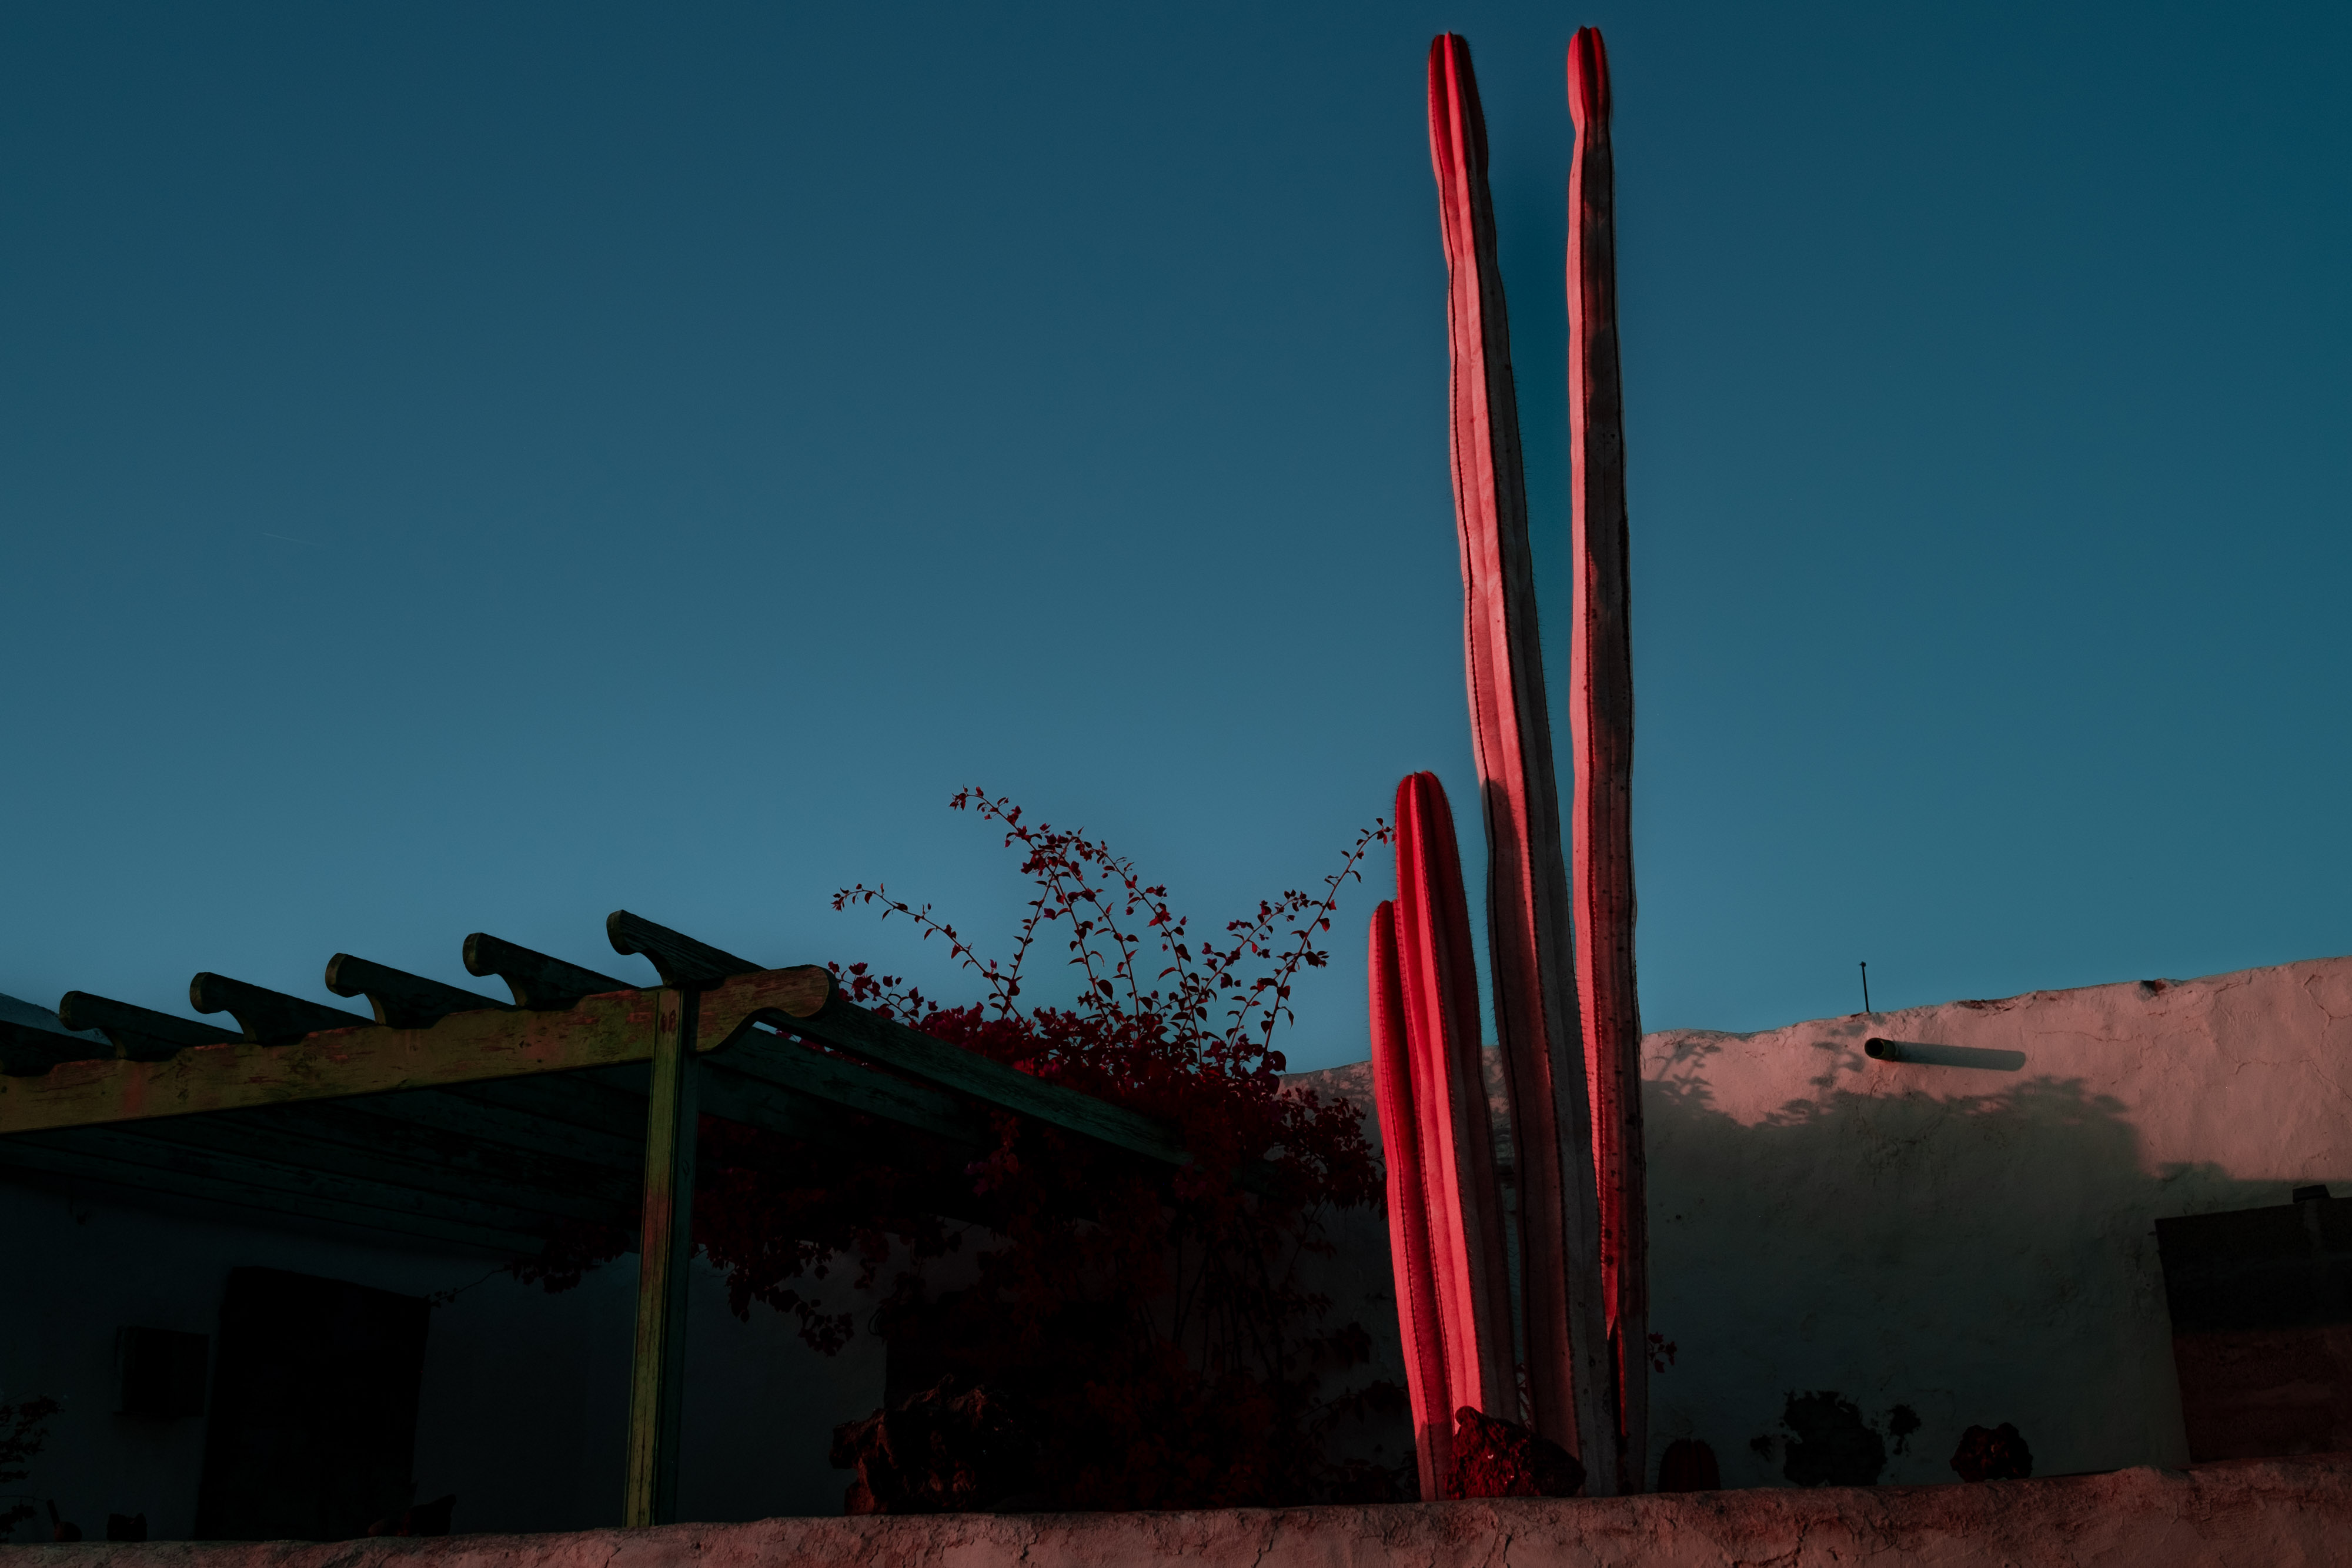
I also found that different types of vegetation were more prone to the IR effect. Cacti and saguaros, for example, tended to be less affected and created a slightly more subdued look.
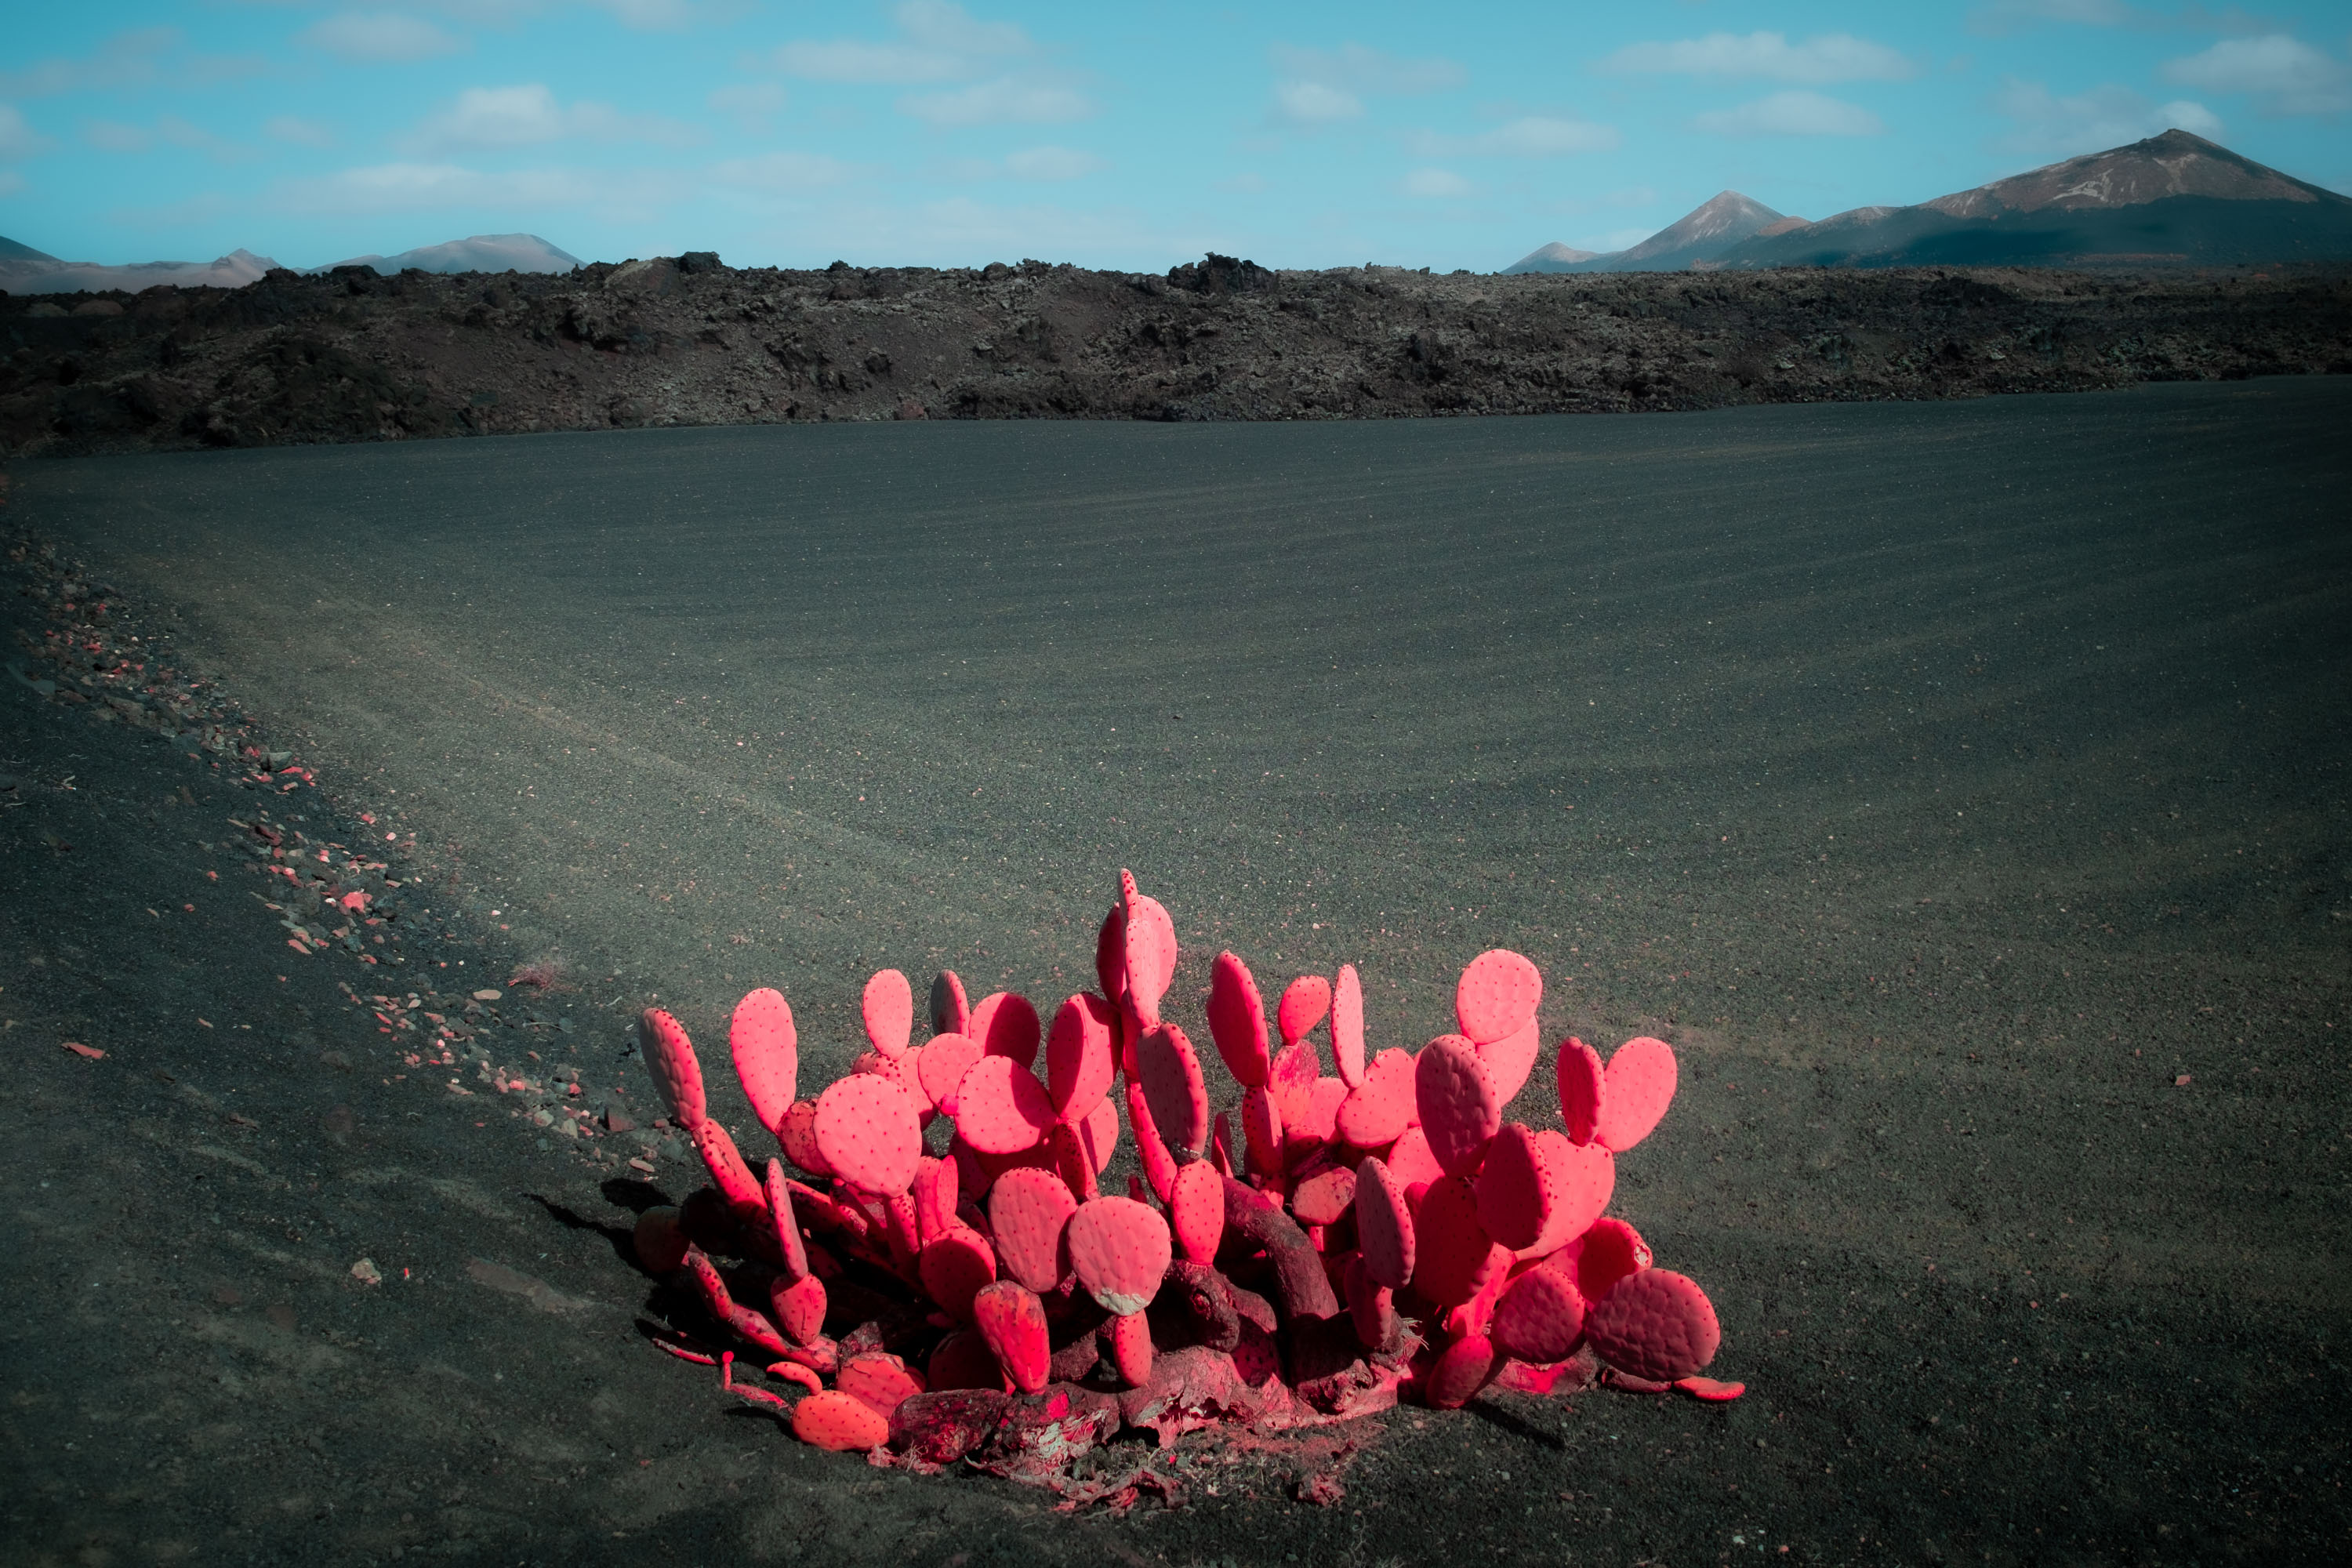
Ian Howorth | Fujifilm X-T1, IR Converted | Fujifilm XF 23mm f/1.4 | f/8 | 1/250th | ISO 200
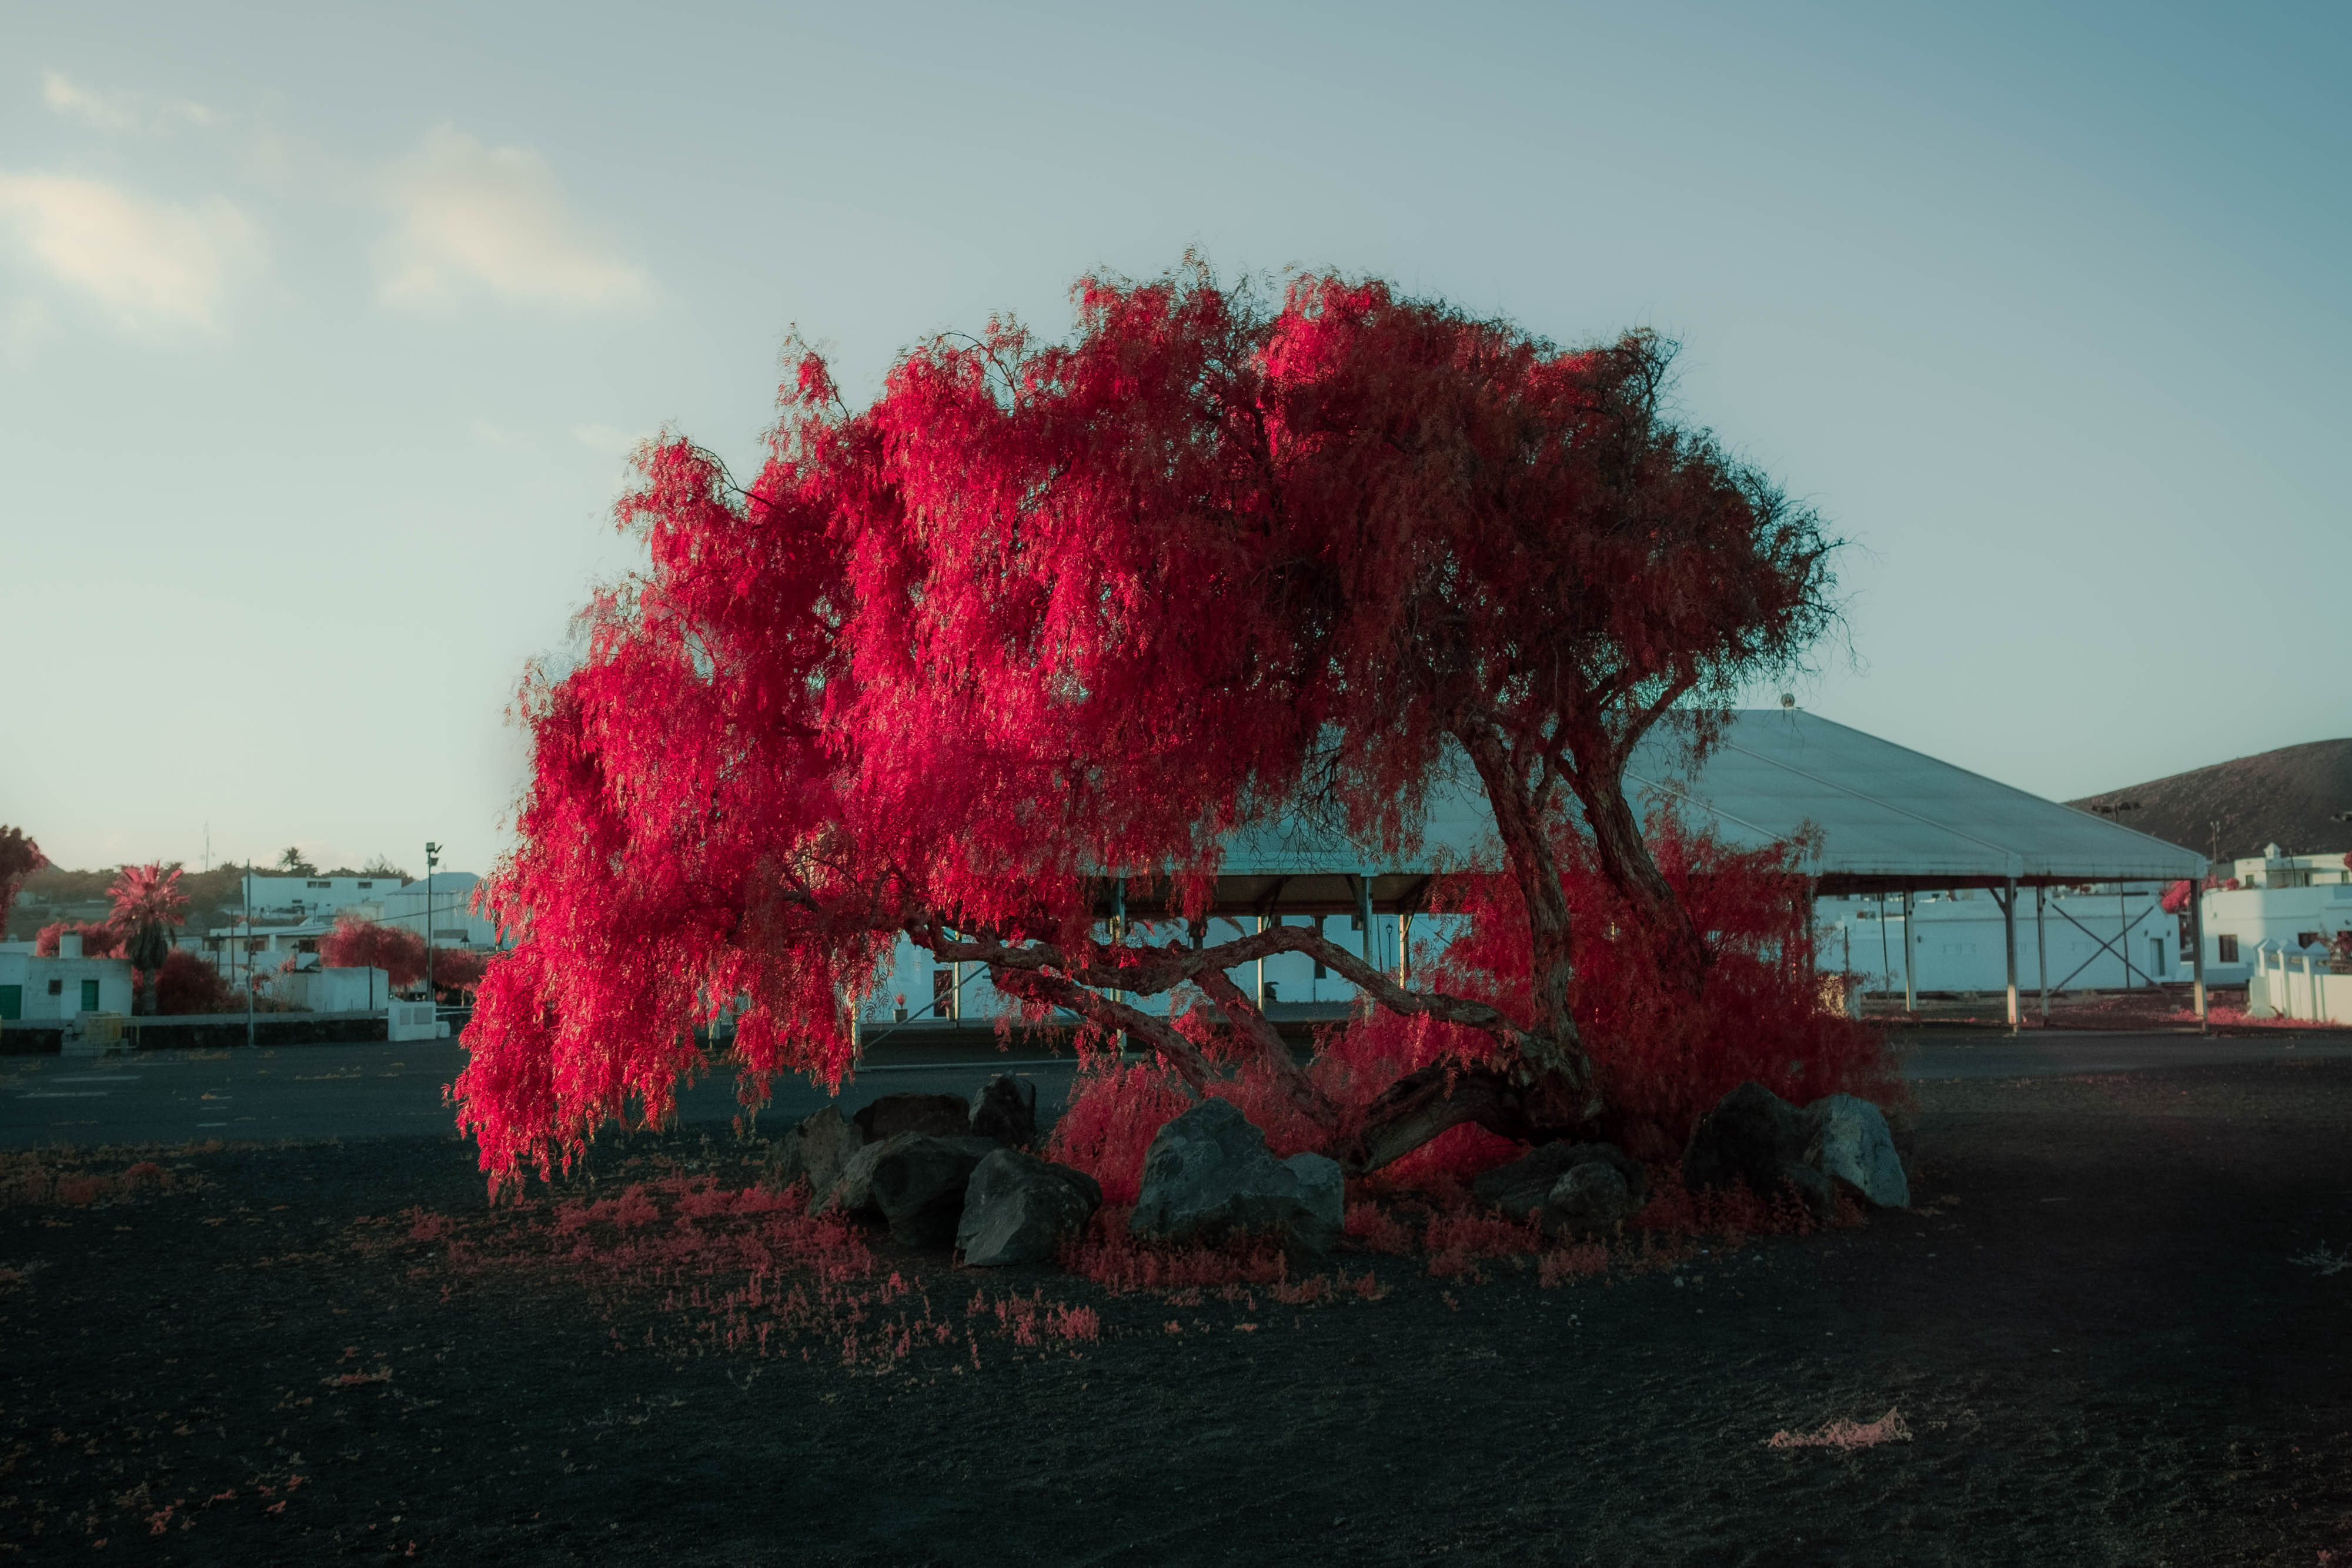
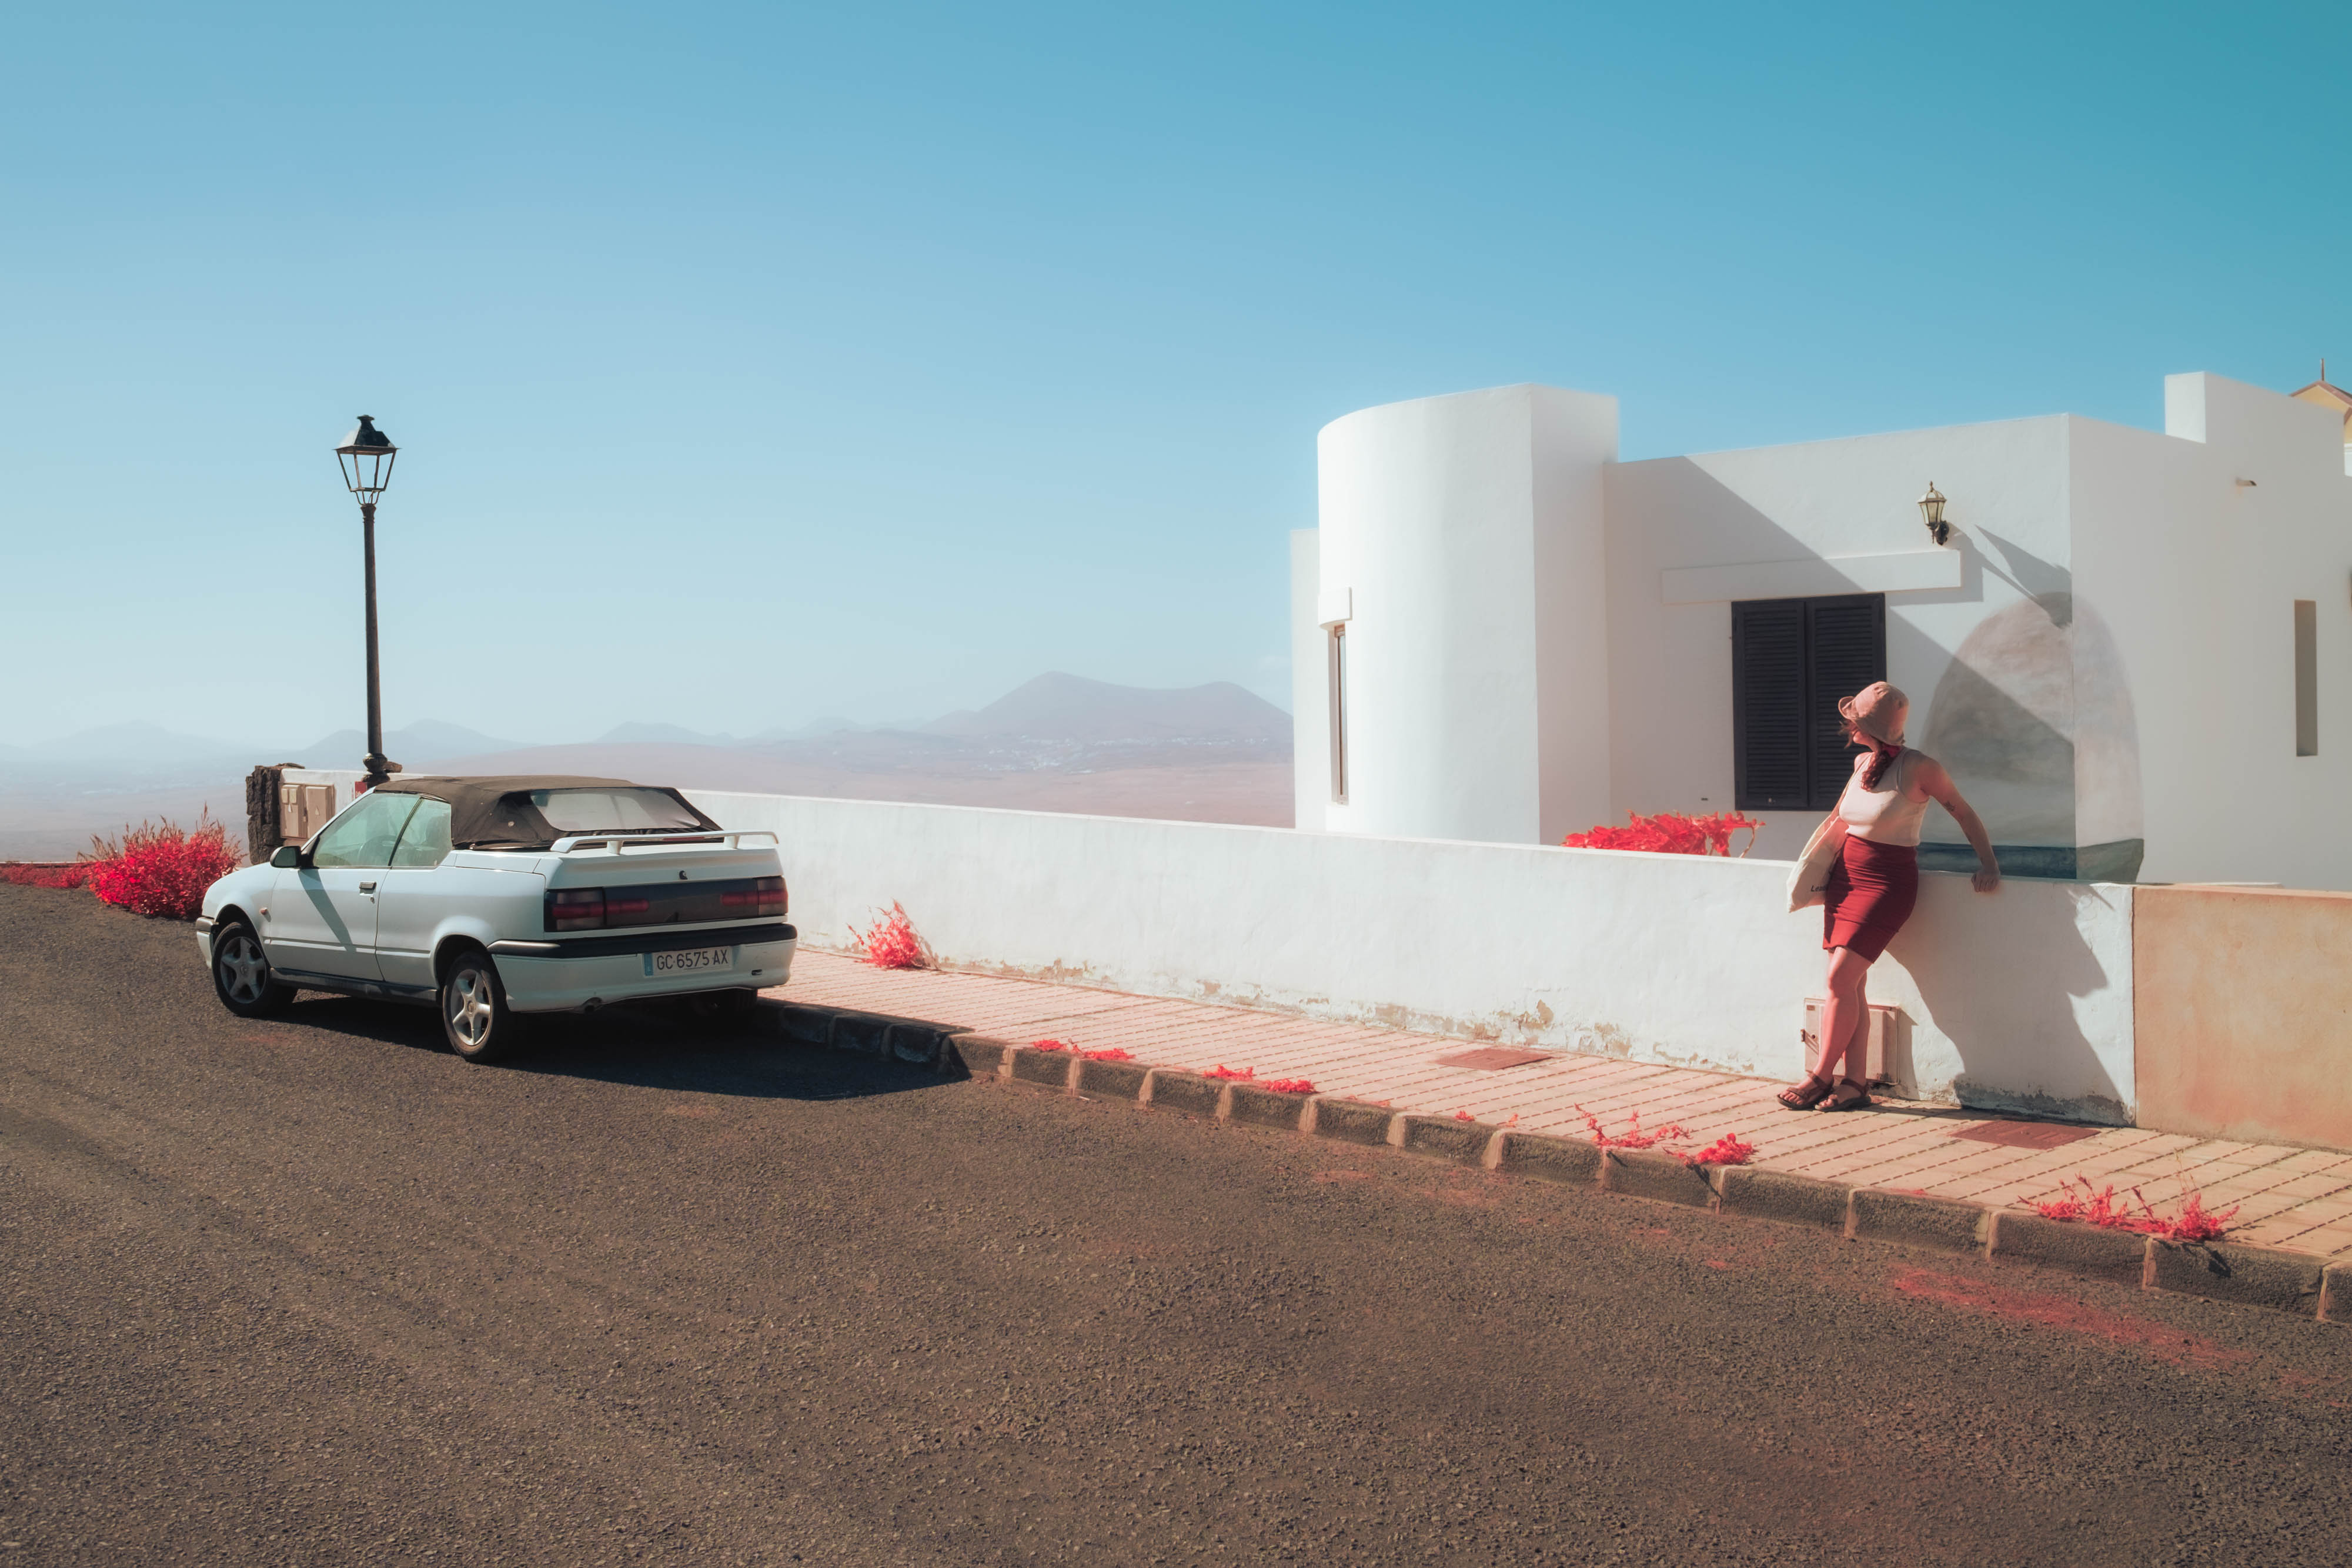
Trees and plants with more ‘conventional’ leaves tended to react quite strongly, with the brightness of the green being clearly evident.
Ian Howorth | Fujifilm X-T1, IR Converted | Fujifilm XF 23mm f/1.4 | f/5.6 | 1/500 | ISO 400
Ian Howorth | Fujifilm X-T1, IR Converted | Fujifilm XF 23mm f/1.4 | f/5.6 | 1/250th} | ISO 200
The only issue with shooting in extremely bright conditions is that you could get excessive brightness on leaves, almost yielding them white. However, with cacti and other more opaque flora, this was somewhat diminished.
Ian Howorth | Fujifilm X-T1, IR Converted | Fujifilm XF 23mm f/1.4 | f/8 | 1/180th | ISO 400

Ian Howorth | Fujifilm X-T1, IR Converted | Fujifilm XF 23mm f/1.4 | f/8 | 1/125th | ISO 200
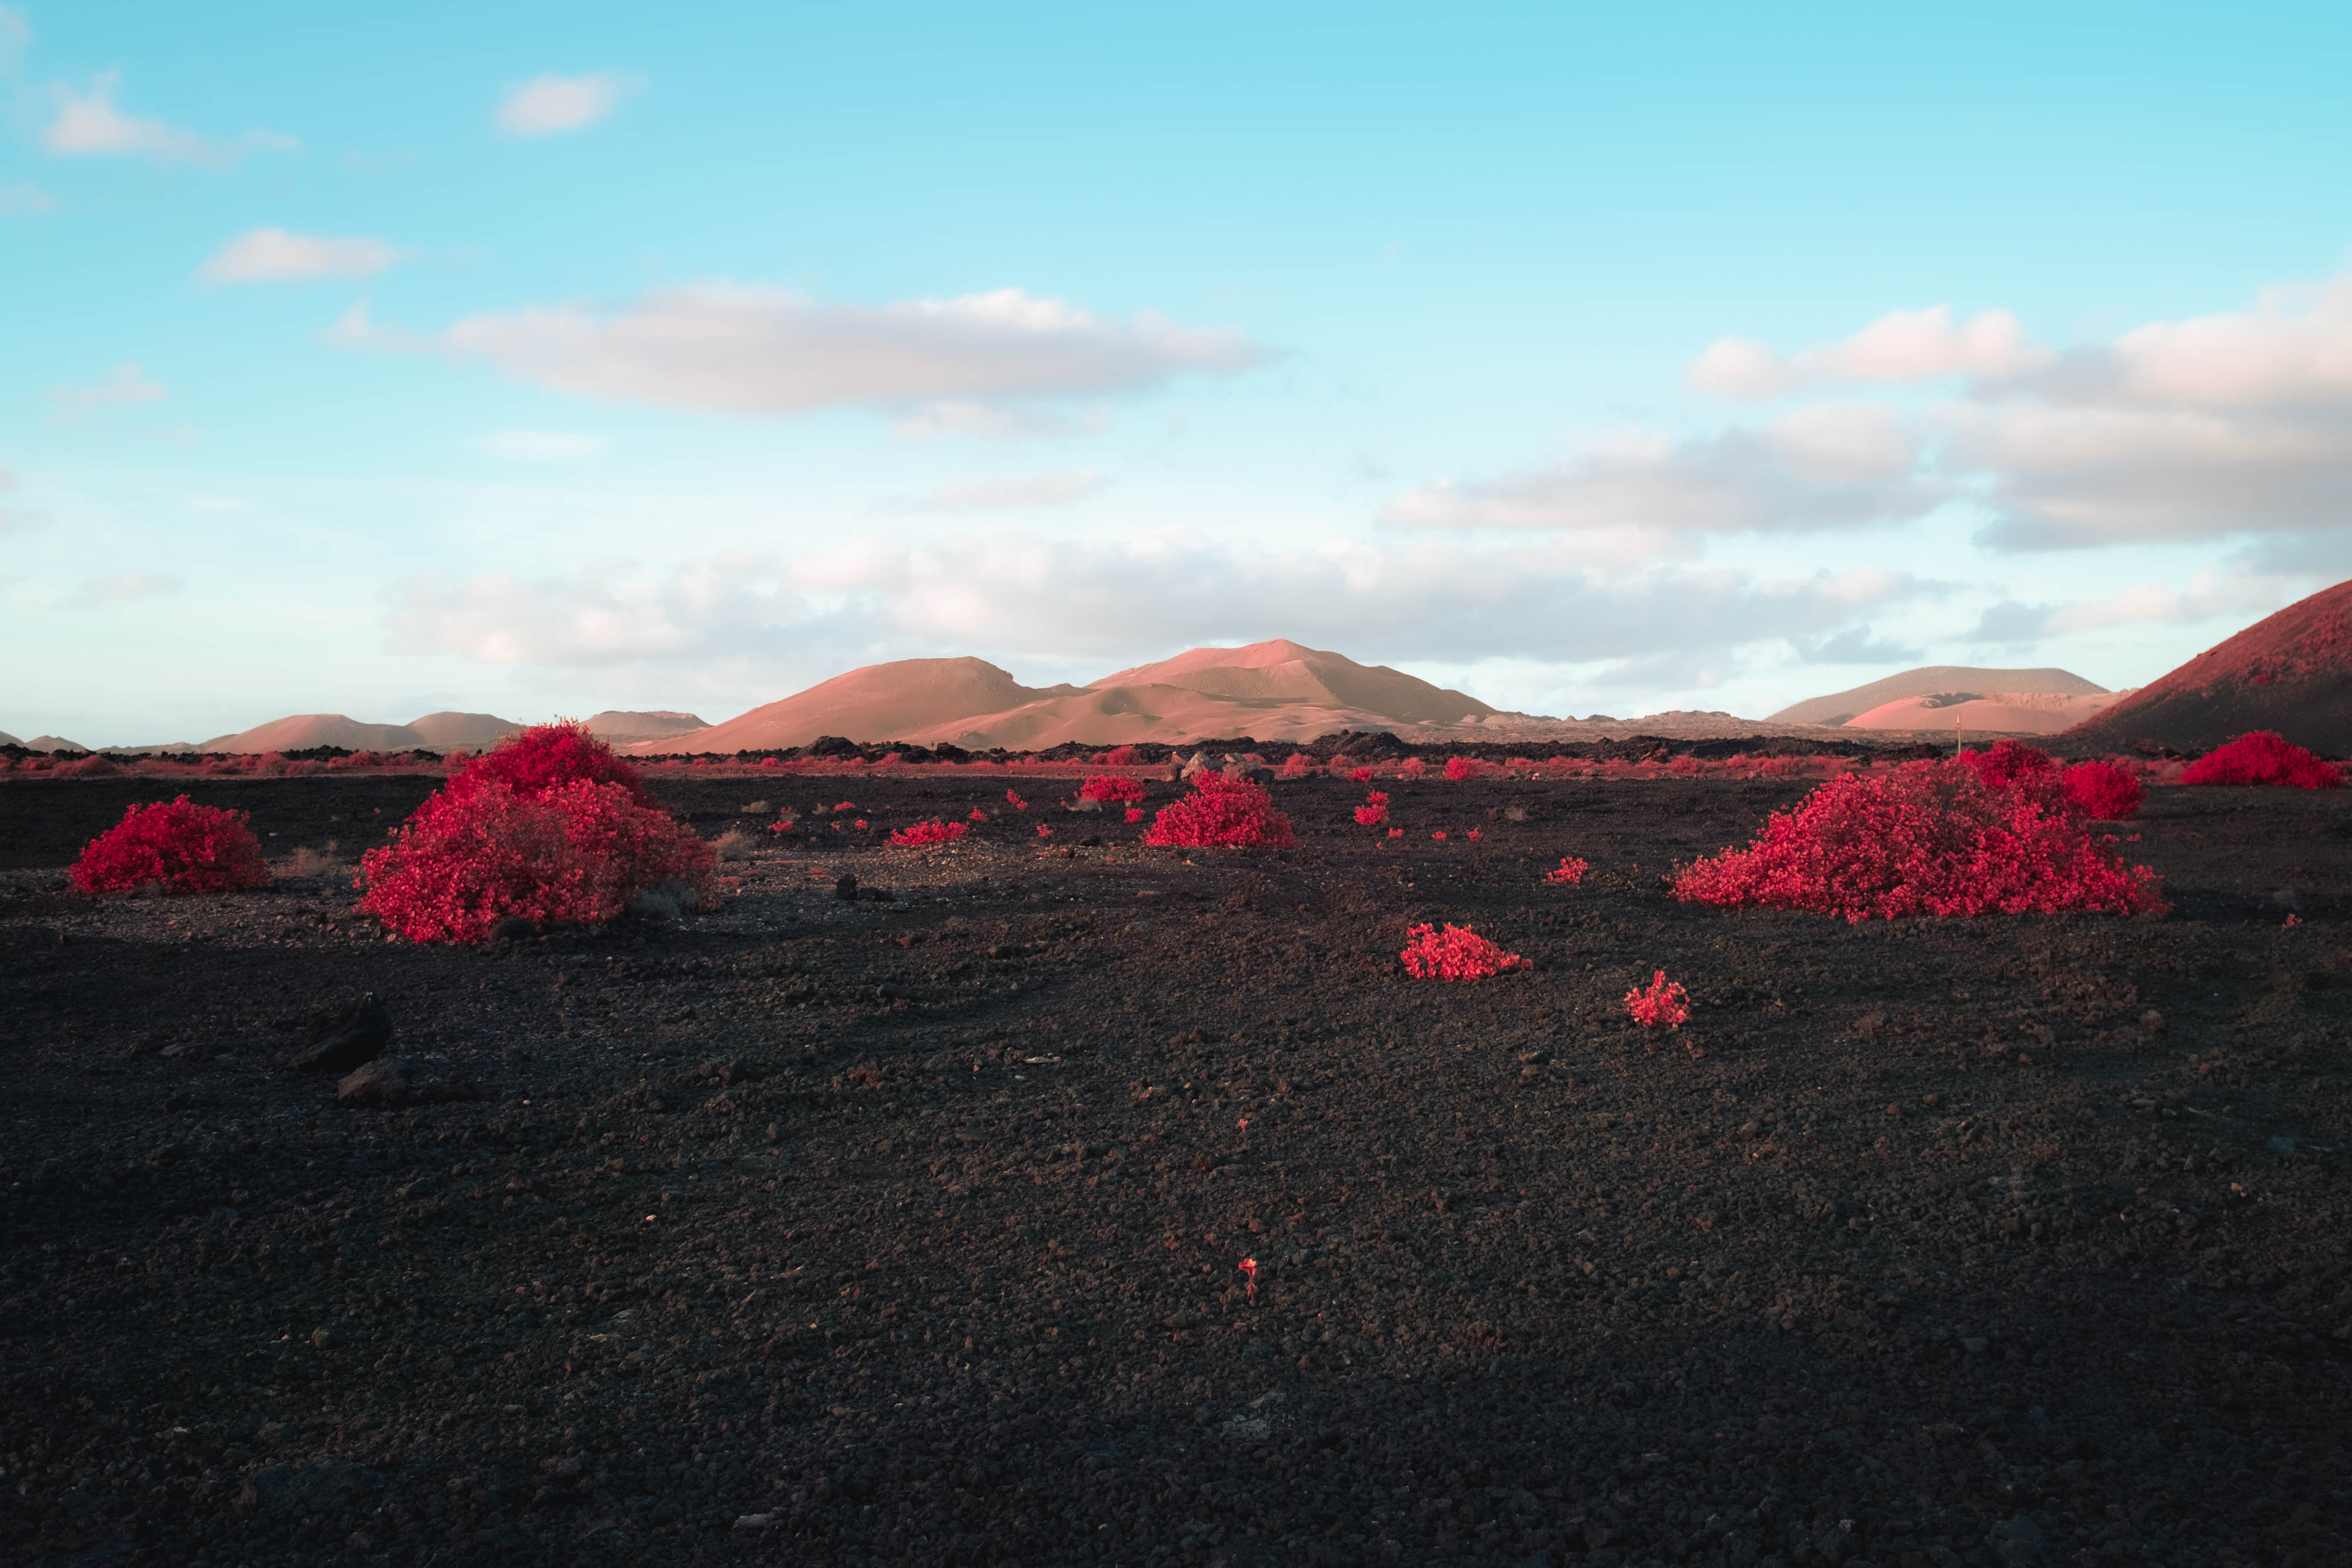
I found the magic to be at sundown and golden hour—or about an hour beforehand—when light is pretty even everywhere, and there is the least contrast between the bright sky and shadows.
Ian Howorth | Fujifilm X-T1, IR Converted | Fujifilm XF 23mm f/1.4 | f/5.6 | 1/60th | ISO 400
Ian Howorth | Fujifilm X-T1, IR Converted | Fujifilm XF 23mm f/1.4 | f/2.2 | 1/60th | ISO 800
Combining this with shooting with a fairly wide aperture creates a dreamy look, with some wonderful soft tones and richness in the infrared effect on flora.
Ian Howorth | Fujifilm X-T1, IR Converted | Fujifilm XF 23mm f/1.4 | 23mm | f/5.6 | 1/60 | ISO 250
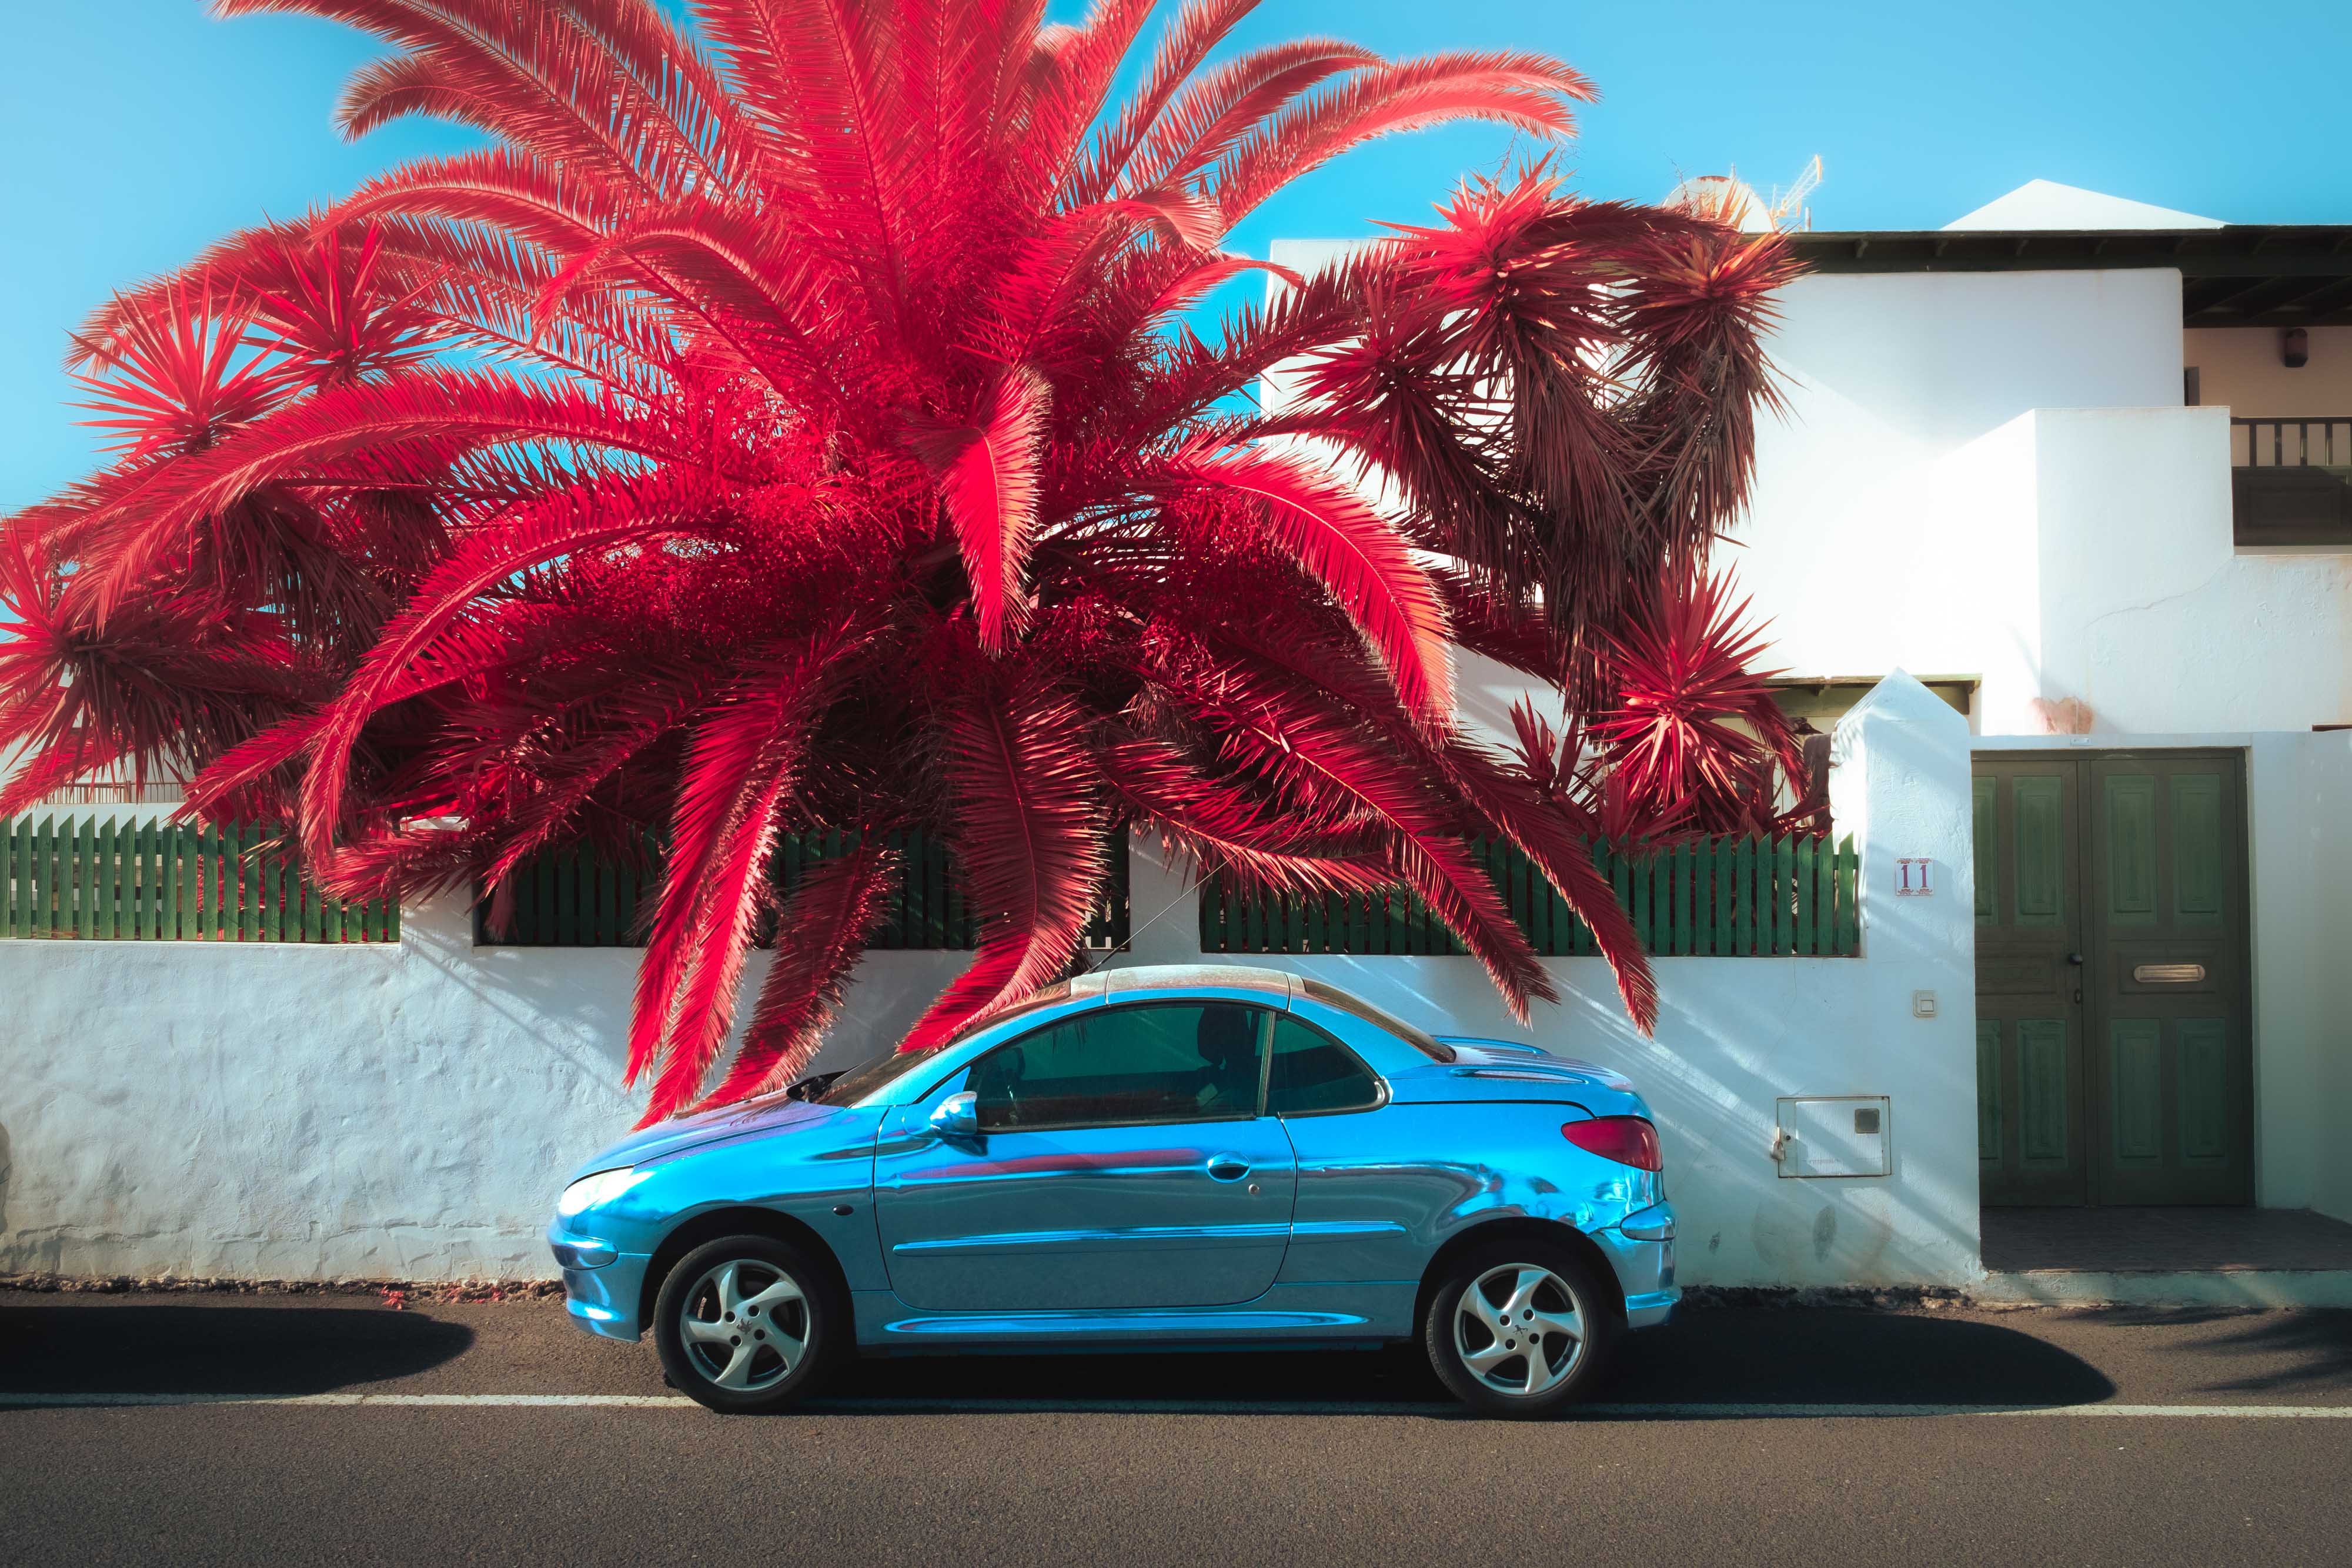
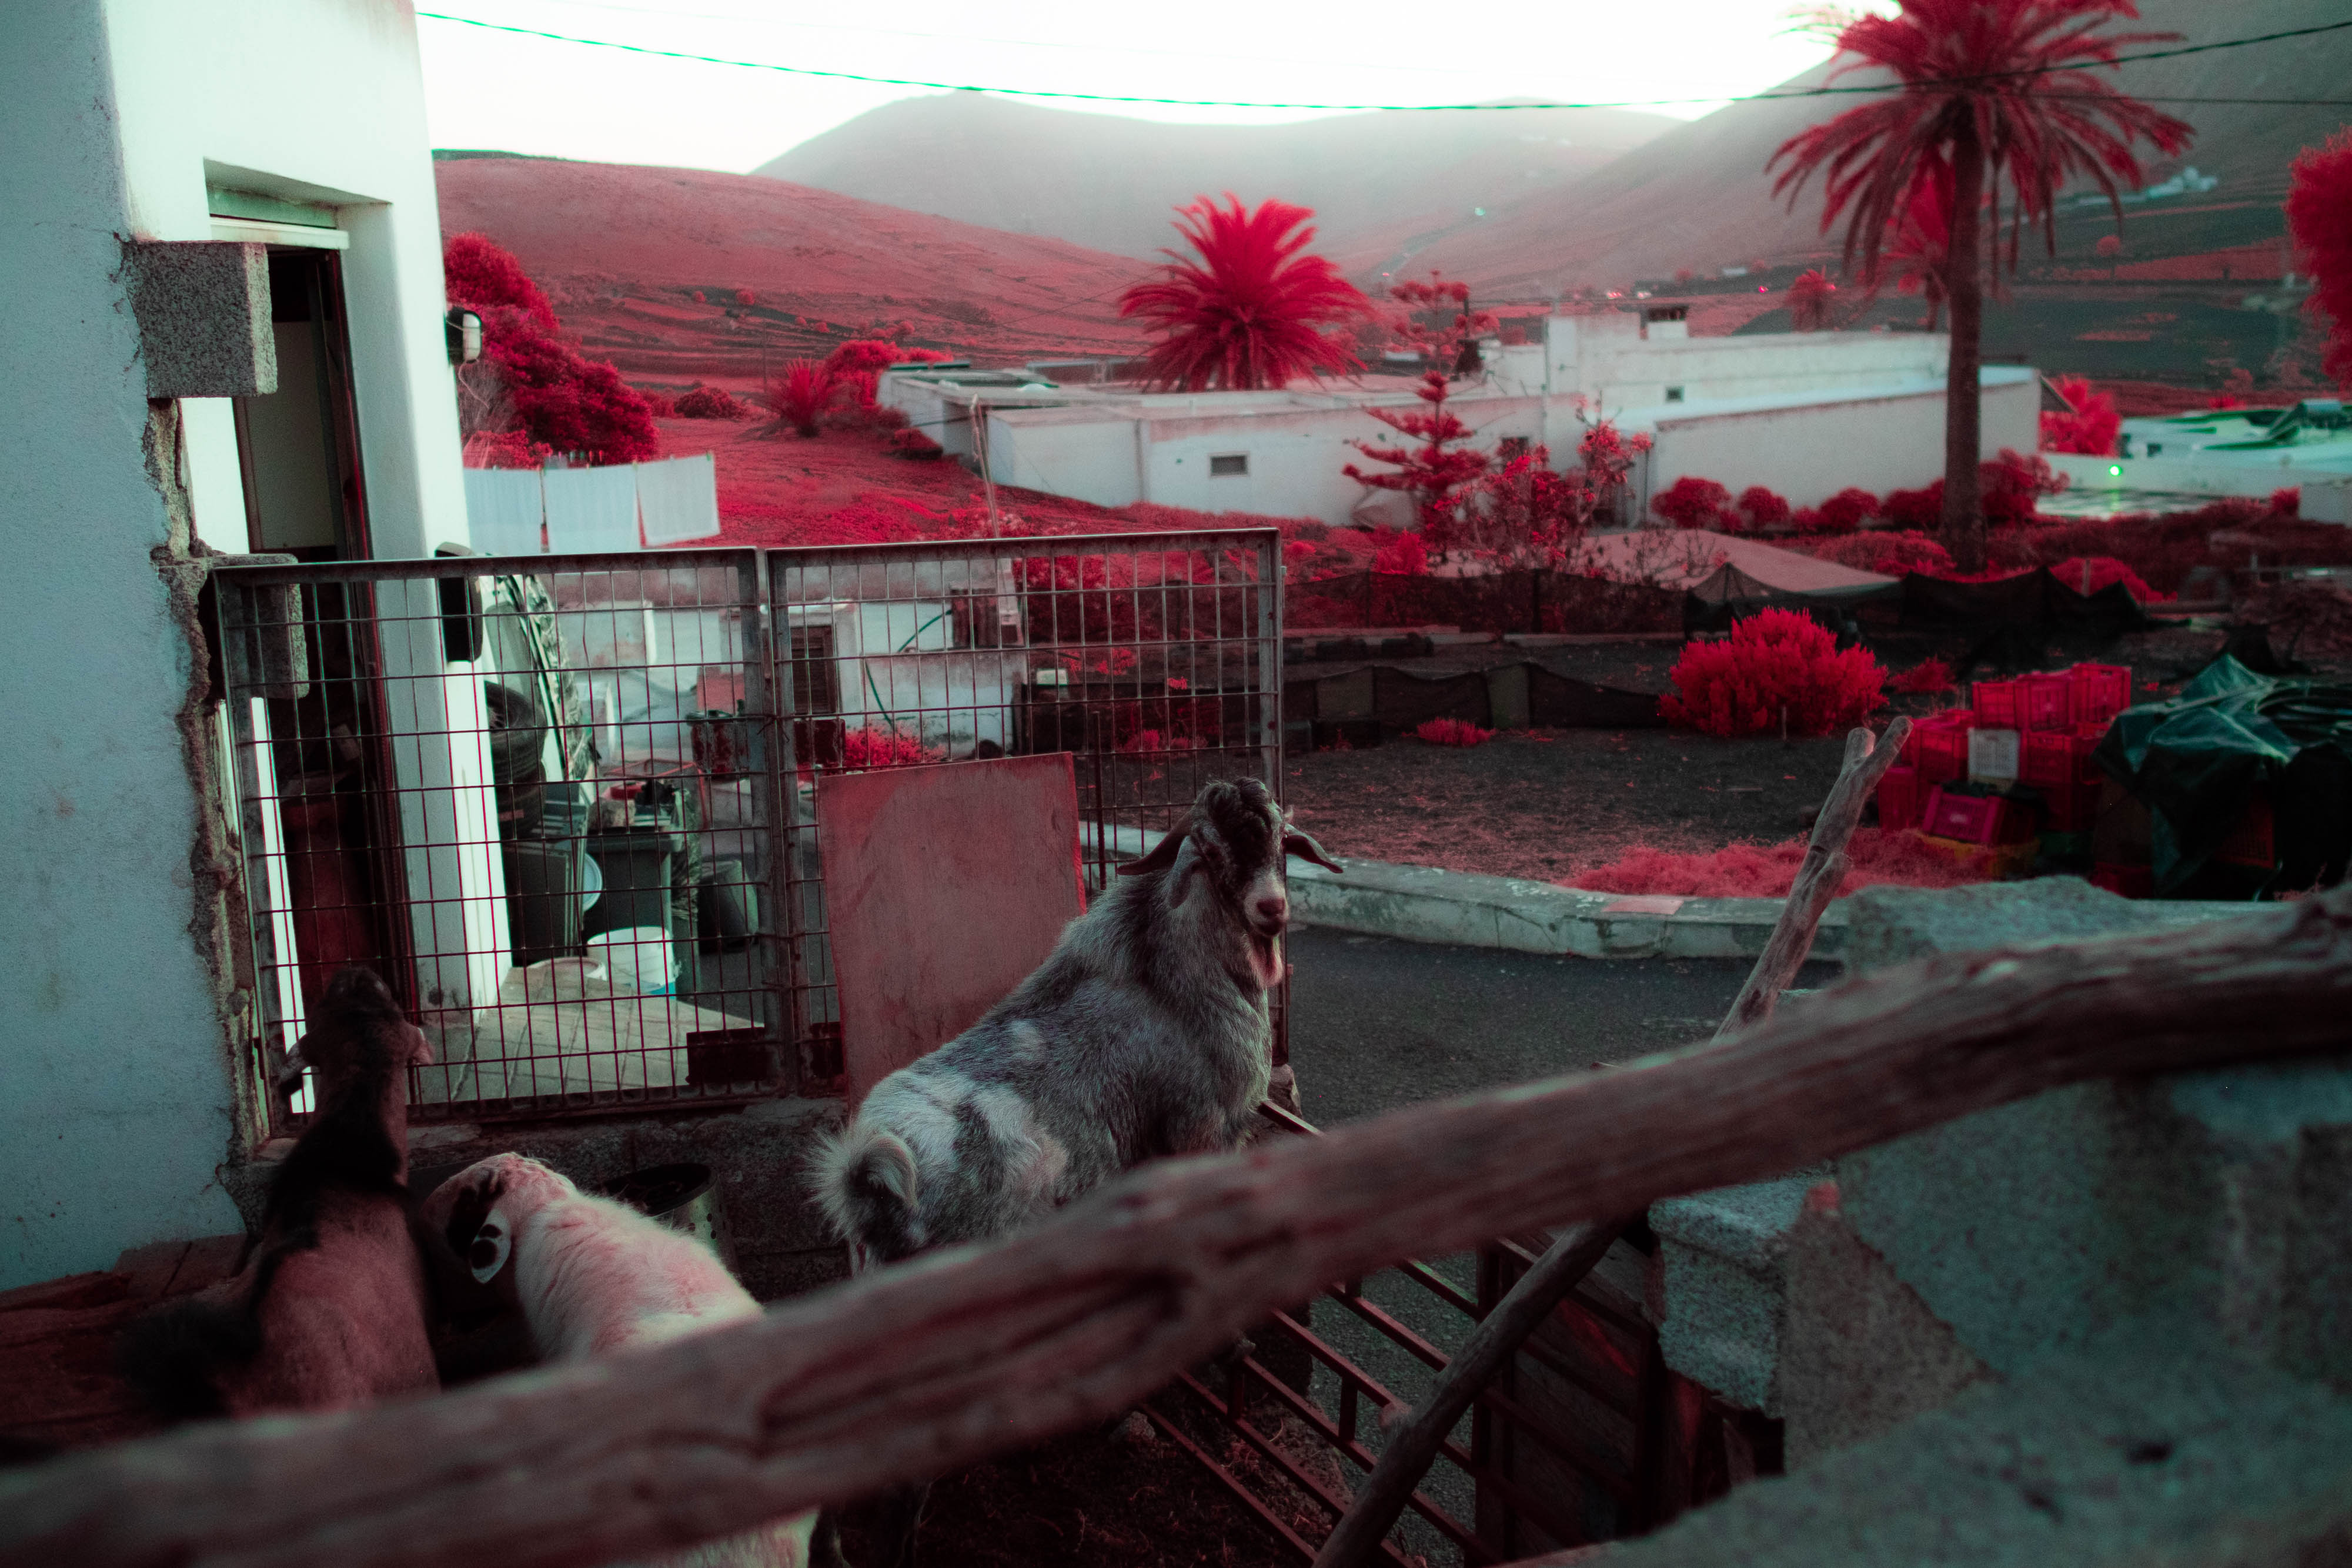
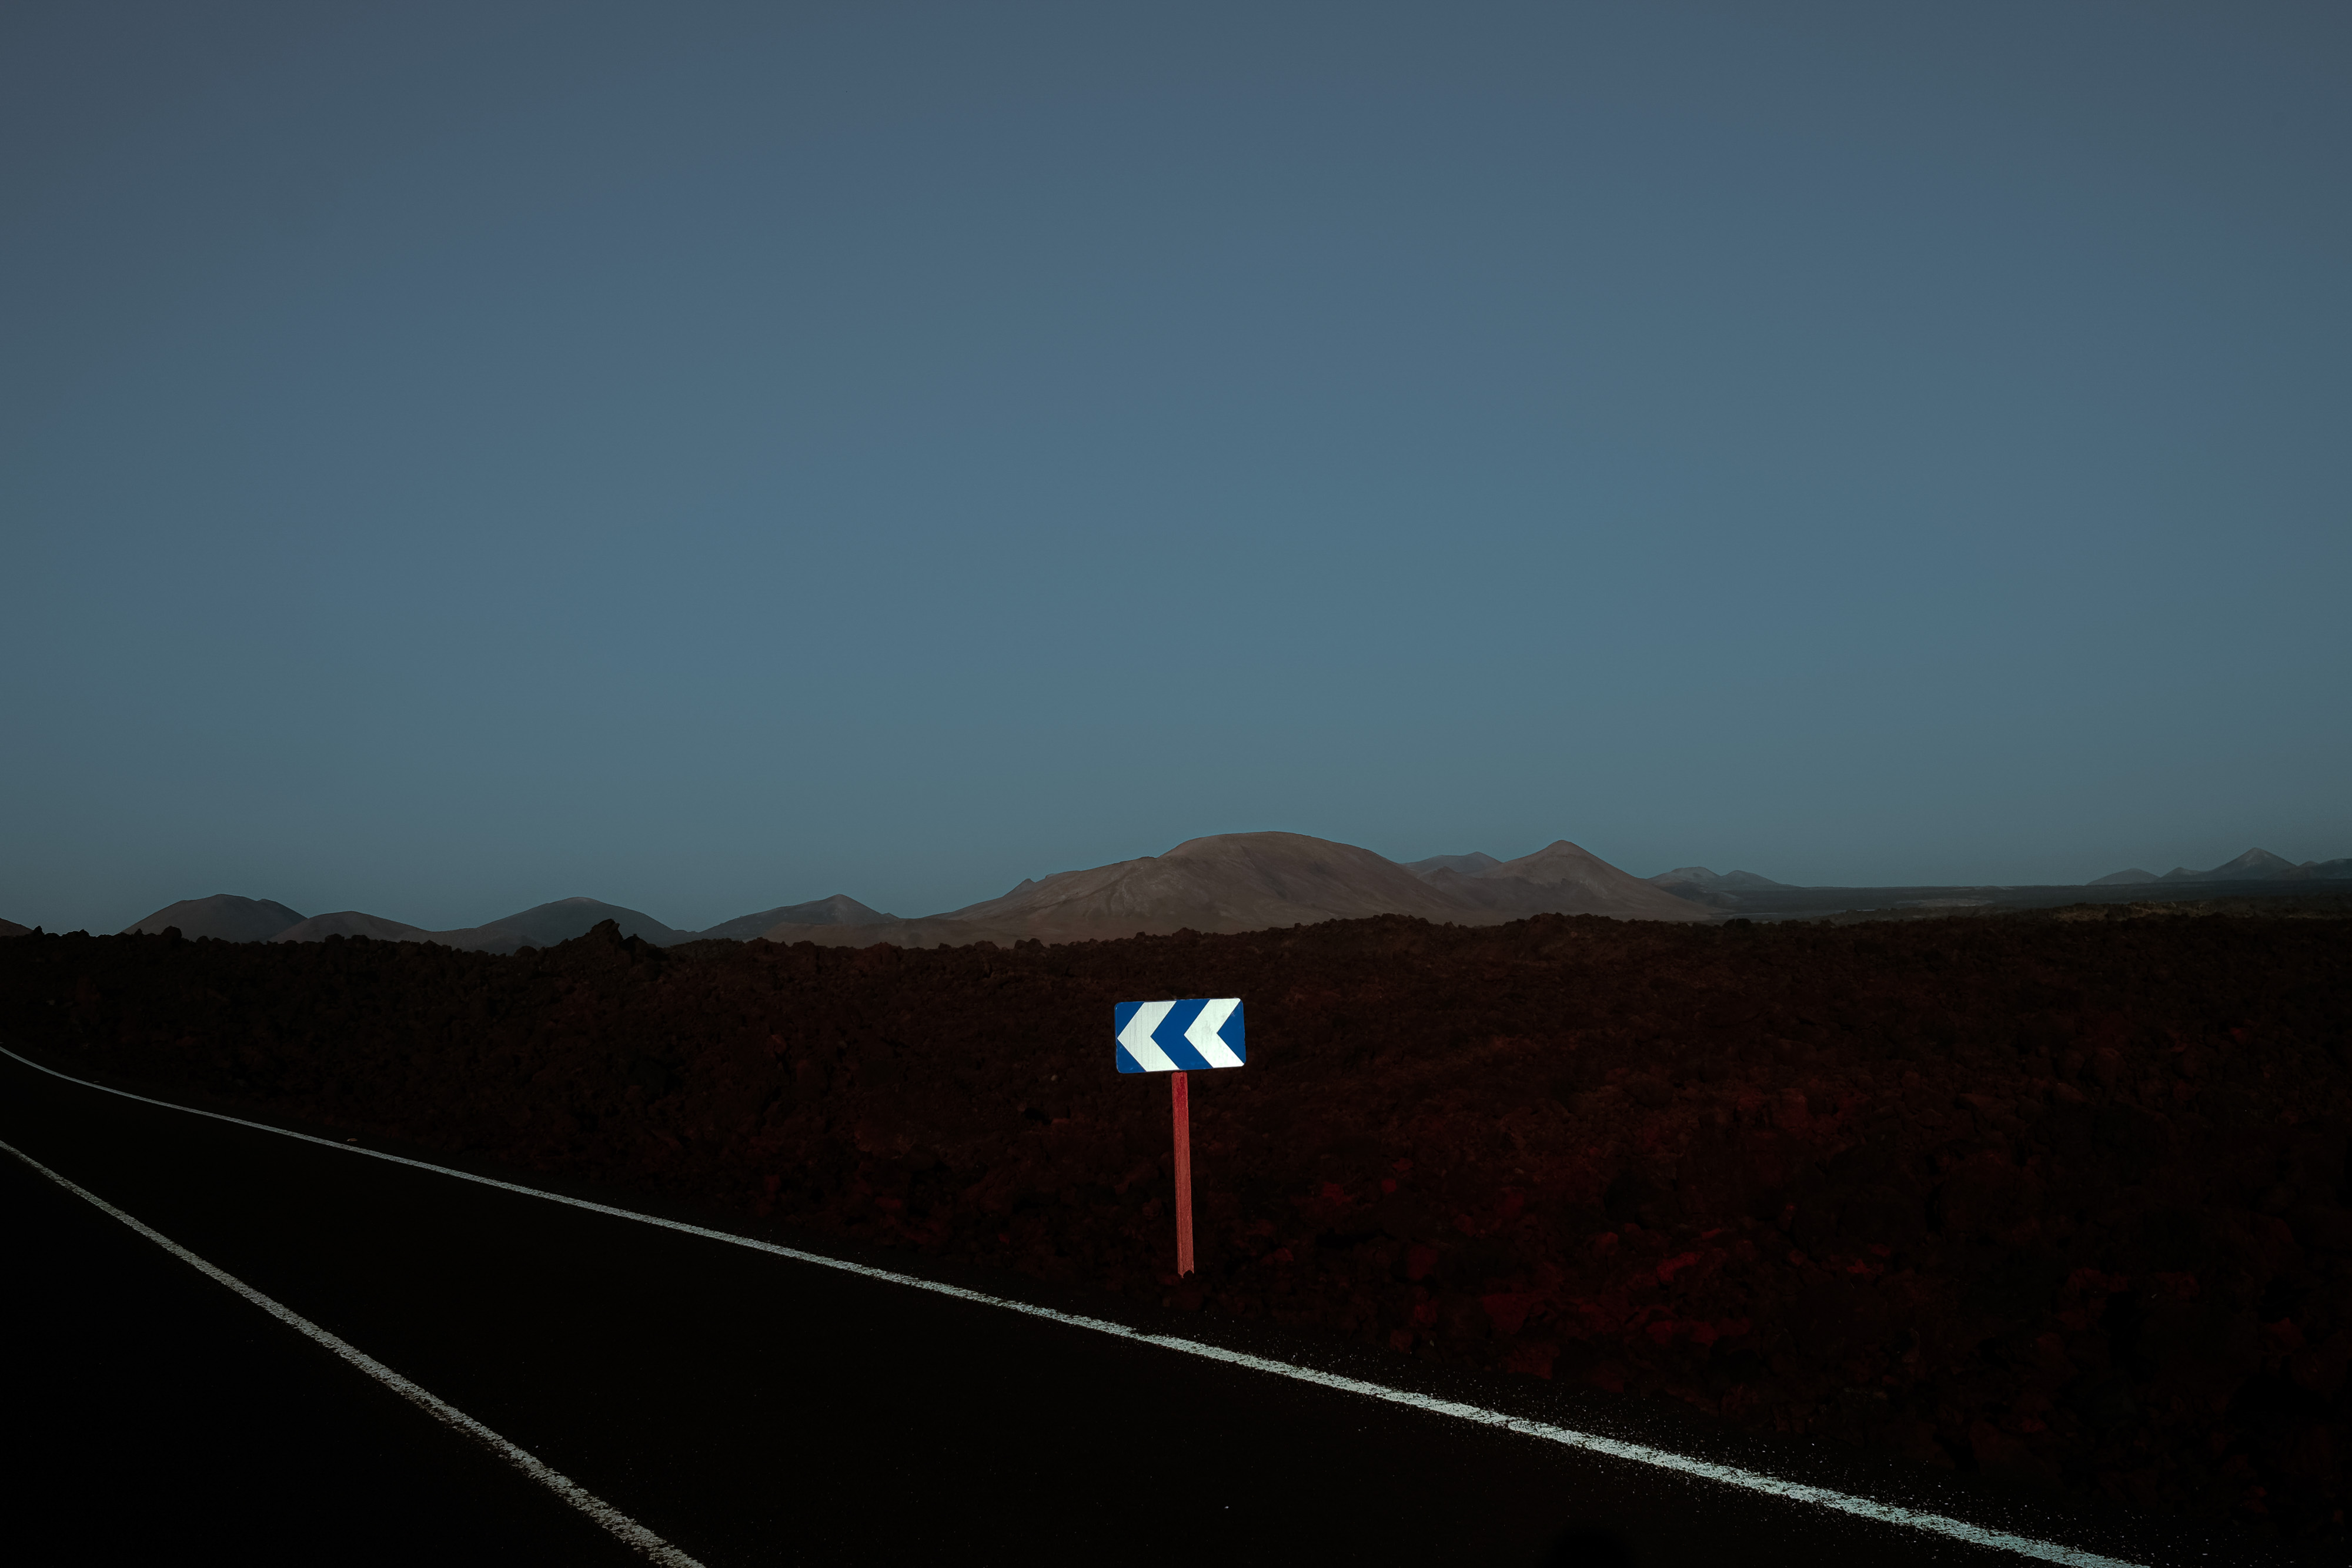
I found that the filter-and-sensor combo impacted the way some other colours were rendered too. Certain blacks turned to red, and blues could be rendered slightly greenish—which is, in fact, quite reminiscent of Kodak Aerochrome film.
Ian Howorth | Fujifilm X-T1, IR Converted | Fujifilm XF 23mm f/1.4 | f/5.6 | 1/180th | ISO 100
Blacks can go to red, and oranges and warm tones can be accentuated. Though, ultimately, this is up to you and how you wish the image to look
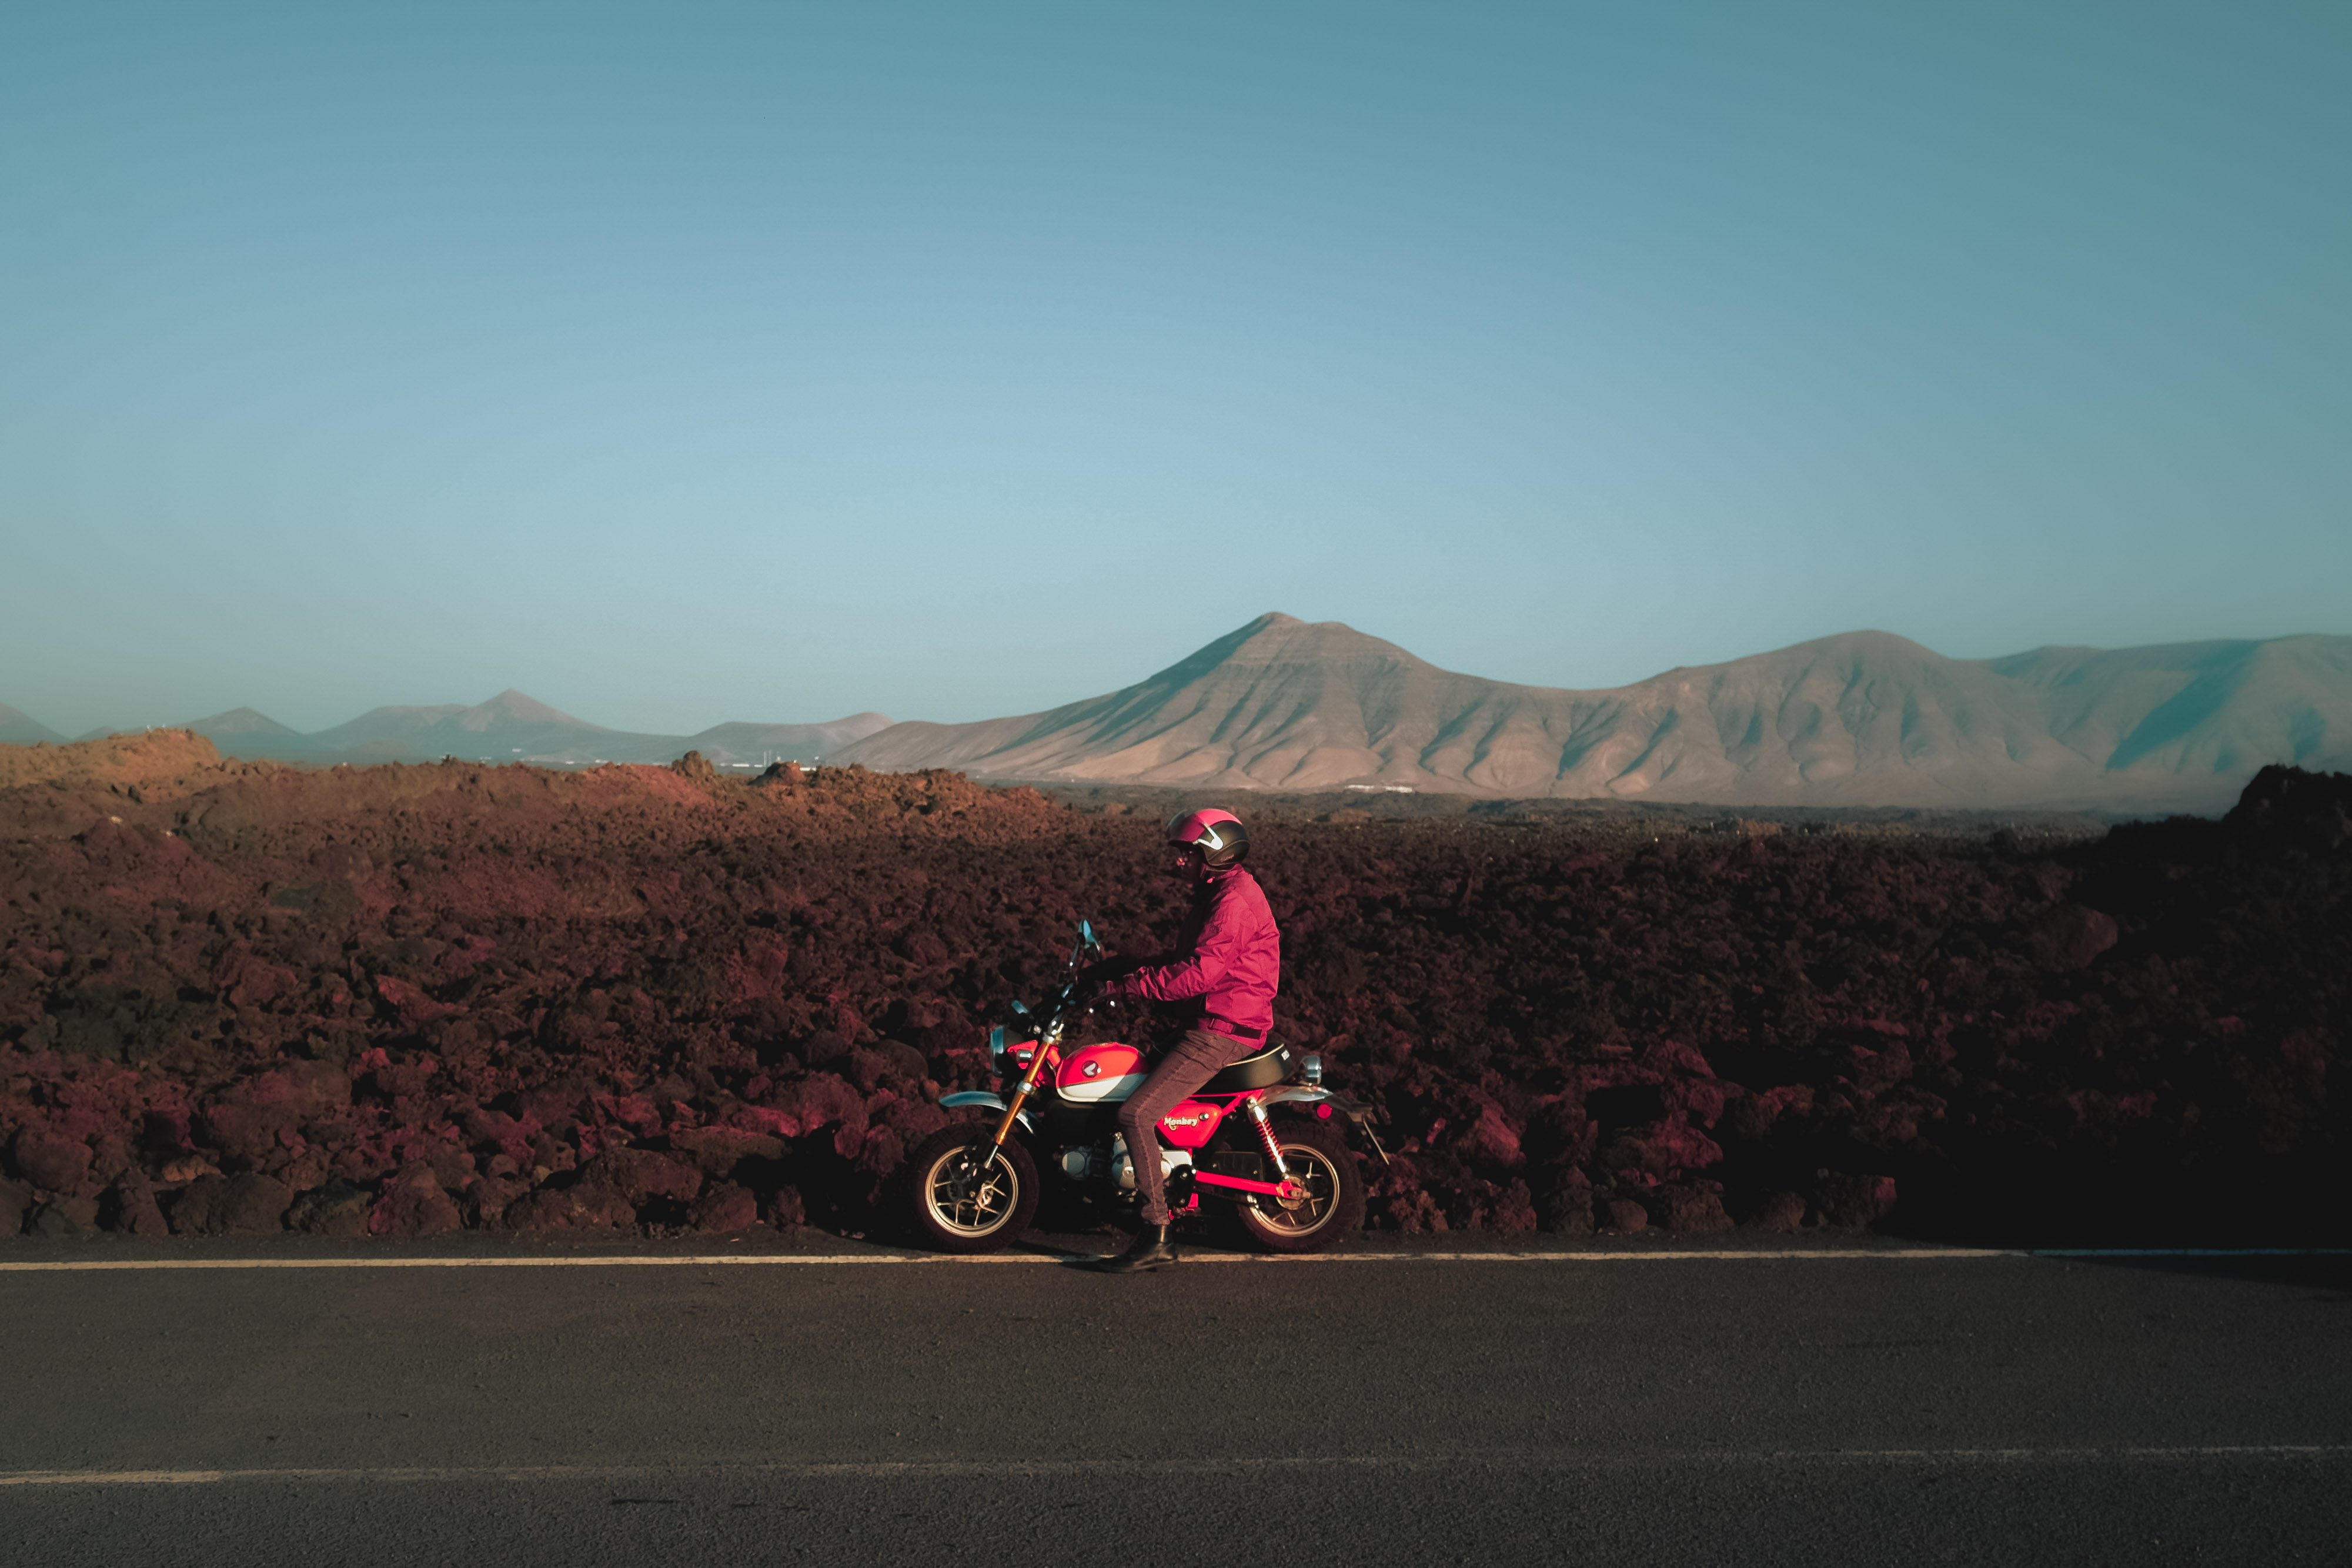
When I was editing, I realised I was basically creating a specific look, which starts off with an already pretty extreme image. Infrared effectively alters the landscape as you know it into something magical and otherworldly, without it looking overtly synthetic or over-edited.
Ian Howorth | Fujifilm X-T1, IR Converted | Fujifilm XF 23mm f/1.4 | f/8 | 1/500th | ISO 100
I noticed the more I edited these—much like Richard Mosse’s work—the colours aren’t always consistent. For example, with a ‘normal’ image, when setting white balance all you have to do is effectively choose middle grey or white as your base point.
With these images, because your reference points are skewed, it gives you more freedom to explore—both in camera and in post.
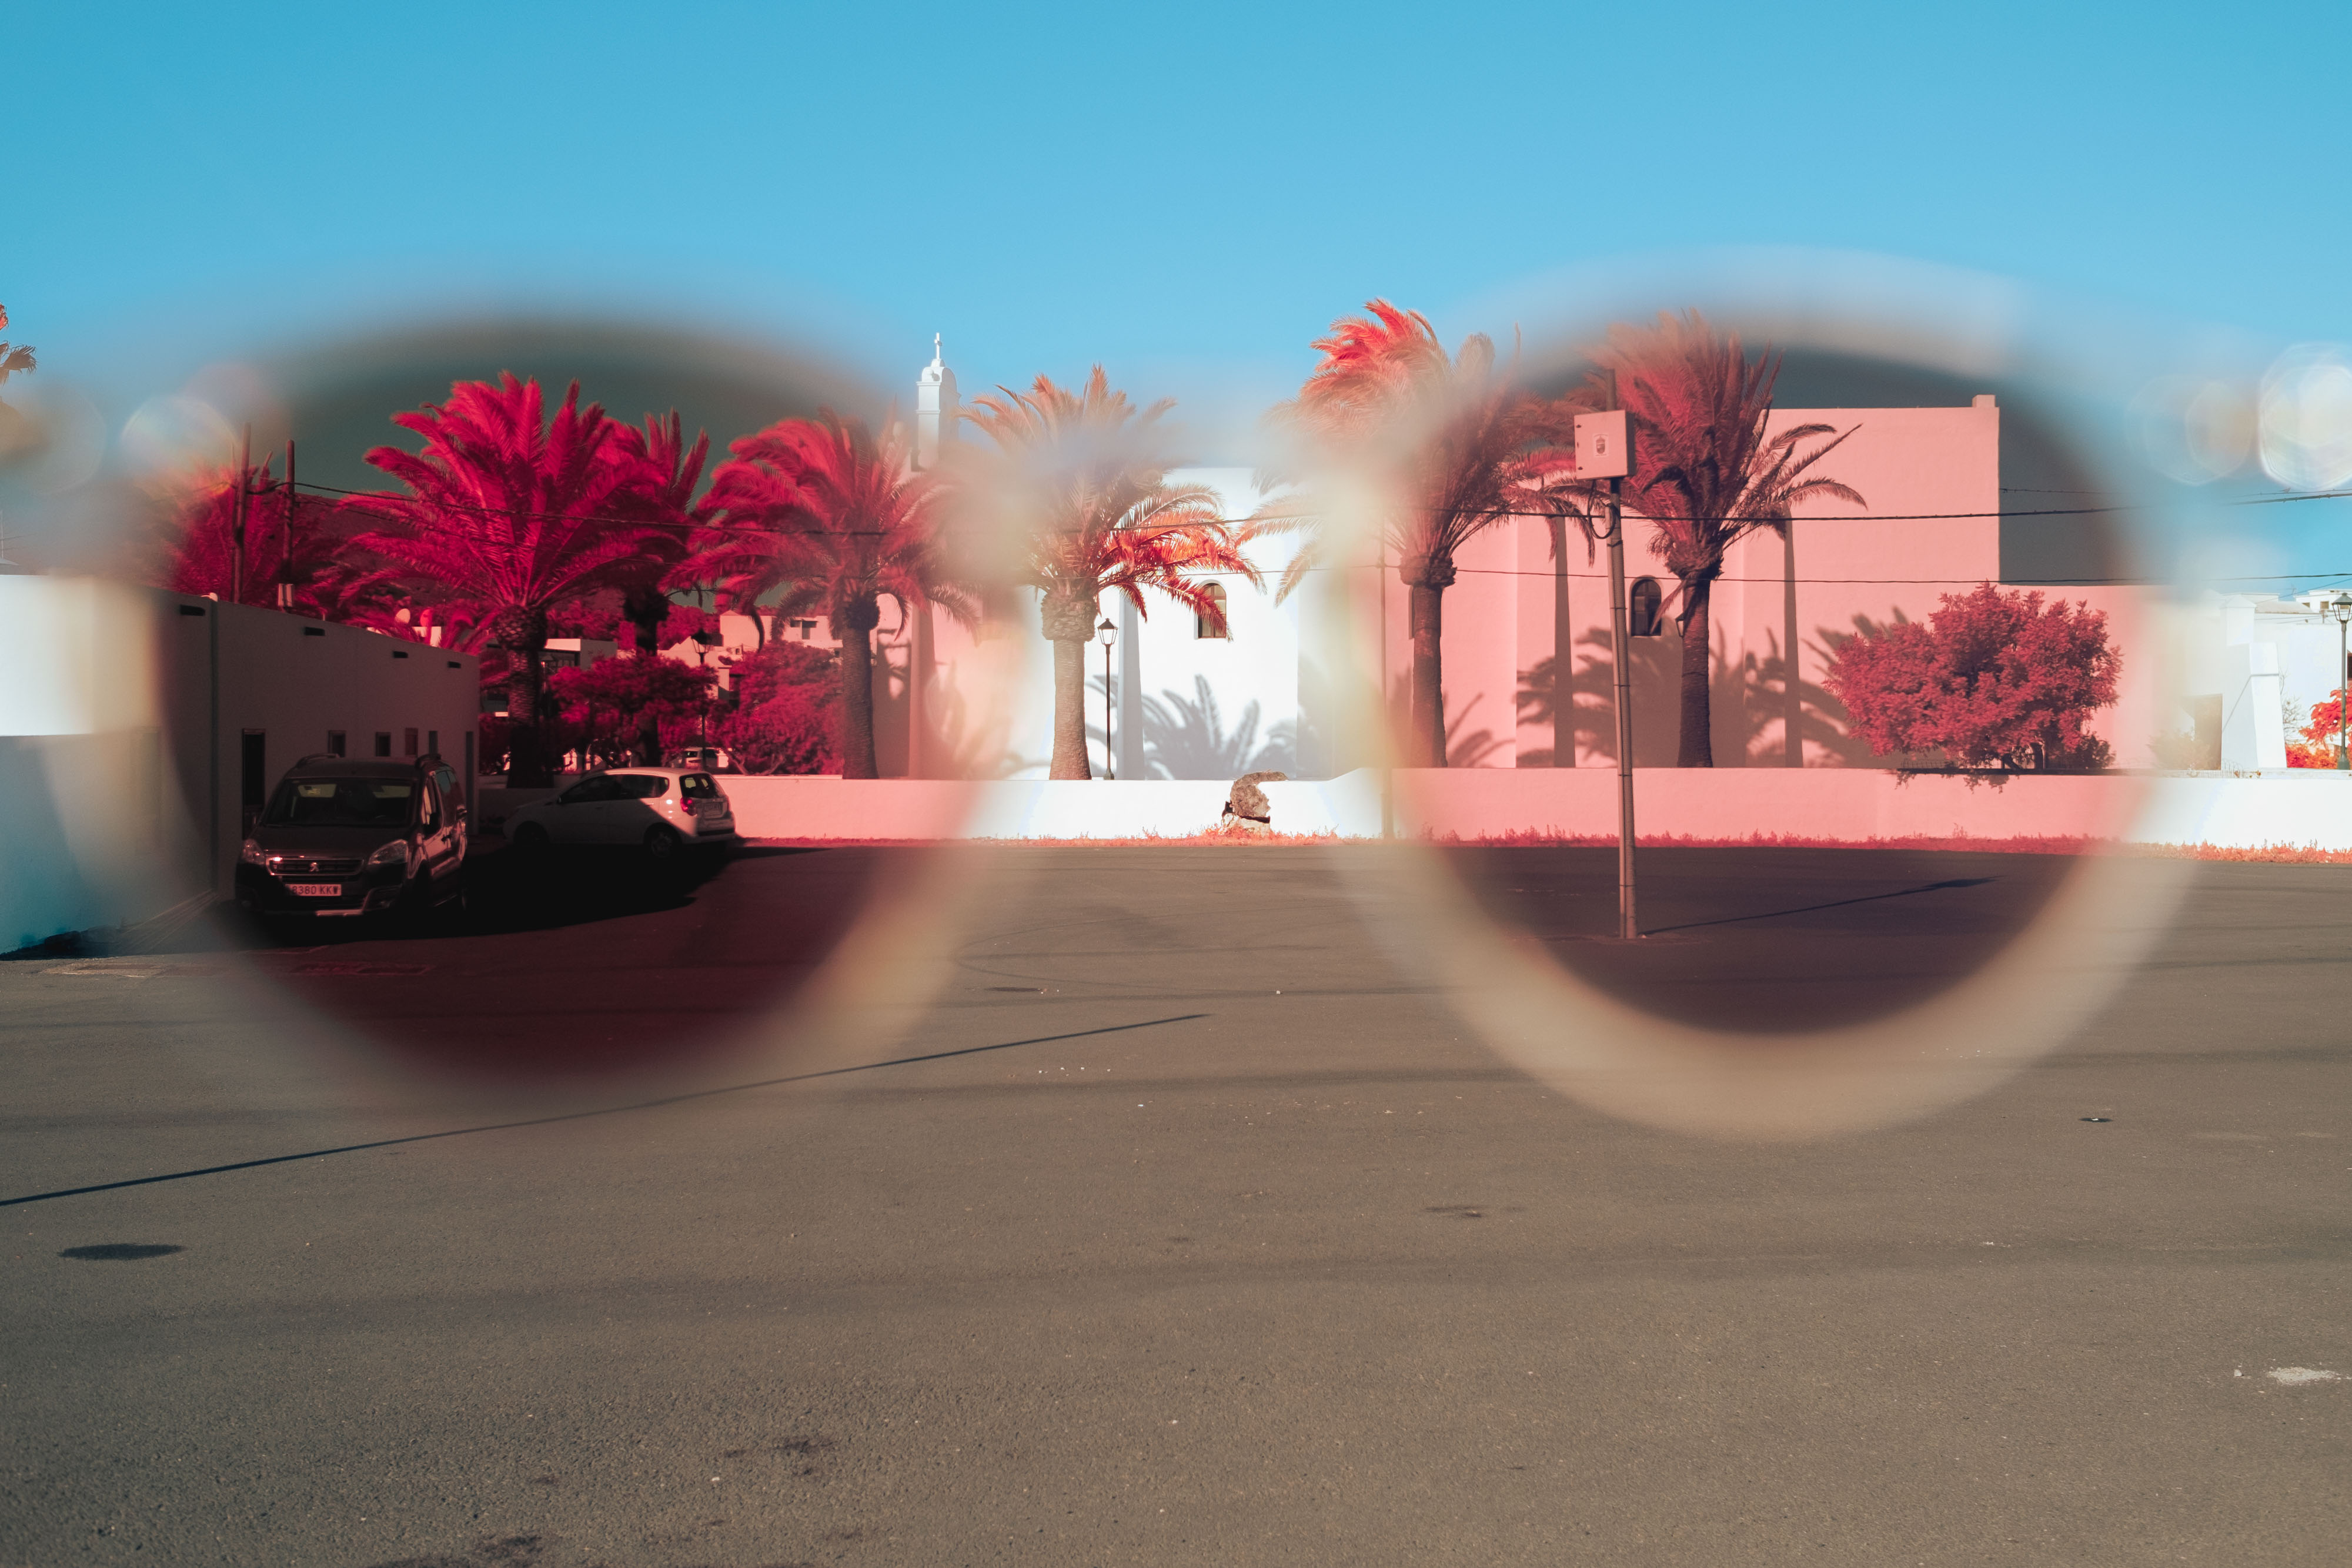
With polarisation | Ian Howorth | Fujifilm X-T1, IR Converted | Fujifilm XF 23mm f/1.4 | f/4 | 1/1000th | ISO 320
My sunglasses are polarised. Adding this to the lens added a stronger look to the colours, making the effect denser and also helping tone down the highlights somewhat under harsh light.
As this was my first time shooting any form of infrared, there are certainly things I discovered that I’d change the next time around. Here are some of my top tips to make the most out of shooting infrared.
What time of day is the best for shooting infrared photos?
If you wanted an effect that emulated the Kodak Aerochrome look more closely, I’d suggest shooting at golden hour or sundown.
Shooting with close to a fully-open aperture creates a wonderful dreamy look. And, depending on the lens you choose, allows some lovely flares and soft contrast in the sky.
Shooting in the bright midday sun is fine. But take care with your subjects, and perhaps experiment with a polariser to take the edge off the highlights.
Ian Howorth | Fujifilm X-T1, IR Converted | Fujifilm XF 23mm f/1.4 | f/8 | 1/250th | ISO 400
What white balance should I use when shooting infrared?
With a colour palette that is already quite extreme, it might be daunting to set a proper white balance. My advice is to keep an eye on changing conditions. Due to the ‘quality’ of the effect being so dependent on sunlight, and the effect on flora, it can sometimes feel like it's not ‘popping’ enough.
Lightroom does some pretty extreme things in regard to white balance. Mine would read as high as 28,000K, which obviously isn't the case. If you can, use a grey card as your base point with the filter on and go from there.
Ian Howorth | Fujifilm X-T1, IR Converted | Fujifilm XF 23mm f/1.4 | f/5.6 | 1/500th | ISO 200
Should I use filters for infrared photography?
This is a big one. Filtration—including polarisation as mentioned earlier—is a good place to experiment in order to achieve your chosen look.
Infrared is complex, and not something I can pretend to fully understand without further testing. But it would be interesting to experiment with other colour filters. For example, you could see how adding a yellow filter or a red filter would alter the image, in addition to the IR Chrome filter that is working in tandem with the IR-converted sensor.
Missed focus | Ian Howorth | Fujifilm X-T1, IR Converted | Fujifilm XF 23mm f/1.4 | f/1.4 | 1/4000th | ISO 200
How to focus your infrared-converted camera
I did mention this earlier, but I can’t stress it enough. If you are shooting above 35mm and/or you are working with large, wide-open apertures—especially when close to the subject, within a couple of metres—you are likely to need to manual focus. Use focus peaking to ensure you nail it every time.
If you’re shooting with narrower apertures, much further away or on wide-angle lenses, you stand a better chance of hitting focus in auto. However, I would still recommend shooting manual focus. I took a couple of shots with a fully open aperture that I really liked, but I missed focus—heartbreaking!
Ian Howorth | Fujifilm X-T1, IR Converted | Fujifilm XF 23mm f/1.4 | f/8.0 | 1/125th | ISO 100
Which lenses can I use for shooting infrared?
To recreate the Aerochrome look, I was shooting with the Kolari IR Chrome filter. But make sure to check with the manufacturer of the filter you’re using in your infrared setup.
I'm no expert. But, apparently, some lenses will create a hotspot—in the centre of the lens—which will overexpose the image or create unwanted effects. If you’re looking to buy kit specifically for infrared with the IR chrome filter, always check the filter is fully compatible beforehand. For reference, I used the Fujifilm XF 23mm f/1.4.
Fujifilm X-T1, IR converted
Shooting infrared in this way was an amazing experience. one I'm keen to revisit again once spring arrives. I was happy. For under a grand—or the cost of just four rolls of Aerochrome—I had a camera that creates a look I simply adore and opens up a lot of creative options. Sure, the look isn't exactly like Aerochrome. But I found that I ended up arriving at a look that I really liked—and perhaps even preferred.
With the amount that I shot over the week, the cost of buying, developing and scanning infrared films would’ve been in the thousands. For a much smaller amount, I can use this setup over and over again.
When the sad day comes that the world finally runs out of Kodak Aerochrome film, I’ll still be able to achieve a look that I love for years to come.
Thanks, Ian. Looking for more guides on how to recreate film photography with digital cameras? Discover the Top Digital Alternatives to the Hasselblad XPan. Or, read more tips and techniques on the MPB content hub.