Learn: Top 6 Tips for Architectural Photography Beginners
Published December 10, 2025 by MPB
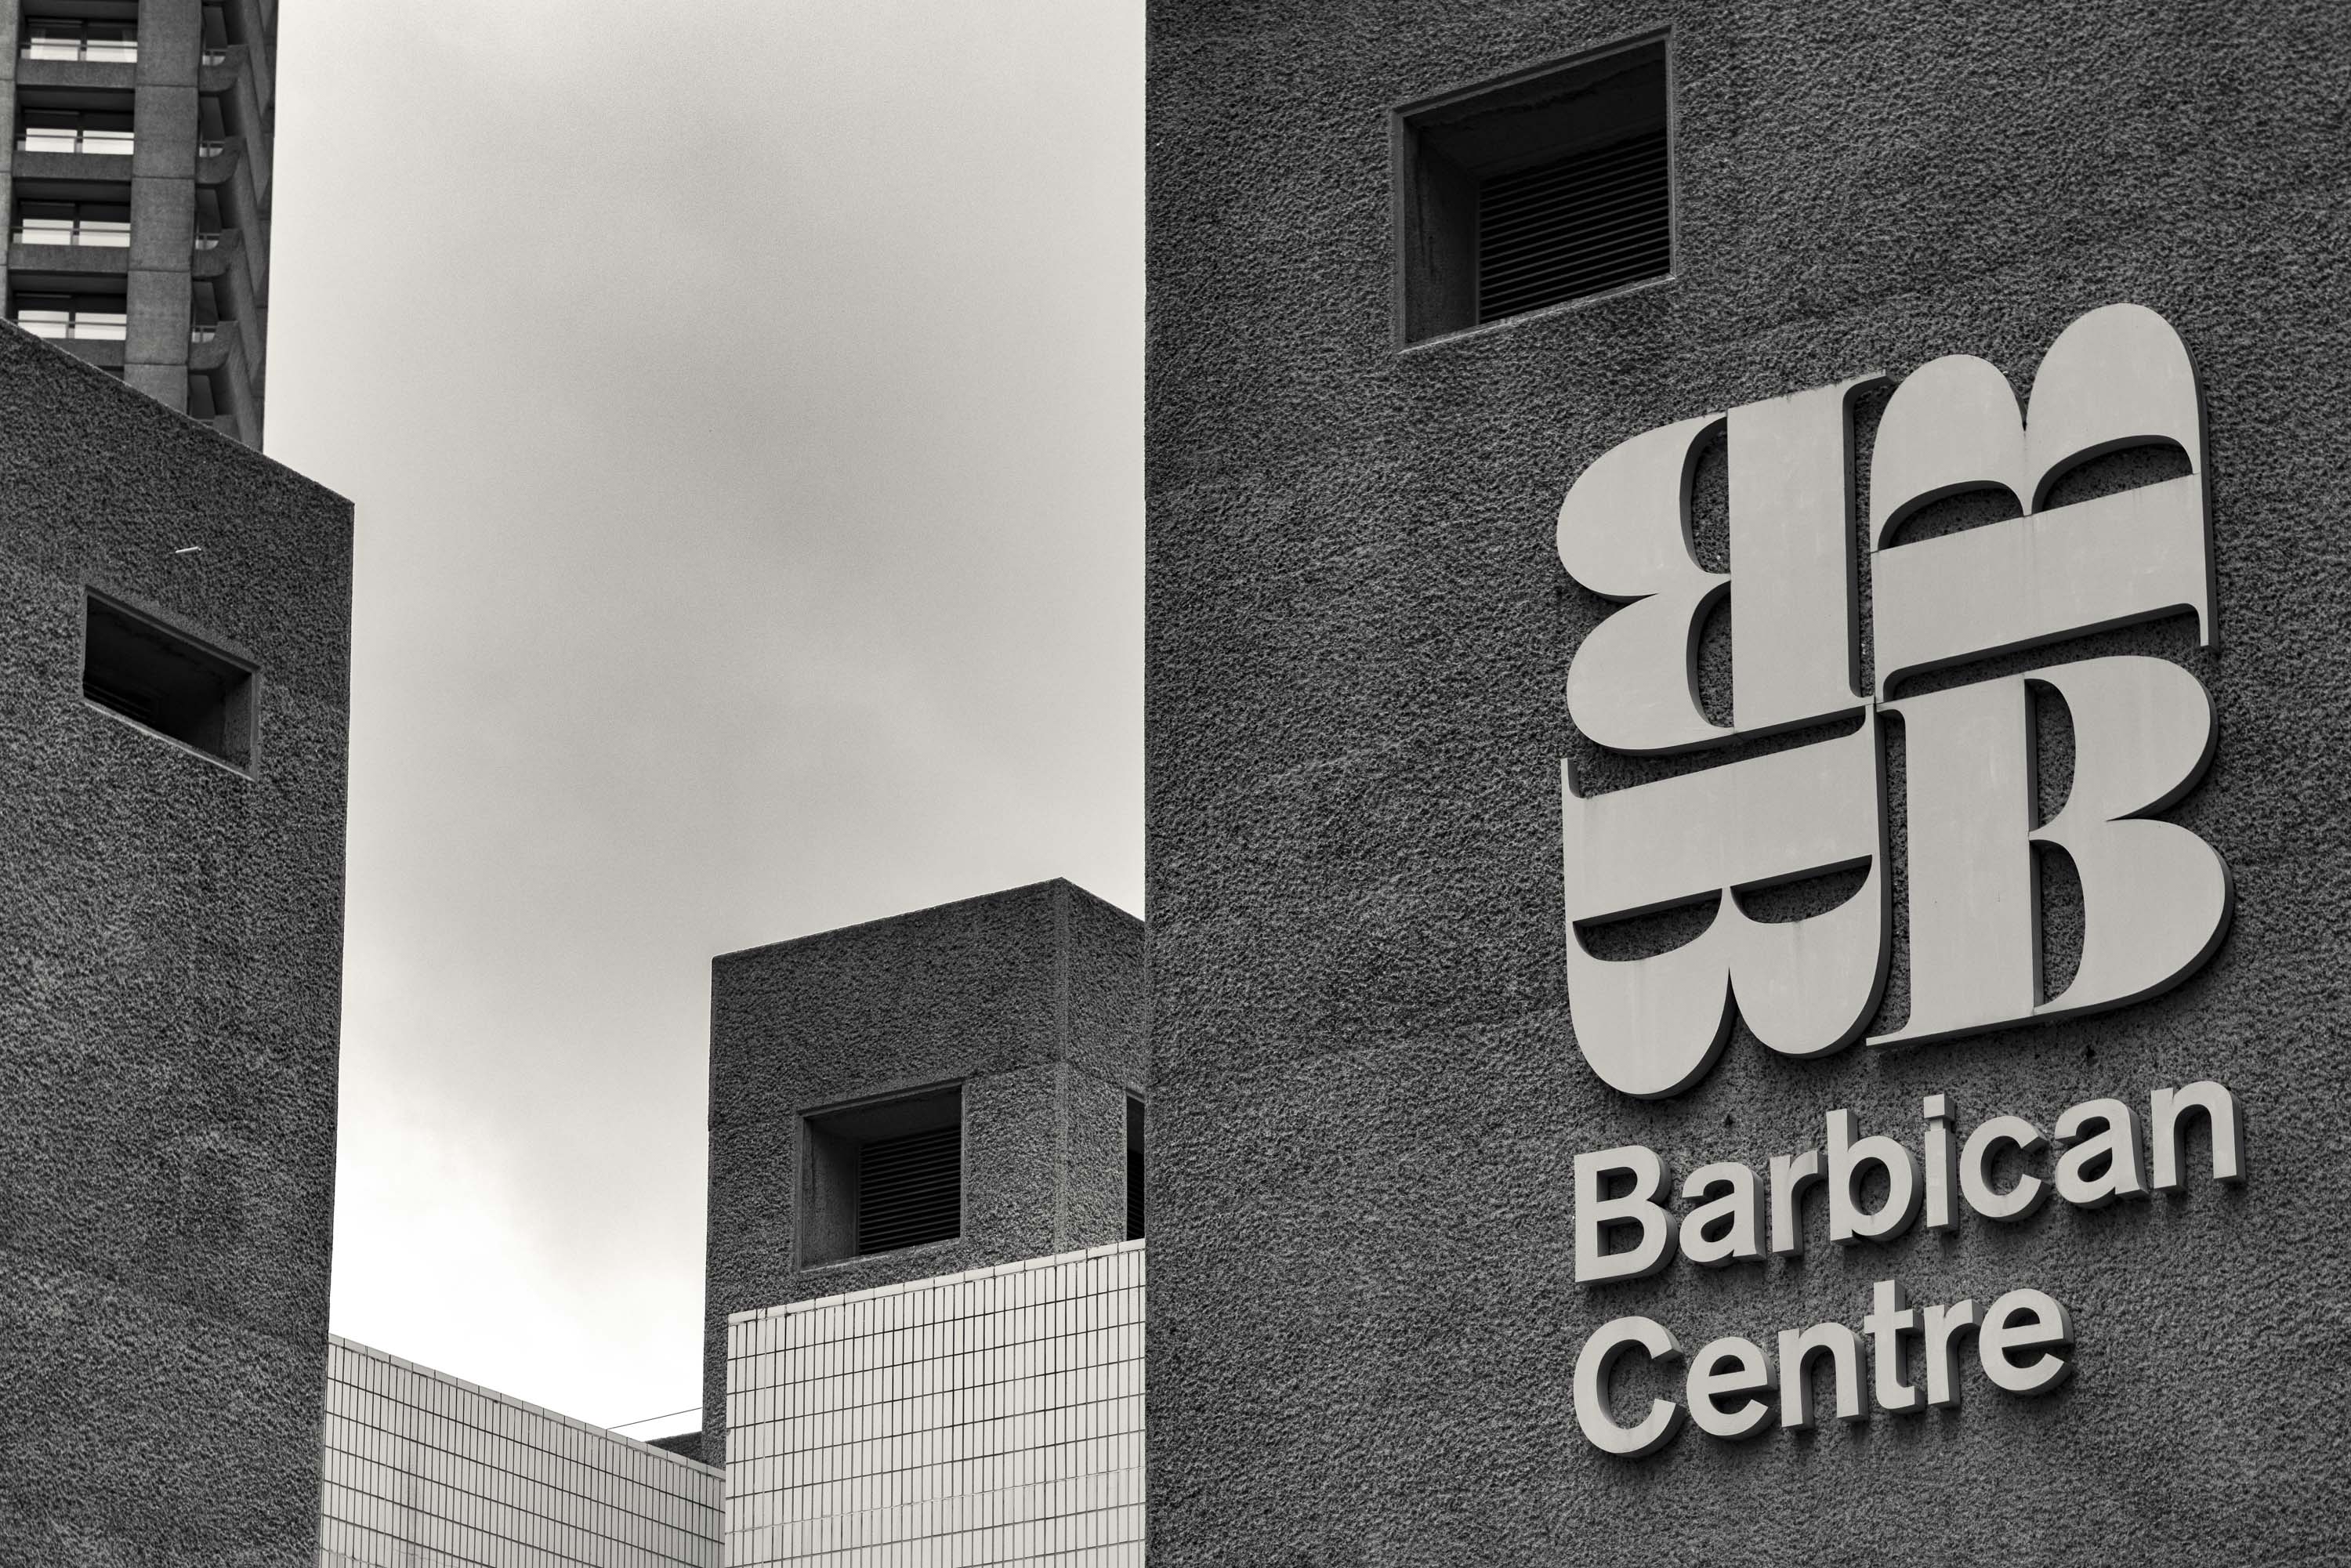
In many photography genres, it often feels like there are a set of unofficial ‘rules’. For portraiture, it’s always getting the eyes in focus. In nature and wildlife, it’s perfect sharpness. And in architectural photography, it’s getting your lines completely straight. Ian Howorth, a self-confessed novice at architectural photography, took a dive into the genre. Here's what Ian learned about tilt-shift, perspective and shape at London's brutalist icon, the Barbican.
Ian's architectural photography advice includes:
Use a tilt-shift lens (but you don't need one)
Consider shooting in black and white
Line building edges with your frame
Bring the buildings to life
Use a tripod
Keep practicing and train your eye
Architectural photography has always been a genre of photography that has interested me both from the technical and the artistic side. I’ve always viewed it as a collaboration between architect and photographer—even when the architect isn’t aware of the collaboration. Finding lines and shapes that work with one another, and seeing if we can spot what the architect had in mind when they put pen to paper, is the challenge. But just as discovering and unraveling the artistry behind bricks and mortar, it’s also a big challenge trying to find your inner voice as an architecture photographer and seeing what you can extract from a maze of monoliths to create something interesting.
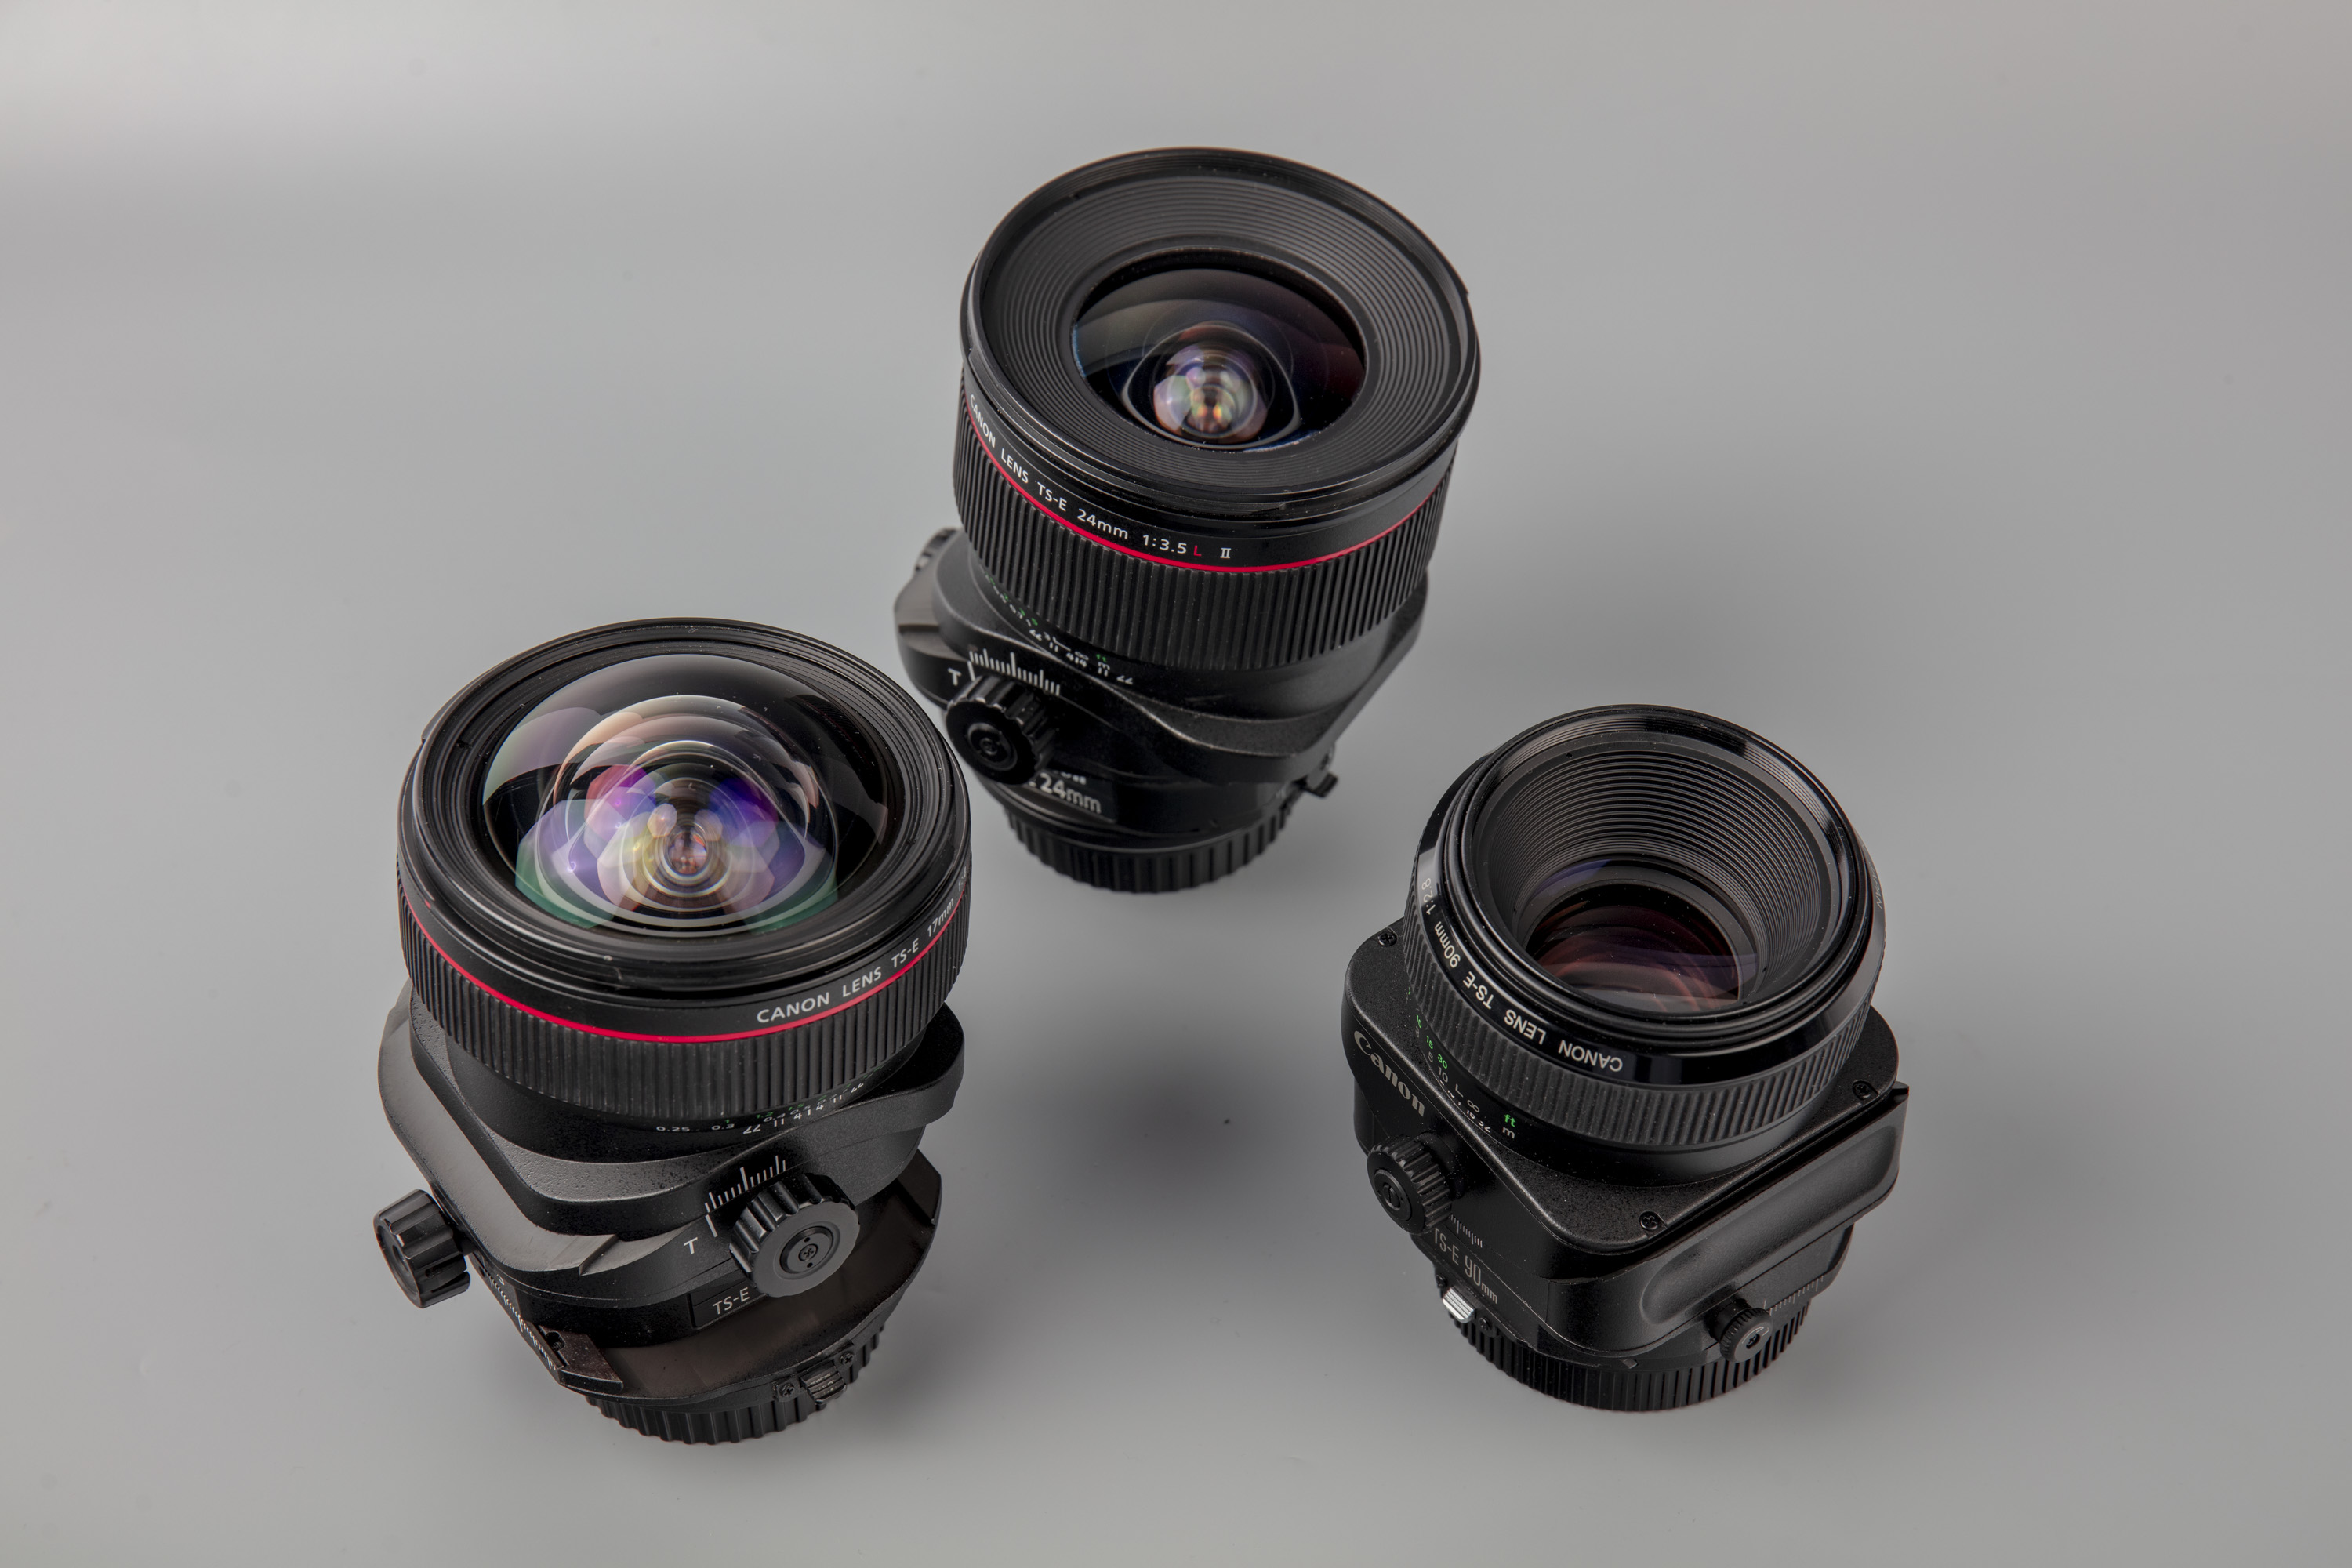
Used Canon TS-E 17mm f/4 L, Canon TS-E 24mm f/3.5 L II and Canon TS-E 90mm f/2.8
1. Use a tilt-shift lens (but you don't
As I had access to tilt-shift lenses, I decided it would be good to give them a try. After all, they also function as normal lenses, so that option was there too. I opted for the Canon TS-E 17mm f/4 L, TS-E 24mm f/3.5 L II and TS-E 90mm f/2.8 with a Canon EOS R5 via a Canon EF-EOS R adapter.
I arrived at the Barbican on a pretty dreary day. No rain, fortunately, but a classic winter’s day in London. I figured a bit of sun would have created some interesting shapes, but I relished the opportunity to just concentrate on the buildings and structure to extract the general vibe rather than relying on something else to accentuate the images. Initially, I found it quite tricky figuring out the ins and outs of the tilt-shift lenses, in terms of how much they could do with perspective correction. Singular structures were easy to correct with ‘tilt—a combination of my positioning and the movements allowed me to get the whole structure pretty straight.
Ian Howorth | Canon EOS R5 | TS-E 90mm f/2.8 | 90mm | f/7.1 | 1/100 | ISO 400
Initially, I thought that most of the work would be carried out with the 24mm TS-E and less so with the 90mm. Aside from the brain-numbing challenge of getting around tilt shift, it’s also a focal length I'm not accustomed to shooting with—except for studio work. However, I found that there is as much interest in getting up close and personal with these concrete monoliths as going wide and presenting a larger vista.
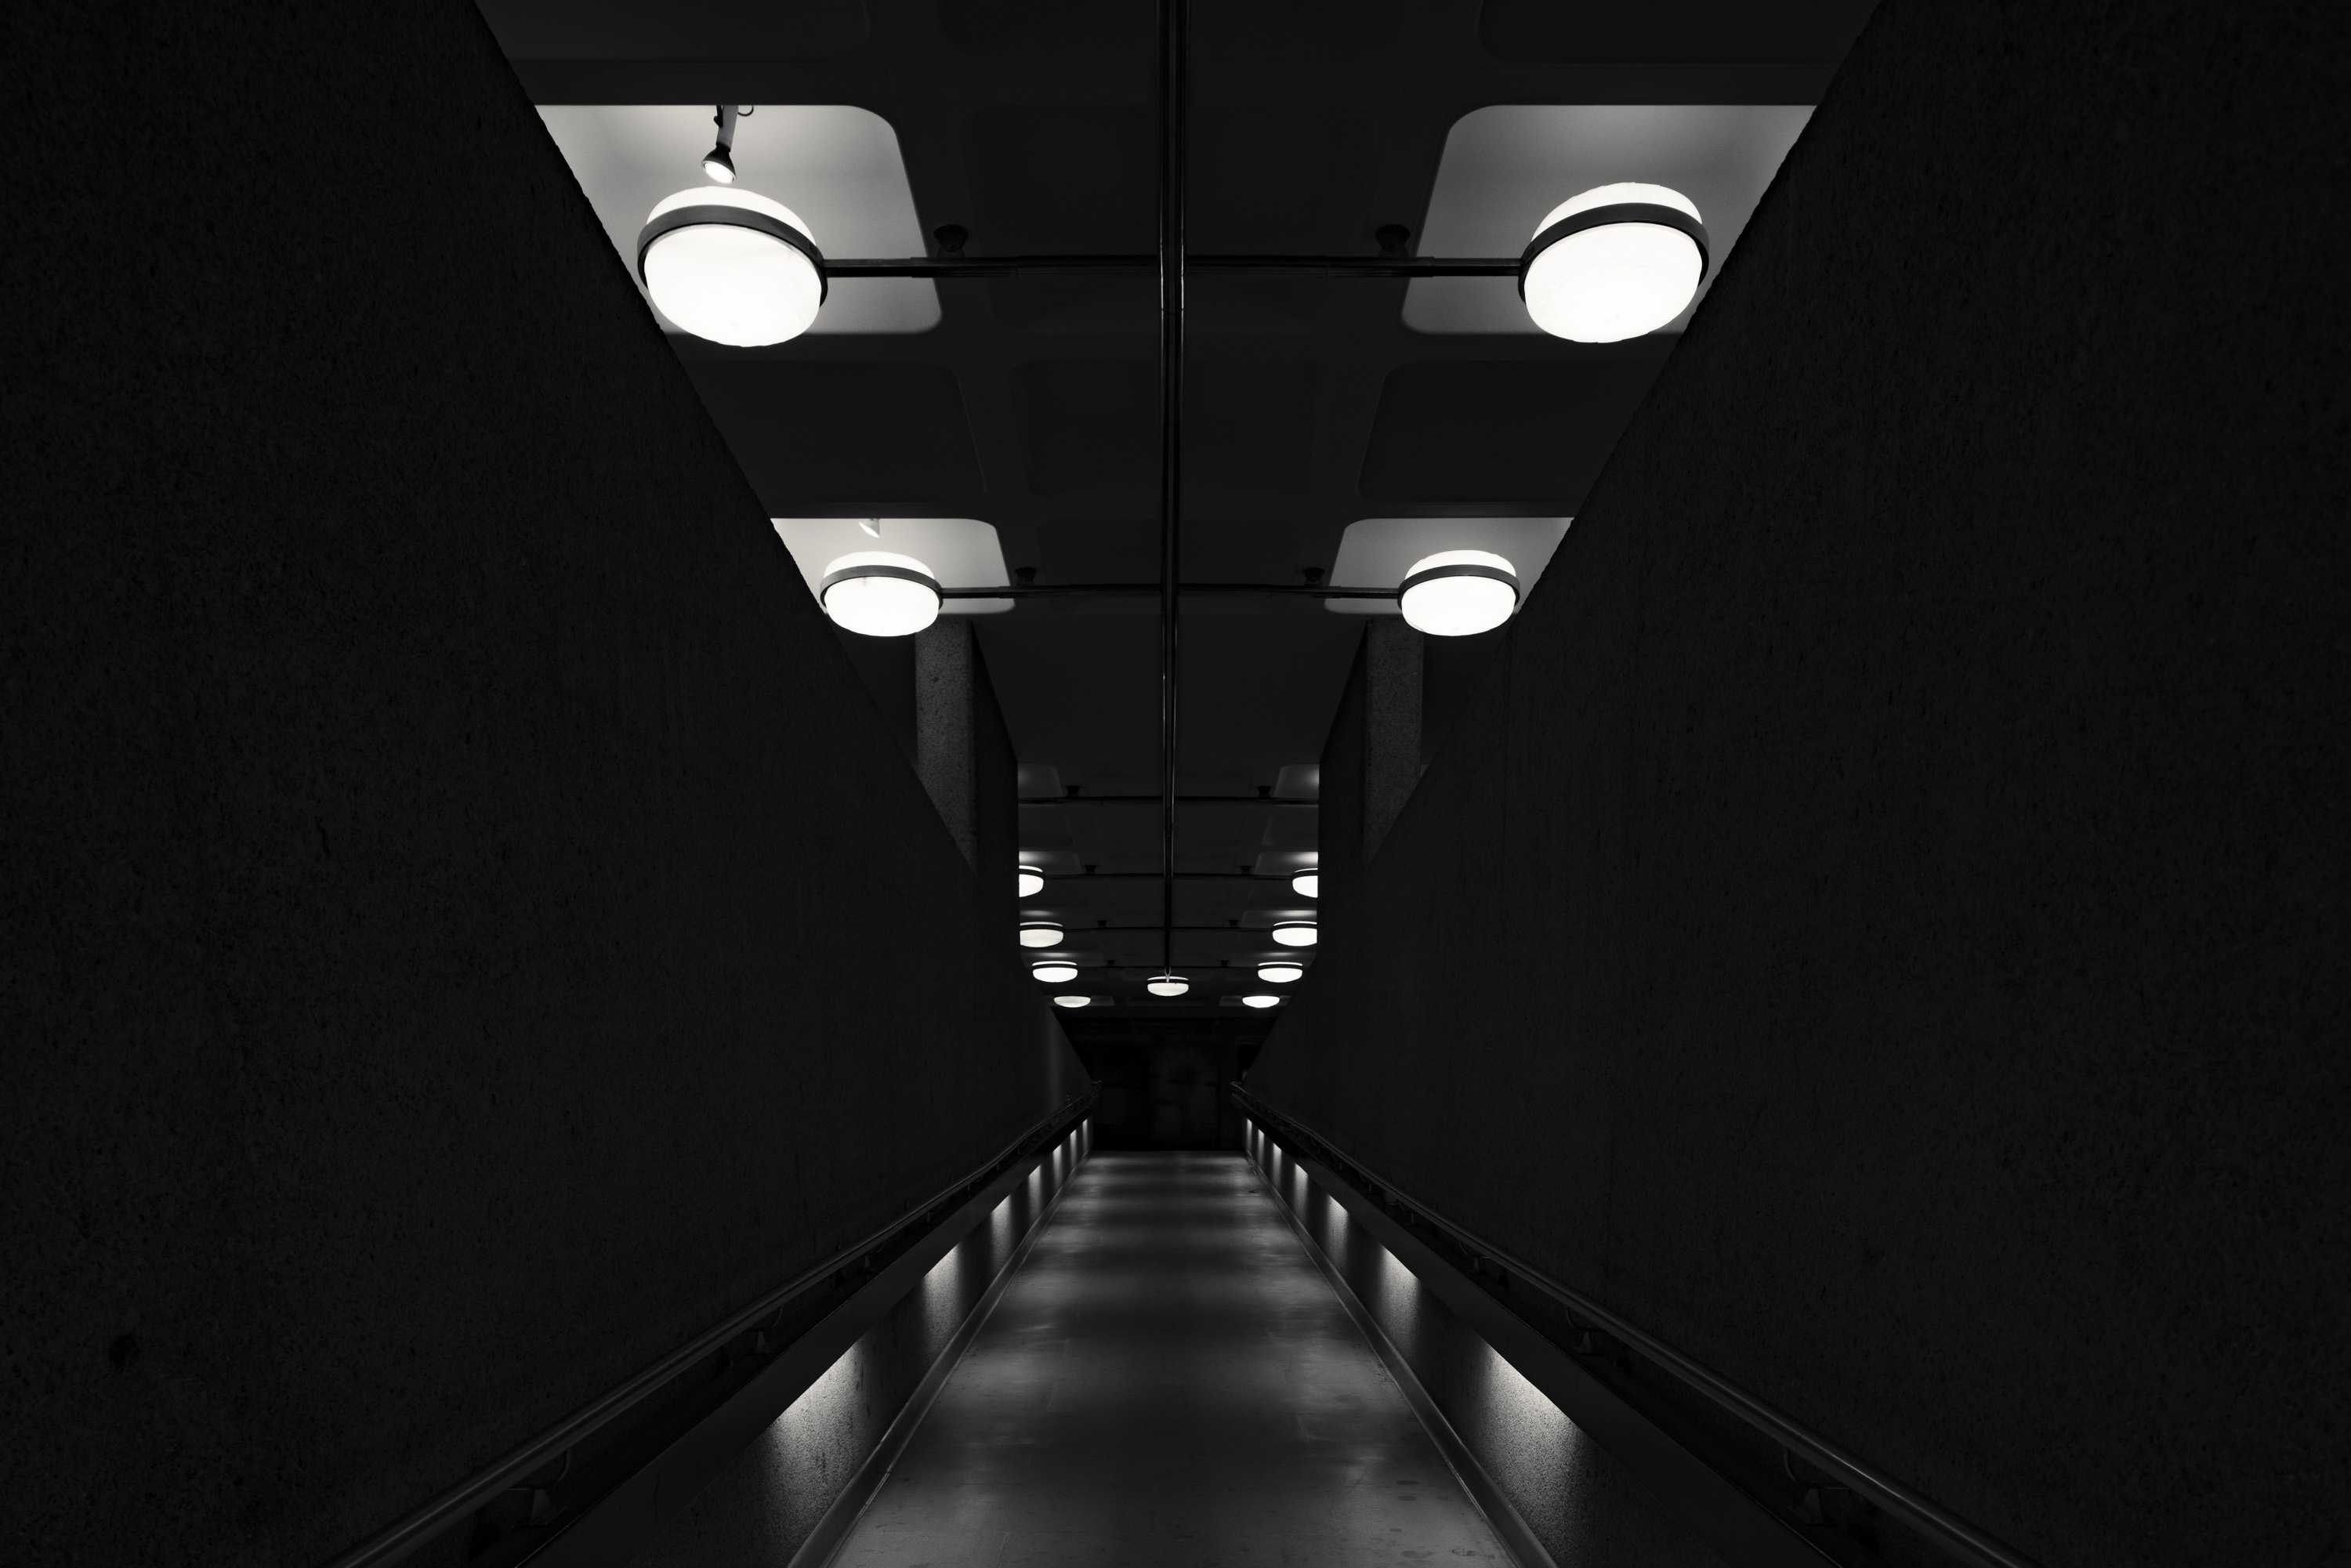
Ian Howorth | Canon EOS R5 | TS-E 90mm f/2.8 | 90mm | f/9 | 1/60 | ISO 1250
But the first thing I learned is that you don’t need tilt shifts to enjoy yourself. Making the shot work, regardless of your equipment, is key and will ultimately train your eye better. Many times, I felt like I didn't need to use the tilt/shift adjustments but I did because they were there.
I found it slightly difficult to keep my eye focused on more than one focal length and really get the most out of the place. I’m sure if I’d have done the walkabout with any of the three lenses, I would have got great shots—simply because my brain would have been focused on something more specific. Switching was difficult, as I then felt like I could make that focal length work for me. But then the fear of missing shots crept in, so I was constantly in between looking wide and looking tight. This could just be me, but just something to bear in mind if shooting with primes.
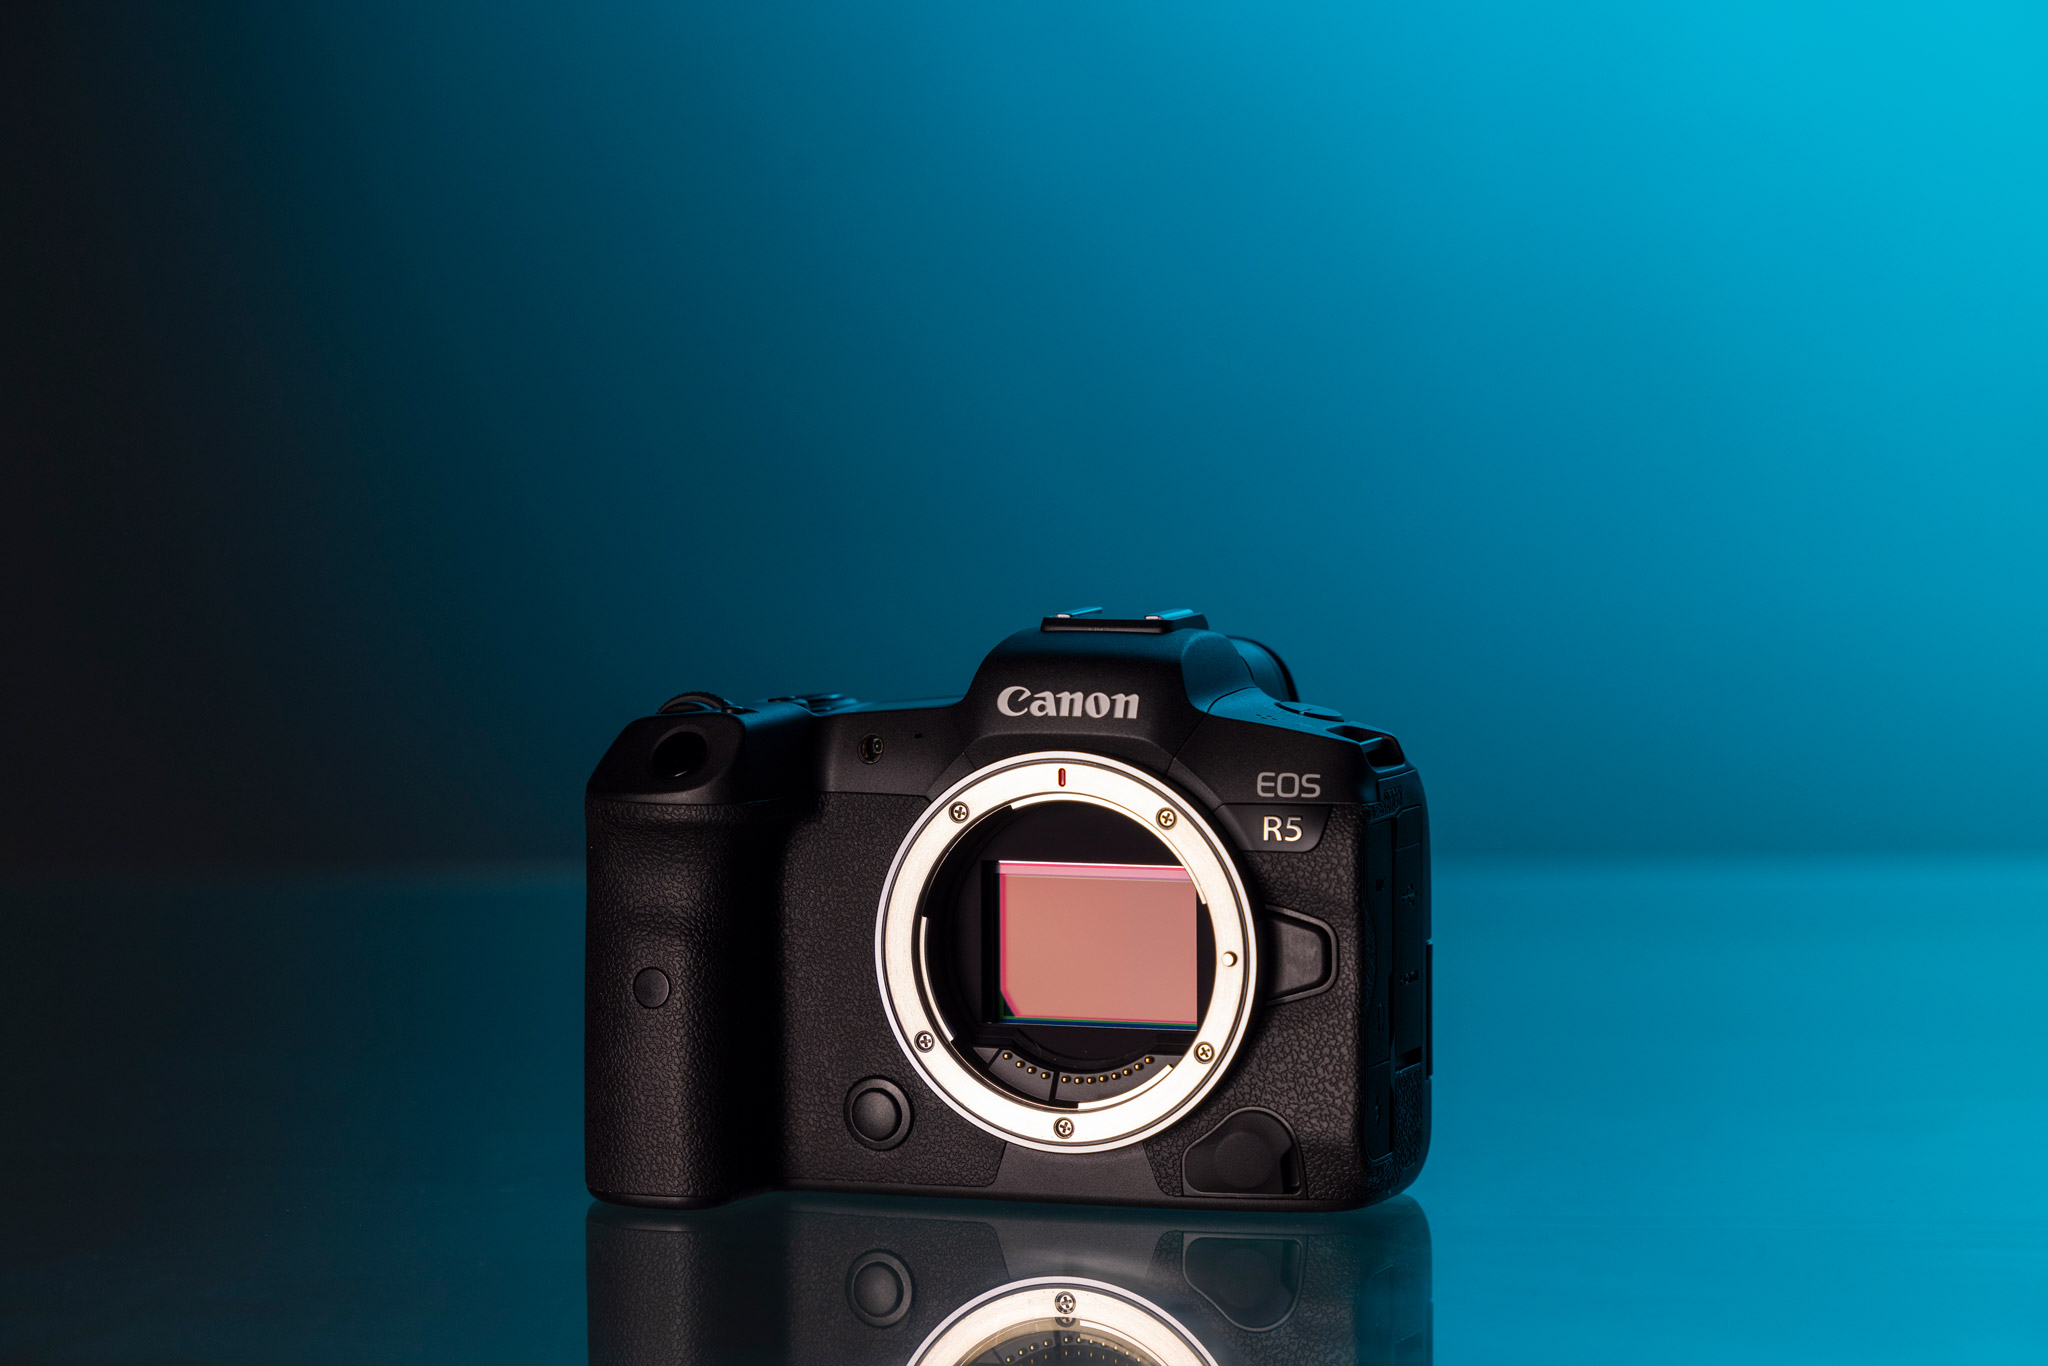
Used Canon EOS R5
For manual-focus lenses, use a mirrorless camera. My three tilt-shift lenses were manual focus. One of the many boons of mirrorless tech is focus peaking. Especially with the 90mm, I could use focus peaking to make sure I nailed focus.
2. Consider shooting in black and white
I wanted to focus on light and shape, so my plan was to shoot in black and white. It was also important to monitor in black and white, as I didn’t want the distractions associated with colour. For me, black and white are very much about composition, tonality and shape. There is more simple, but to get the most out of it, I tend to prefer seeing the world in monochrome. It helps me to get accustomed to looking for these simple elements. You don’t necessarily need to do the same if you are undecided, you can ‘monitor’ in colour and convert to black and white later. But if you’re set on a monochrome palette, it might be worth trying to shoot in black and white too.
Ian Howorth | Canon EOS R5 | TS-E 90mm f/2.8 | 90mm | f/7.1 | 1/60 | ISO 1250
3. Line building edges with your frame
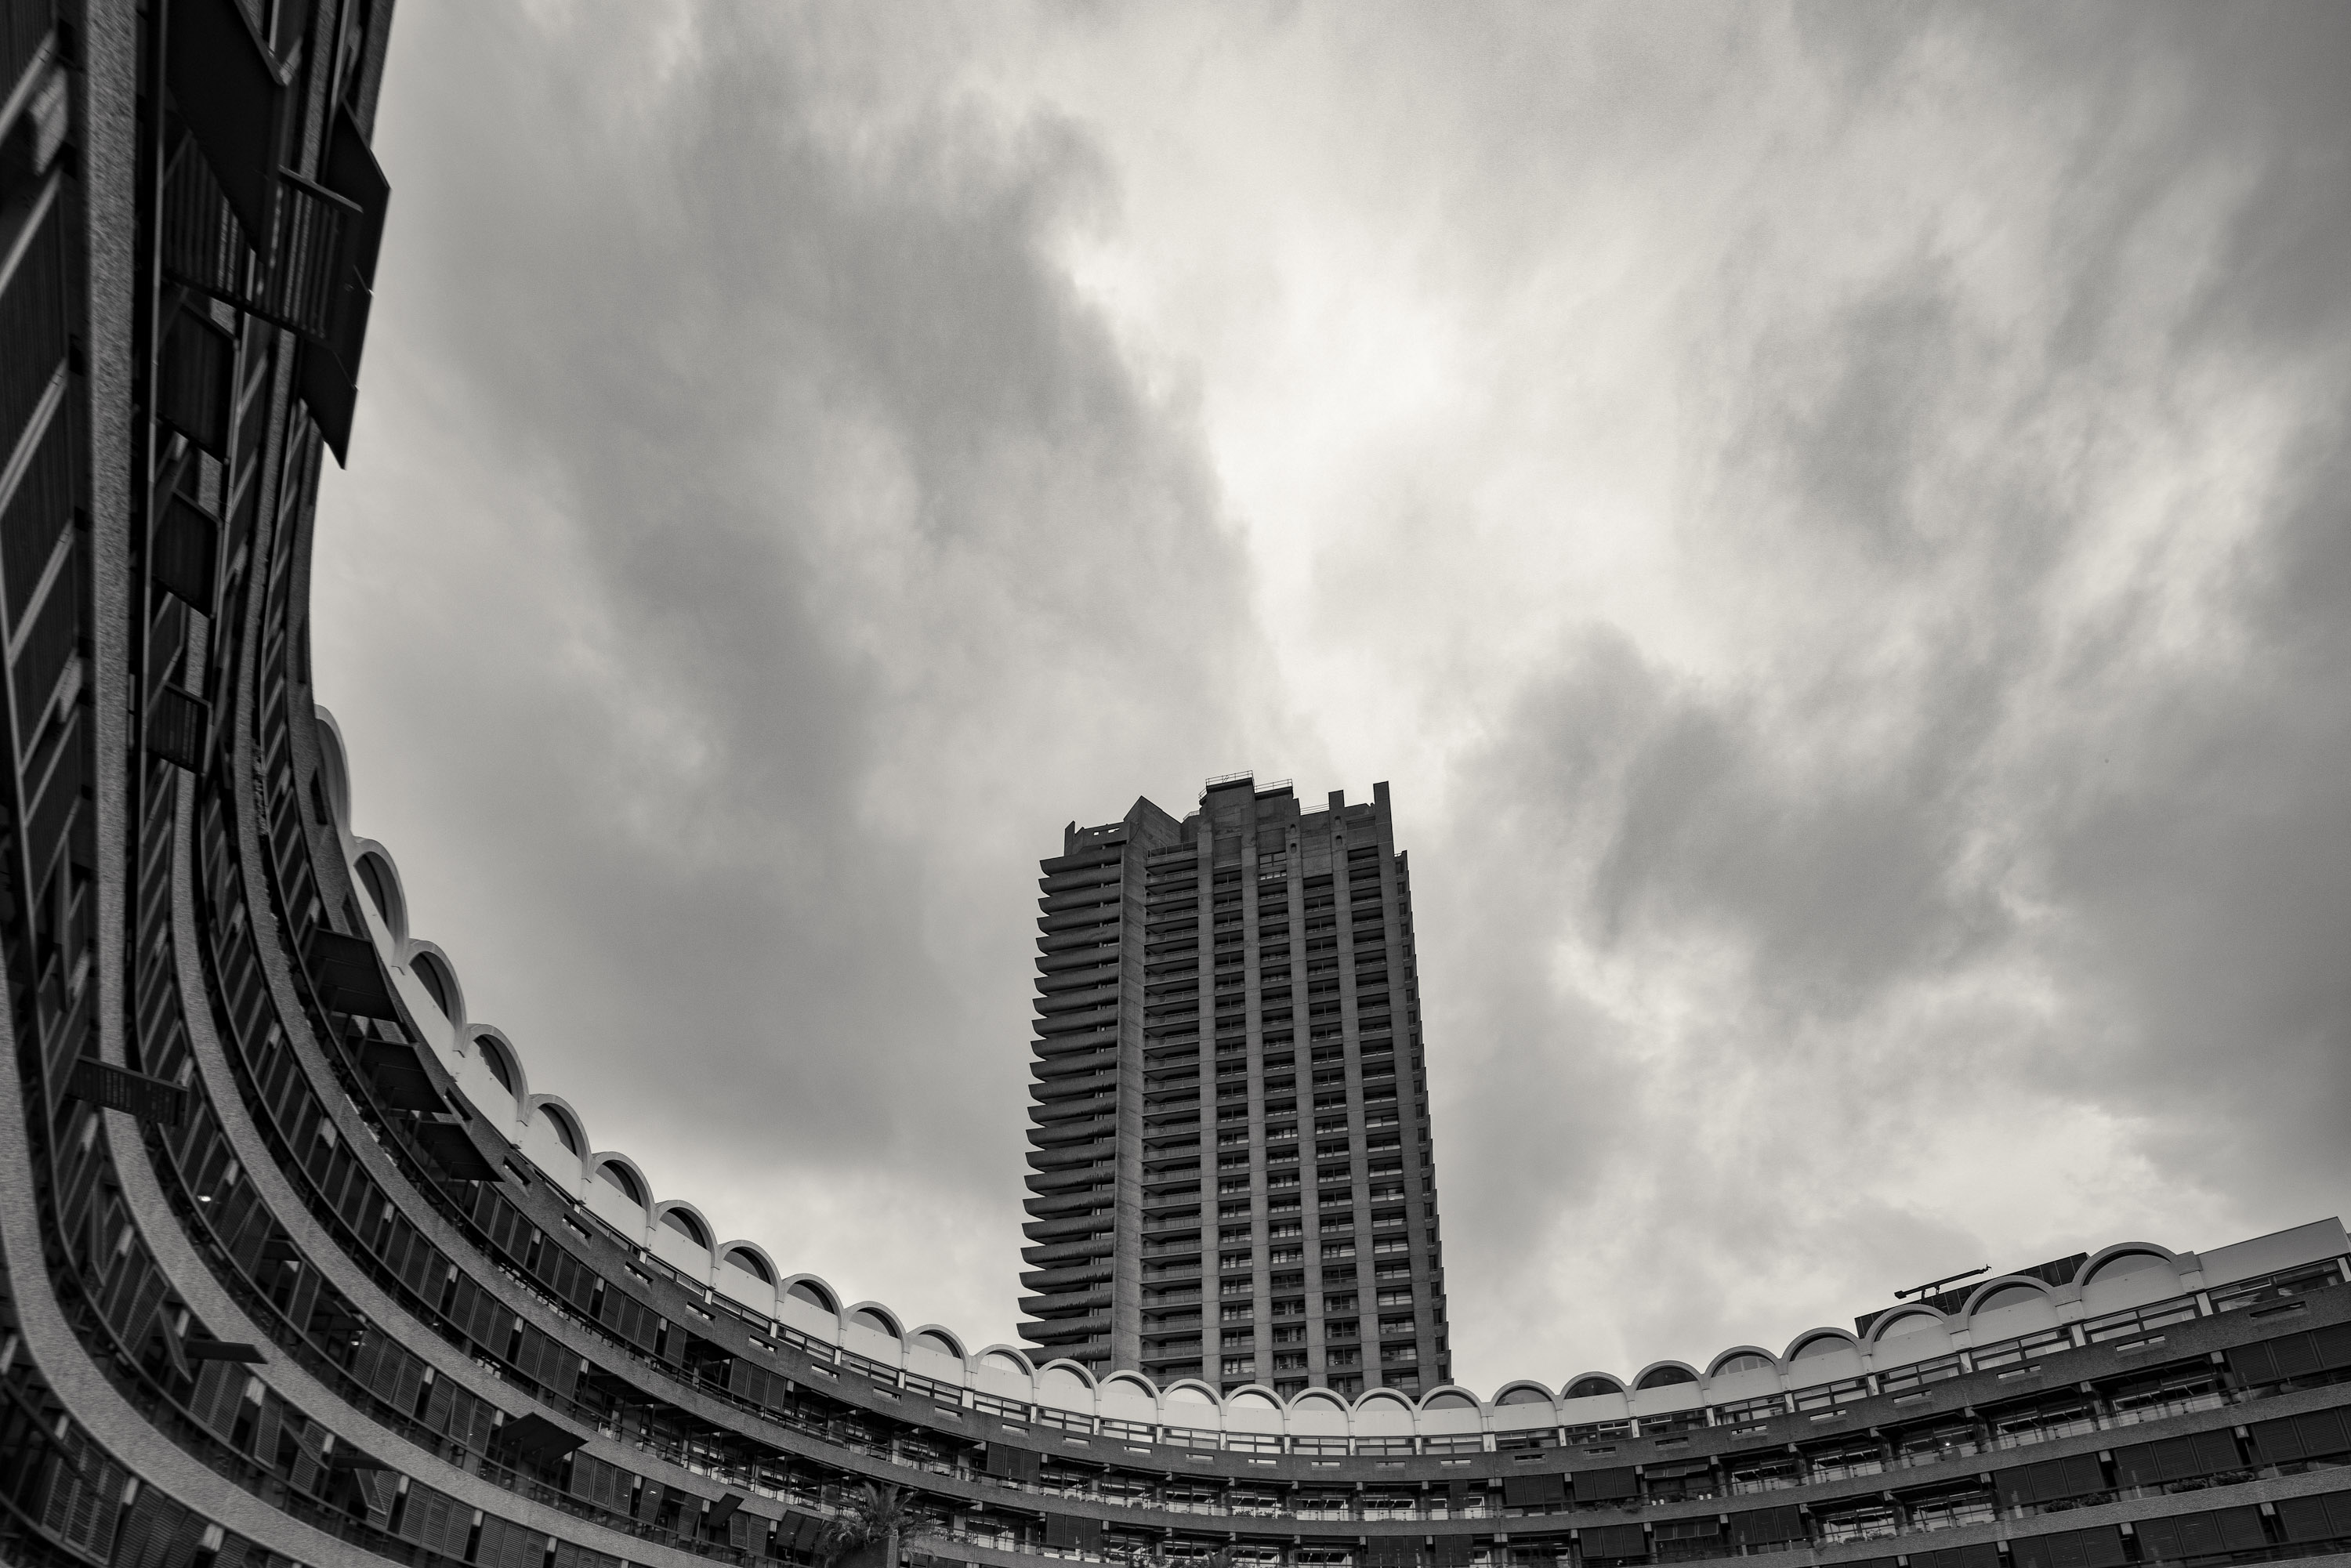
The image below was my first shot of the day, and one I knew I wanted to get. The key for me was to get the tall building’s sides to line up perfectly against the edges of the frame. The buildings on either side were less important. And, as you can see, the one on the left isn’t perfectly straight, but it’s passable. My limited knowledge allowed me to conclude that there is a limit as to how much tilt shift can help with correction. This is especially true when subjects are at different heights. All buildings in the frame would have been affected by this by simply pointing the camera up, so they all get corrected somewhat with the tilt function. But, ultimately, I felt I had to choose which one was the focus. Truth be told, the variables here with angle, perspective and height were too great to really figure out how to mitigate the situation better.
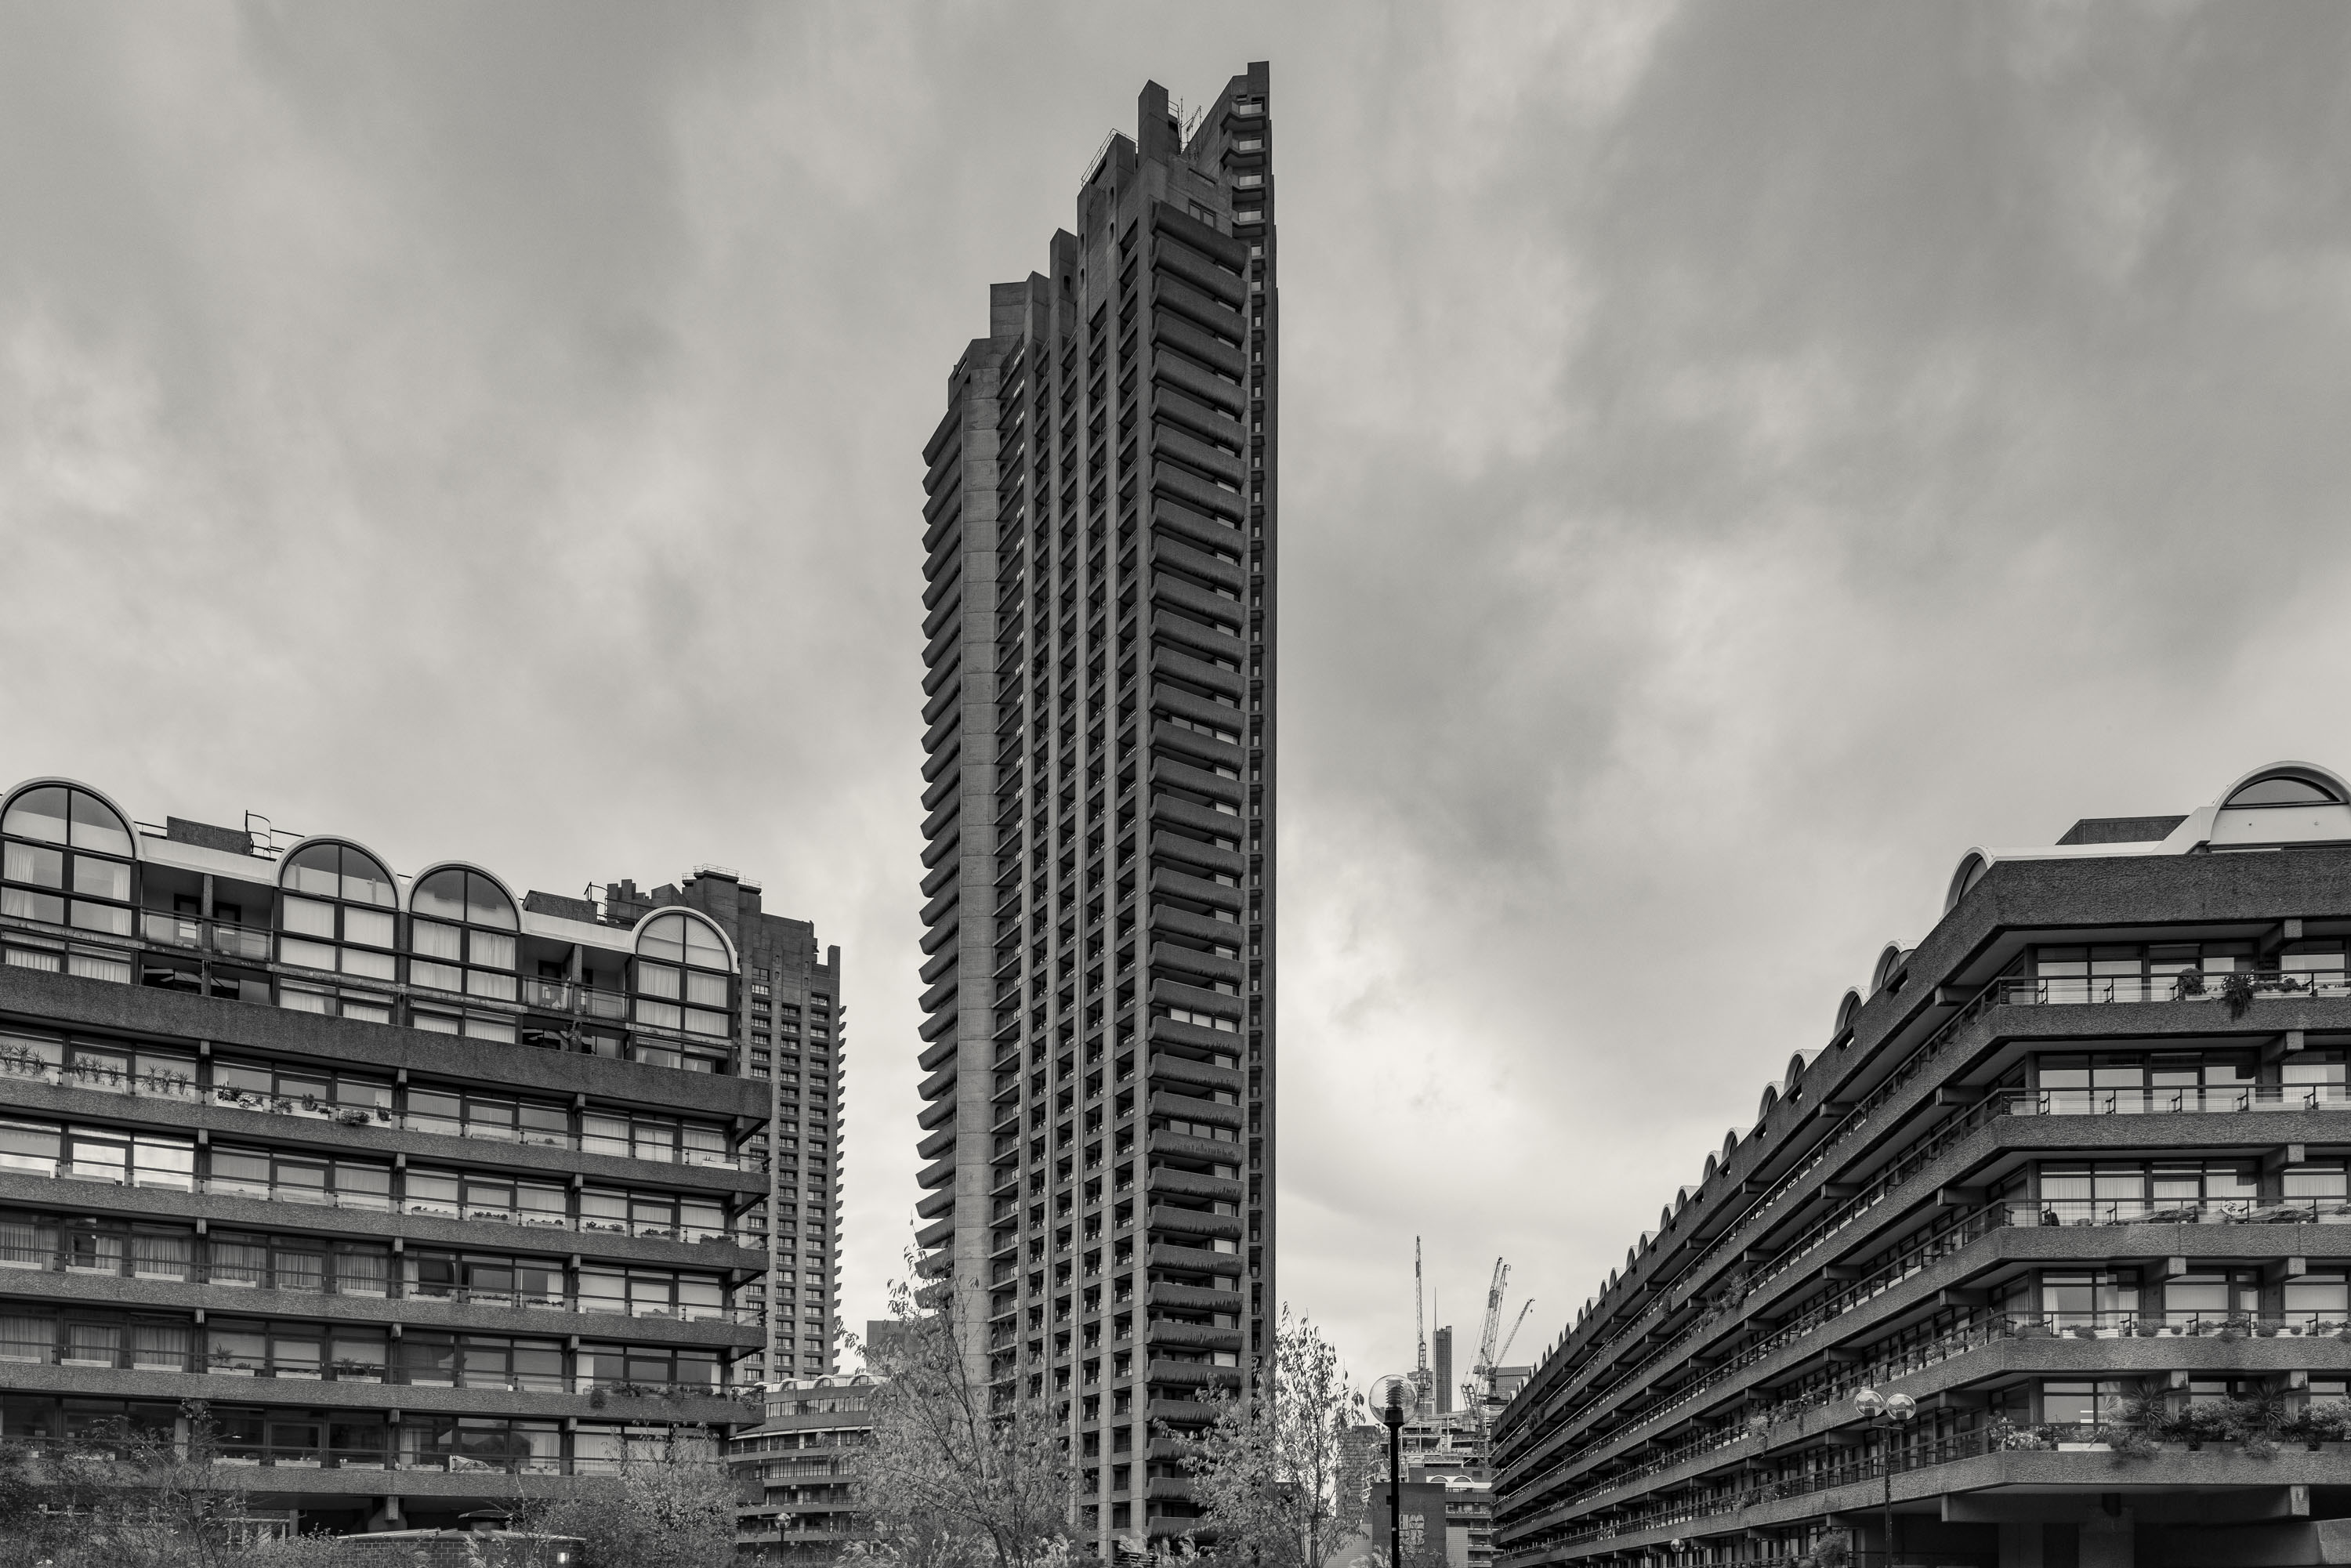
Ian Howorth | Canon EOS R5 | TS-E 24mm f/3.5L II | 24mm | f/9 | 1/160 | ISO 400
As soon as I saw this next shot, I knew it would be easier to correct. Both buildings at either extreme were roughly the same height and orientated similarly. Just a simple tilt for this one with the 24mm.
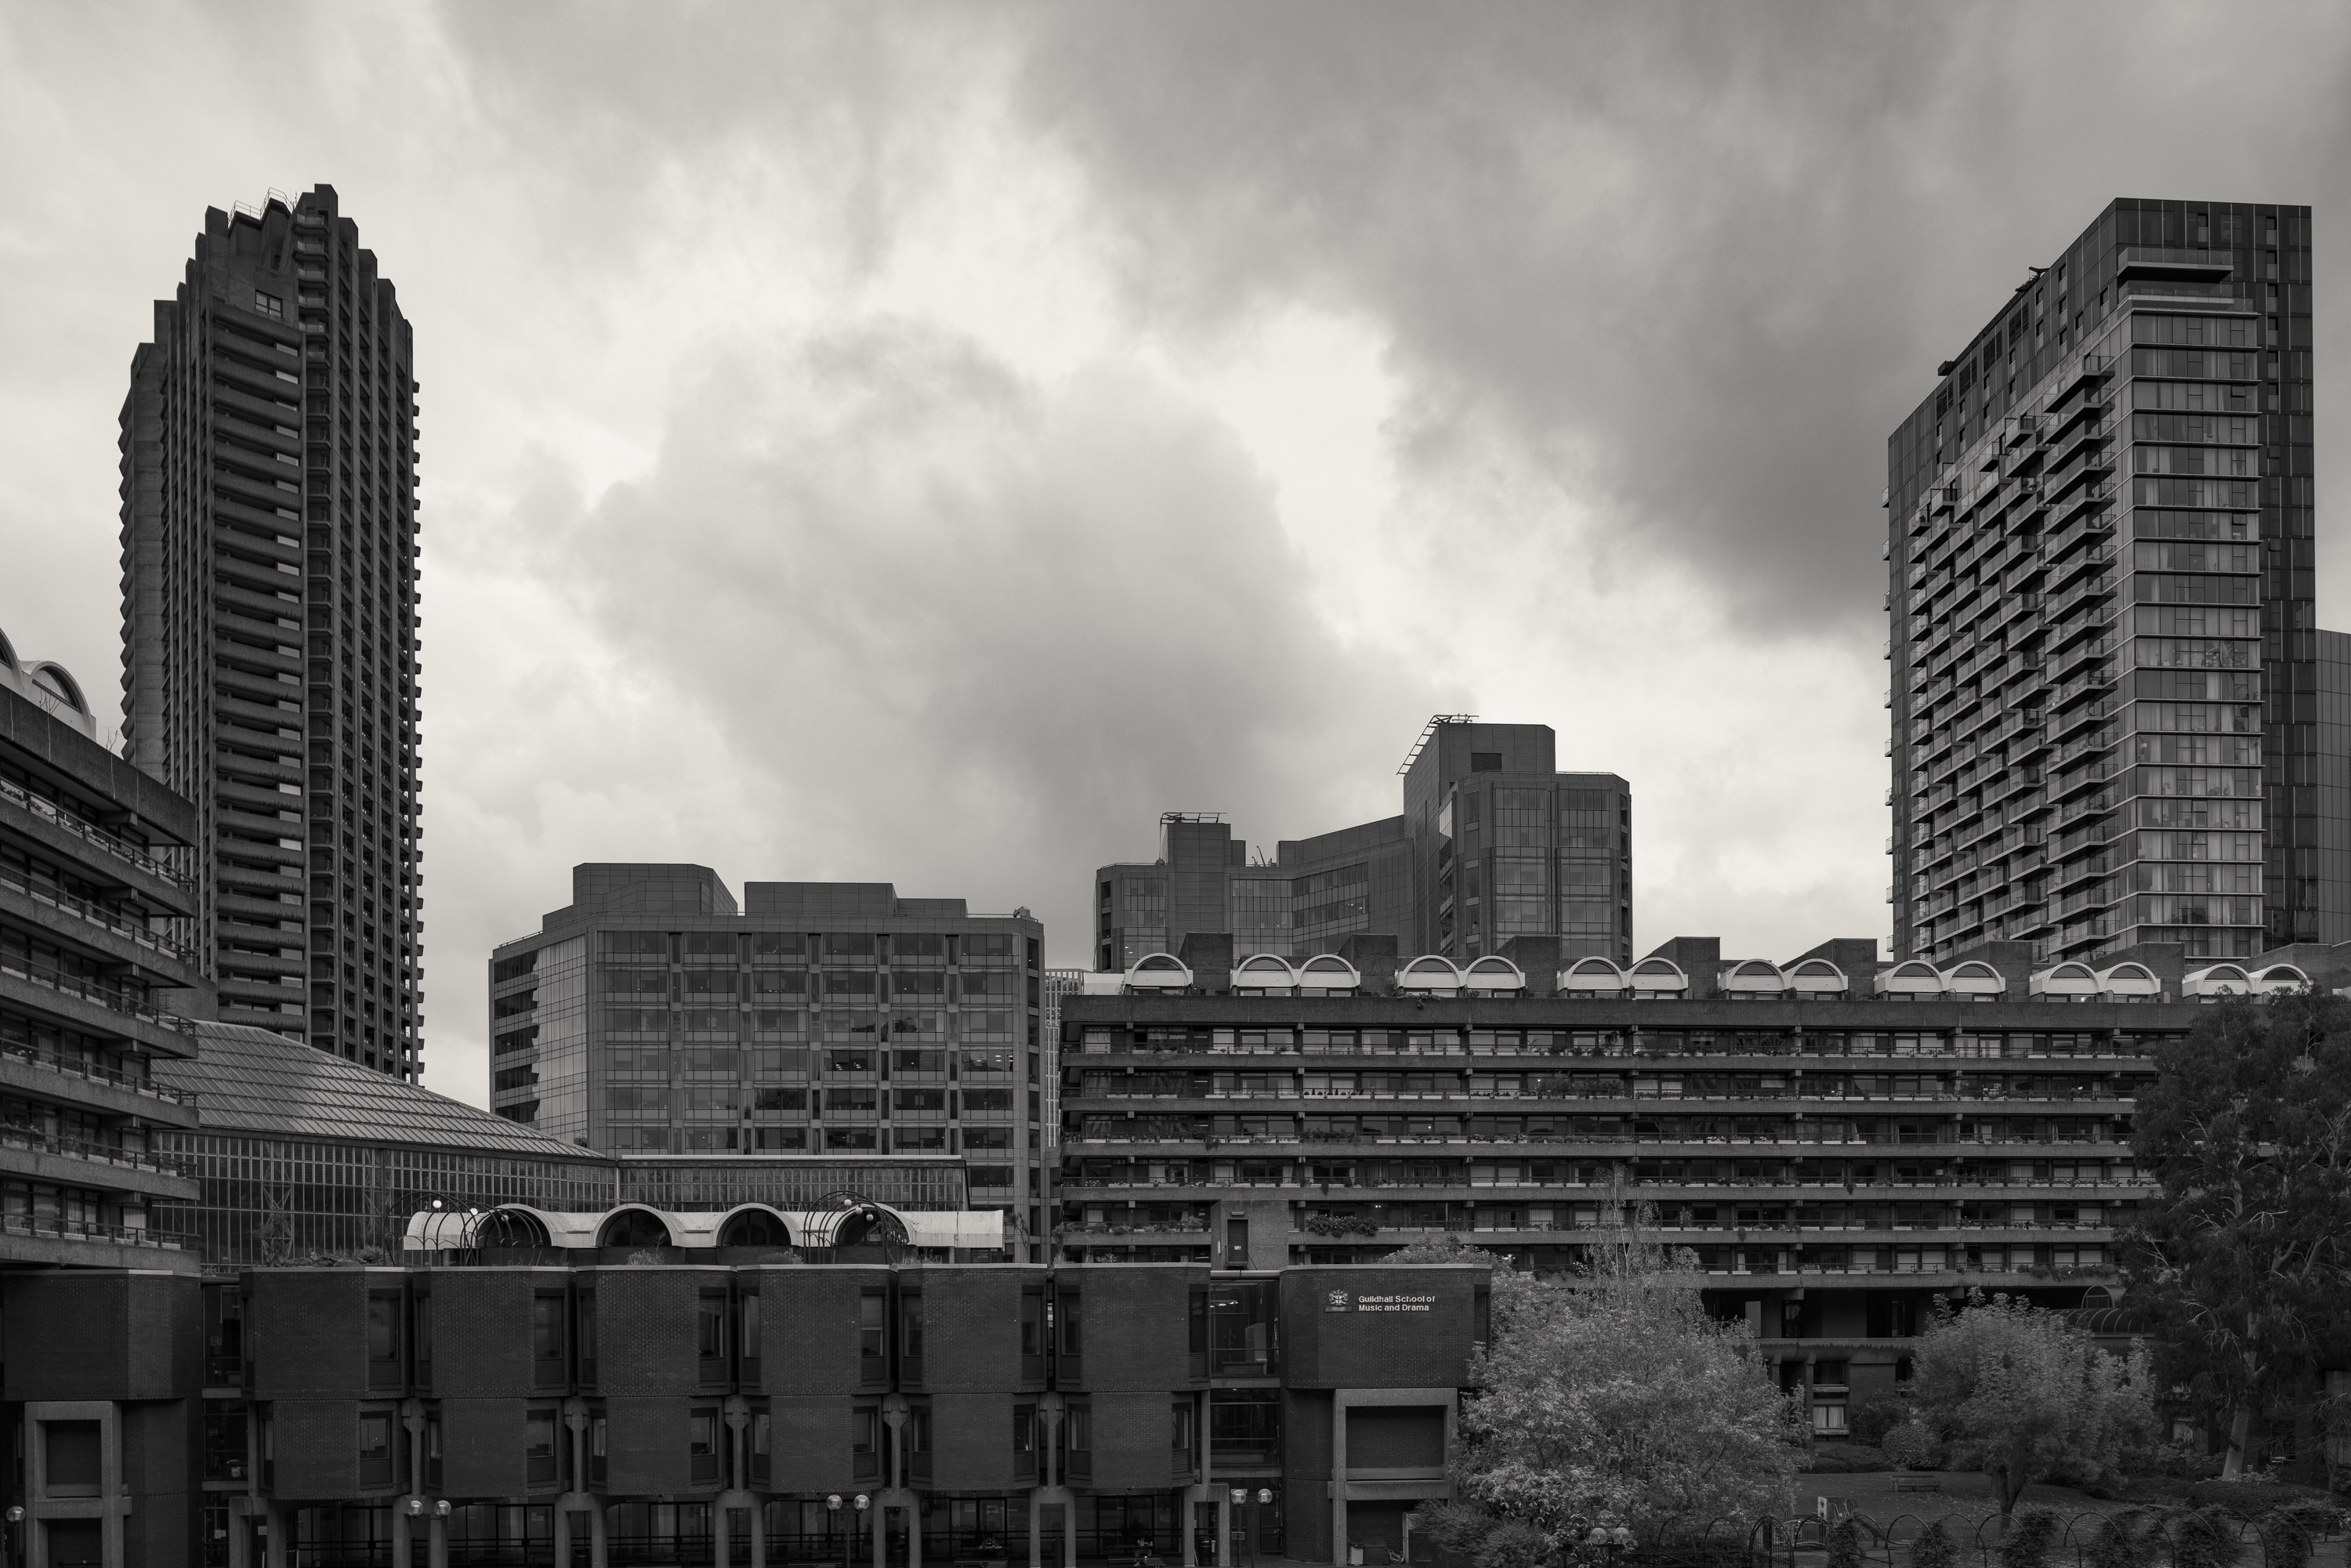
Ian Howorth | Canon EOS R5 | TS-E 24mm f/3.5L II | 24mm | f/7.1 | 1/80 | ISO 400
4. Bring the buildings to life
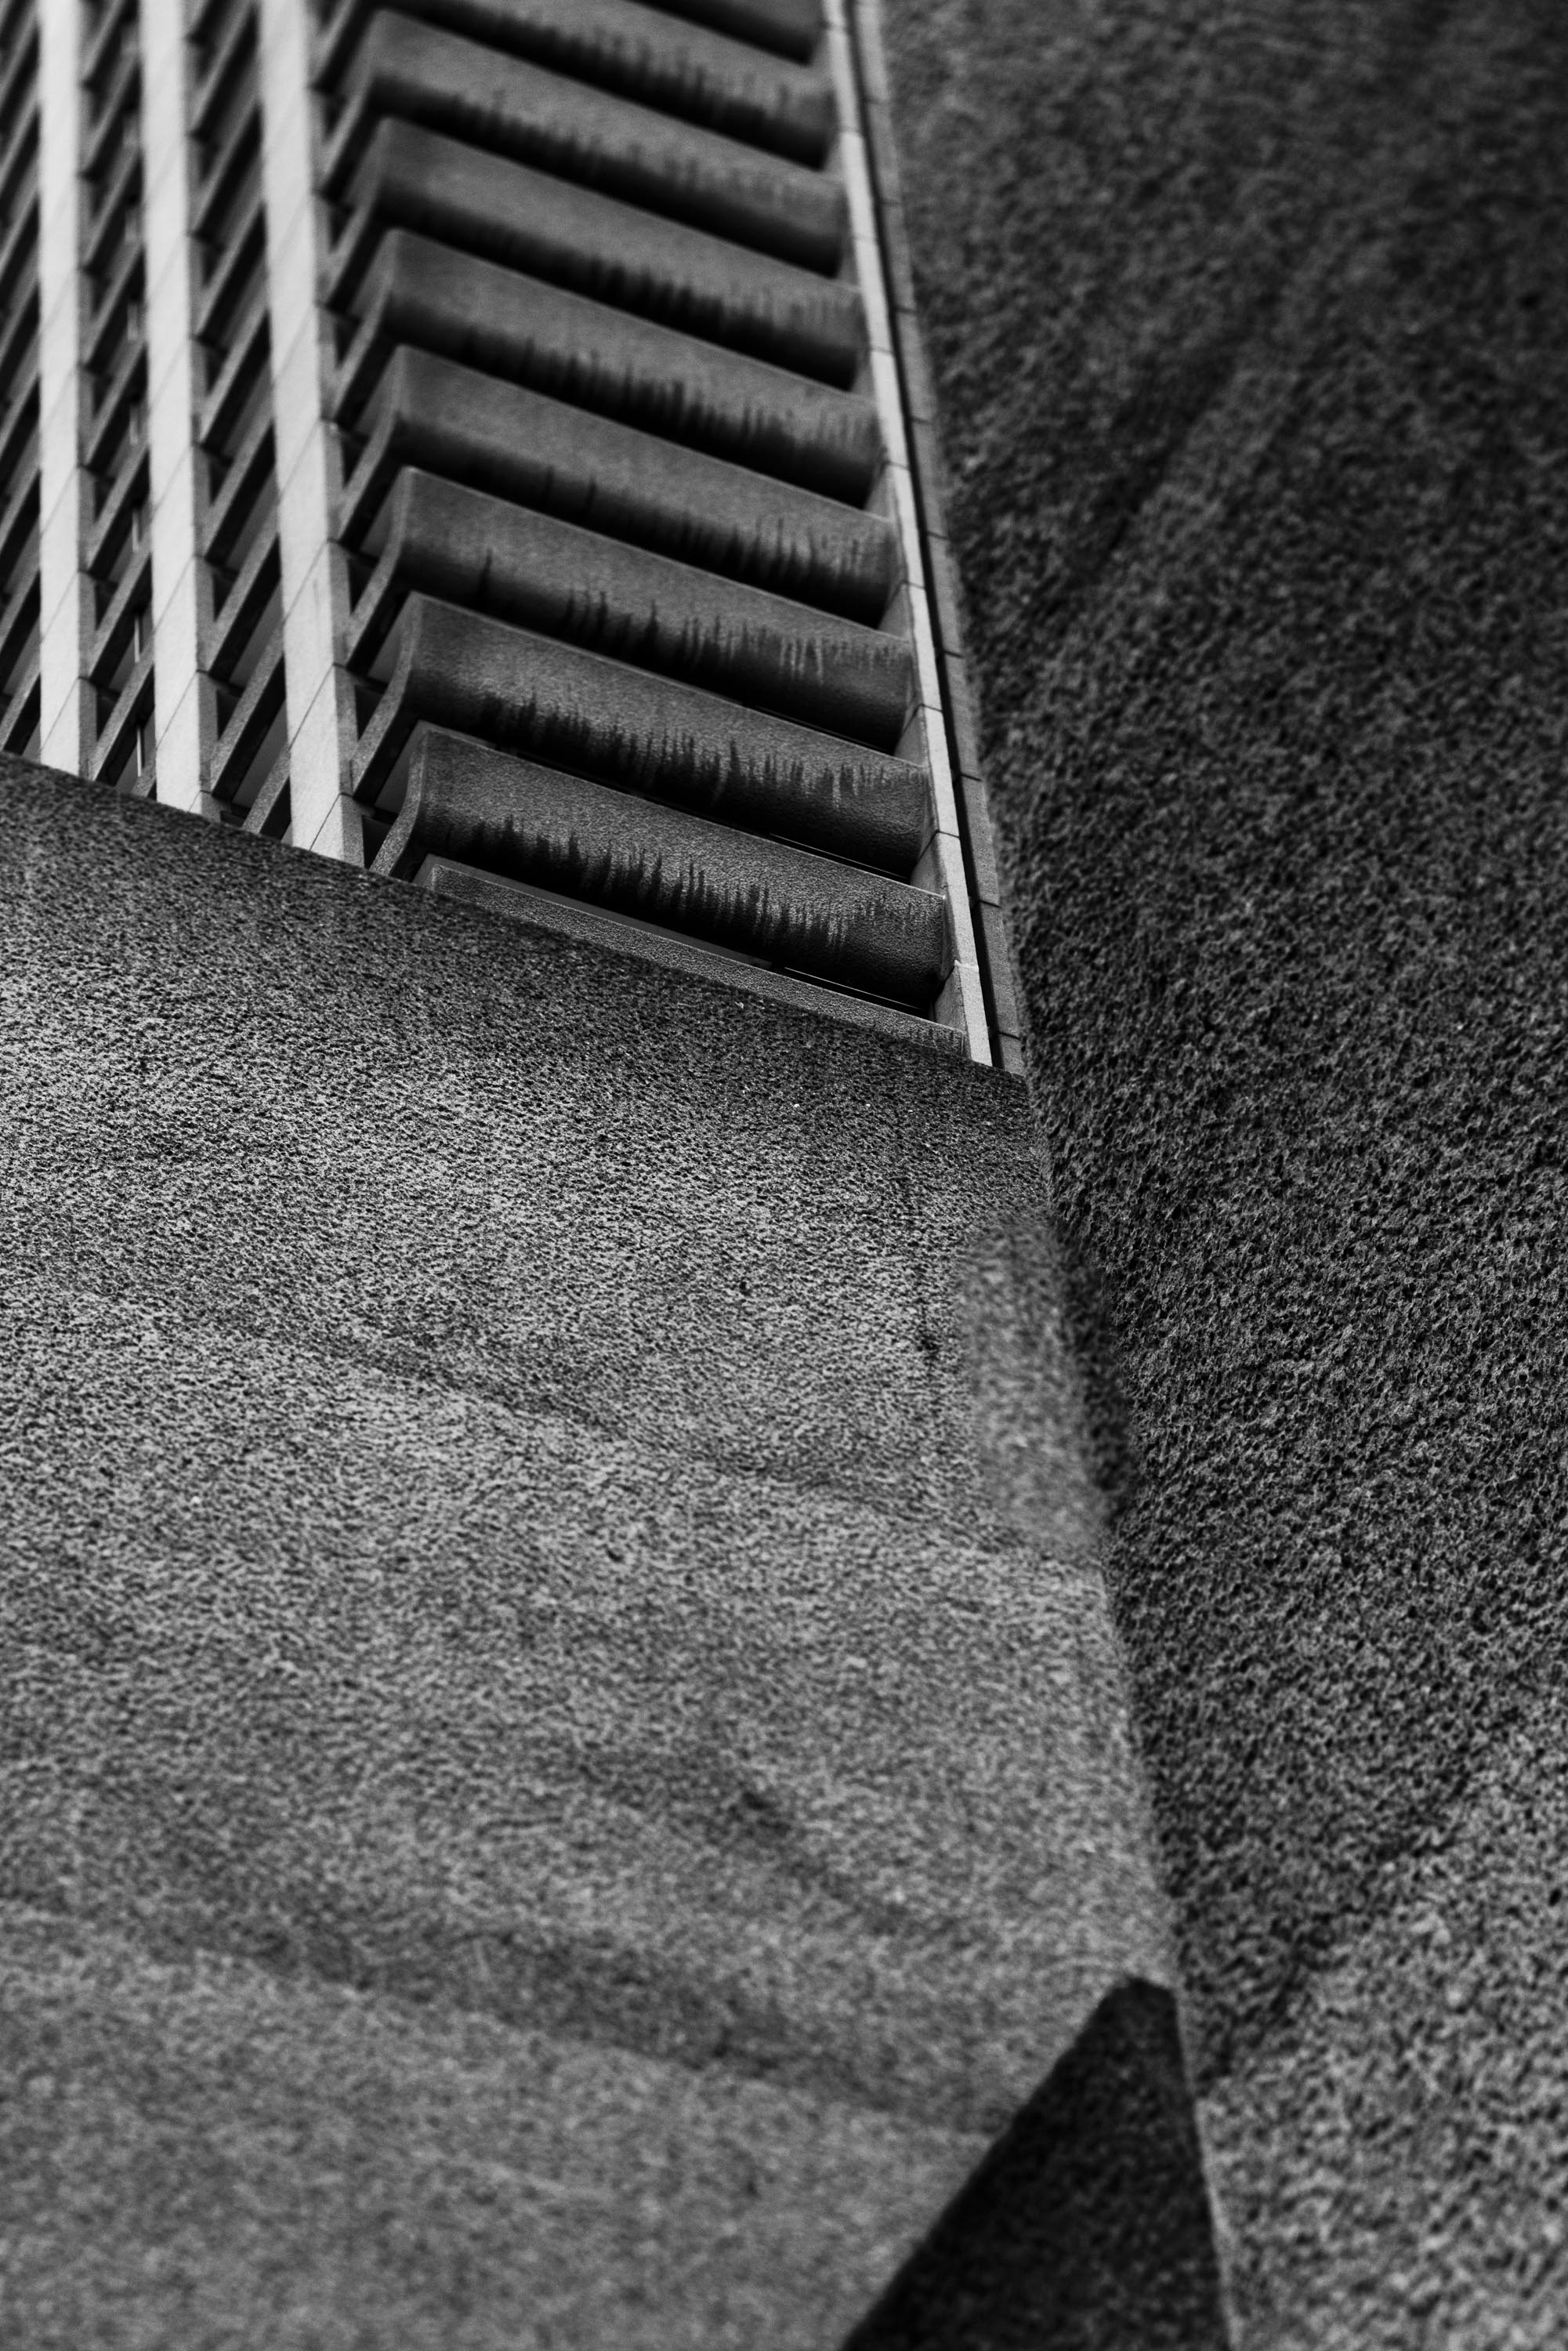
Aside from the relative simplicity of straightening lines, architectural photography is very much also about bringing to life the specifics of what makes something interesting. This is completely separate from the importance placed on the technical side. Simply put, how do I capture this, to bring to life its essence?
Ian Howorth | Canon EOS R5 | TS-E 17mm f/4 L | 17mm | f/13 | 1/50 | ISO 640
The minor movement was needed on the tilt, as I felt the curvature would overpower the entire image, rendering the building secondary. What was important was the perspective and the curvature of the crescent, and of course, we won’t complain about the looming clouds adding a bit of drama.
Ian Howorth | Canon EOS R5 | TS-E 90mm f/2.8 | 90mm | f/9 | 1/80 | ISO 640
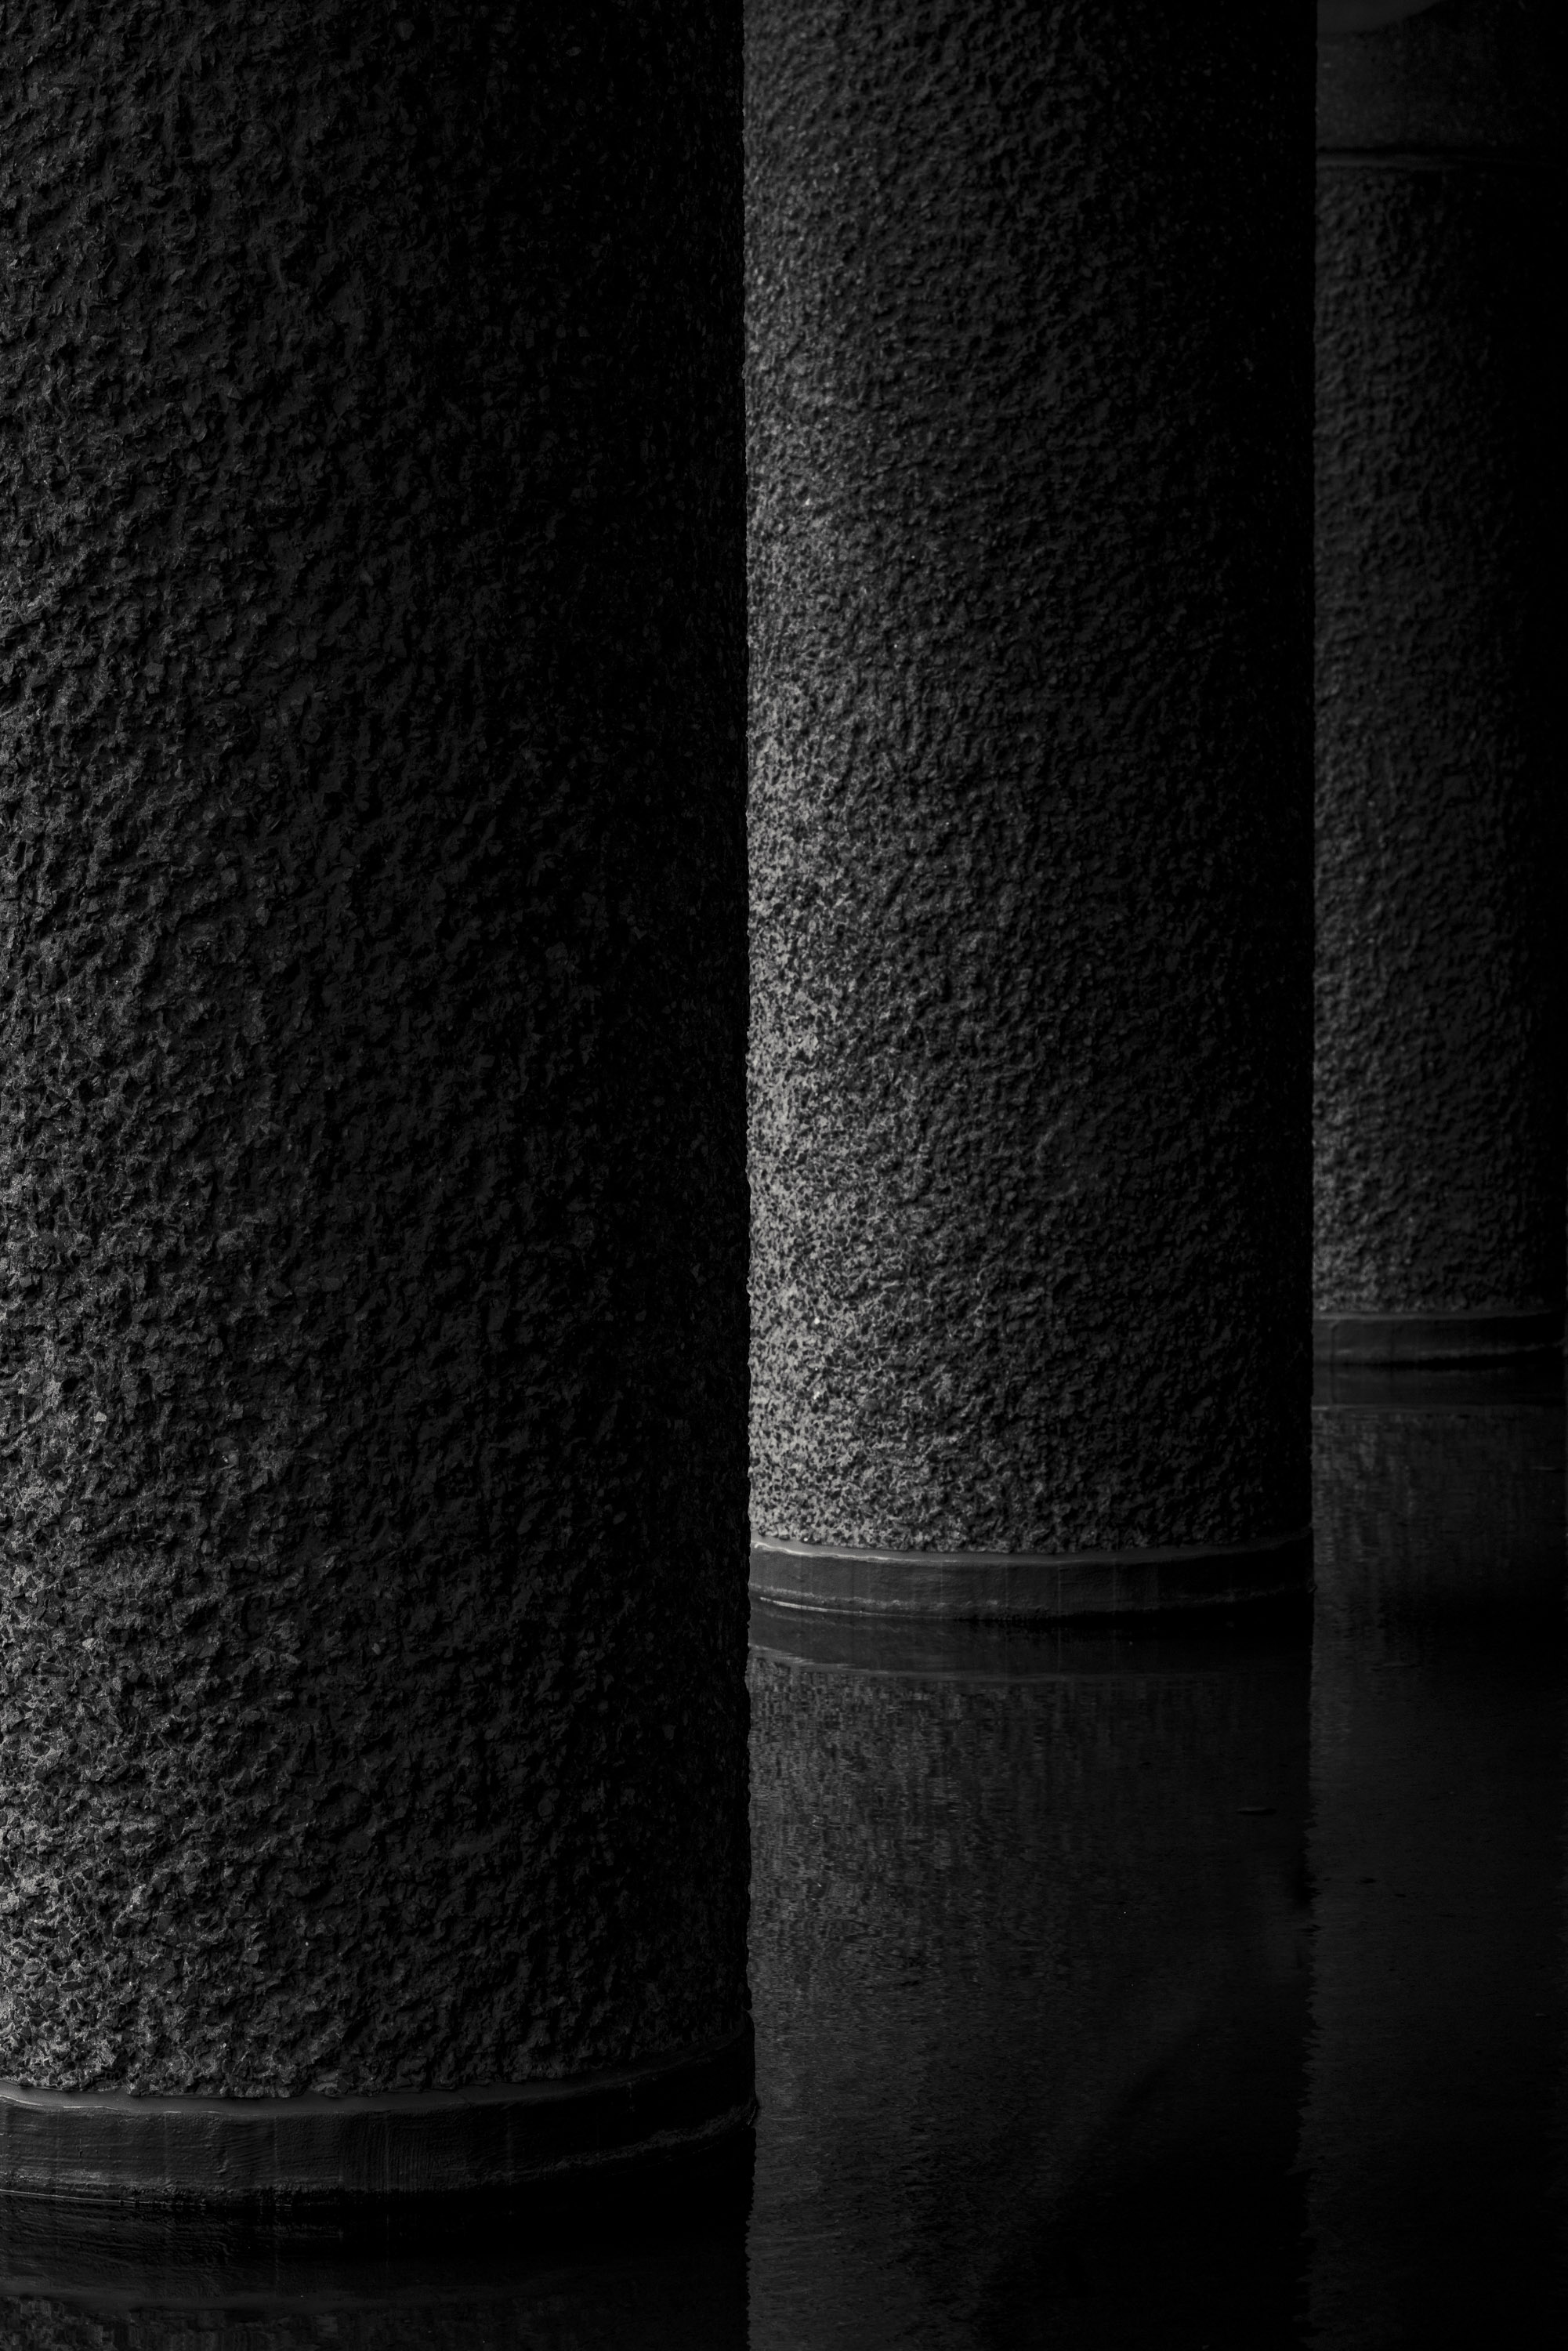
The Barbican is brutalist architecture’s poster child. Bringing it to life is very much about finding the angles and, of course, the natural contrast that texture and light can provide. In many ways, how you shoot and what you shoot is what will be your guiding light. You will likely naturally fall into ‘how’ you do things and see the world. So, while it’s good to have a yardstick in terms of how to approach a new style, there’s an argument for just letting rip and doing it your own way and seeing where you land.
Ian Howorth | Canon EOS R5 | TS-E 90mm f/2.8 | 90mm | f/9 | 1/30 | ISO 400
5. Use a tripod
Bring a tripod—and use it! I brought mine, and I didn’t. Truth be told, I was afraid of going to the Barbican and being asked to leave because I appeared too ‘pro’. There were a few shots where it would have served me well.
The reasons are twofold. One is to manage depth of field better and have the choice to shoot at smaller apertures to control texture without having to increase ISO and lower image quality. While I certainly liked many of the images I shot with a smaller aperture, there are a few that would have needed a tripod to close down the diaphragm small enough to get a deeper depth of field. Two, some of the movements in the tilt-shift lenses create such minute changes that hand-holding immediately undoes them. So, having a static vantage point that doesn’t change is great—it allows for greater accuracy and consistency.

Ian Howorth | Canon EOS R5 | TS-E 24mm f/3.5L II | 24mm | f/7.1 | 1/40 | ISO 400
6. Keep practicing and train your eye
In a genre where the composition is everything, the one thing I immediately noticed was how much of my entire frame I was inspecting before firing the shutter.
When you’re looking so closely at every subject, every line and every ‘thing’ in your frame, it sharpens up your eye and ensures you're excluding the irrelevant and including all the things that will aid your shot. Whether or not architectural photography stays with you as a mainstay of your work, or if you dip in and out every so often, one thing is for sure. It will train your eye and keep you present—and in the moment—to help you get a better shot, regardless of the equipment you use.
Read more tips and techniques, and discover our list of the best women in architectural photography, on the MPB Content Hub.
You can sell or trade your camera gear to MPB. Get a free instant quote, free insured shipping to MPB, and get paid within days.