
Landscape photography is all about going outside and capturing the beauty of nature through a lens. It could be a huge mountain range, a quiet stretch of coastline or a patch of woodland with sunbeams poking through. Whatever inspires you to take on the great outdoors, photographing it will require a mix of curiosity, patience and a bit of technical know-how.
Landscapes are one of the classical art subjects, with a deep, storied history stretching far back into the history of painting. Landscape photography carries the lineage on and is often the first time people experience photography as more than just documenting daily life.
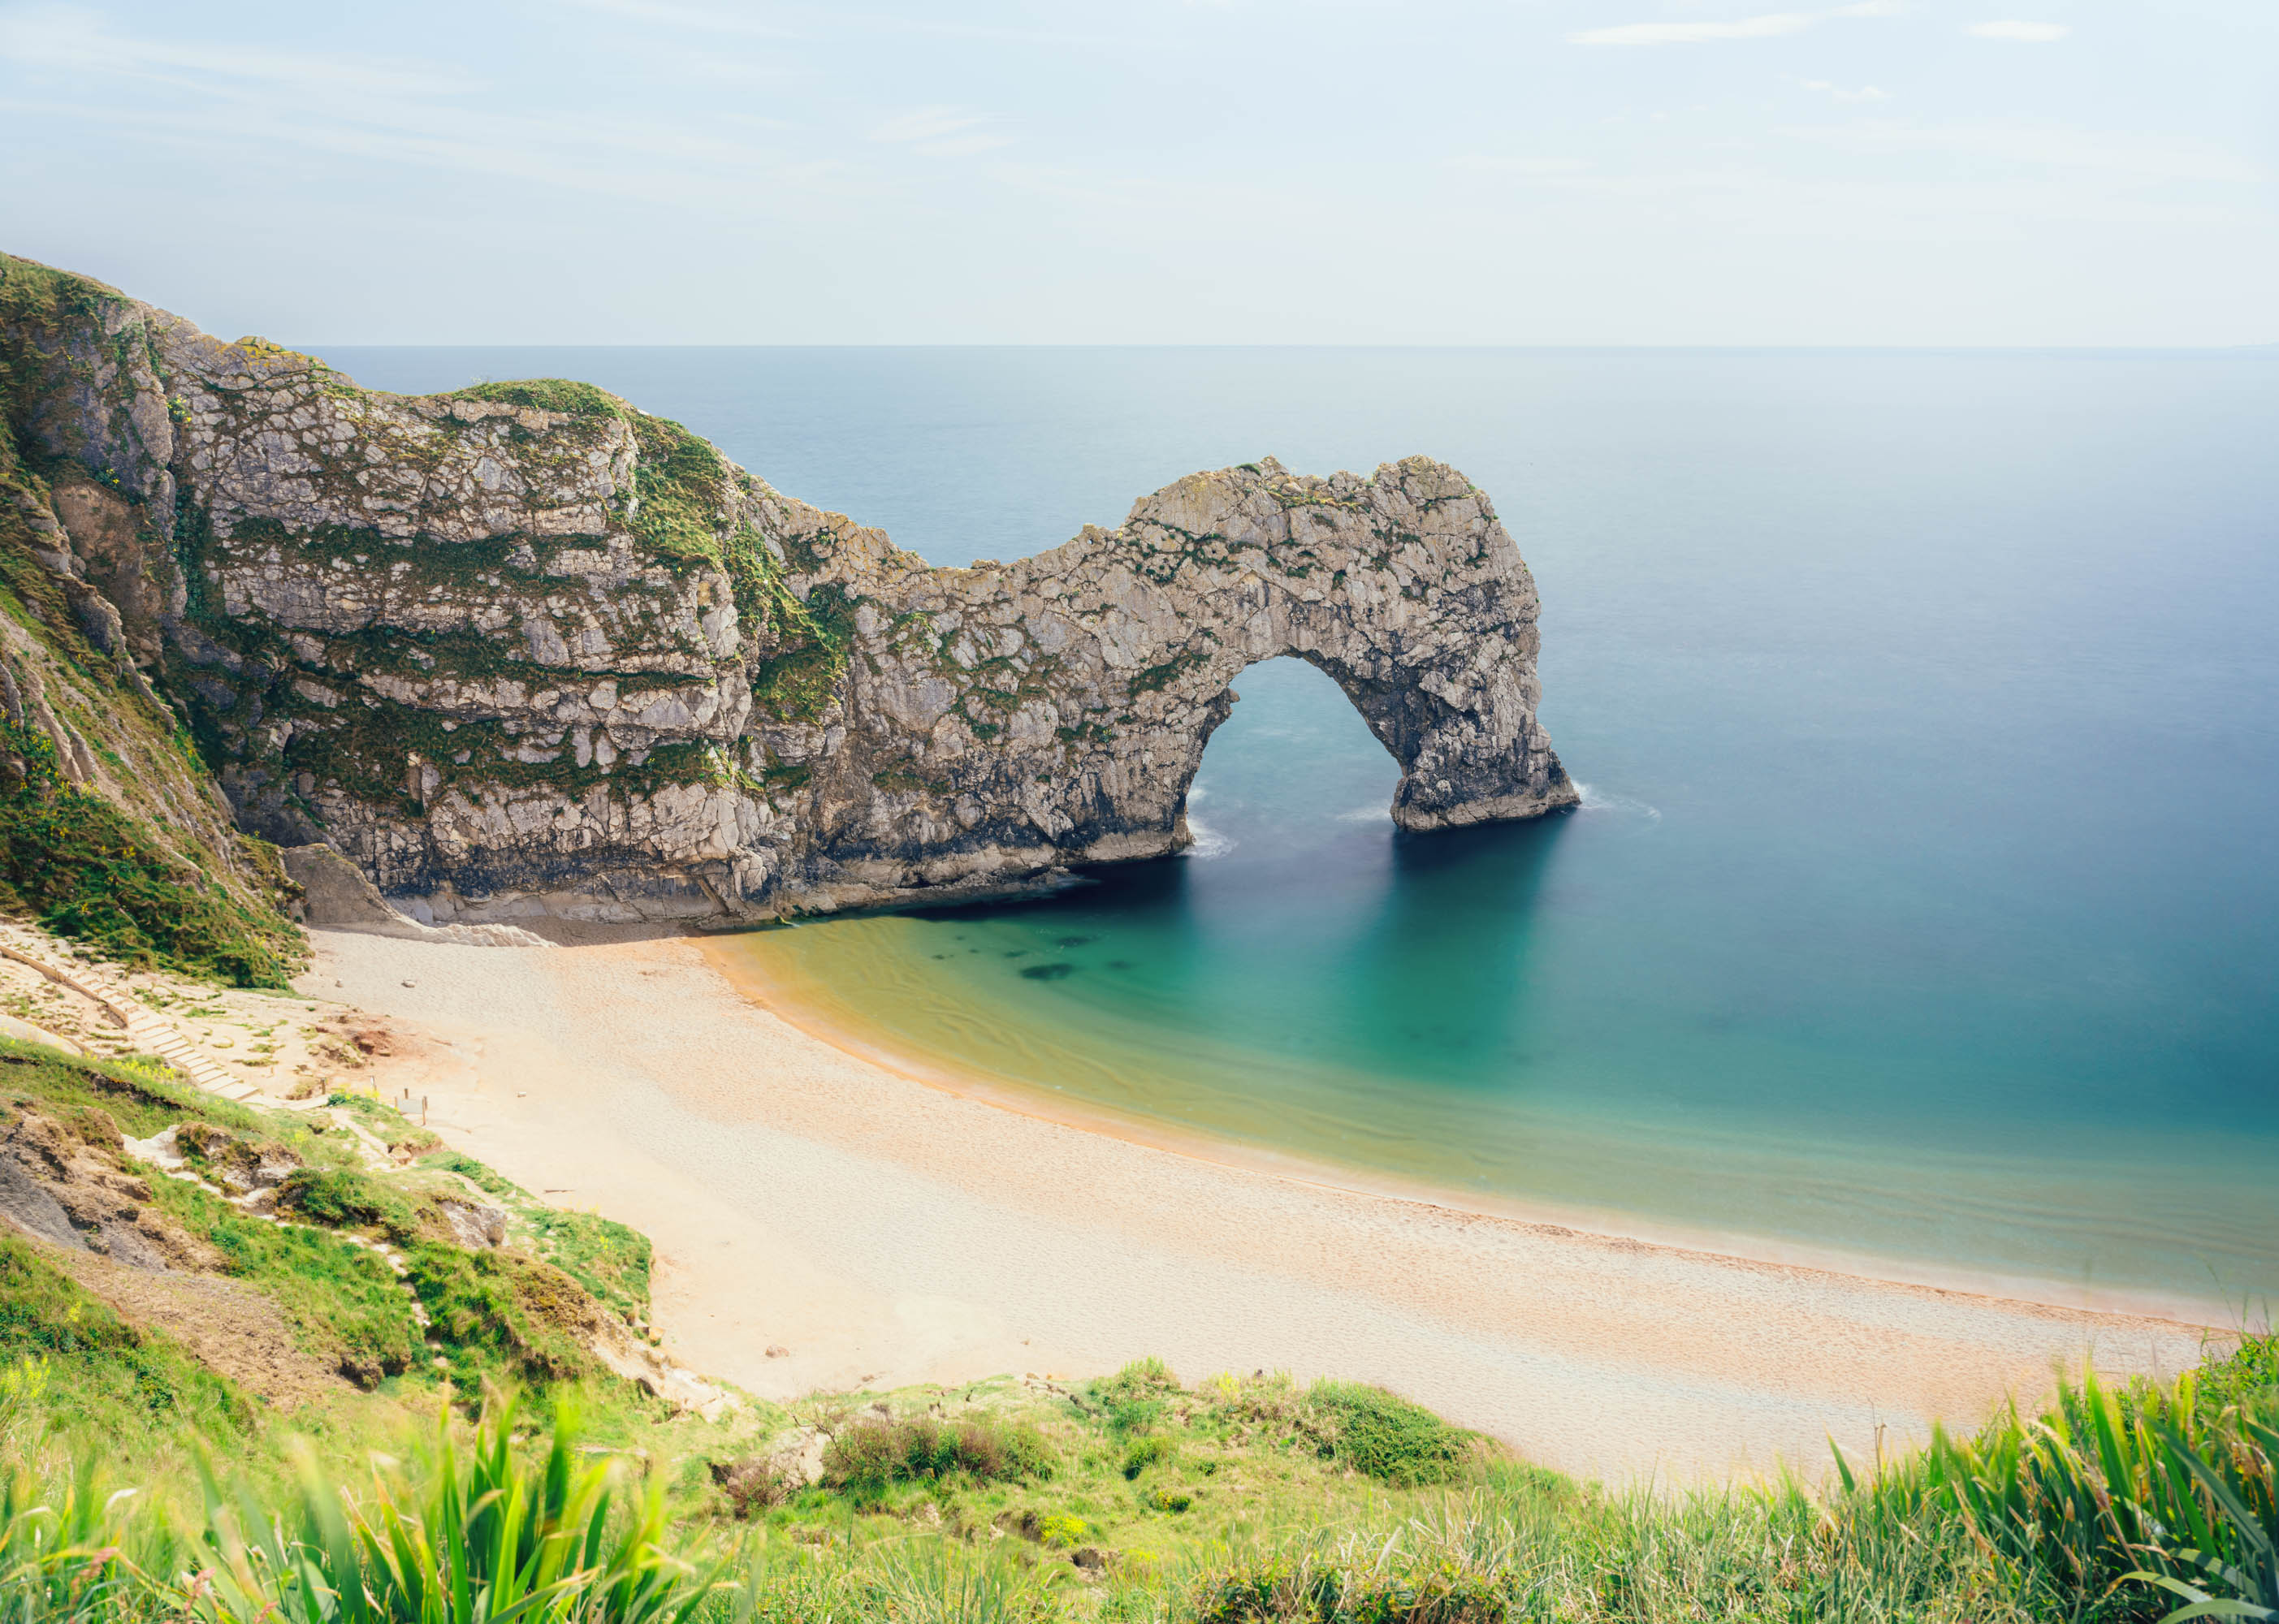
Connor Redmond | Fujifilm GFX100S II | GF 32-64mm f/4 R LM WR | 32mm | f/8.0 | 13 sec | ISO 80
Throughout this landscape photography guide, we'll share practical tips and techniques from experienced landscape photographers. We’ll cover everything from choosing the right kit to getting to grips with composition and editing, so whether you’re just starting out or hoping to sharpen your skills, you’ll come away with ideas next time you head outside.
Our in-house photographer Connor Redmond, will be sharing his own photos and advice on the subject, as well as practical tips from true expert landscape photographers like Charlie Waite, James Popsys and Kilian Schönberger, who have dedicated a lifetime to the landscape craft. We also feature additional shots from MPB photography aficionados Kristi Townsend, Adam Makkai, Amy Moore, Brad Pinhorn, Charlie Richards and Ian Howorth.
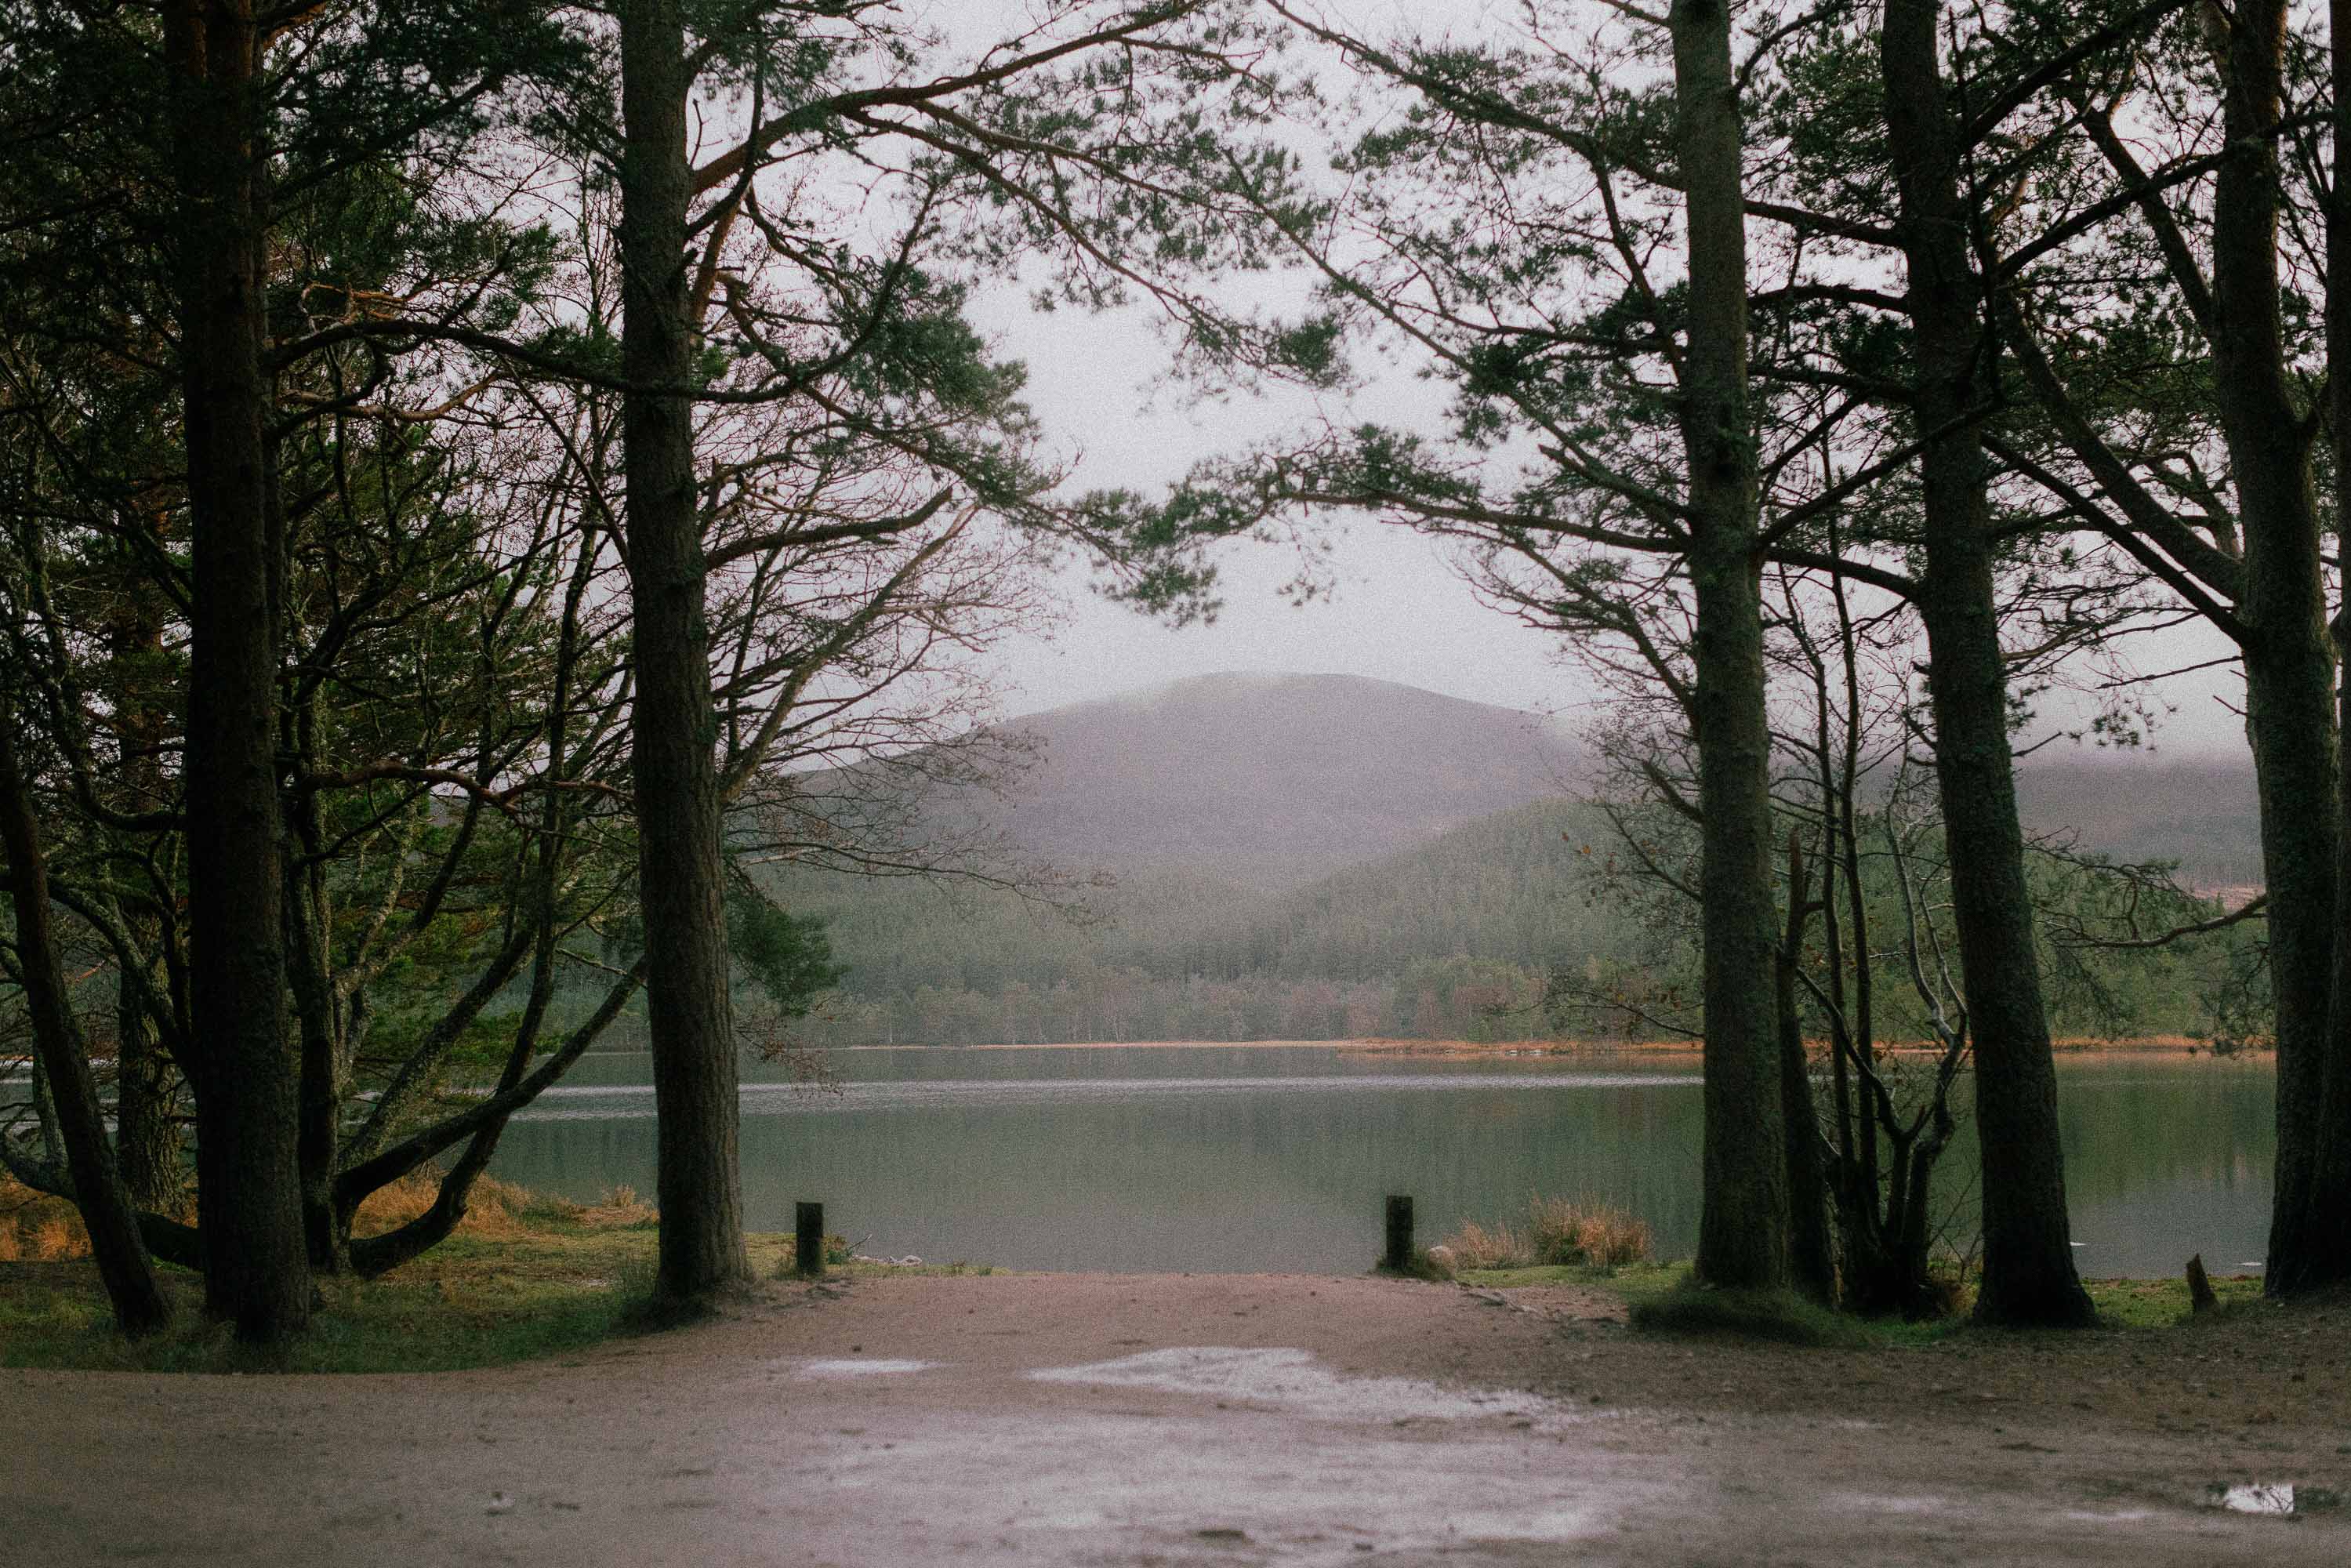
Connor Redmond | Canon EOS R5 Mark II | Canon EF 50mm f/1.2L USM | f/2.8 | 1/160 sec | ISO 2500
What is Landscape Photography?
Traditionally, landscape photography focuses on natural scenes such as mountains, coastlines, forests, valleys, and other outdoor vistas, often captured in flattering light (e.g., sunrise or sunset) to highlight the beauty of nature. But definitions can be broad.
To me, landscape photography may seem ‘easy’ to get to grips with on the surface, but it’s infinitely harder to master and produce interesting, not-seen-before images. I define it as pictures of the land, in a mostly untouched state. Good landscape photography does more than show a place; it conveys a mood, an emotional connection. The same feeling you get walking into the Sistine Chapel: that sensation of awe and wonderment. Landscape photography is the genre of spectacle.
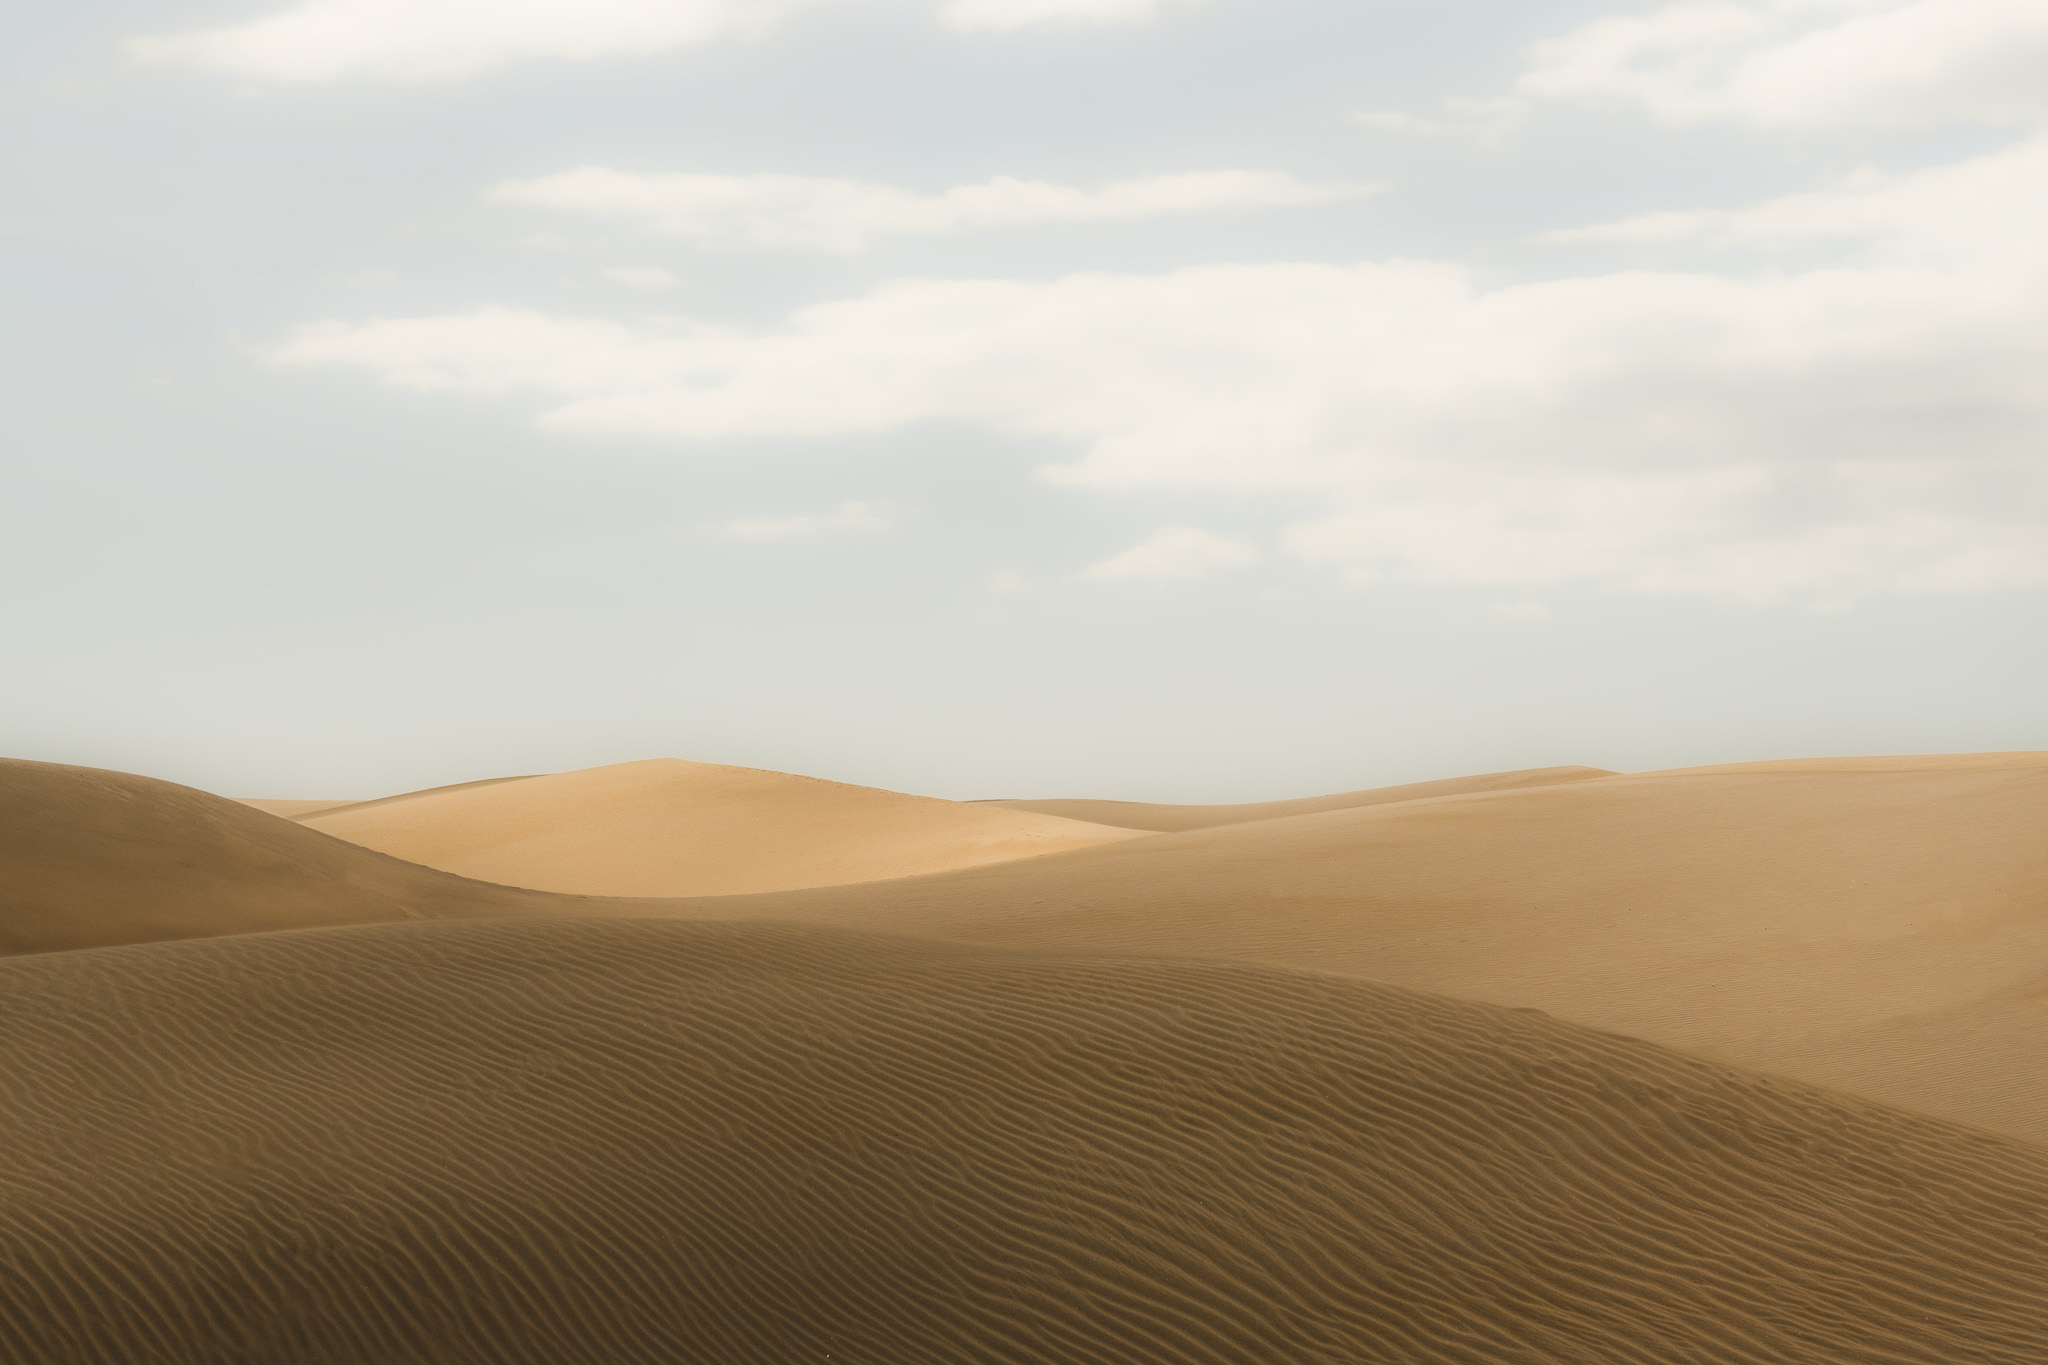
Adam Makkai | Nikon D850 | AF-S Nikkor 24-70mm f/2.8E ED VR | 44mm | f/8.0 | 1/500 sec | ISO 100
Some competitions, like the International Landscape Photographer of the Year, don’t place strict limits on what counts as a landscape image. An unconventional interpretation, like including man-made structures, cityscapes or people, can even work in your favour. In reality, most landscape photographers focus on the outdoor environment. Human elements might appear for scale or context but usually the goal is to capture a sense of grandeur, tranquillity or wilderness.
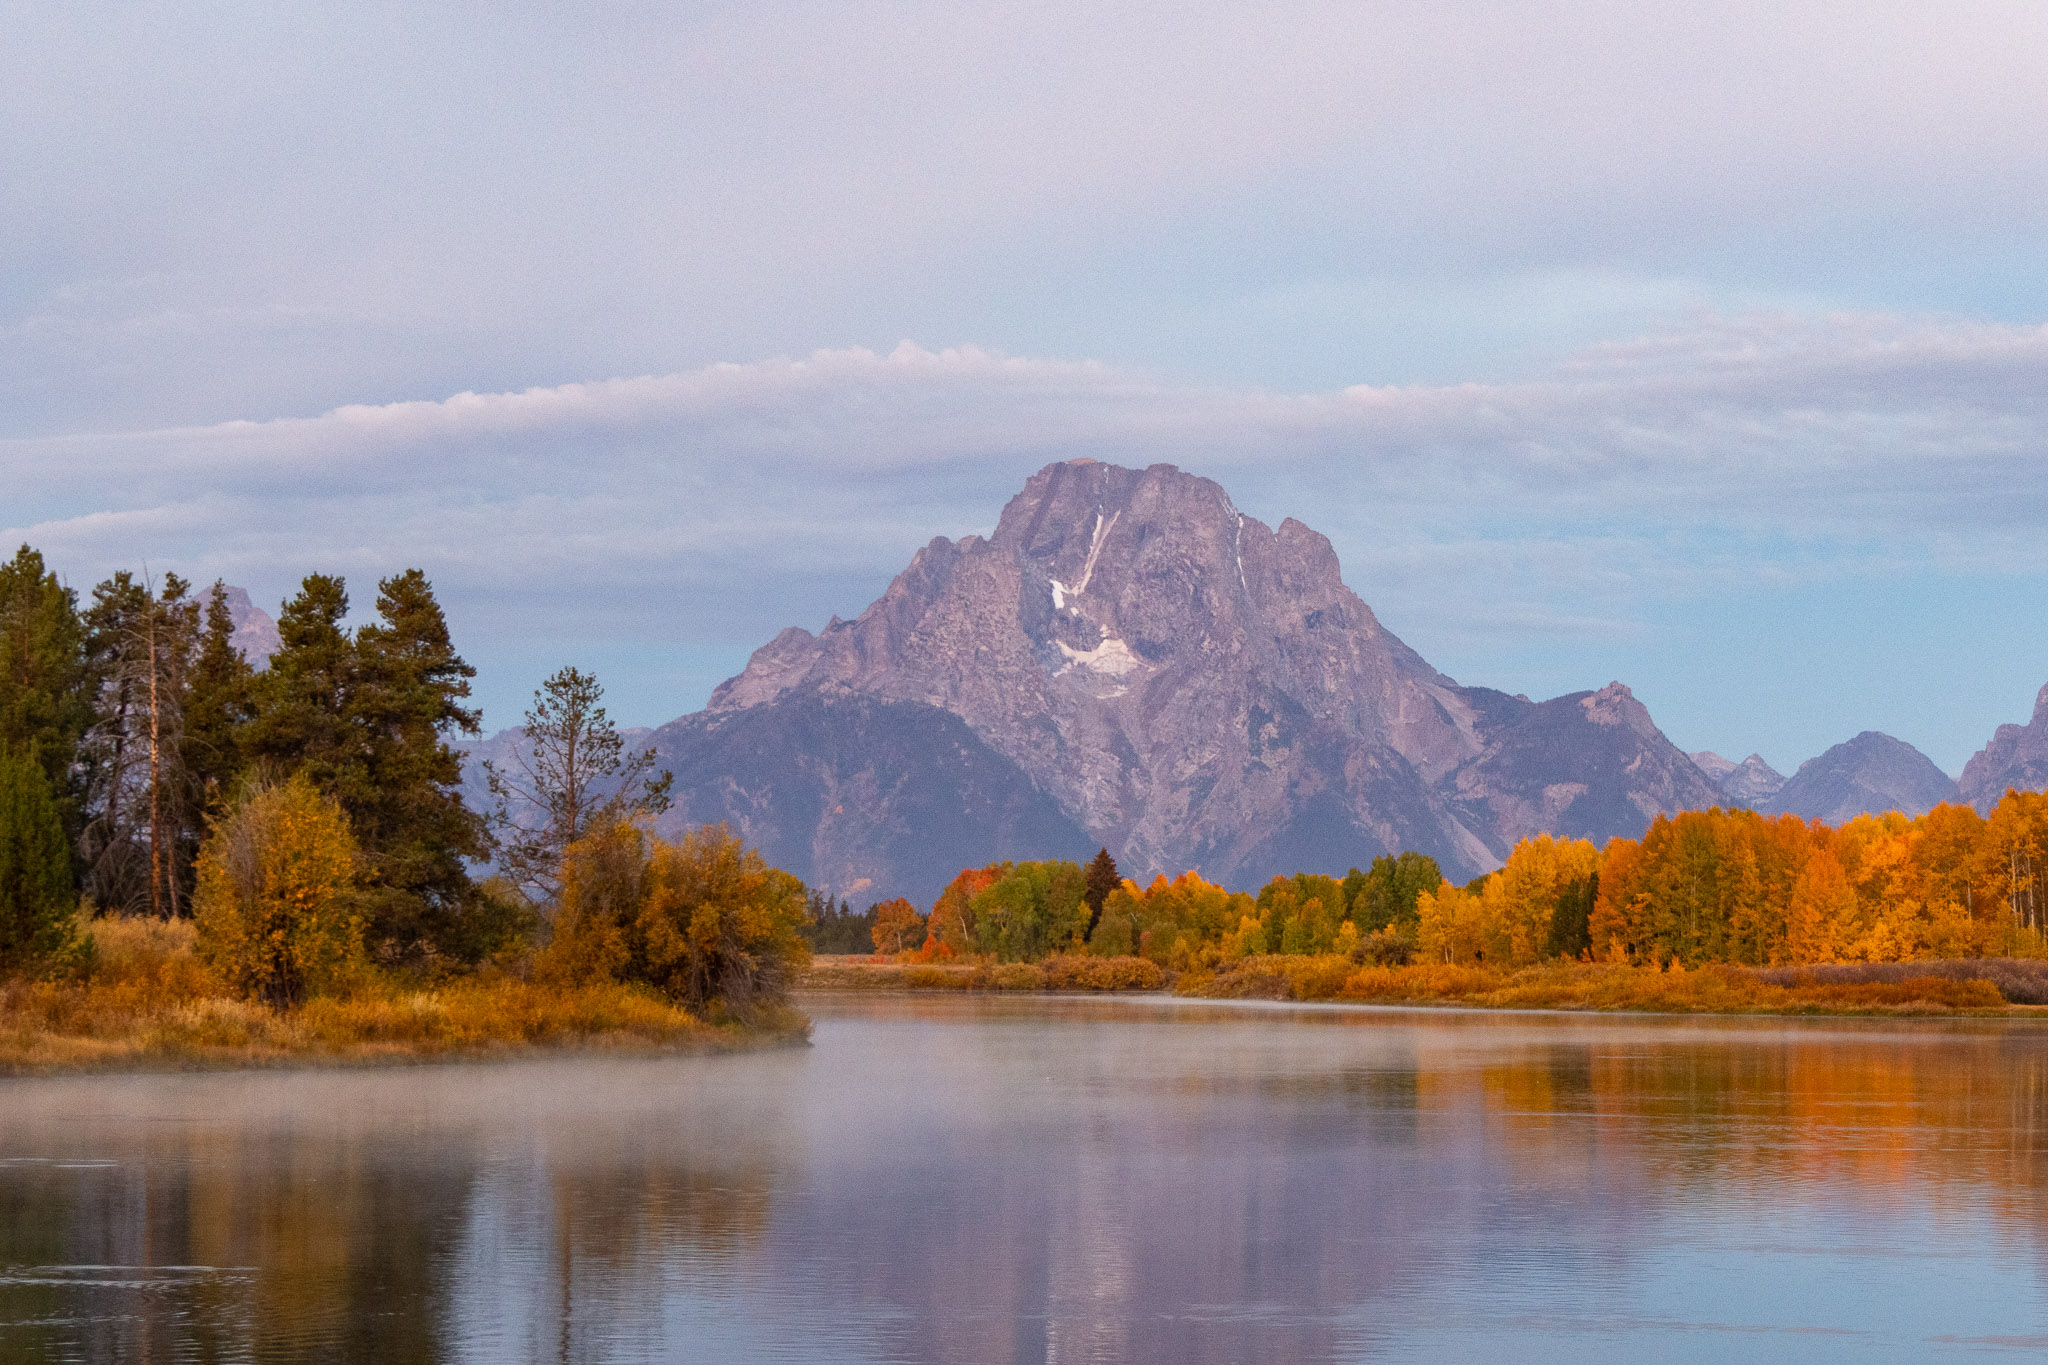
Kristi Townsend | Canon EOS R7 | Canon RF 24-105mm f/4 L IS USM | 47mm | f/4.0 | 1/40 sec | ISO 1250
An often-overlooked aspect of landscape photography is that, by definition, you spend more time in the great outdoors, which can only ever be a good thing for our increasingly urbanised world. Even if you don’t manage to get the shots you want, you’re still bathing yourself in all the wonders of the great outdoors and nourishing yourself in nature. You’ll feel better for it.
Advice for Landscape Photography Beginners
When starting out with landscape photography, it’s important to get the basics right first. These fundamental techniques will give you a foundation to build on and make you a better, more intentional photographer in the long run.
Get to grips with manual exposure
Because landscape photography is a slow and patient game, you’ll find that you won't get much use out of aperture and shutter priority modes, as you will have a lot more time to nail the exposure of the scene (unless you find yourself in the middle of a hurricane).
Learning manual exposure is one of the most crucial steps you can take in landscape photography because it helps you stop “accepting” whatever the camera gives you and start understanding the results yourself.
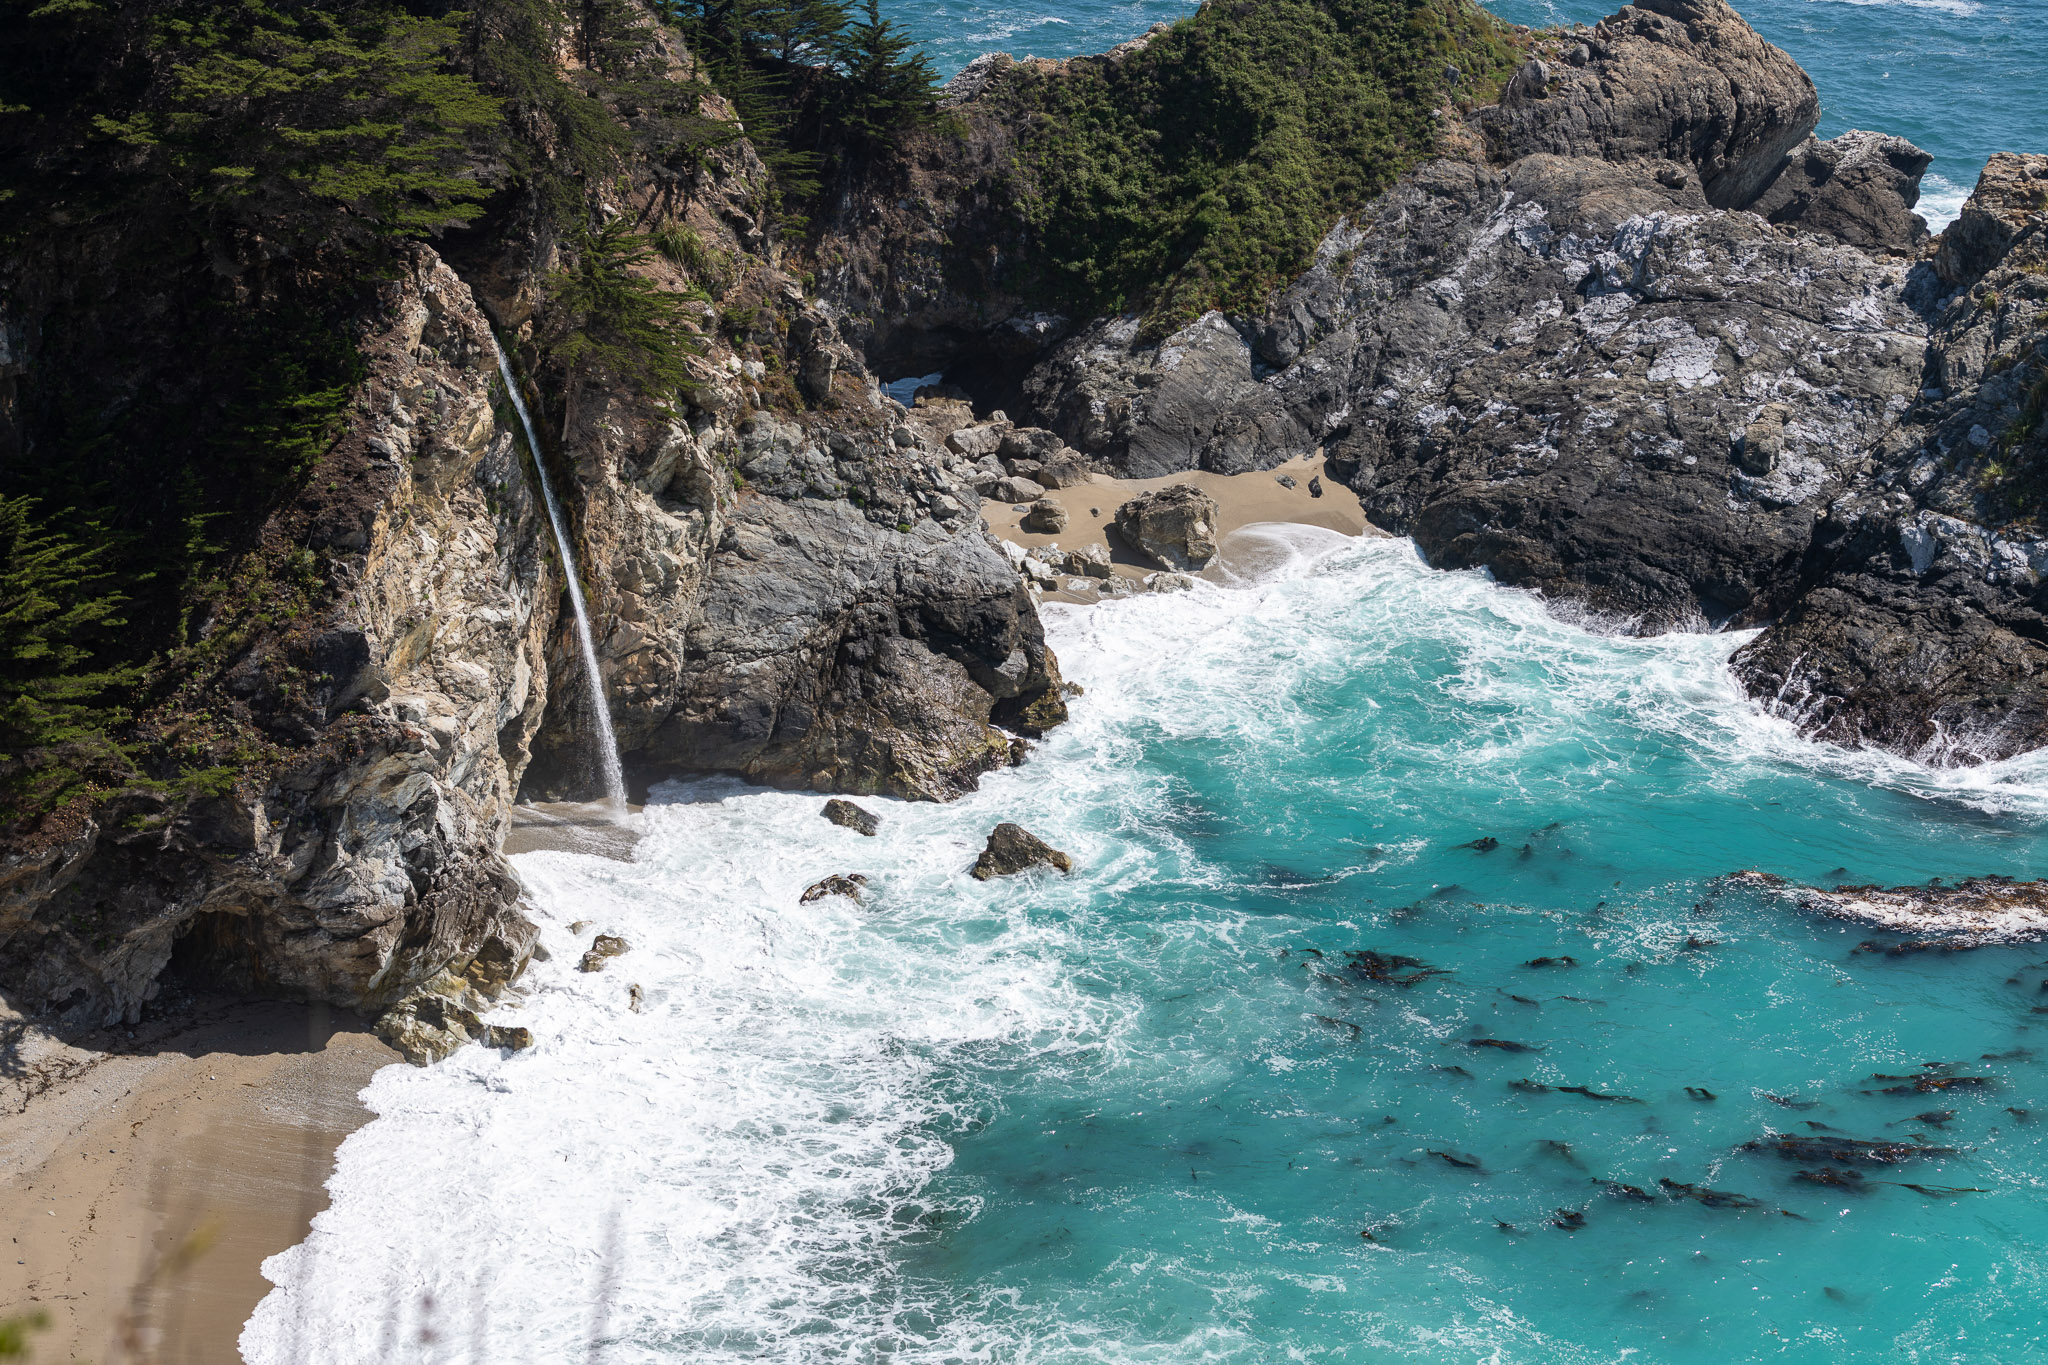
Kristi Townsend | Nikon D850 | Nikon AF-S Nikkor 70-200mm f/2.8E FL ED VR | 70mm | f/5.0 | 1/500 sec | ISO 64
Landscape exposure advice
Manual exposure is based on the exposure triangle: shutter speed, aperture and ISO. We have a useful read on this very topic, so feel free to dive into our exposure triangle guide. See below for a handy chart showing how the three variables affect exposure.
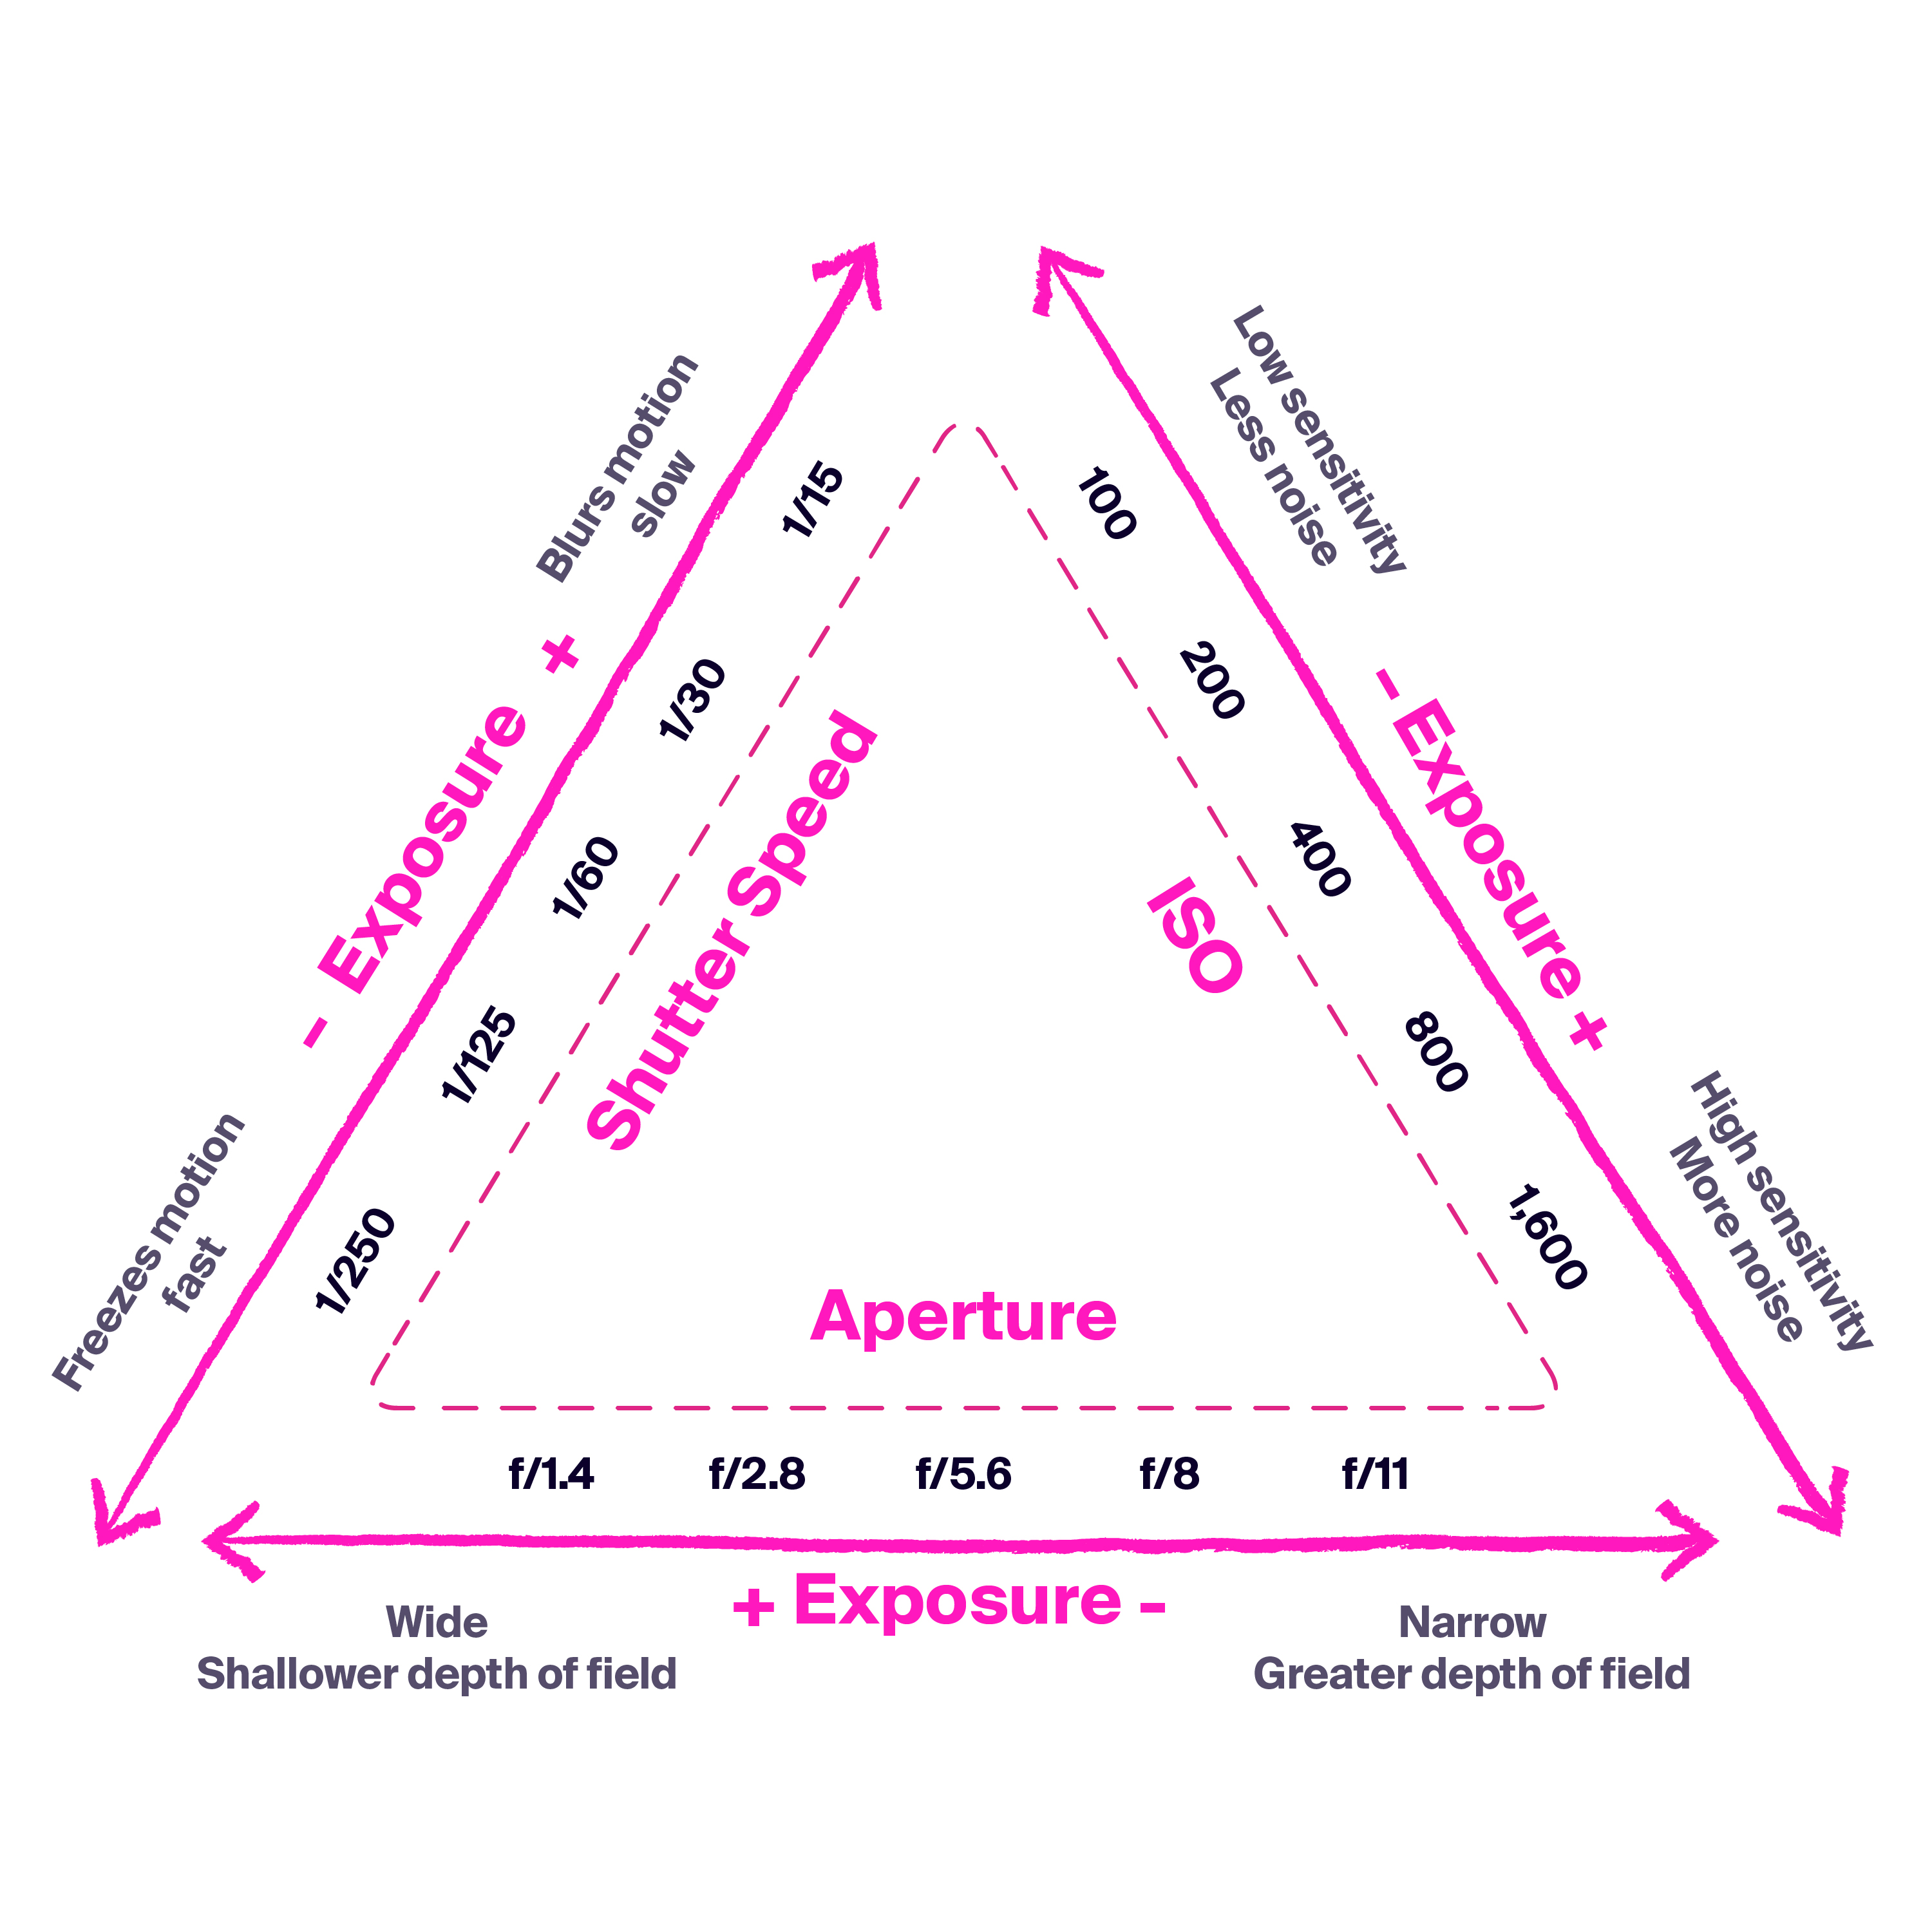
In practice, landscape photography often involves deciding what matters most in a given scene. If you want front-to-back depth, you might prioritize aperture and keep it between f/8.0 and f/16. If you want blur, like in water or clouds, you prioritize shutter speed. Then you set the ISO to the lowest possible value and let the remaining settings fall into place. Once you can make these decisions calmly, you’ll find that confusing light is a puzzle you can solve.
Learn to use the Histogram
The histogram is a graph that displays the tones in your photo and is a common tool for measuring the exposure of your shot. It’s a useful tool if you want to get the most detail and the best exposure possible from your photo. It is especially useful in landscape photography to make sure you are exposing your images properly, using the common ETTR method.
Our in-depth histograms in photography guide goes into detail on what histograms are and why using them can benefit your photography.
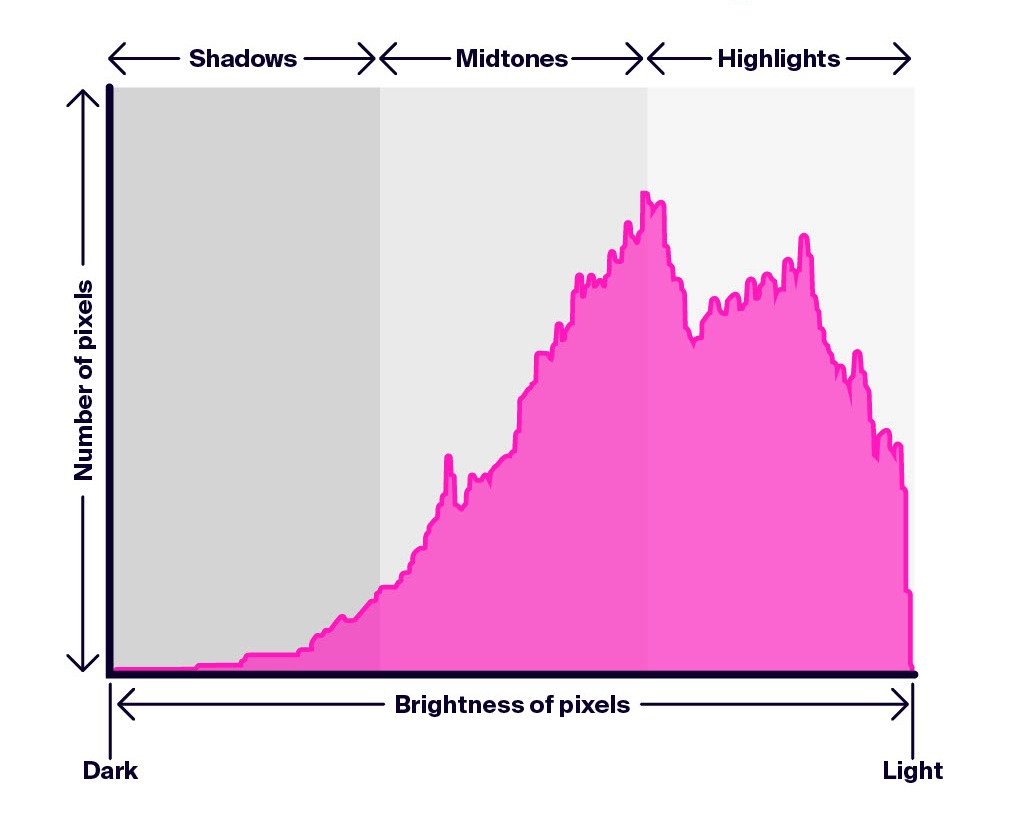
Some scenes are simply too bright and impossible to balance (it goes to show how amazing the human eye's dynamic range perception really is), so in these scenarios, you have some other options to balance exposure.
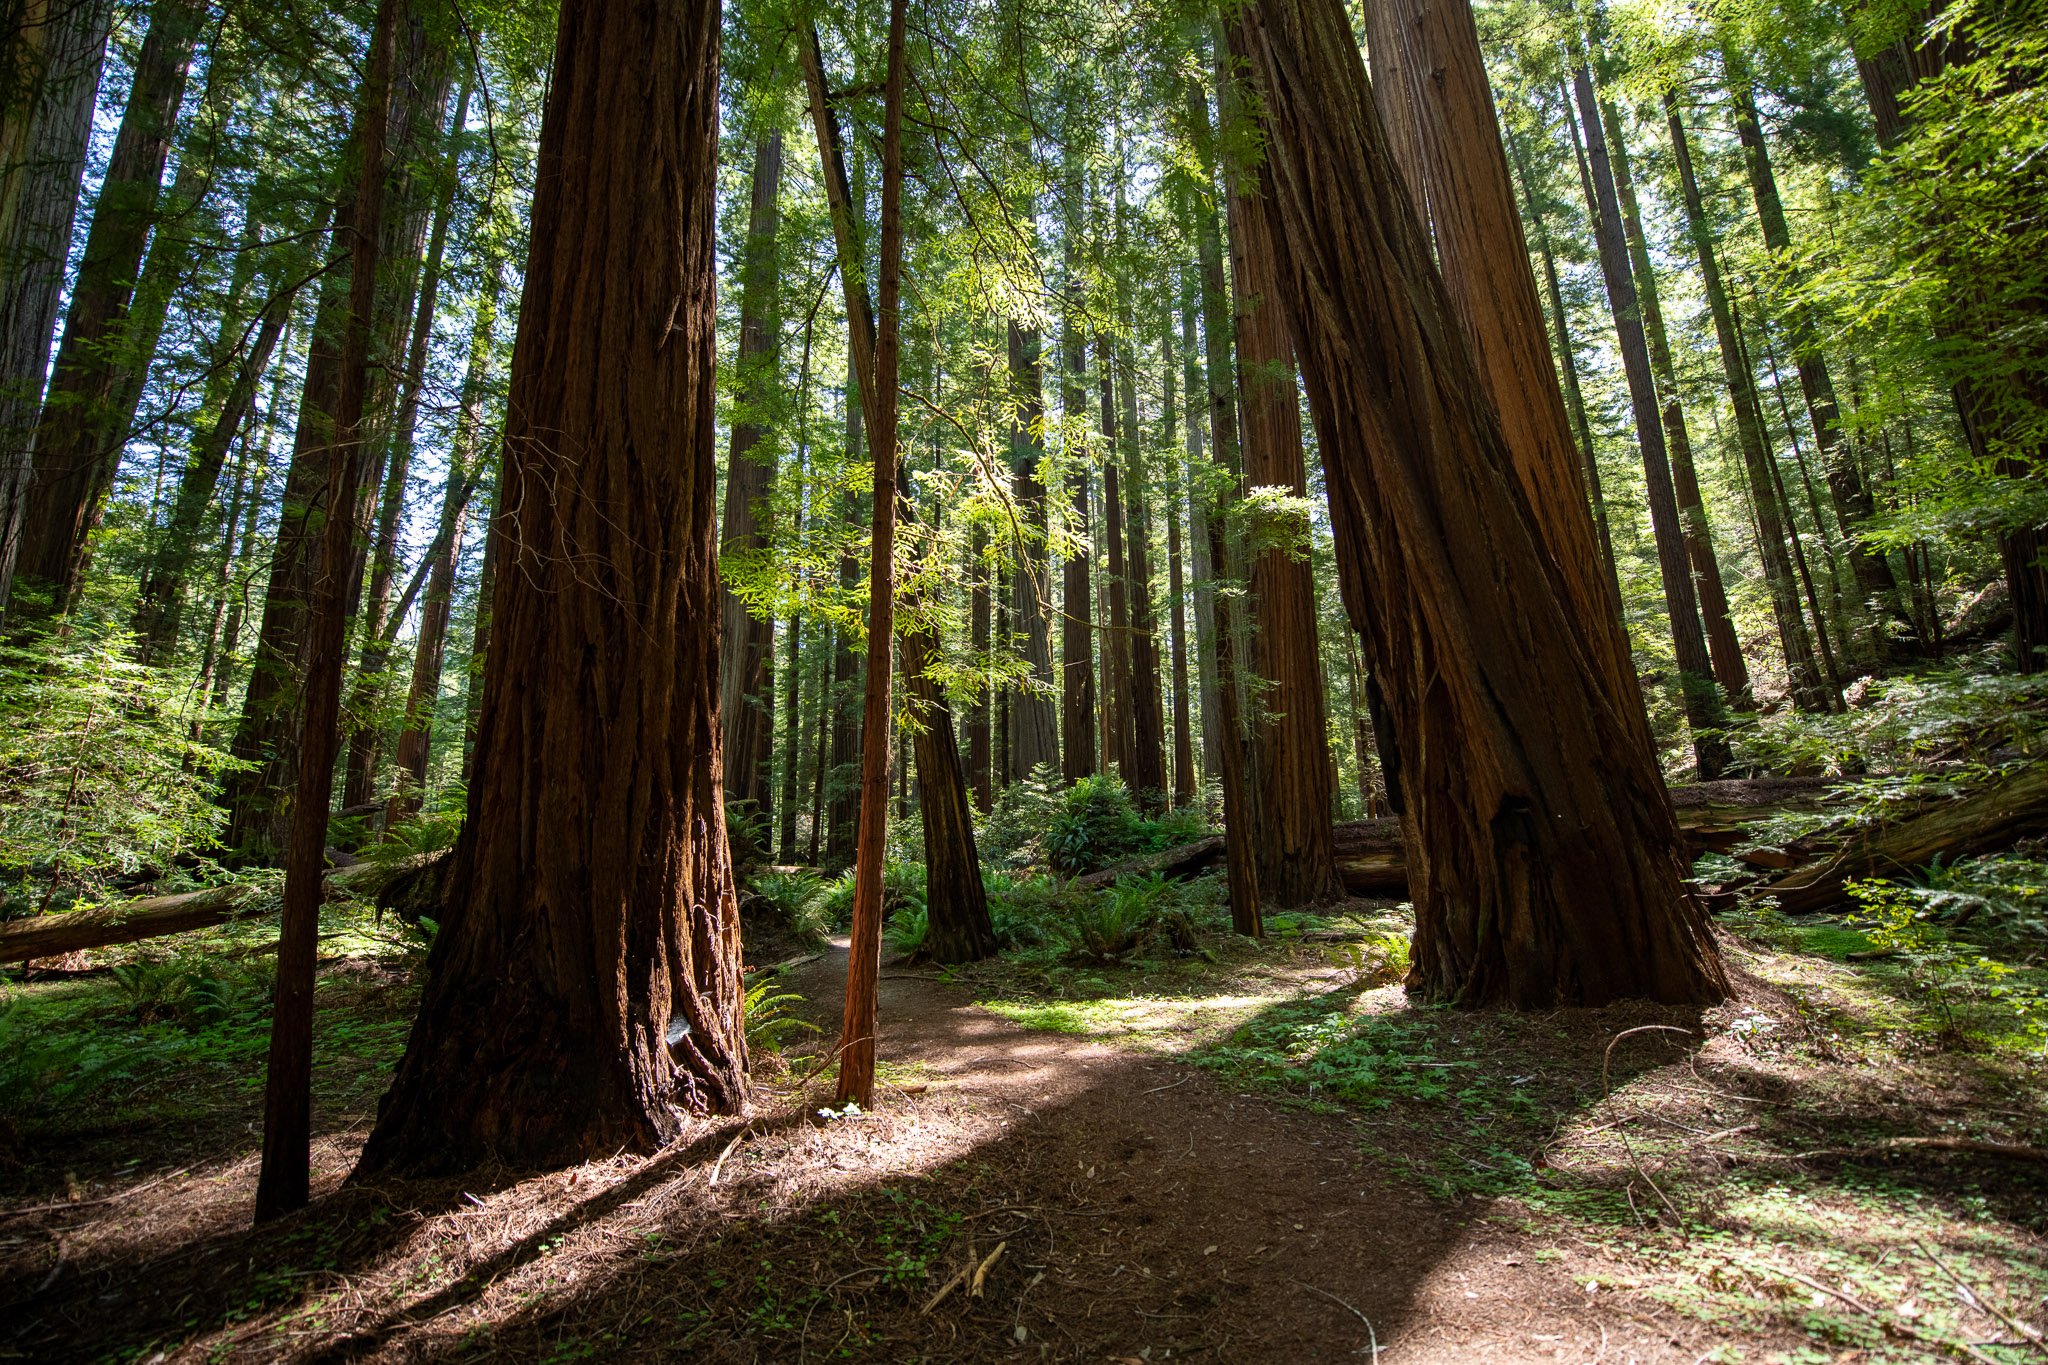
Kristi Townsend | Nikon D850 | Nikon AF-S Nikkor 14-24mm f/2.8G IF-ED | 14mm | f/2.8 | 1/250 sec | ISO 640
Exposure bracketing is always an option in tricky light situations if you have a tripod. You take multiple exposures on a tripod at +1 EV, 0 and -1 EV and then stitch them together in post. Many modern cameras can do this for you with dedicated exposure bracketing modes. It is an advanced technique, though and requires some post-production know-how. An easier option for a beginner is to simply use an ND filter. Let’s see how filters work in landscape photography below.
Use filters to improve your landscapes
Filters can feel intimidating because there are so many to choose from, but they’re mostly just tools for controlling the light coming into the camera. What’s the difference between UV, neutral density, polarizing, and color filters? Our guide to lens filters answers this for you. But let us look at how to use filters to our advantage, particularly in landscape photography.
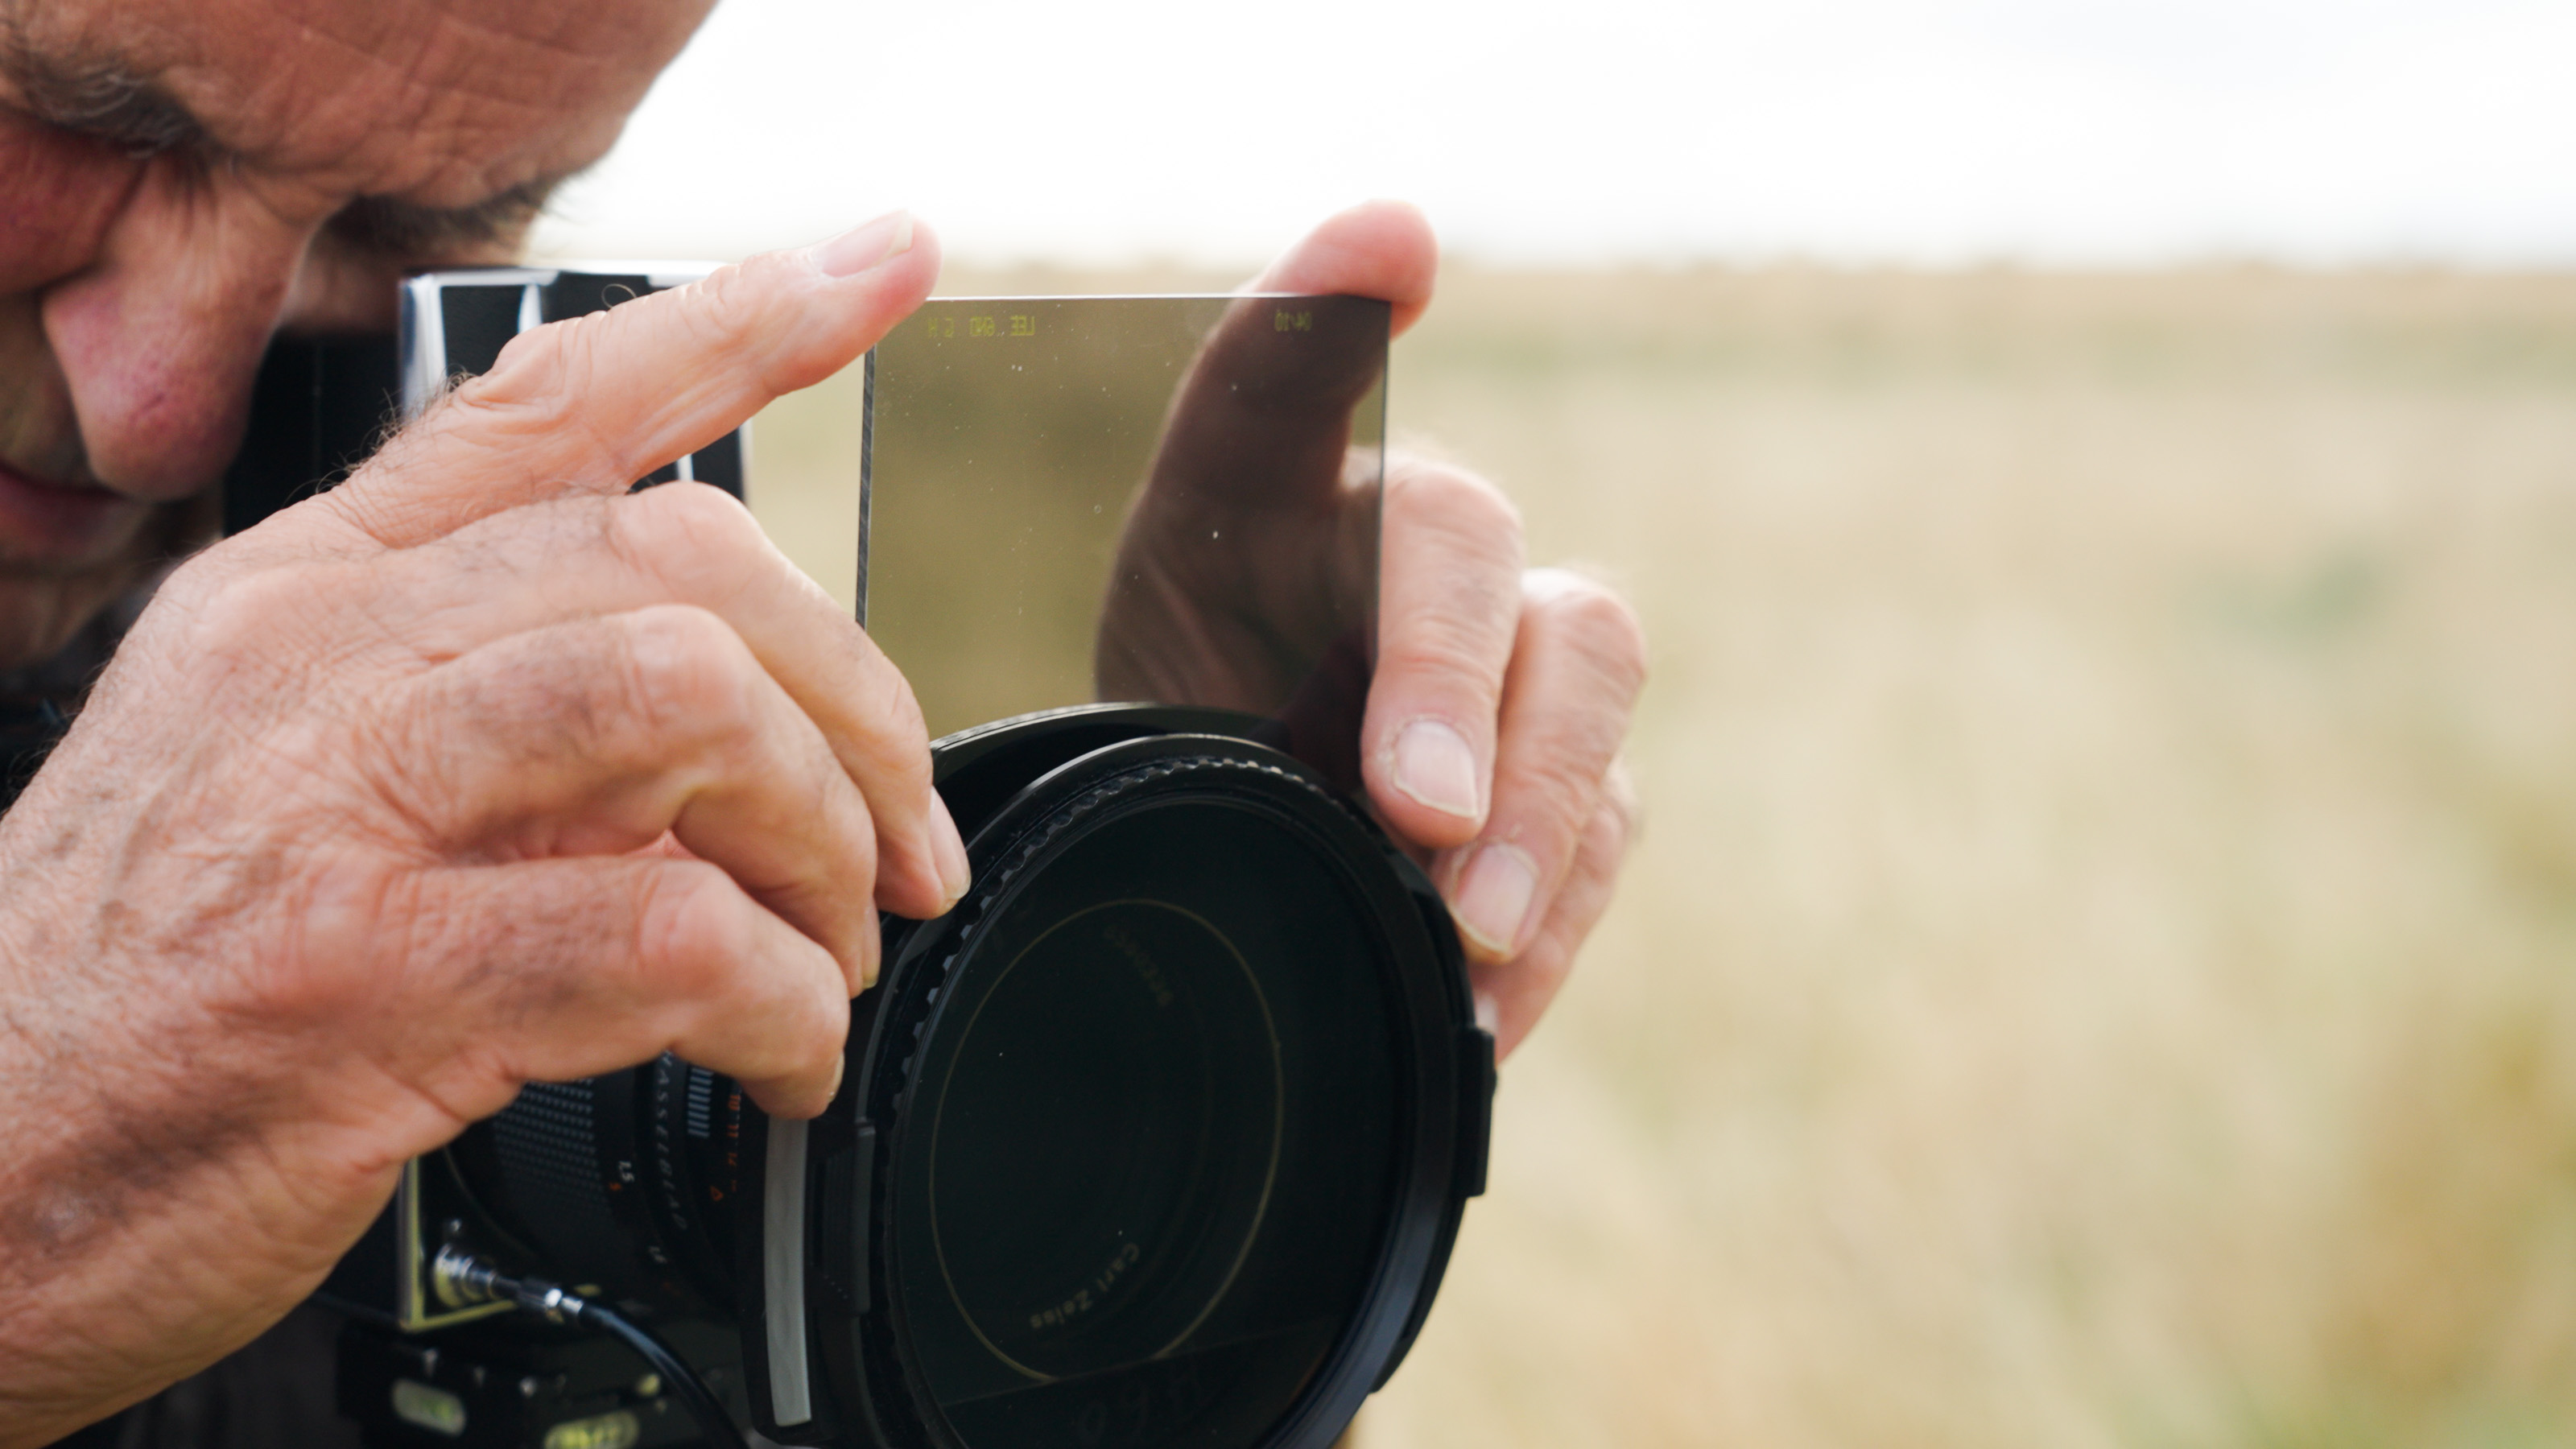
Landscape photographer Charlie Waite in the field using a square neutral density filter
Polarizing filters in landscape photography
A polarizer (often called a polarizing filter or CPL) helps reduce reflections and glare, both of which are common in landscapes. Polarizers reduce reflections on wet rocks or water, increase color saturation in foliage, and deepen sky colors under certain conditions, making polarizers a versatile tool for improving your landscape photography. It's an essential part of your kit bag.
Used carefully, a polariser can add clarity and contrast to an image. Used aggressively, though, it can make skies look horribly unnatural, particularly with ultra-wide lenses. It’s worth using trial and error here and watching the effect. Don’t rush.
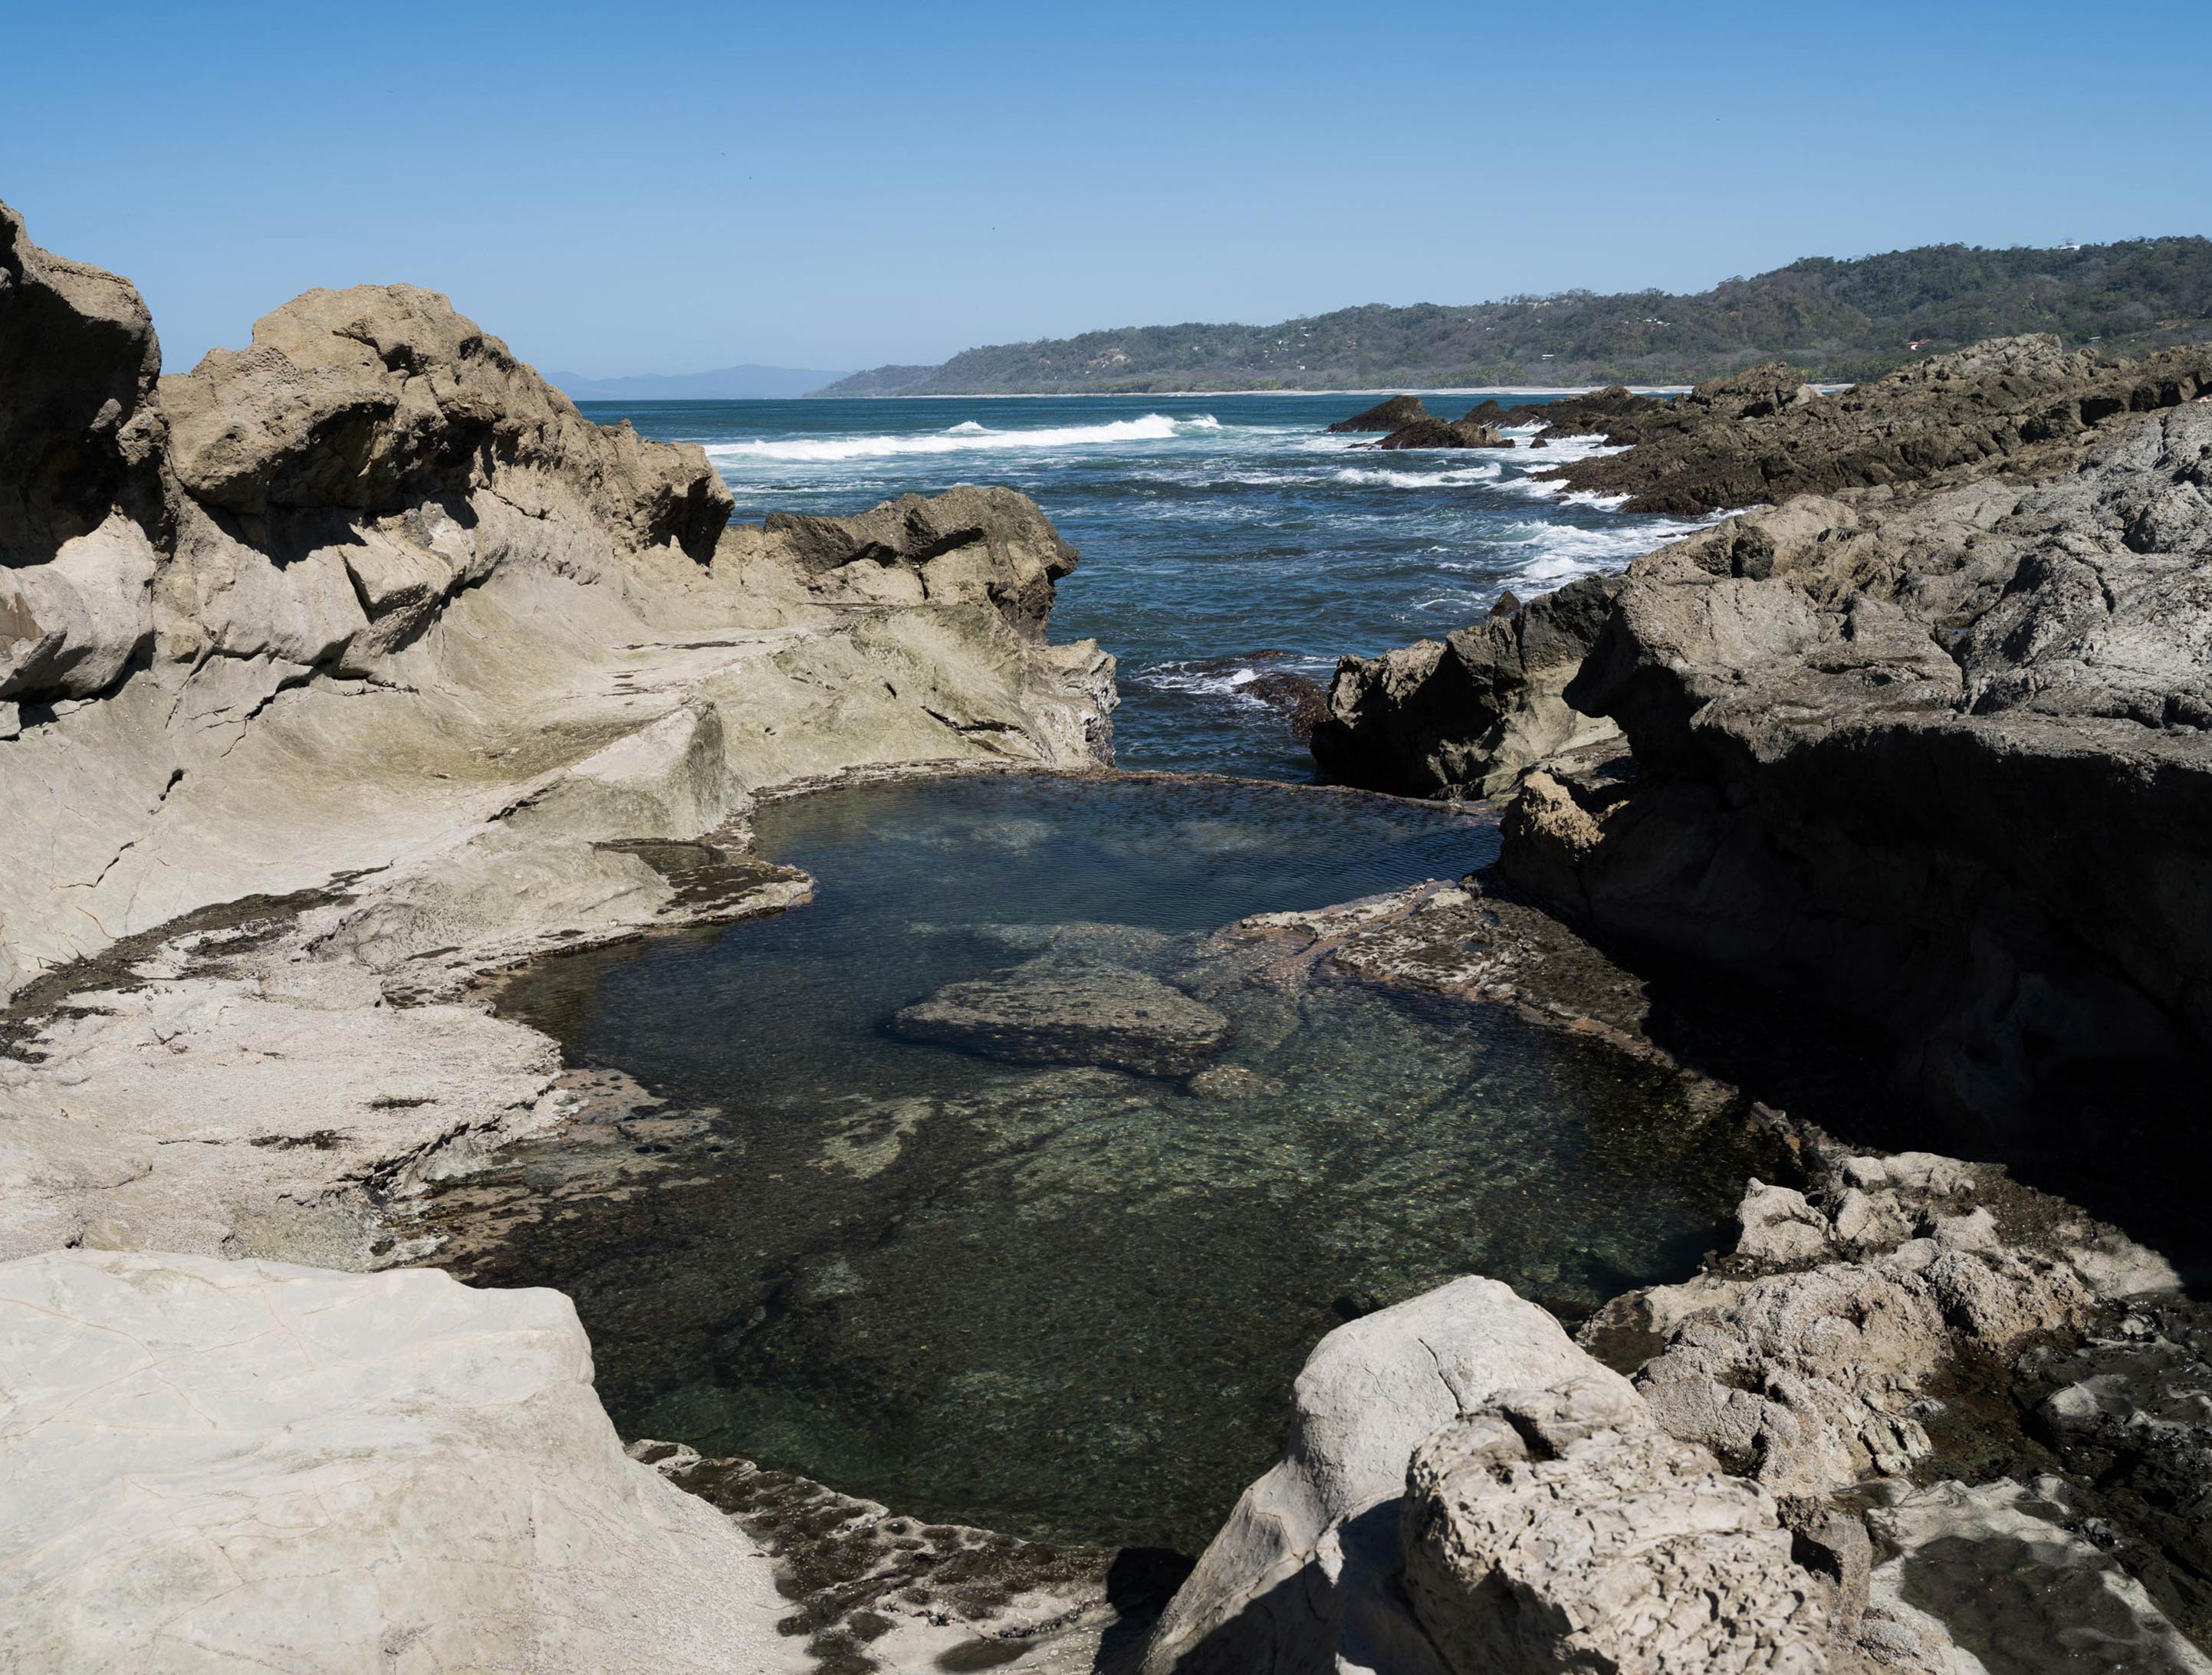
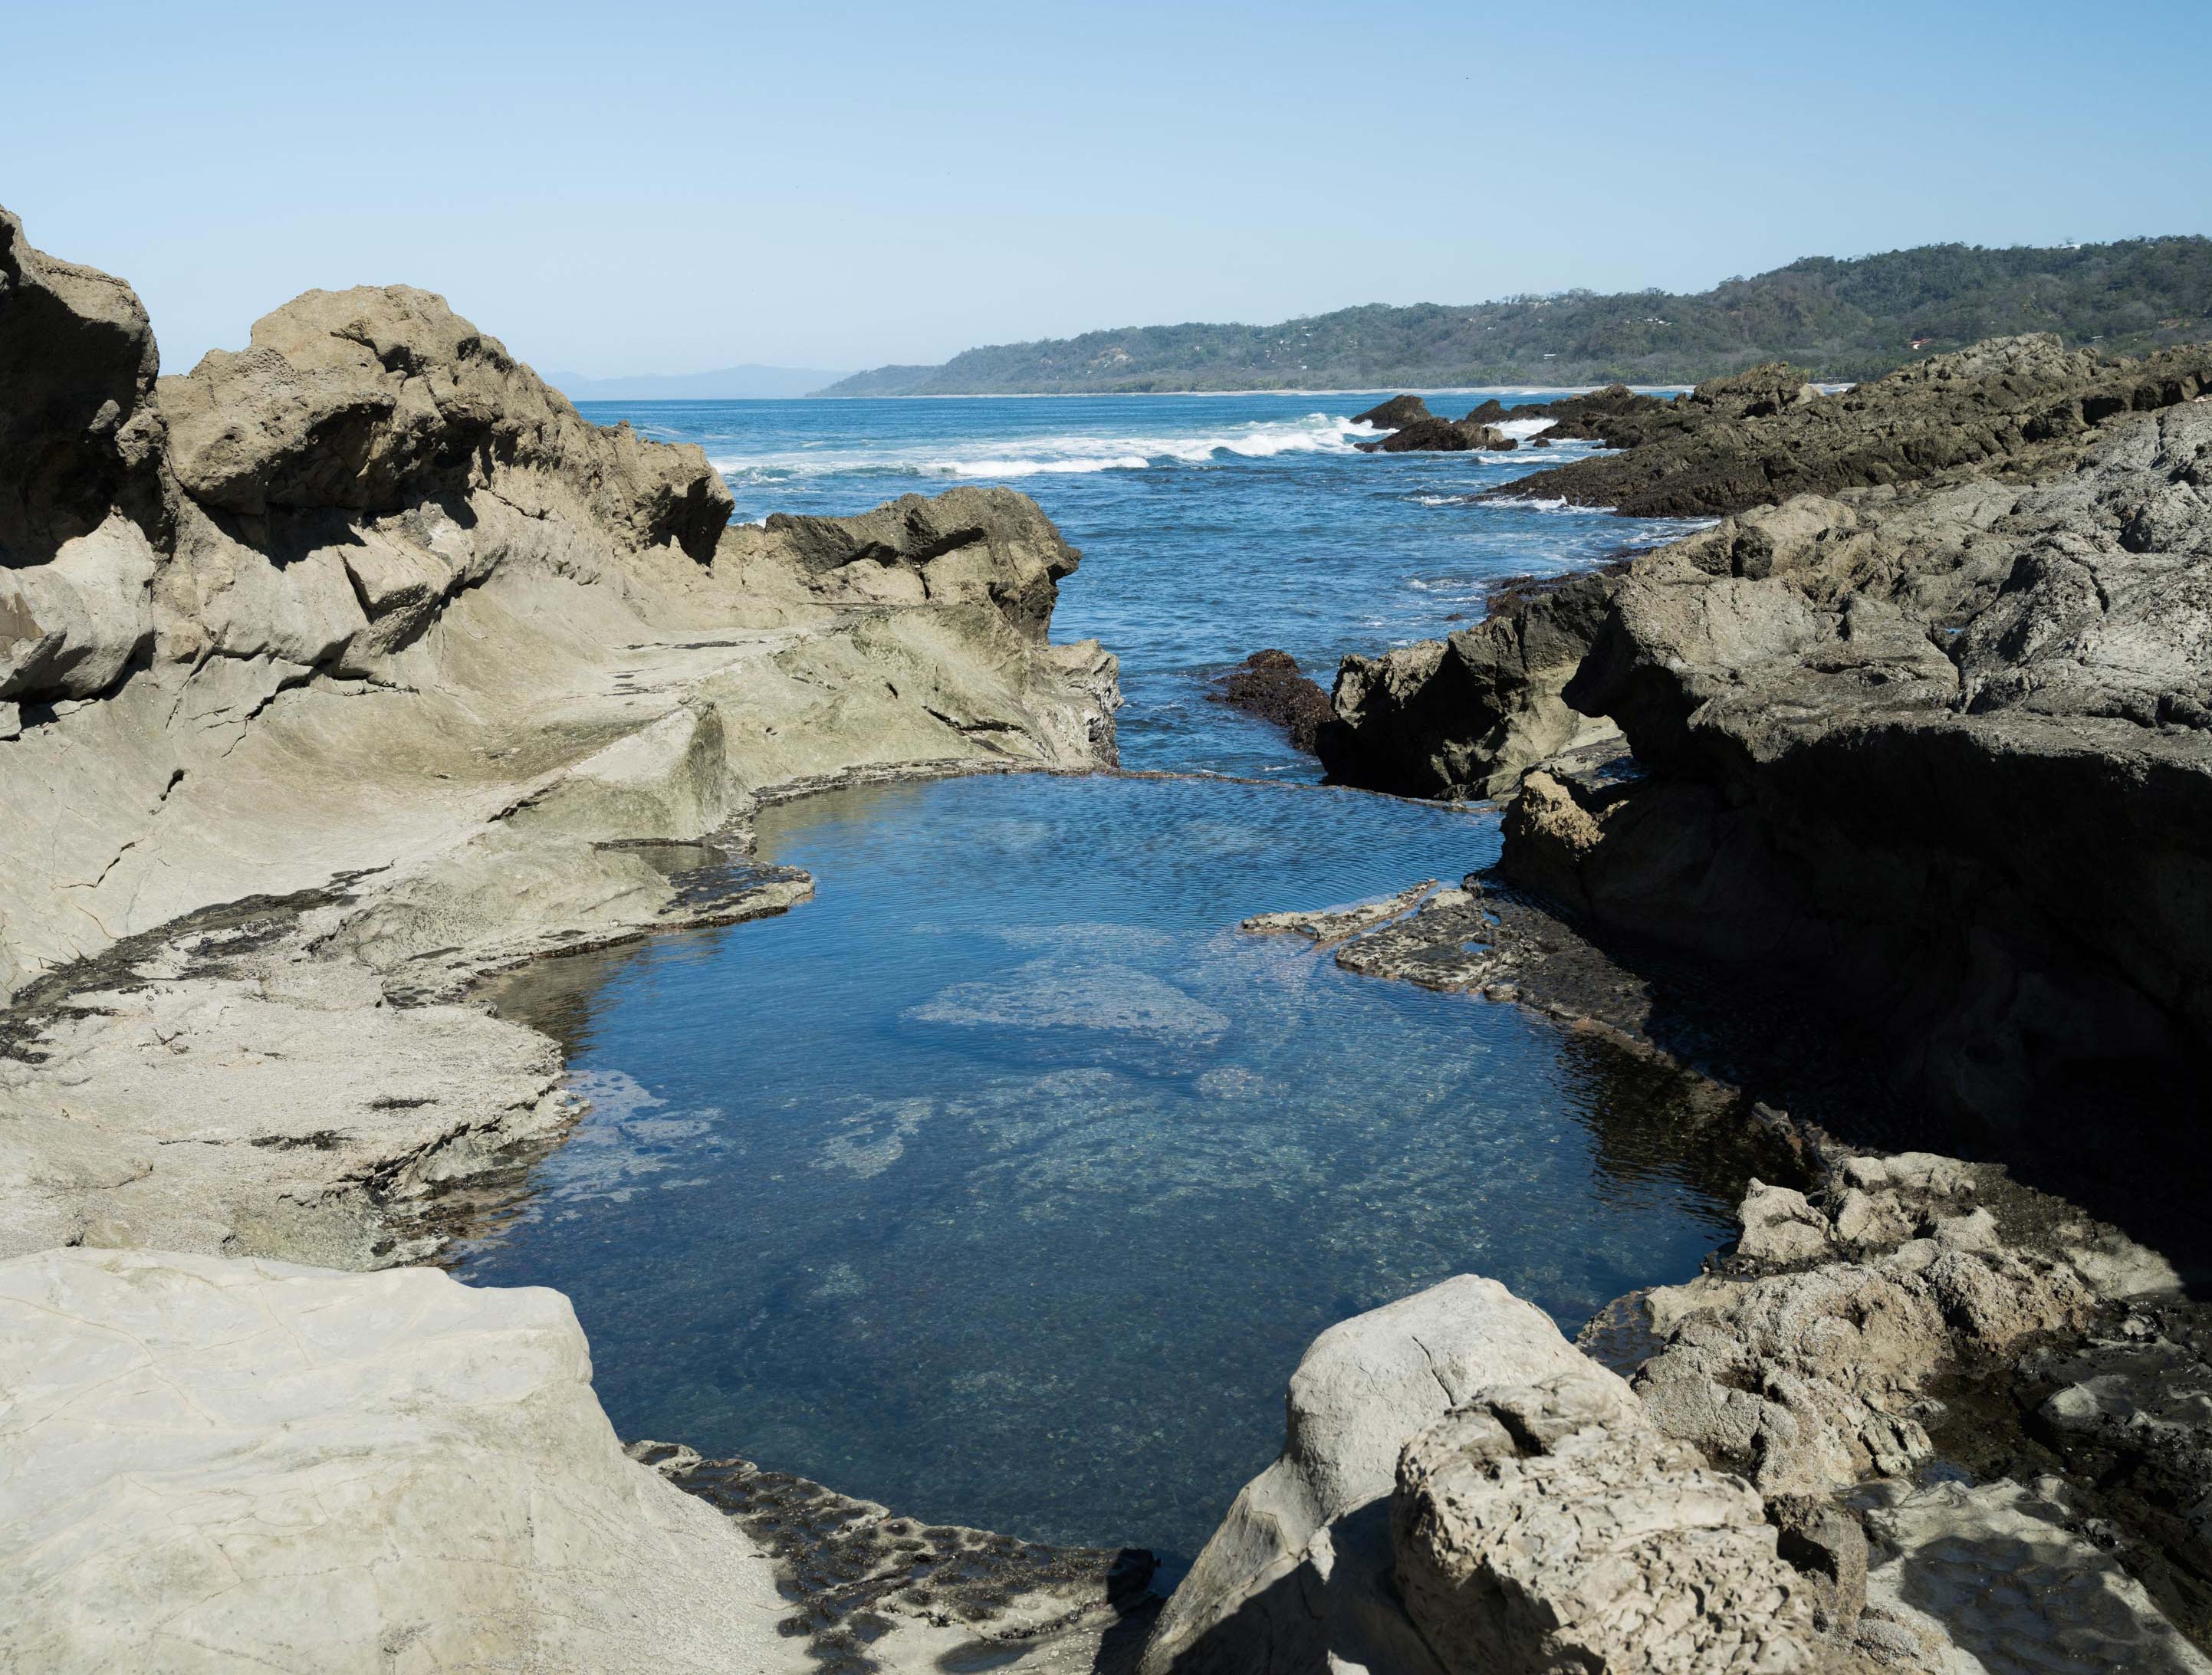
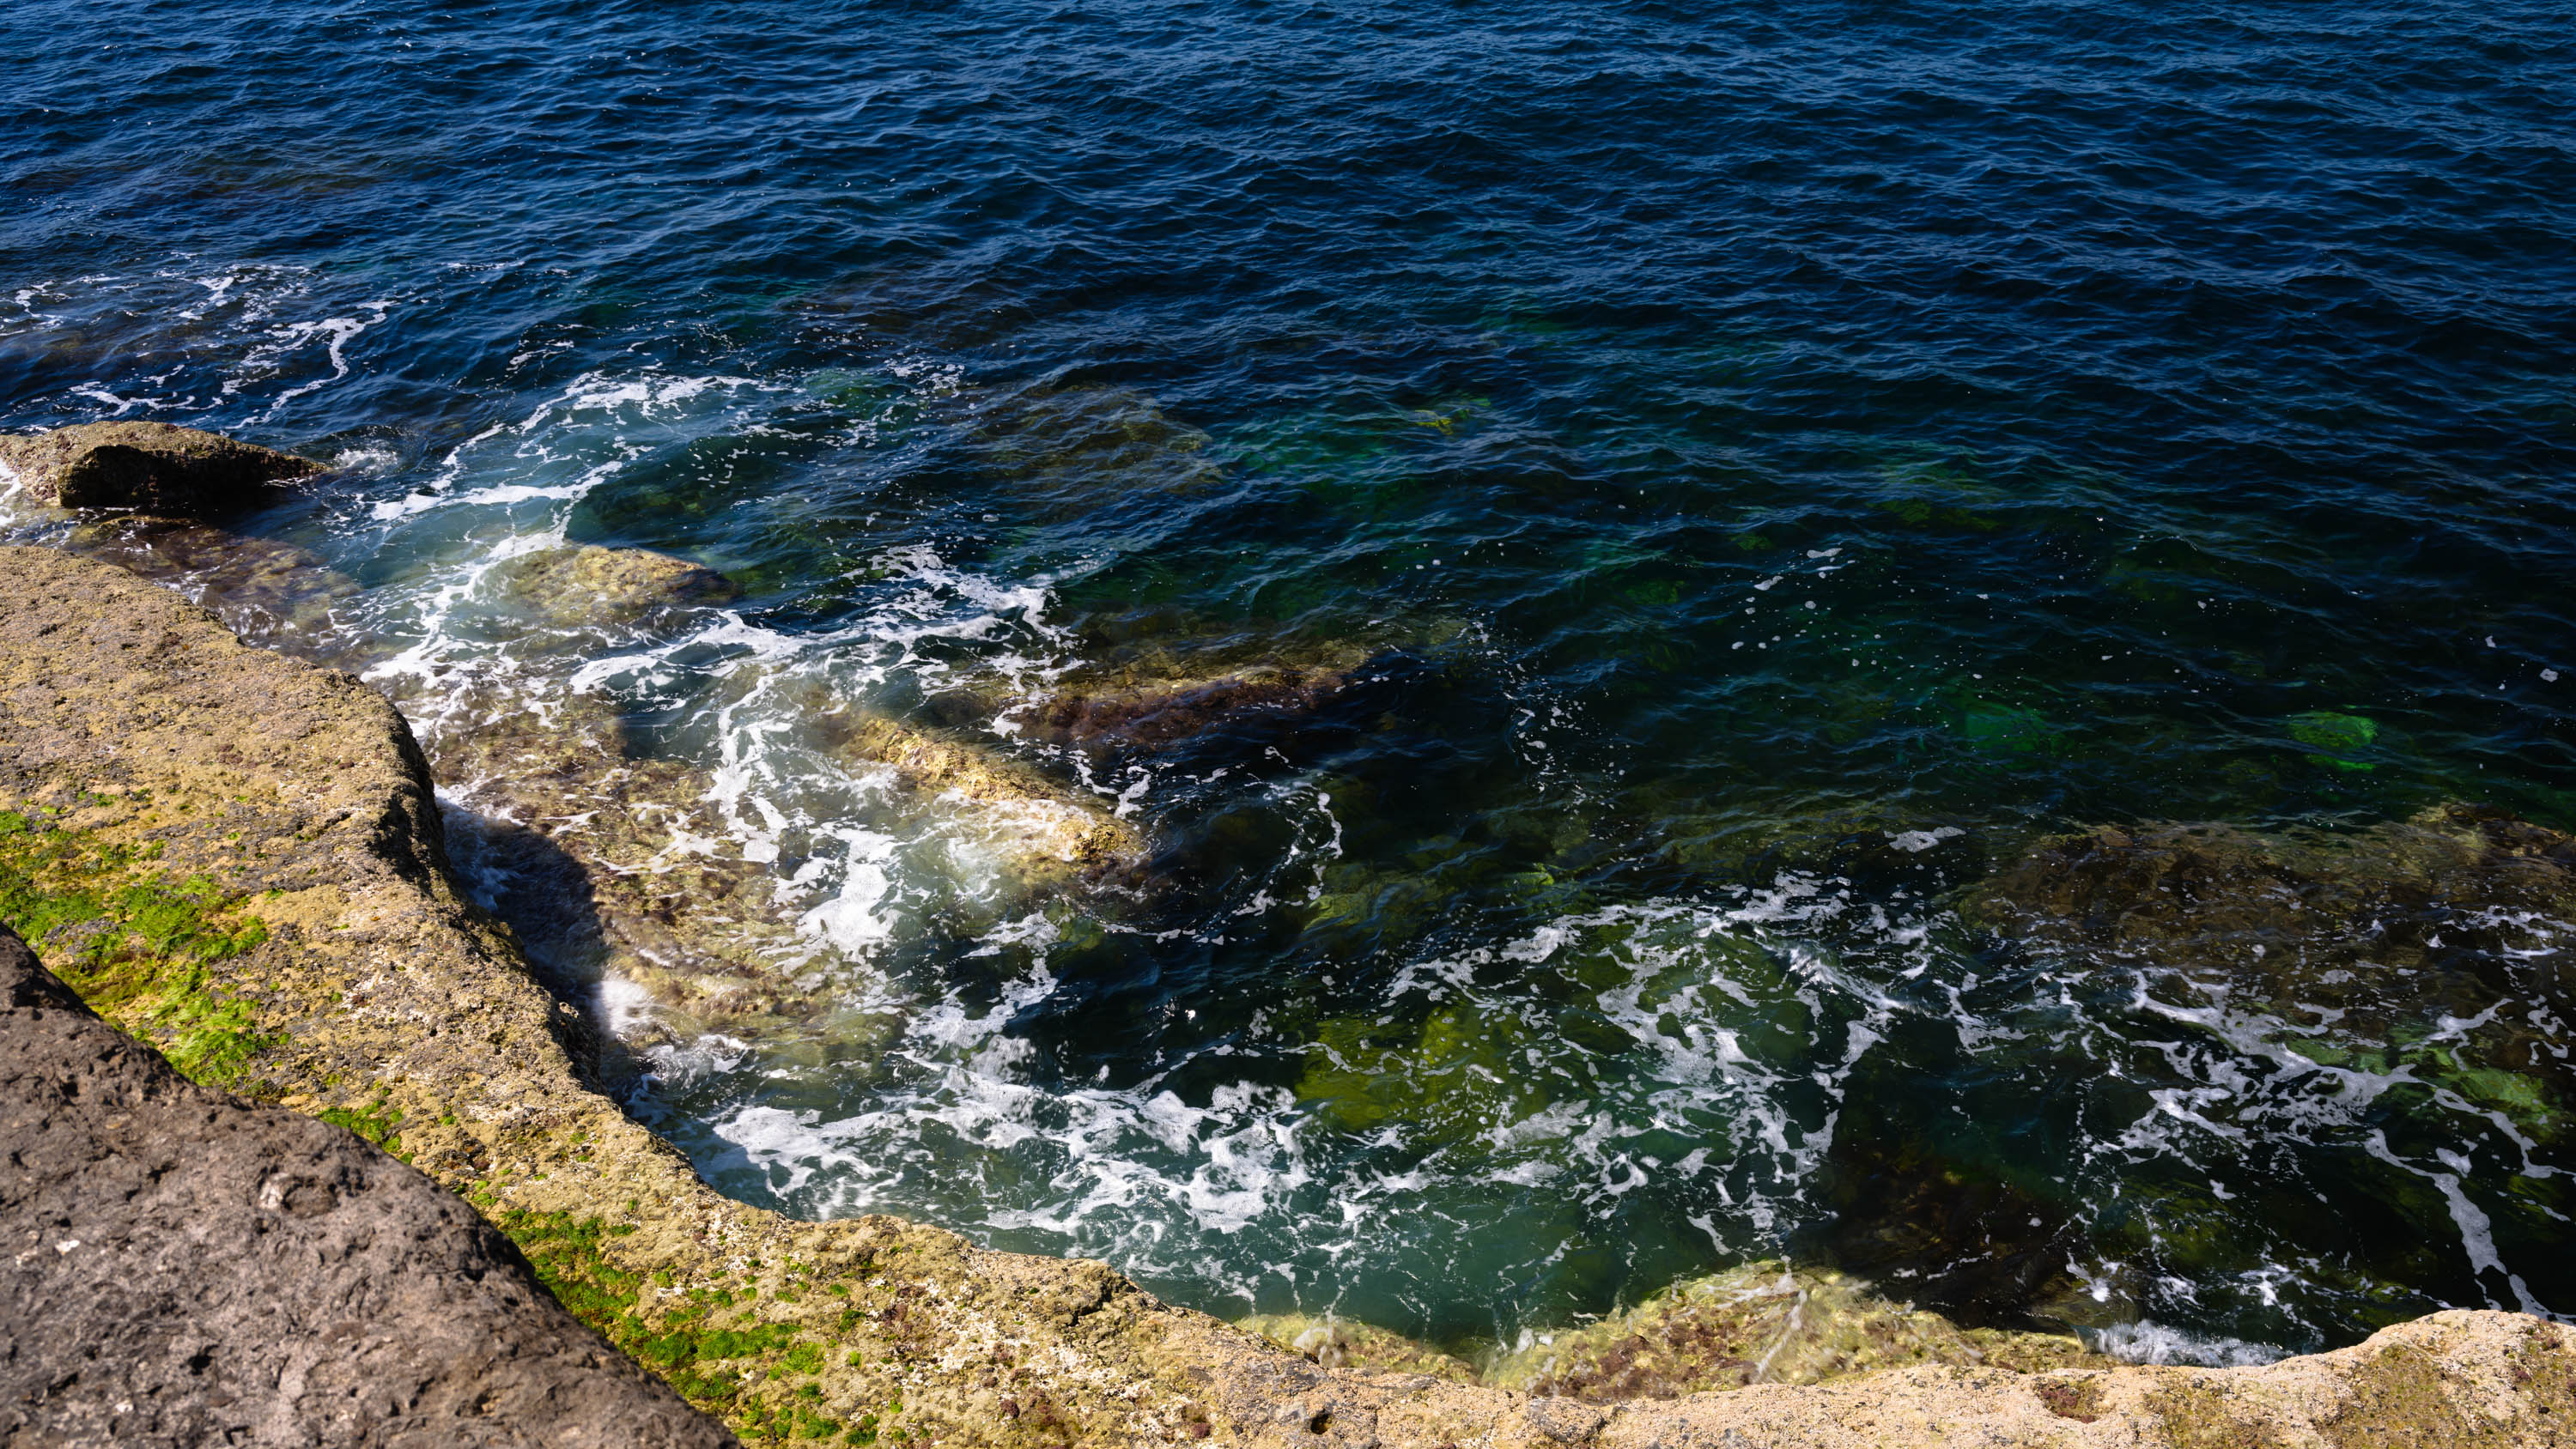
Left: Polarizer off | Right: Polarizer on
In the example above, look closely at the rockpool in the foreground. You can see, with the polarizer off, the standard reflective quality of water, as you would expect on a bright day. In the example with the polarizer filter on, you can see that the rocks underneath the water are a lot more visible and clear and the reflections have been cut through. This can create a smoother feeling image, but that’s not a given; it’s still a creative decision you need to make. A polarizer will also affect the skies in your image, darkening them and increasing contrast, so be aware of this. It isn’t too difficult to adjust the skies in post if they have become a little “over the top”. Don’t ask me how this optical black magic works, because it is just that: magic.
ND filters in landscape photography
A neutral density filter (commonly just called an ND filter) reduces the amount of light entering the lens, allowing you to use slower shutter speeds even in bright daylight. An ND filter is one of the most common filters you will find in a photographers camera bag. It’s used when too much light is hitting the sensor and you might want a slower shutter speed, for example.
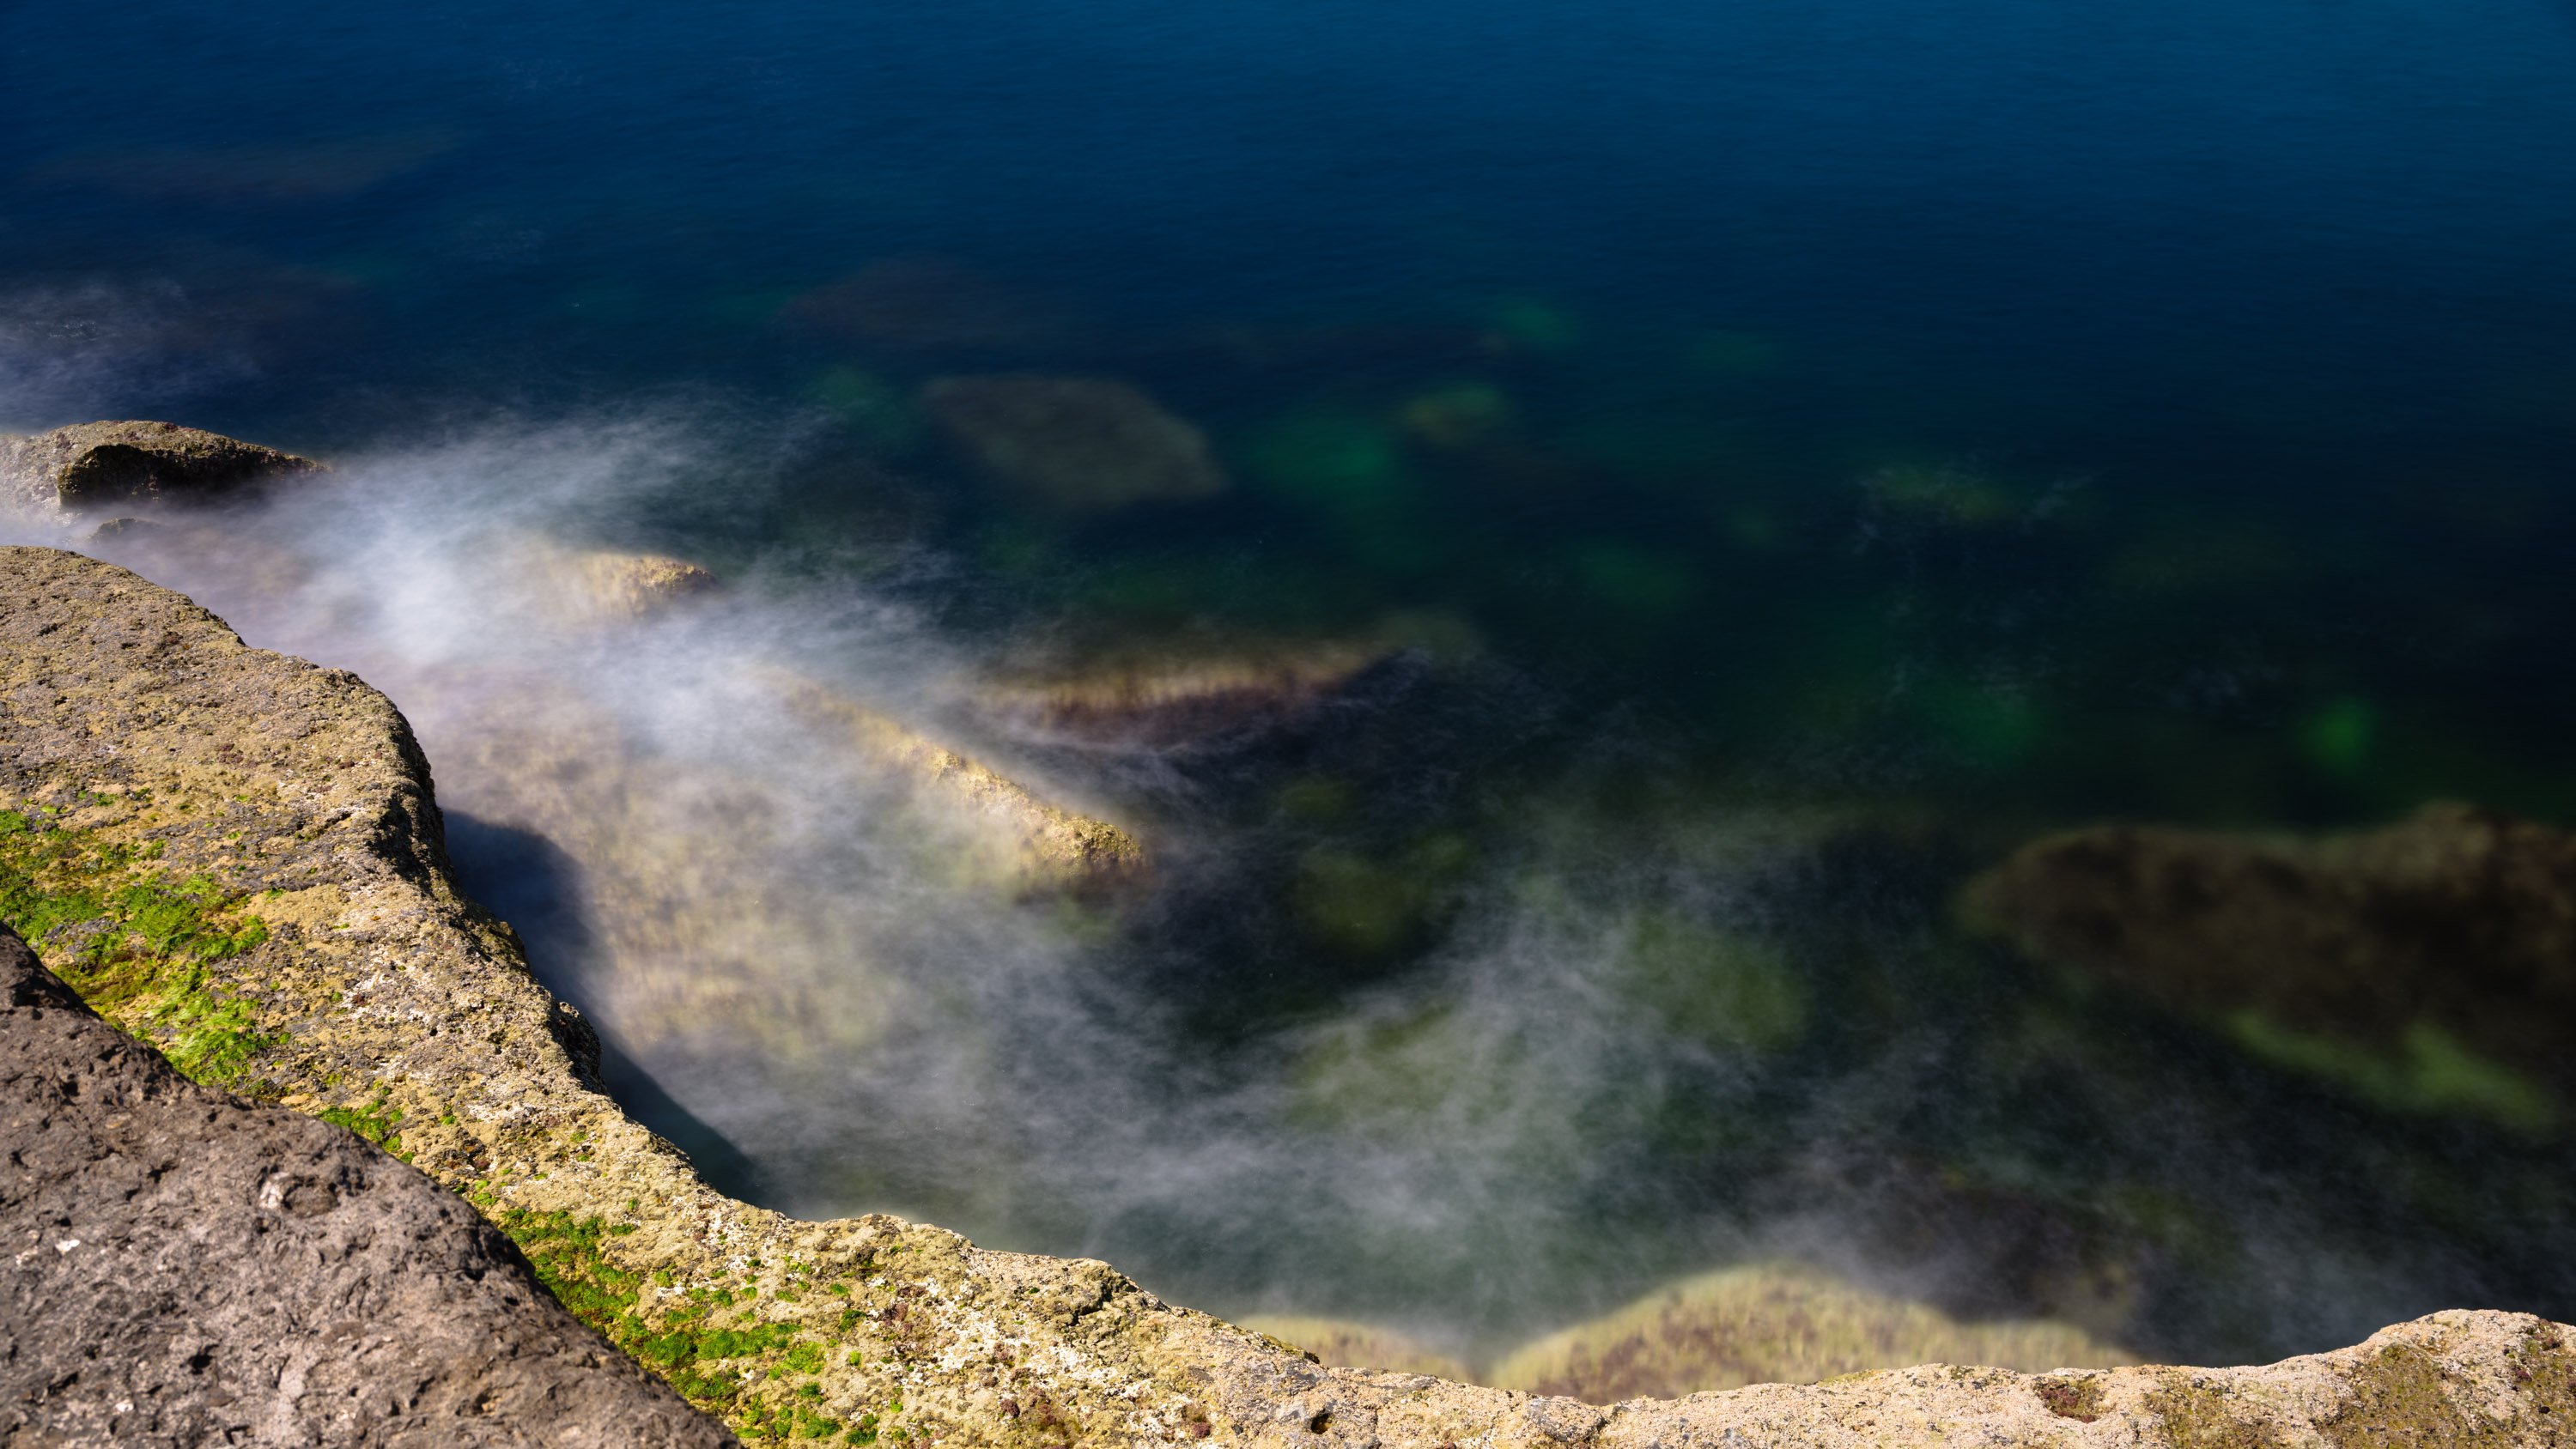
Left: no ND Filter | Right: with ND Filter
This is how photographers achieve silky water effects and cloud streaks in landscapes. See the comparison slider above and below to understand what I mean.
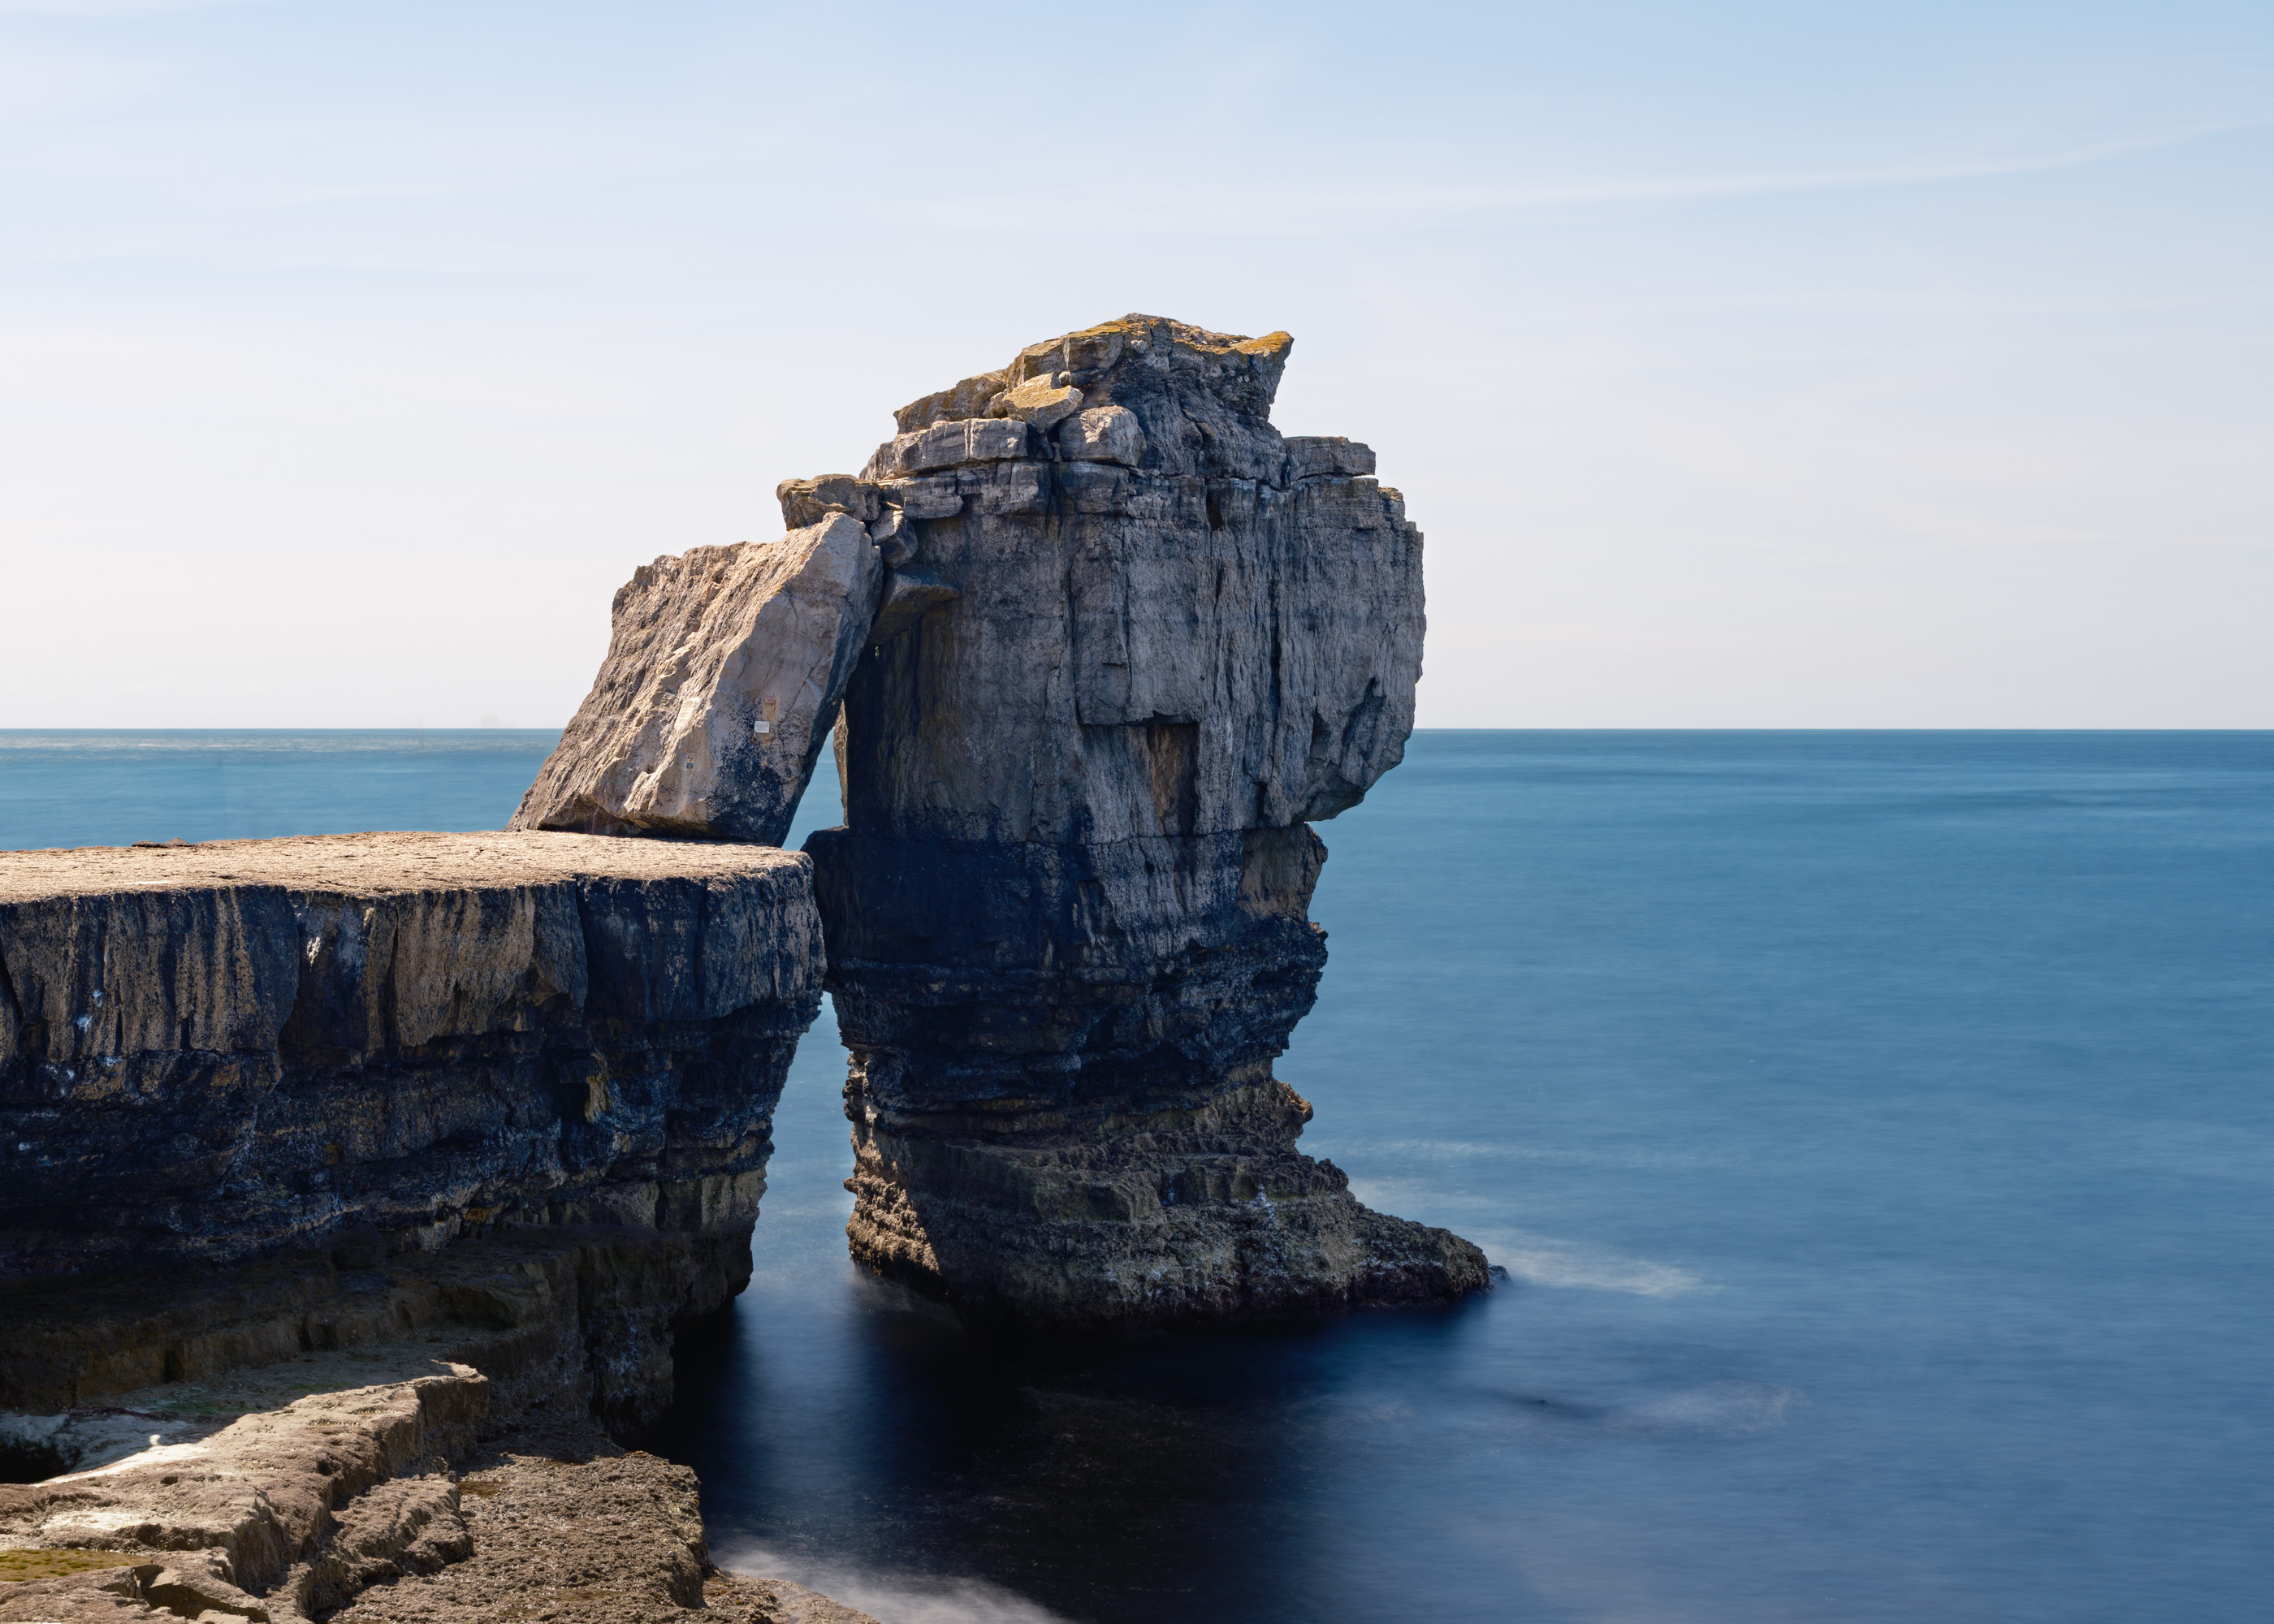
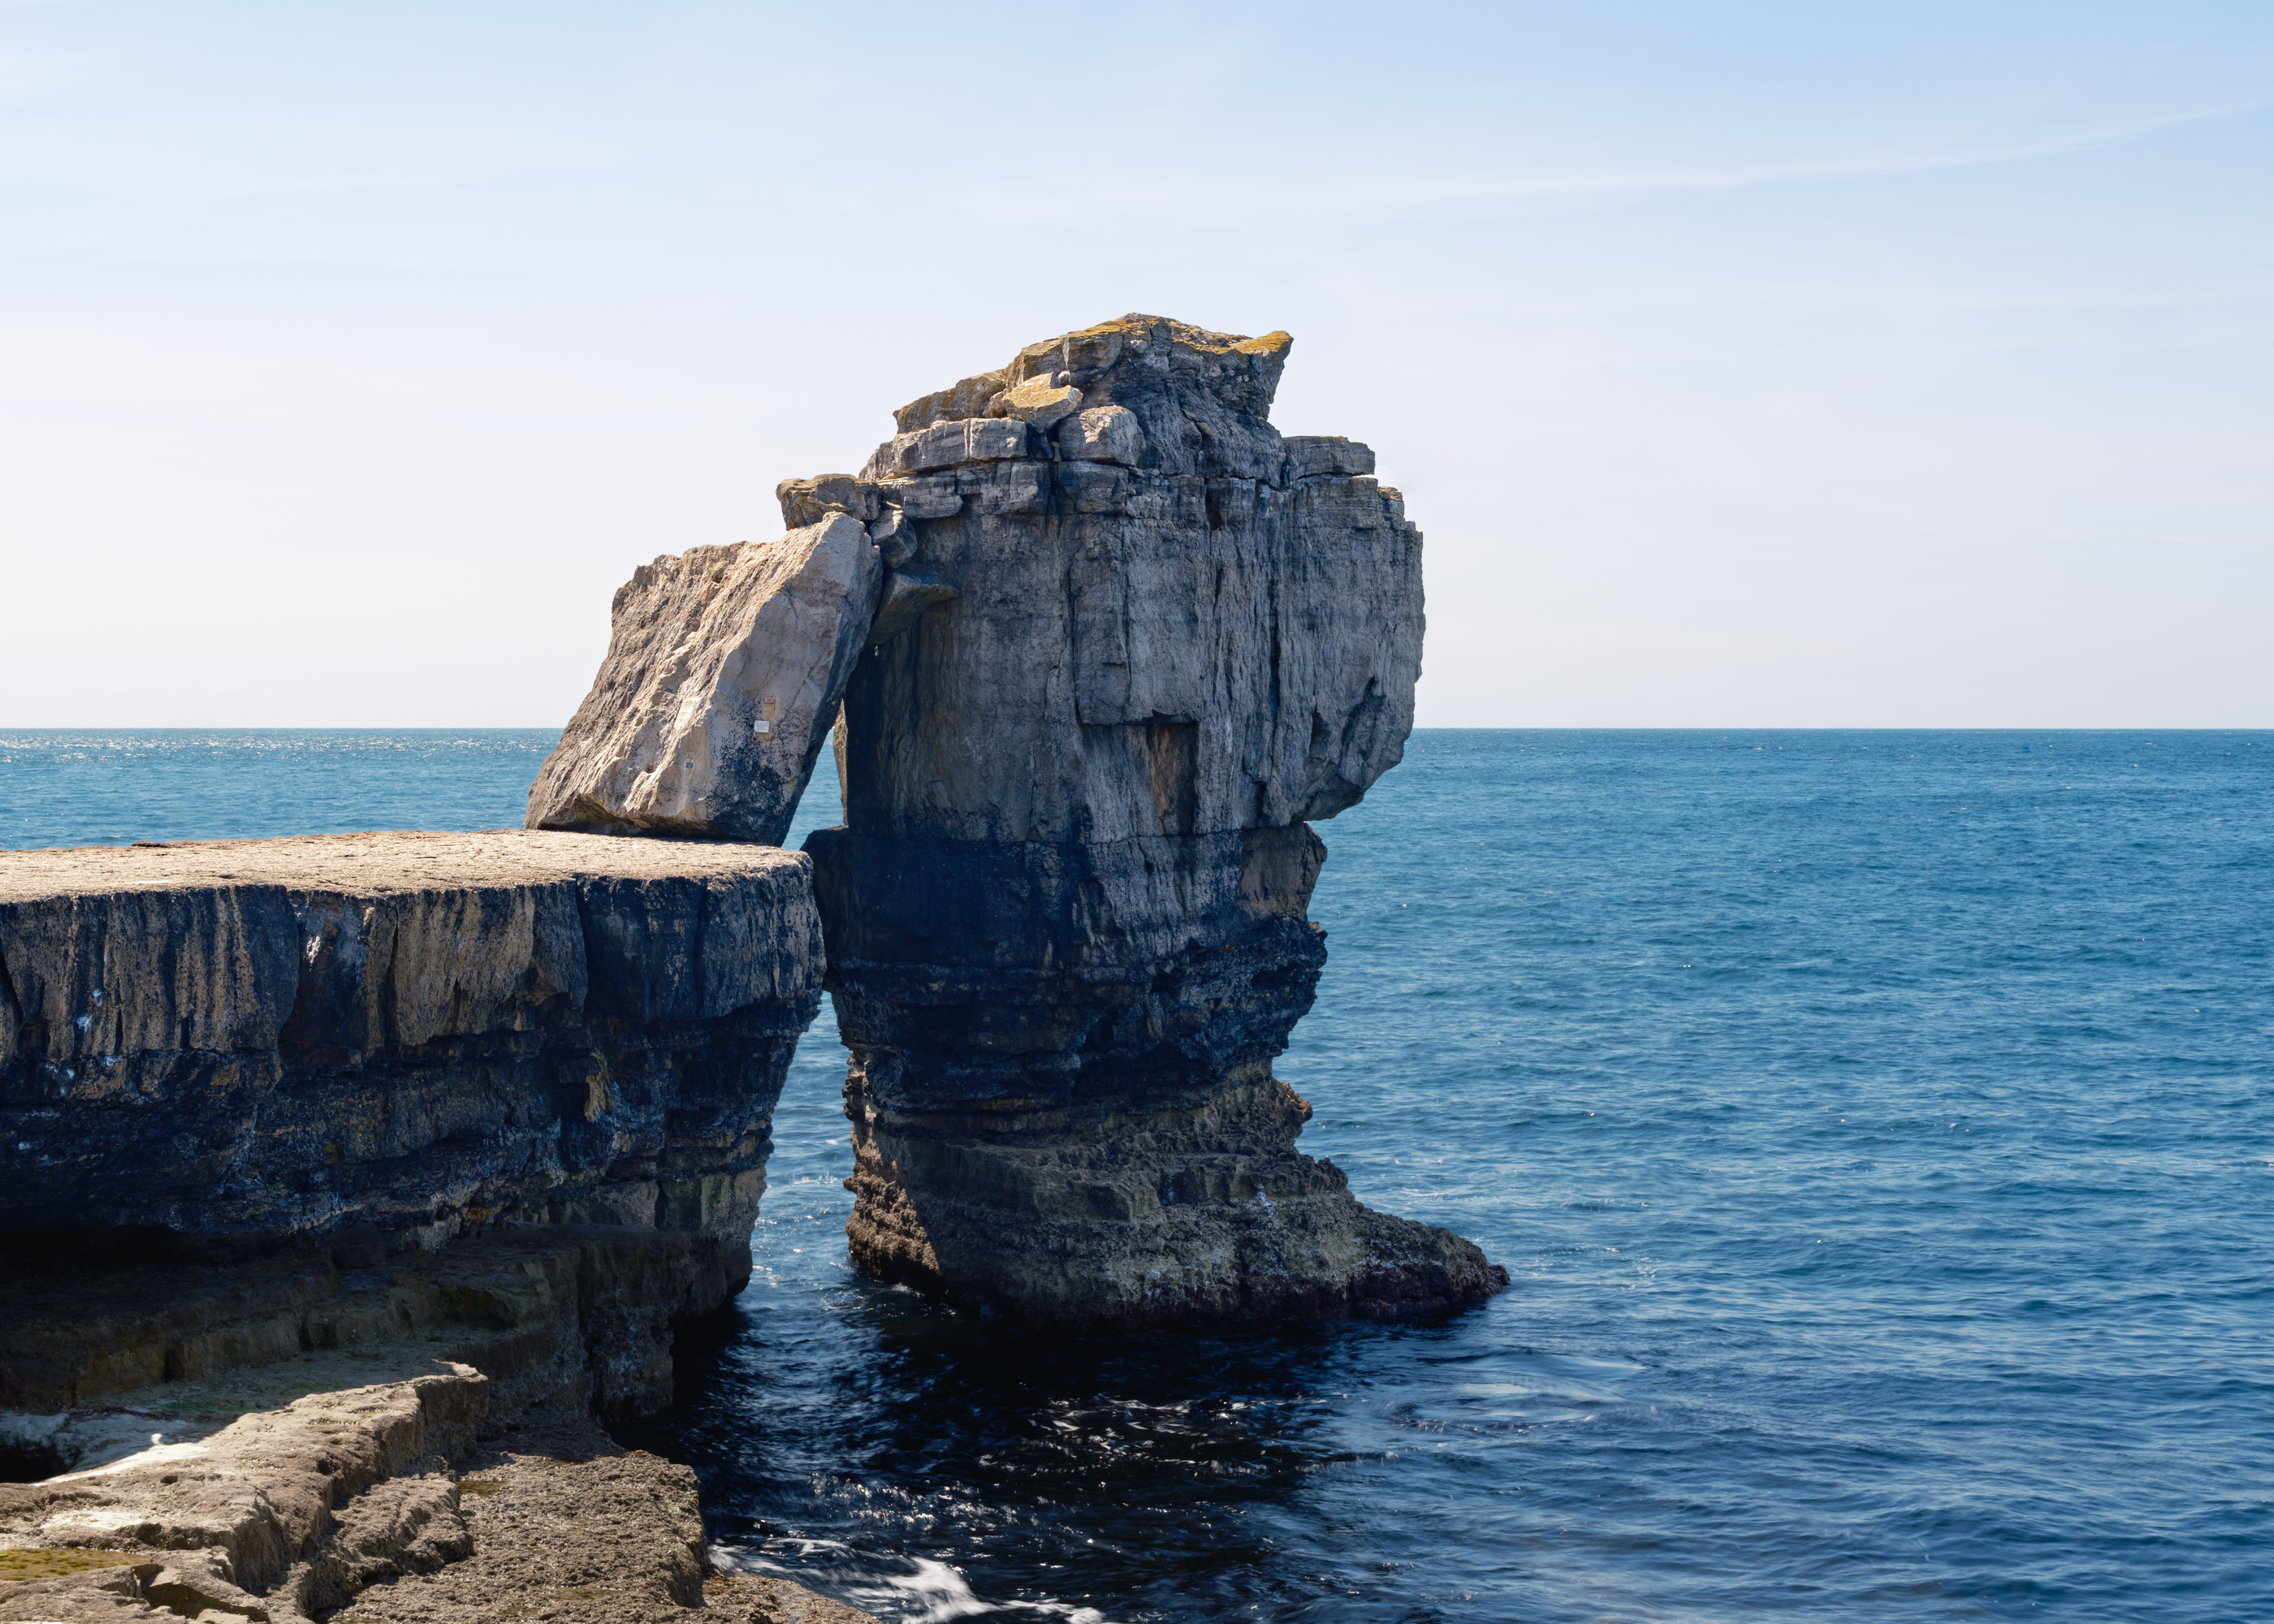
Left: No ND Filter (1/5 second exposure)
Right: With ND Filter (20 second exposure)
The ND filter allowed me to use a much longer shutter speed, 20 seconds, without blowing out the highlights. Because the shutter was open for so long, any movement in the frame, water especially, renders it smooth and glassy.
ND filters also help you keep the aperture in the sharper range of your lens in bright conditions, rather than having to stop down to f/22 or beyond, where the lens might not be in its sweet spot for sharpness. A good ND filter is the first filter you should buy and practice with. They’re essential to managing light conditions in the field.
Graduated ND filters in landscape photography
Graduated neutral density filters, or GNDs for short, are popular with landscape photographers who want to balance the sky's brightness with the darker exposure required for the foreground.
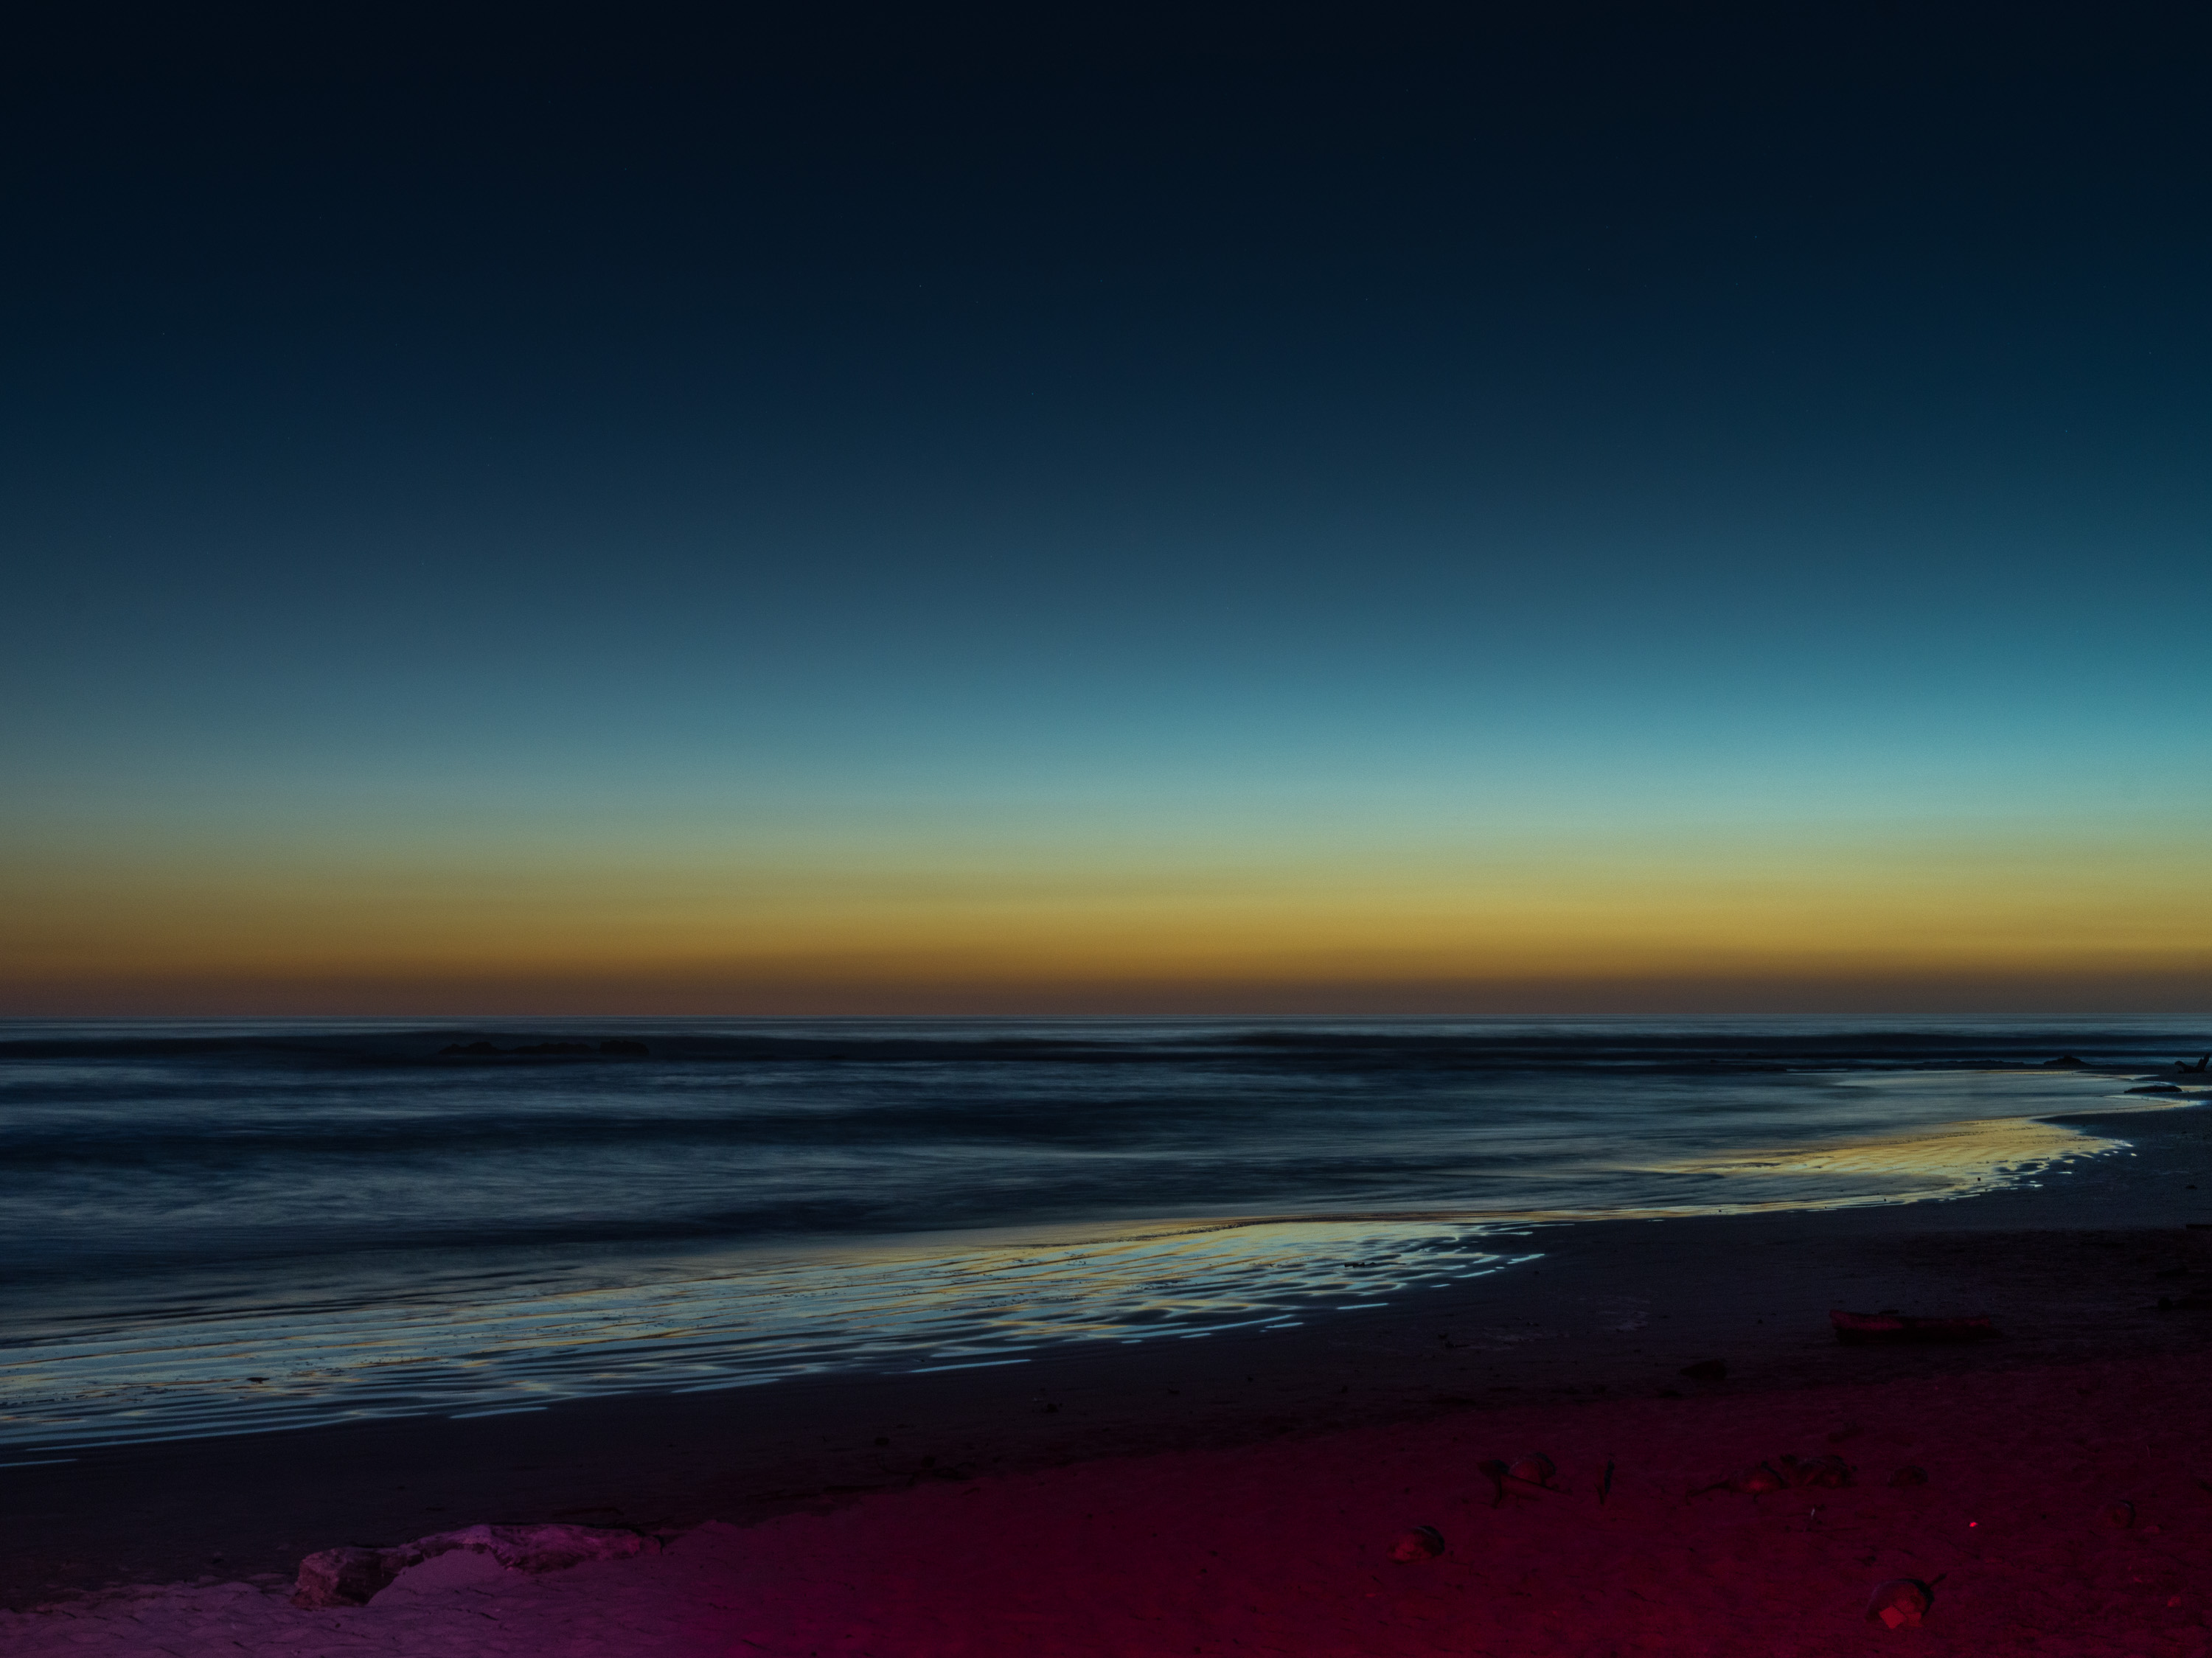
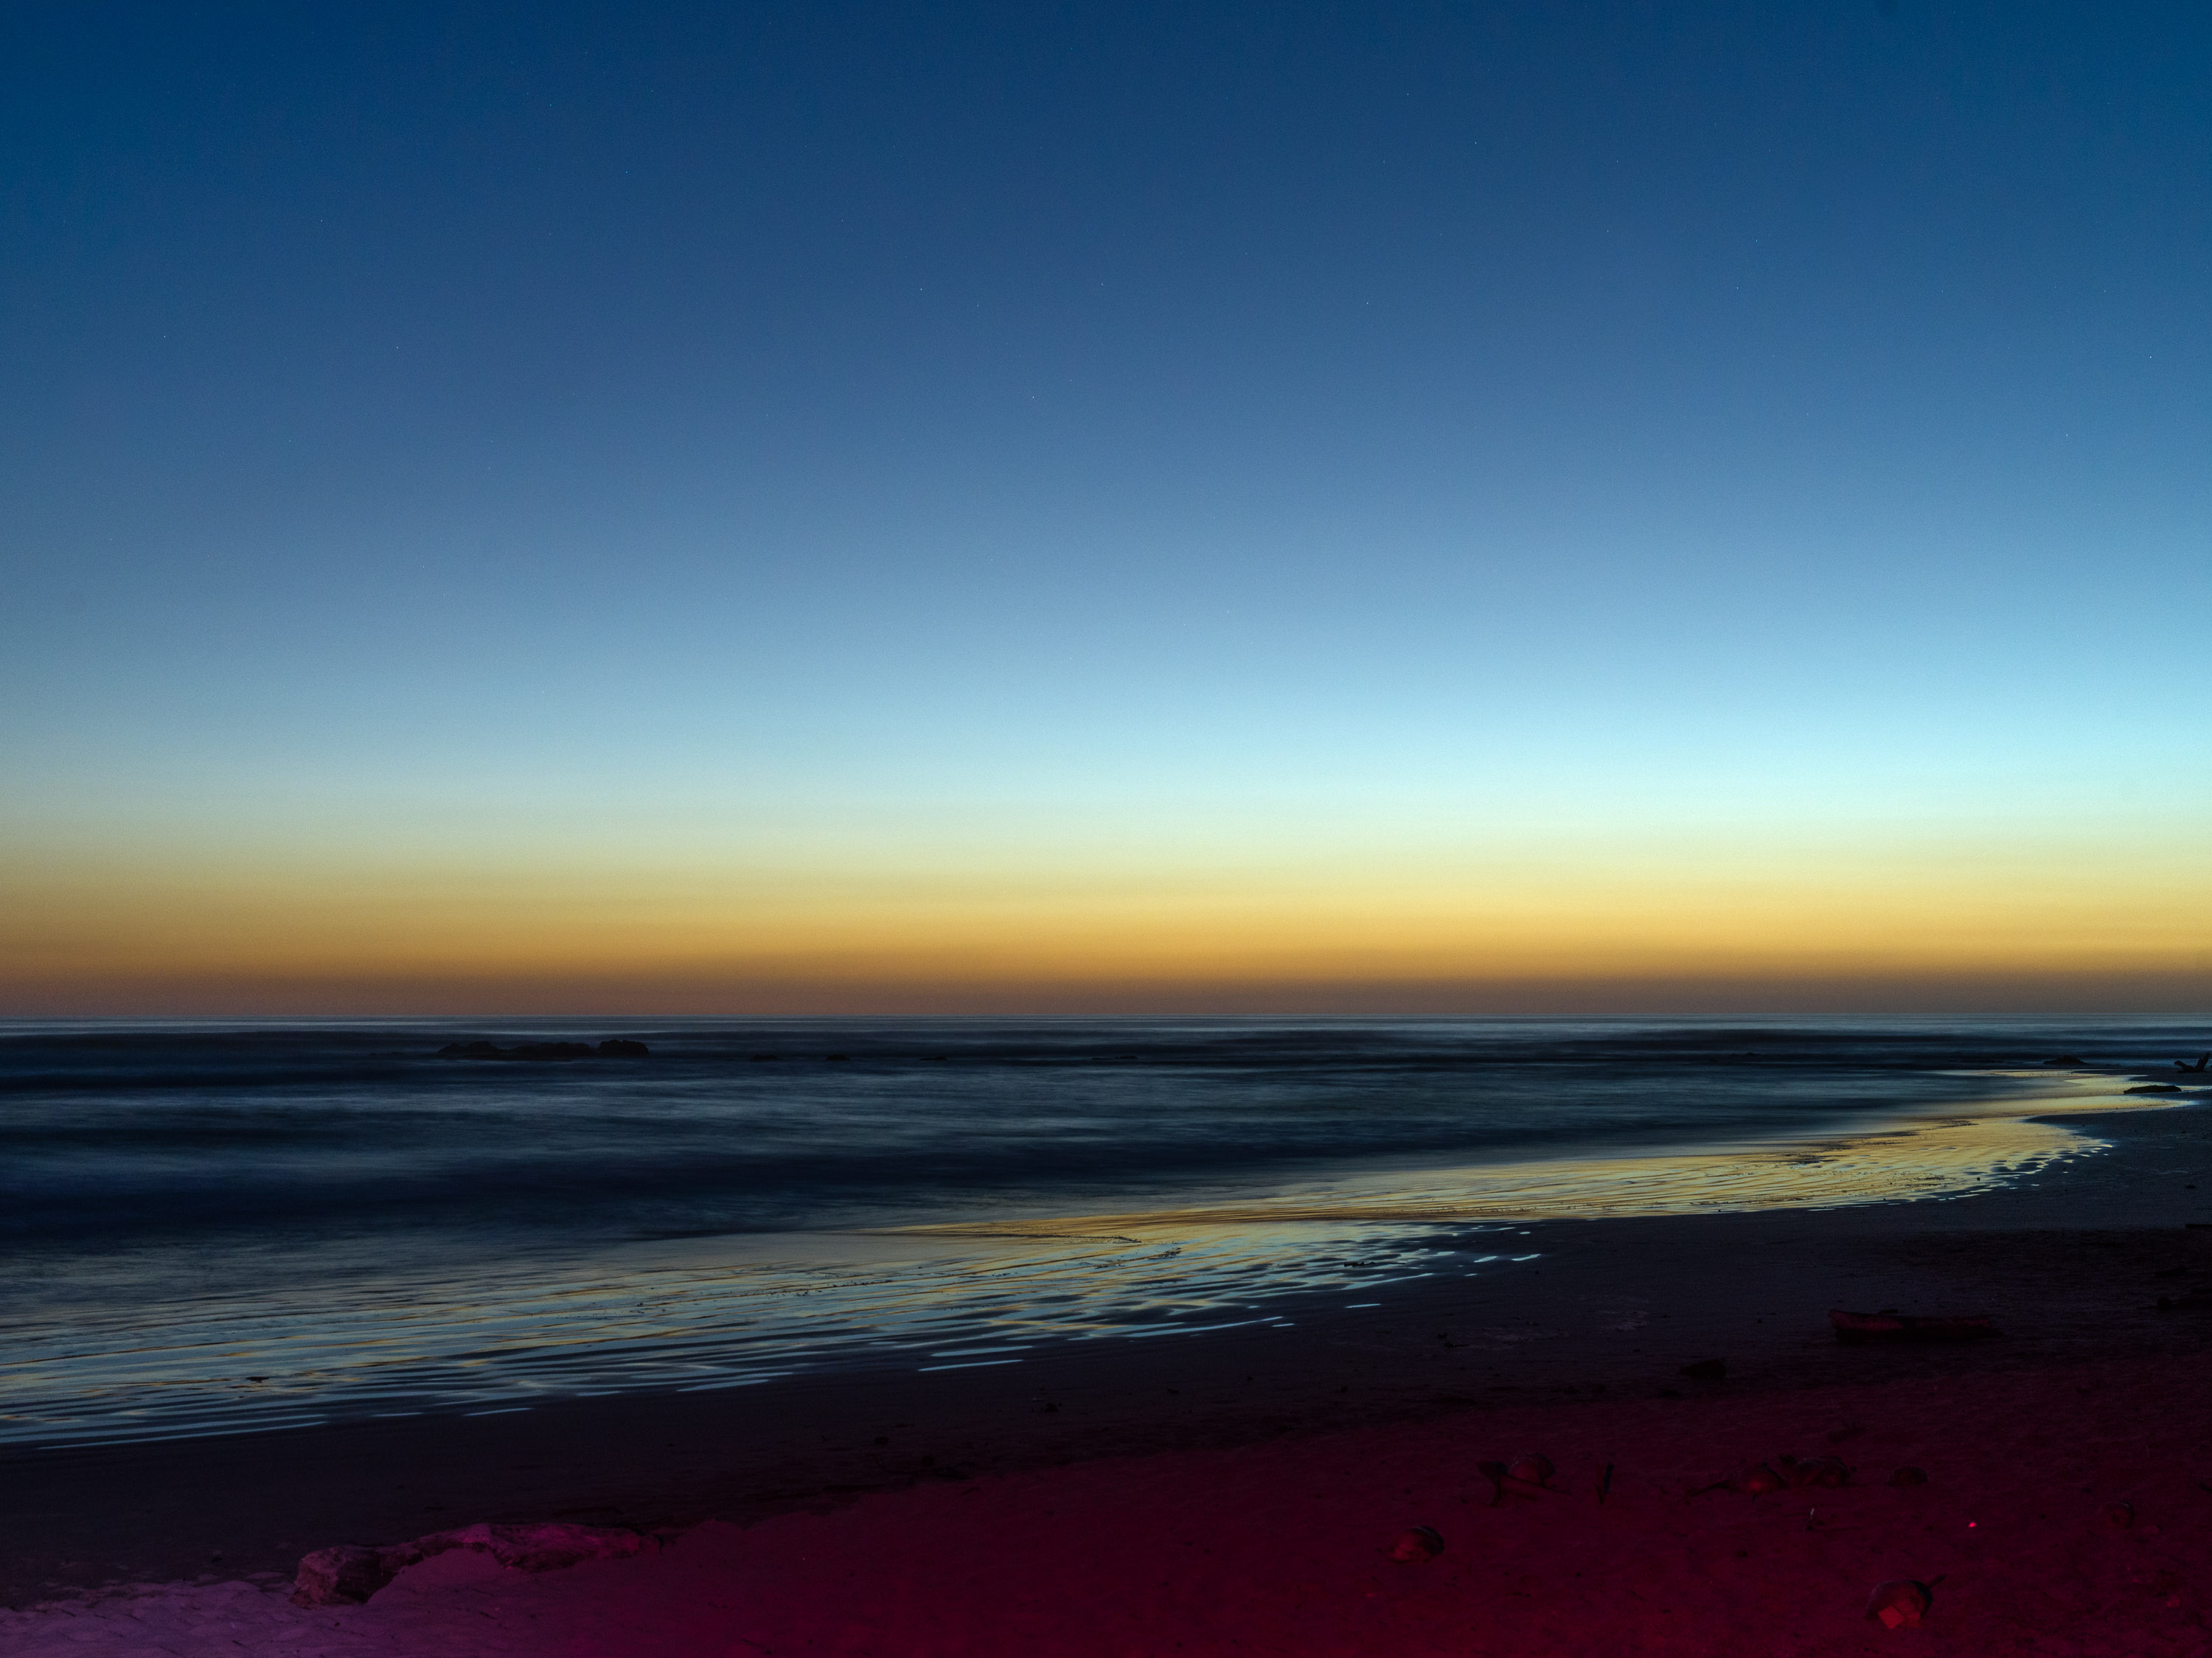
Left: Graduated ND Filter Off
Right: Graduated ND Filter on
You can see in the example above, shot by Ian Howorth, with the graduated ND on, how it darkens the top of the sky and balances the exposure with the ground.
Graduated neutral density filters (GNDs) come in either hard-edge or soft-edge versions. Soft-edge filters have a more gradual transition between dark and clear. Hard-edge filters use a hard cutoff with very little to no transition between dark and clear areas. Both are useful in different scenarios, depending on the horizon.
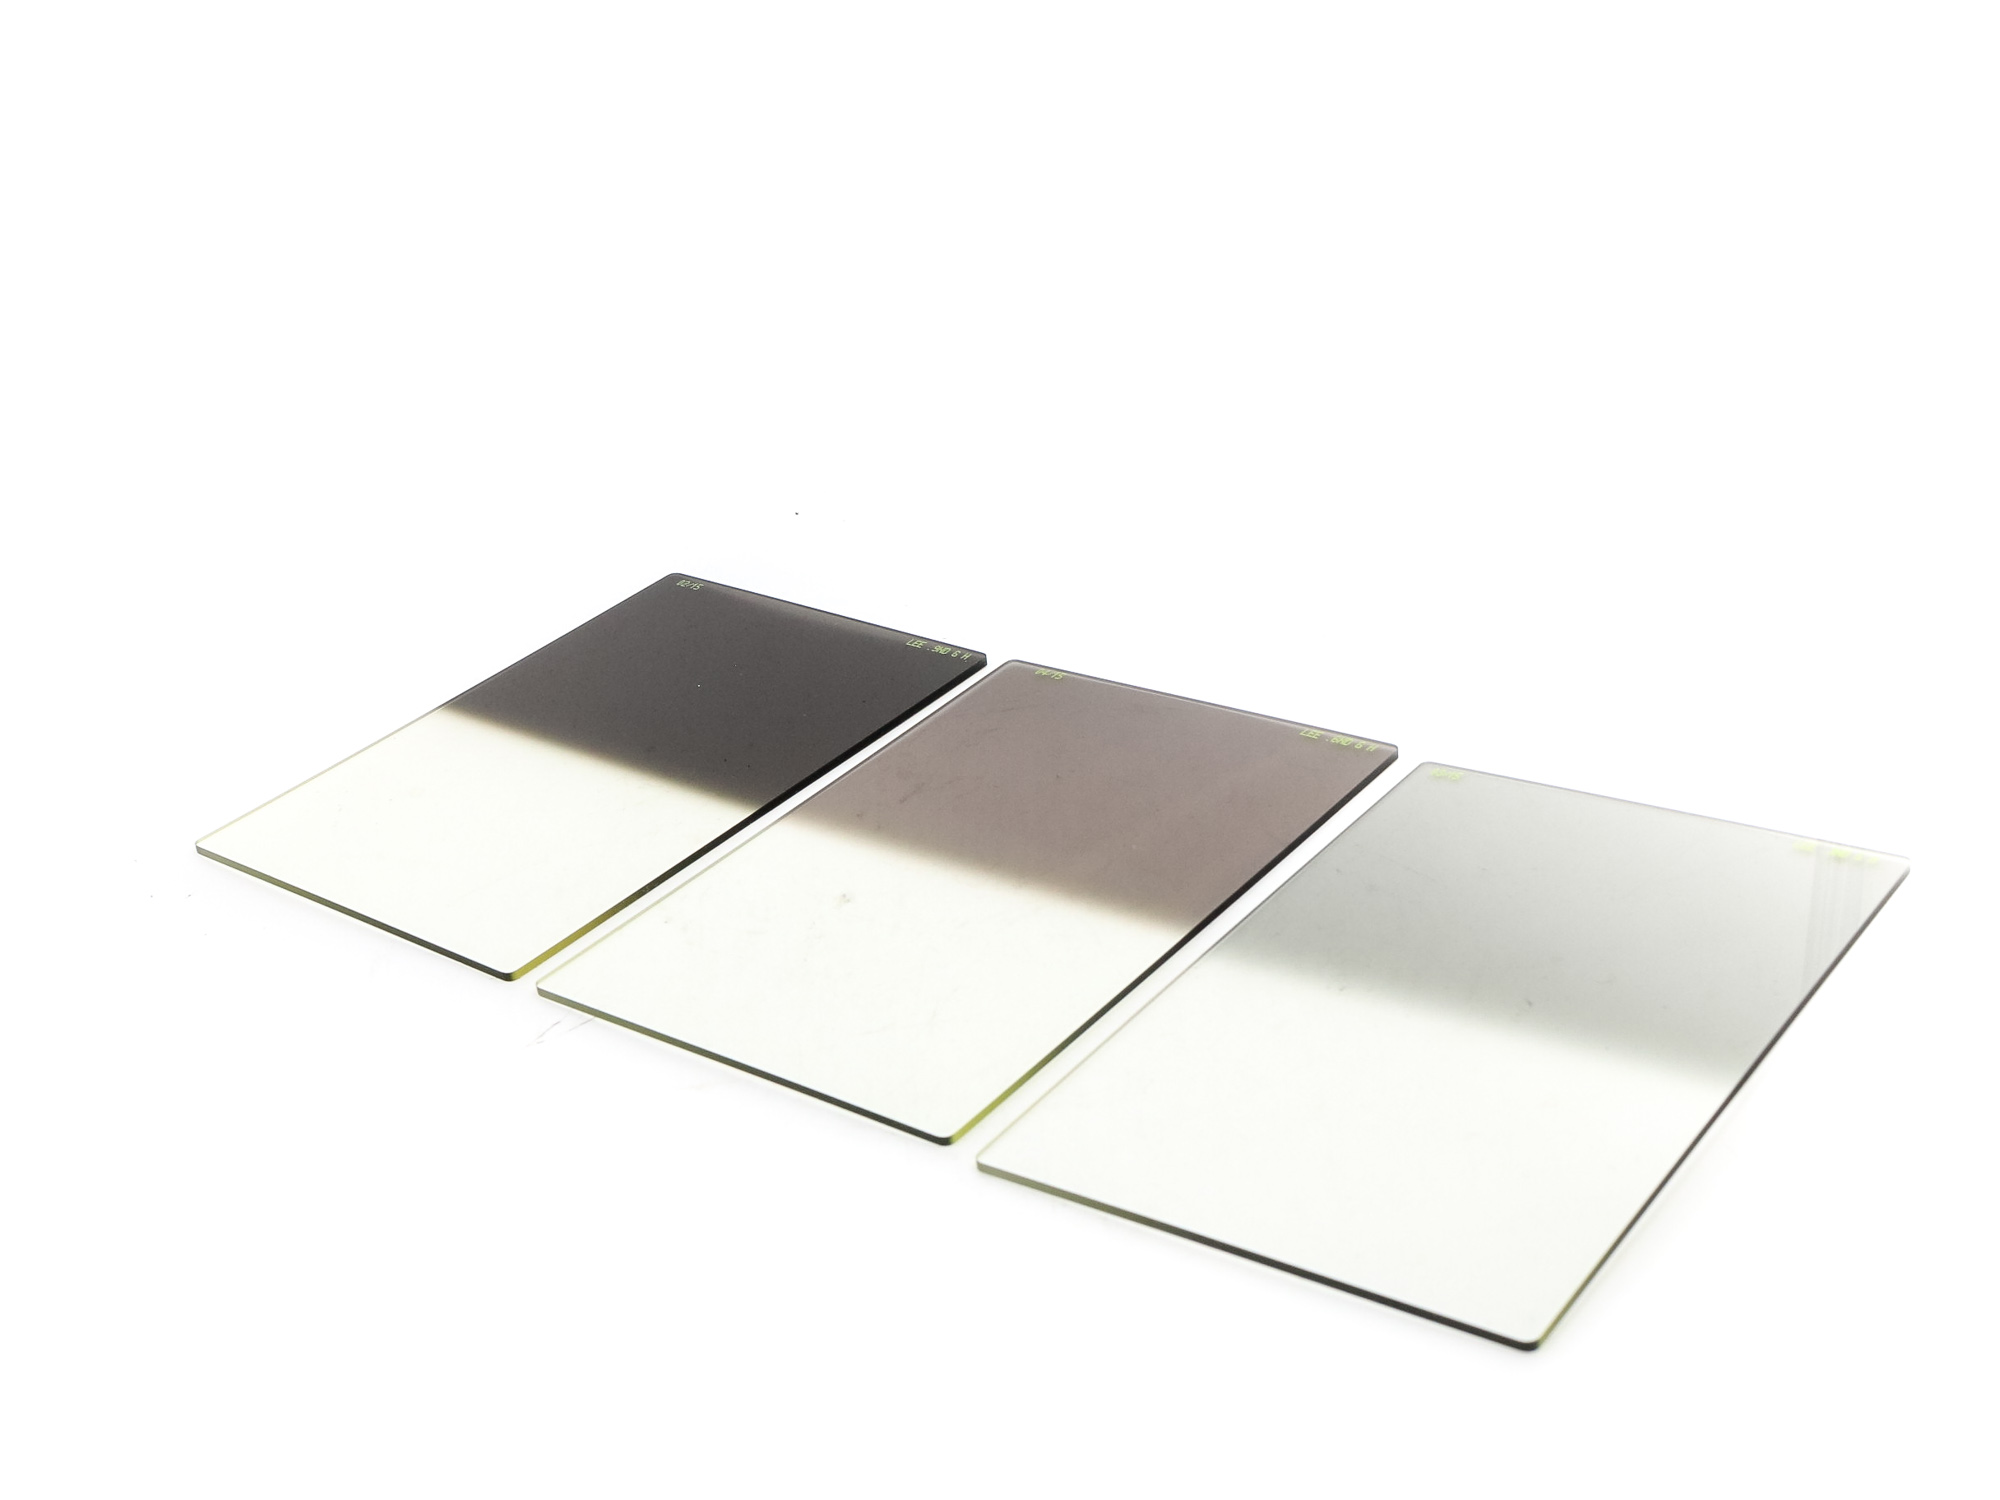
Hard Graduated Neutral Density Filters, which often come in sets with different degrees of ND strength
Hard-edge graduated ND filters are good when the horizon in your scene is very straight and clear. A good example would be shooting seascapes, where the horizon is just water, or perhaps the flat cornfields of Ohio or the polders of the Netherlands. Wherever you are, you can place the dark part of the GND filter over the sky and line up the transition with the horizon to balance the exposure.
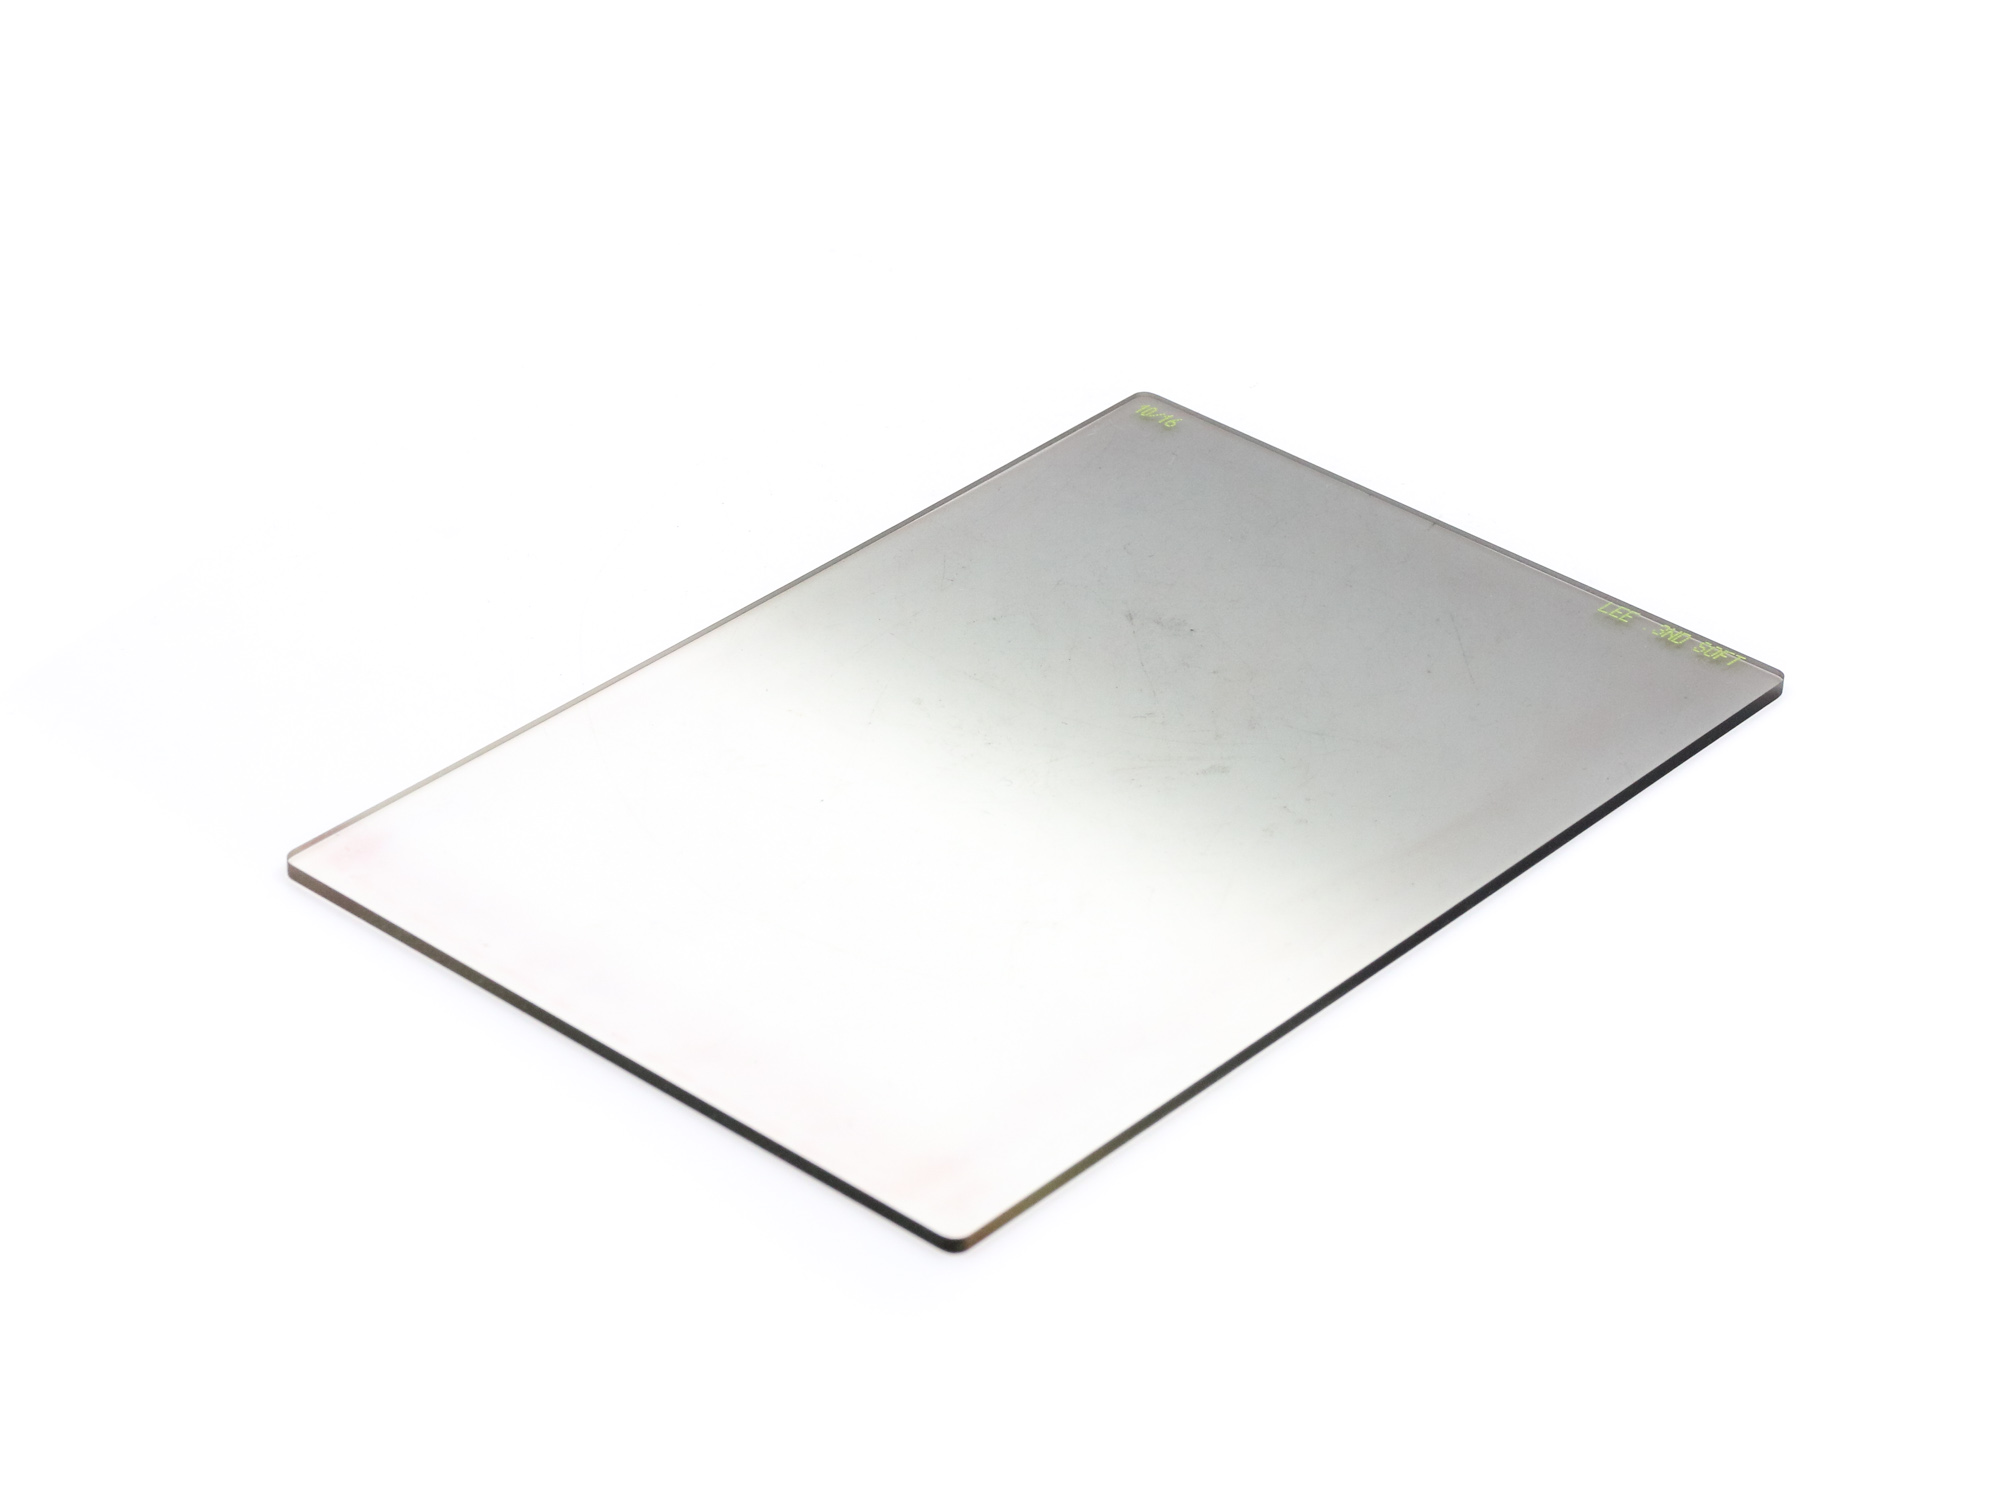
LEE100 0.3 ND Soft Graduated Filter
Soft-edge GNDs are good when the horizon in your scene is not straight and is more fuzzy. The more gradual and subtle effect allows for use in a lot more scenarios: sunrises and sunsets, forest photography and cityscapes can particularly benefit from very gradual ND; basically, any scenes with protruding objects.
Soft-edge GNDs come in different strengths and colors, allowing you to fine-tune your exposure. While some landscape photographers prefer to bracket exposure in-camera, shooting different exposures to edit in post, many will try to get it right in-camera. ND grads usually come as square filters, which are dropped in front of your lens via an adapter, but you can also find them with a circular screw. Square filters let you shift them up and down in the holder, something you can’t do with circular filters. This comes in handy with gradual filters, where they must be tuned to the scene in front of you.
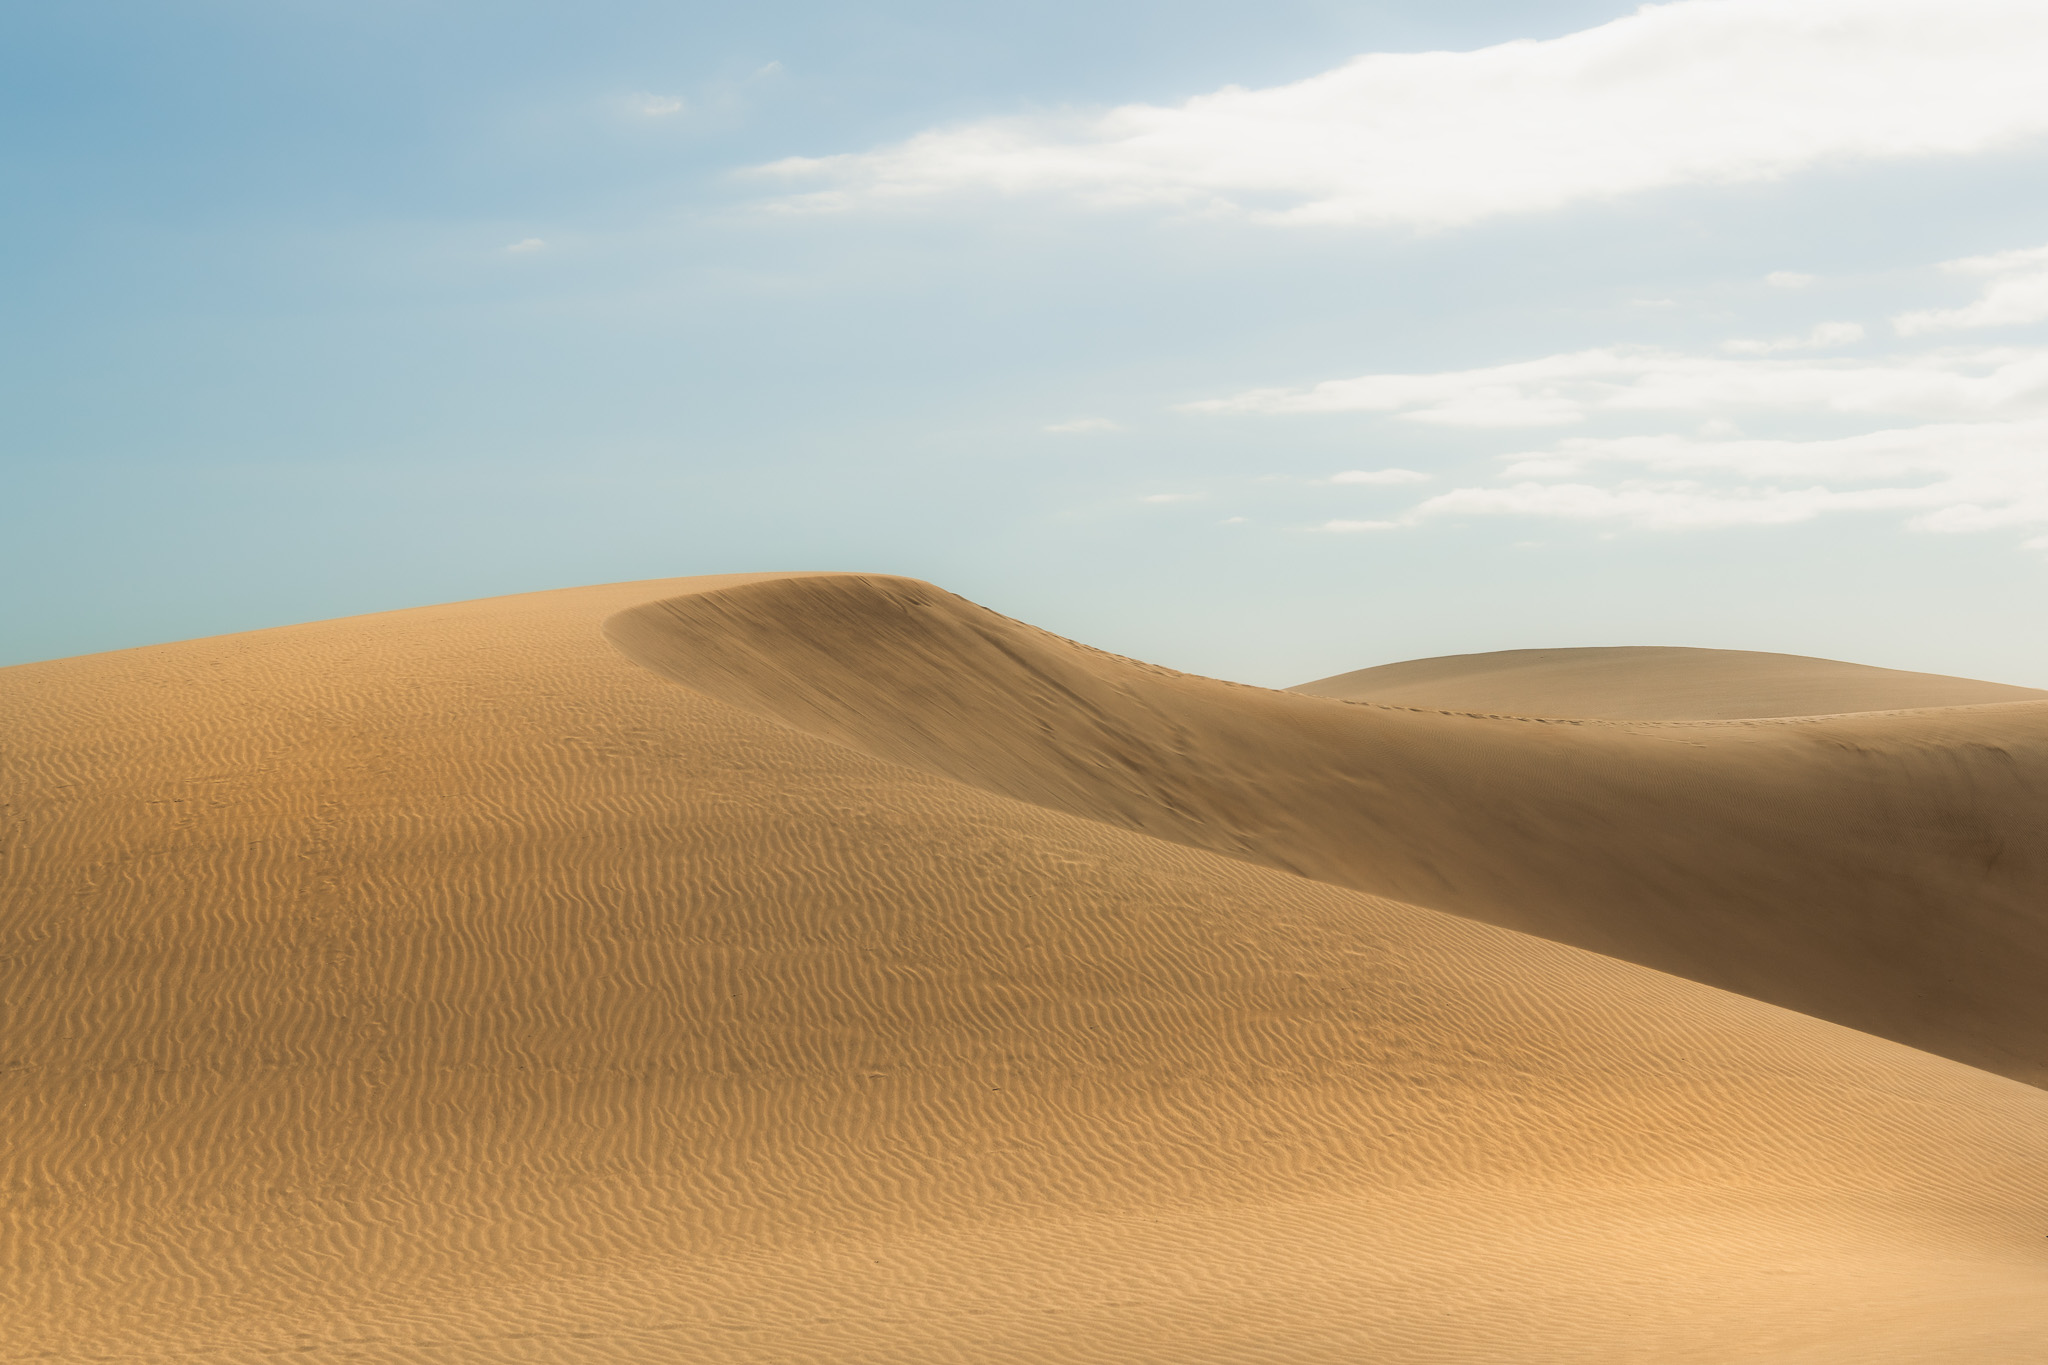
Adam Makkai | Nikon D850 | Nikon AF-S Nikkor 24-70mm f/2.8E ED VR | 44mm | f/8.0 | 1/500 sec | ISO 100
Look for Z lines and shapes
When you’re composing a landscape image, it can help to look for any implied shapes within the scene. One particularly effective option is a subtle “Z” shape running through the frame.
Once you start noticing this technique, you’ll notice it everywhere. This isn’t always an obvious or literal line; more often it’s suggested through overlapping layers, a winding stream, a curving path or the way hills and ridgelines fall back into the distance.

Kyle McDougall | Fujifilm GFX 100S | GF 35-70mm f/4.5-5.6 WR | 58mm | 1/60 | f/16 | ISO 800
A Z-shaped structure naturally guides the viewer’s eye through the photograph, leading it from foreground to background in a fluid, engaging way. It can add depth, movement, and a stronger sense of flow, helping the image feel more dynamic and visually connected.
See how photographer Kyle McDougall subtly weaves shapes into his landscapes in our Fujifilm GFX 100S for landscape photography piece.

Chris Burkard | Sony ILCE-7M2 | Sony FE 24-70mm f/4 ZA OSS | 37 mm | f/4 | 1/320 sec | ISO 200
Always Shoot RAW
If you want some flexibility in your images, it’s best to shoot in RAW format. RAW files preserve more color and detail than JPEG files, so you can adjust exposure, recover highlights and fine-tune color with less quality loss during editing. Why does this matter in landscapes? Because skies and shadows can be tricky to get right and you want your images to look believable.
We’d recommend shooting RAW by default and switching to JPEG only when you have a clear reason (like needing to deliver your photos quickly or having limited storage). If you’re learning the basics, RAW will also give you more room to recover from mistakes as you refine your skillset.
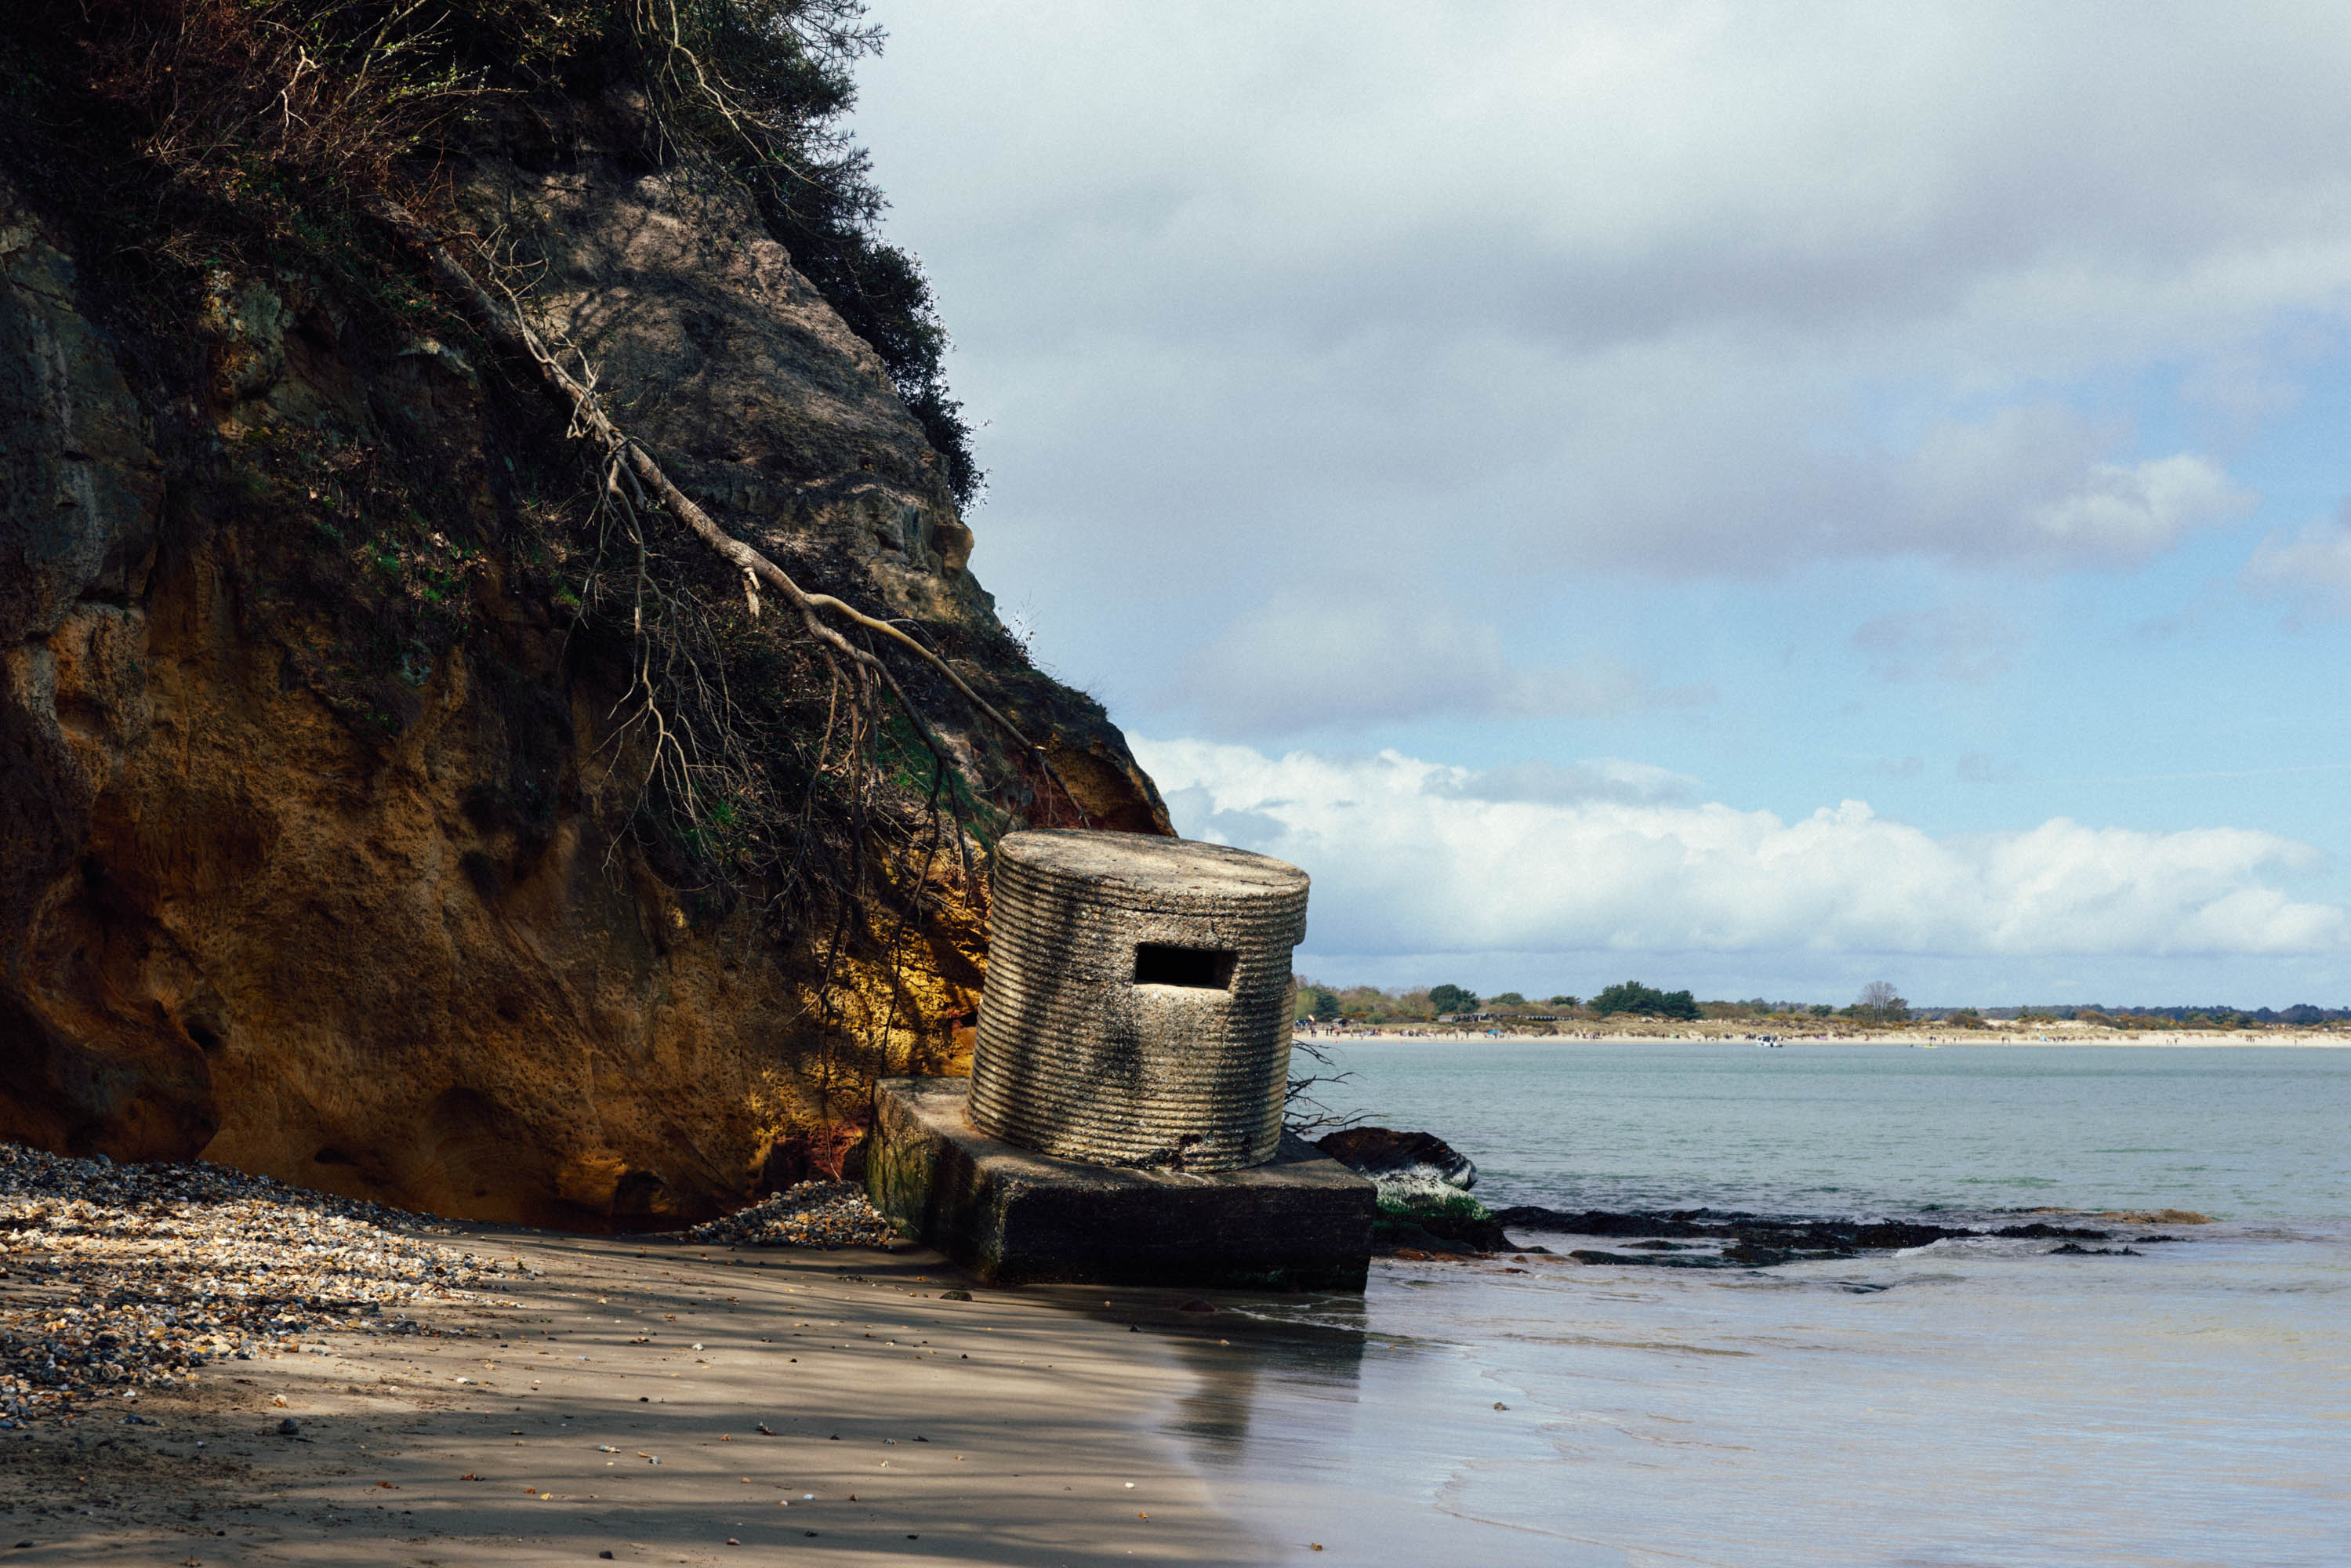
Connor Redmond | Canon EOS R5 Mark II | Canon RF 24-70mm F/2.8 L IS USM | f/8.0 | 1/400 sec | ISO 100
Keep an eye on sharpness
If you want an honest answer to where to focus for front-to-back sharpness in your images, know that it depends on what makes sense for the image. People love to talk about how crisp a lens is and whether everything in the frame is sharp from front to back.
One of the most common questions beginners ask is: Where should I focus? It’s really wherever makes sense for the image but I’ve got some handy methods for you to try out if you want that front-to-back detail.
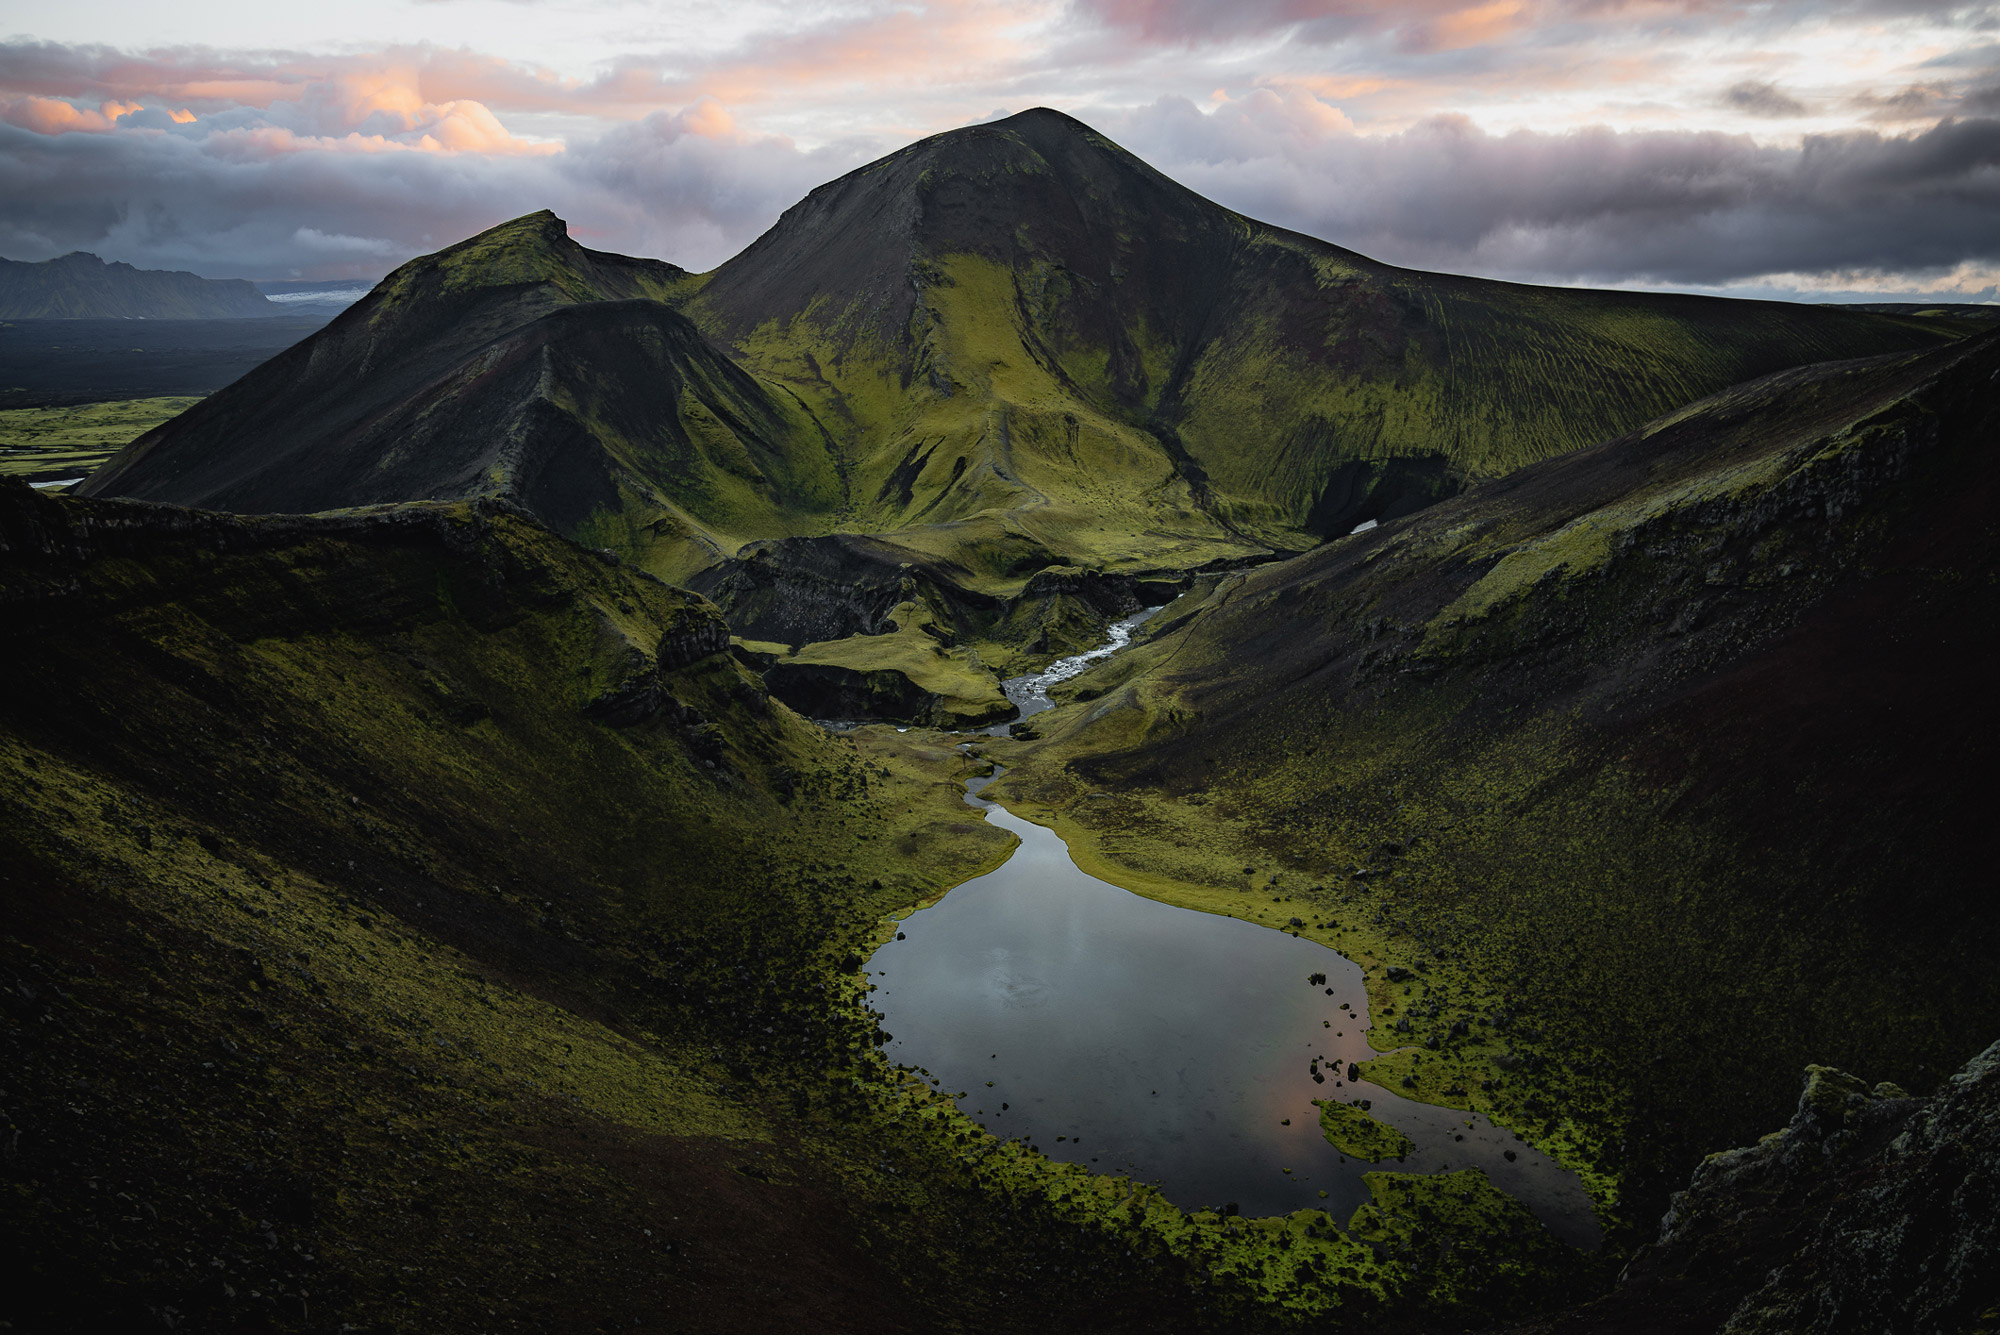
Paul Watson | Panasonic S1R | 24-105mm f/4 | 24mm | f/4 | 1/13 | ISO 100

Used Nikon Z6 and Nikon 14-30mm f/4 S

Paul Watson in Iceland | DJI Mavic 2 Pro | 28mm f/2.8 | 10.3mm | f/6.3 | 1/240 | ISO 100
One of the most reliable focus techniques is focusing at the hyperfocal distance, which means focusing on a point that keeps as much of the scene sharp as possible, from somewhere near the foreground right through to infinity. It’s especially effective with wide-angle lenses.
Your aperture choice matters here a great deal; many lenses are sharpest at their mid apertures (often called the lens’s sweet spot) and stopping down too far can reduce fine detail. It’s worth researching your lens's sweet spot to get the best out of it.

Atacama Desert
Unlike portrait or wildlife photographers, landscape photographers don’t usually worry too much about bokeh, which is the soft, blurry effect you can often see behind a subject. In landscapes, the goal is usually the opposite because most of the time, you want as much of the scene as sharp and detailed as possible. That’s one reason larger medium-format lenses get so much praise in landscape circles. They can be very sharp and capture a huge amount of fine detail across the frame.
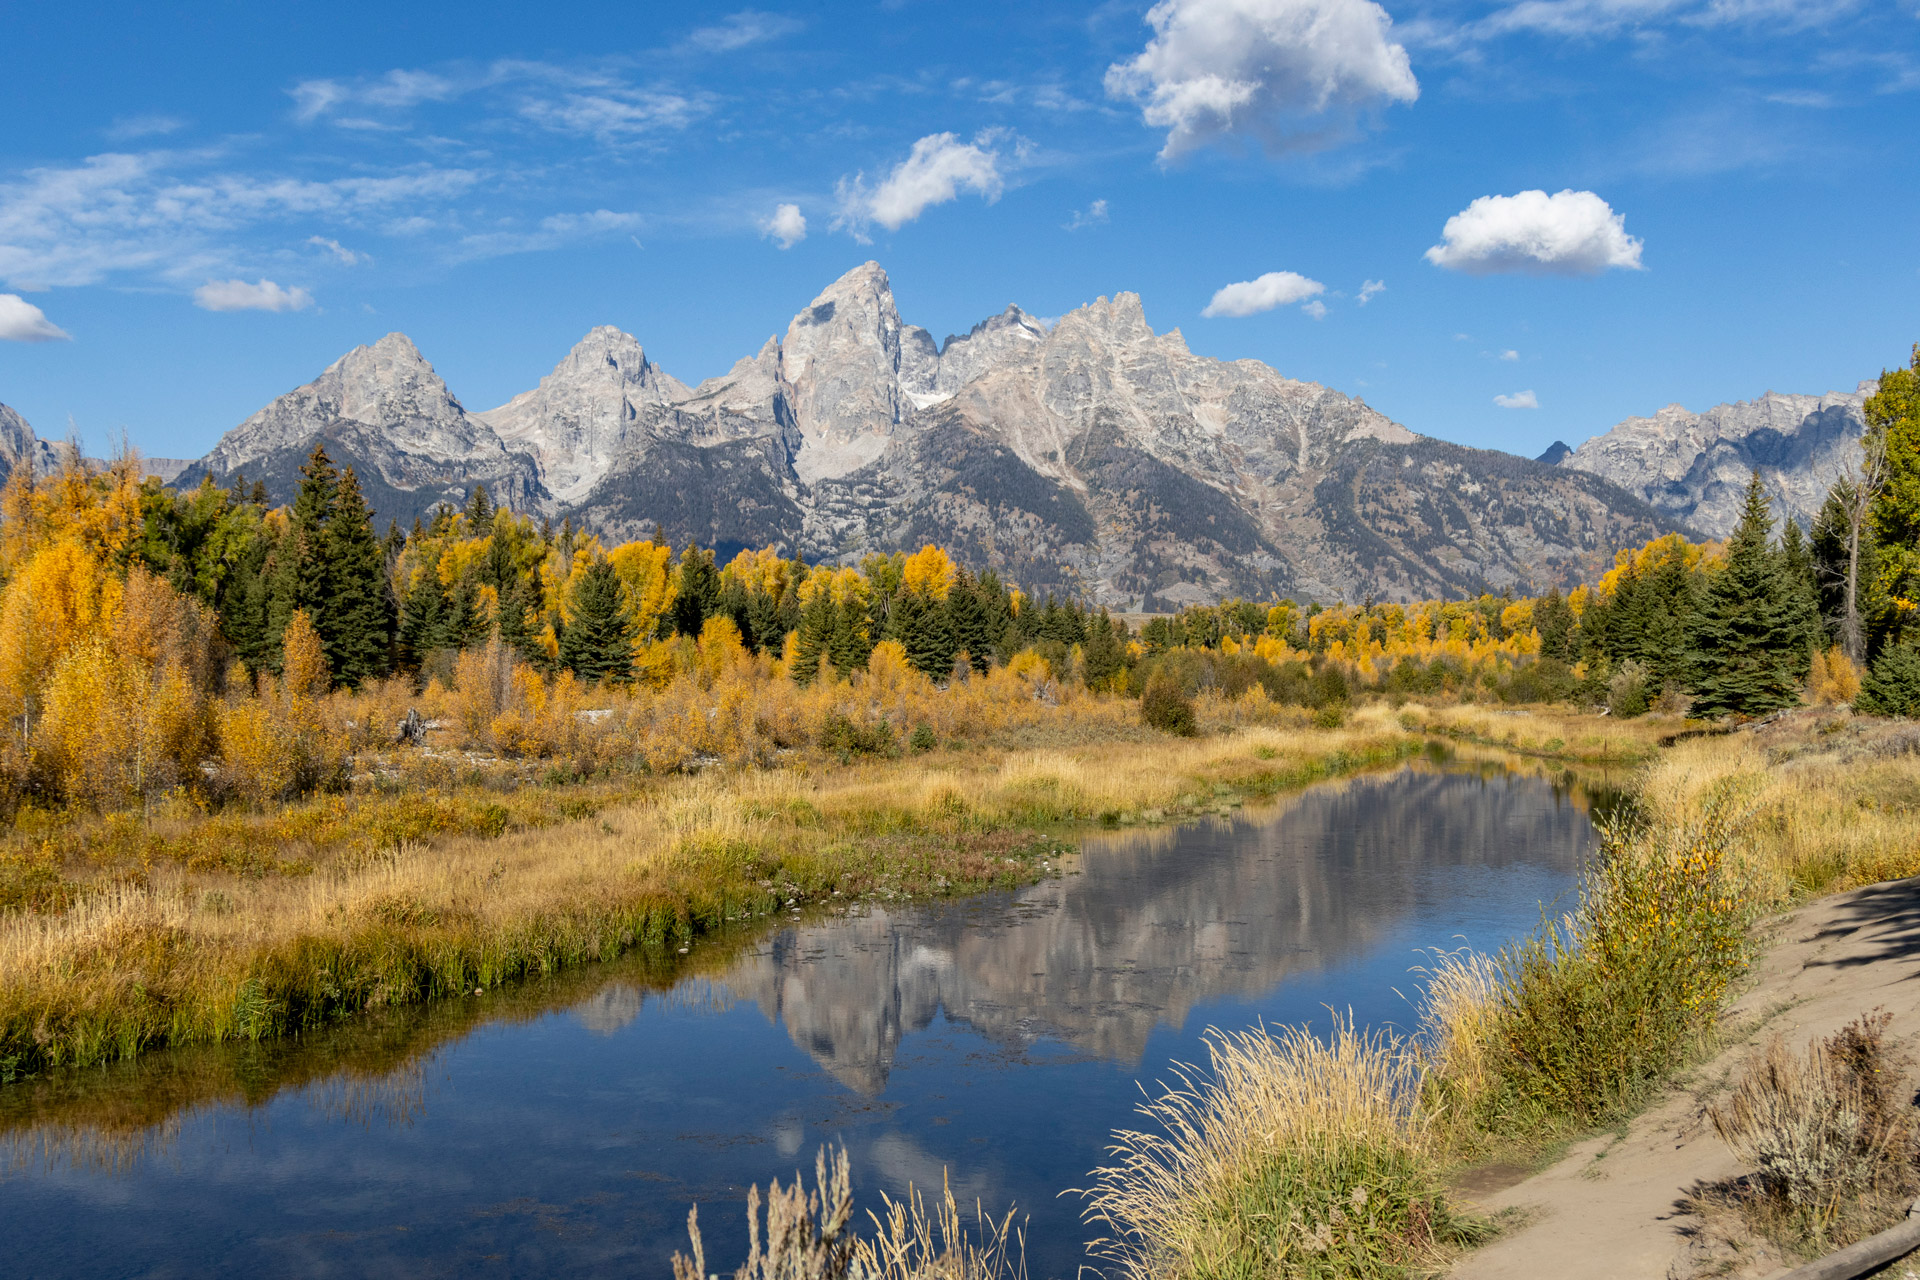
Kristi Townsend | Canon EOS R7 | RF 24-105mm F4 L IS USM | 24mm | f/4 | 1/5000 | ISO 320
Advanced technique: Focus stacking involves taking multiple images of the same scene on a tripod, each focused at a different distance, and blending them together in post-processing. The final photograph maintains sharpness and detail throughout the frame, without the softness or diffraction that can occur when the lens is stopped down too far.
Wait for the right conditions
Patience is one of the most valuable skills you can develop in landscape photography and it’s one that often matters more than technical ability or equipment. Being in the right place at the right time is half the challenge.
Unlike many other genres, you can’t fully control your subject. Light will change, weather will shift, clouds will move and conditions will rarely match your expectations when you arrive. Learn to wait and keep working on a scene rather than rushing on.
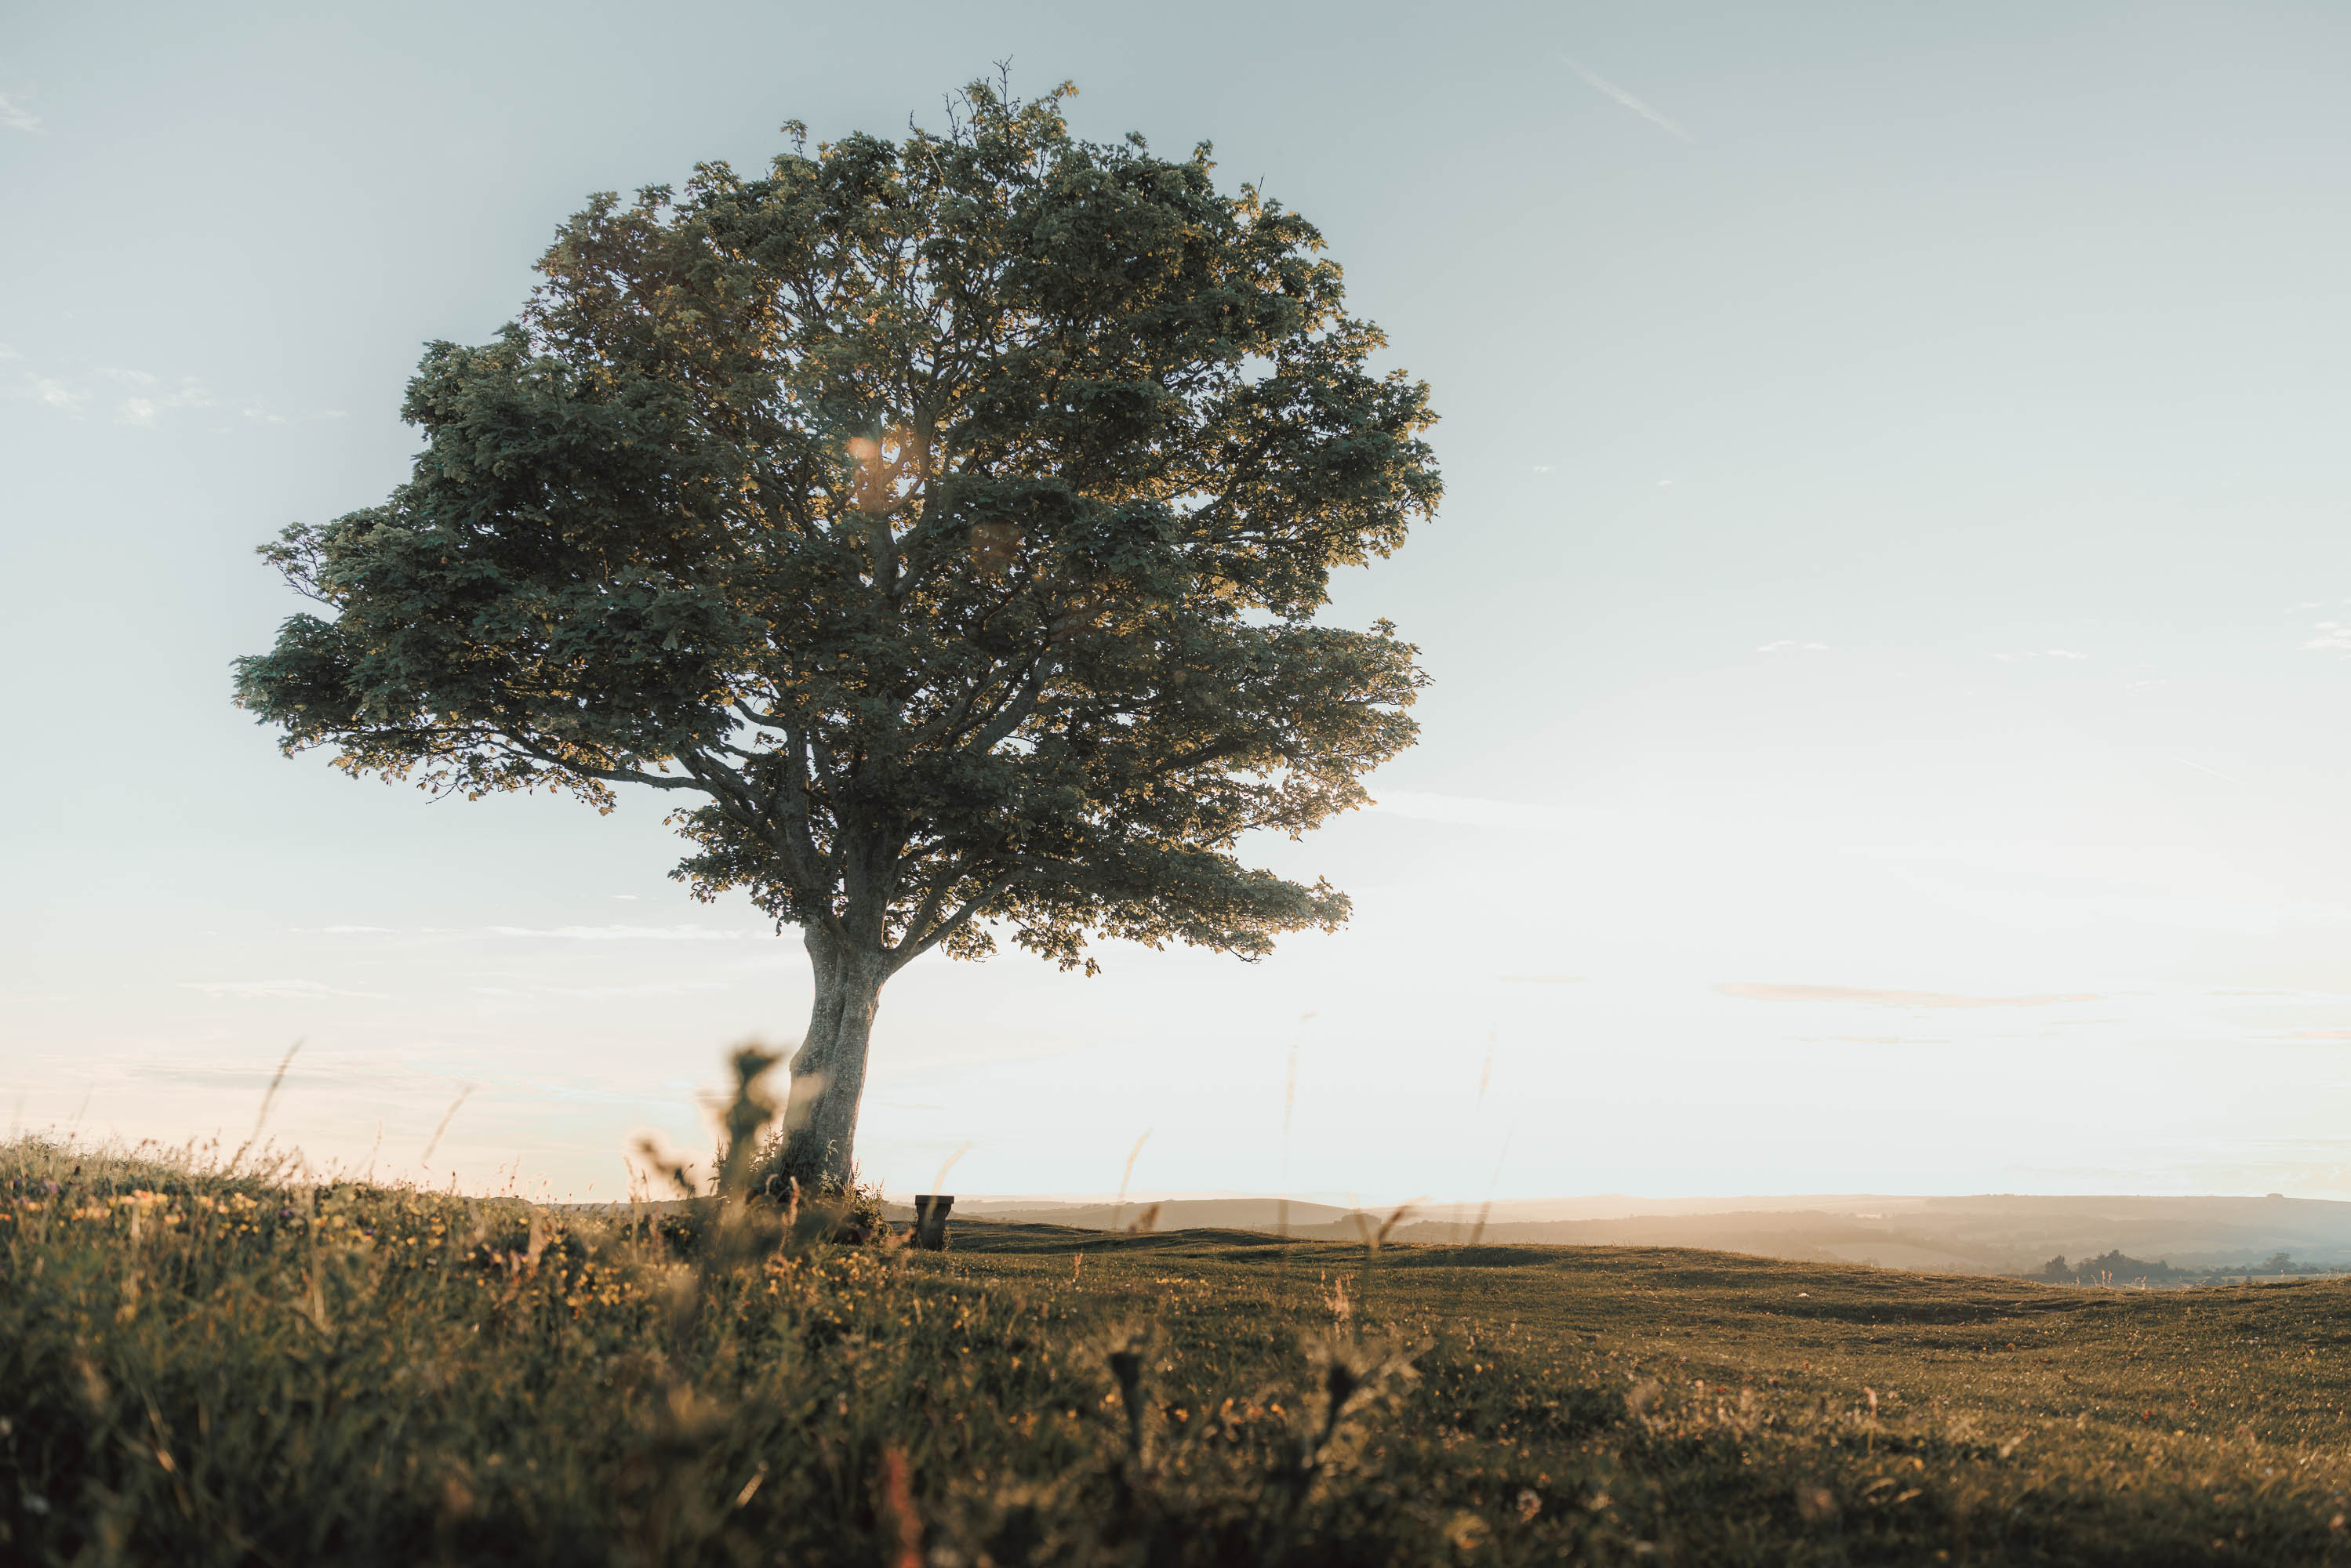
Charlie Richards | Canon EOS R5 | RF 24-70mm f/2.8 L IS USM | 24mm | f/3.2 | 1/500 sec | ISO 200
Revisiting a place at different times of day, in different seasons, or under different weather patterns helps you understand how light and atmosphere can shape a scene. Each time you return, you’ll build familiarity, which makes it easier to anticipate moments rather than react to them.
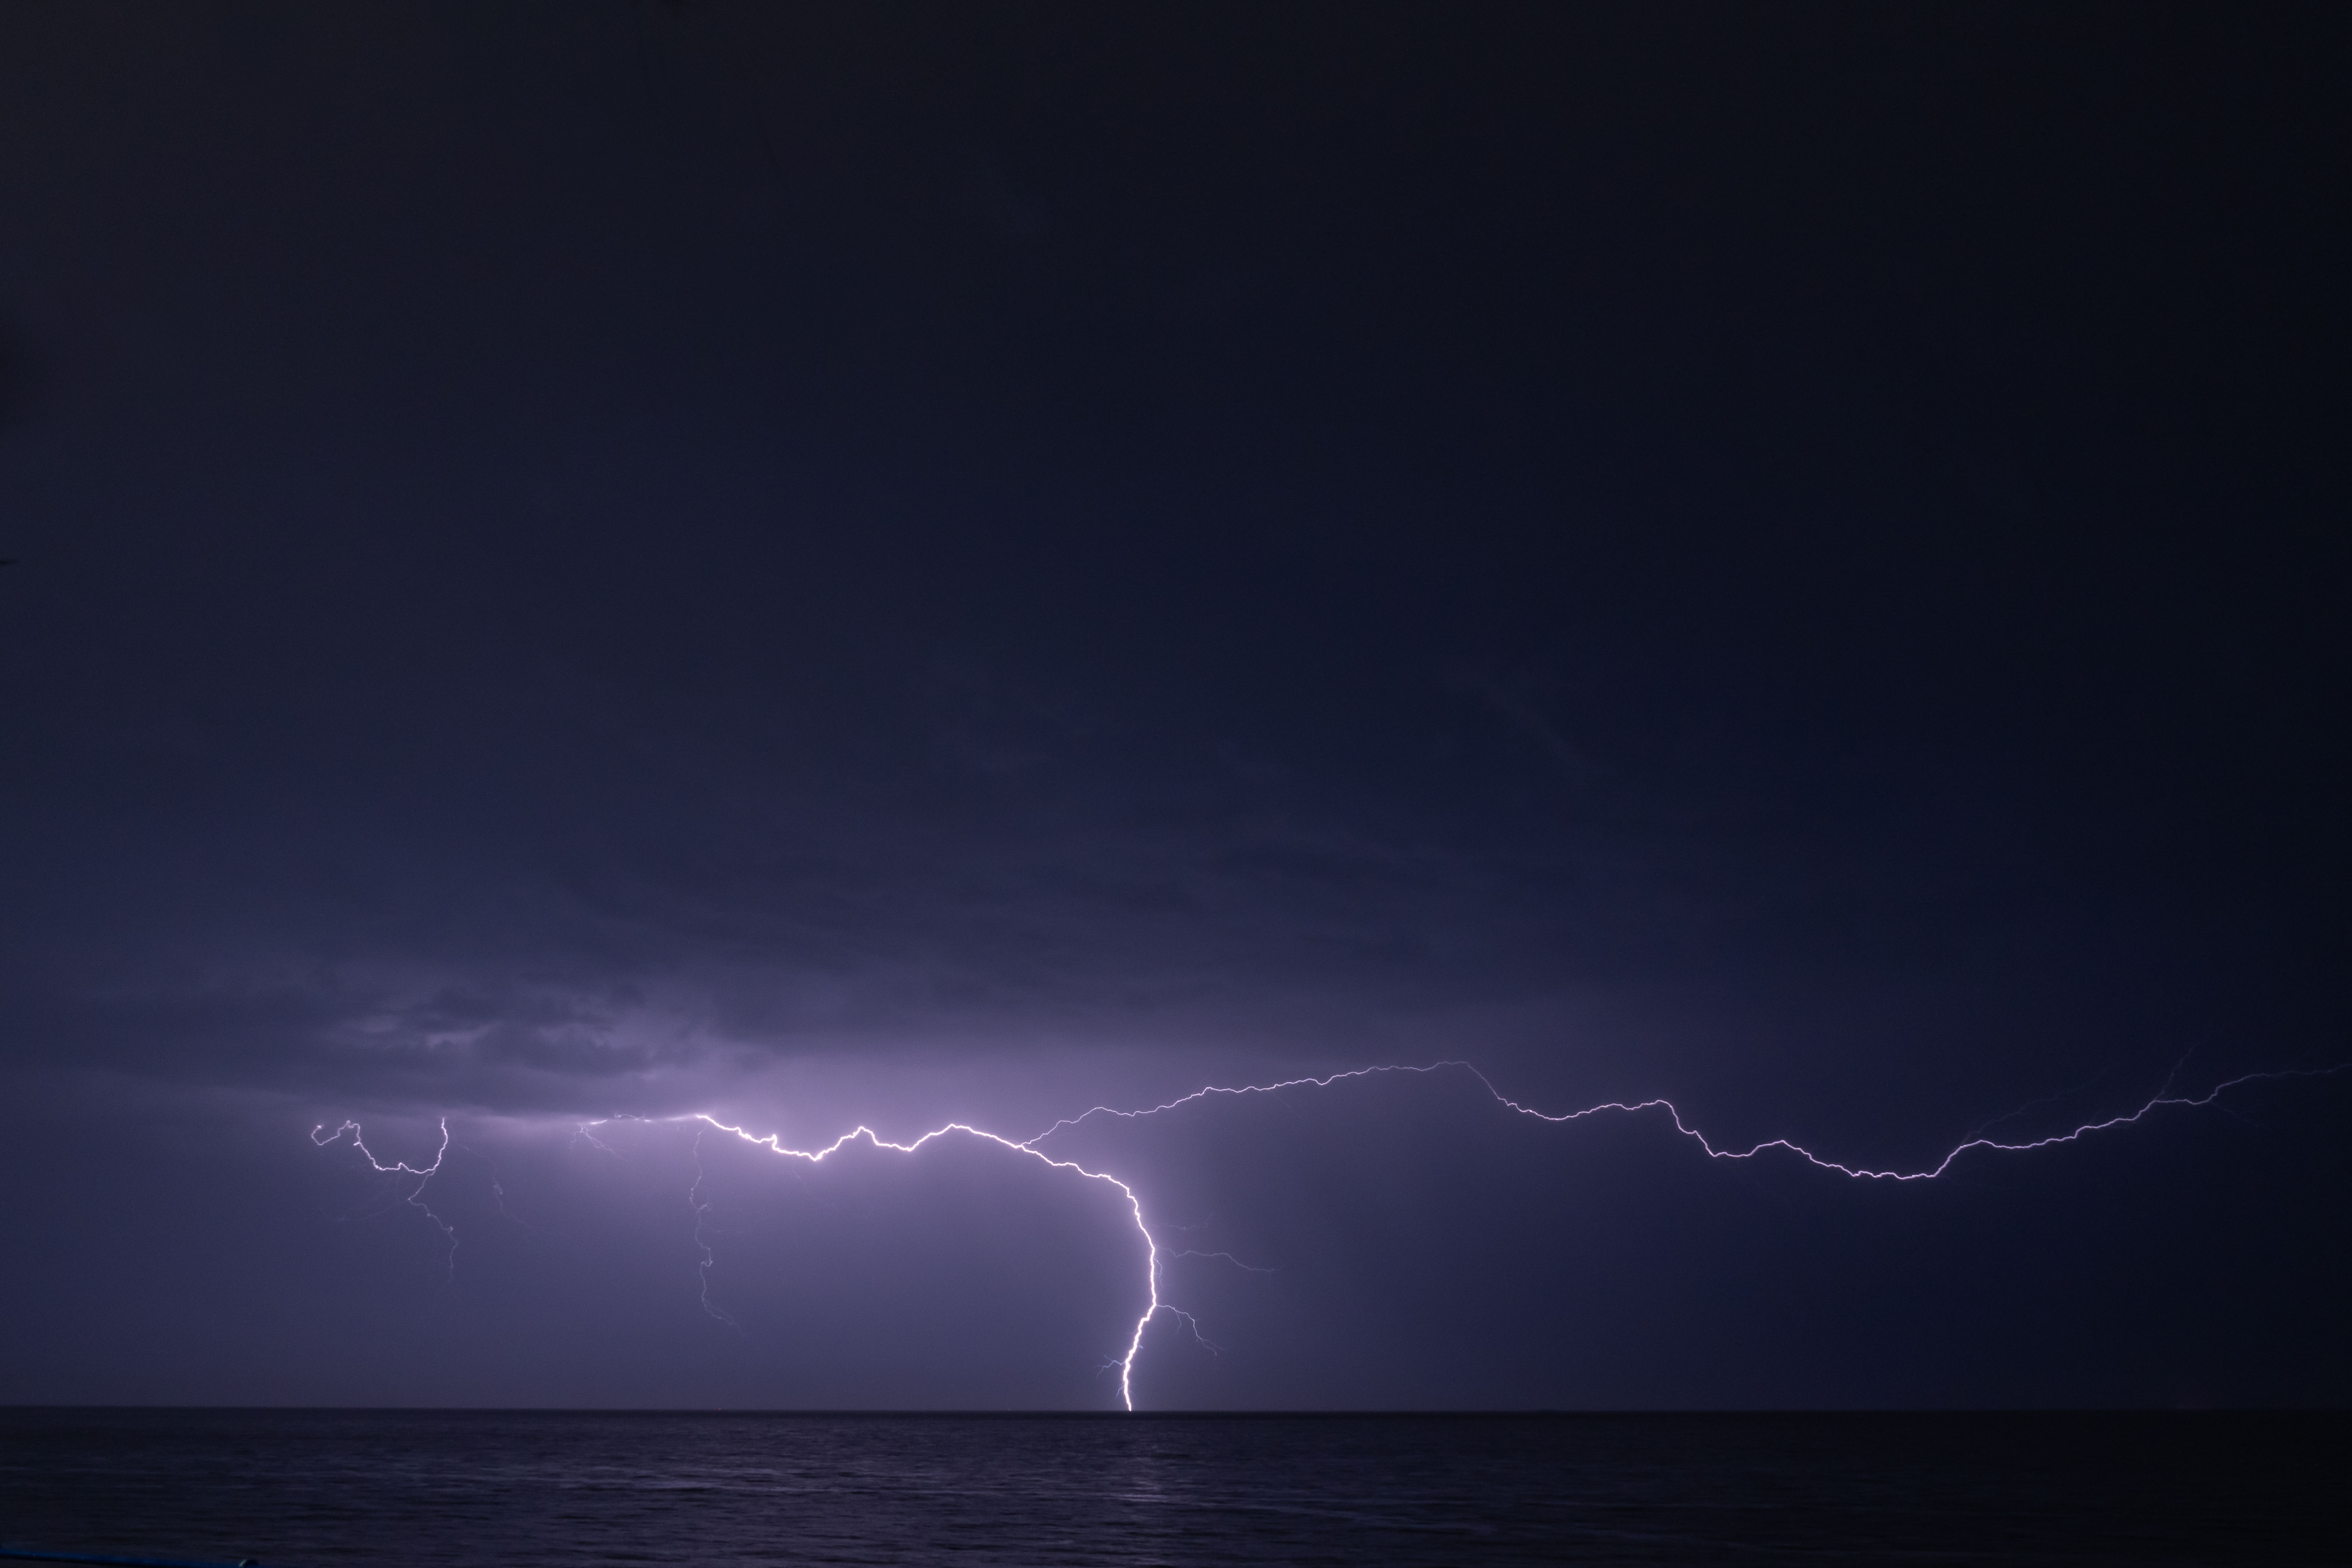
Amy Moore | Sony A1 | Sony FE 24-70mm f/2.8 GM II | 24mm | f/6.3 | 13 sec | ISO 320
Less is (usually) more
Landscape photography often benefits from having as few visual elements as possible in the frame. When a frame contains too many competing elements, it can be difficult for the viewer to understand what they’re meant to look at first. Think about where your eye is first drawn to and then where it wanders off to.
It’s best to reduce a scene to its strongest components to make it easier for the audience to digest the image and appreciate what’s happening within it.
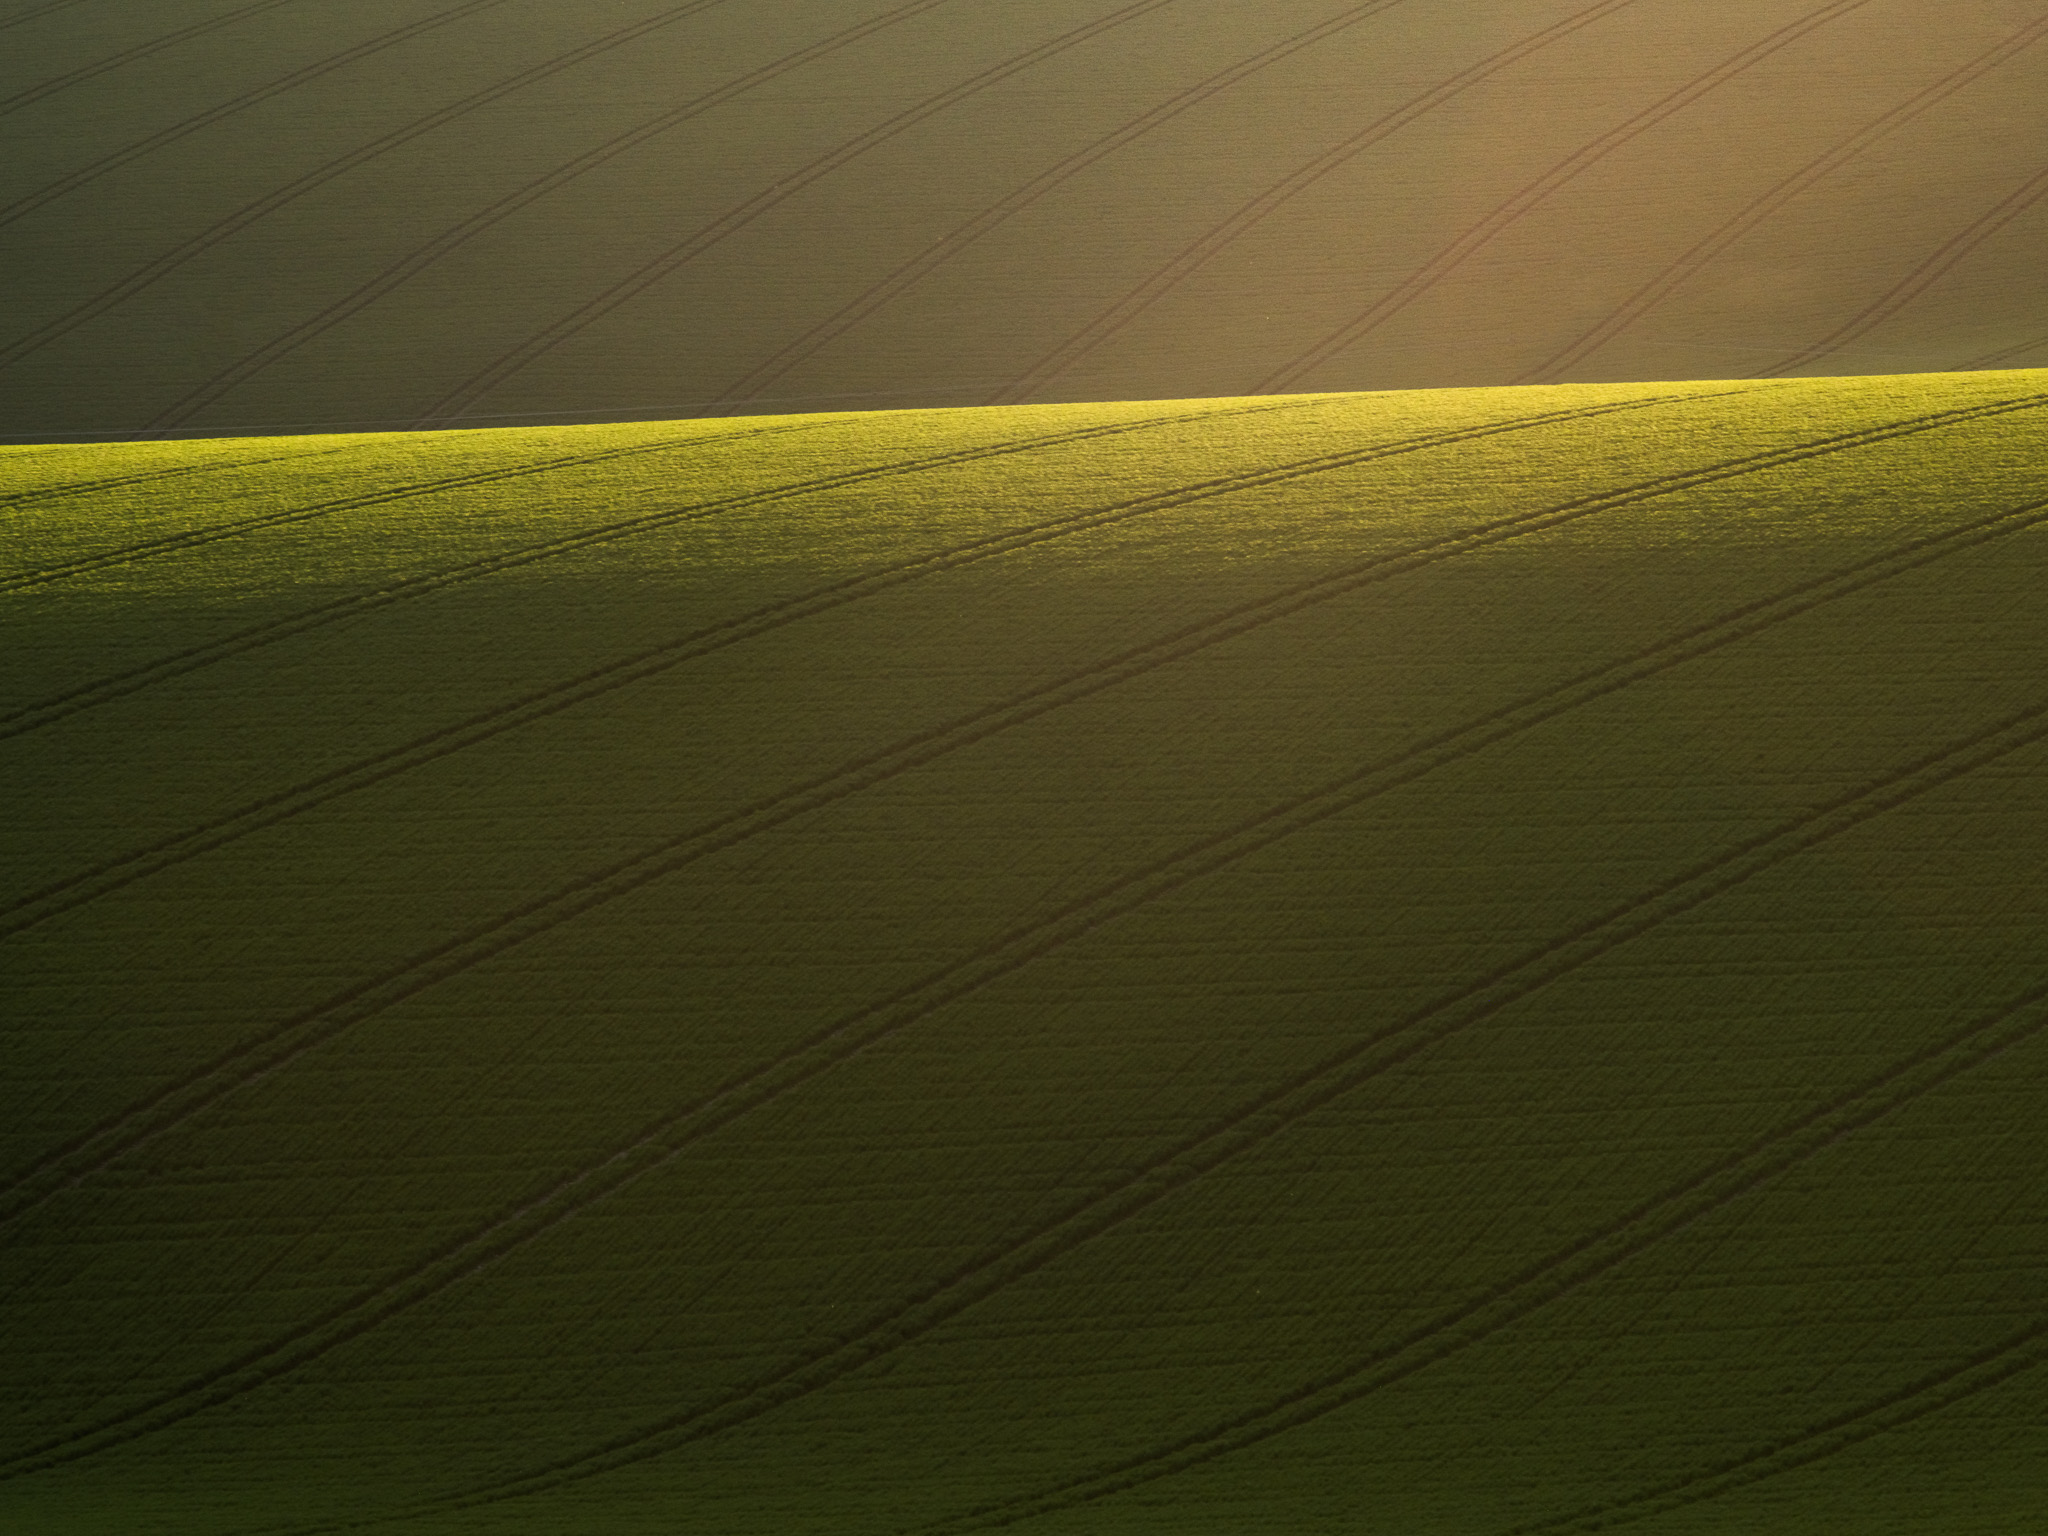
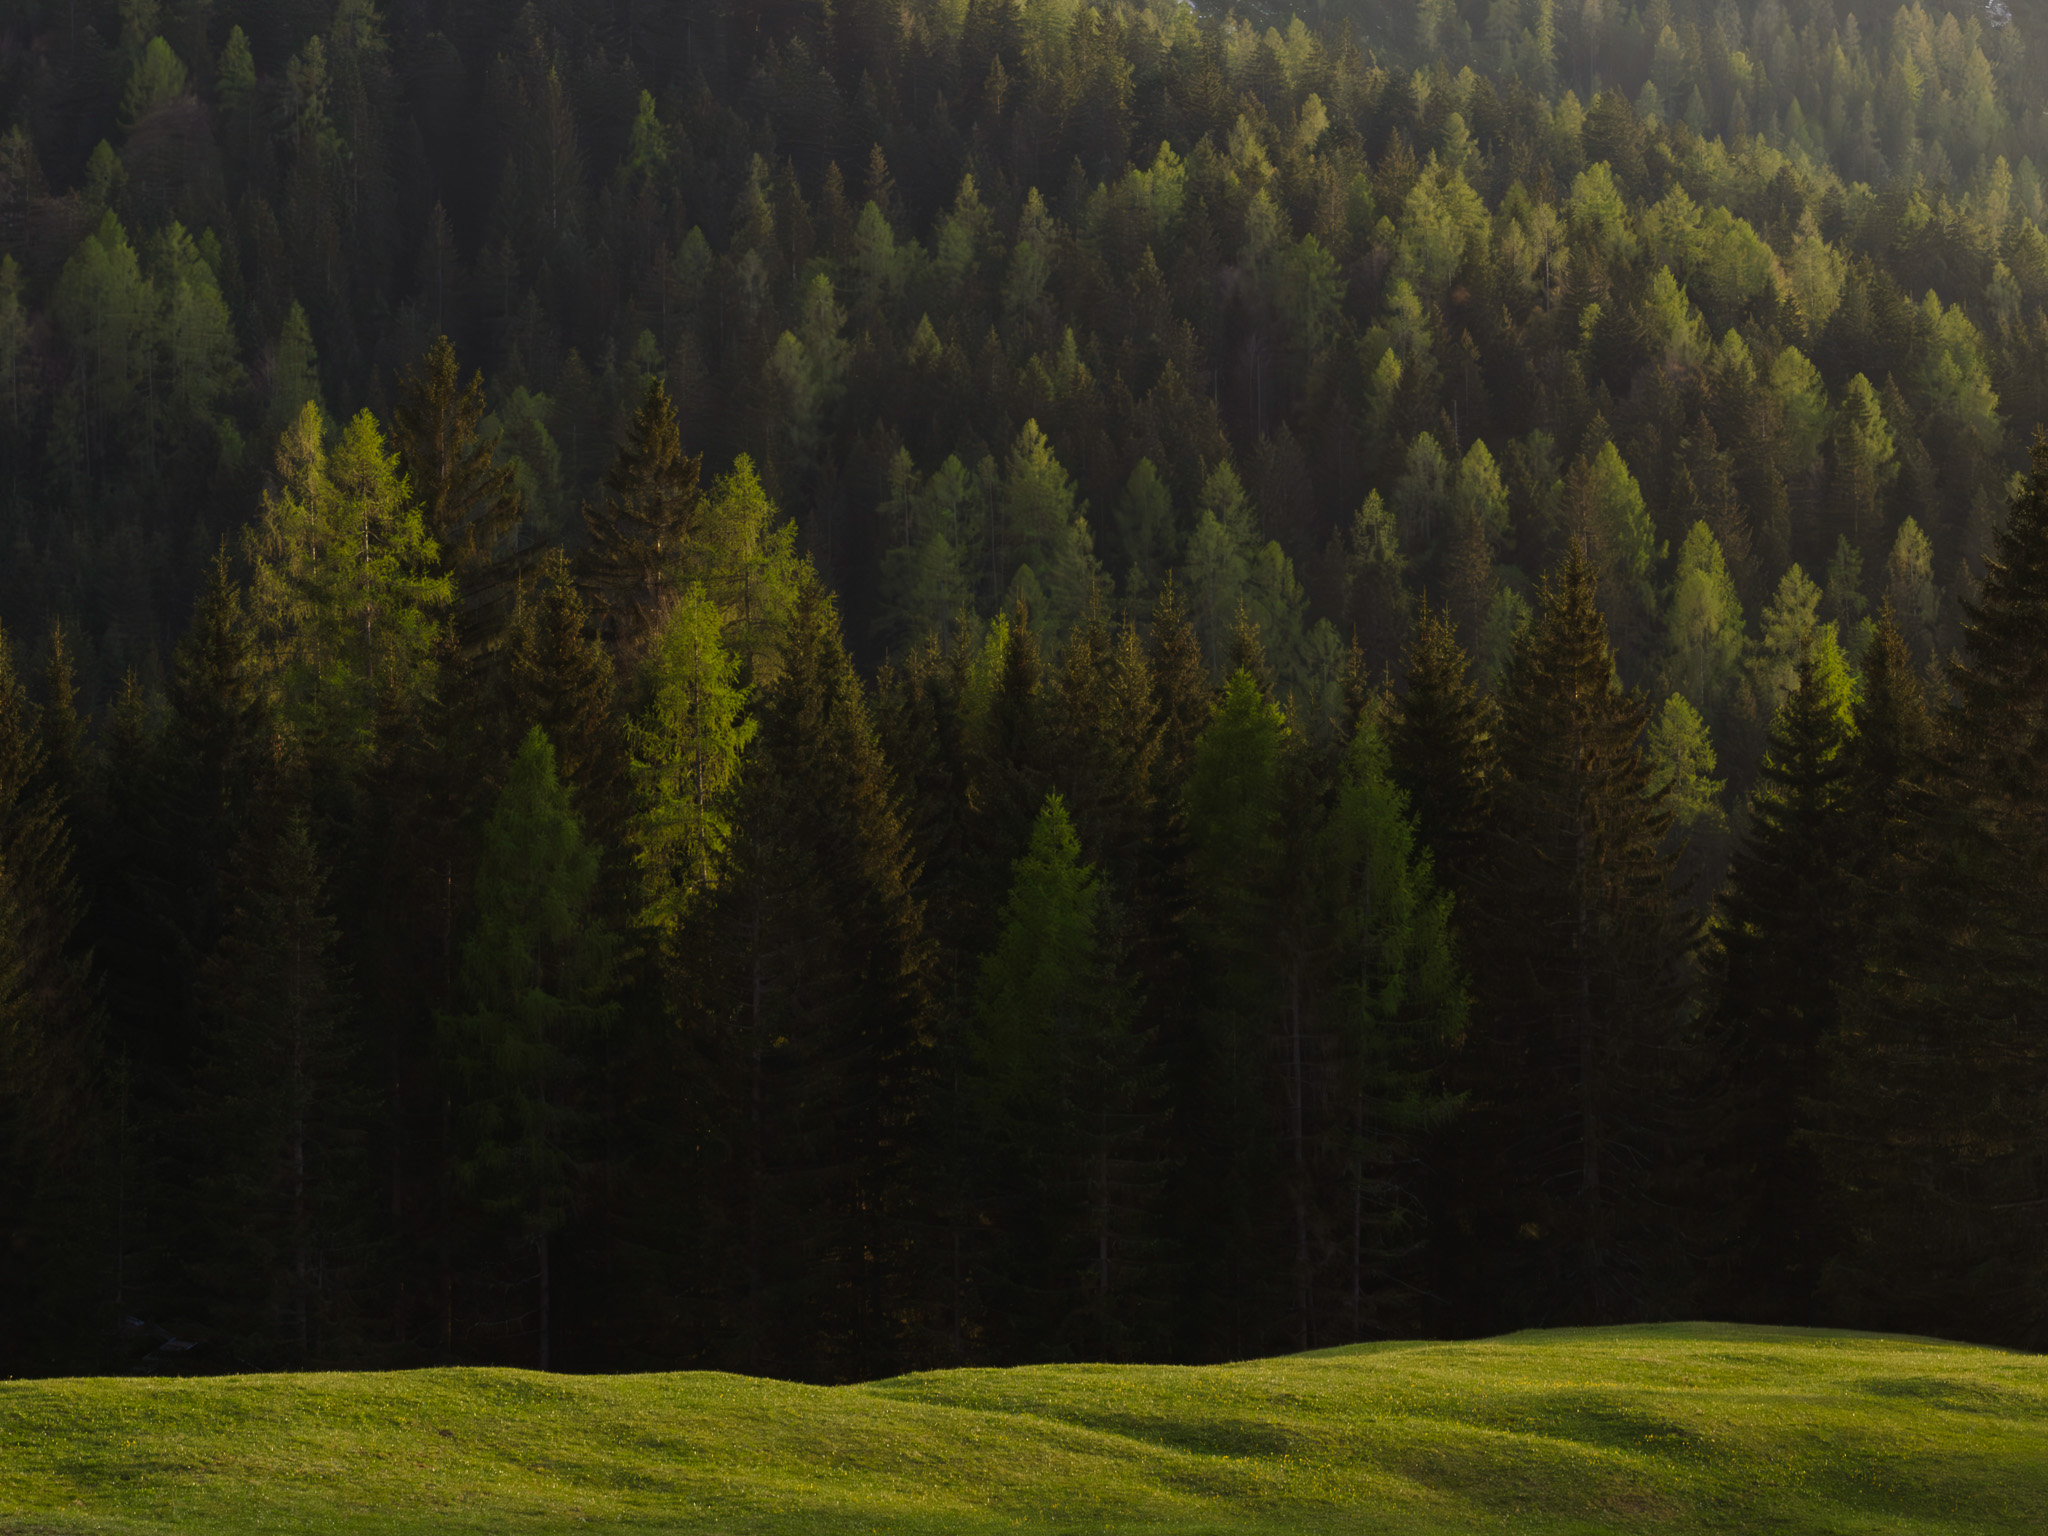
Adam Makkai | Fujifilm GFX50s | Super-Multi-Coated Takumar 200mm f/4 (adapted) | f/8.0 | 1/125 sec | ISO 400
By removing distractions, simplifying backgrounds or framing out elements that don’t support the main idea, you give the photograph clarity and purpose. A strong foreground, a clear line or one area of light can often say more than several weaker points of interest.
This is, of course, harder than you think. Nature has not developed into an immaculate, symmetrical Wes Anderson film for us; quite the opposite: it’s hard to find compositions that are mere ideas. But training your photographer’s eye for repeating shapes and patterns is a good tip to get you started. If you are a beginner, venturing out to the nearby countryside is a good start. If a scene looks messy in person, it is very likely to look the same in camera. Another way to frame out unwanted clutter in the frame is to pick up a telephoto lens and zoom in on details in the environment you like.
A rule you can set for yourself is that if something in the frame doesn’t add to the ‘story’ or feeling behind the image, it’s worth questioning whether it needs to be there at all. Fewer elements usually lead to stronger compositions, clearer visual flow and calmer-looking images.
As the grandfather of landscape photography, Ansel Adams put it: “There is nothing worse than a sharp image of a fuzzy concept.”
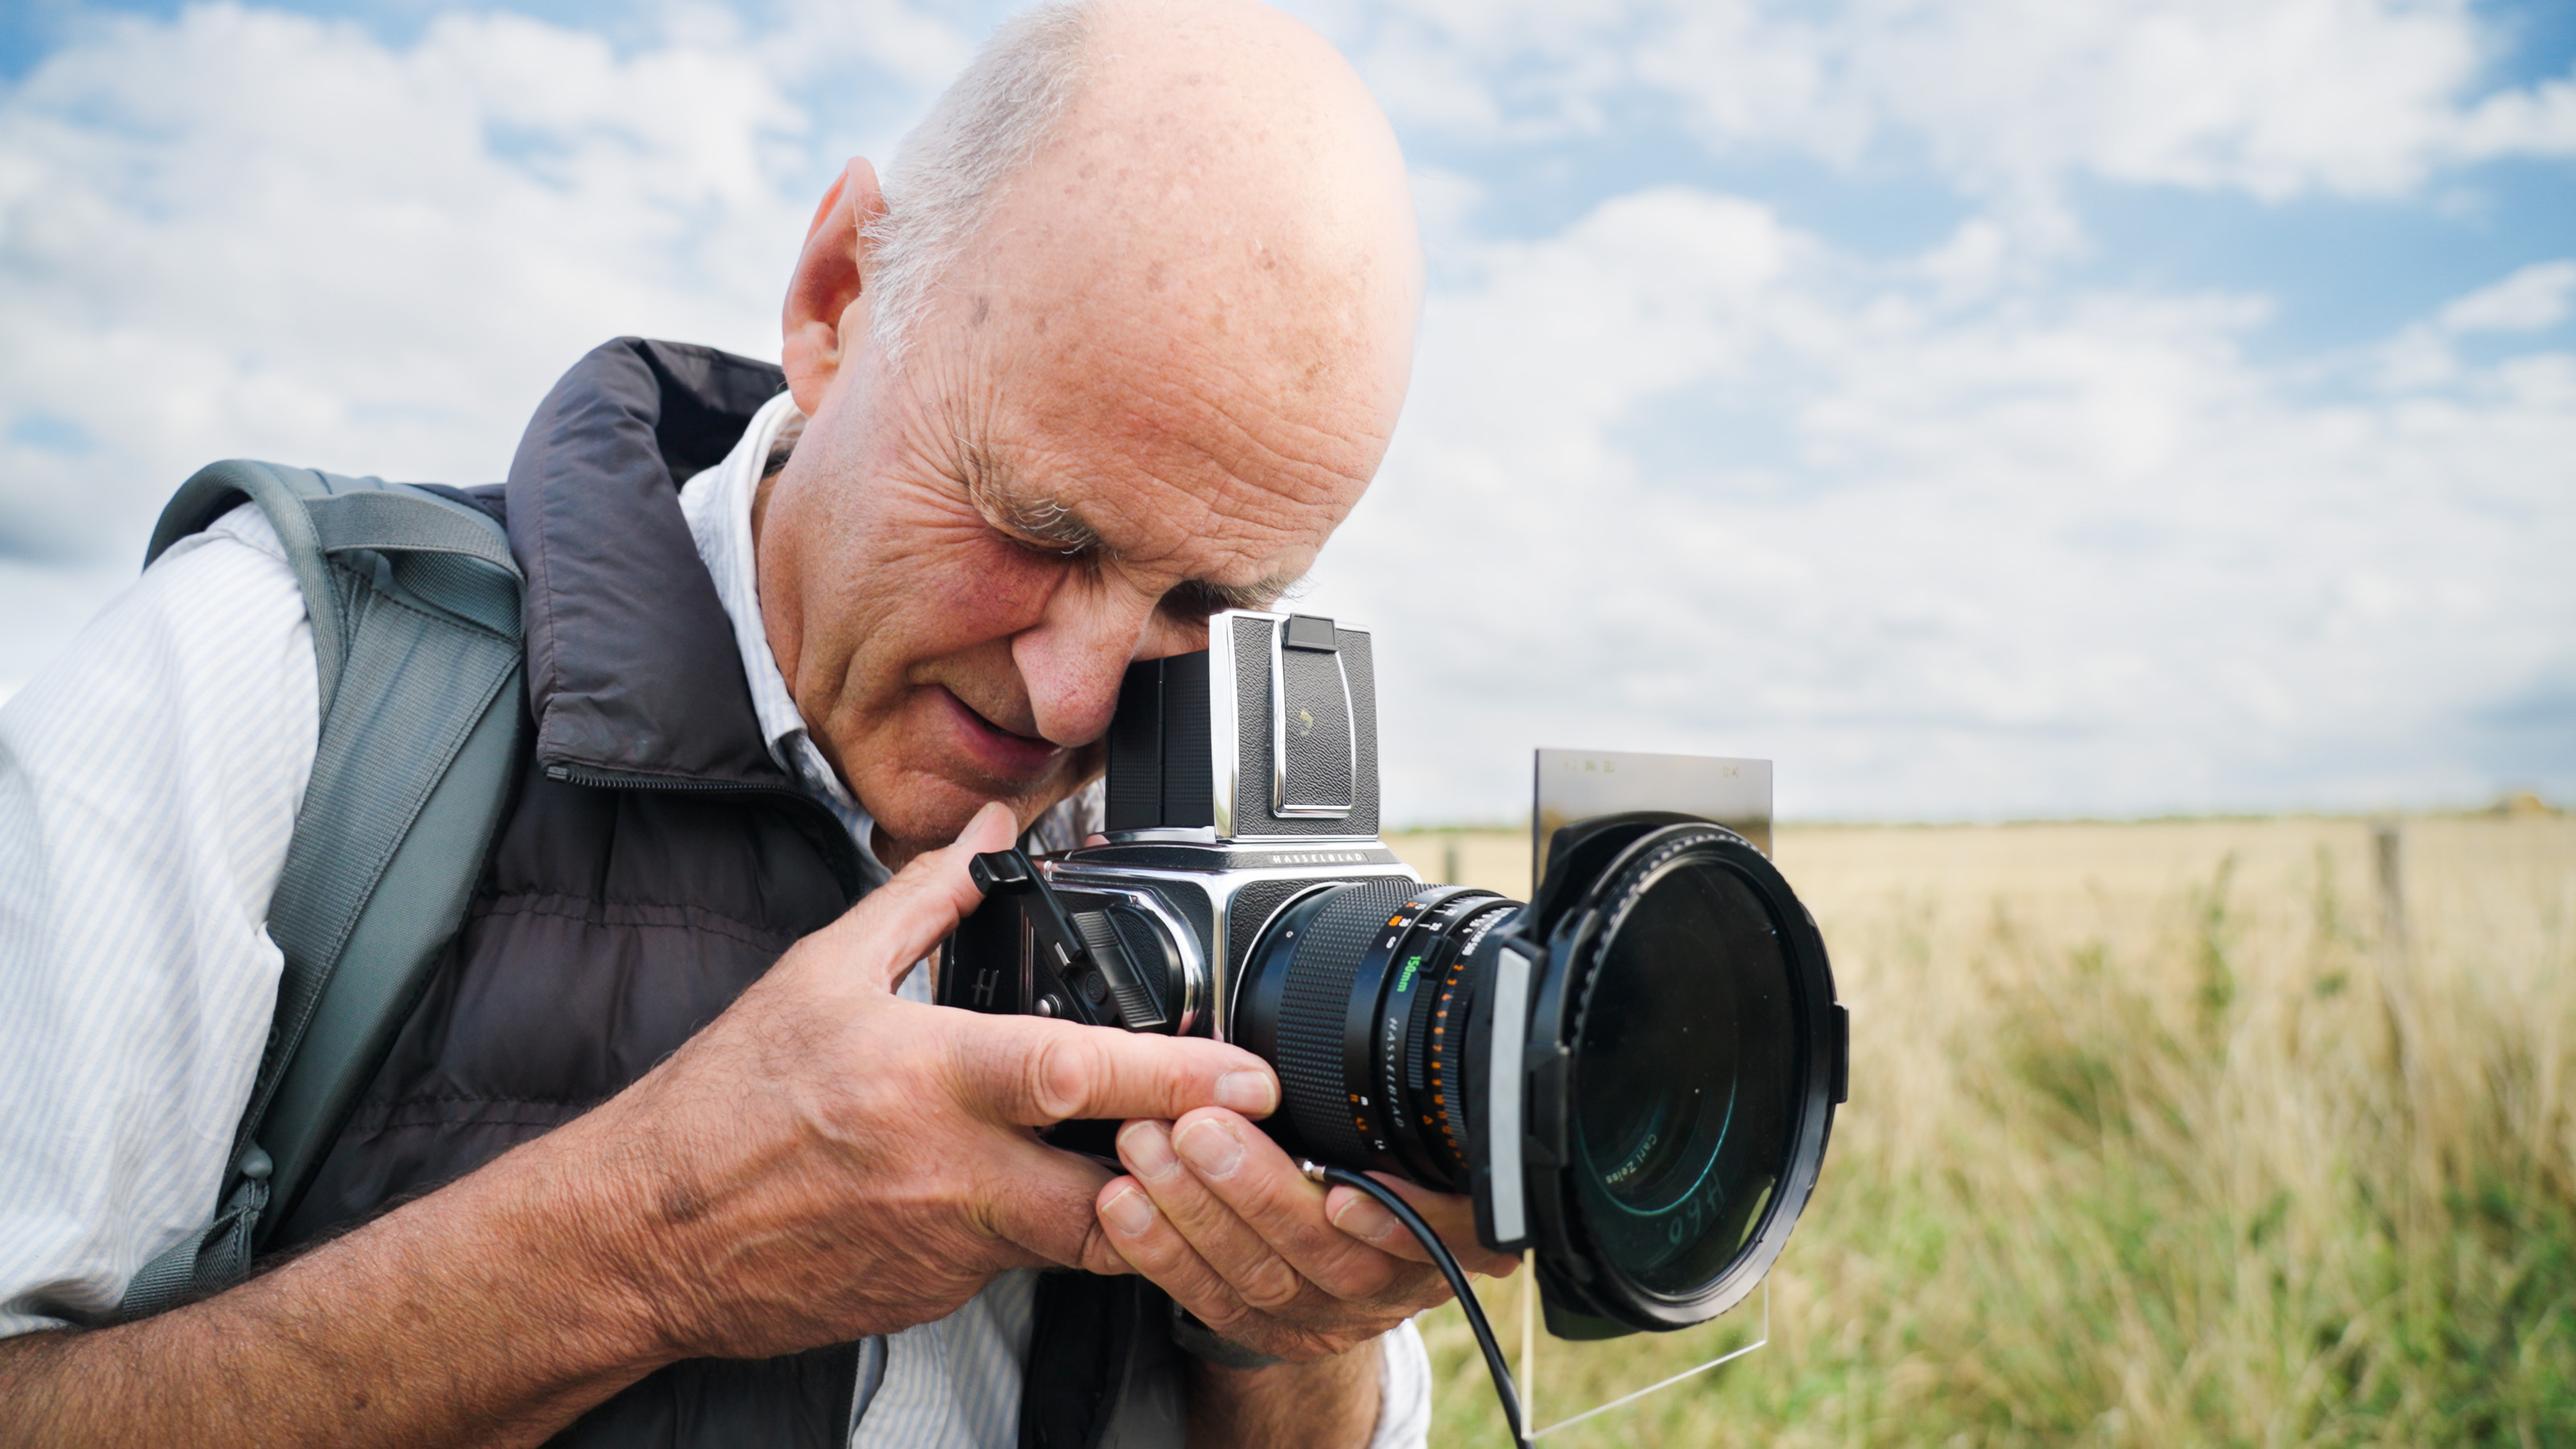
Landscape photographer Charlie Waite in the field using a Hasselblad 500C with the CFV II 50C back
Landscape or portrait? That is the question
Deciding whether to shoot in landscape or portrait orientation is an important part of composition and it’s unfortunately a choice that’s often made too quickly. Rather than defaulting to a single orientation, pause and consider how you want the final image to feel and how the elements within the scene relate to each other.
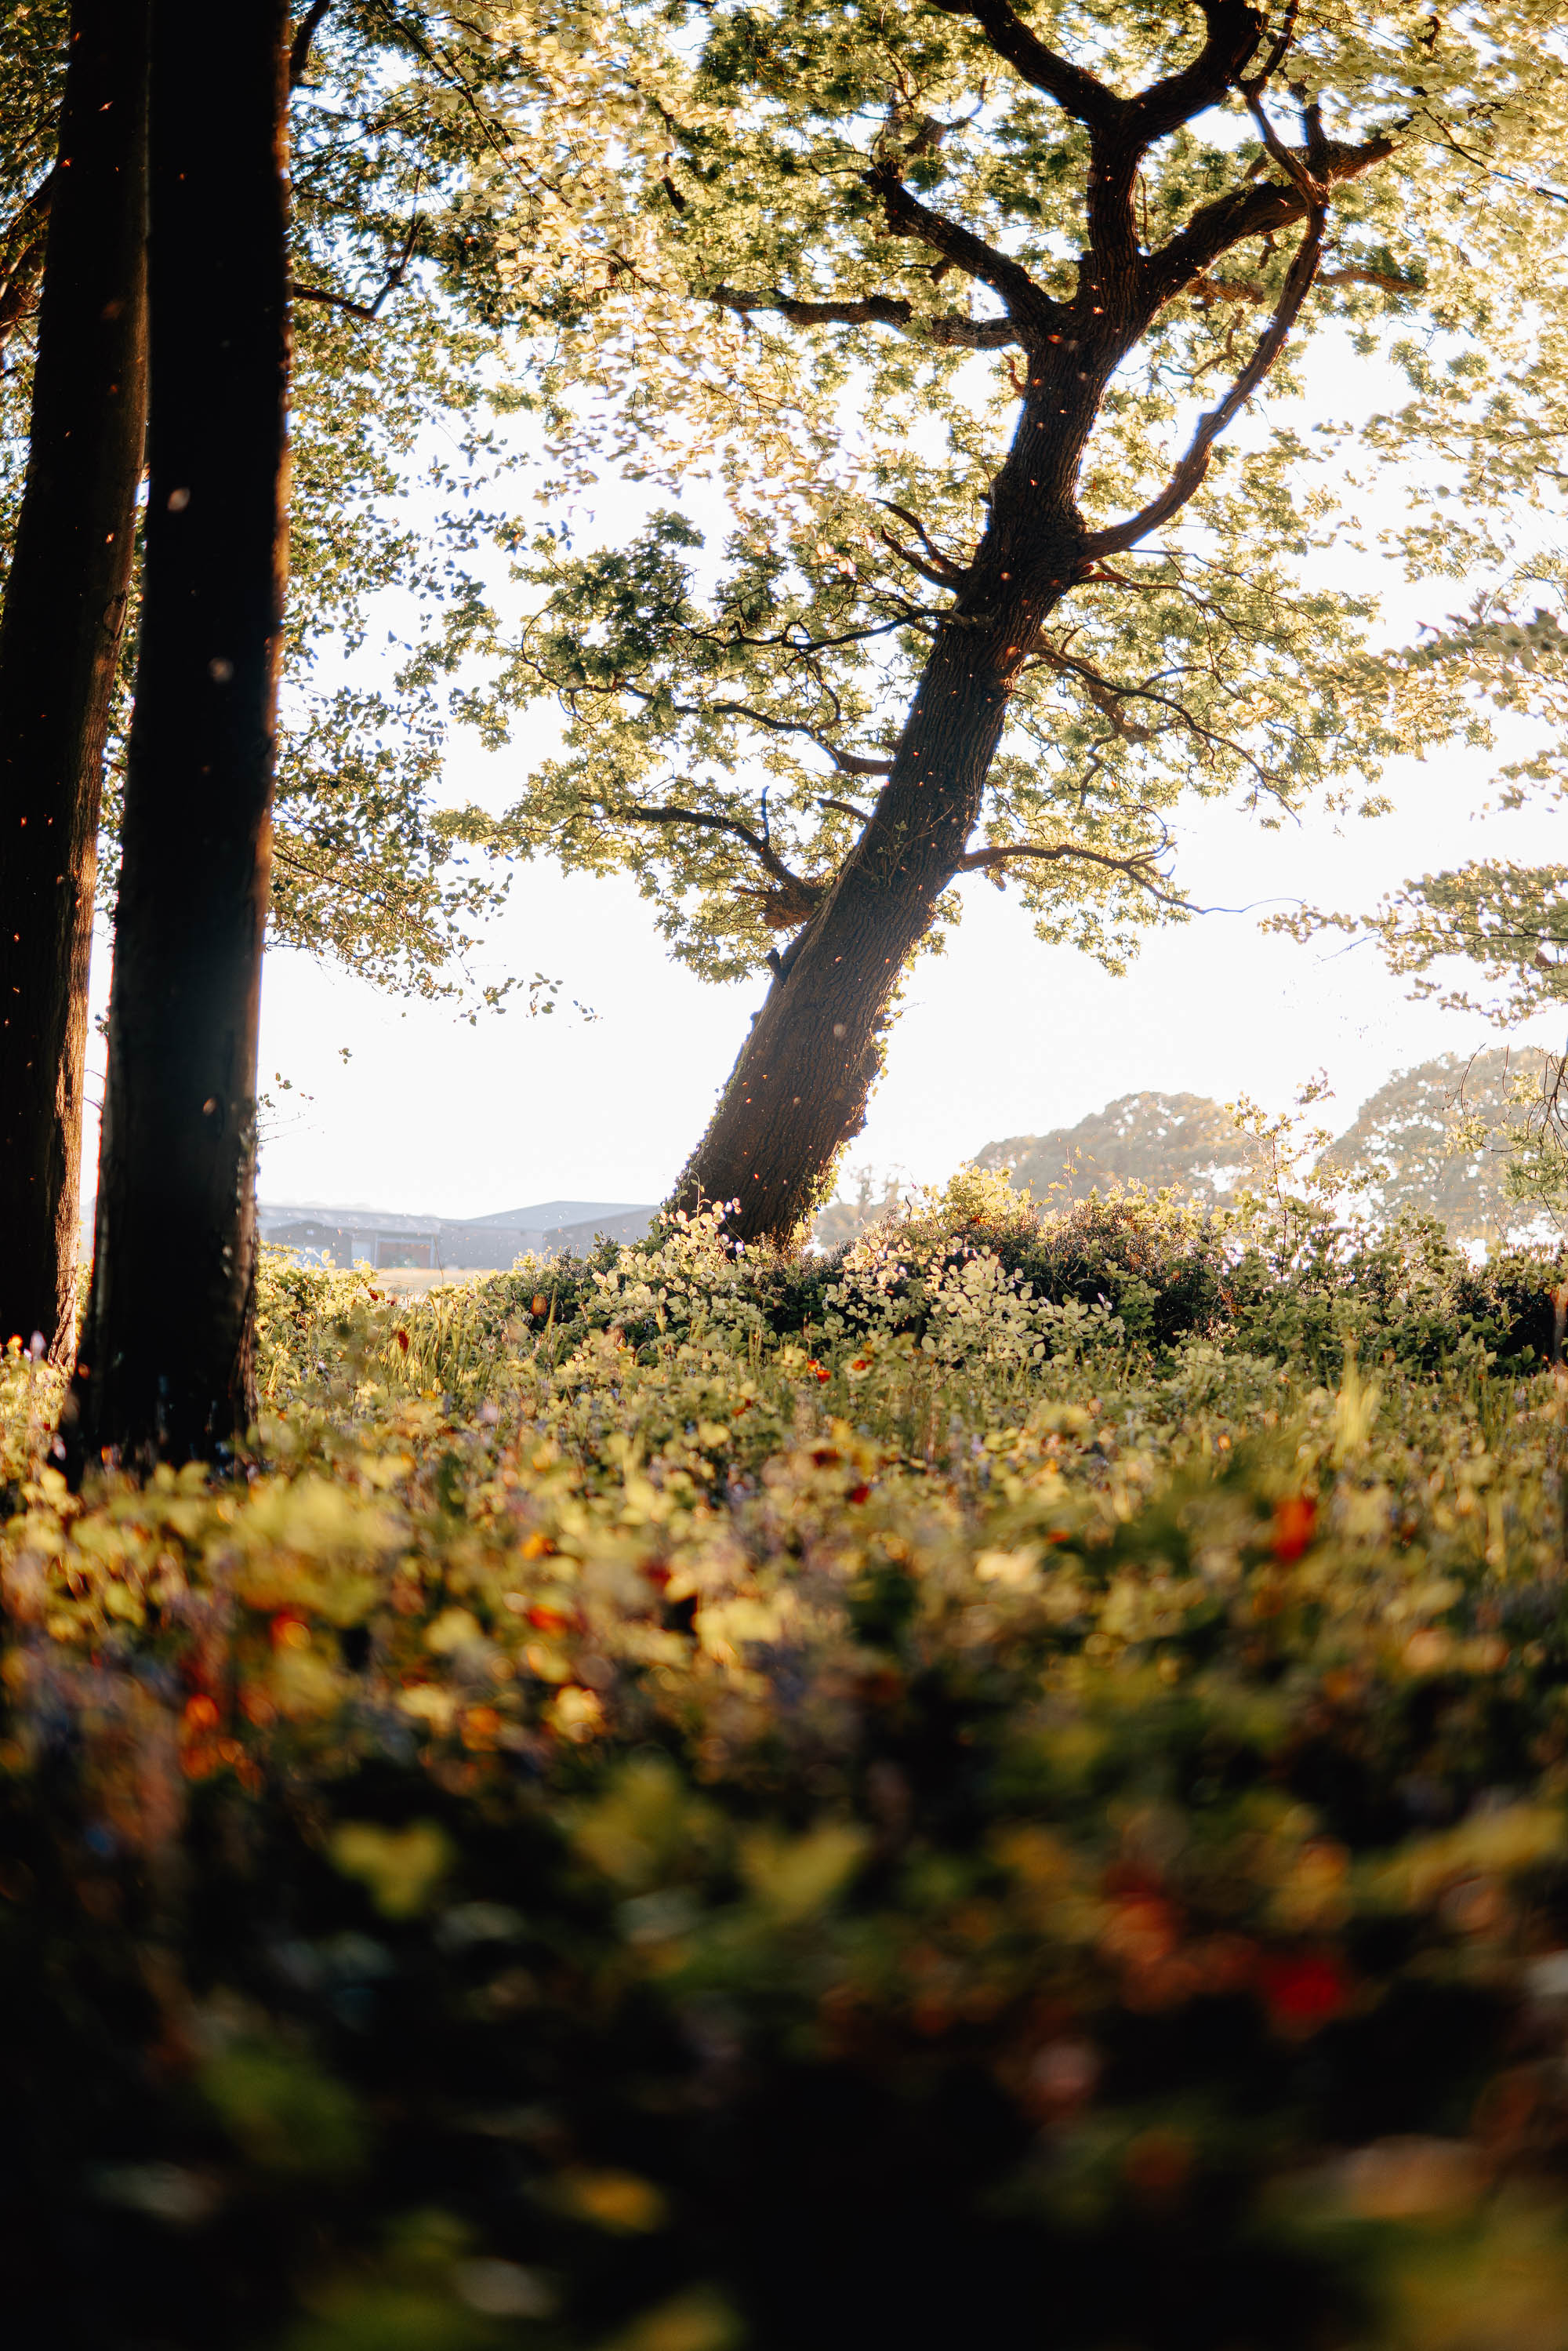
Charlie Richards | Canon EOS R5 | Sigma 50mm f/1.4 HSM Art | f/1.4 | 1/2000 sec | ISO 500
If the answer isn’t immediately clear, photograph the scene in both orientations. I do this a lot, especially if conditions are changing quickly. You can always decide later when you’re editing.

Scott Jessiman | Nikon Z6 II | Z 24-200mm f/4-6.3 VR | 56mm | f/7.1 | 1/6 | ISO 100
Photography is an ongoing learning process and composition is something you refine over years of experience. You should encourage yourself to think more deliberately about how you frame a scene, so that each photograph is taken with intention rather than out of habit.

Scott Jessiman | Nikon Z6 II | Z 24-200mm f/4-6.3 VR | 200mm | f/6.3 | 1/160 | ISO 125
Find a captivating foreground
An enticing foreground will give a landscape photograph depth and a sense of pull. The best foregrounds are often simple, like flowers, rocks, foliage, pools of water, patterns in sand or the texture of waves.
I find a wide-angle lens to be particularly effective here because it makes nearby elements feel large and immersive while still including a dramatic background.
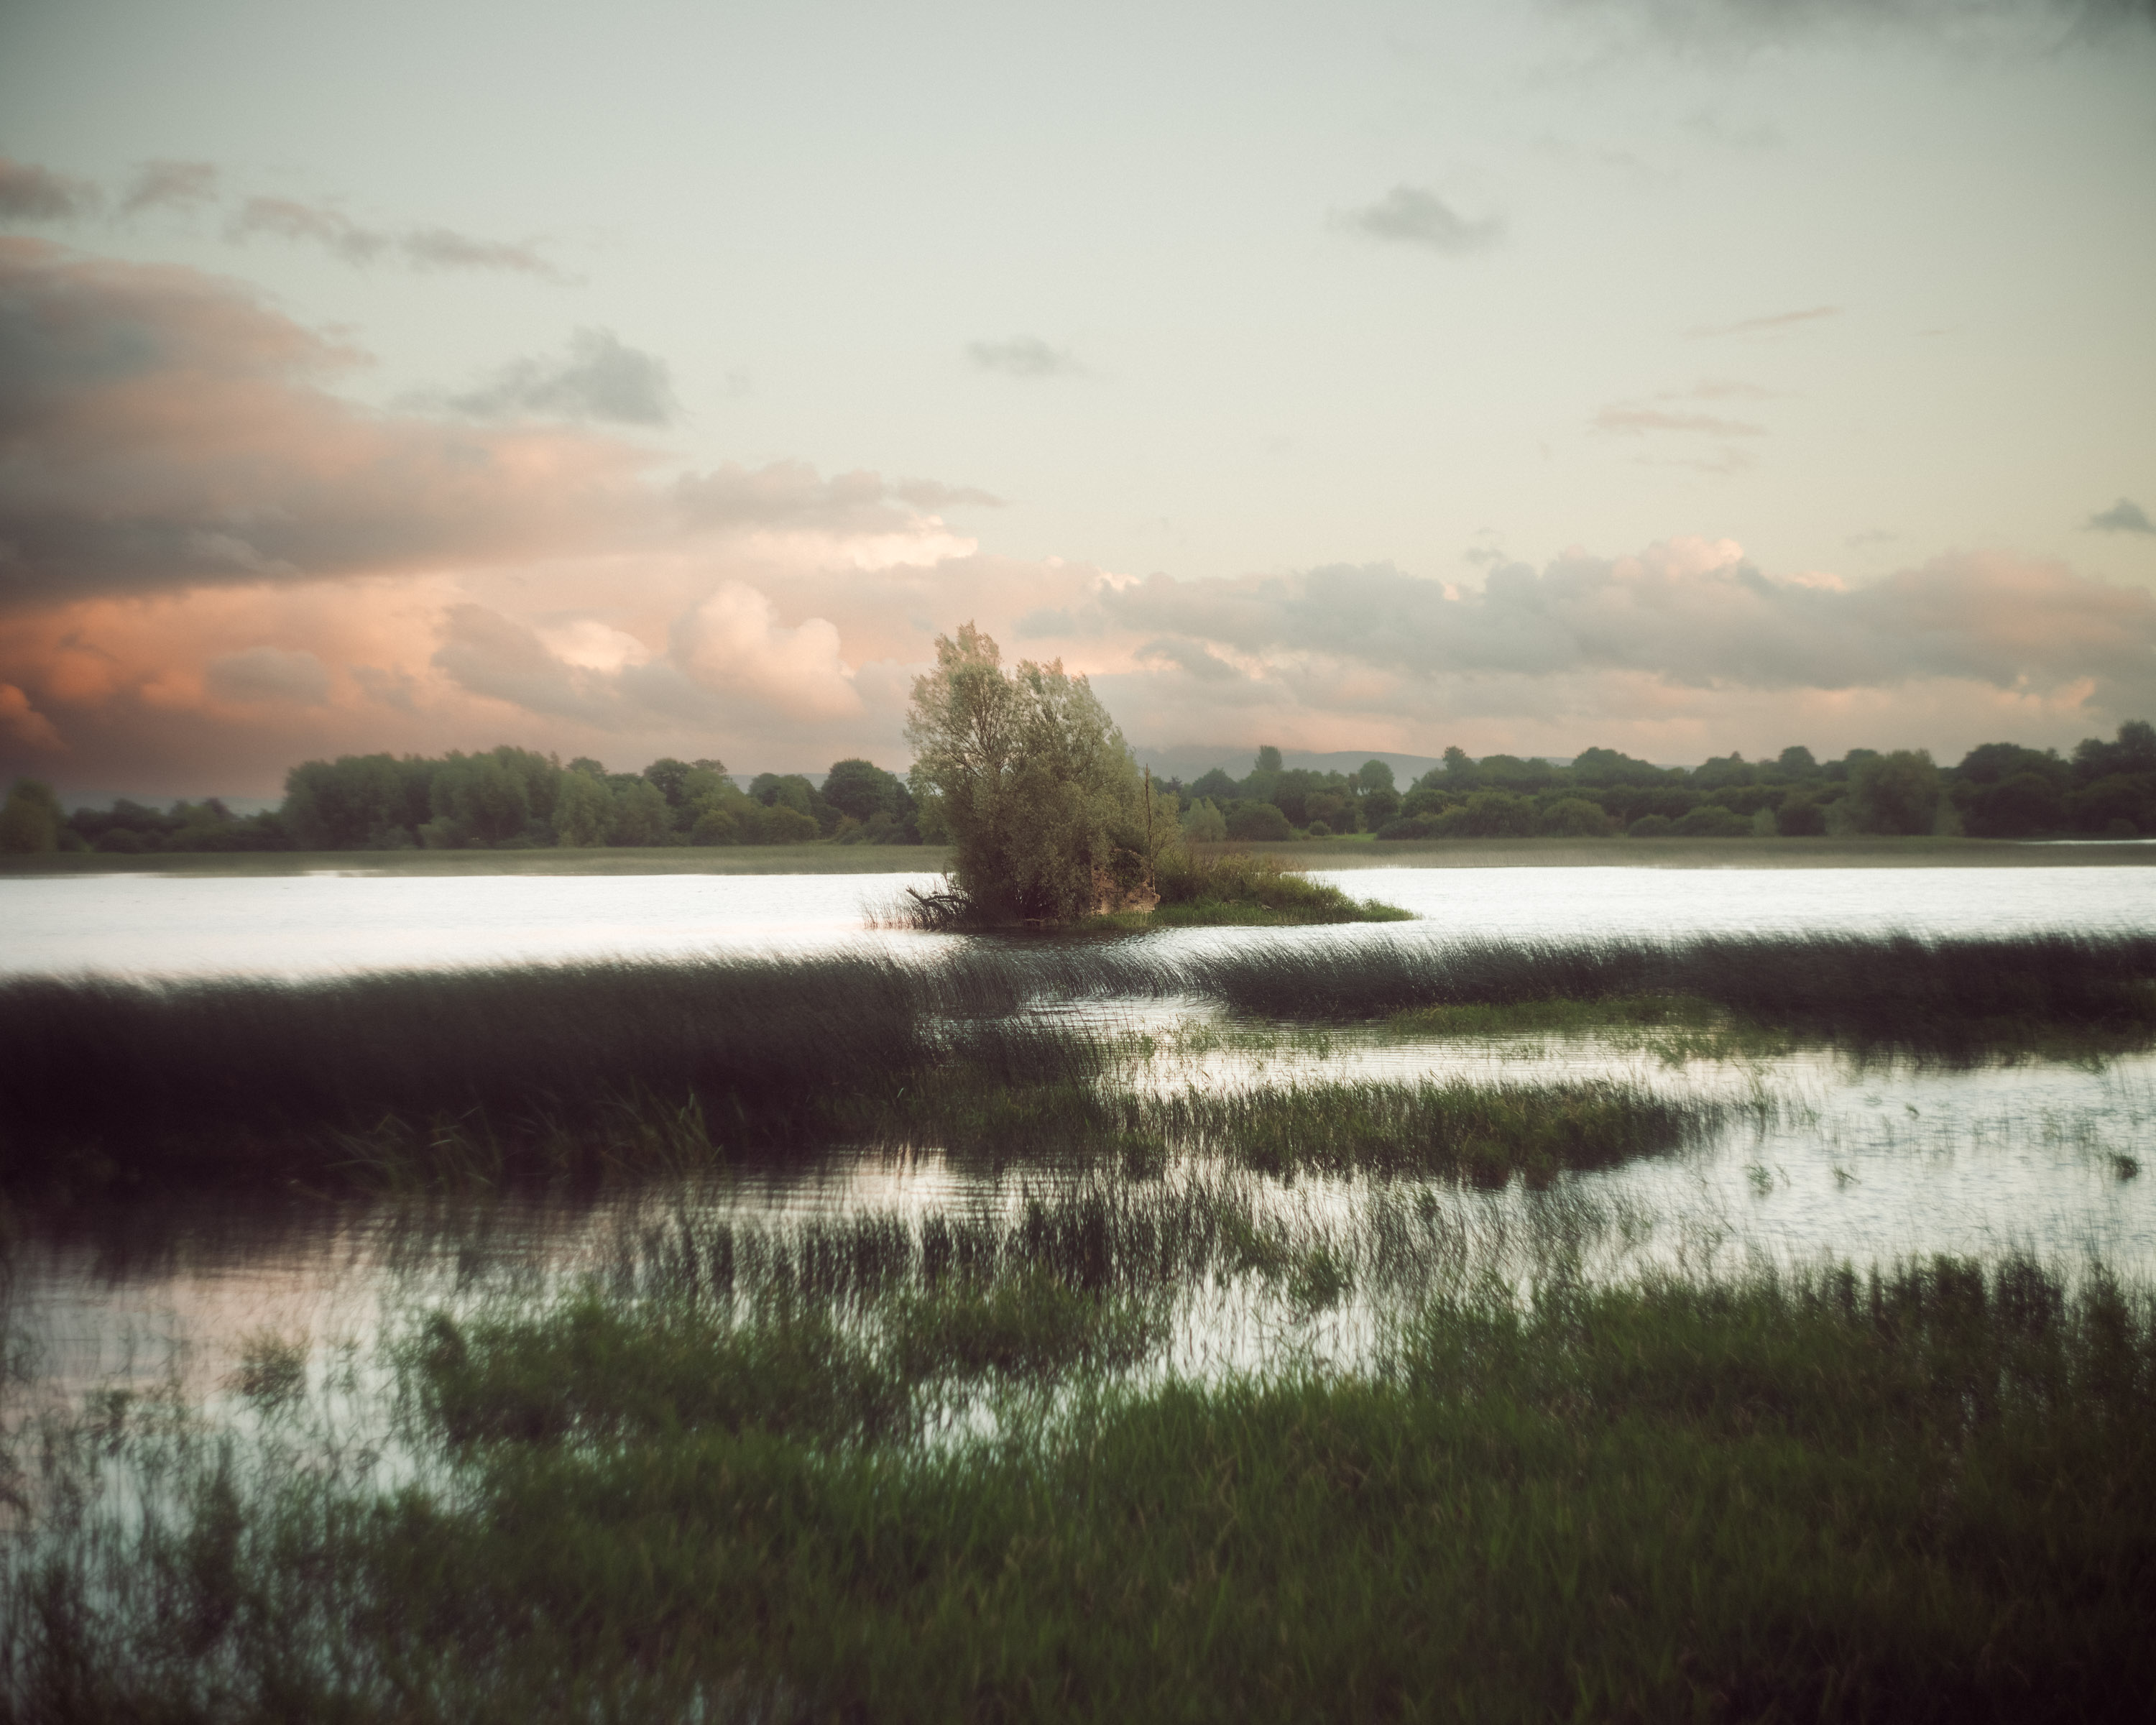
Ian Howorth | Fujifilm GFX 100S | Asahi Pentax Takumar 55mm f1.8 (adapted) | f/1.8 | 1/200 sec | ISO 800
It’s also important to remember balance in your scenery. If the foreground is too dominant, the background will feel like an afterthought. If the background is spectacular but the foreground is empty, the image can feel flat. Aim for a relationship between them that makes the whole scene feel intentional.
Don’t be afraid of the details
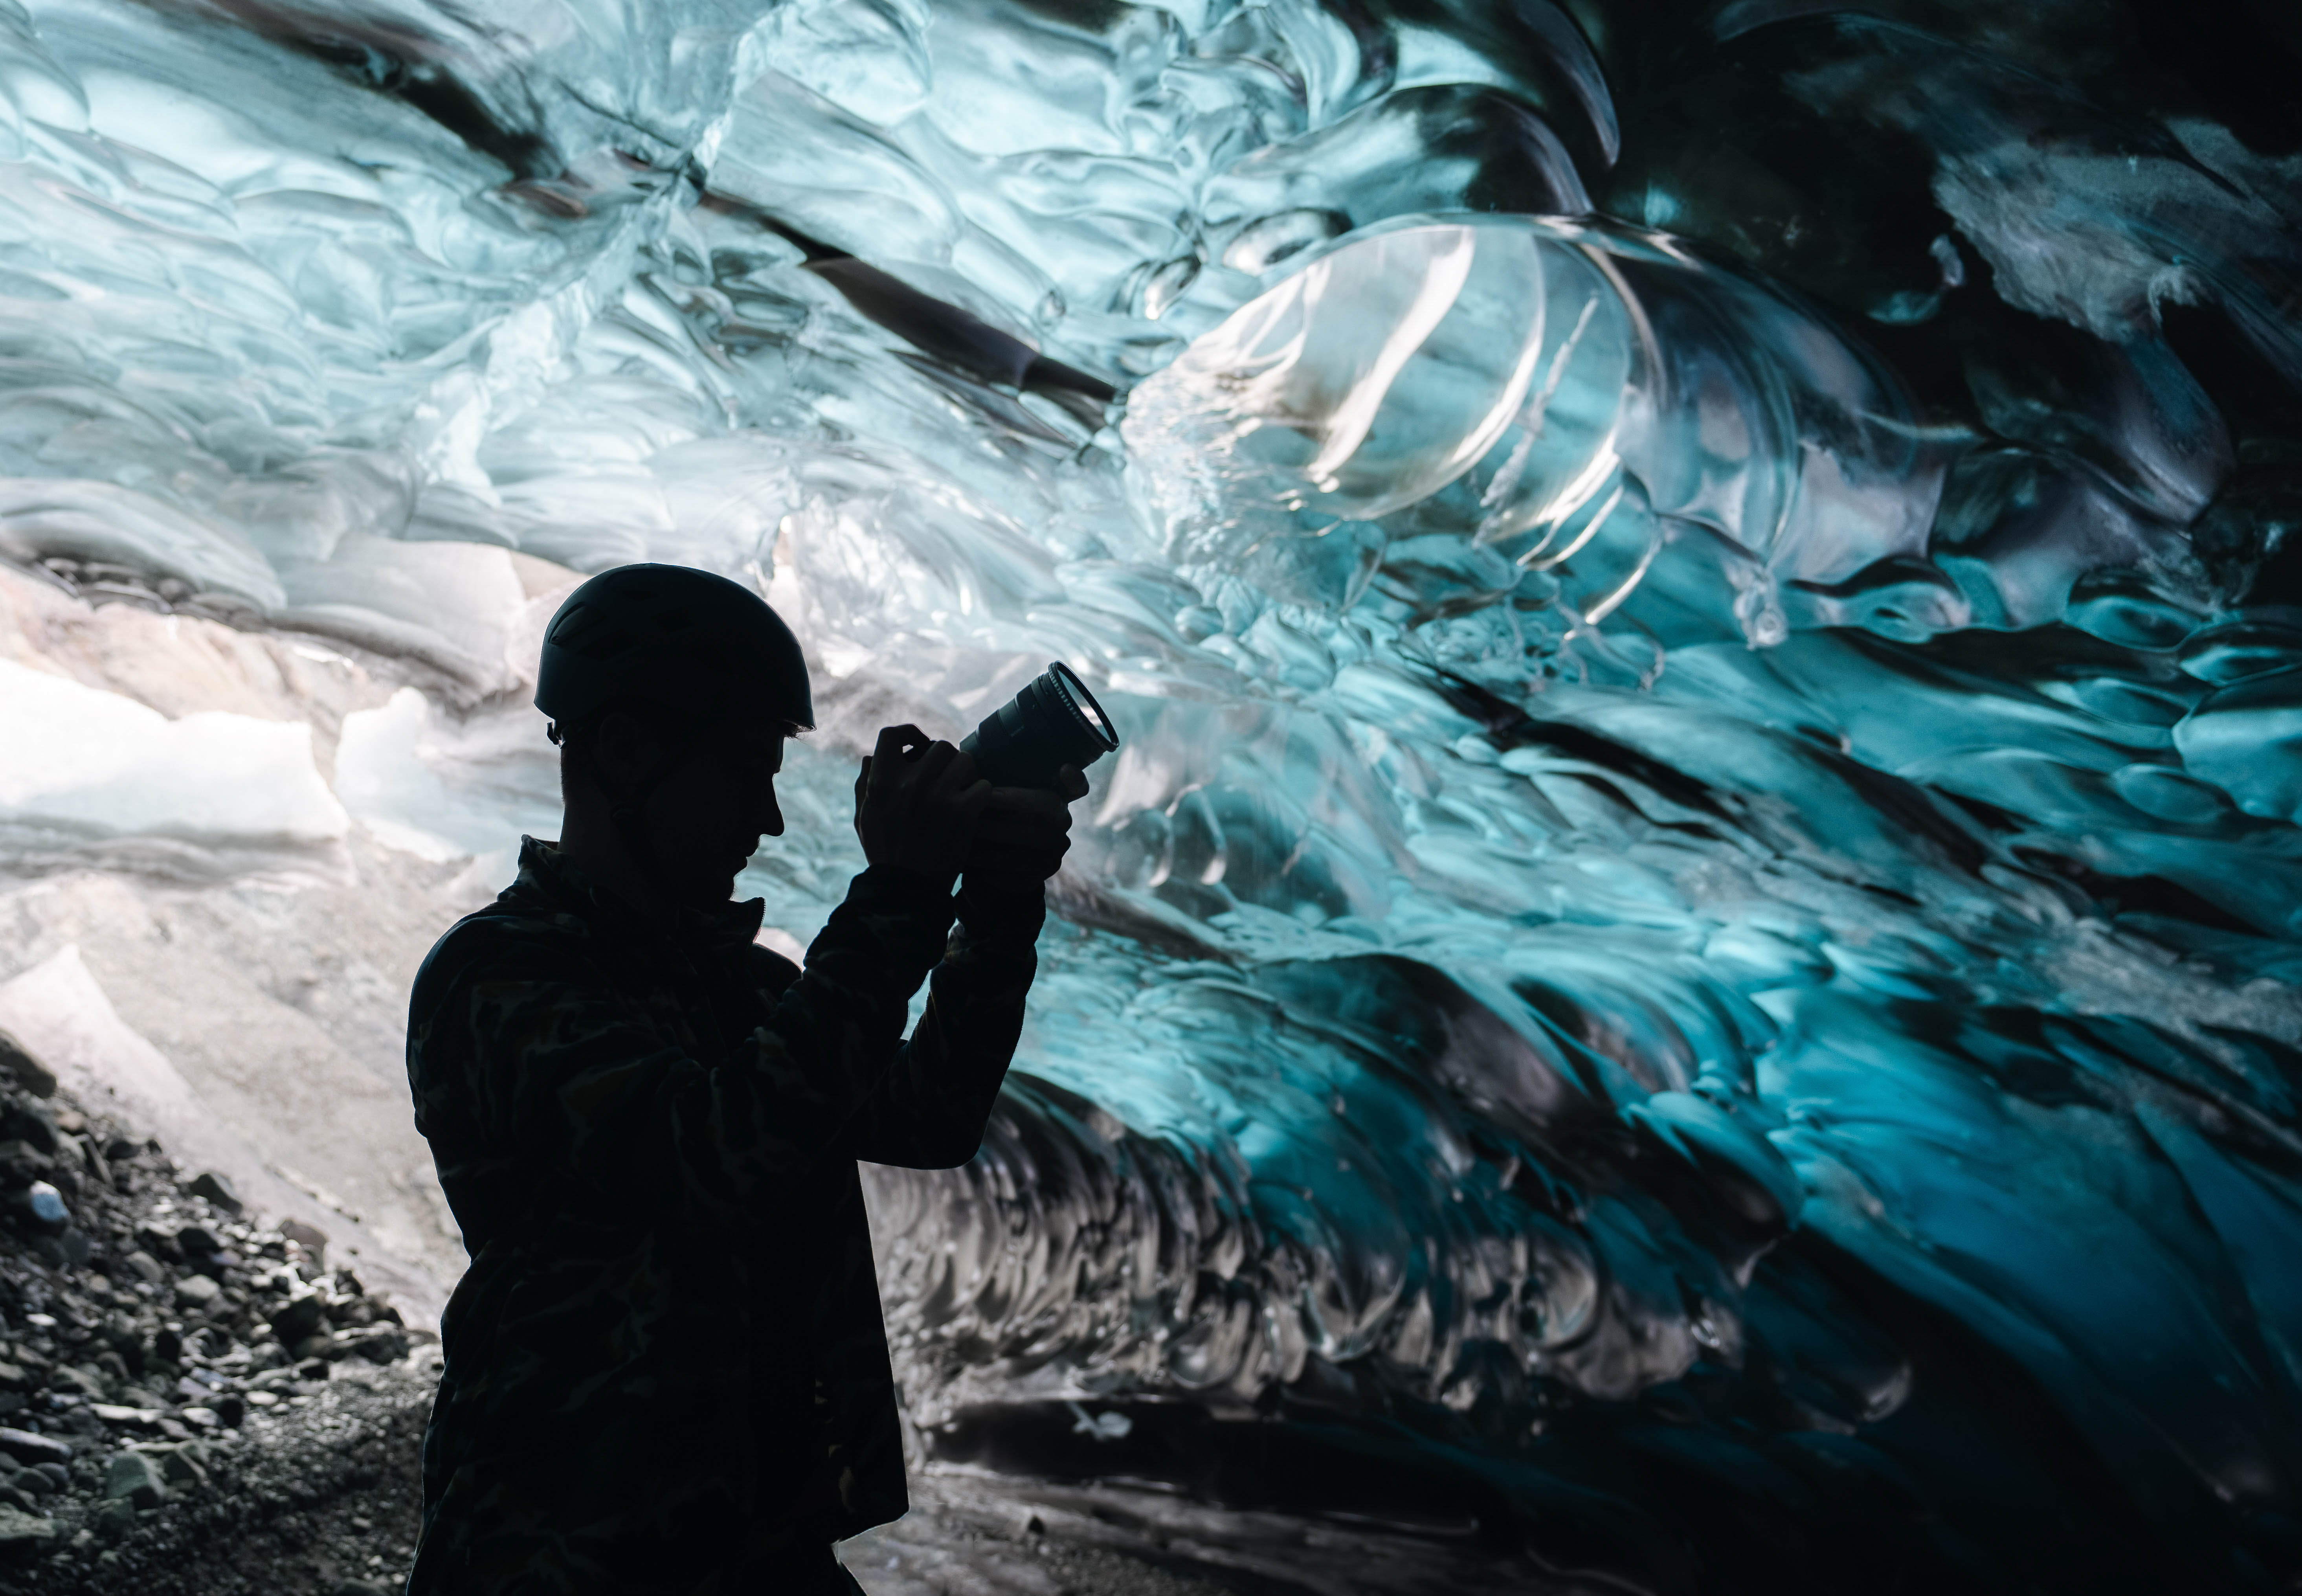
Landscape photography isn’t always about wide, sweeping vistas. Grand scenes can be powerful but some of the most interesting images come from focusing on a single element within the landscape and not the landscape as a whole.

Marvin Kuhr | Patagonia | Sony A7 IV | Sony 70-200mm f/2.8 GM OSS | 200mm | f/4.0 | 1/8000 sec | ISO 400
Check out Marvin Kuhr’s guide to photographing glaciers, icebergs and ice caves while being as sustainable as possible.
Isolating a subject, such as the texture of rock, patterns in the sand, ripples on the water, frost on leaves or light catching a single tree, allows you to explore shape, colour and form more deliberately.
Use a longer focal length or move closer to your subject to simplify the frame and remove distractions to make your image easier to read and more intentional.
Expert Landscape Photography Tips
Now you’ve learned some basics, it’s time to hear from some of the experts. Landscapes are not an easy art form to master; it takes a lot of time, patience and cost to get right, with some luck mixed in as well. But it can be one of the most rewarding moments you experience when you get the shot you set out to take. When the light is just perfect, and you are in position with everything ready, you come home feeling accomplished.
https://youtu.be/ALrg388HPcs?rel=0“A photograph isn’t just a snapshot, it’s a multi-dimensional production. Every single element in the frame matters. As a landscape photographer, you are a noticer.” - Charlie Waite
Learn from the master, Charlie Waite, who has 10 top tips for landscape photography for you.
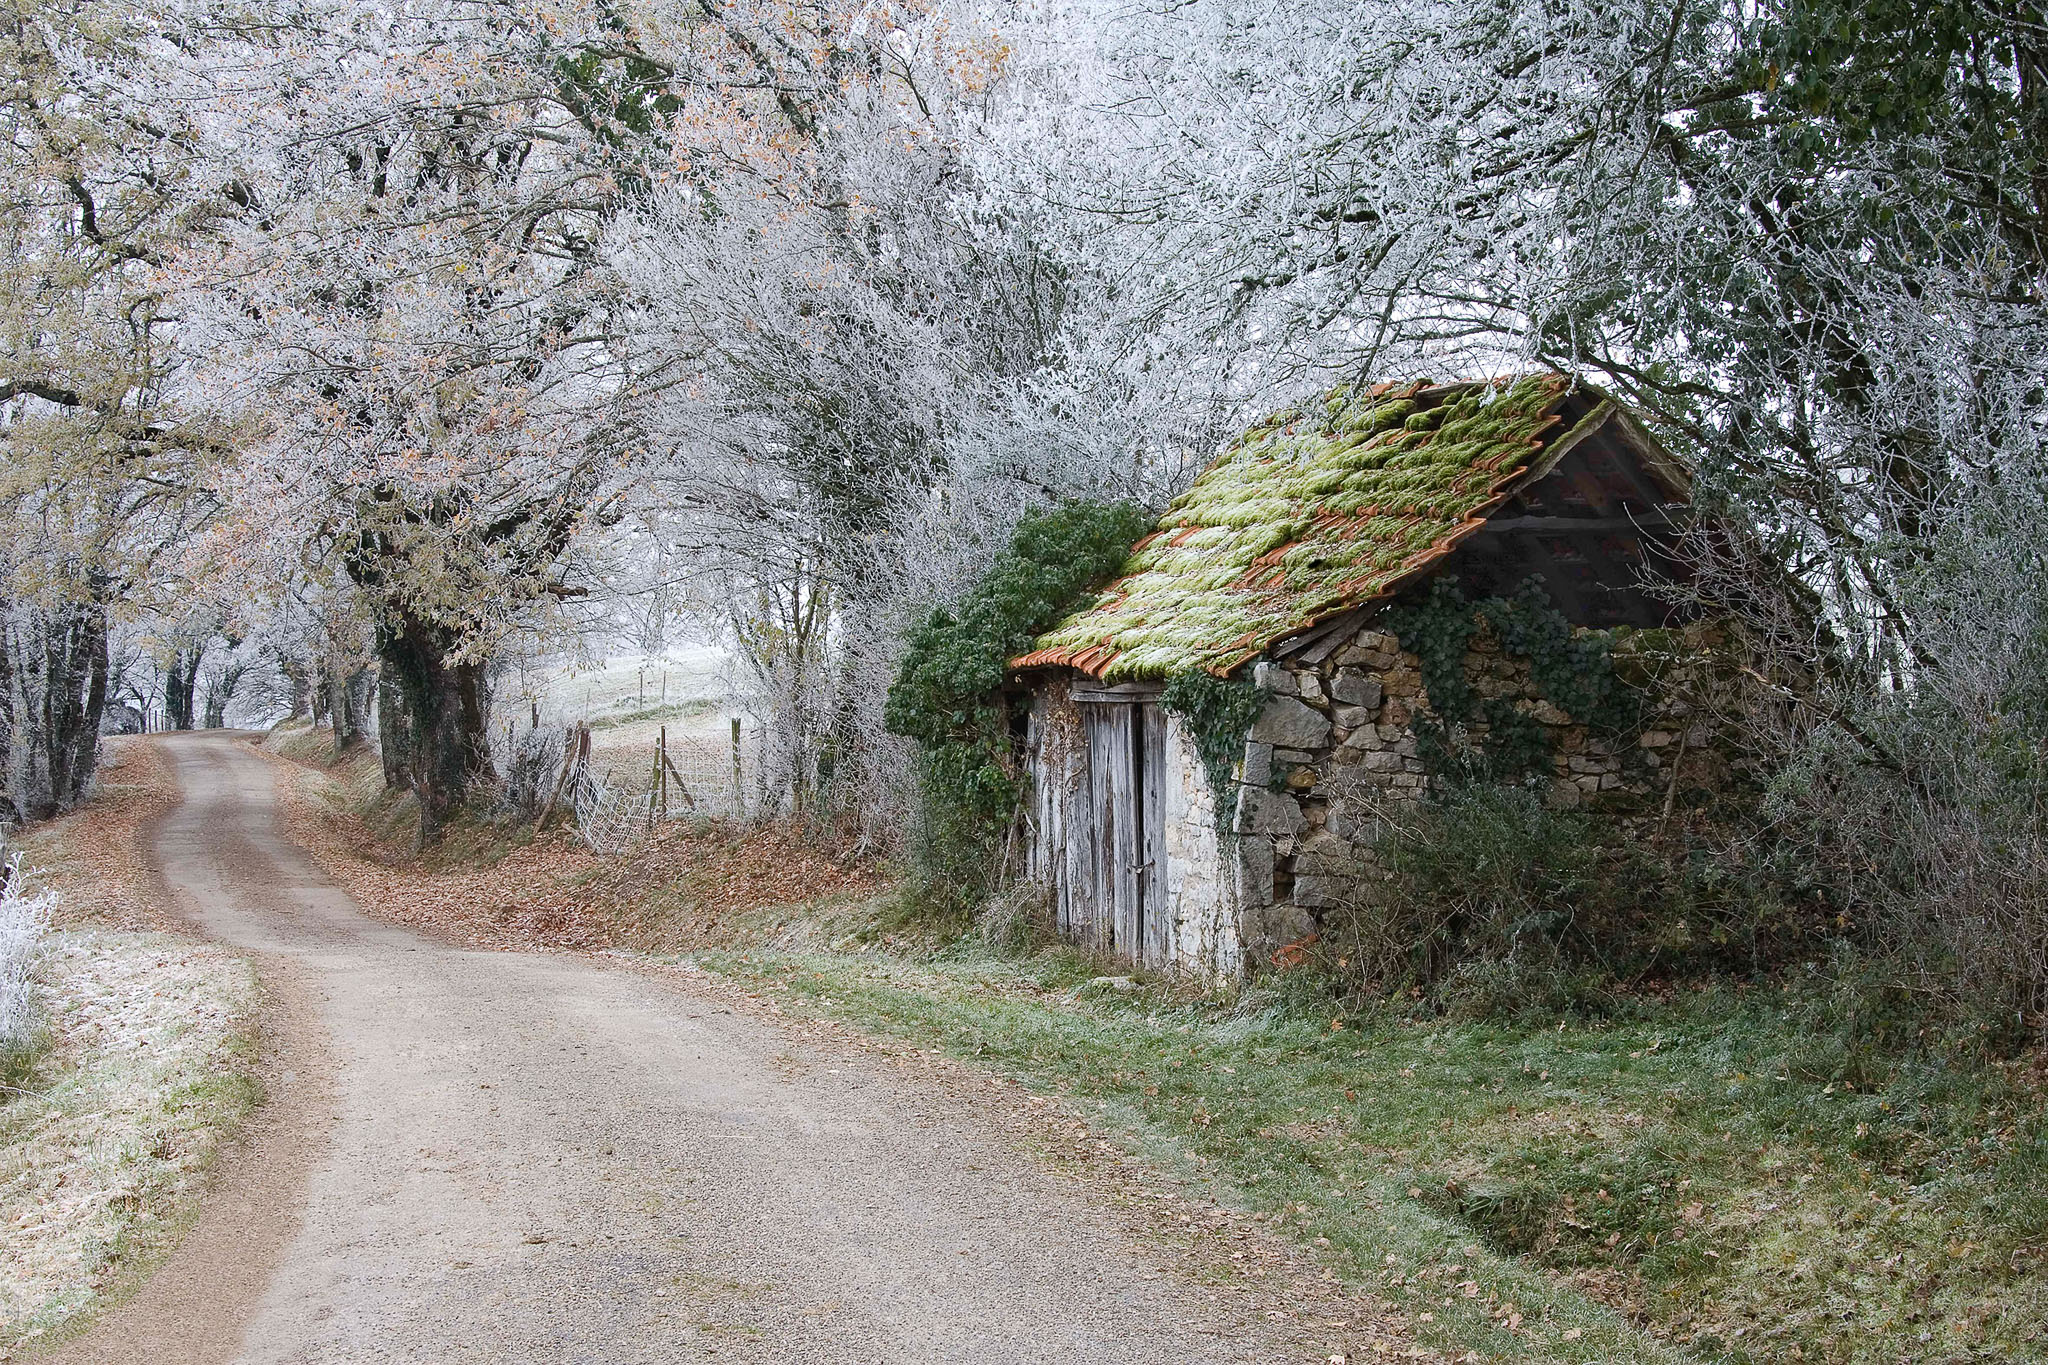
Charlie Waite | Canon EOS 5D | Canon EF 28-300mm f/3.5-5.6 L IS USM | 60mm | f/29 | 1.6 sec | ISO 50
It may be challenging, but it’s also a lot of fun, thanks to the unpredictability of the weather and nature.

Michael Schauer
Our interview with Michael Schauer, an environmental photographer and landscape-shooting pro, defines the role of a landscape photographer and covers how to source incredible subjects to shoot.
Finding good light in landscape photography
Finding the light that speaks to you is an essential part of developing your landscape photography style. You can photograph the same location a hundred times and get a range of different images, because light changes everything in a shot. It doesn’t always mean waiting for a perfect sunrise; it means choosing light that supports your intention.
In our guide to winter landscape photography, renowned forest photographer Kilian Schönberger says:
“The light makes the scenes really come alive because it creates depth and ‘plasticity’. In this respect, the planning of light—and its effect—is essential in the preparation of my photographs.” - Kilian Schönberger
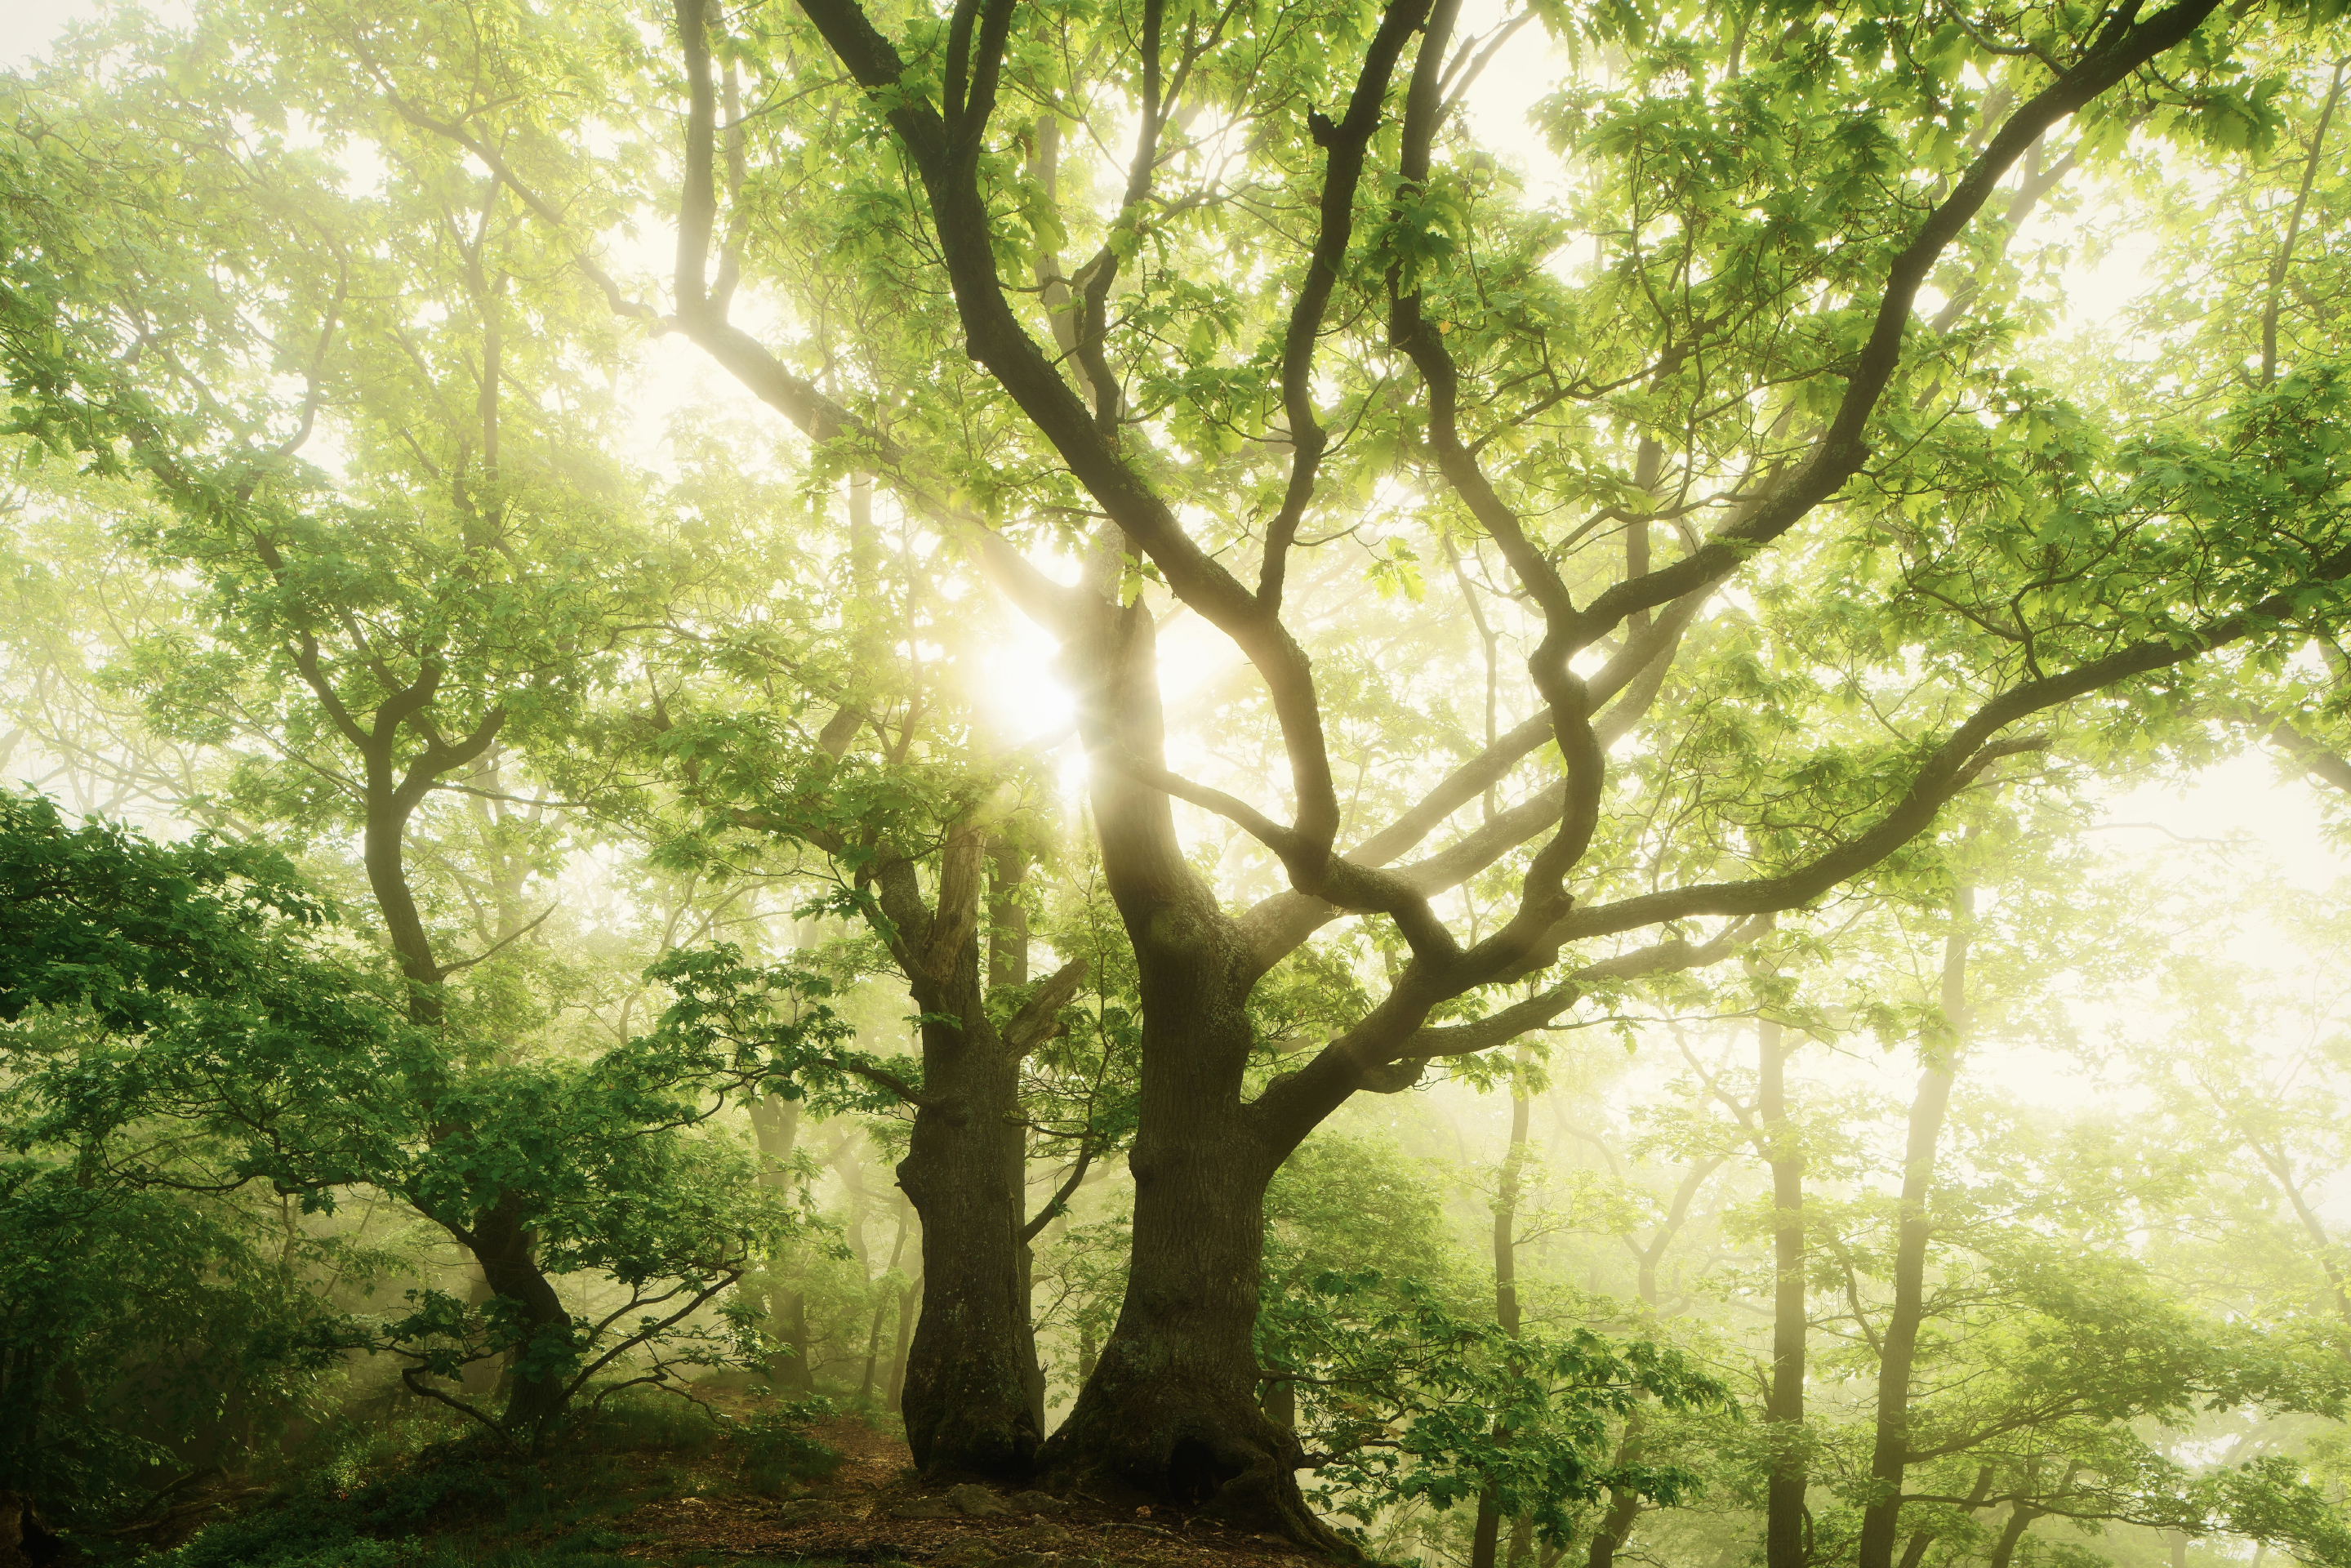
Kilian Schönberger | Sony A7R II | Sigma 24mm f/3.5 DG DN FE | 24mm | f/13 | 1/8 sec | ISO 100
What does “choosing a light to support your intention” actually mean? Well, if you want warmth and soft contrast, golden hour is the classic choice of timing. When the sun is low, the light becomes softer because it is travelling through more atmosphere and is being diffused and scattered. This makes the light softer and less harsh than it is in the middle of the day. A low sun also creates longer shadows that can add shape and it often adds a gentle glow to clouds and highlights.
If you want mood, subtler color, and calmer contrast, diffused lighting like cloud cover, mist, or light rain can work wonders. It reduces harsh shadows and works particularly well in forests, waterfalls and intimate landscape scenes.
Then there’s the kind of light that makes you pause, like direct sidelight breaking through clouds after a rainstorm, sunbeams cutting into a valley or storm light turning the sea metallic. Most of these moments are hard to predict unless you pay attention to weather forecasts, get to know your local shooting locations and stay put when your shooting conditions start to shift. In landscape photography, patience often means waiting for the weather to do something interesting.

On the flip side, landscape photographer Nina Papiorek doesn’t believe you need any ‘nice’ light: ”I’ve never been particularly drawn to fair-weather photography. I’d choose dramatic clouds over a cliché sunset any day.”
It’s all about finding the sorts of images that speak to you. You don’t have to go down the typical sunset route but it is also a good starting point to learn. Everybody starts somewhere, after all.

James Popsys | Sony ILCE-7RM4 | 85 mm | f/1.4 | 1/400 sec
Be experimental and break the rules
Once you feel comfortable with the ‘rules’ of landscape photography, you should have a go at breaking them, especially if you want to get those creative juices flowing. For those rebels among you, it’ll be encouraging to learn that outdoor photographer James Popsys likes to use shallow depth of field in his landscape photography. In a genre that often encourages a deep depth of field, it’s a refreshing take. Read more about James’s tips on how to use wide apertures for unconventional landscapes.
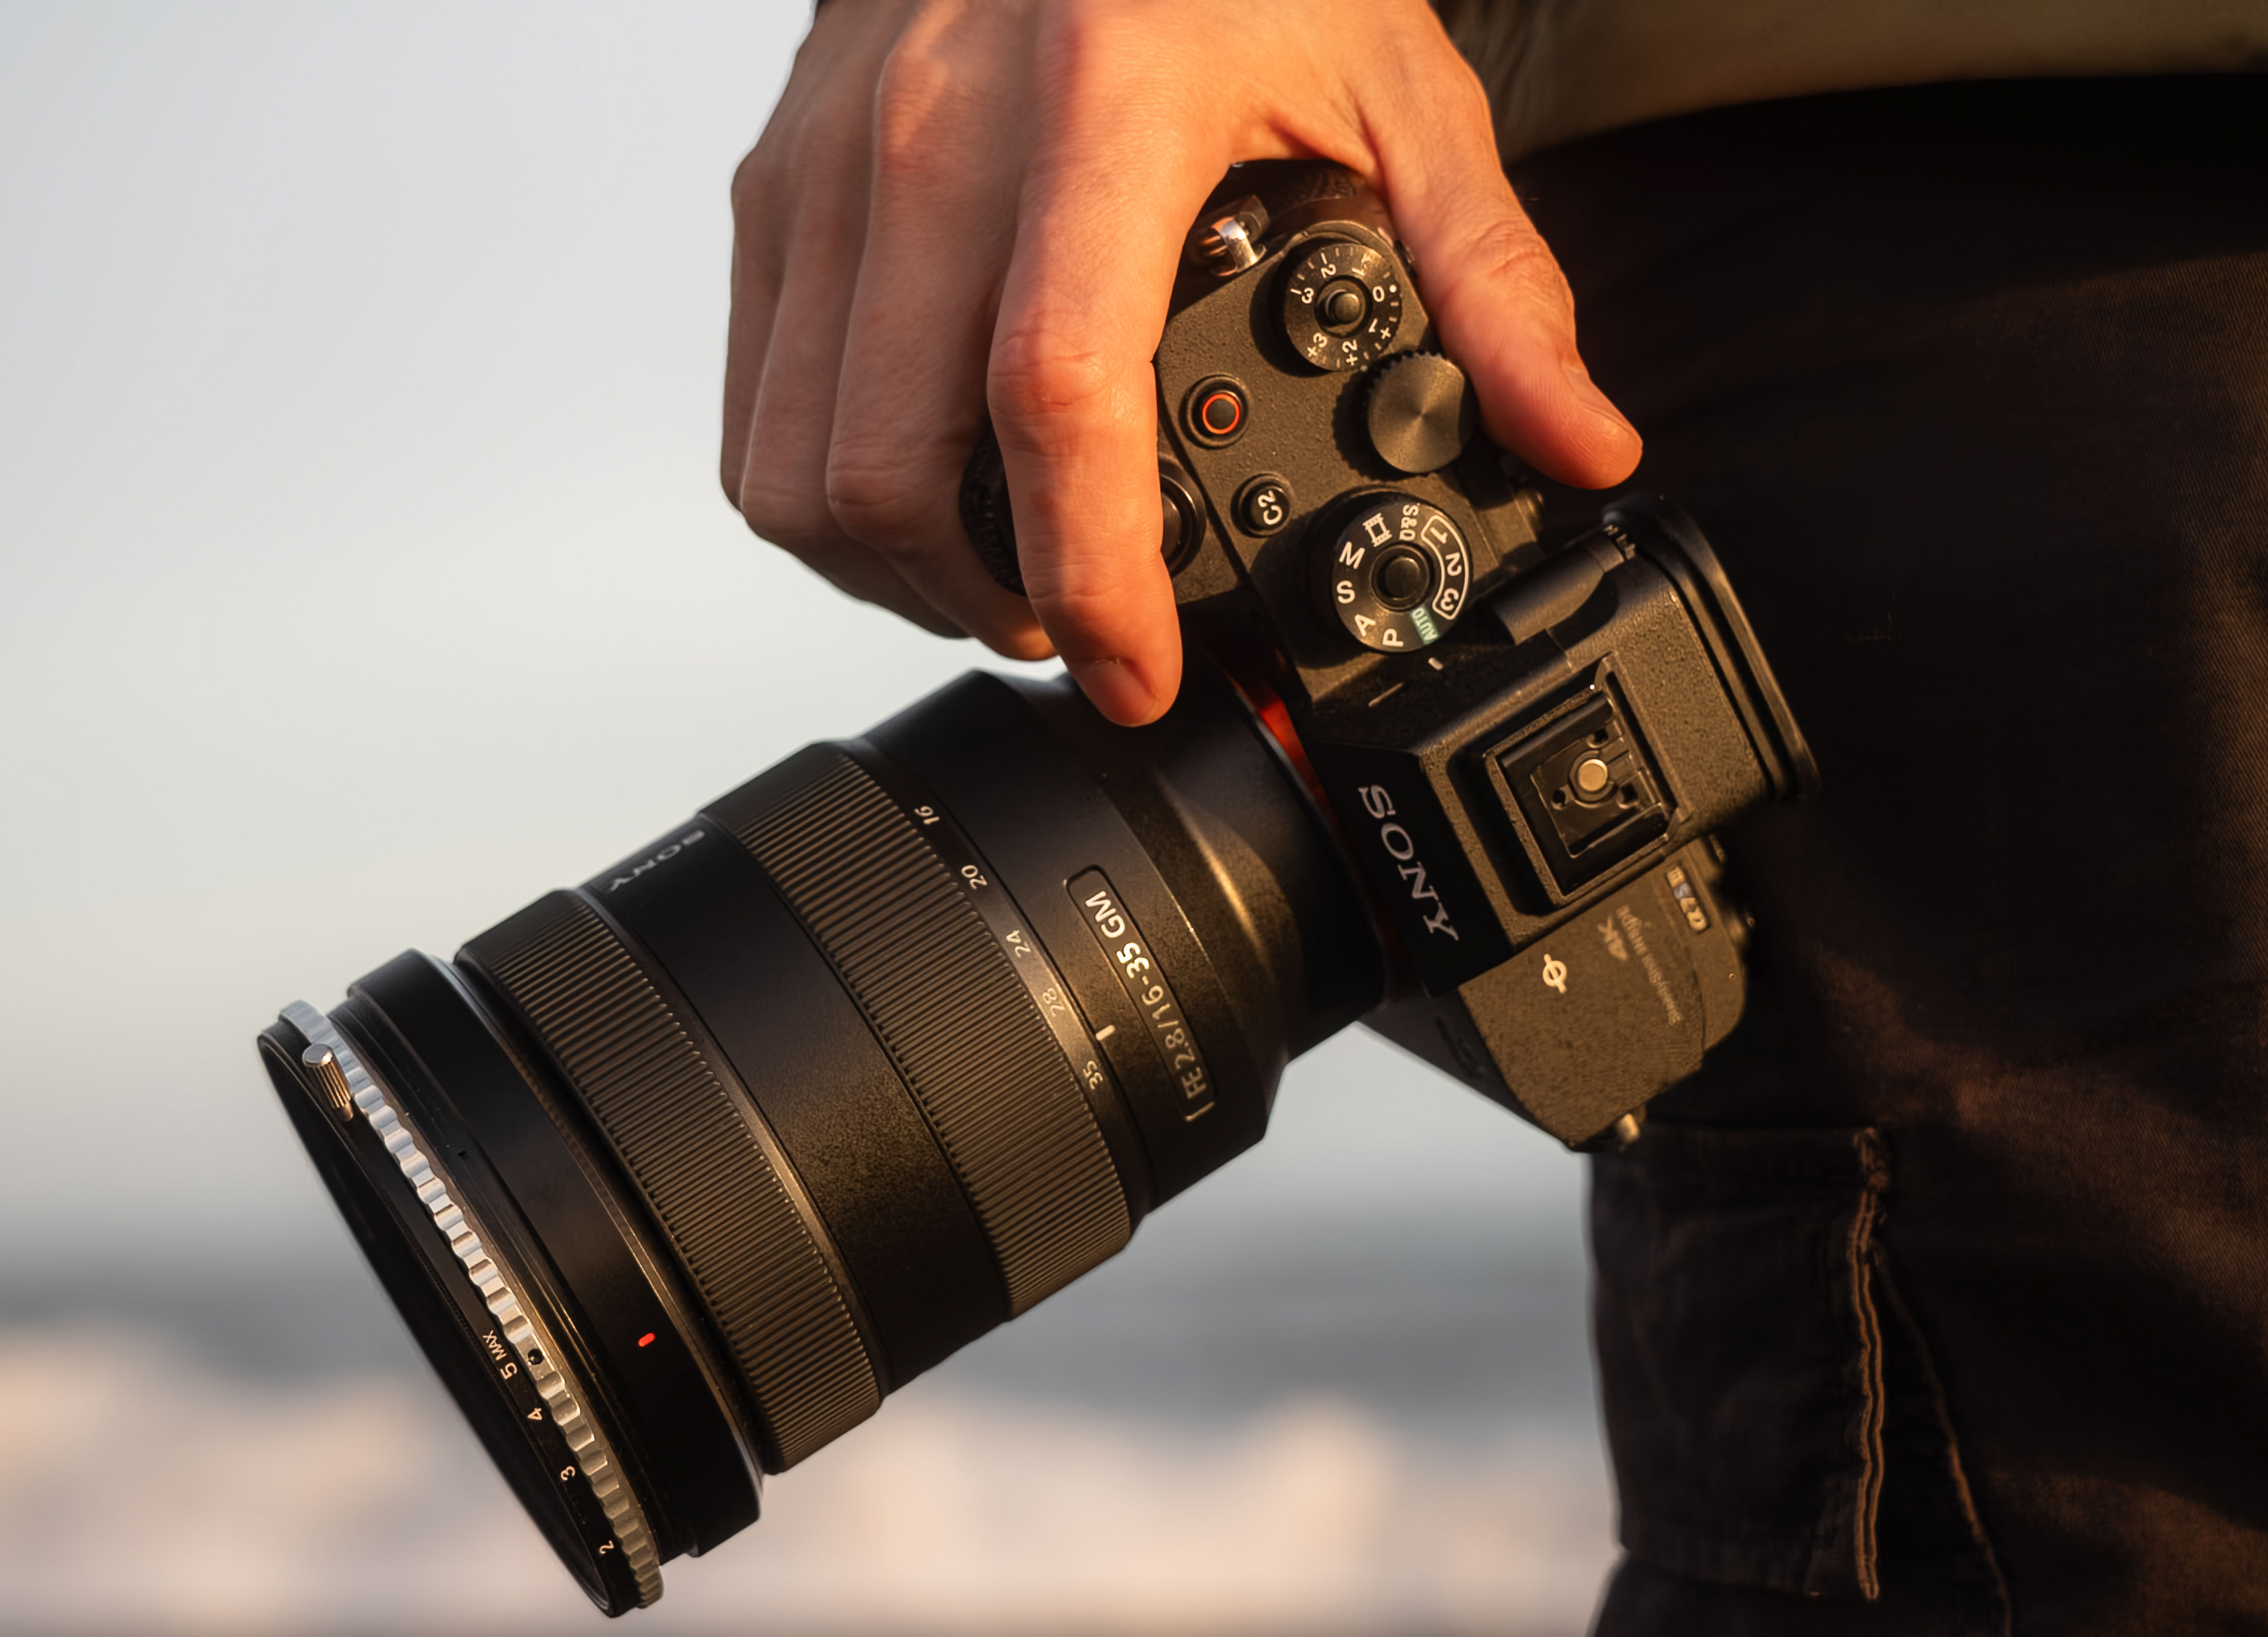
Used Sony A7S III with the Sony FE 16-35mm f/2.8 GM lens
Cameras for Landscape Photography
Start simple, with a small body and a versatile zoom lens. We go in-depth on the best cameras for landscape photography to make your decision easier.
The key when starting out is to keep the weight of your camera bag down, as there is nothing more discouraging than buying lots of heavy gear you are not sure how to use. Then you get worn out before you even reach your destination. The best landscape cameras will offer high resolution for the detail you need, wide dynamic range for challenging skies and weather sealing for cold and wet conditions. Many pros lean towards full-frame bodies, but you absolutely don’t need a full-frame sensor for landscapes; most modern sensors will do a fine job.
If you are a more experienced photographer, then check out our Nikon Z6 II for landscape photography review, or if you’re more of a Sony shooter, there’s always the Sony A7R V for landscape photography.
Used Canon EF and RF lenses
Lenses for Landscape Photography
Lens choice really matters, not just in landscape photography but in all types of photography. Your choice of lens will have a greater impact on your final image than your camera body. You can take a picture of the same subject, say a tree in a lone field, from 8mm all the way to 600mm and each one of those frames is going to make the viewer feel a little differently.
There’s no single "correct" lens for landscape photography, but the most common ones tend to range from 16mm, which is very wide, to 35mm, which feels more like a human eye perspective.

Dylan Nardini | Nikon D850 | Zeiss Distagon T* 21mm f/2.8
Dylan Nardini, winner of the 2021 British Landscape Photography Awards, likes to use 21mm and 25mm Zeiss manual focus lenses. See Dylan’s recommended Nikon lenses for landscape photography.
Best beginner lens for landscape photography
A 24-105mm lens is a fantastic starting point for a beginner landscape photographer. The wide focal range will give you great versatility, from wide-angle to telephoto; you can go out and shoot with just one lens, keeping your kit bag light. Start with a 24-105mm or equivalent range and choose the best one you can afford.
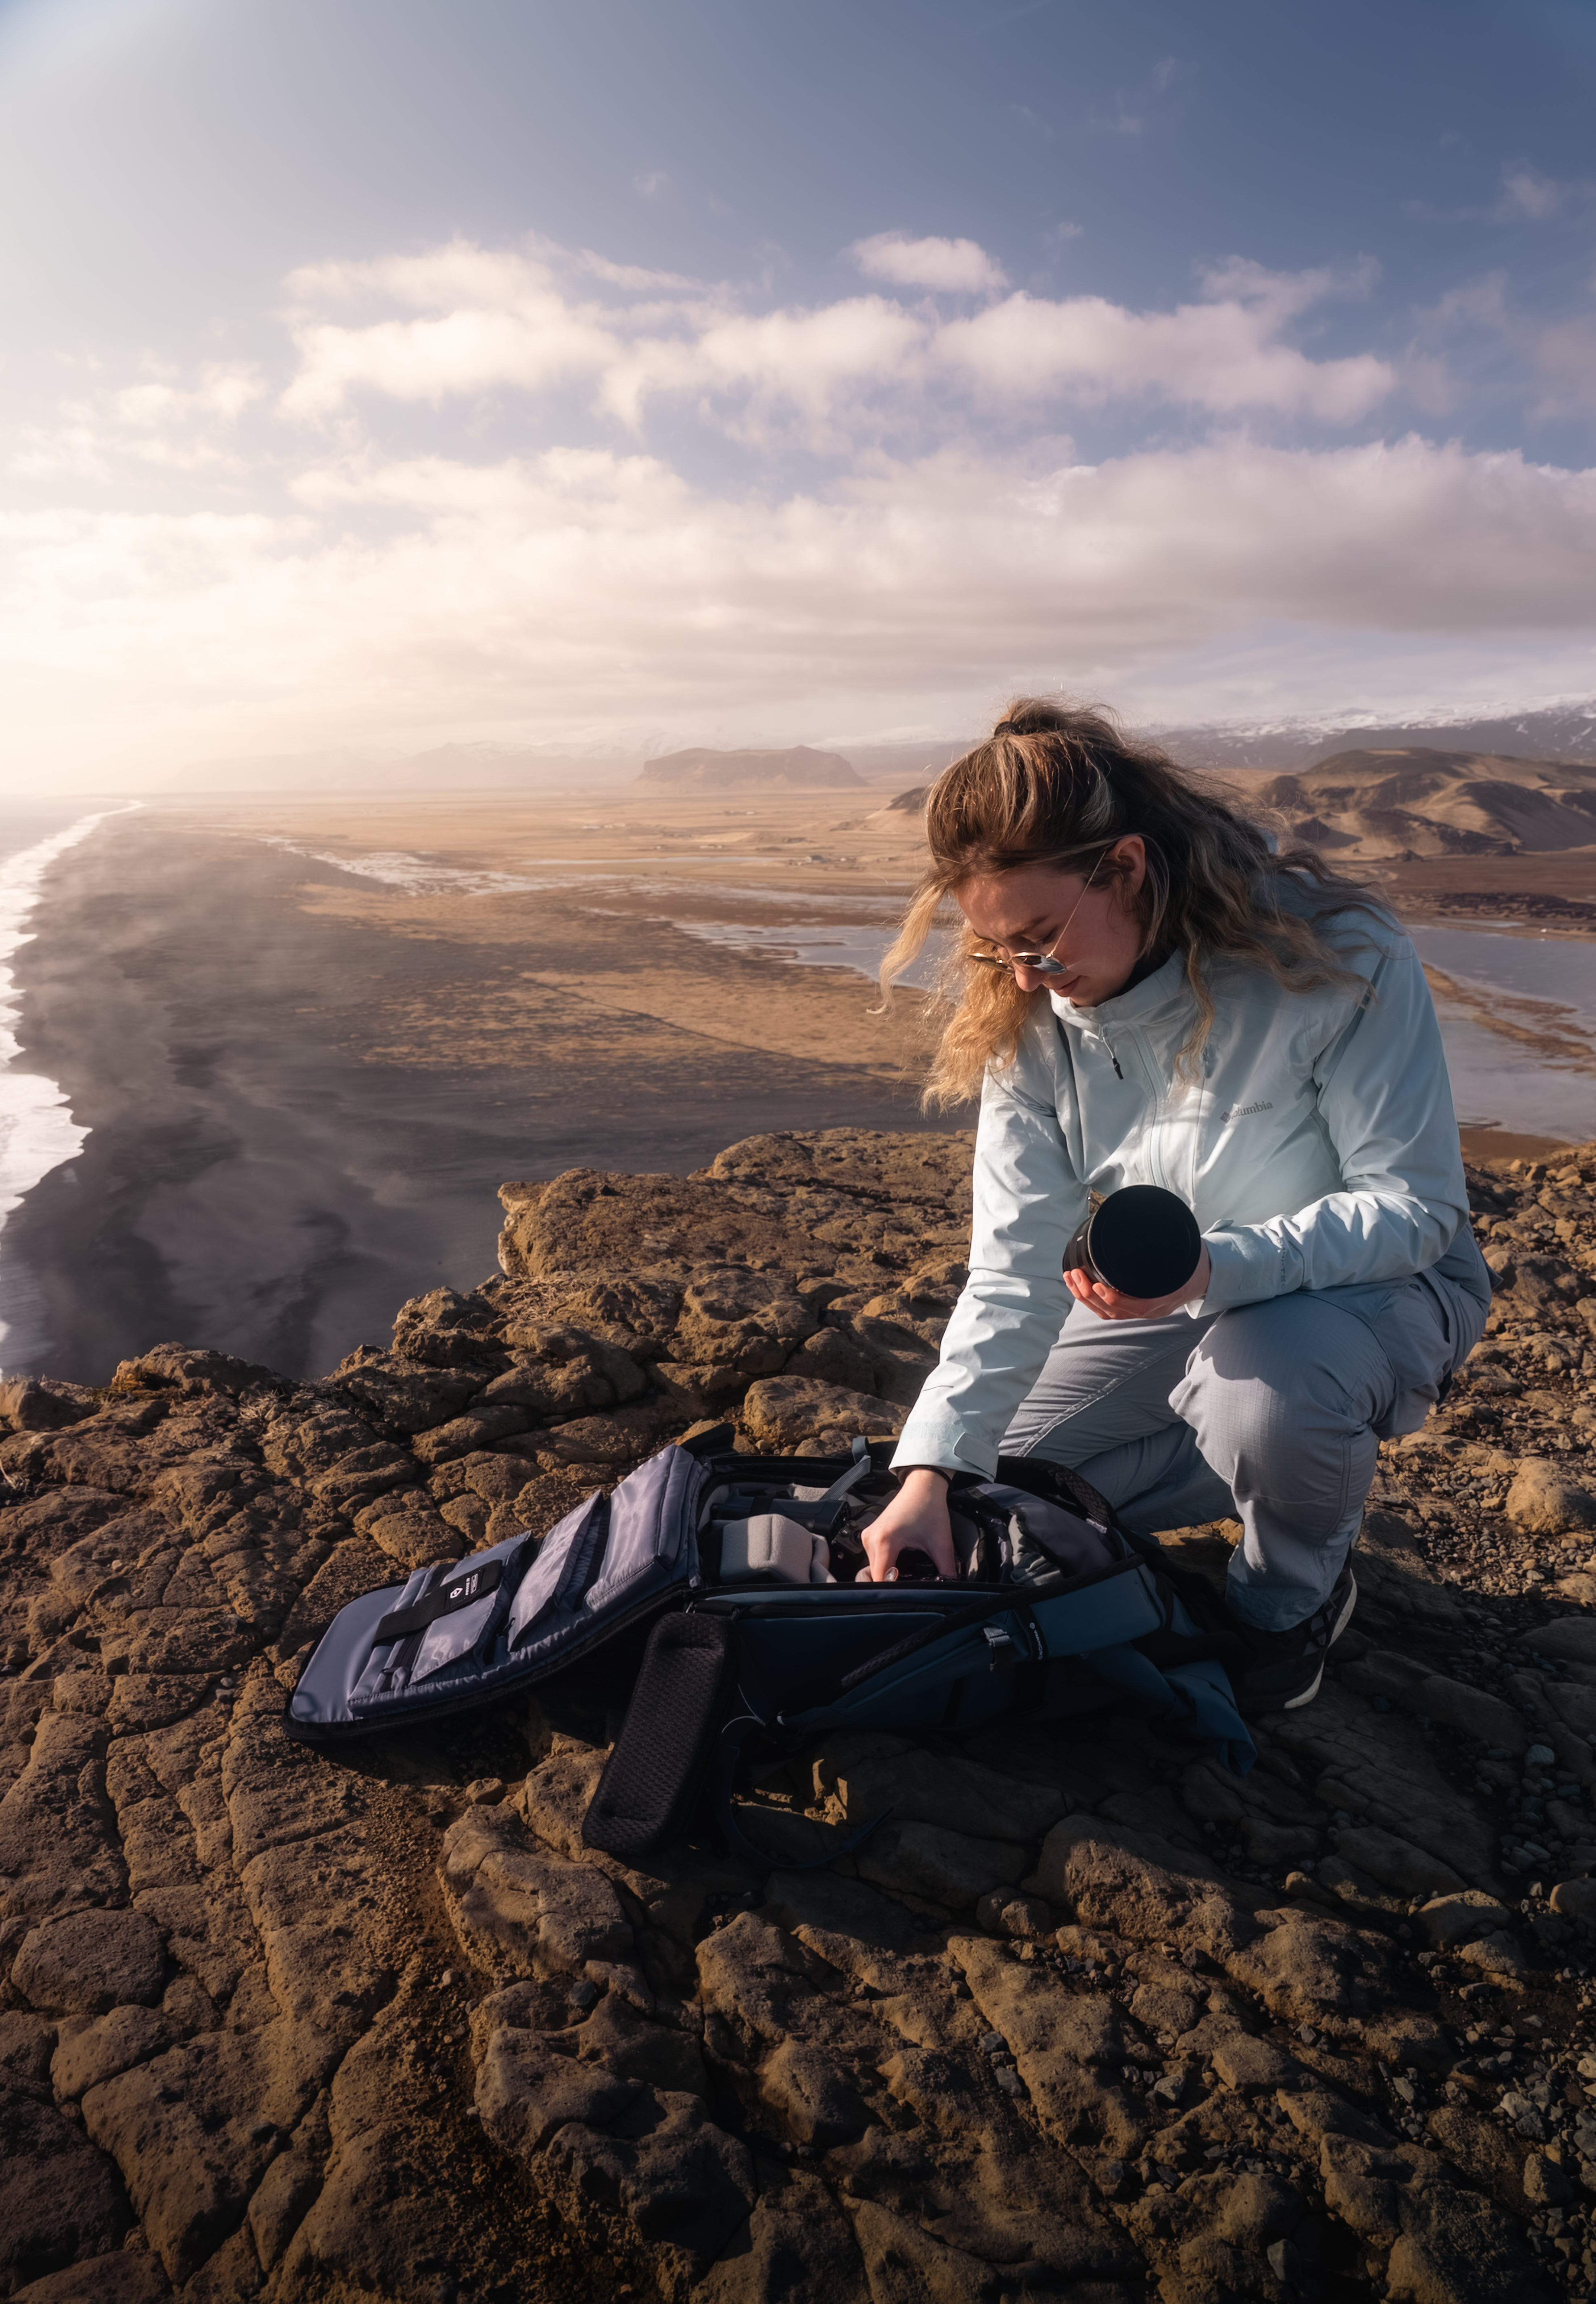
Accessories for Landscape Photography
When pursuing great landscape photography, you will often find yourself in both stunning and treacherous locations. It’s paramount that when you do, you know your supporting gear will survive the storm and make it easier to get the shot.
The criteria for the best accessories for landscape photography boil down to those two factors: will it last and does it help me? You don’t want to be trekking miles uphill with unnecessary gear; trust me, you’ll be sweating and cursing by the end of it. Keep your backpack as light as you possibly can.
Tripod
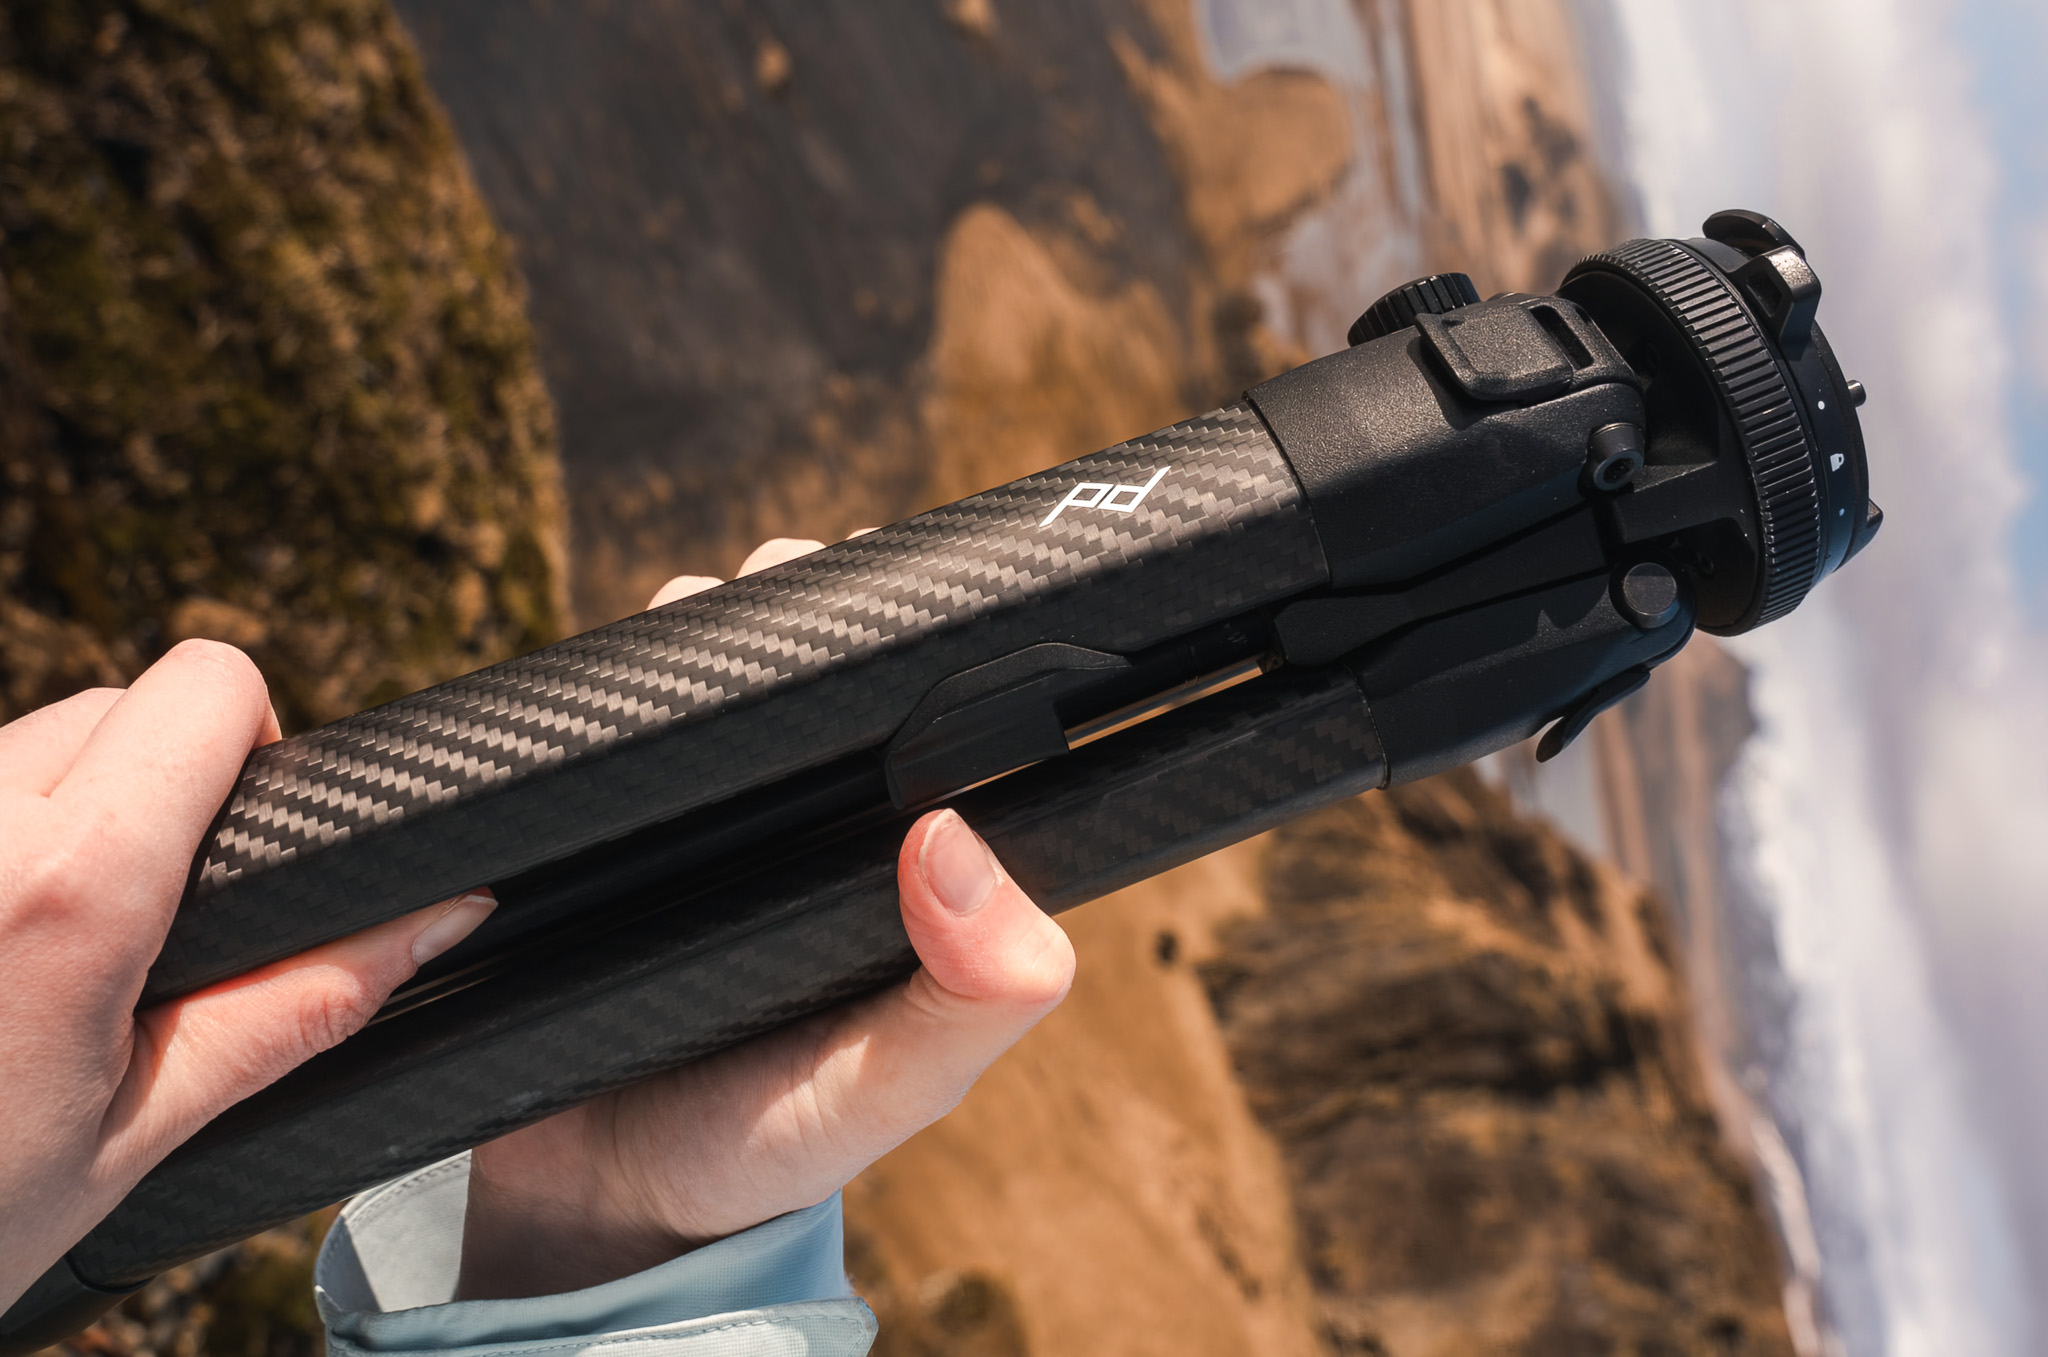
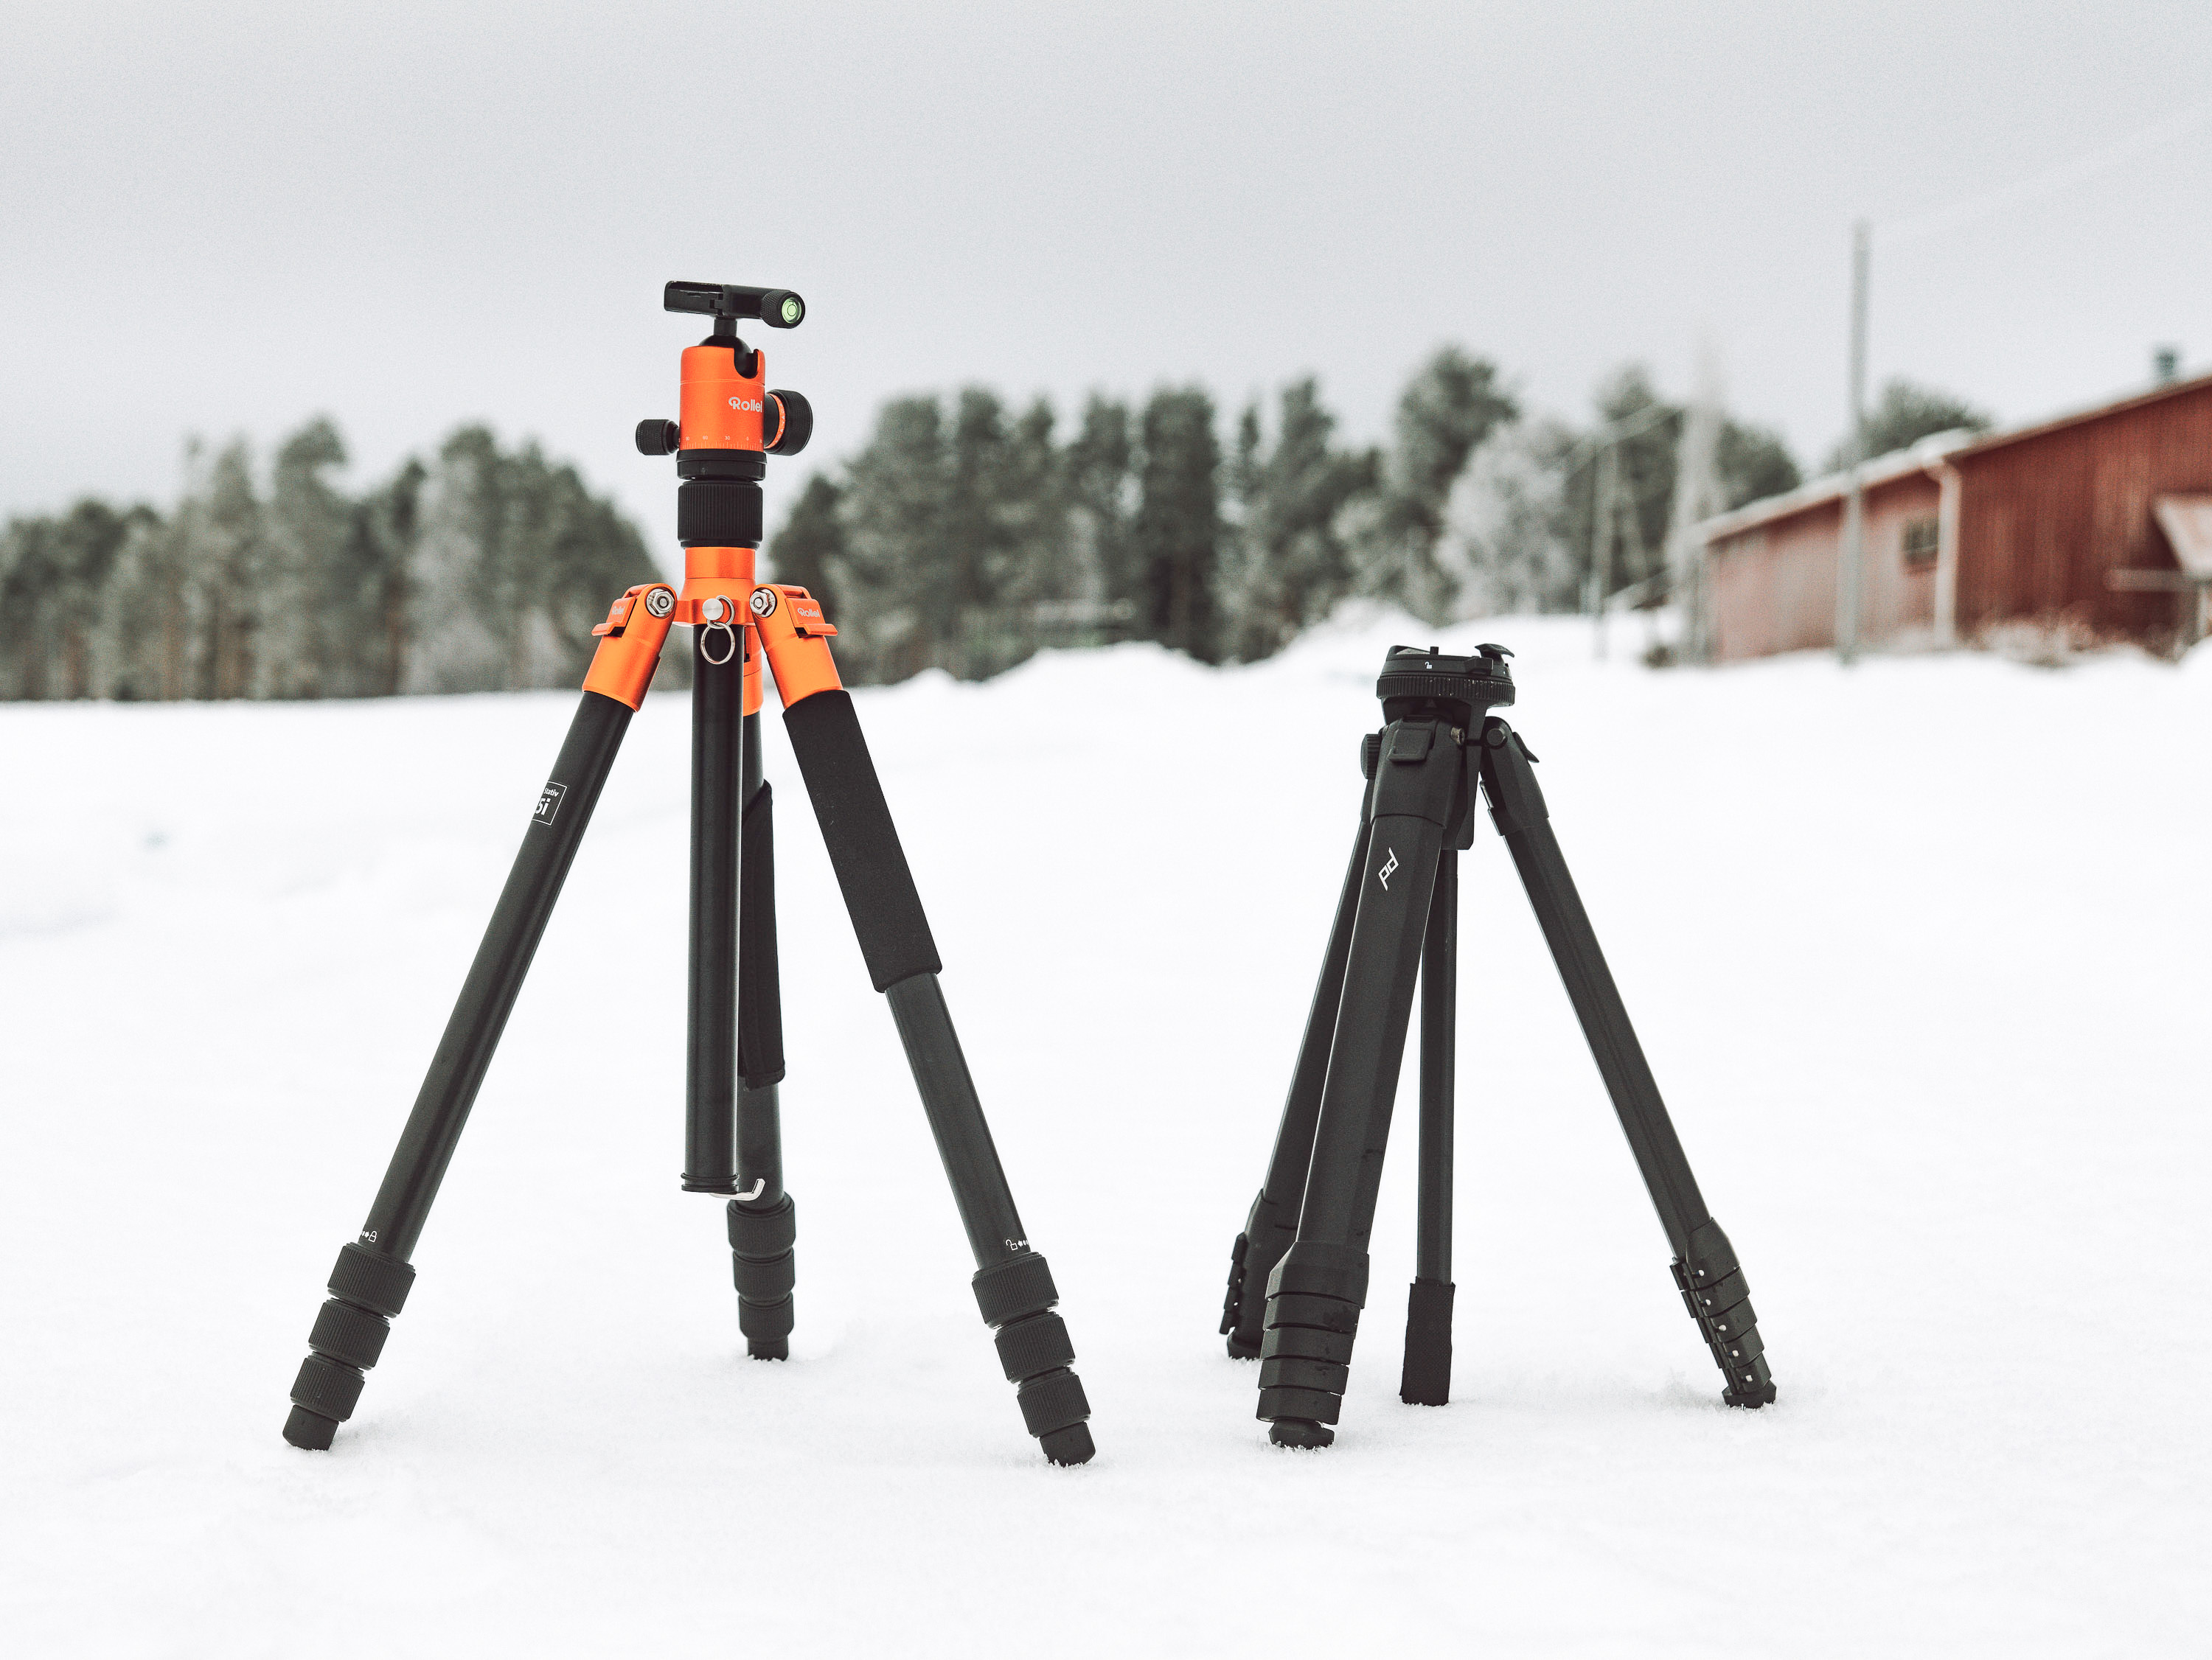
A tripod and landscape photography go hand in hand. Modern mirrorless cameras with IBIS can sometimes produce almost-miraculous long exposures handheld, with many caveats, but nothing will beat a good, sturdy tripod. You will always need one if you are serious about the landscape genre.
I’d recommend the Peak Design Travel Tripod - Carbon Fibre. These tripods have travelled with us on many MPB shoots and they’re perfect when you’re going long-distance. It is exceptionally lightweight for the payload it can carry and never feels like it is going to fall over in windy conditions.

Filters
Using filters will greatly help you achieve the best exposures. If you’ve ever wondered how they get the water to look all smooth and soft, know that it can only be done with a long shutter. To achieve that without blowing out the highlights, you’ll need a set of ND filters. “Sunglasses for lenses”, as the saying goes.
I strongly recommend the LEE100 Filter Holder kit with the LEE 100mm Graduated Neutral Density Hard Filter Set. These will set you up nicely to get perfectly exposed landscape shots.

Think Tank Airport International V 3.0
Backpack
Arguably, one of the most important investments for any photographer is the right backpack. The Lowepro ProTactic 450 AW II is a perfect bag for most occasions. It has plenty of space while not being too huge and a lot of modularity to fit your specific kit with the Velcro holders. The Peak Design Travel 45L is another sturdy option.
Read our article on hard vs soft cases for travelling to see which will best suit your needs. If you’re shooting mostly from where you park the car, hard cases might make more sense, but if you are trekking long distances a soft case/backpack makes the most sense.
Beginner Tips for Editing Landscape Photos
Editing is the final step in the process to a finished picture. Once you get home, the second part of your process, processing the RAW image, begins. If you’re anything like me, a large part of your time will be spent selecting and editing your best landscape shots.
Editing your photos can take as long as you want, or you can make basic exposure adjustments and leave it at that. Many people do, which is understandable when you’re stuck for time. You may find the editing part of the process the most tedious and tiresome, or you may love it. It comes down to personal preference. Sometimes you can go too far and your image may feel ‘over-edited’ or unnatural, but there also may be a specific “look” you’re going for.
There is a lot to cover when it comes to photo editing but before we dive in, have a read of our best photo editing software article and pick the best editor for you.
Adam Makkai | Fujifilm GFX50s | Super-Multi-Coated Takumar 200mm f/4 (adapted) | f/8.0 | 1/125 sec | ISO 400
Don’t be afraid to crop in
Cropping is cutting out a portion of the image to change the composition, and it’s your friend. Don’t let anyone convince you otherwise. A good crop can change the feel of an image dramatically and why not make the most of all those megapixels you paid the money for?
It doesn’t have to be a dramatic crop, though; even a subtle crop can help improve an image. I don’t often crop right in but I very regularly will use Lightroom's levelling tool first. This compensates for your human limitation in not being able to get a perfectly level image. Secondly, I’ll usually crop in a bit closer to the subject, or at least crop out distracting elements in the corners.
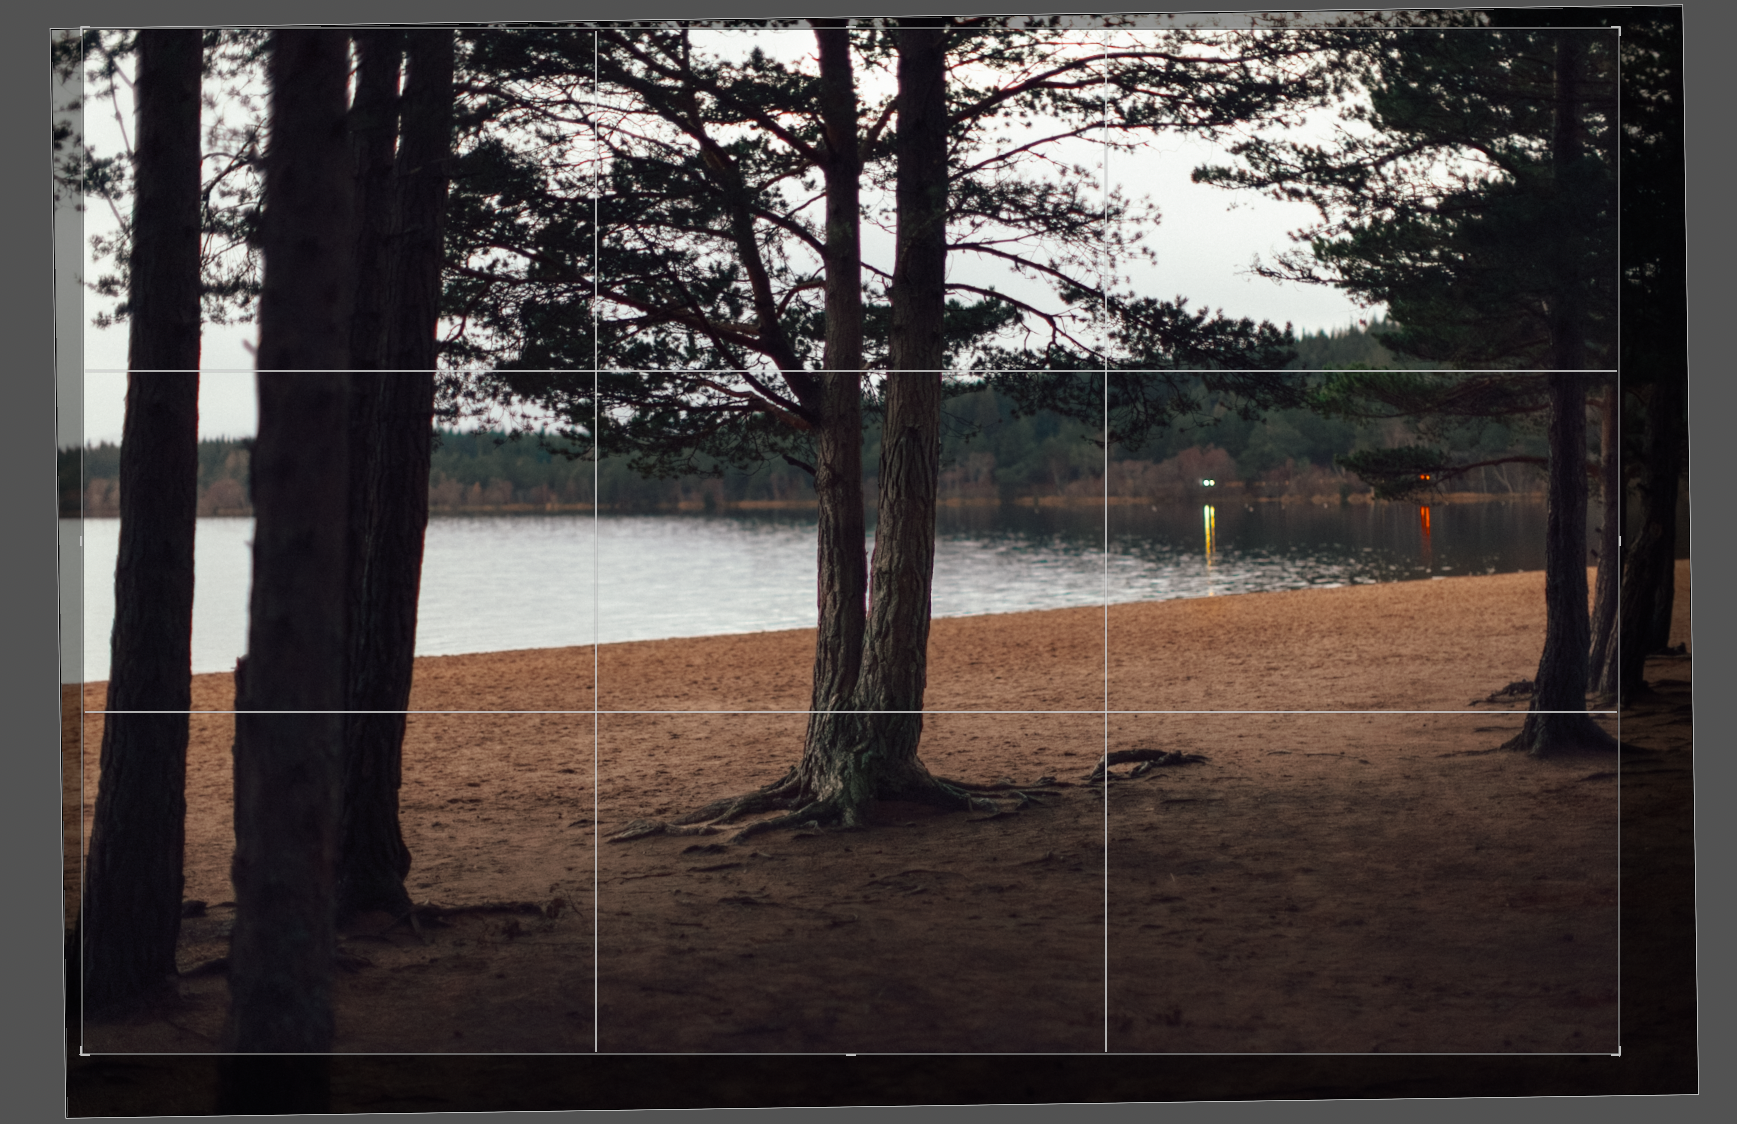
Example of cropping in Lightroom Classic
Cropping is helpful for removing distracting parts of the frame, such as the corners or sides. You can also use it to make the subject feel bigger and fill the entire frame, so you don’t have wasted space in your shot.
Balance the exposure
We talked at length about balancing the exposure in the field and you should absolutely try to get it nailed in-camera. But, as the old saying goes, “fix it in post” can be true. One of the main things you’ll be doing in your editor of choice is perfecting and correcting the exposure of your images.
Below is a before-and-after of a basic exposure adjustment. We protected the highlights when shooting, so we need to bring the shadows and overall luminosity up.
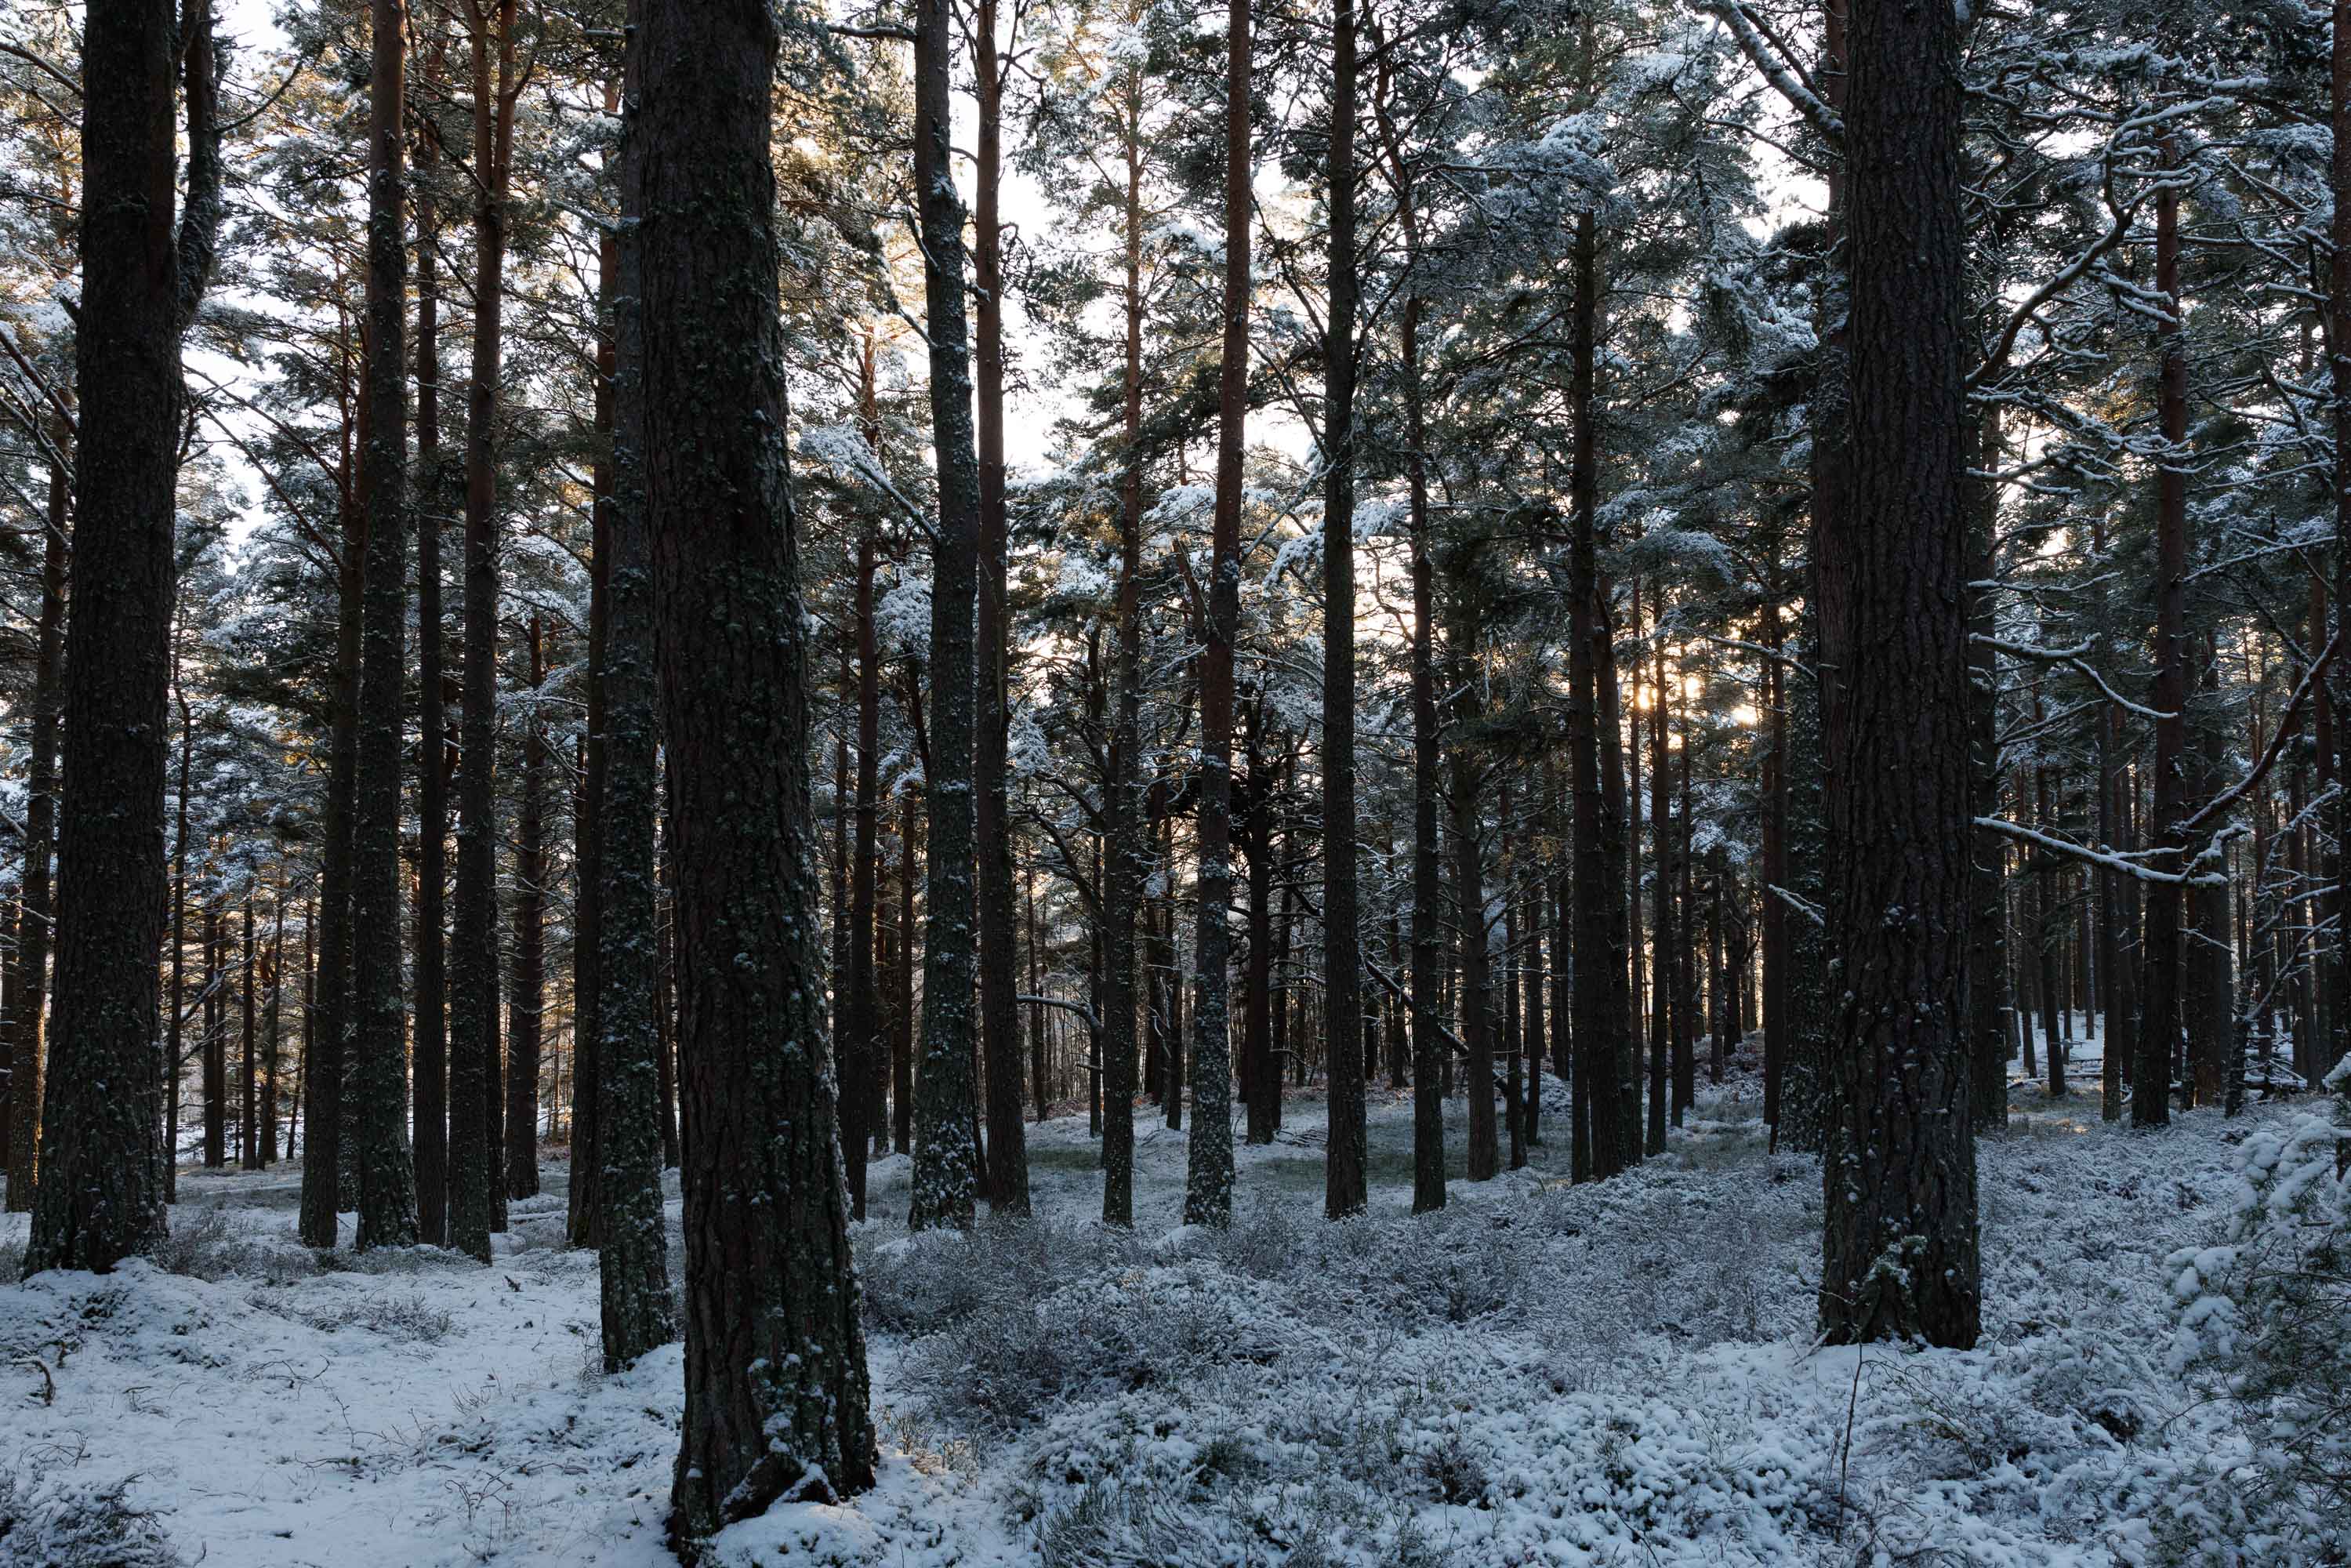
Below are the corresponding histograms of each of the images above. You can clearly see how I have shifted the overall exposure into the midtones, which to our eyes appears overall brighter and, in my opinion, more ‘balanced’.
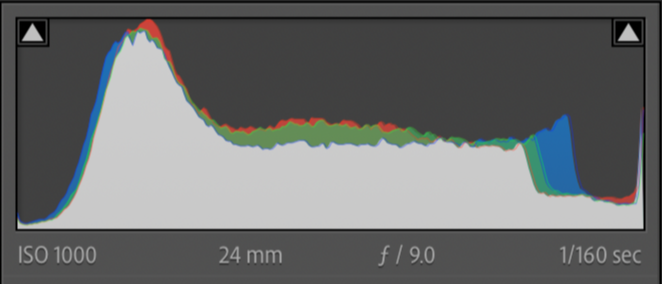
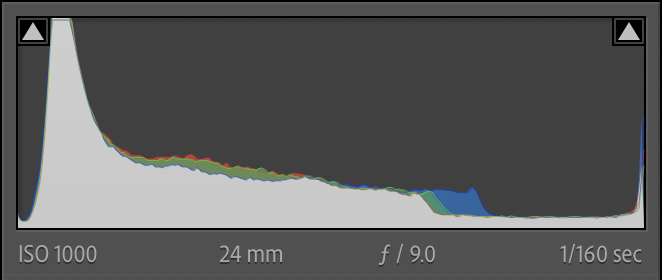
Here are the edits made in Lightroom's basic adjustment panel. Shadows have been brought right up. Thanks to modern mirrorless sensors, there are tonnes of detail in the shadows for us to play with.
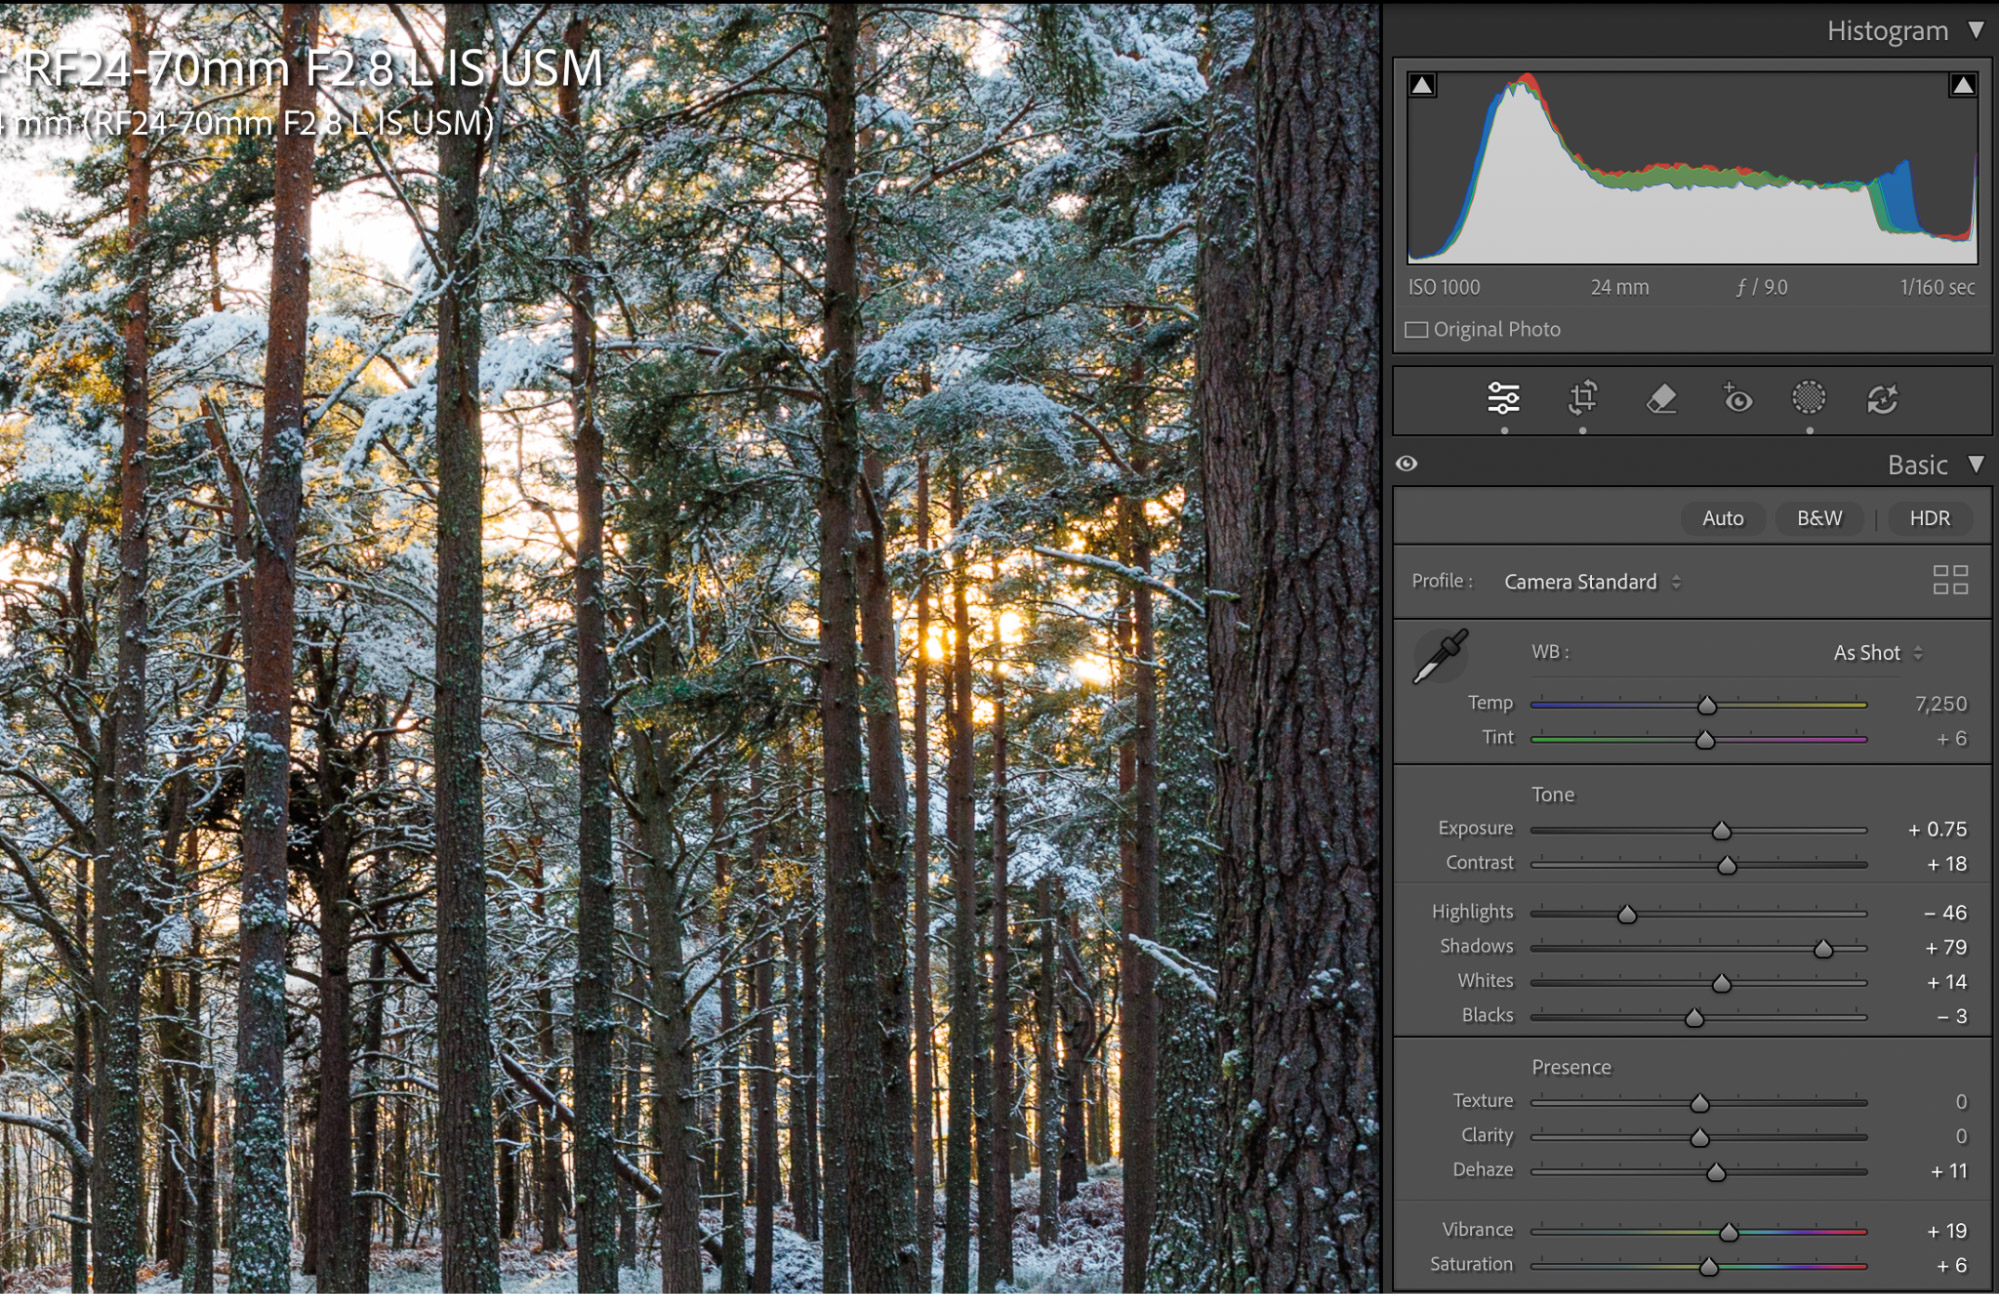
Example of basic exposure panel adjustments in Lightroom Classic
This is also where you can get creative and start to hone in on a style, like pushing the image's contrast if that’s your kind of thing. But if you’re a beginner, it’s helpful to learn the basics, understand what each adjustment slider does and then go from there.
Perfecting color and saturation
Colour in landscape photography is one aspect you should take the most time to consider, because it has such a strong connection to emotions. It’s important to understand how different strengths and hues of color will affect your image.
Let’s go over some common terminology you will hear a lot. "Warm colors/tones" are your reds, yellows and oranges. "Cool tones" are your blues, greens and purples. You will find all of these naturally when photographing landscapes, but you may prefer to be more picky with your palette. Plenty of warm colors in the frame might feel more energetic or emotional, whereas cooler colors can make the photo feel calmer and more serene. These are, of course, subjective feelings but generally you can work along these lines.
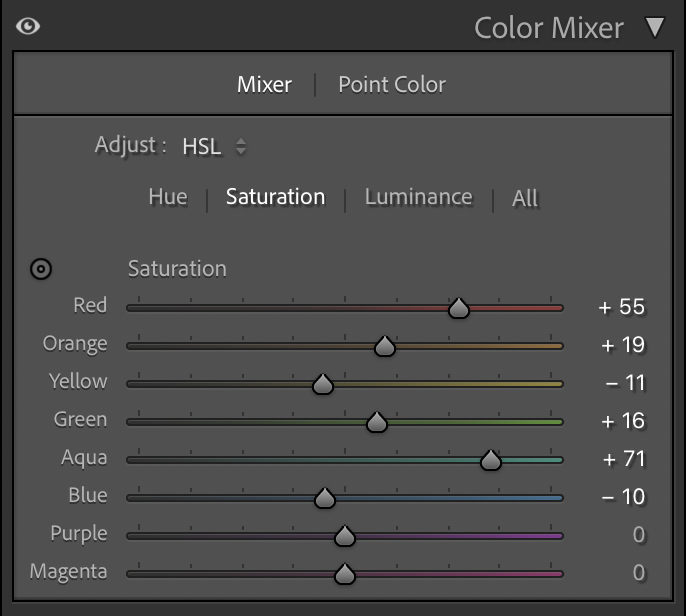
Colour Mixer in Lightroom Classic
When it comes to editing, your main tool for manipulating color will be the HSL tool, short for Hue, Saturation and Luminance. I’d avoid the Global Saturation slider as it’s a blunt tool that rarely works well; it is better to be more precise with color. For example, enhance just the reds or blues in your scene rather than all colors flatly at once.
I’d opt for the Vibrance global slider over Saturation, which targets the less saturated colors in the image and out details in the more muted areas.
Colour editing is a fairly gargantuan subject, but your main goal is not to push it too far into the realm of the unrealistic. Be subtle until you are confident in what you are doing. If you want to go more in-depth, check out our photo editing for beginners deep dive.
Types of Landscape Photography
Finding your niche in landscape photography will help you focus on what you really enjoy, so you can avoid getting bogged down in decision paralysis about subject matter. Landscape photography covers many different styles, each with its own character and challenges. There’s a whole lot of wilderness out there to shoot.
https://youtu.be/-G9hjz9gZhw?rel=0Aerial
Aerial photography gives a bird's-eye perspective that is impossible to see from ground level, revealing patterns, textures, and oddities that are invisible from our usual view. It has become much more prevalent since the huge advancement in drones, mostly from DJI.

Lake District islet | DJI Mavic II Pro | 28mm f/2.8 | 10.3mm | f/7.1 | 1/80 | ISO 100
Drones have democratized aerial landscape photography, so you no longer need a helicopter or plane to get up high. Though drones mean that the genre is more accessible than ever before, you must always adhere to your local drone laws. Commercial operations require proper licensing and compliance with aviation regulations. Once you’re acquainted with the rules, we’ve got a huge range of drones to pick from.
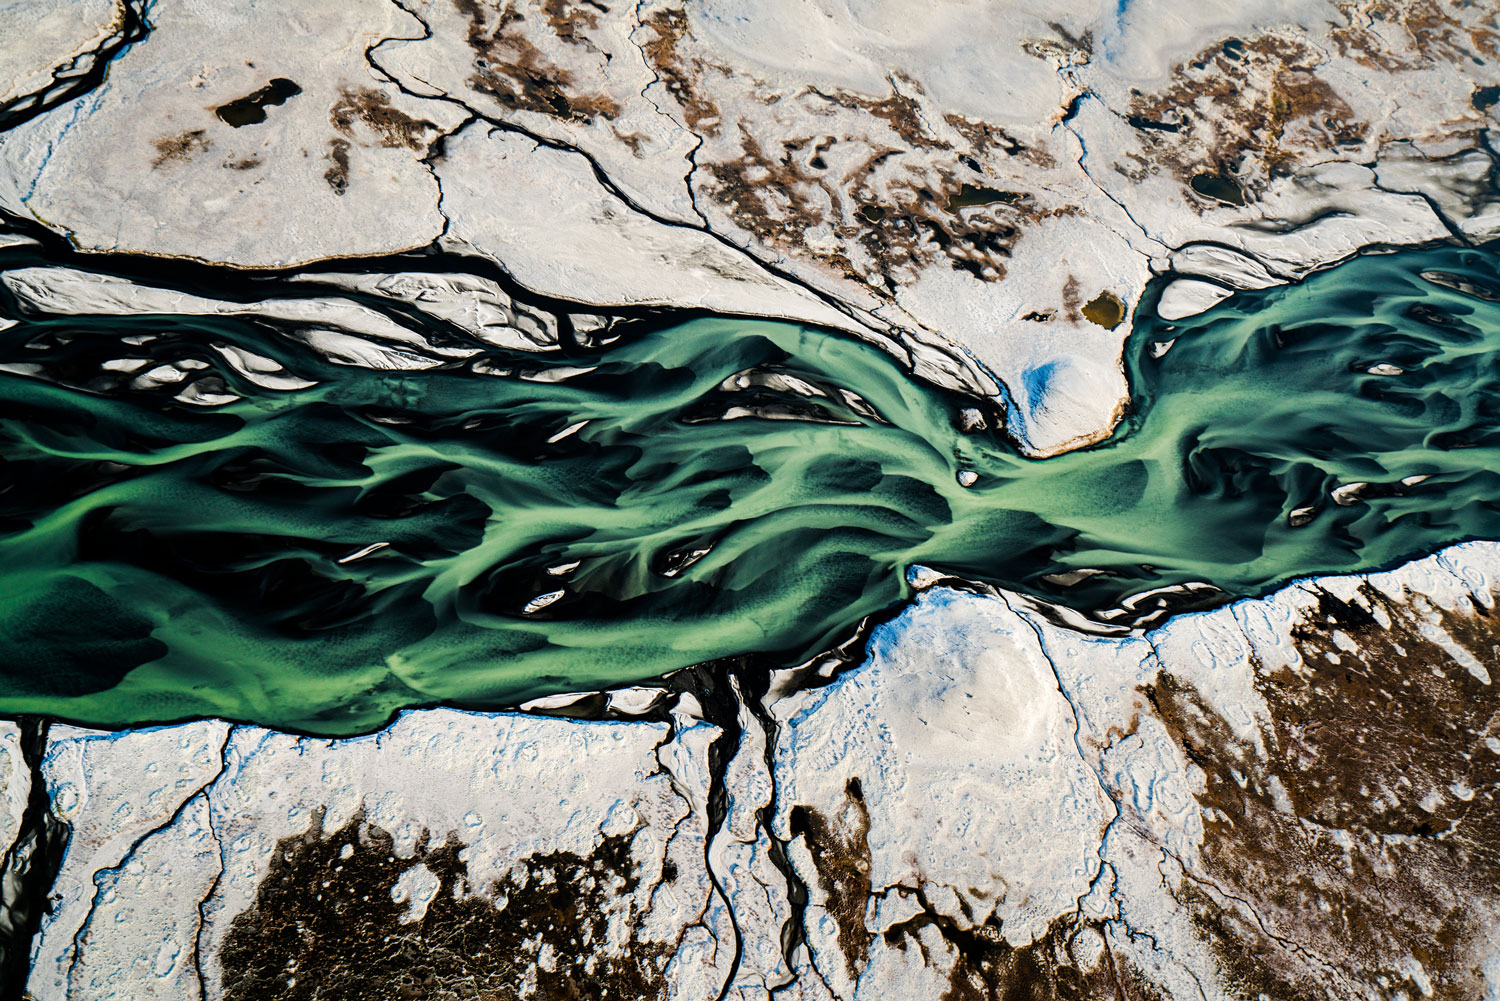
Chris Burkard | Sony ILCE-7RM2 | Sony FE 16-35mm f/4 ZA OSS T* | 35 mm | f/5 | 1/320 sec | ISO 200
Travelling photographer Chris Burkard has extensive experience shooting aerial landscapes from helicopters. He advises on the best kit and accessories to use in our How To: Aerial Photography guide.
One of the most creative uses of drones in landscape photography in recent years is by light-painting photographer Ruben Wu. He uses drones to paint landscapes in light, creating ethereal-looking landscapes. Read about how he achieves it in Light Painting with Reuben Wu.

Reuben Wu
Astrophotography
Astrophotography captures celestial wonders such as star trails, the Milky Way, auroras and other night-sky phenomena against terrestrial landscapes. This challenging genre requires fast lenses (f/2.8 or wider), high ISO capability and tripods that support precise long exposures.
We interviewed astrophotographer Nicholas Römmelt, who has spent many years photographing the star-speckled night sky, to get his advice on astrophotography. You can also check out more landscape and astrophotography tips in our interview with Jonny Hill.

Nicholas Römmelt | Canon EOS R | 14mm f/1.8 DG HSM Art | 20 sec | f/2.8 | ISO 6400
Popular nighttime subjects include the Milky Way's galactic core, aurora borealis, meteor showers and constellations rising over dramatic landscapes.
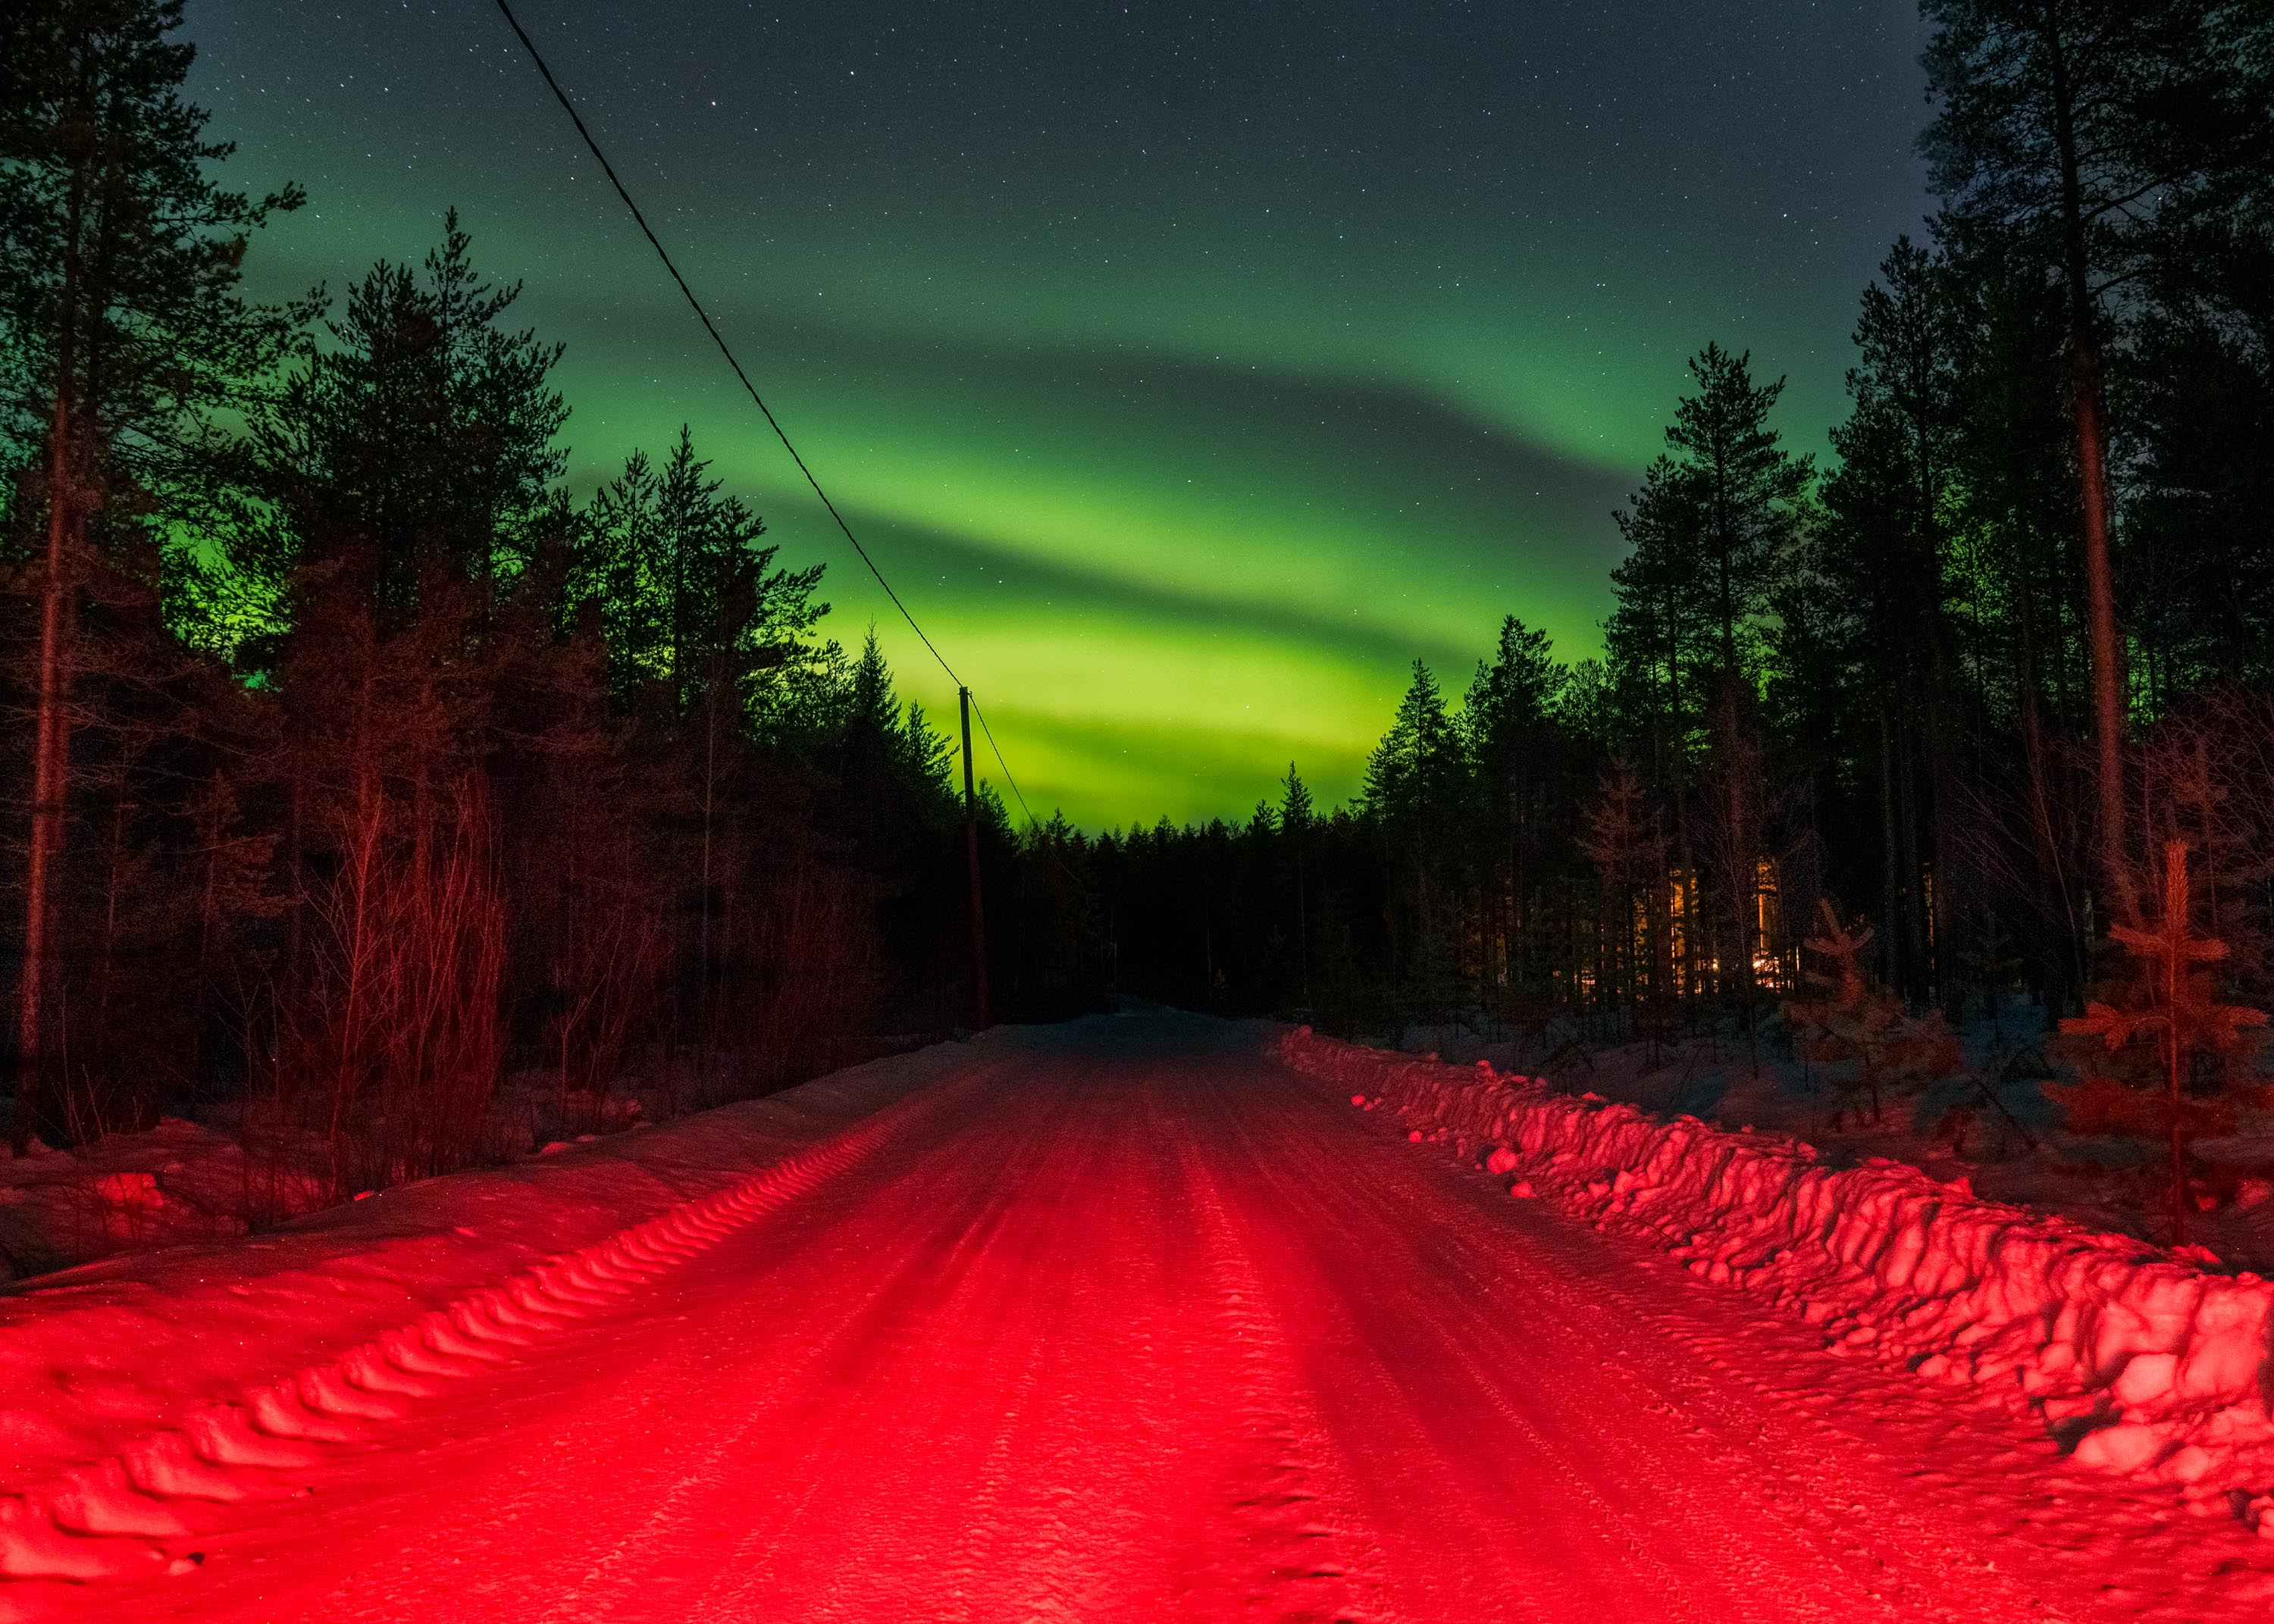
Ian Howorth | Sony A9 | 26mm | f/4 | 10secs | ISO 3200
Aurora Borealis
One of the most distinctive earthly phenomena is the widely observed and photographed Aurora Borealis, also known as the Northern Lights, which appears only in the Northern Hemisphere. They are infinitely photogenic, which is why we cover how to shoot them in how to shoot the northern lights. You can also follow along with adventure photographer Paul Watson, who ventured out to photograph the Northern Lights in Iceland for us.
Tip: When you’re ready to shoot the Aurora Borealis, use a 24mm or wider lens because they almost never fill the entire sky and often appear on the horizon. A 24mm focal length works particularly well for auroras, making them appear larger than life whilst keeping stars as pinpoints during 15-20 second exposures.
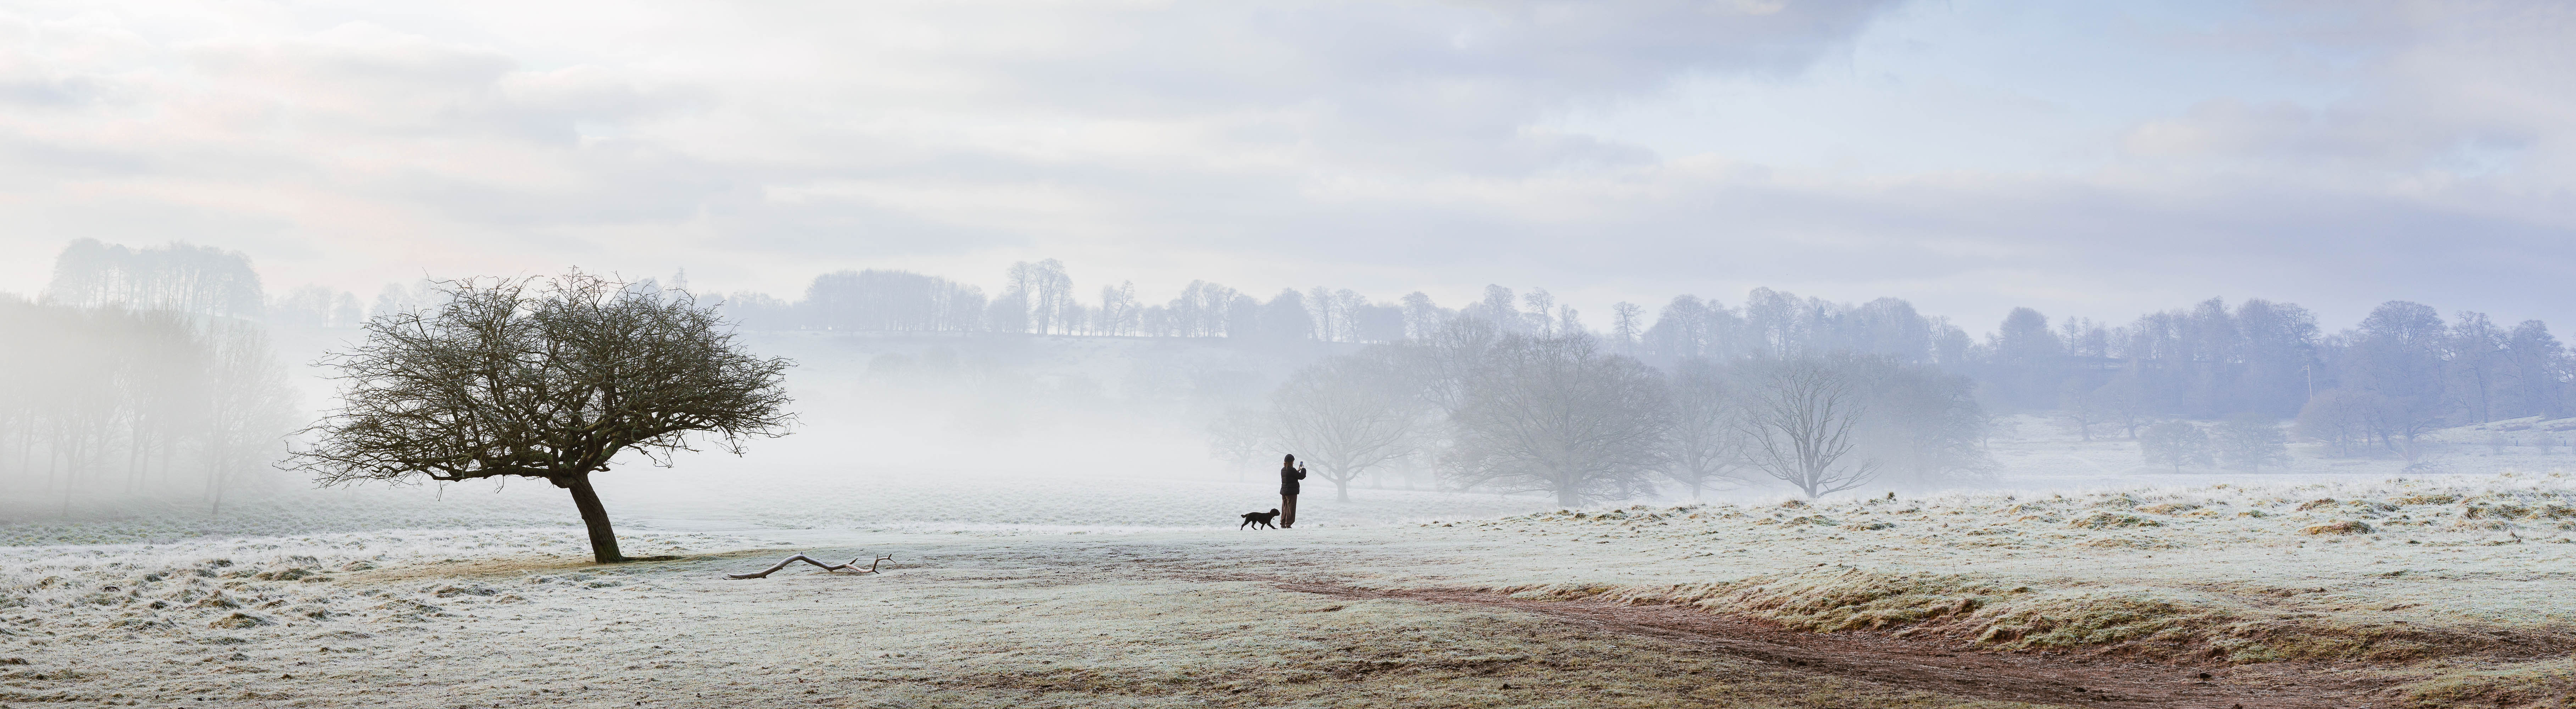
(panoramic crop) Brad Pinhorn | Sony A6700 | Sigma 56mm f/1.4 DC DN Contemporary | f/10 | 1/100 sec | ISO 200
Panorama photography
Panorama photography involves capturing multiple overlapping images and stitching them together to create ultra-wide or massive compositions. This technique enables you to capture scenes broader than any single lens can see at once, resulting in incredibly detailed pictures that can be printed at enormous sizes.
Some specialist cameras like the legendary Hasselblad XPan and Fujifilm TX-1 shoot in a unique panoramic aspect ratio of 65:24. No modern digital camera can shoot natively in this ratio, but the Hasselblad X2D 100c and Fujifilm GFX 100 II both have ‘XPan’ modes that are in-camera crops to mimic the super wide aspect ratio of 65:24. Make note that these cameras are expensive though, so we found out the best digital XPan alternatives if you want to replicate the experience of shooting.
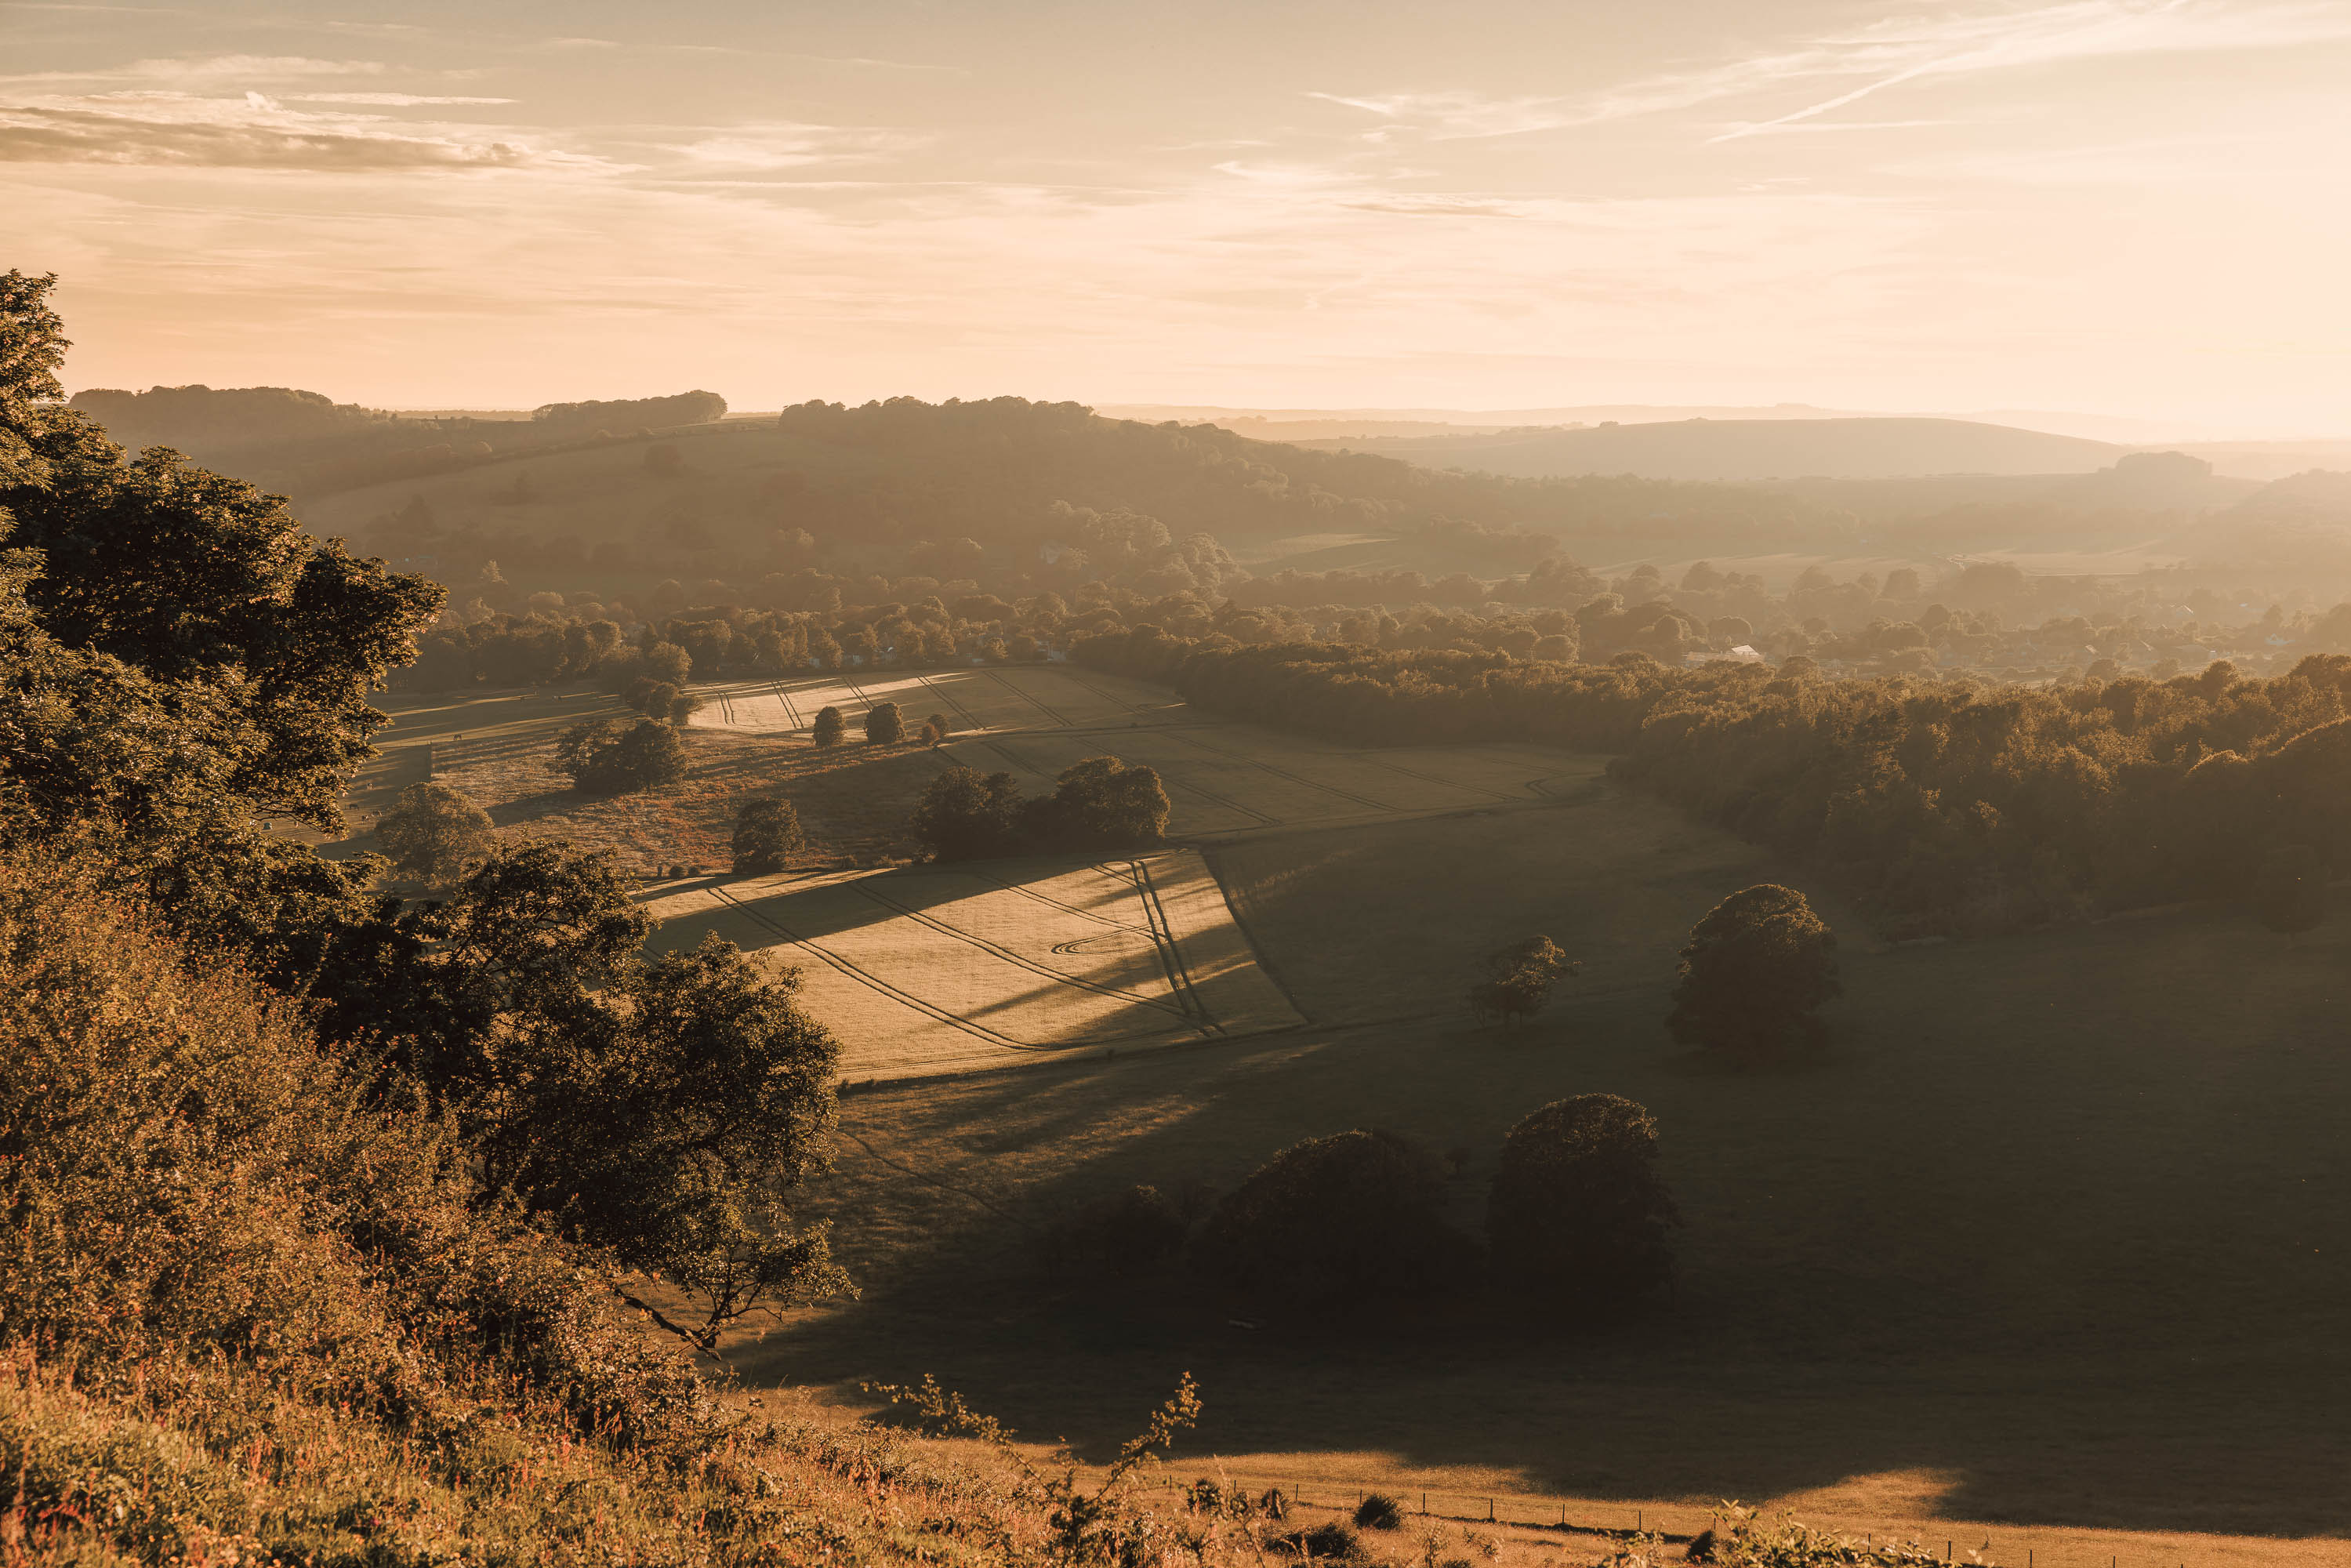
Charlie Richards | Canon EOS R5 | Canon RF 24-70mm f/2.8 L IS USM | 56mm | 1/250 sec | ISO 200
Golden hour photography
Golden hour photography is the art of capturing landscapes during the magical periods shortly after sunrise and before sunset. The warm, directional light during these times creates long shadows, rich colors and a distinctive atmosphere we all recognize. Many landscape photographers plan their entire shooting schedule around these brief windows of optimal light.
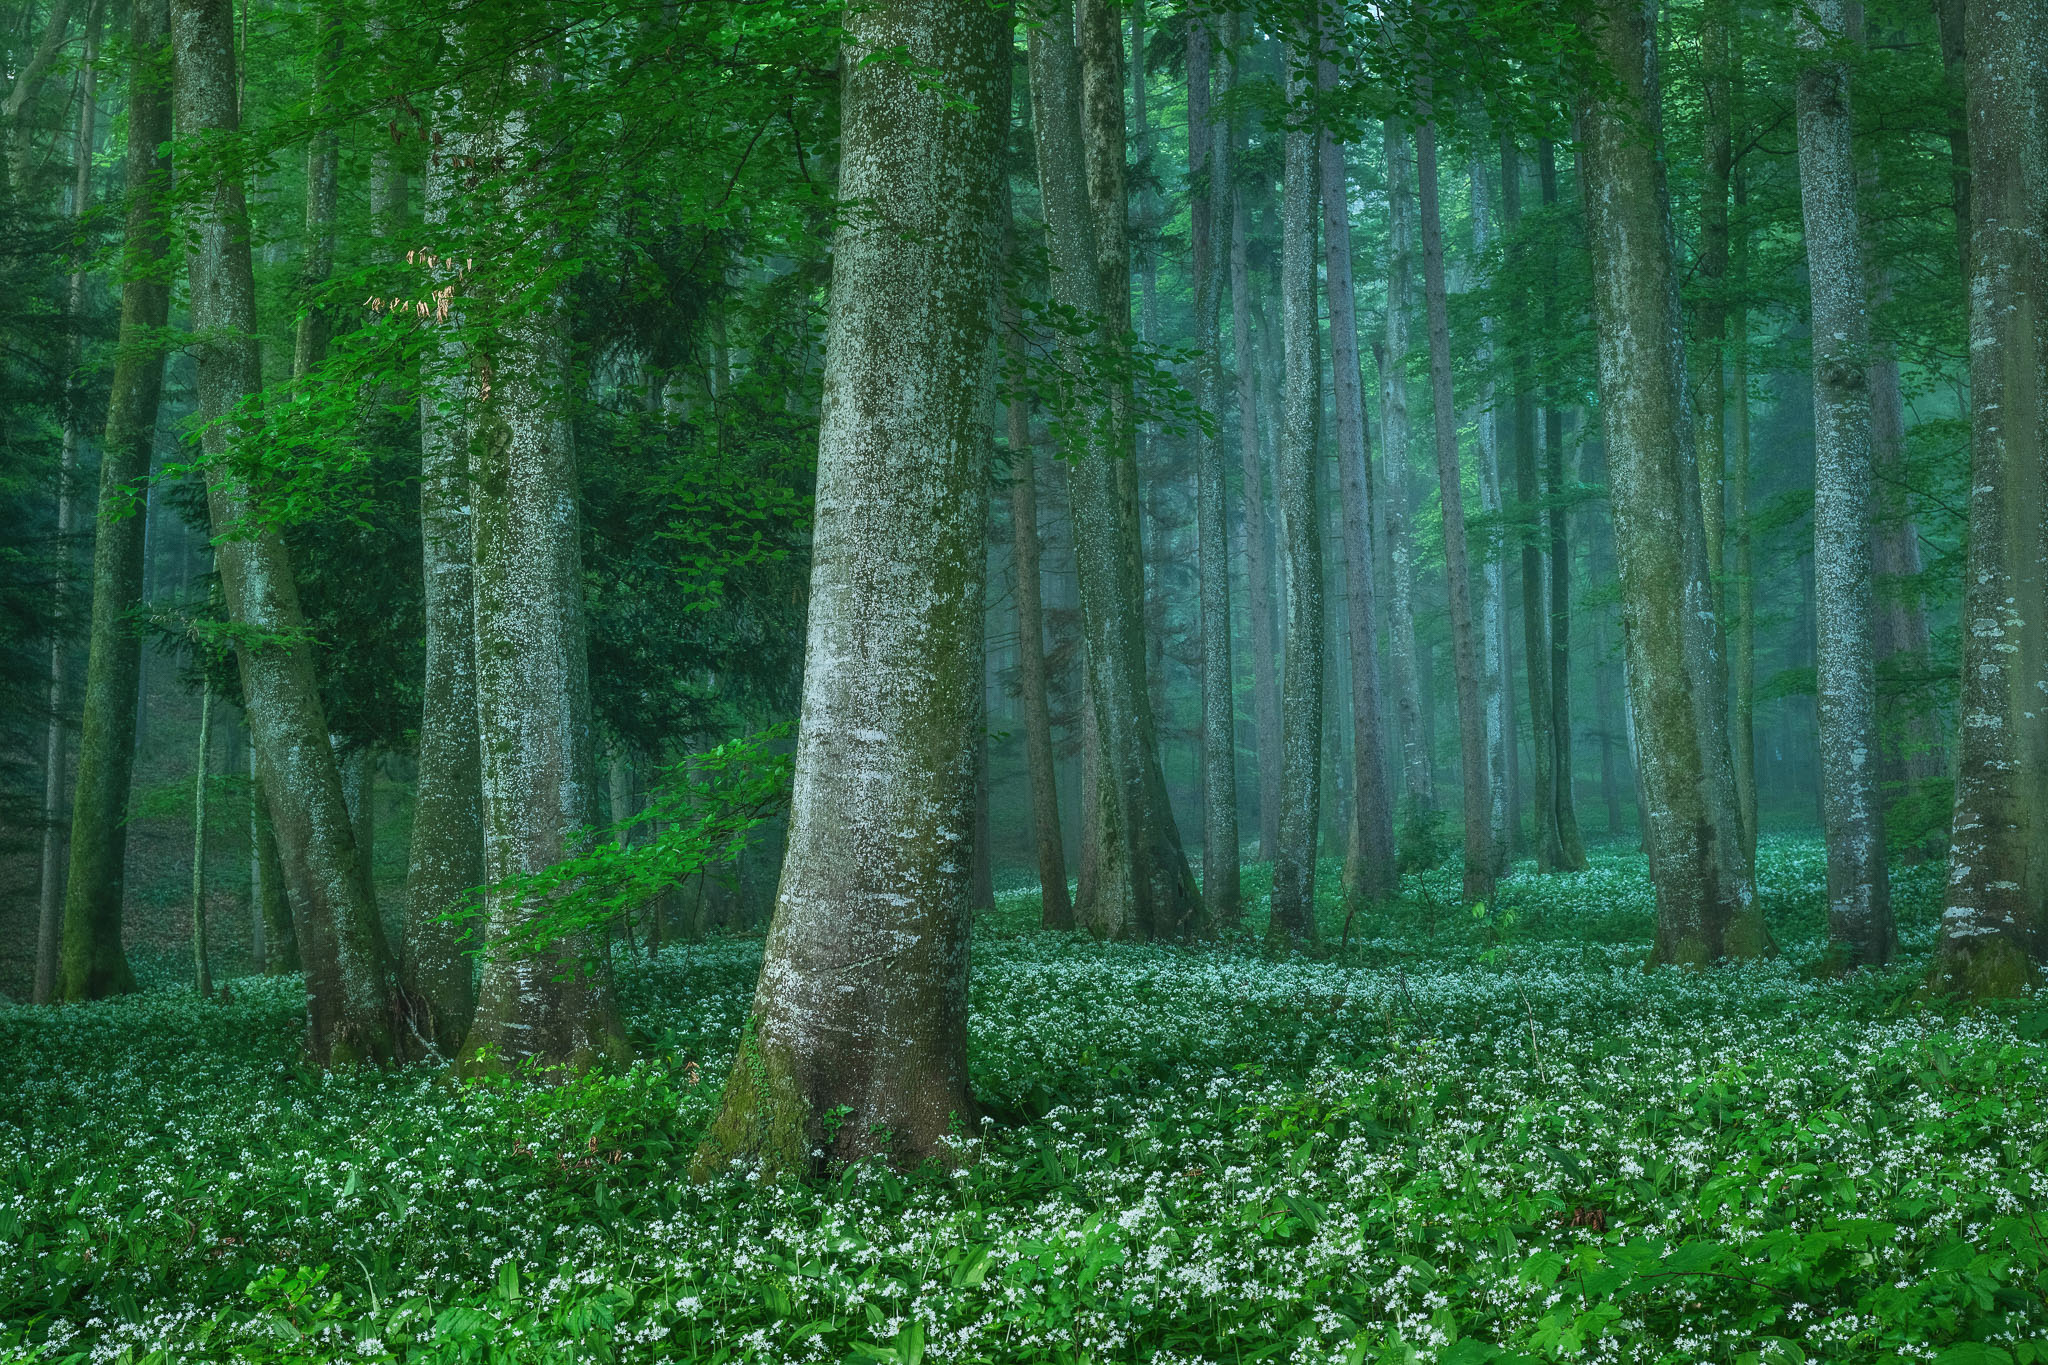
Kilian Schönberger | Nikon Z8 | Nikon Nikkor Z 24-120mm f/4 S | 53mm | f/8.0 | 1/15 sec | ISO 800
Forest photography
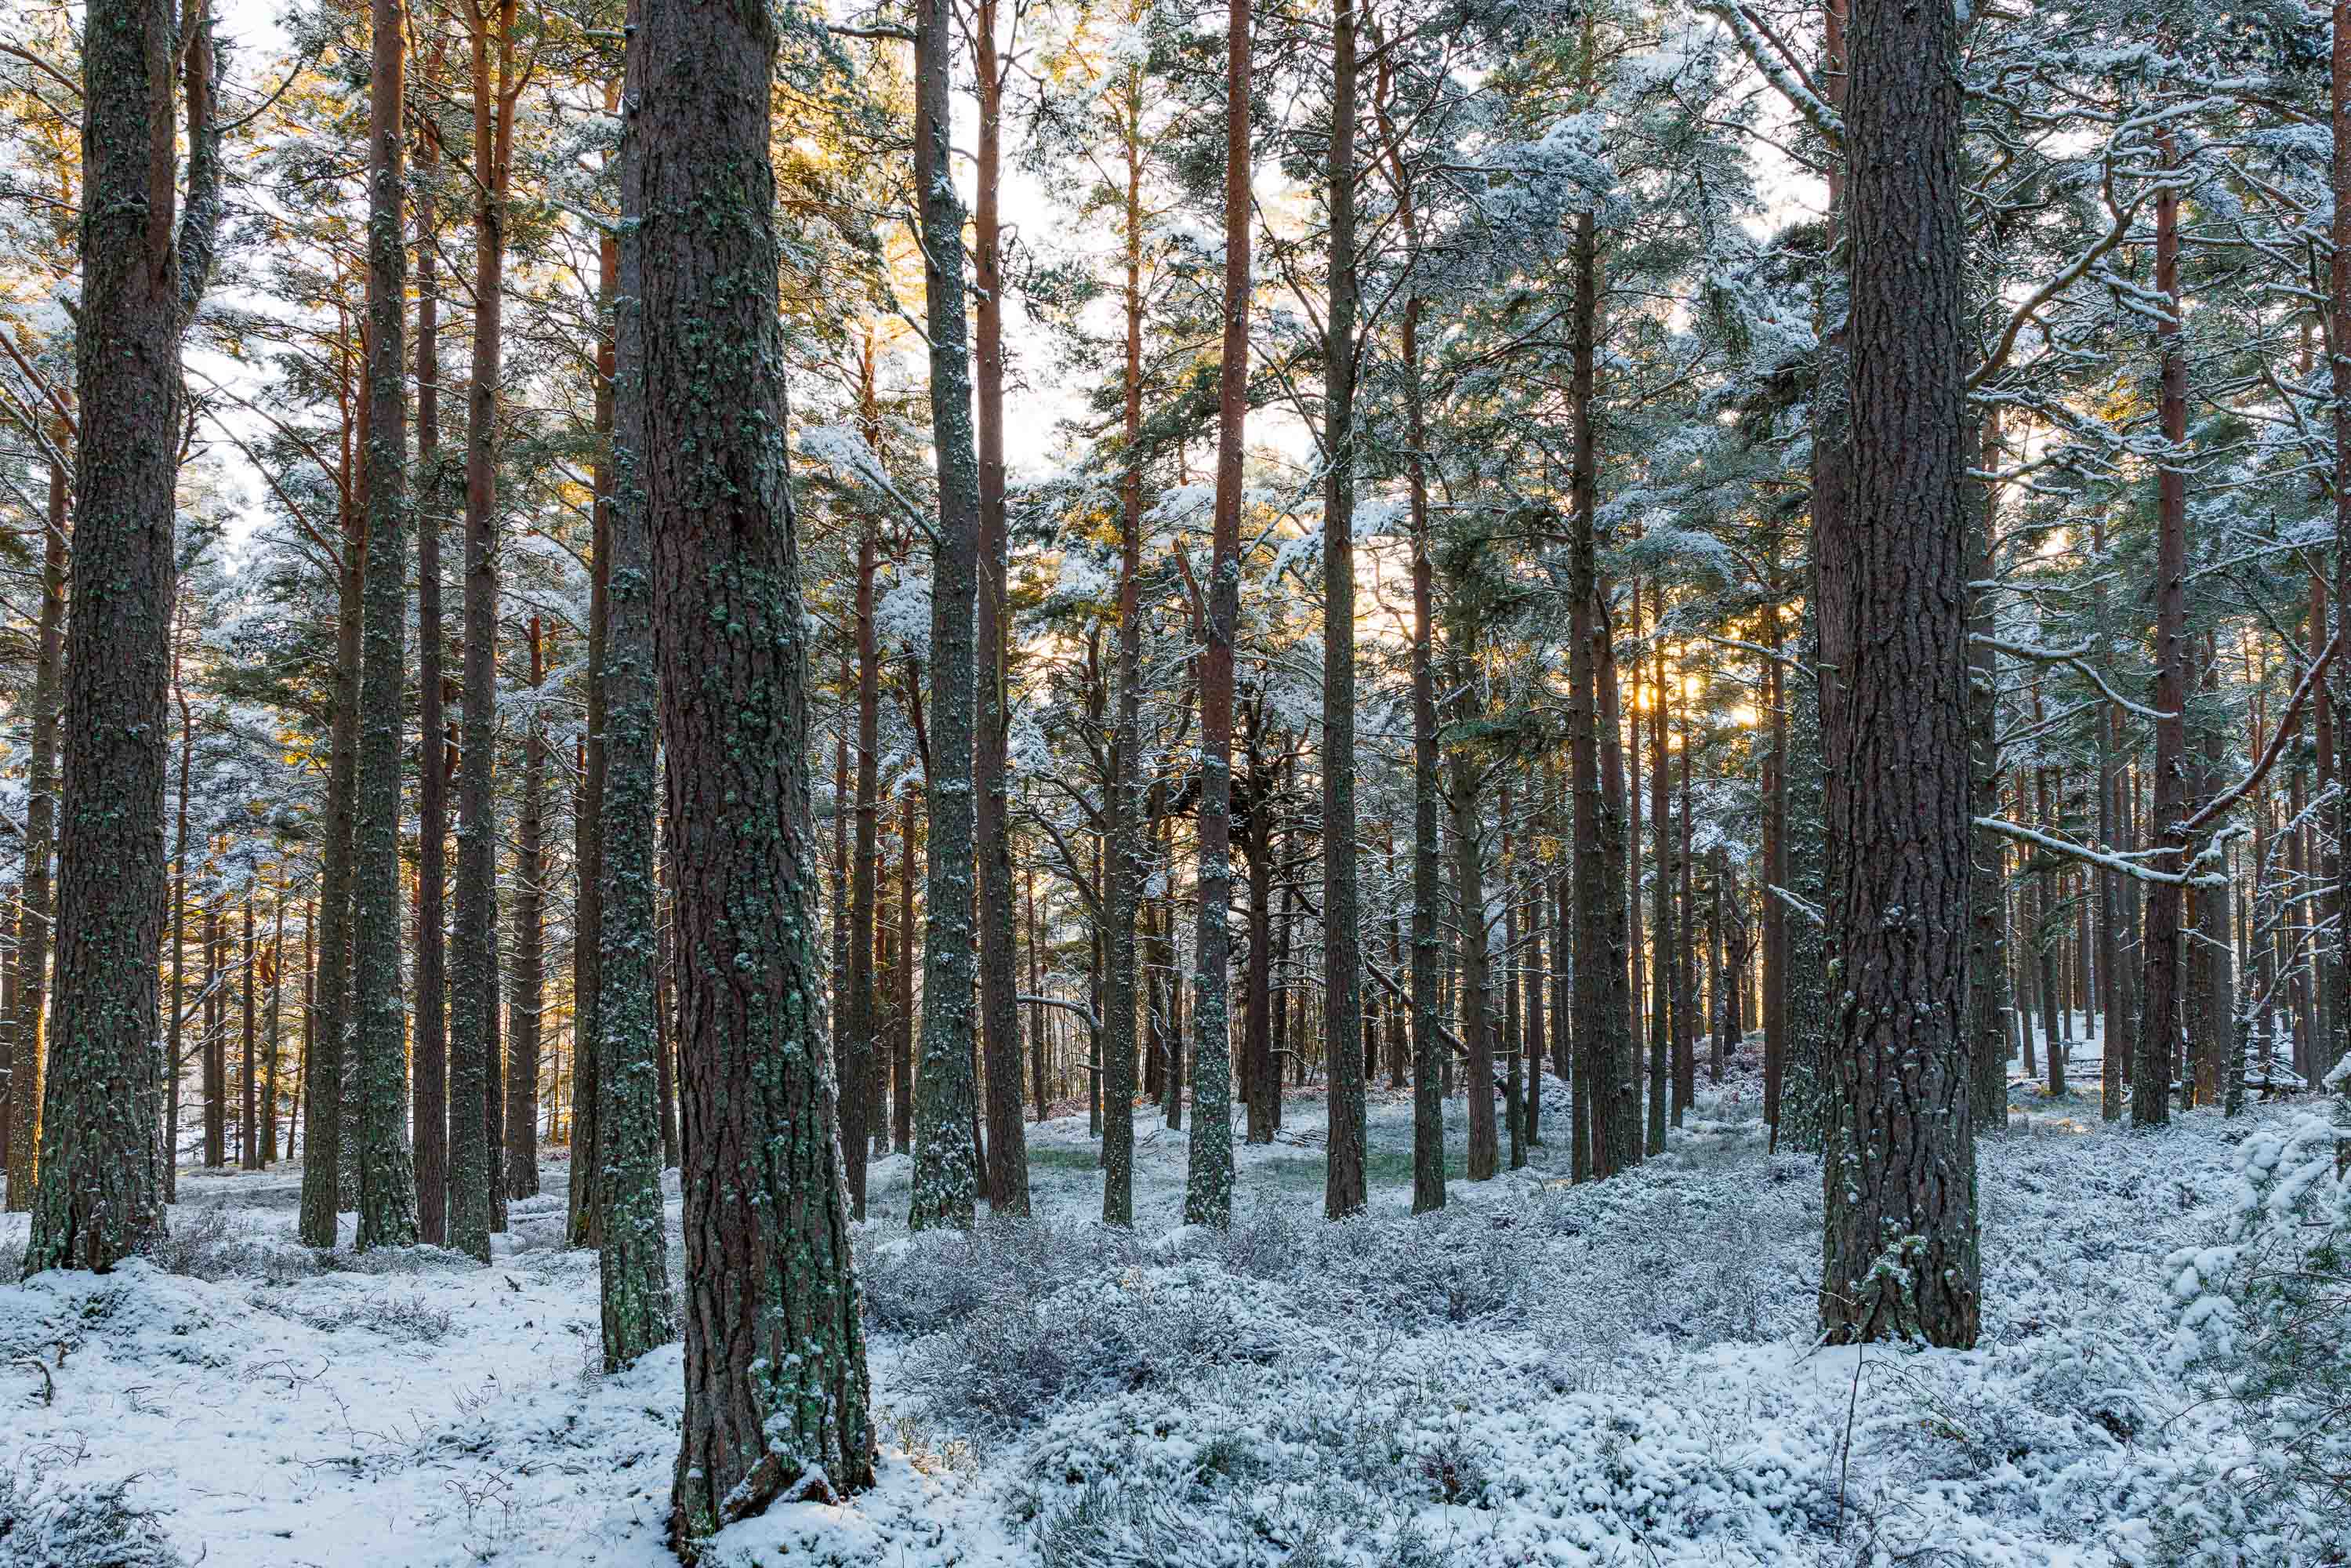
Forest photography is almost its own genre, as the forests allure and bewitch many new landscape photographers. Think of diffused light filtering through the leaves of trees, creating interesting textures in bark and foliage and the layered depth of forest scenes. Check our guide to forest photography for in-depth tips and advice on how to make the most of woodland scenery.
https://youtu.be/Q3pdJjuz2A4?rel=0Germany is one of the best places in Europe for forest photography. Read why and see all the many enchanting forest photography locations in Germany, suggested by photographer Kilian Schönberger.
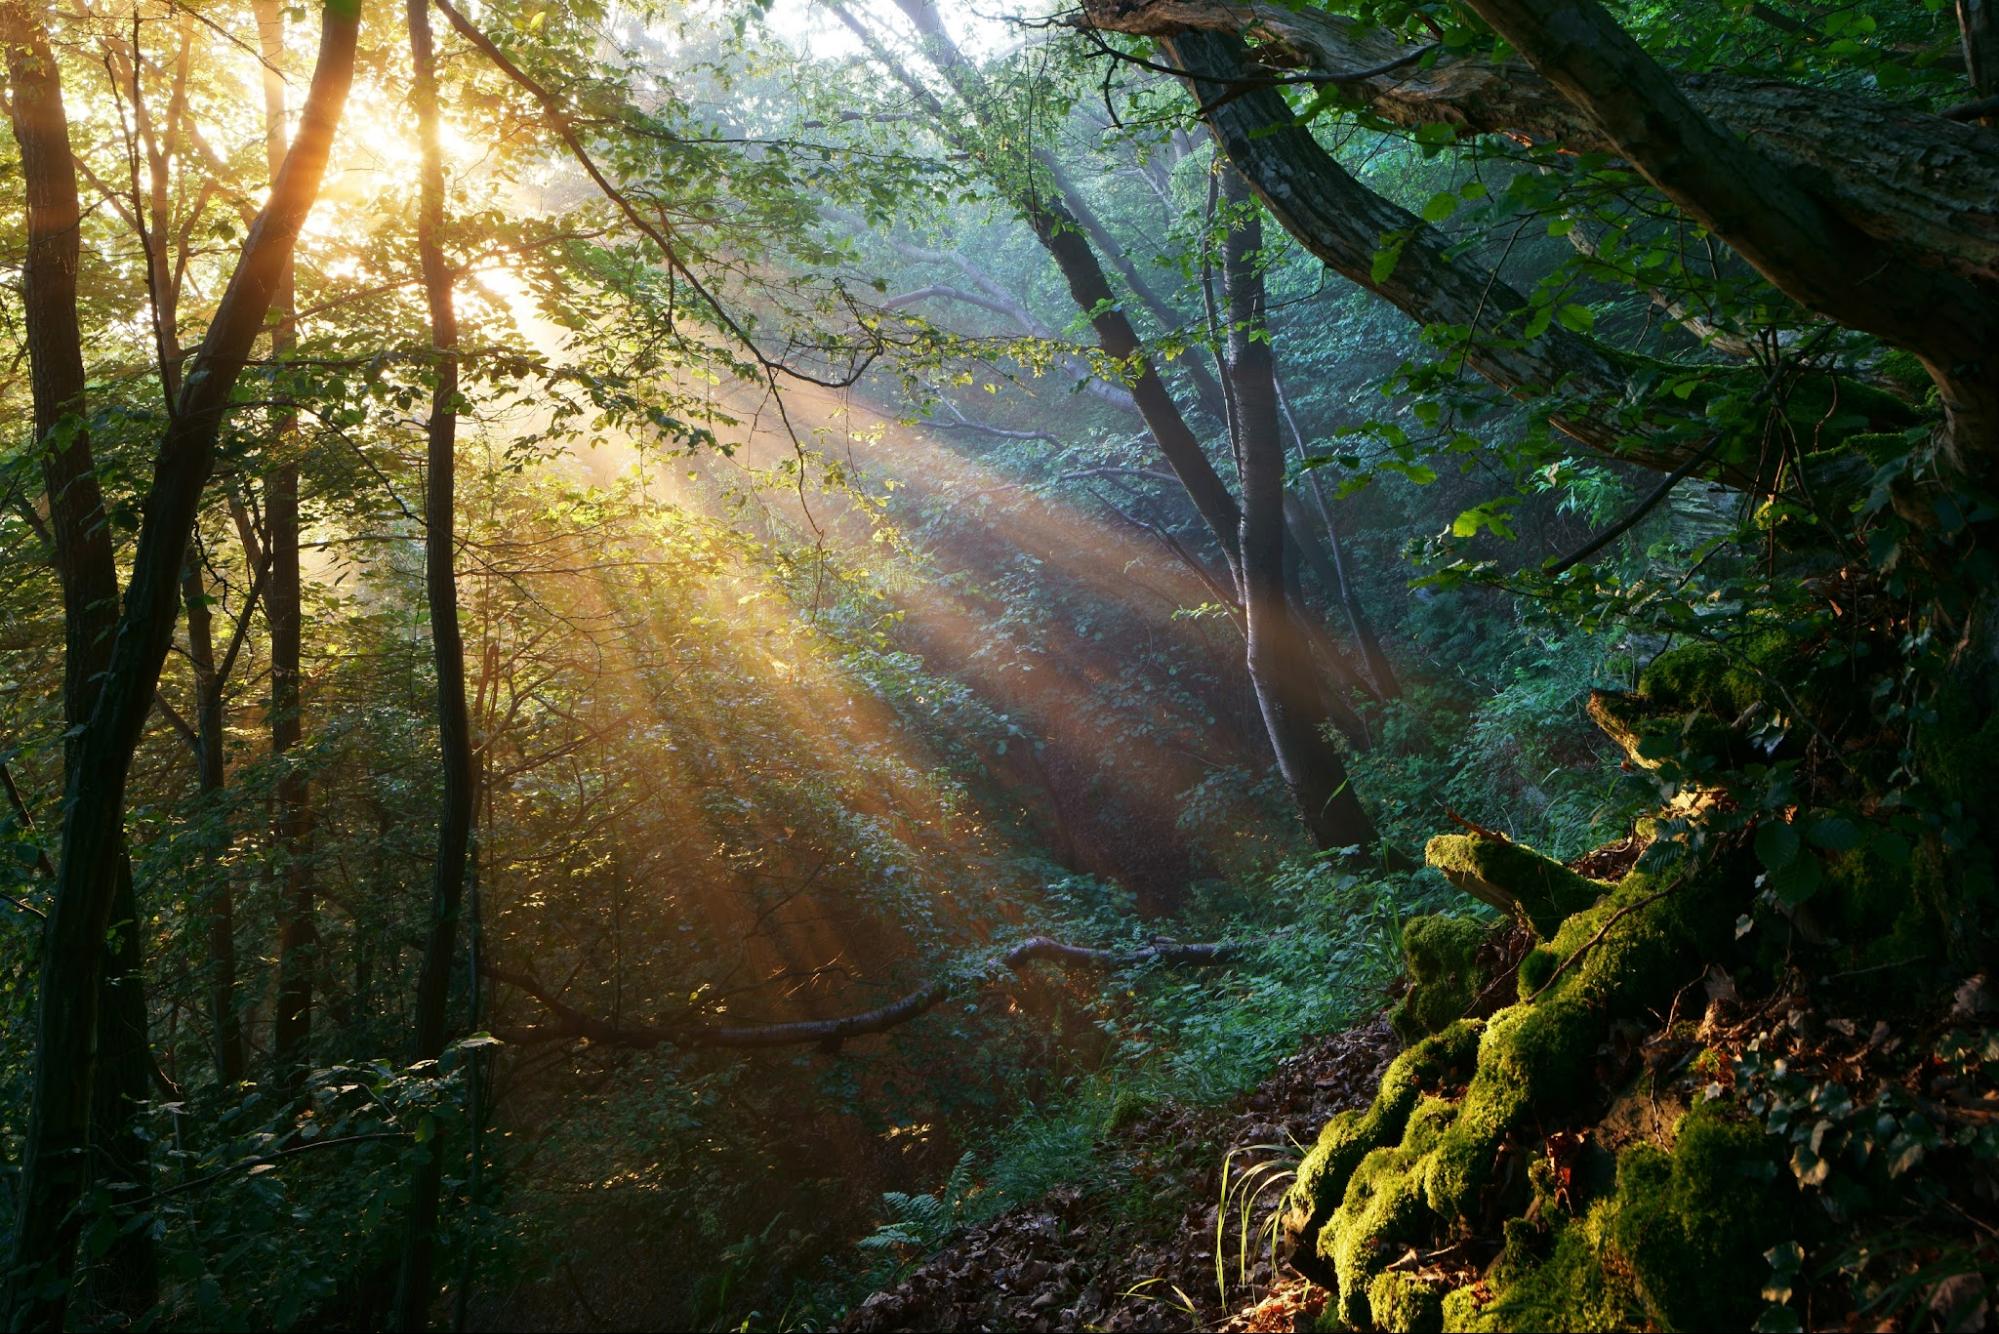
Kilian Schönberger | Sony A7R II | Sigma 24mm f/3.5 DG DN FE | 24 mm | f/11 | 4/5 sec | ISO 200
Tip: Overcast conditions often work better than bright sunshine for forest photography, but shafts of sunlight can also create dramatic Renaissance-esque images.

Charlie Waite
Cloudscape photography
Cloudscape photography emphasizes dramatic cloud formations as the primary subject, capturing the interplay between clouds, light and land.
Stormy weather and distinctive cloud patterns can create compelling compositions. If you’re a weather nerd, then this genre of landscape photography is perfect for you; just remember to bring an umbrella.

Scott Jessiman | Nikon Z6 II | Z 24-200mm f/4-6.3 VR | 24mm | f/11 | 60 sec | ISO 125
Seascape photography
Seascape photography is all about the coastline, where the ocean meets the land. Slow your shutter right down and you can turn the water silky soft, speed it up and you freeze a wave mid-crash, spray and all.
Understanding tides, wave patterns, and coastal weather conditions helps seascape photographers time their shoots properly. If you don’t properly prepare, you’ll be left standing on an empty beach waiting for nothing to happen.
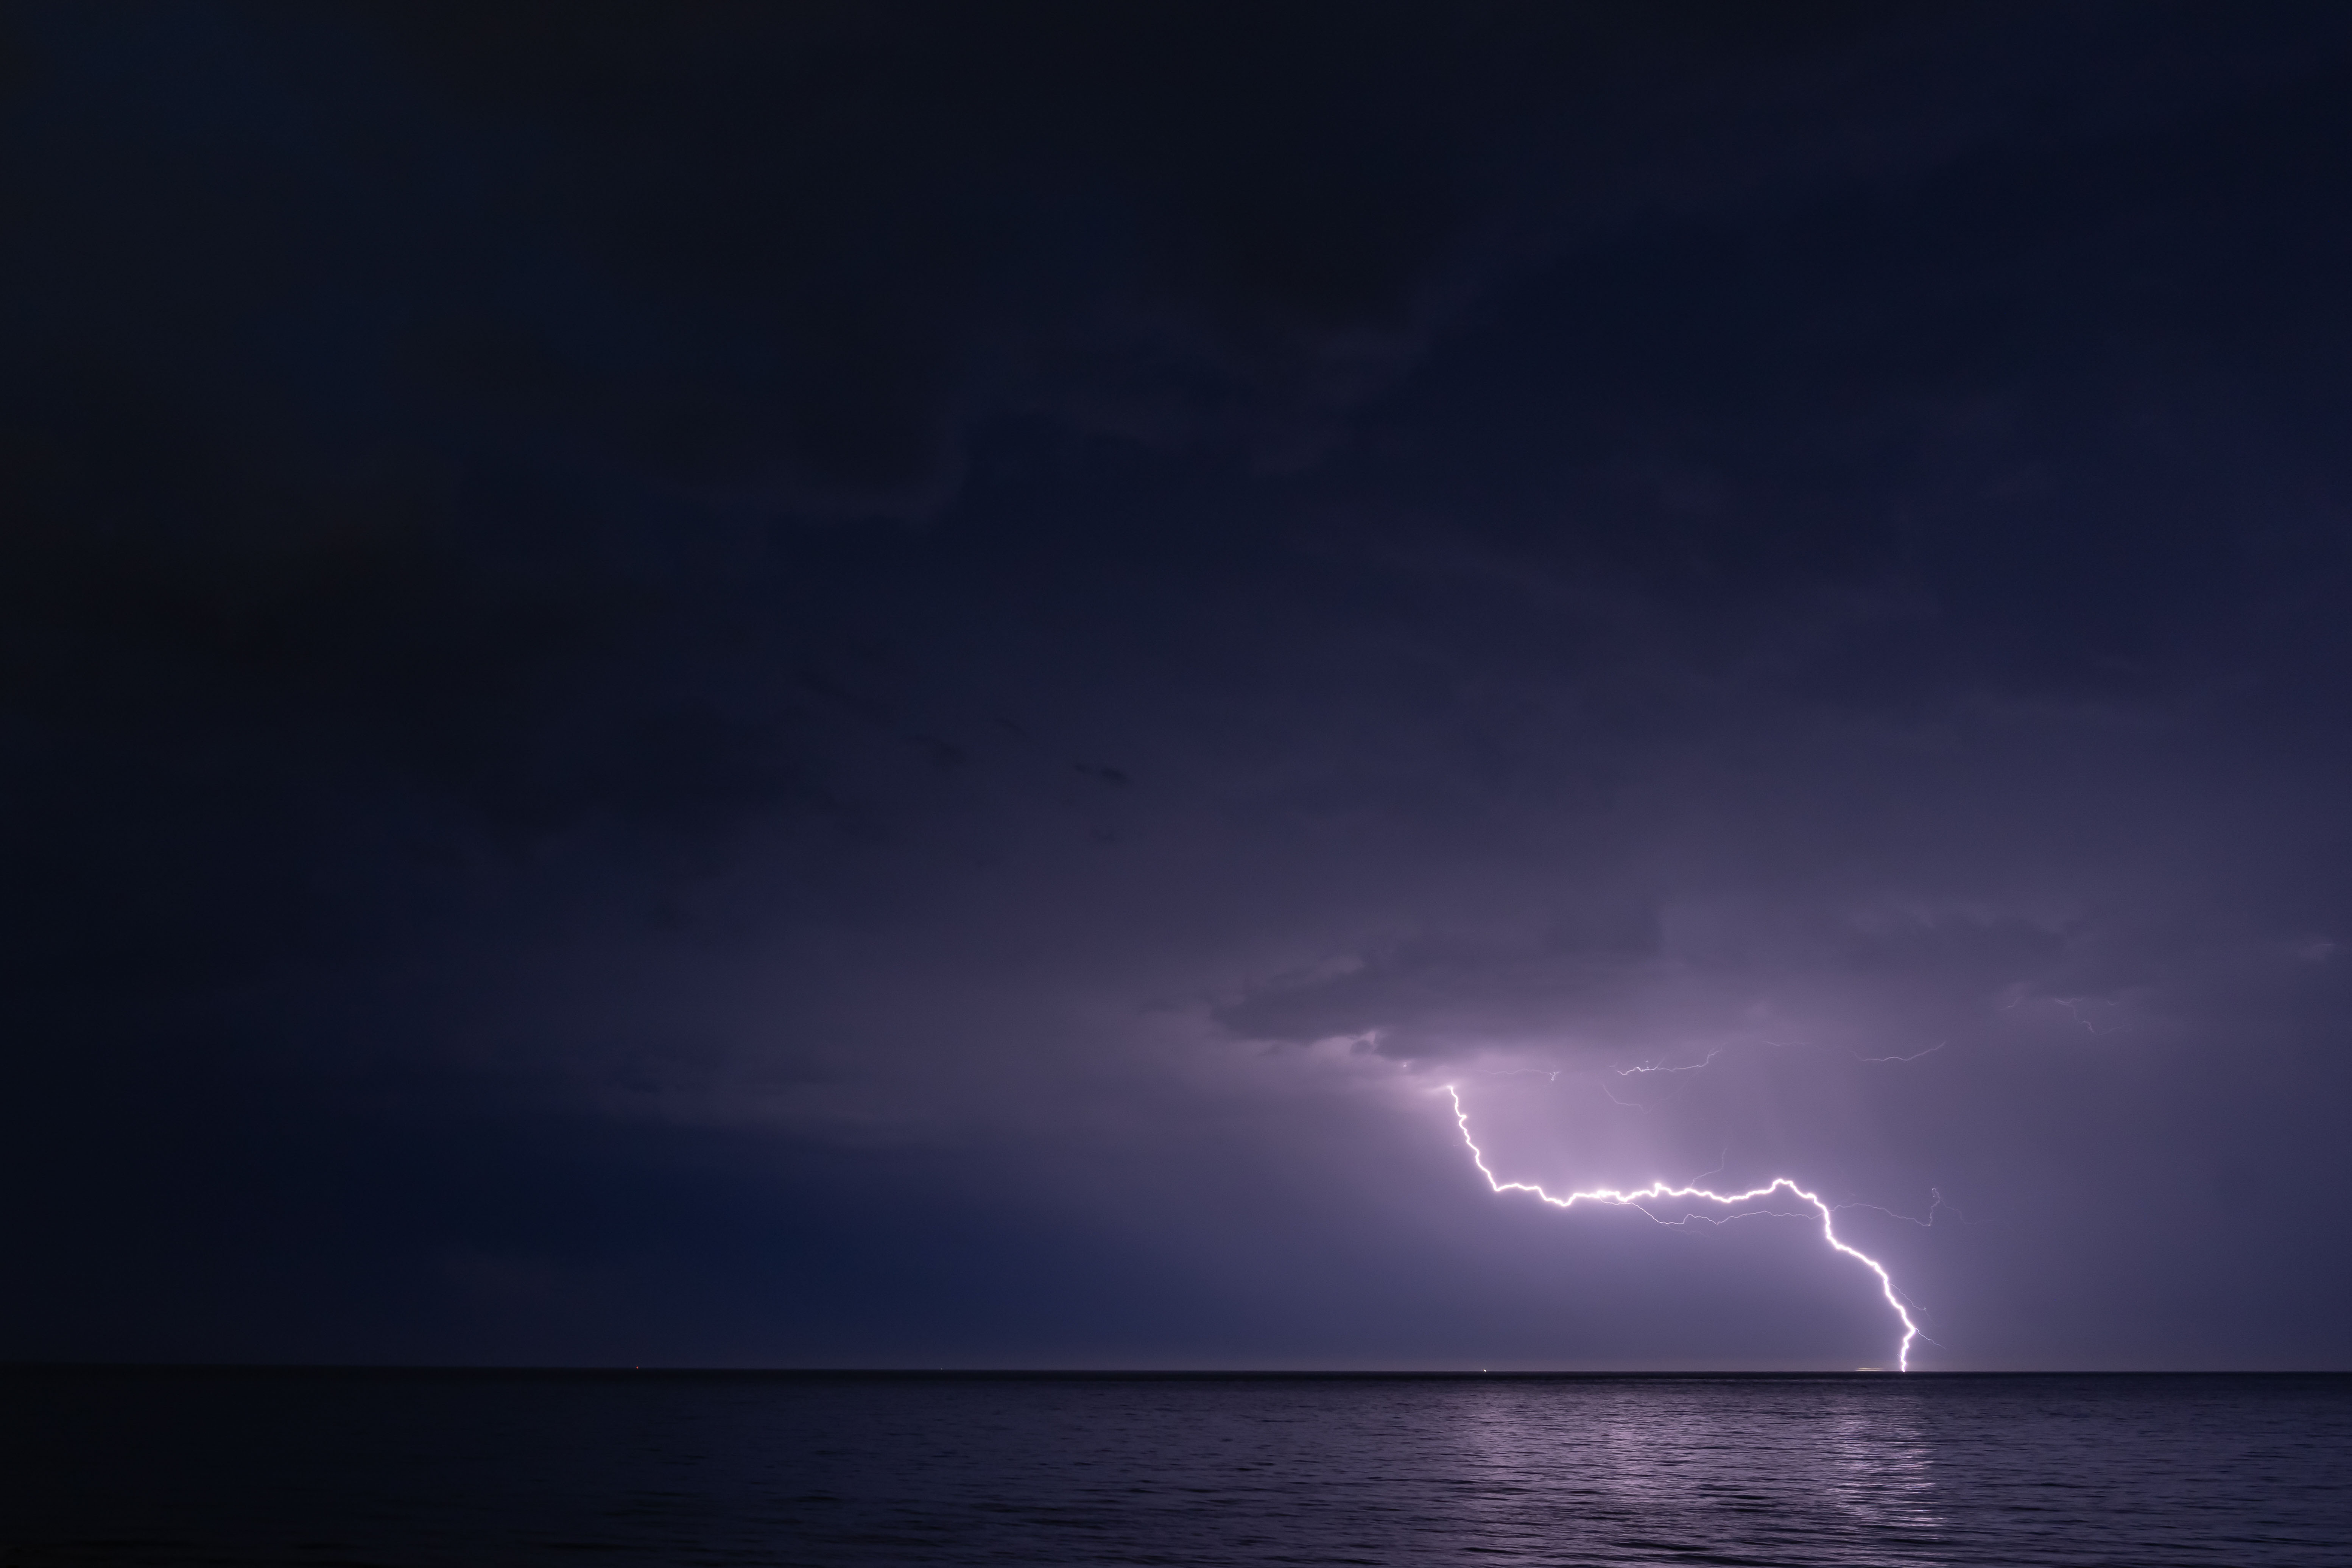
Amy Moore | Sony A1 | Sony FE 24-70mm f/2.8 GM II | 24mm | f/6.3 | 13 sec | ISO 320
Storm photography
Storm photography means pointing a camera at the sky to capture lightning, tornadoes, hurricanes and clouds, and it isn't the genre for beginners. If that kind of chaos appeals to you, take the time to understand weather patterns before you start. You'll need weather-sealed gear and a lot of common sense.
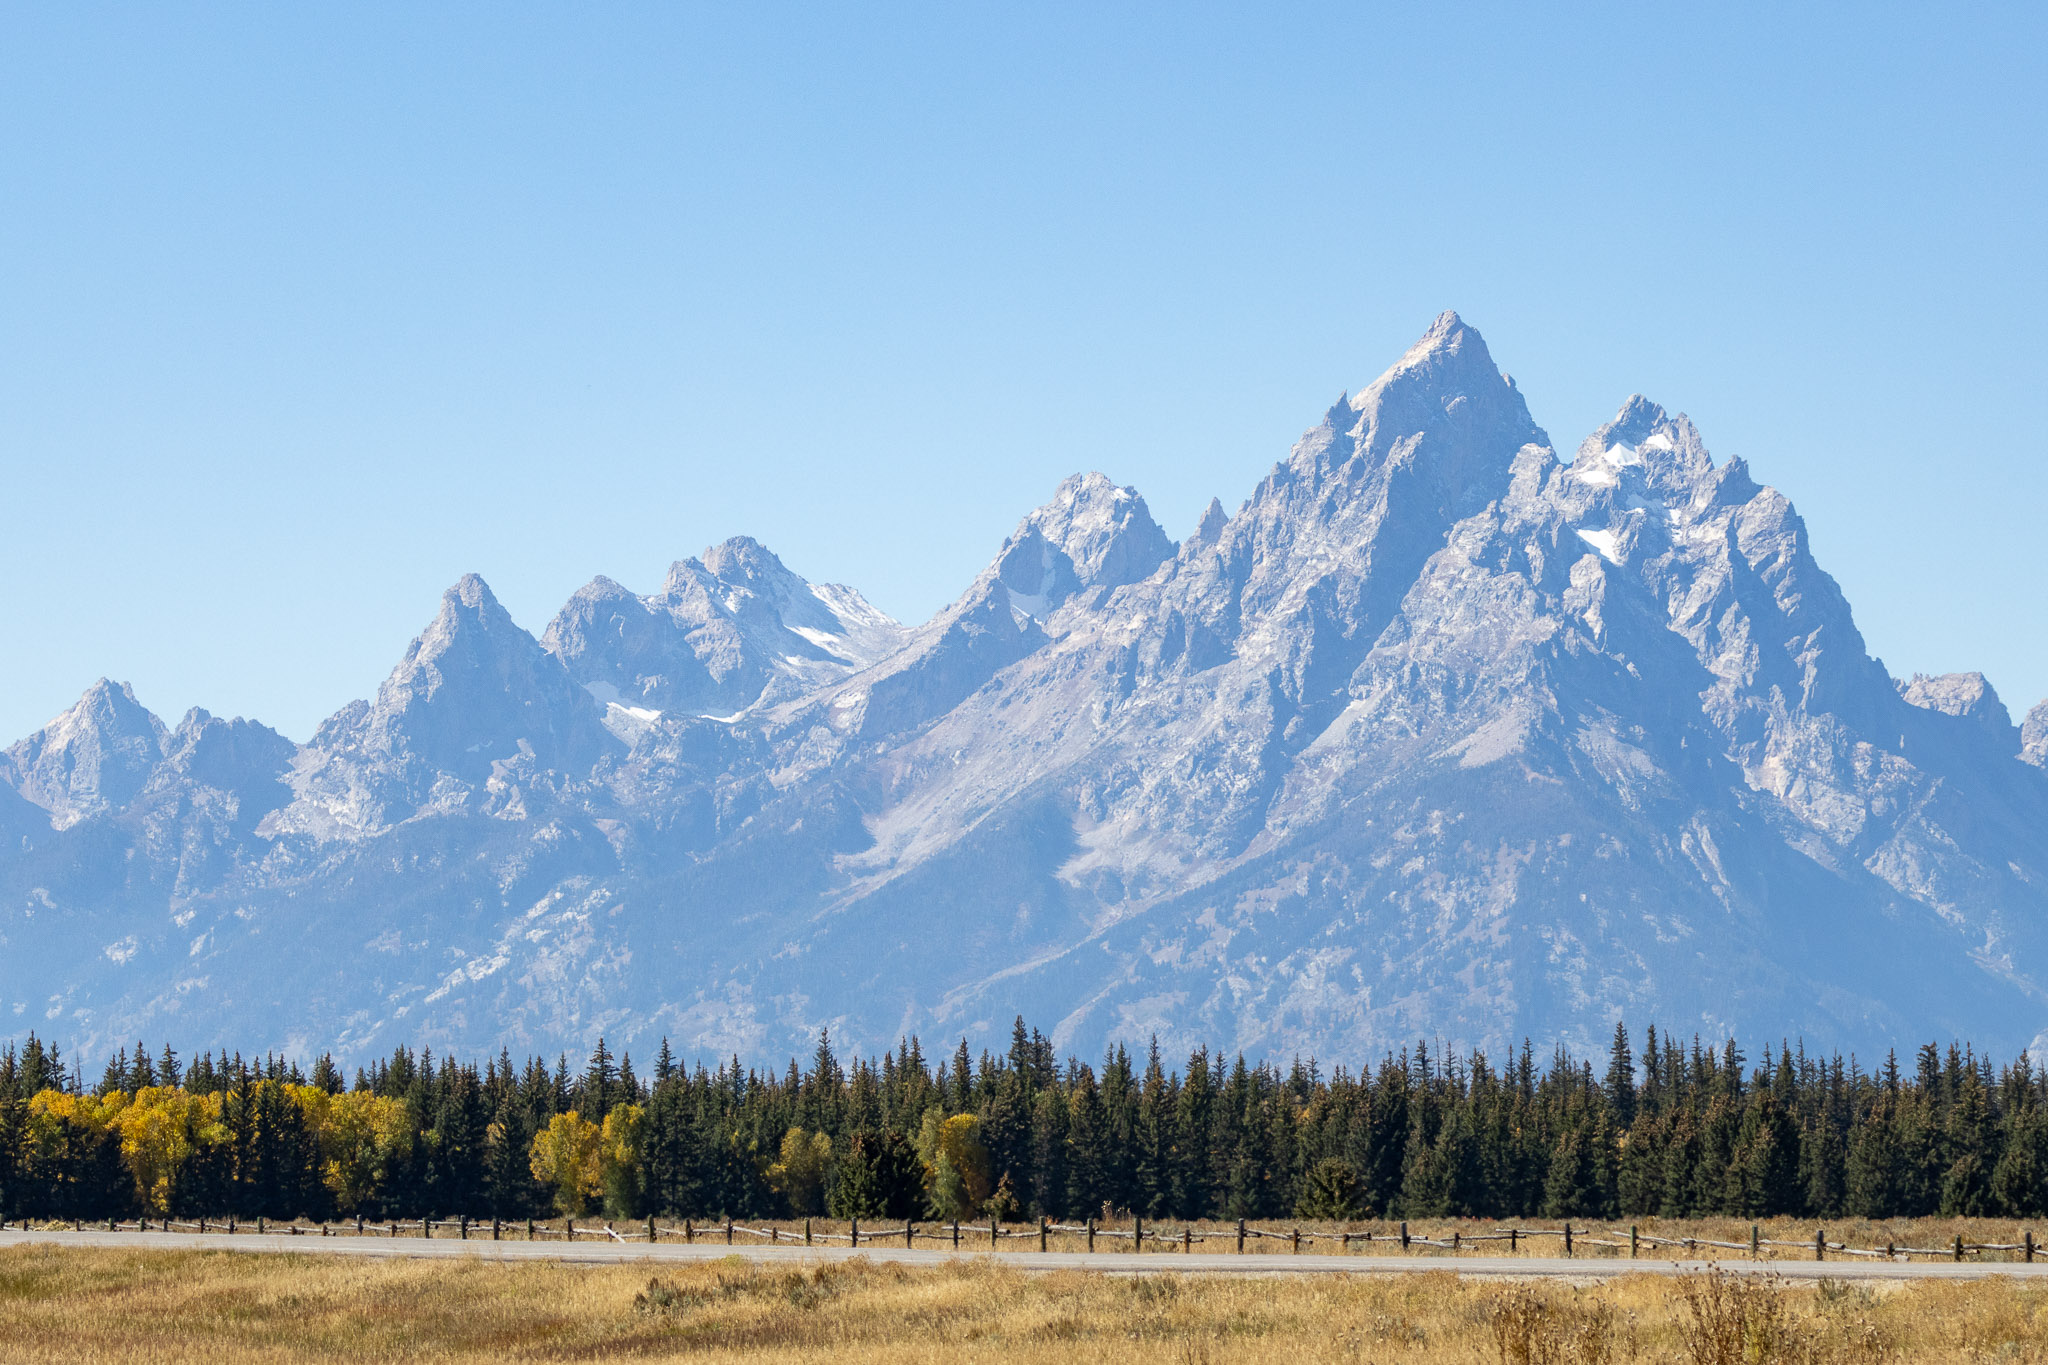
Kristi Townsend | Canon EOS R7 | RF 100-500mm f/4.5-7.1 L IS USM | 100mm | f/4.5 | 1/2000 sec | ISO 200
Mountain photography
When you’re out shooting in the mountains, you’ll want to pack as light as possible and use a sturdy technical bag. This sub-genre often involves significant physical effort to reach good vantage points. Once you’re there, you’ll need to understand how changing weather and light can affect high-altitude scenes.
FAQs
What is landscape photography?
Landscape photography is the practice of photographing outdoor natural environments, focusing on the land, weather and a sense of place.
How do you take landscape photography as a beginner?
If you’re a beginner taking up landscape photography, start by learning basic camera settings and using a tripod. Practise simple compositions with clear foregrounds and backgrounds.
What camera settings are best for landscape photography?
The best camera settings for landscape photographers is low ISO and mid-range aperture (around f/8–f/11).
What is the best lens for landscape photography?
There is no single best lens for landscape photography, but wide-angle lenses (16–35mm) and mid-range zooms (24–70mm) are the most commonly used.
Is 24mm good for landscape photography?
24mm is widely considered one of the most versatile fixed focal lengths for landscape photography. It gives you a good balance between foreground and background perspective.
Do you need a tripod for landscape photography?
A tripod isn’t essential for landscape photography but it greatly improves sharpness, allows for long exposures and helps in low light.
Where should you focus in landscape photography?
In landscape photography, many photographers focus on using the hyperfocal distance to keep the foreground and background sharp, or use focus stacking when the foreground is very close.
Should you shoot landscape photos in RAW or JPEG?
When shooting landscape photos, RAW is the preferred format as it preserves more detail and gives you more flexibility when editing.
What is focus stacking in landscape photography?
Focus stacking is the process of combining multiple photos taken at different distances to achieve greater sharpness.
Is landscape or portrait orientation better for landscapes?
Both landscape and portrait orientations can work for landscape photography. Landscape orientation suits wide scenes, while portrait orientation is often better for strong foregrounds, leading lines or height.
What is the best time of day for landscape photography?
The best time of day for landscape photography is golden hour, the period shortly after sunrise or before sunset when the sunlight is soft, warm and low in the sky.
What is the difference between nature and landscape photography?
The difference between nature and landscape photography is that nature photography focuses on wildlife and natural subjects, while landscape photography focuses on places, environments and scenery as a whole.
You can sell or trade your camera gear to MPB. Get a free instant quote, free insured shipping to MPB, and get paid within days.