Guide to Travel & Holiday Photography
Published 1 July 2026 by MPB
This is the MPB guide to travel photography, our comprehensive look at the genre that brings the world to people through the medium of still imagery. This article will provide you with expert advice, recommended gear and inspirational interviews with some of the most exciting travel photographers out there today.
Whether you’re doing initial research, planning your first travel photography trip or looking to improve your skills, read on to learn more about the exciting genre of travel and holiday photography.
This article covers:
What is Travel Photography?
What Makes for Good Travel Photography?
Top Tips for Travel Photography
Recommended Camera Settings for Travel Photography
Best Travel Photography Gear
Best Locations for Travel Photography
FAQs
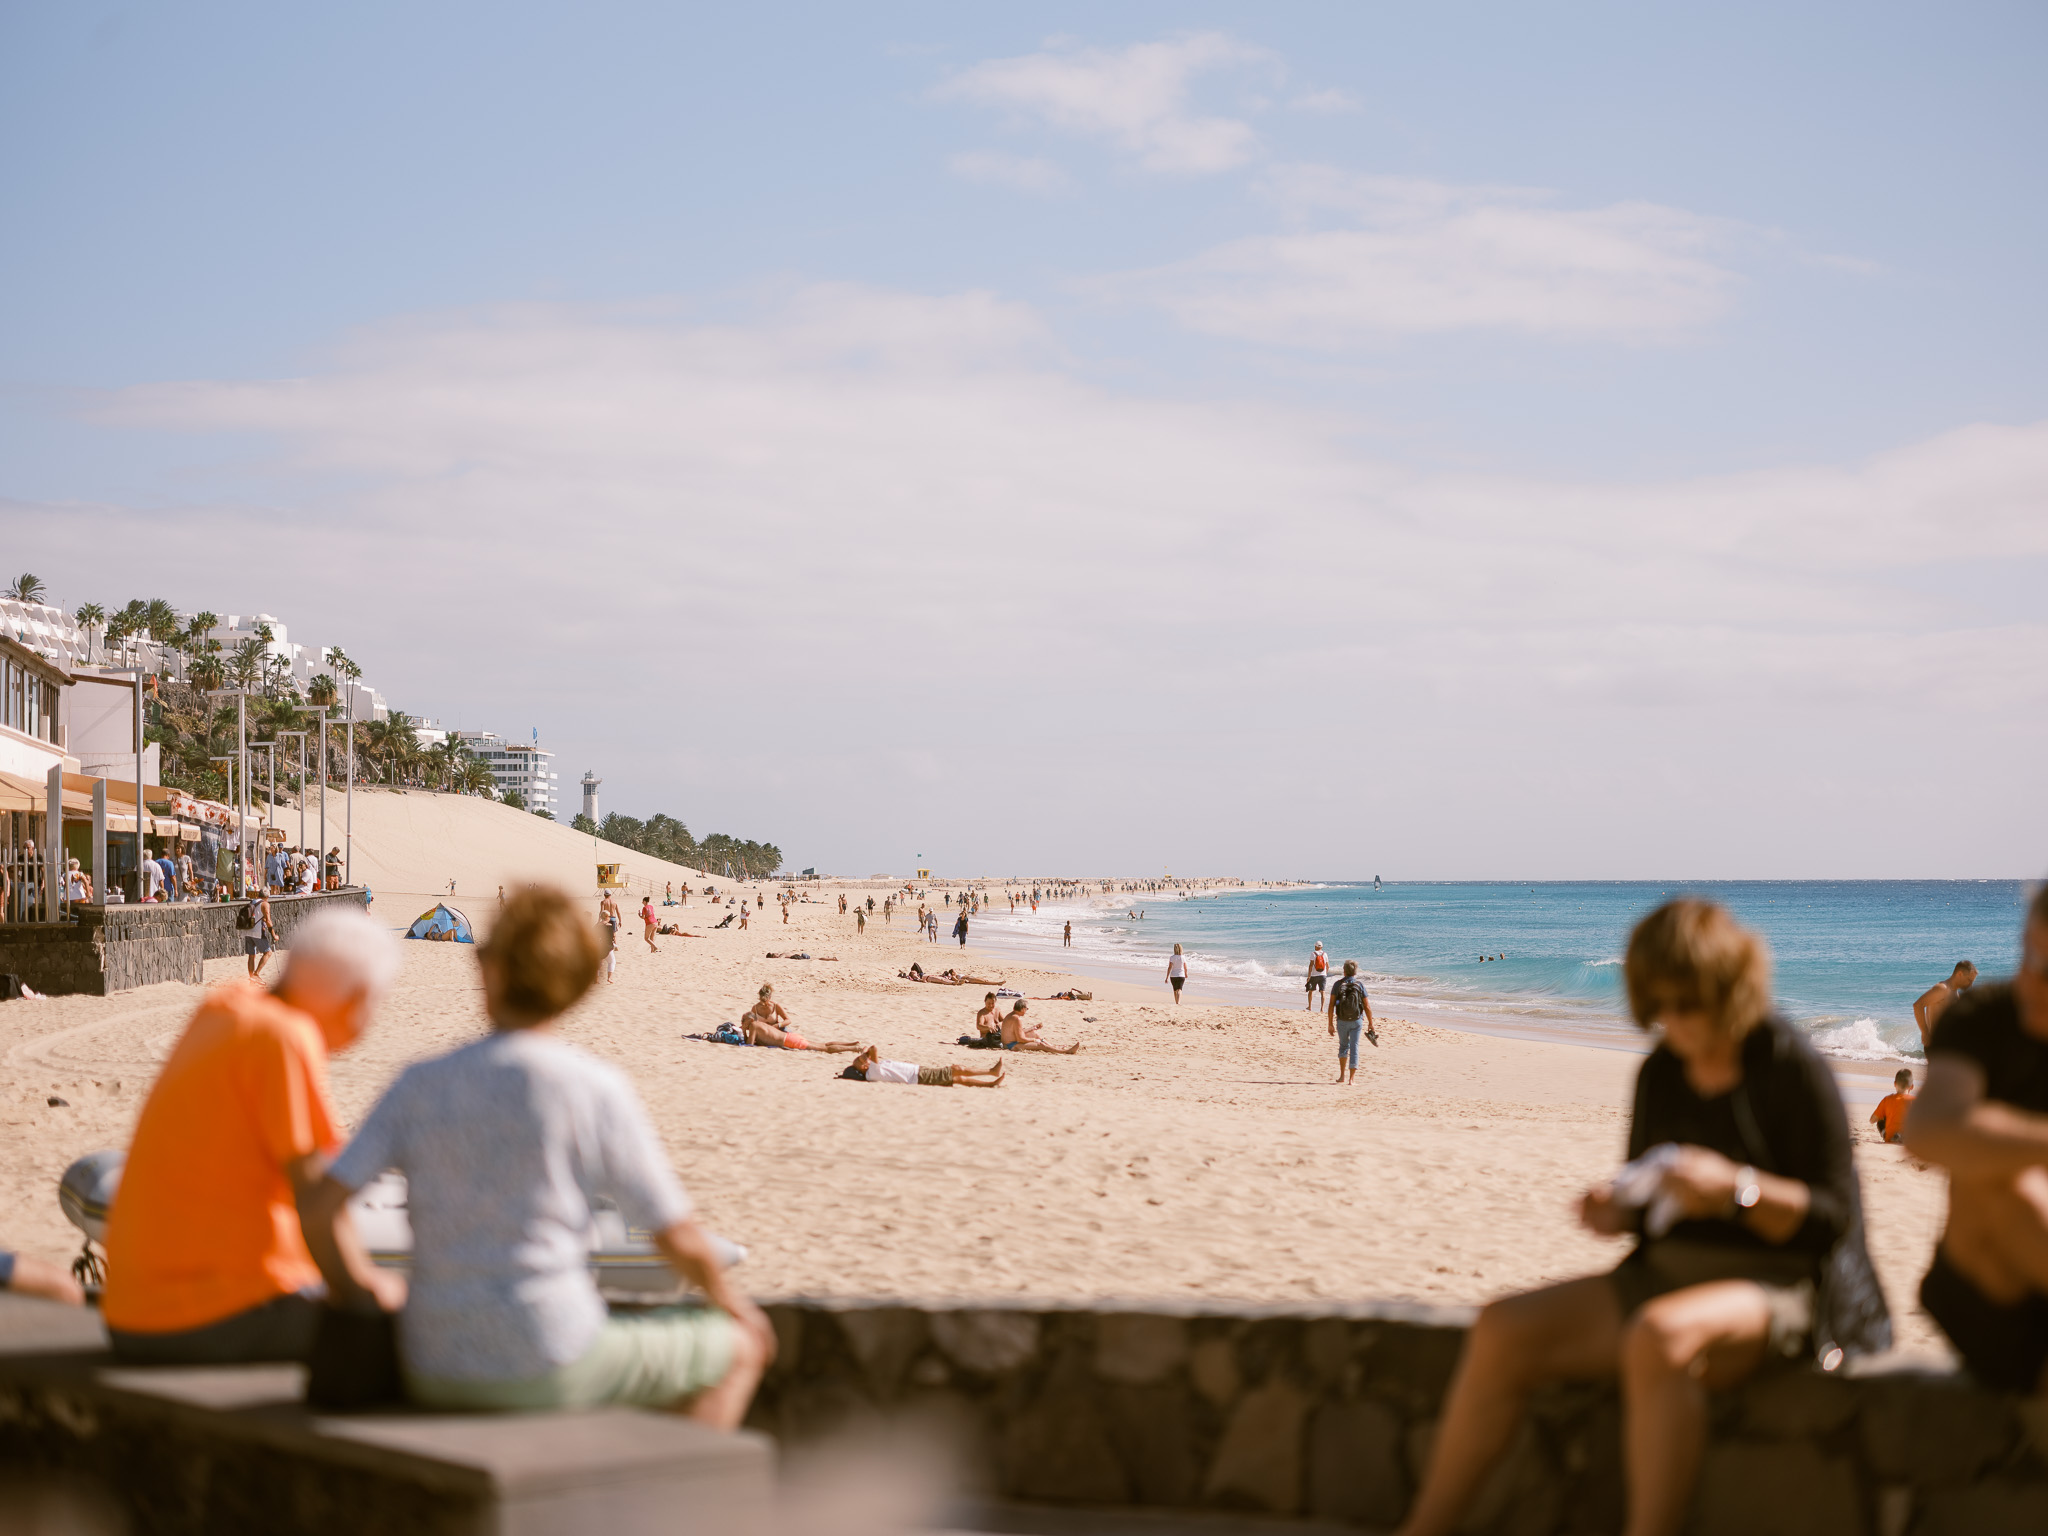
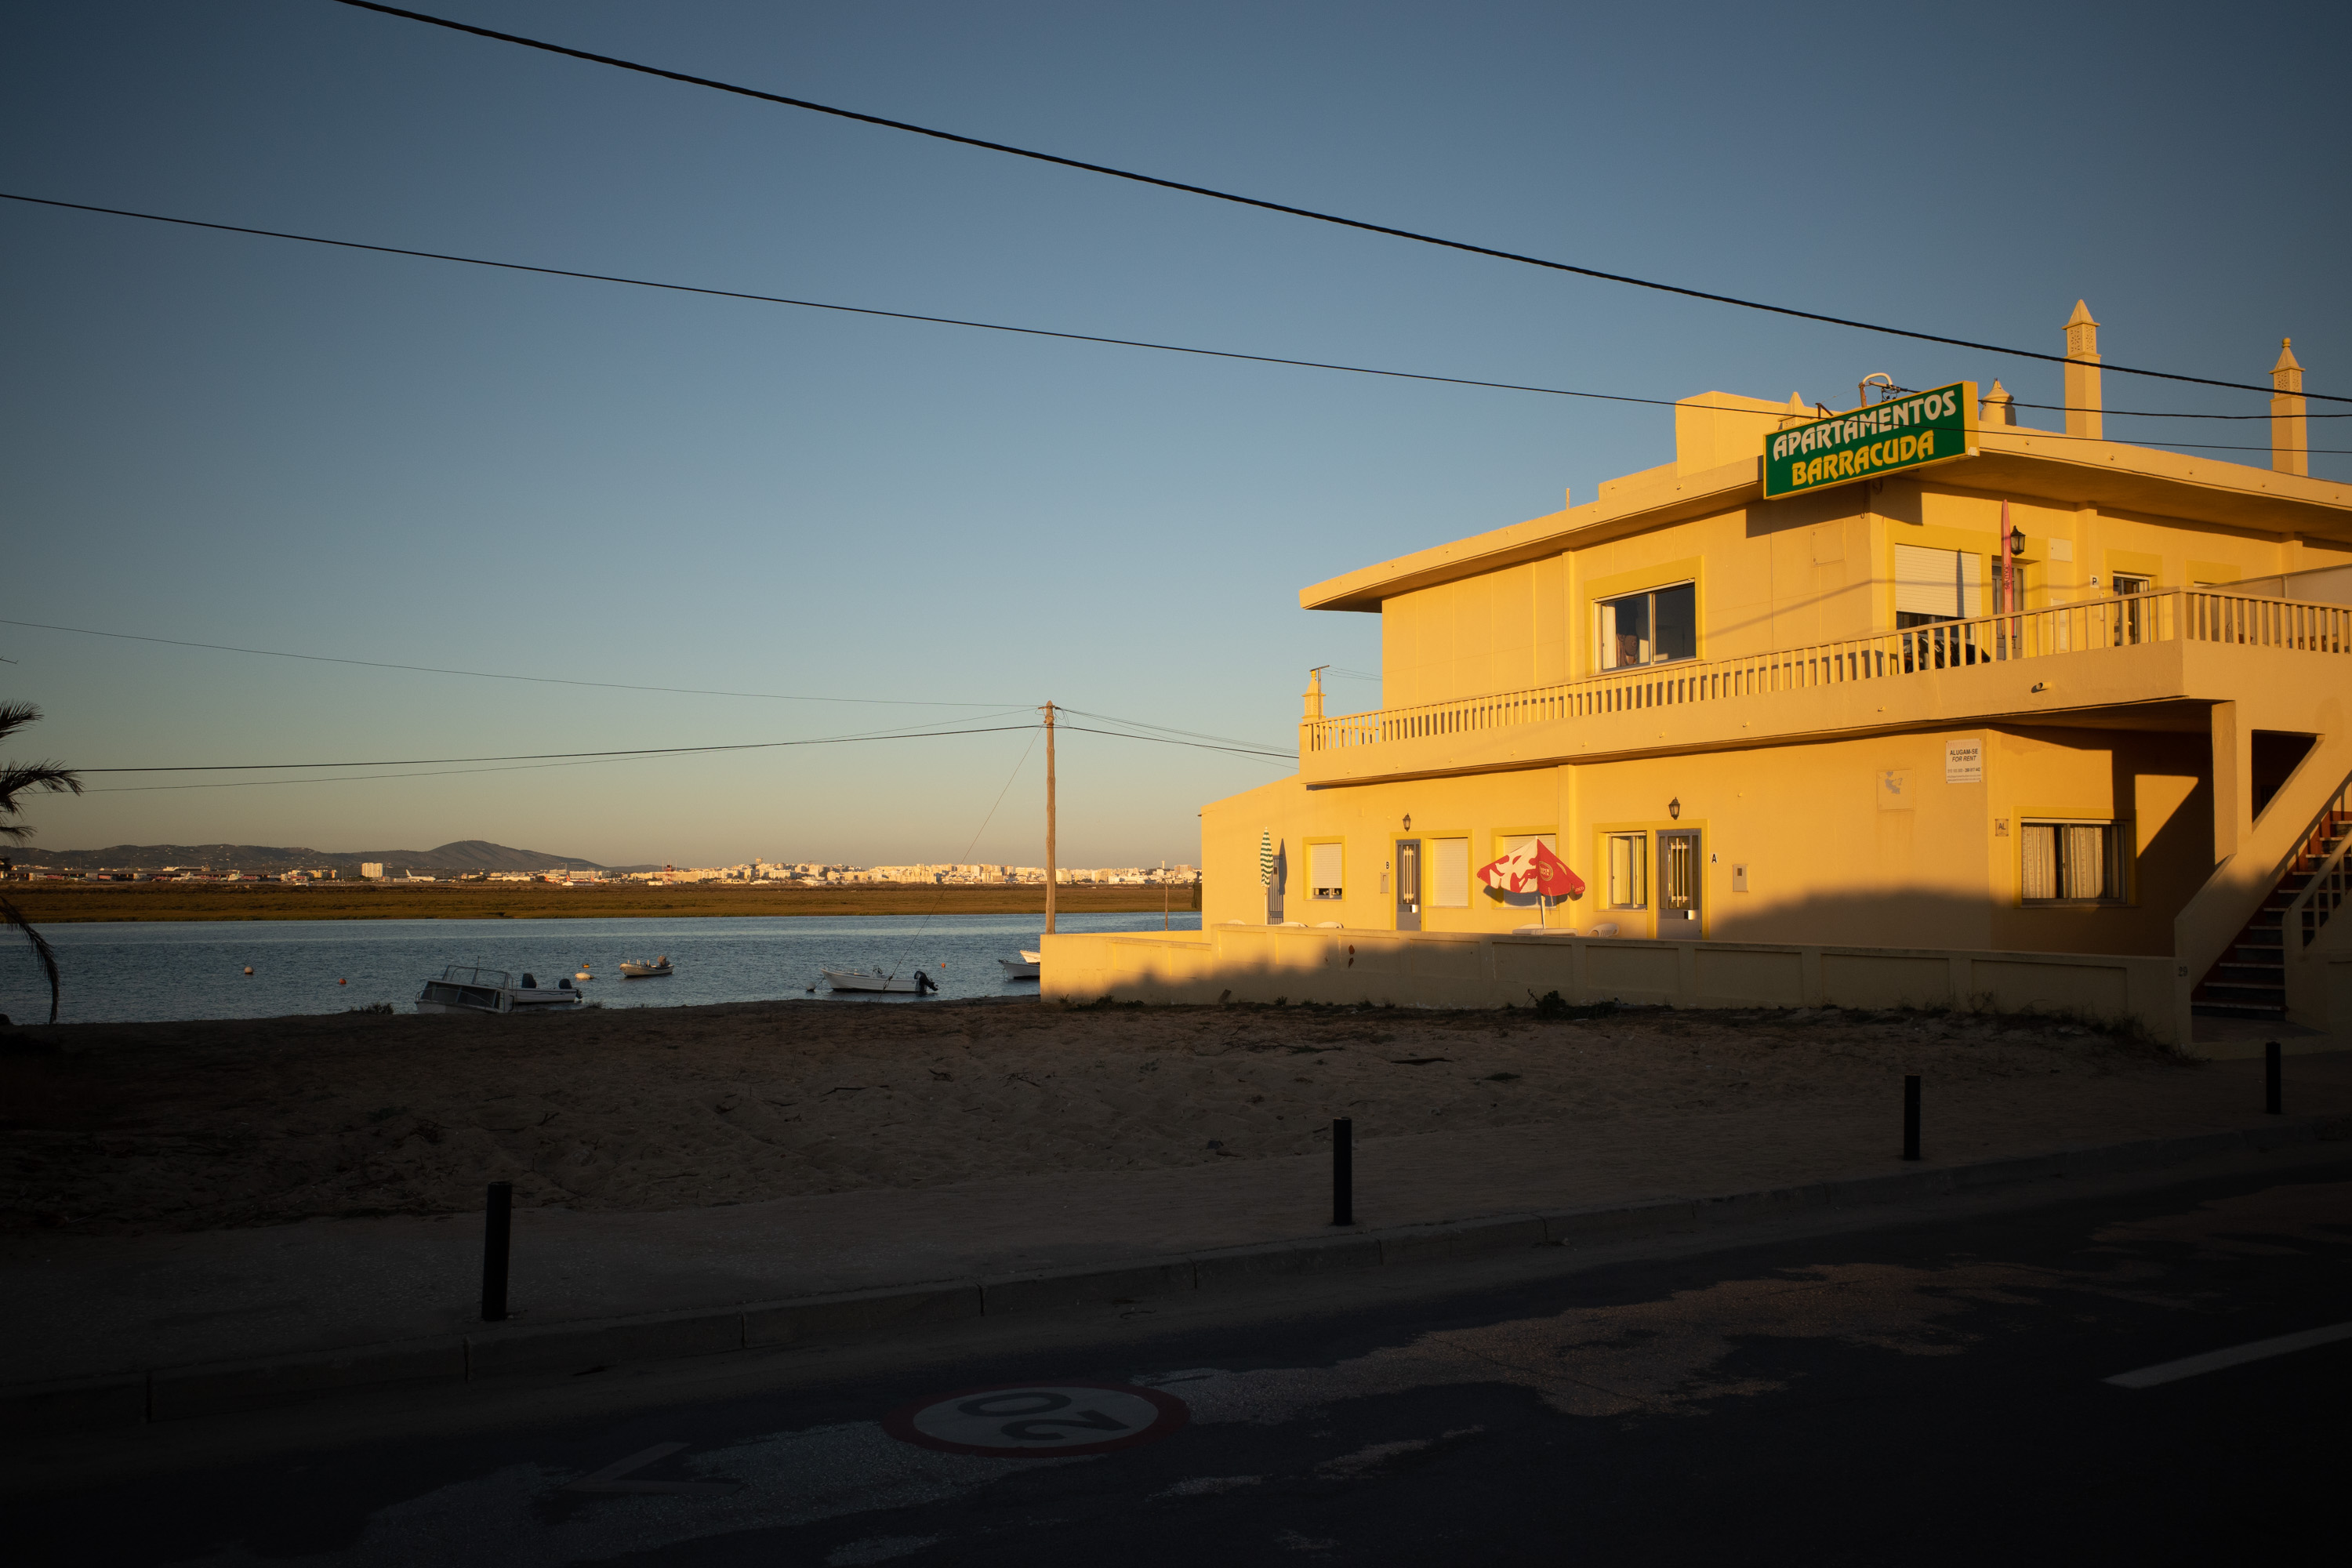
Connor Redmond | Fujifilm GFX 50R | GF 80mm f/1.7 R WR | f/14 | 1/105 sec | ISO 100
What is Travel Photography?
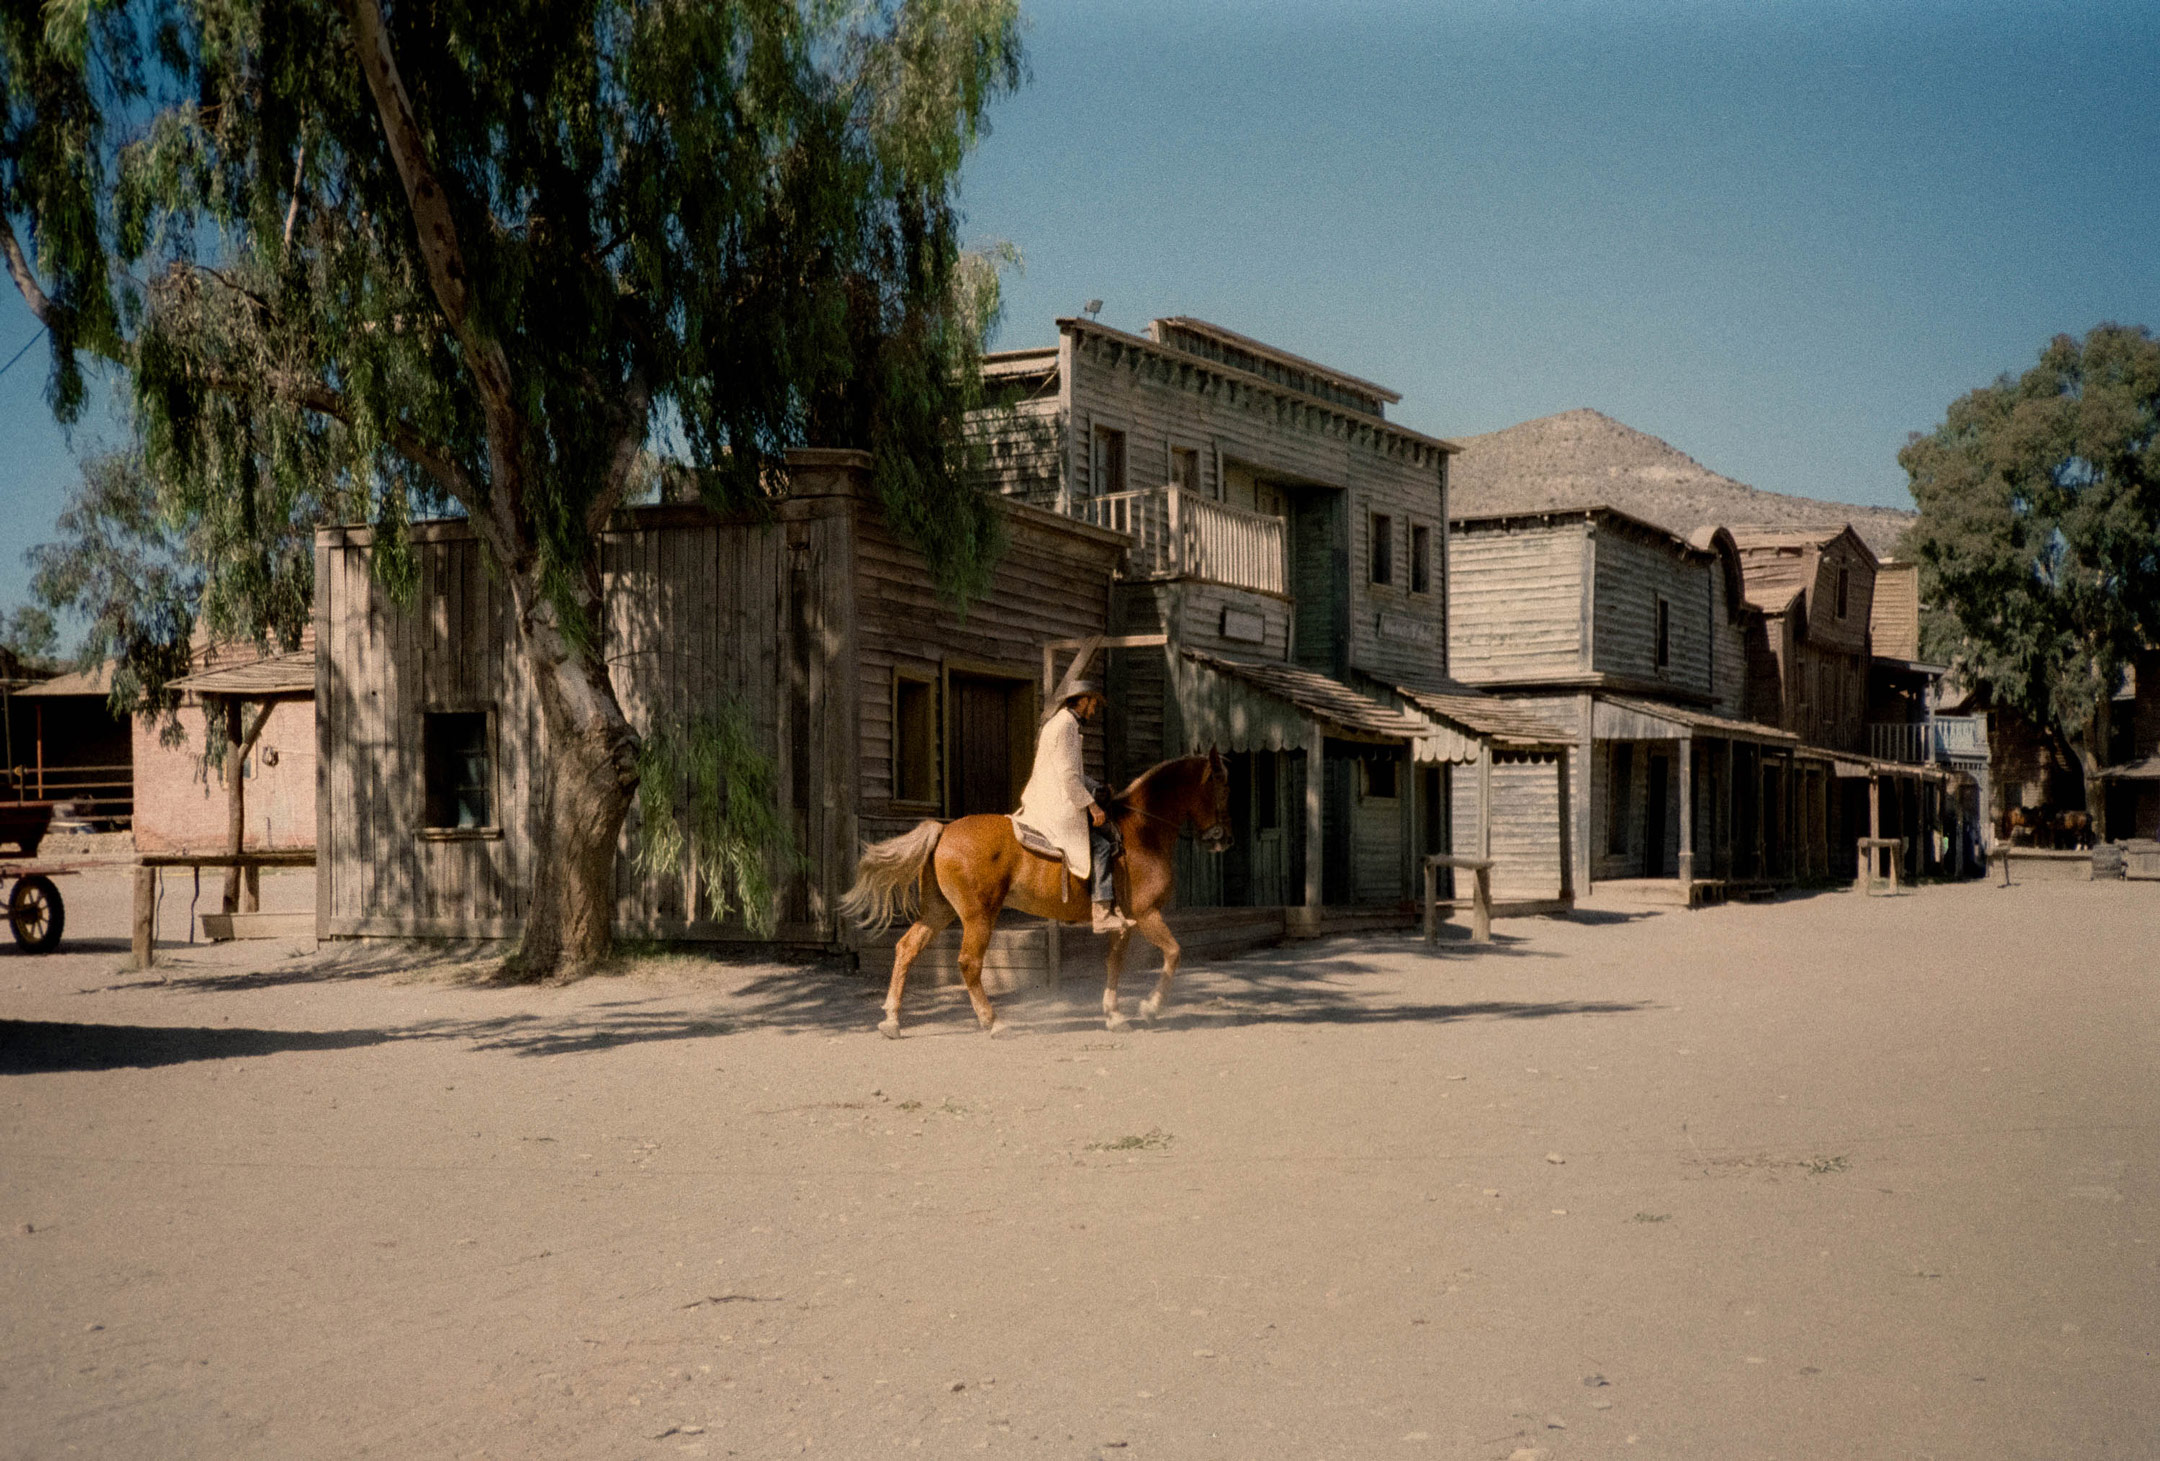
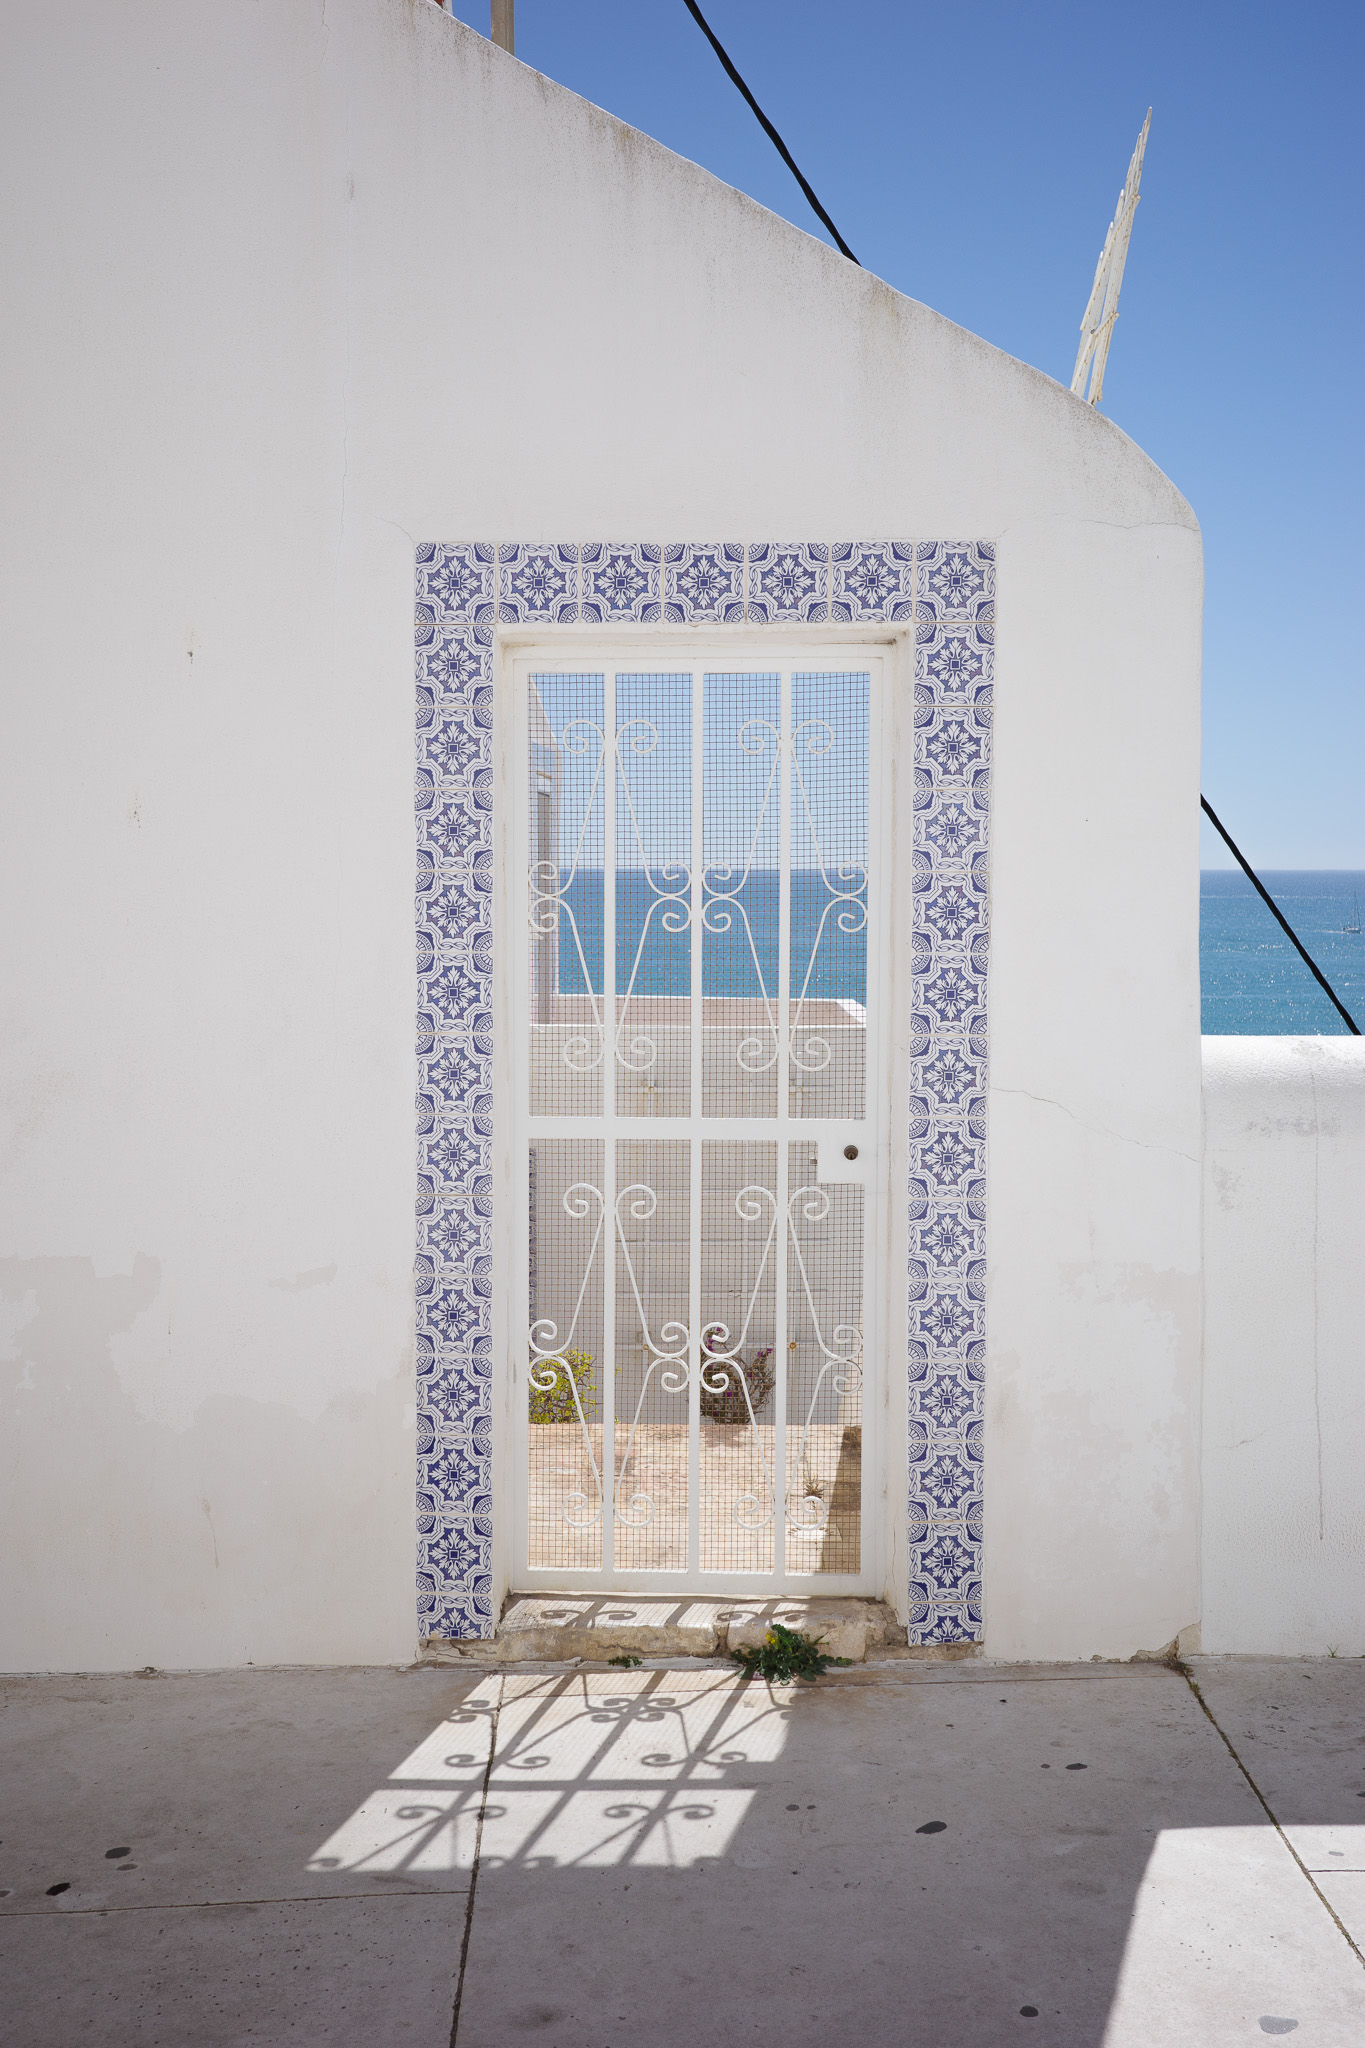
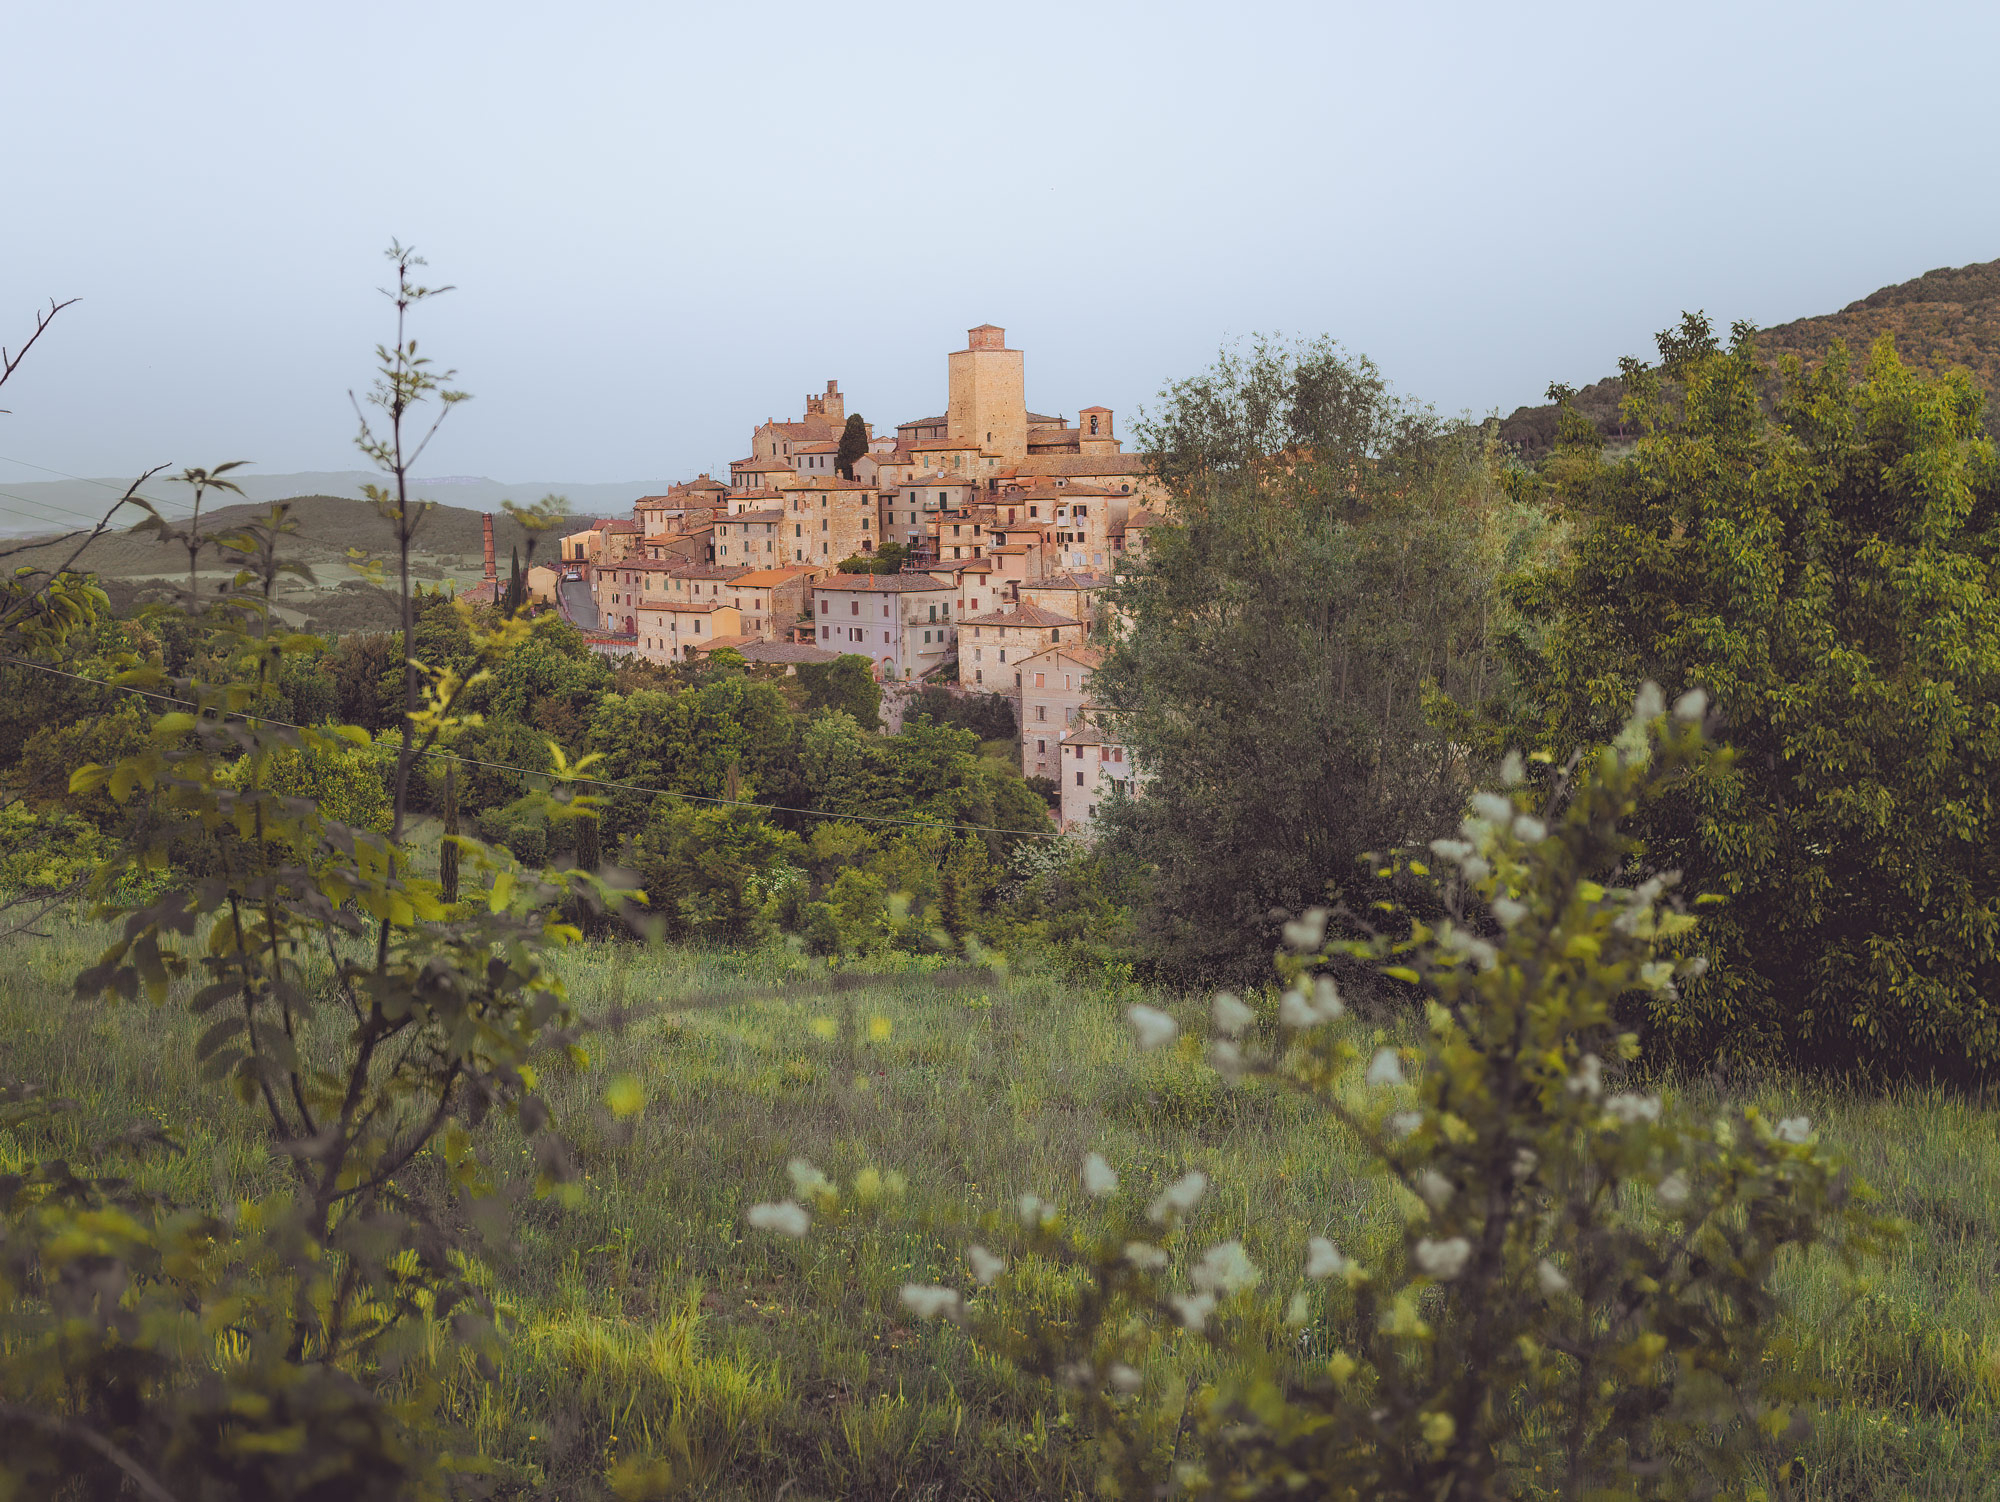
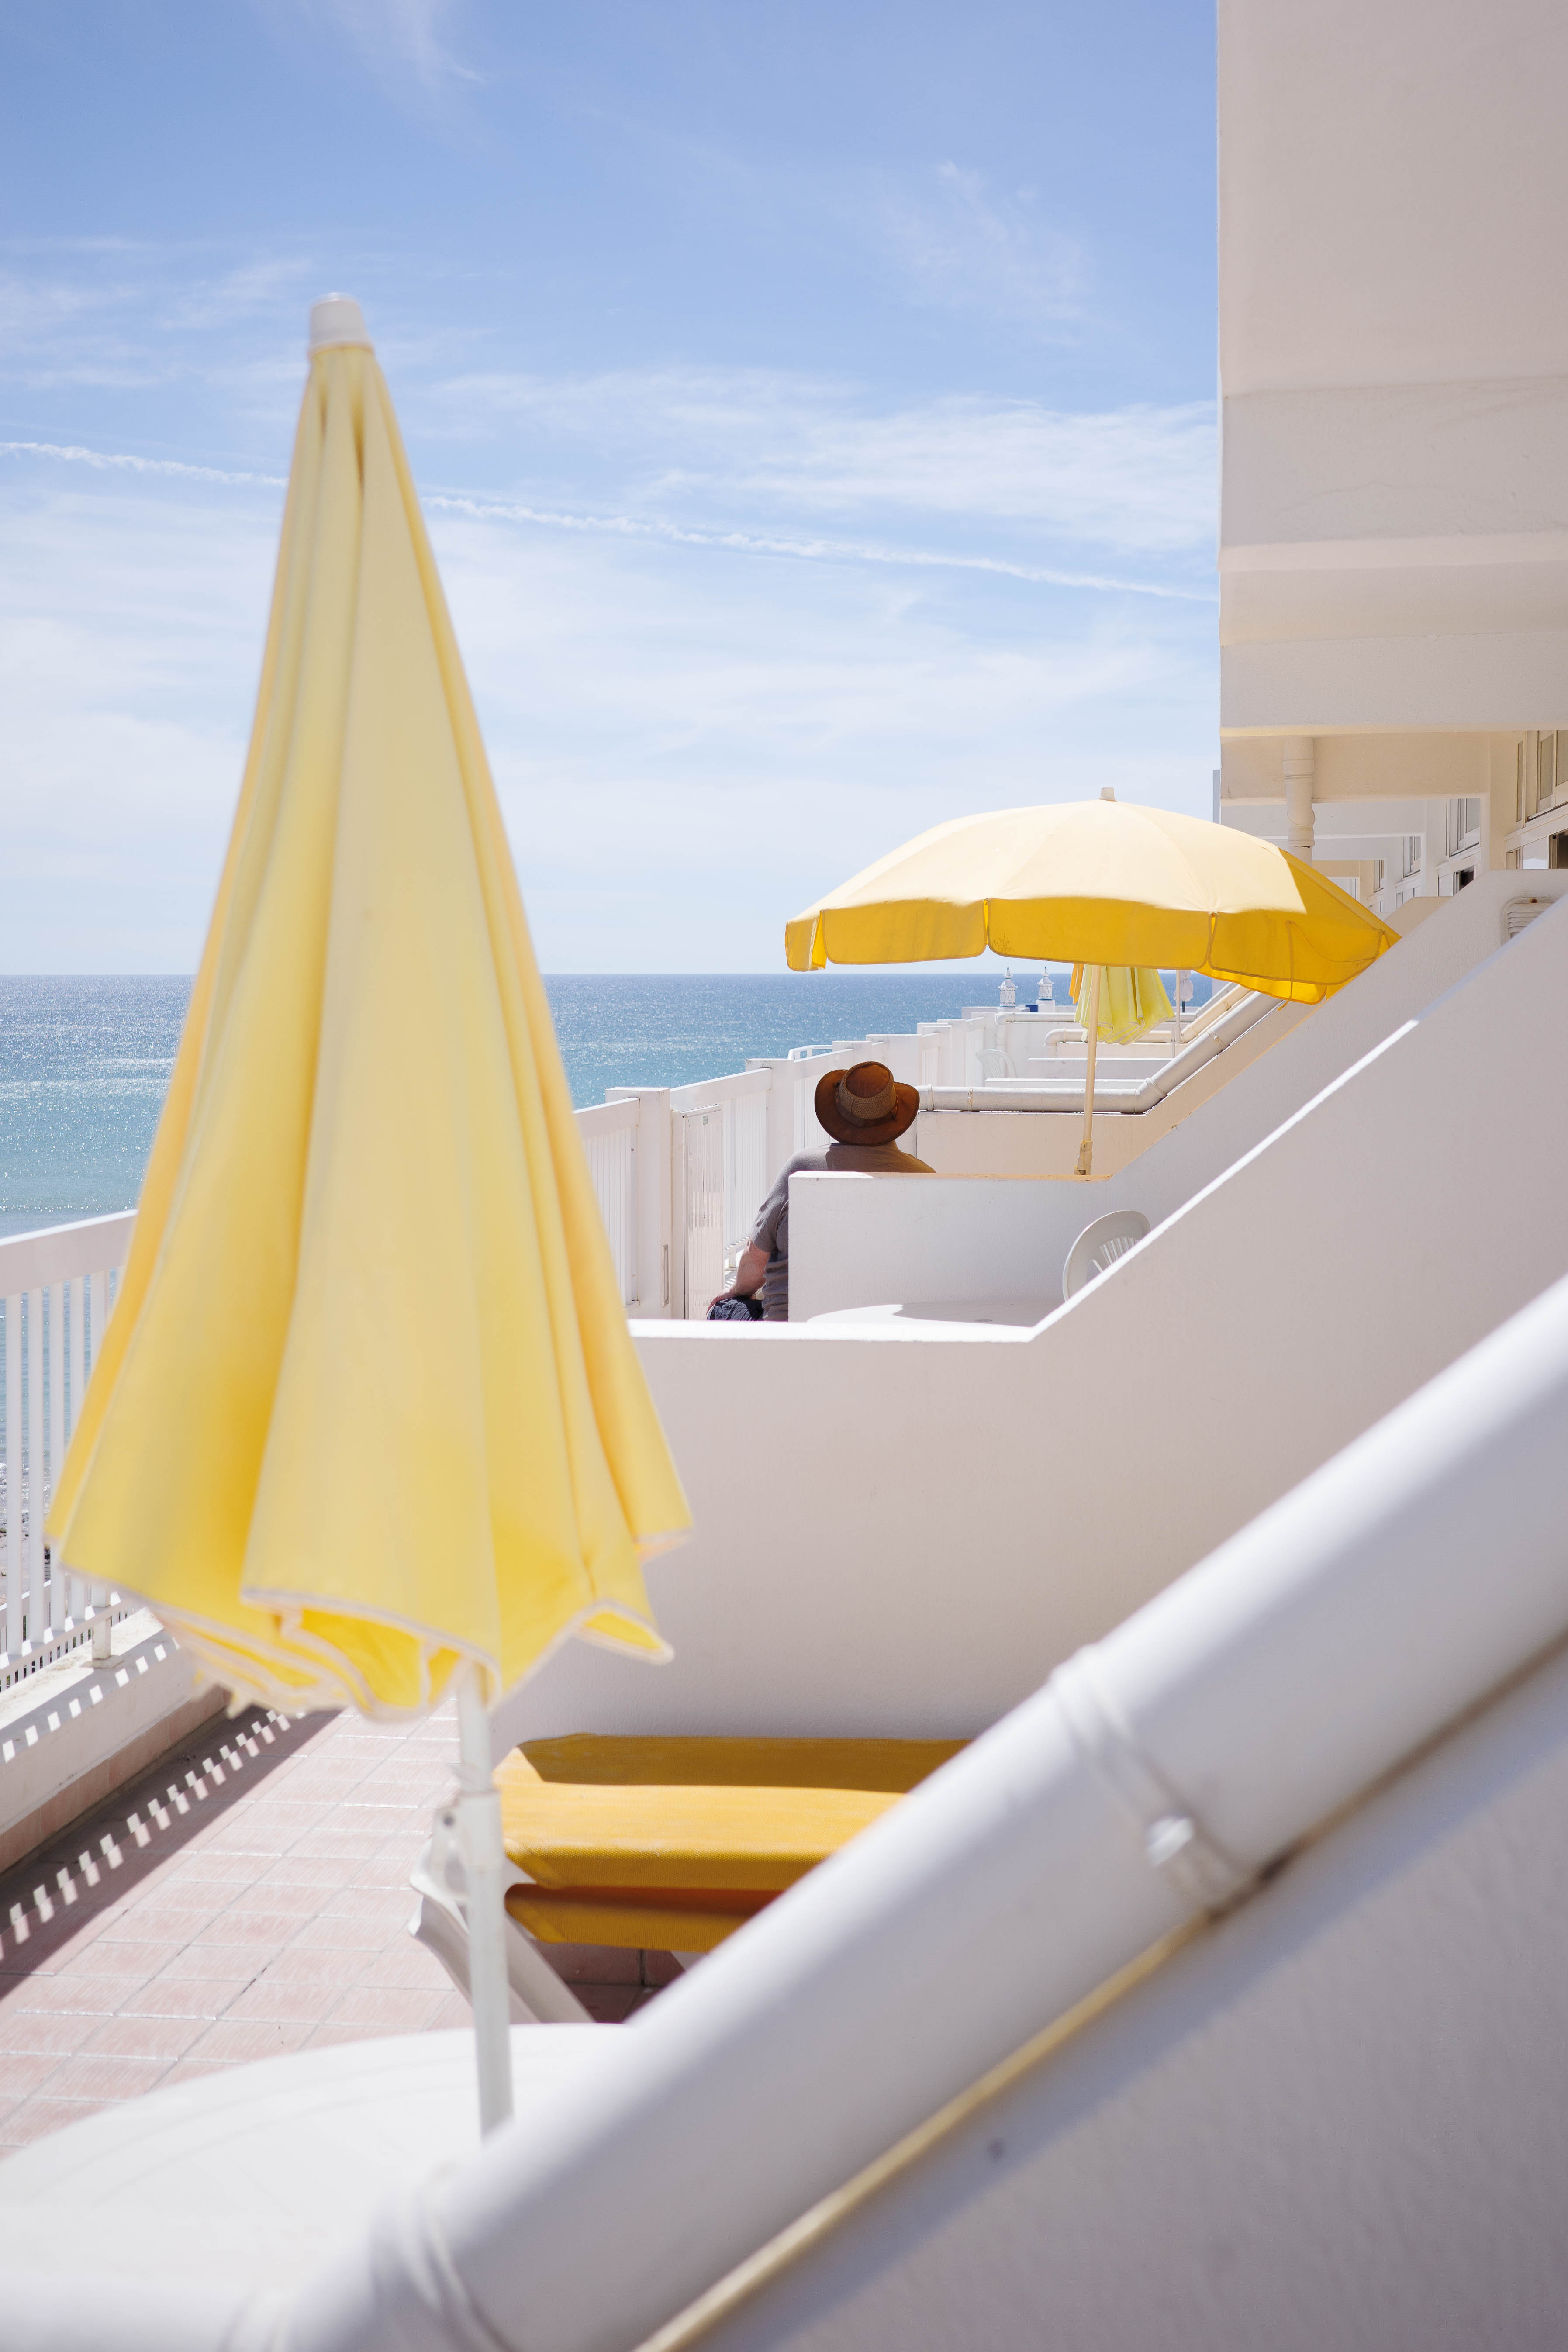
Travel photography is about capturing a destination. As a genre, travel photography often involves sub-genres like landscape, architectural and street photography.
For many travel photographers, a big part of the genre is figuring out the place's vibe. Ask yourself how the place differs from your home country, region or town. How is this place different or unique? For some travel locations, it’s the architecture. For others, it might be the people. Tell the story of that place by capturing its uniqueness through your camera’s lens.
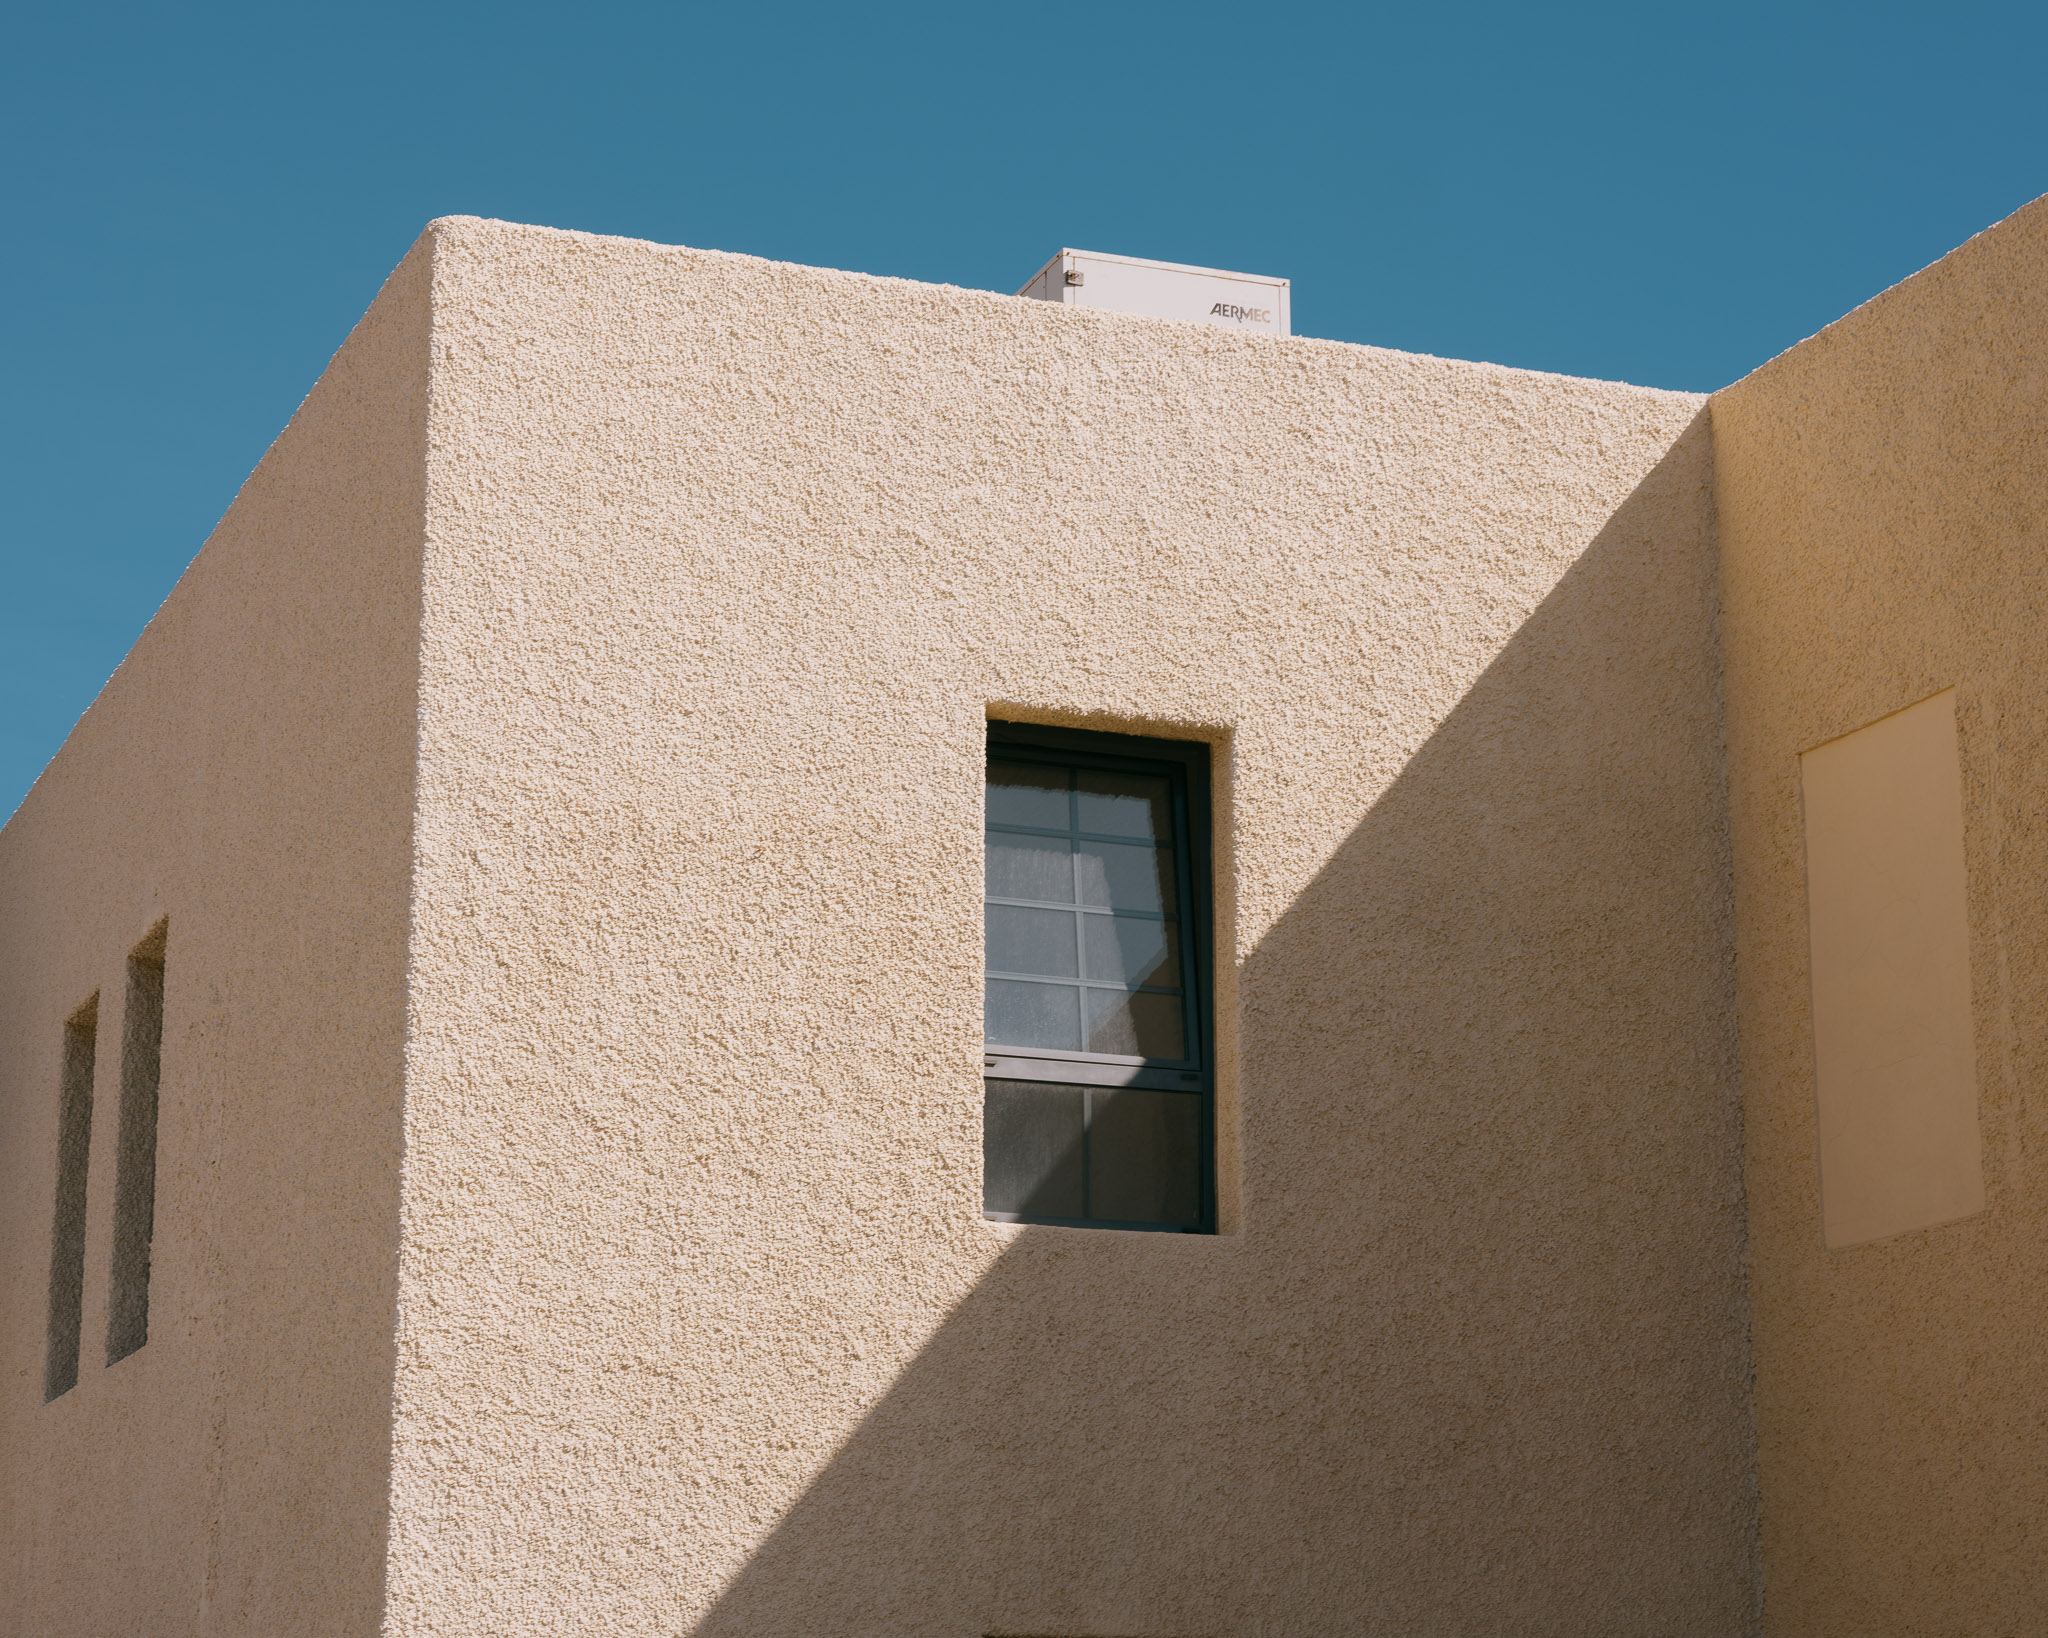
What Makes for Good Travel Photography?
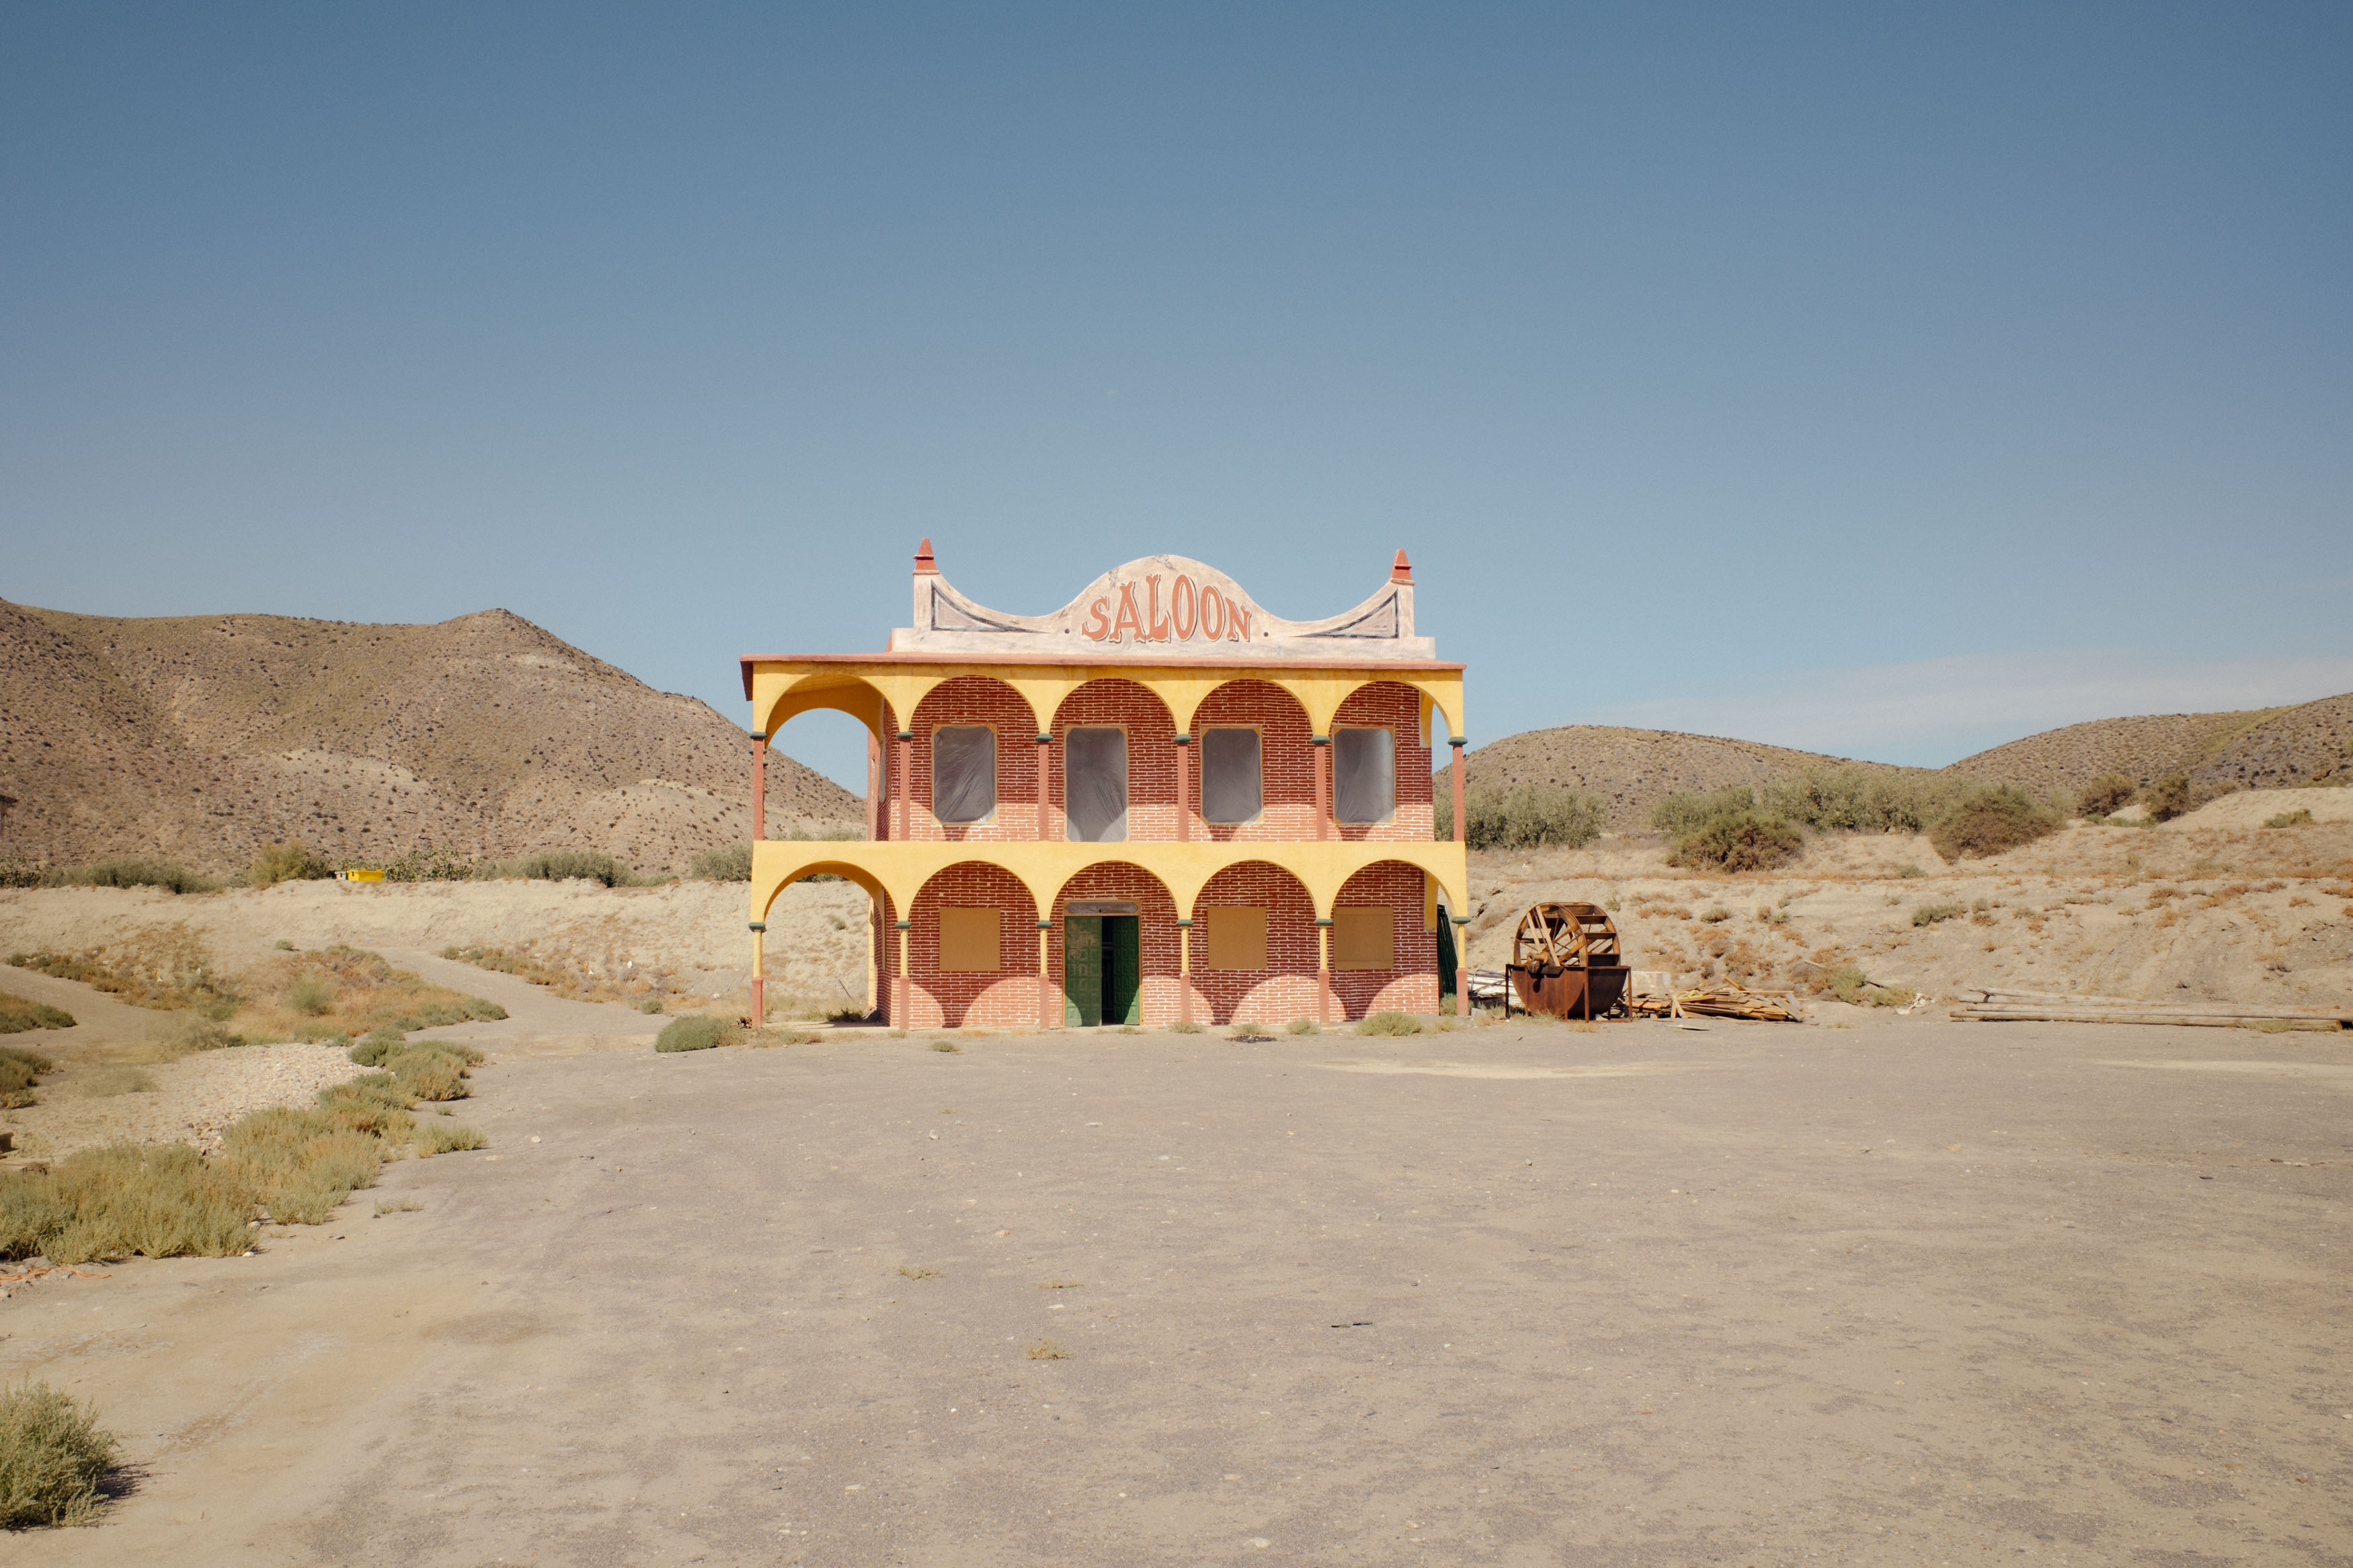
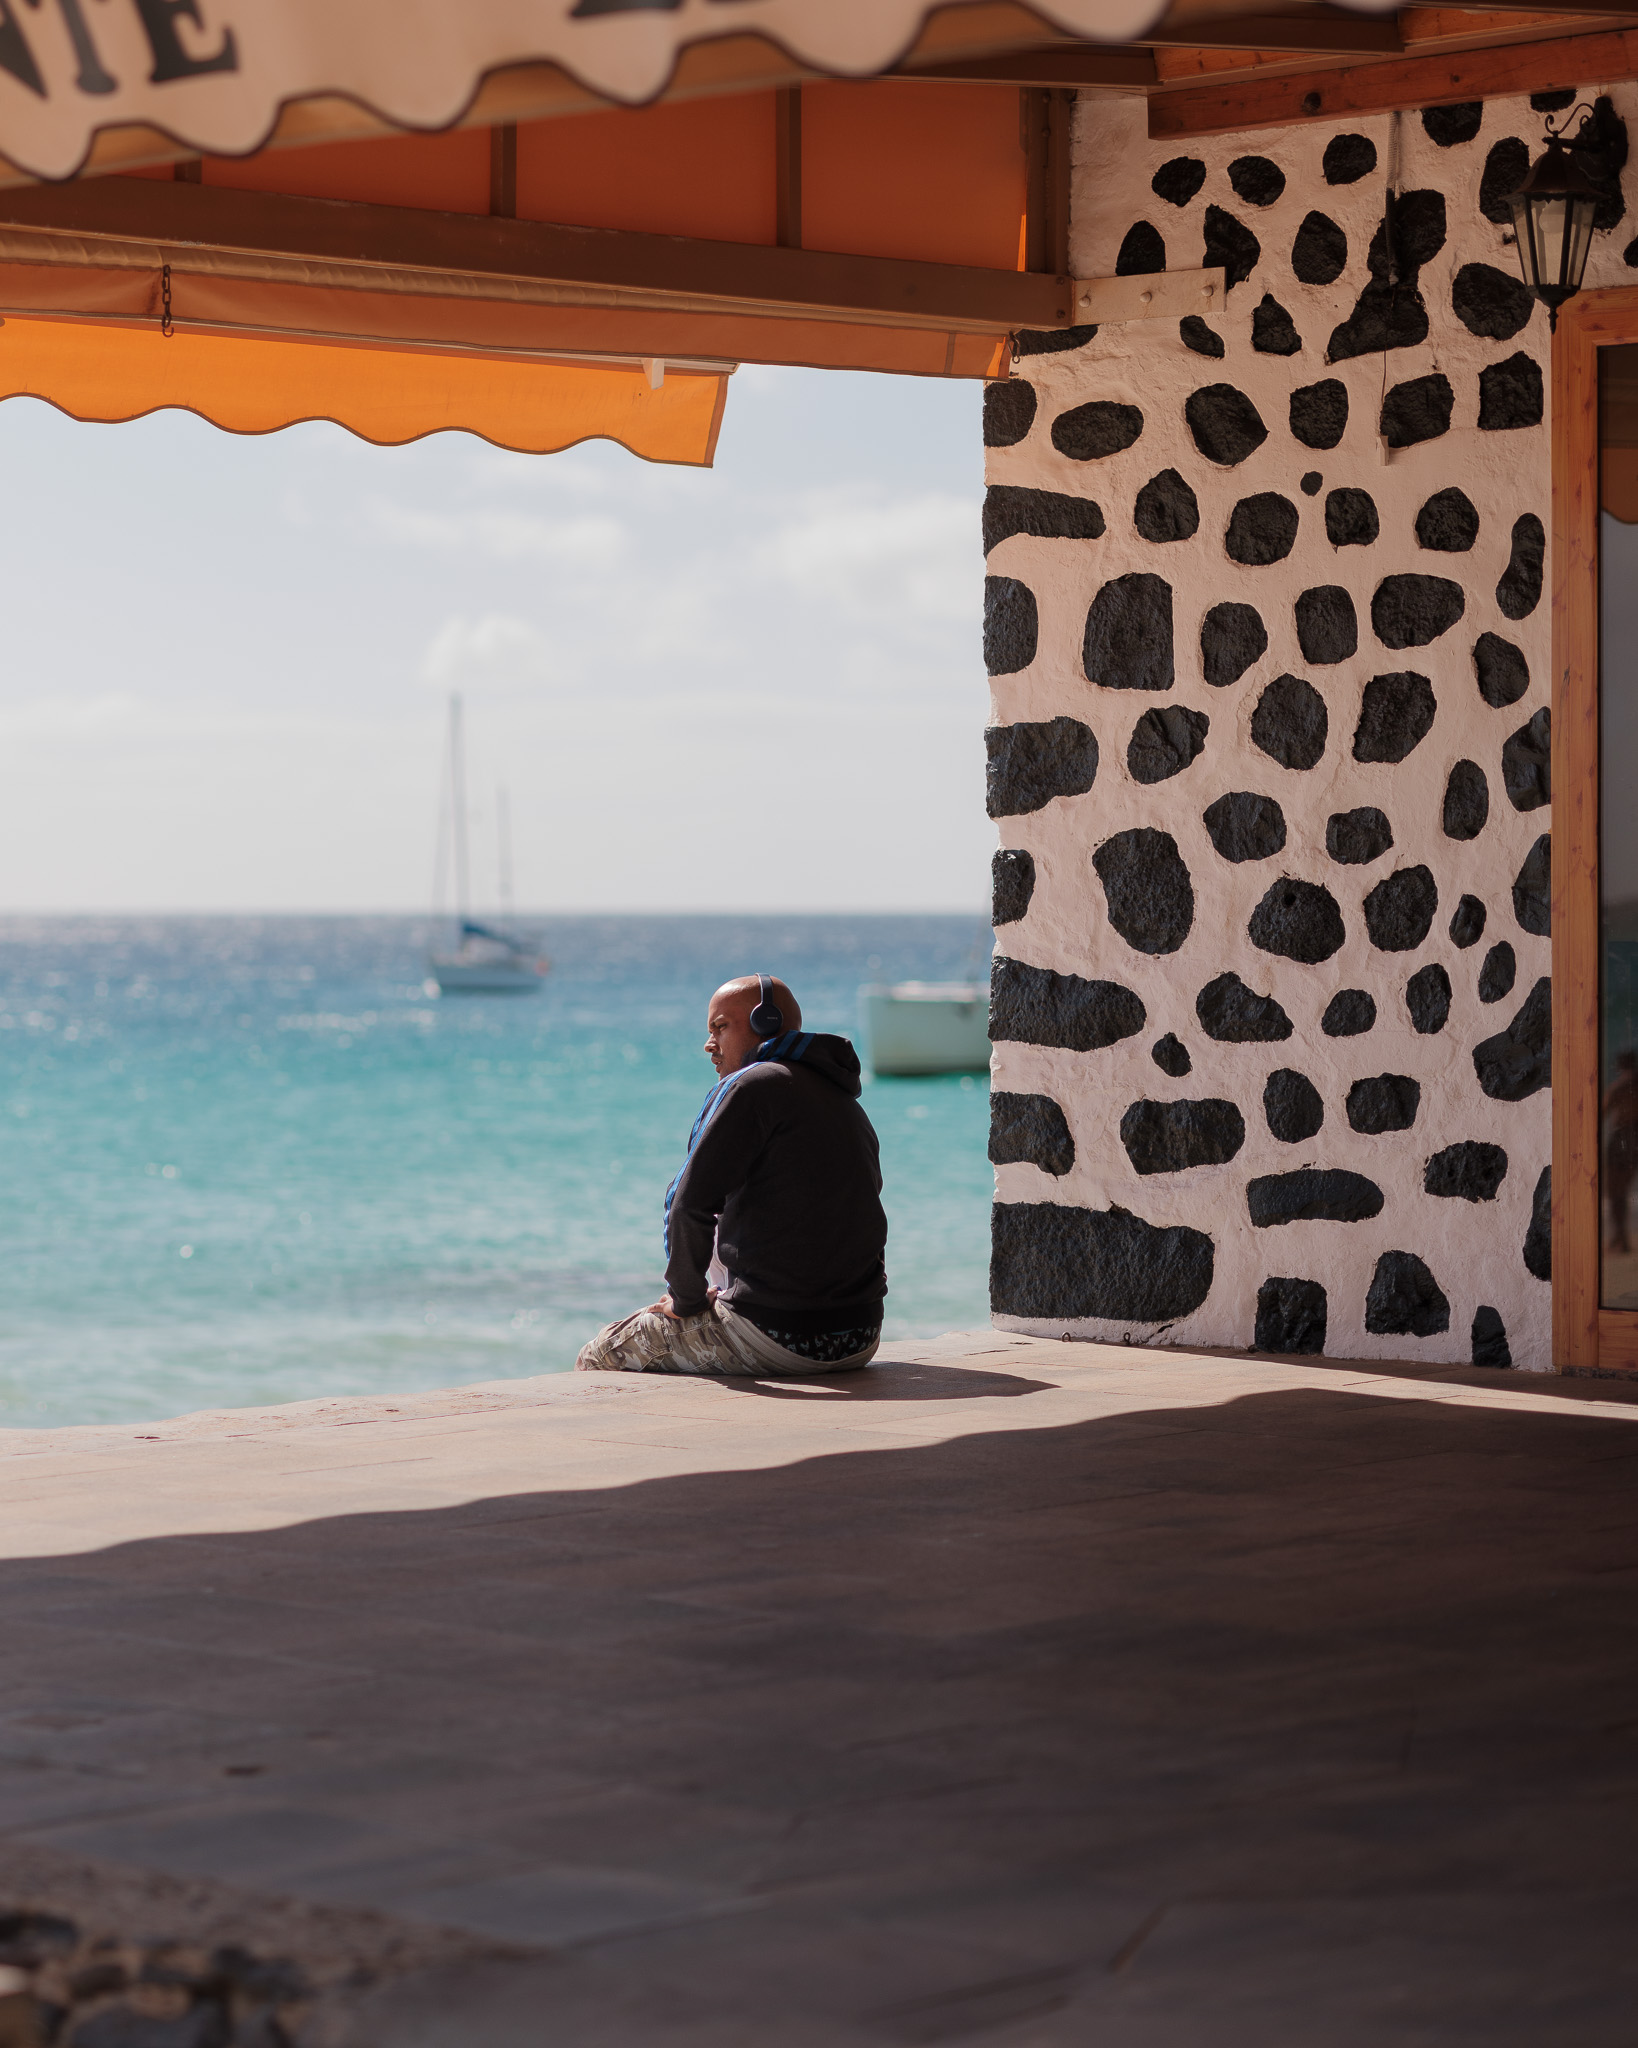
Good travel photography will inspire the viewer with ideas of wanderlust and exploration. A successful series of stills will encapsulate and immortalise the spirit of a destination, giving the viewer a unique perspective of any given location through the eyes and lens of the photographer. When done the right way, travel photography will be an instantly recognisable portrayal of the place through your unique perspective and with your unique creative signature.
Many of the technical decisions you make with the camera will influence what you photograph and how you photograph it. Your choice of ISO, focal length and aperture will colour your images in a certain way. Think about how these decisions will aid or detract from your images.
Connor Redmond | Fujifilm GFX 50R | GF 80mm f/1.7 R WR | f/2.0 | 1/4000 sec | ISO 100
Top Tips for Travel Photography
Our advice should help get you started with your travel photography. Read on to learn how to start local, research, wander, prepare your setup and consider weather conditions. Ethical considerations should also form the bedrock of any travel photography. Read on to learn more.
1. Start local
Paradoxically, you don’t need to travel to create travel photography. First, hone your skills closer to home before venturing further afield. Especially when you grow up in a certain area, if you’re lucky enough to live in an interesting area, you grow used to the landmarks and attractions that other photographers will be drawn to. So, use that to your advantage, train your eye and take the time to foster unique perspectives and build that into your photography. Next, head to your nearest city or tourist destination.
Ian Howorth
2. Research and plan
Once you have a destination in mind, do as much research as possible before you book your tickets. Consider the best season or time of year to visit and look at whether there are any festivals or events you might want to cover. Write up a schedule so you can make full use of every minute of your trip, cut down on travel time between locations and ensure you get as many photo opportunities as possible in the best possible conditions. It’s also worth creating a backup plan in case of adverse weather conditions or issues with public transport.
Make full use of tech. Use Google Earth to scope out your locations so you’ll know exactly where to go on the day. Then, on Google Maps, you can create a custom map to pinpoint each location, plan the most time-efficient route between each location, and provide easy access on your smartphone.
Ian Howorth
3. Leave enough time to wander
Alternatively, consider the concept of the flâneur. Originally popularised by French poet Charles Baudelaire and further developed by social theorists like Walter Benjamin, the flâneur is an urban explorer who strolls through the streets passively observing city life. Instead of rushing from one spot to another according to a planned route, the flâneur absorbs the culture and ambience of the city as they let themselves be led by the moment.
The flâneur approach to travel photography is, therefore, an attempt to capture the spirit of the location. You might not cover all the big landmarks or events, but—with practice—you’ll hopefully capture your unique perspective of being in the city. There’s a certain amount of overlap here with street photography, so check out our street photography tips beforehand and train yourself to spot opportunities as they unfold before you.
At first, we’d recommend leaving enough time for both approaches to travel photography. For the first couple of days, carefully plan an itinerary to ensure you capture all the vital locations at your destination. And then leave another day or two free to wander and see where the city takes you and your camera.
Ian Howorth
4. Pack light
You have two or three options here. You can bring all your gear with you at all times. Your back will suffer, but at least you’ll have all eventualities covered. Or, you can bring all your cameras, lenses and accessories and use your hotel room as a base to pick up anything you need—but that option risks the gear you’ve left in your room. Otherwise, you could consider bringing only a lightweight, streamlined setup, which you carry with you everywhere. This setup can either be a simple point-and-shoot camera and/or a single camera body with a couple of prime lenses or a zoom.
The less weight on your back, the more likely you’ll be happy walking around all day—and the more likely you’ll have plenty of travel photographs. However, depending on your style of travel photography, you’ll have to find the right balance between versatility and weight.
However, remember to bring enough batteries, waterproof clothing and a portable battery pack for your phone. Plus, if you’re flying, keep your camera gear safe. Whenever possible, avoid putting your camera gear into the hold—always try and keep it in your hand luggage.
Ian Howorth | Ricoh GR III | f/9 | 1/80 sec | ISO 100
5. Respect people’s privacy
Always ask for permission before photographing someone. When you’re behind a camera, it’s easy to forget people aren’t just subjects to photograph. Avoid photographing vulnerable people or children. And, if you’re travelling abroad, do your research on the country’s laws and local customs—and act accordingly. With travel photography, there’s often a grey area. At which point does someone who is in the frame become a subject of the photograph? Use your best judgement. If in doubt, it’s best to err on the side of caution.
If you’re creating travel photography in Europe for commercial purposes, read up on GDPR. You might need to bring consent forms for people to sign. Including people in your images can add scale and narrative to your travel photography. But just make sure you’re doing it right.
Ian Howorth
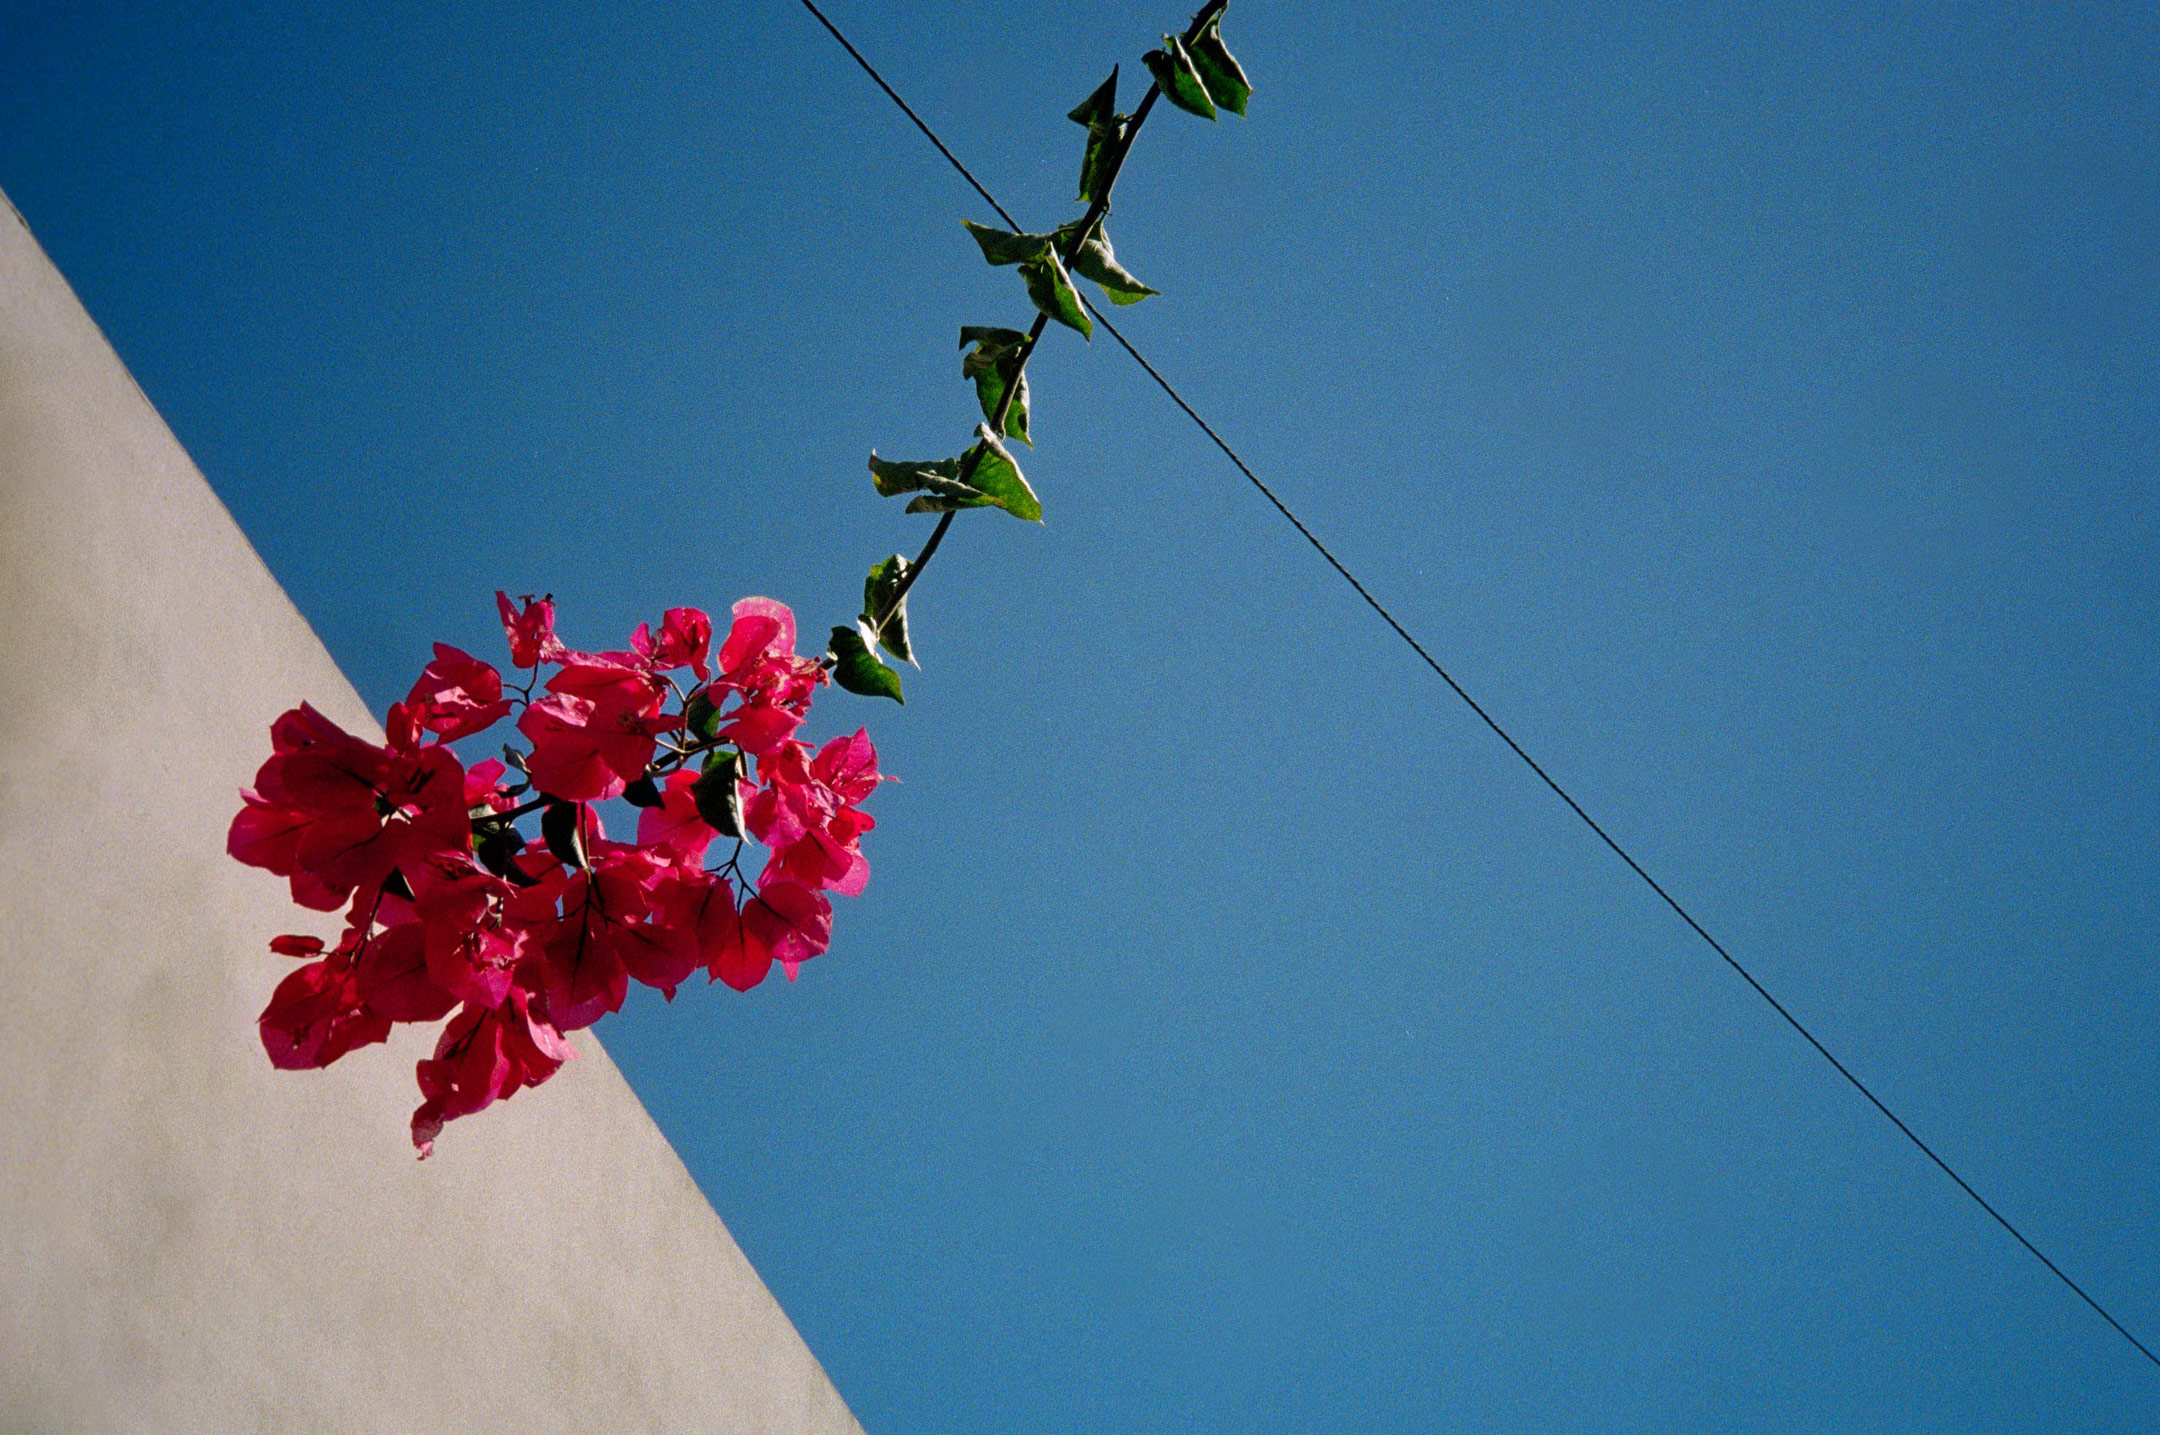
6. Consider natural light and weather conditions
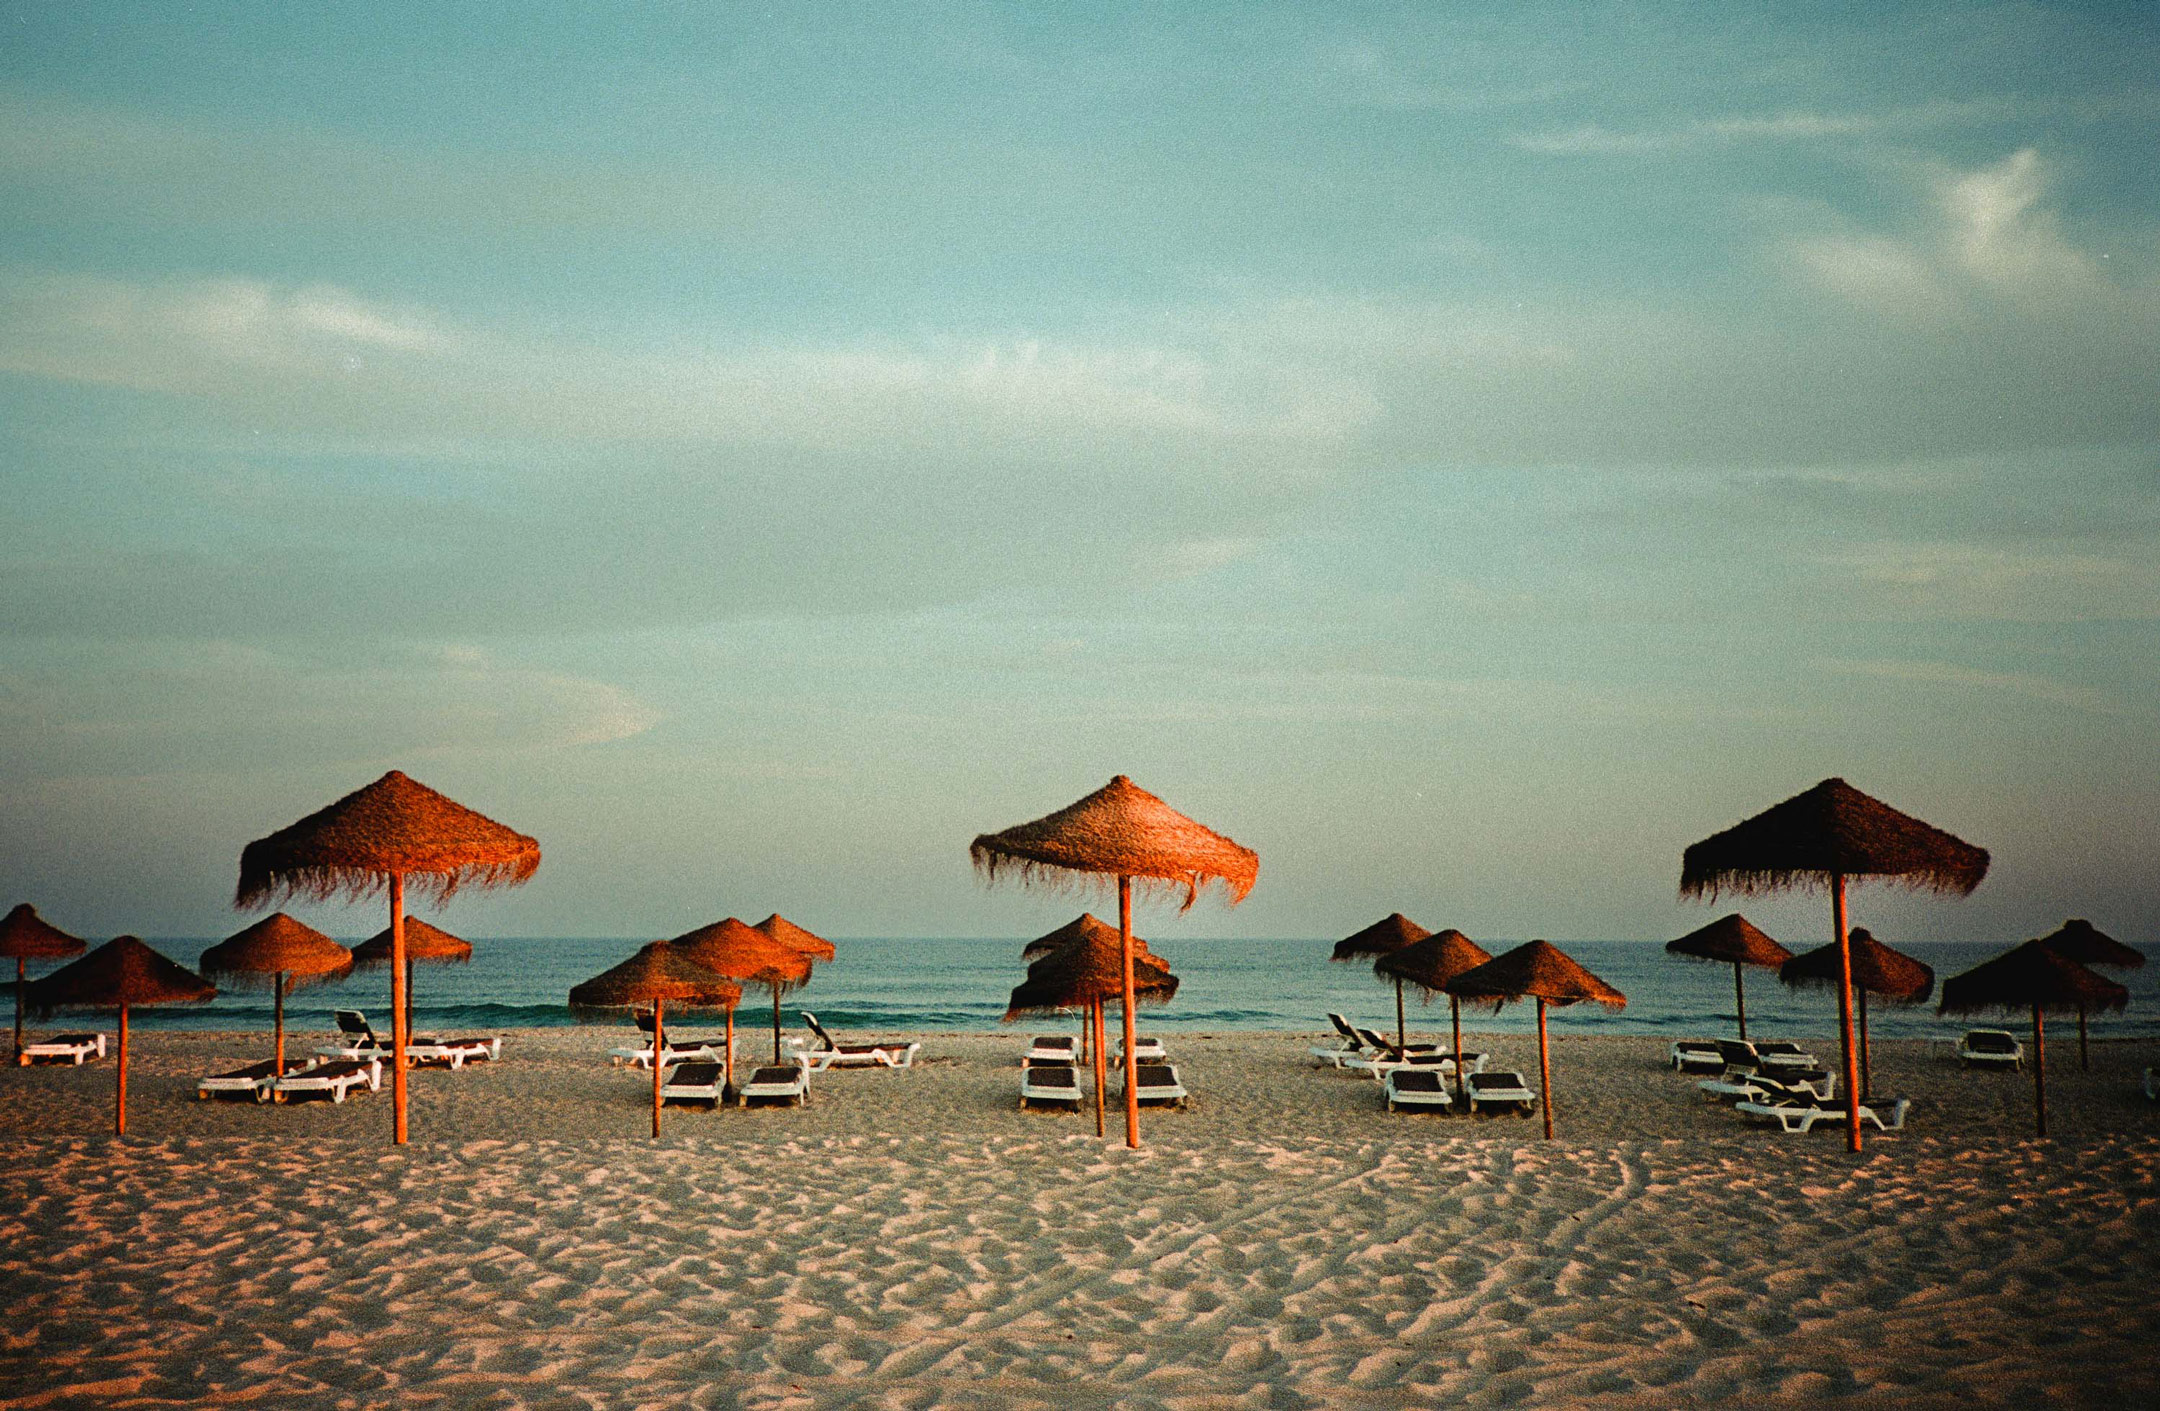
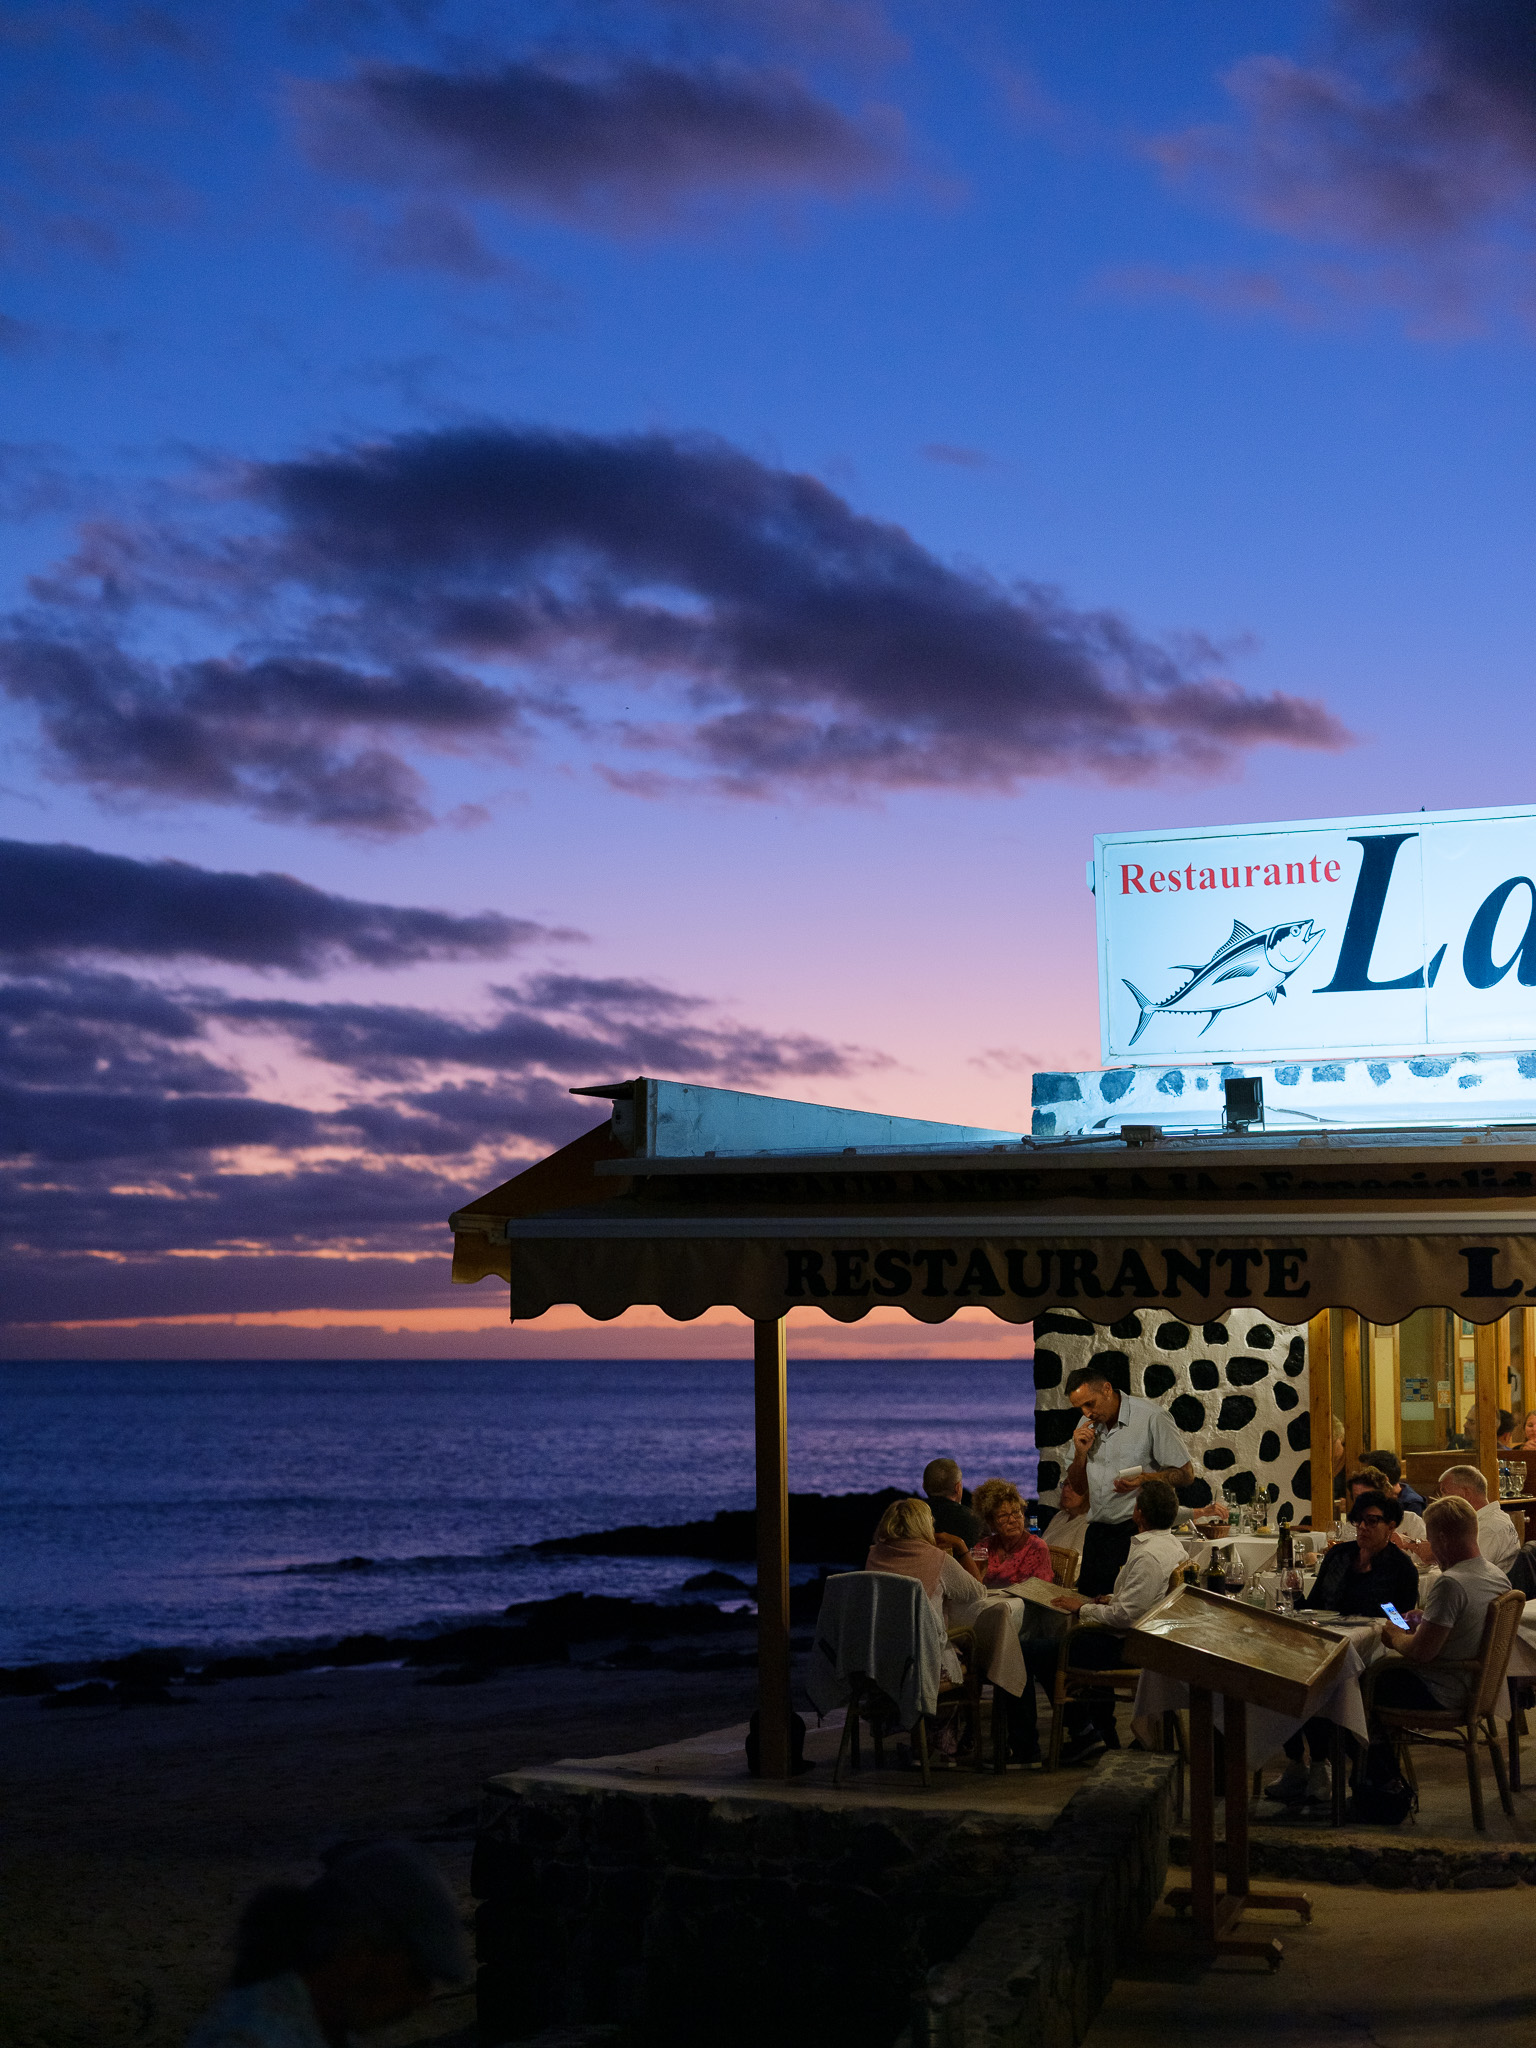
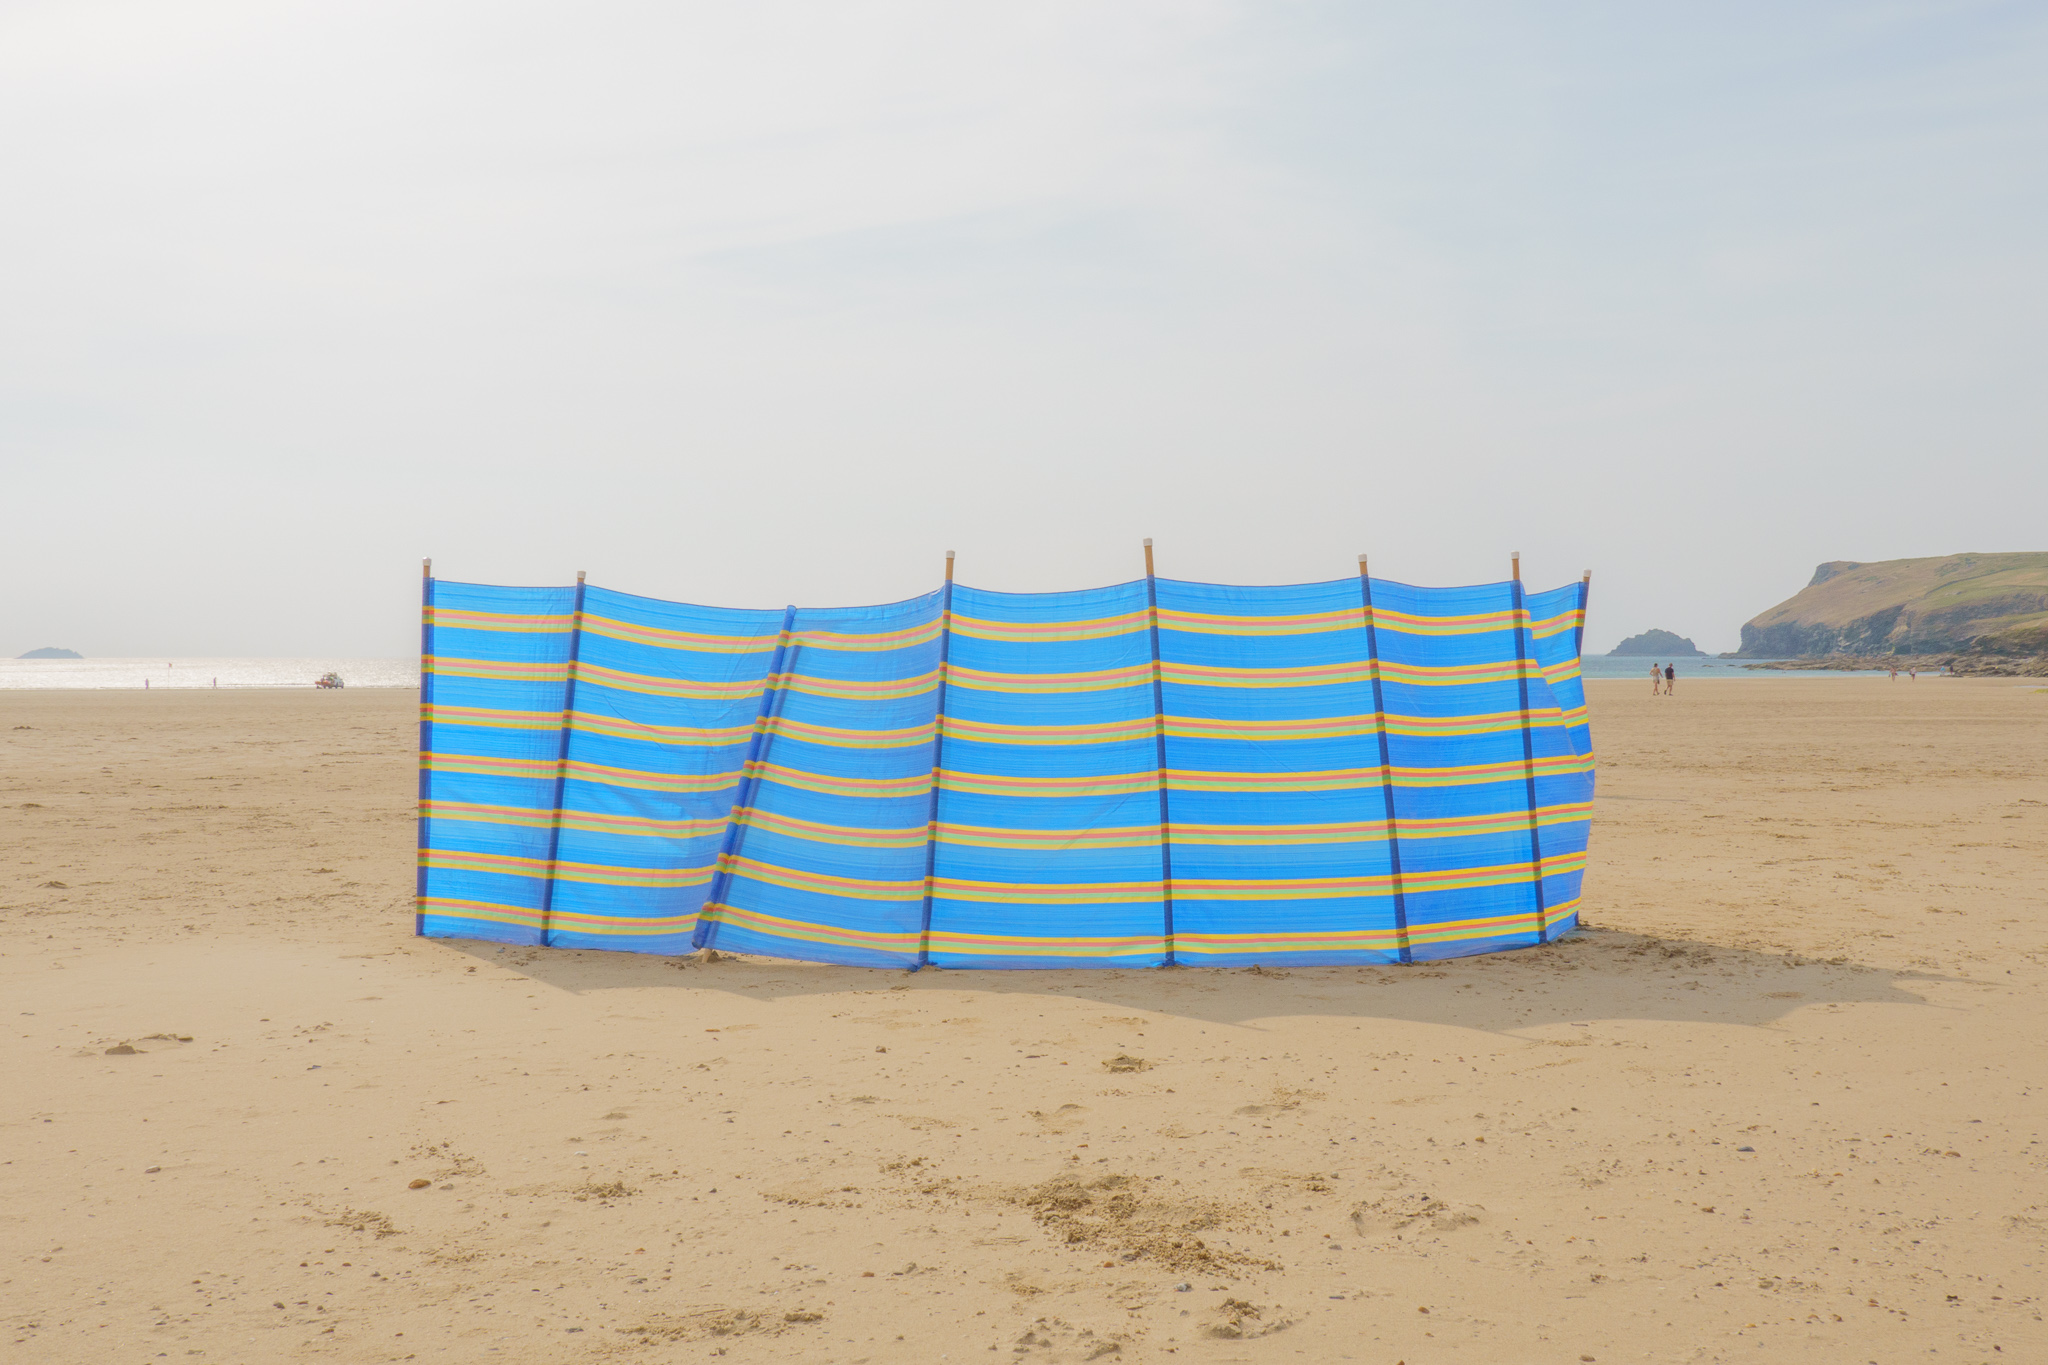
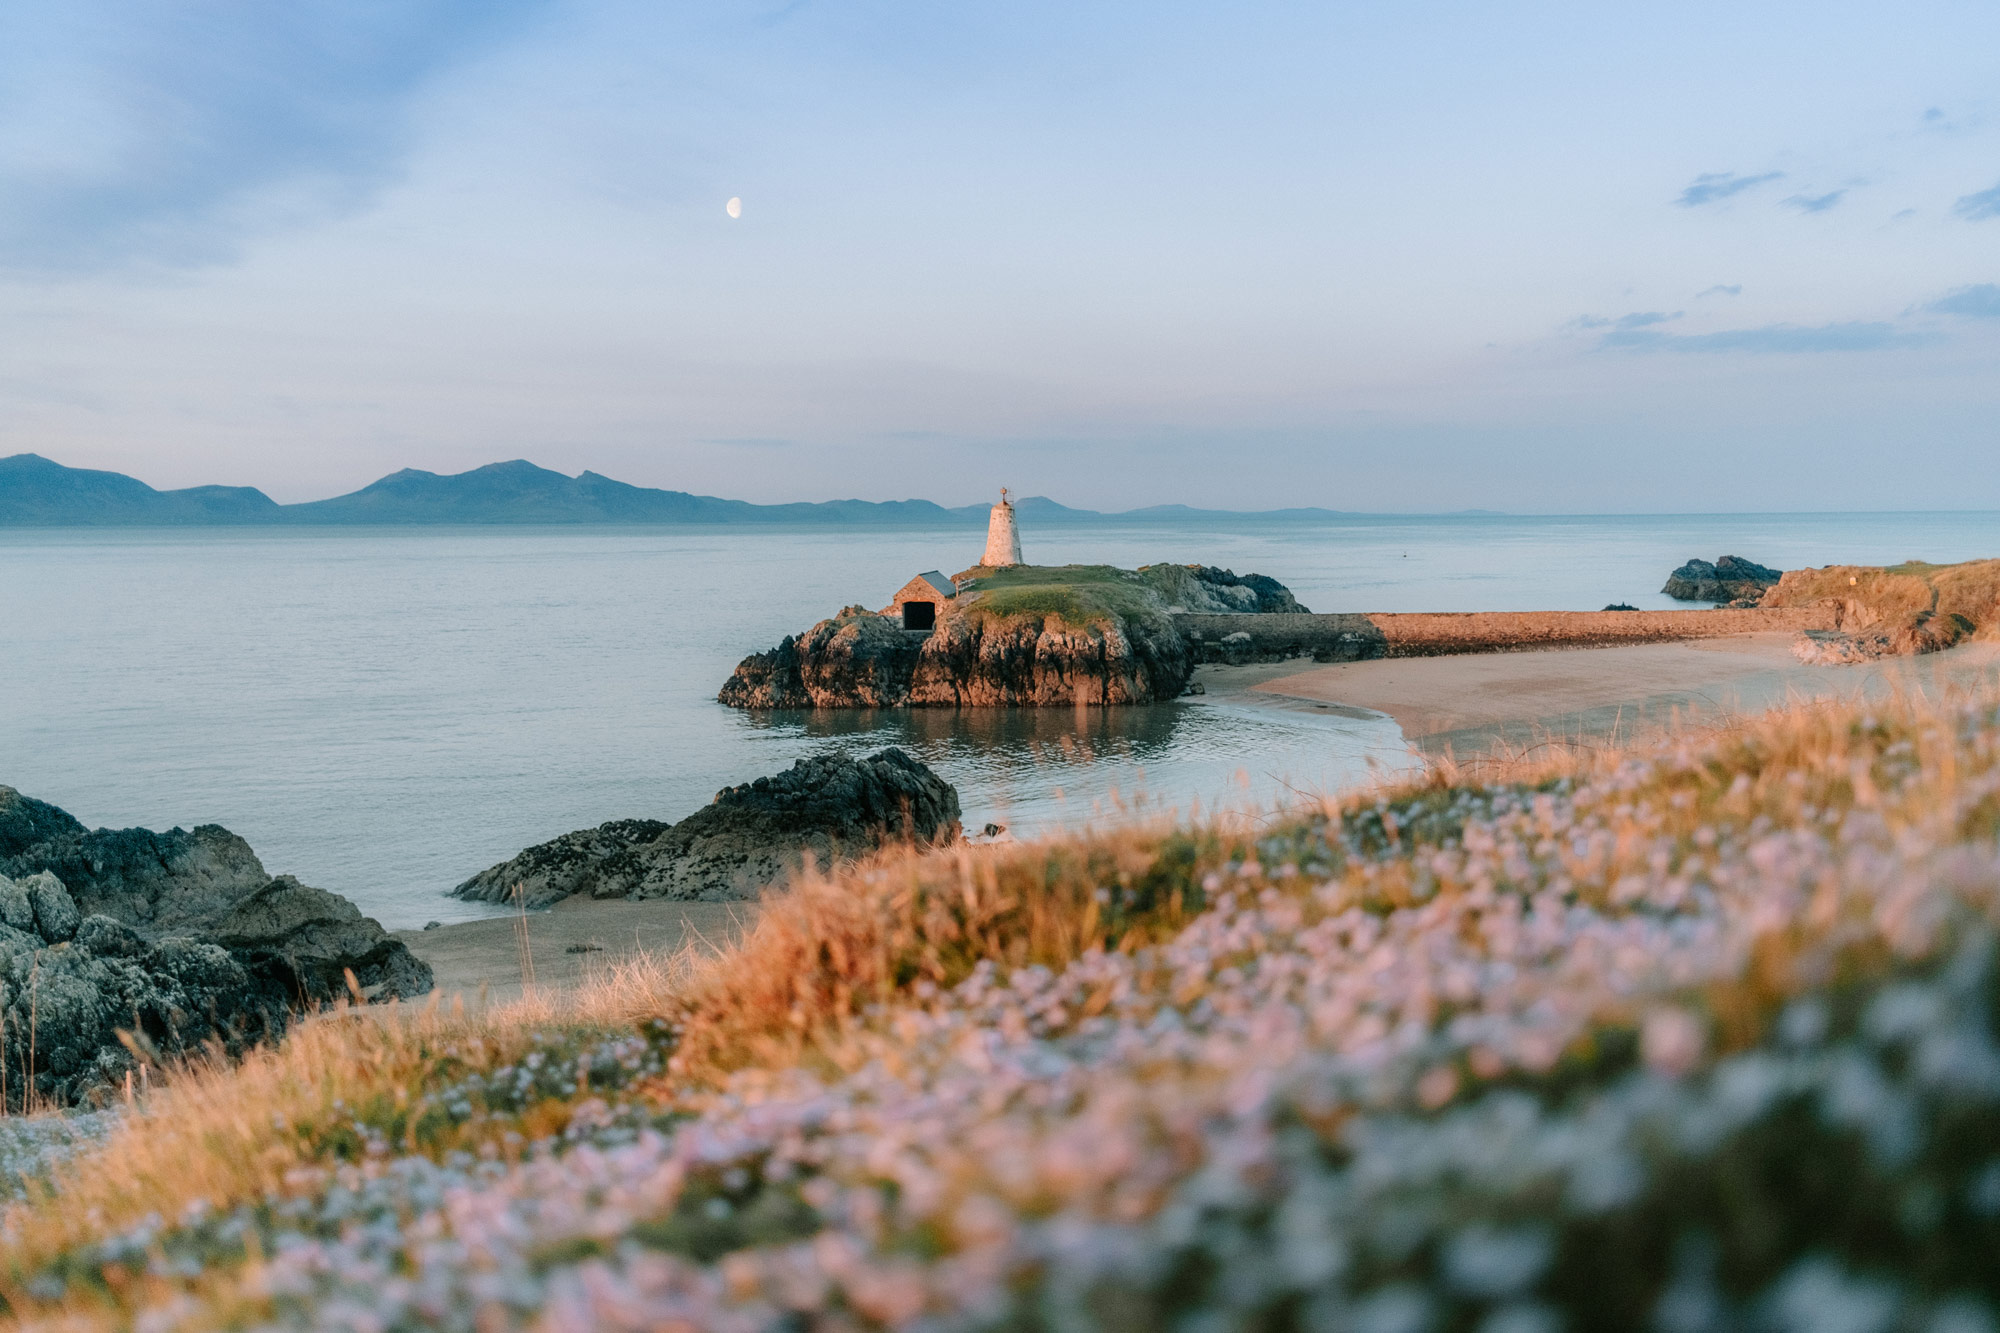
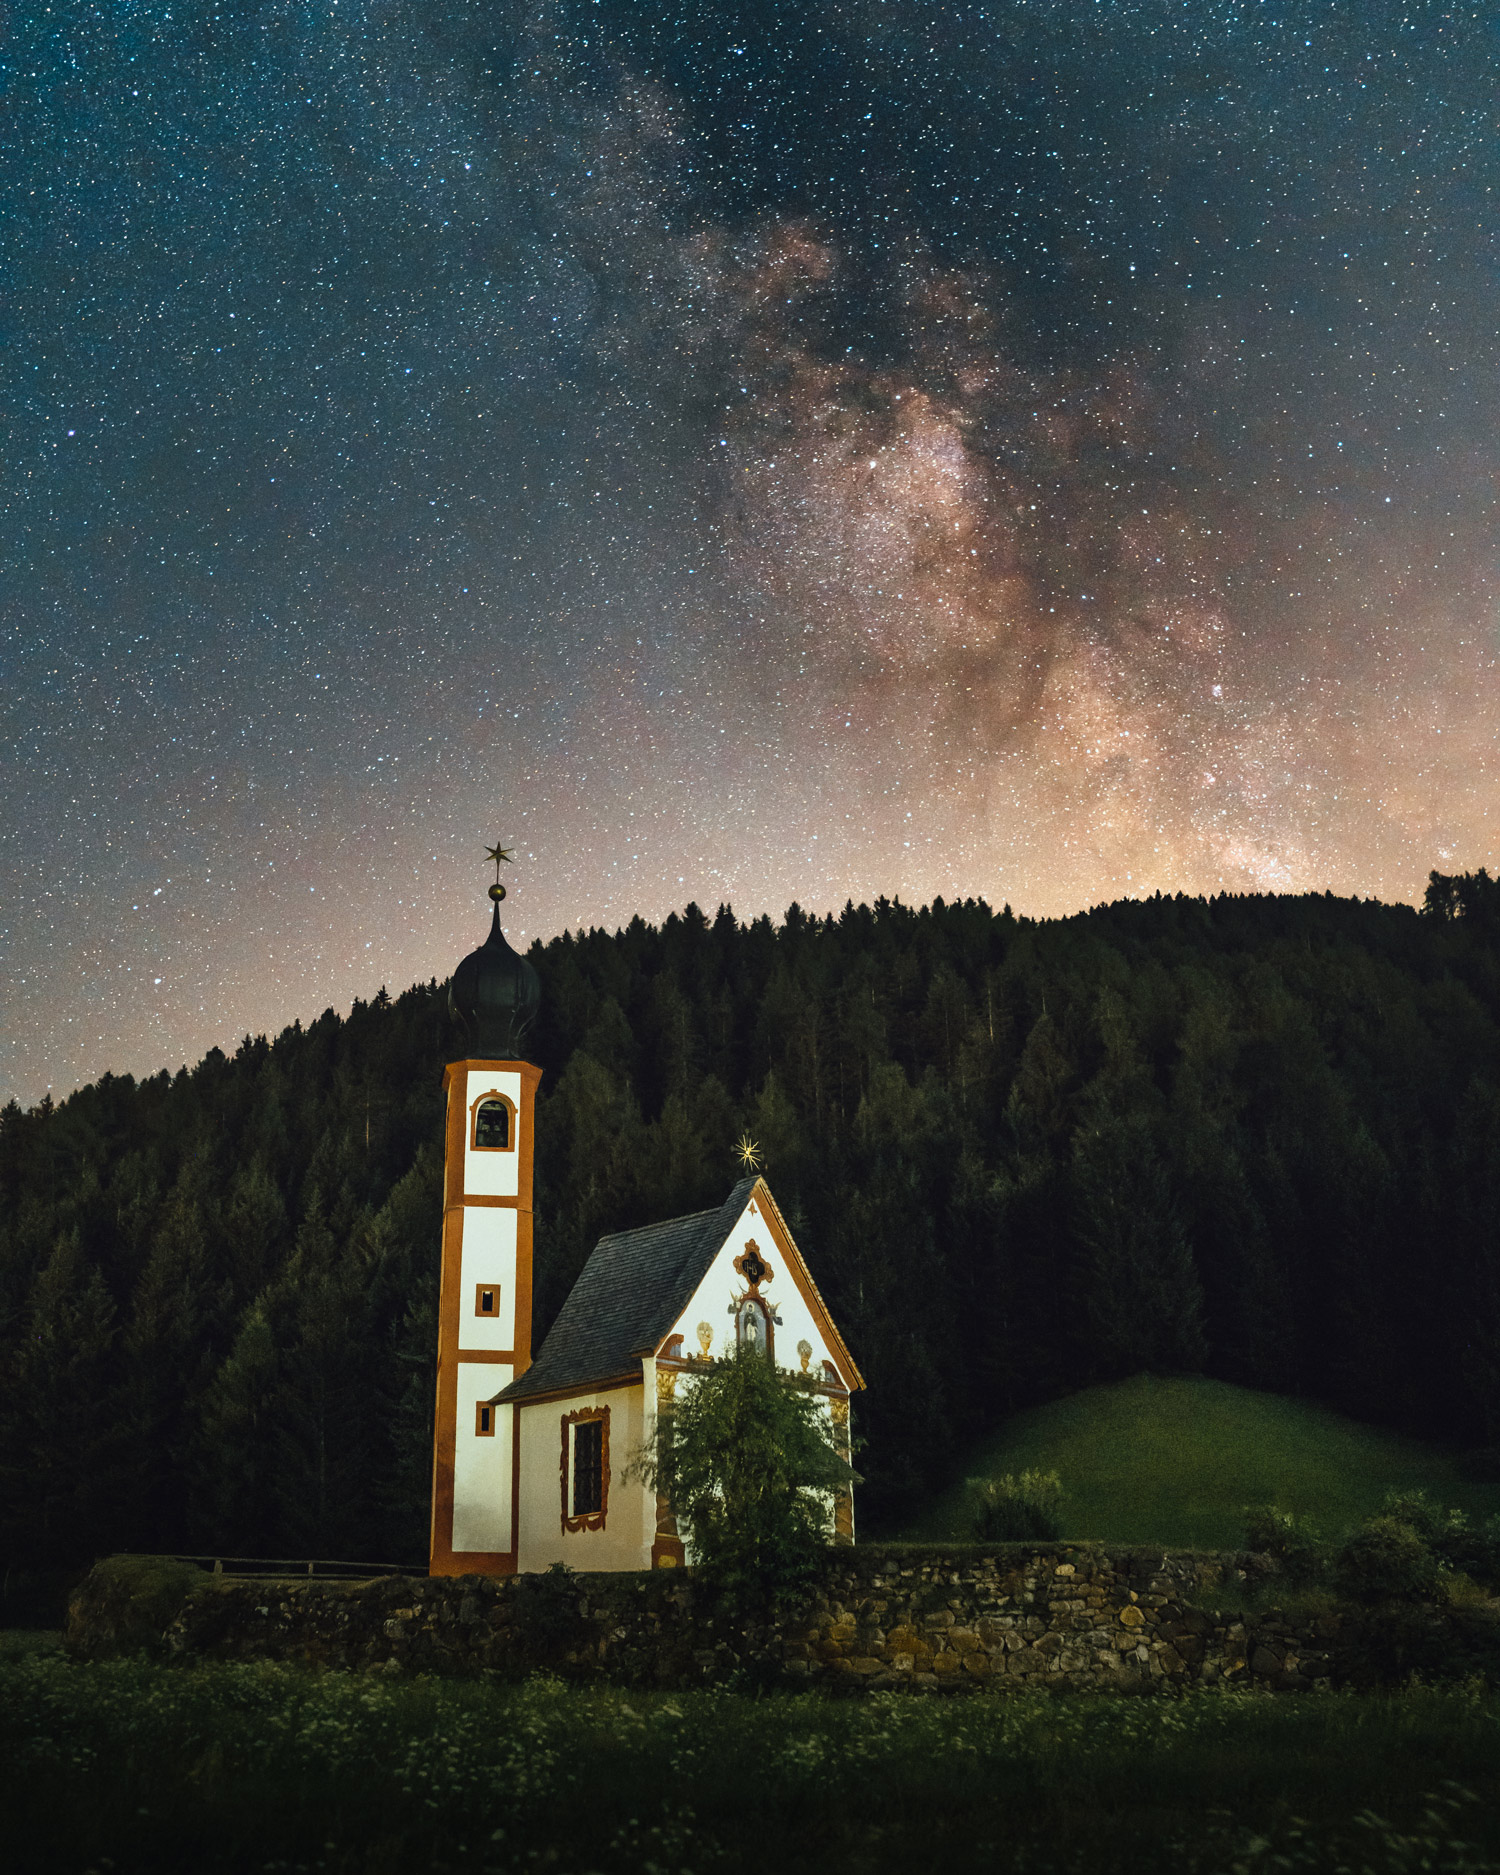
The famous ‘golden hour’ refers to the daylight conditions just after sunrise or before sunset. These lighting conditions are excellent for outdoor photography—including travel photography—due to relatively indirect sunlight casting softer shadows and red-gold tones. Similarly, ‘blue hour’ refers to the blueish light created before the start and after the end of golden hour.
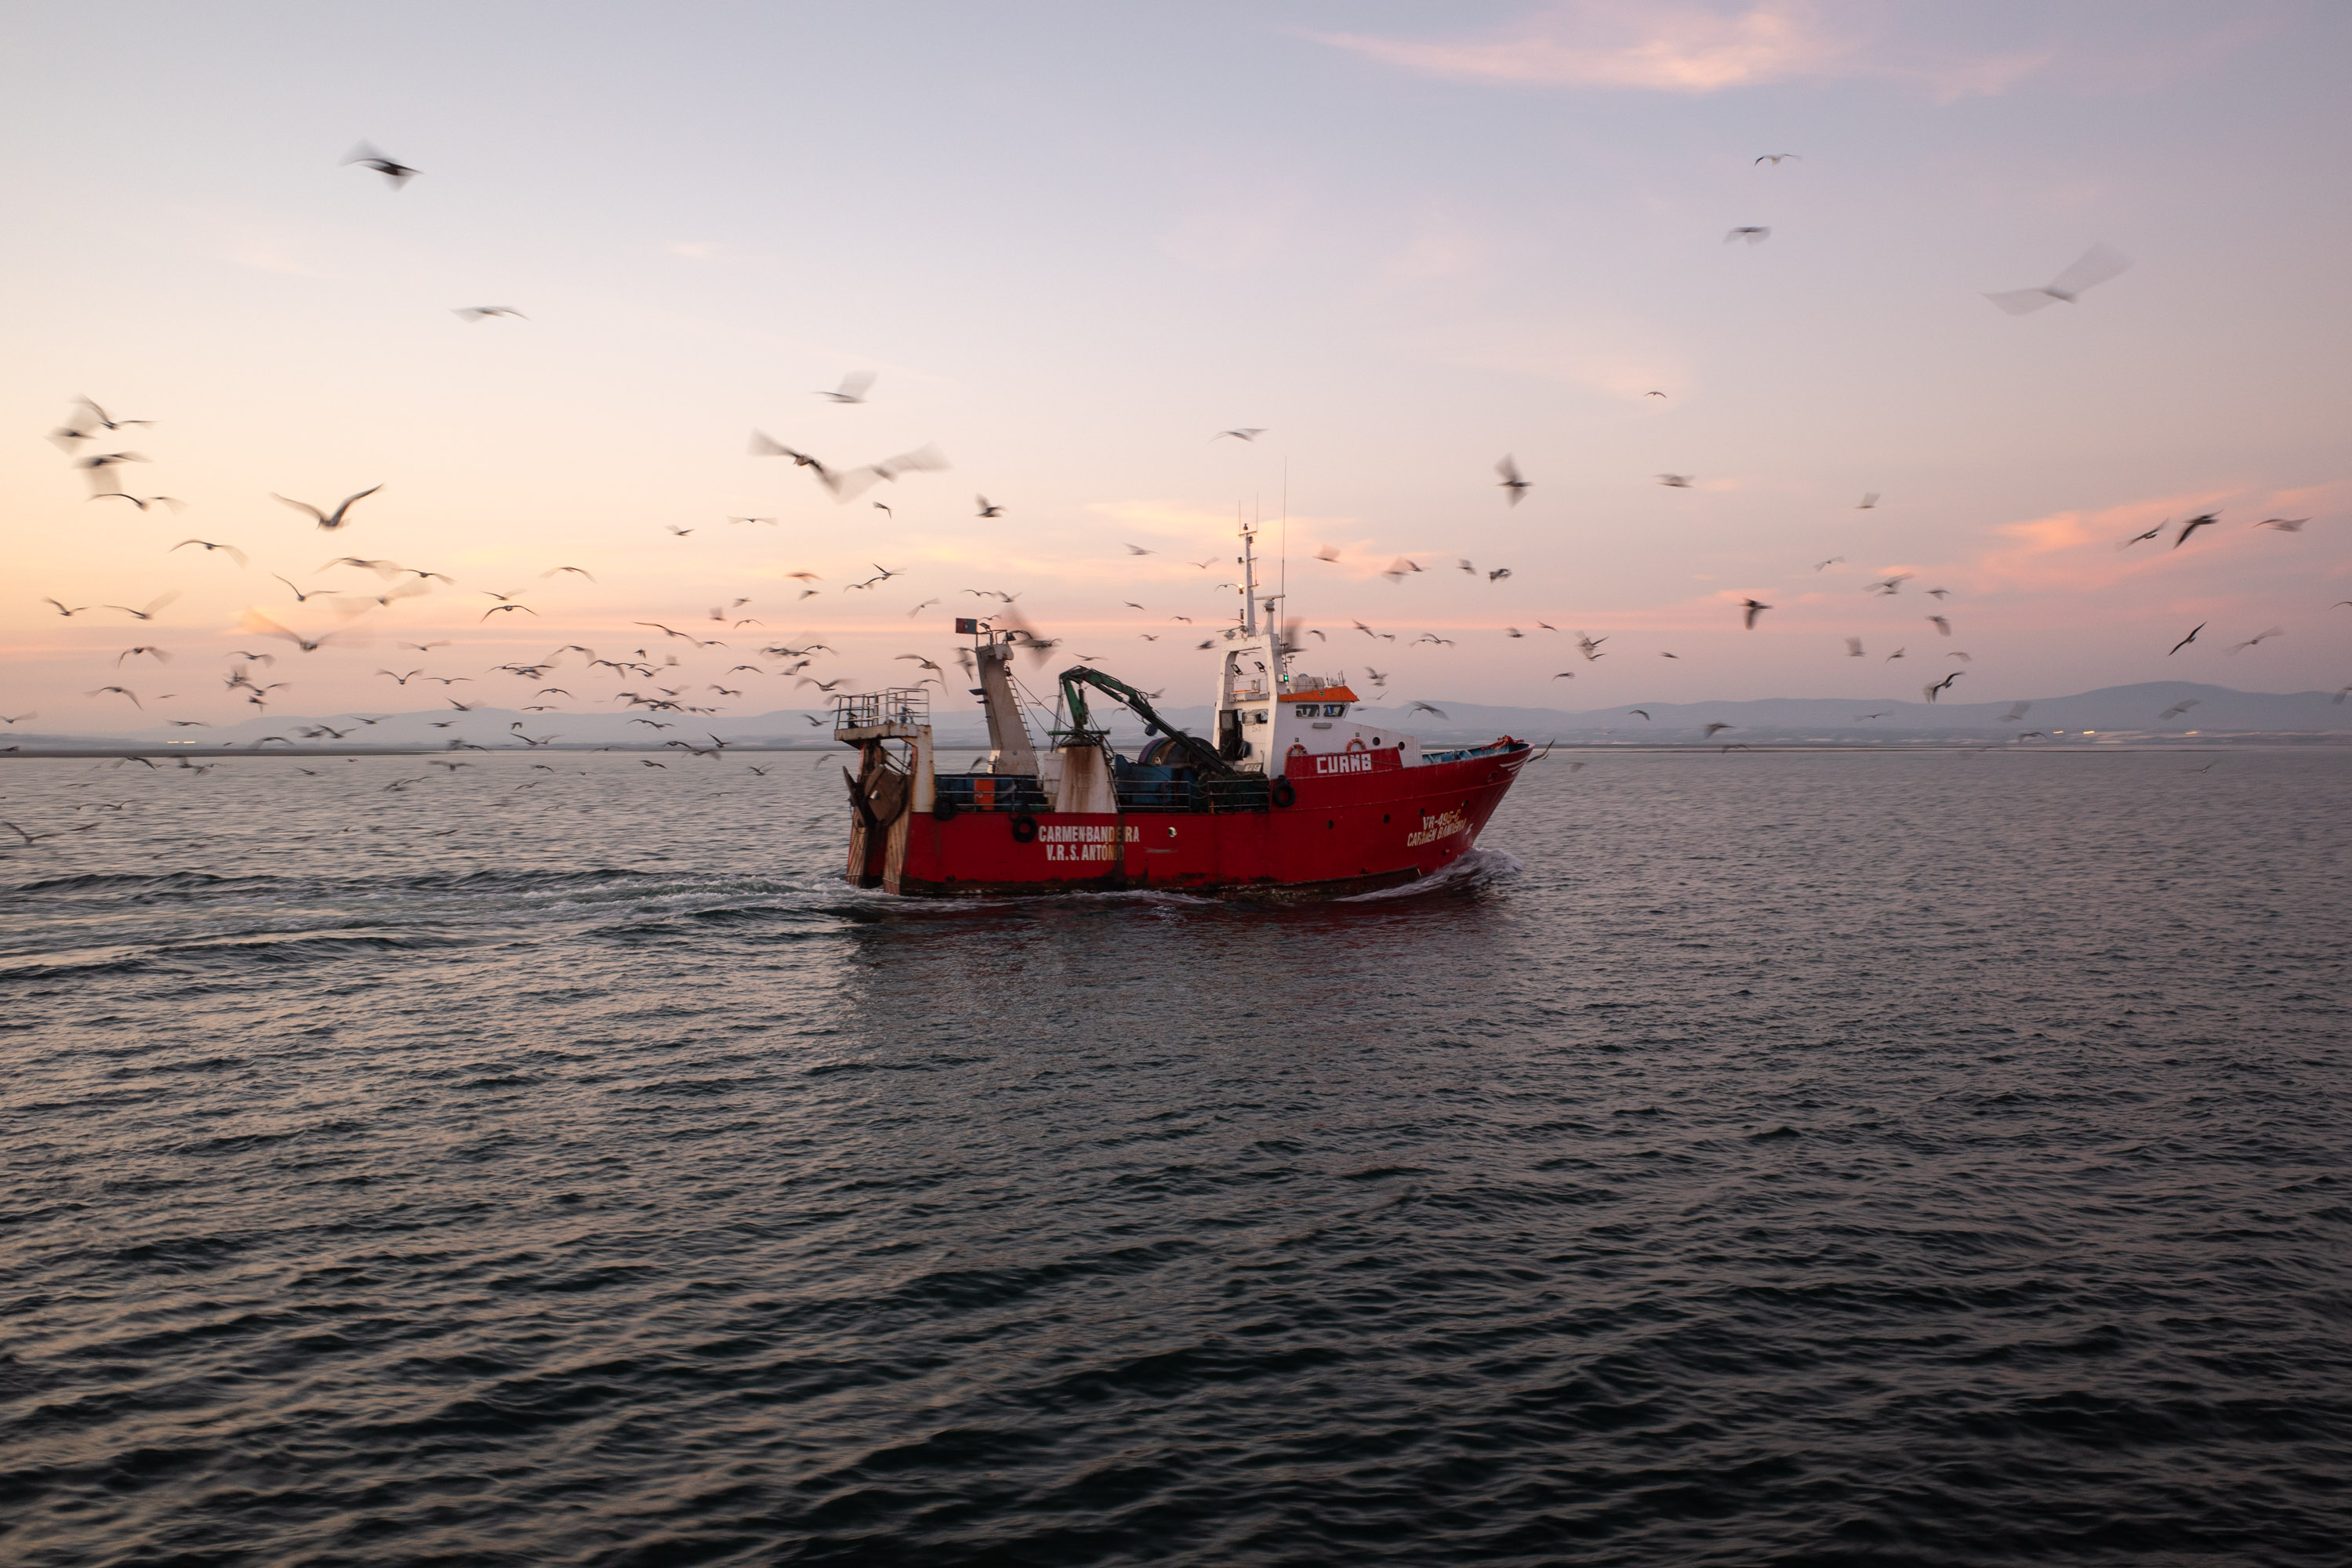
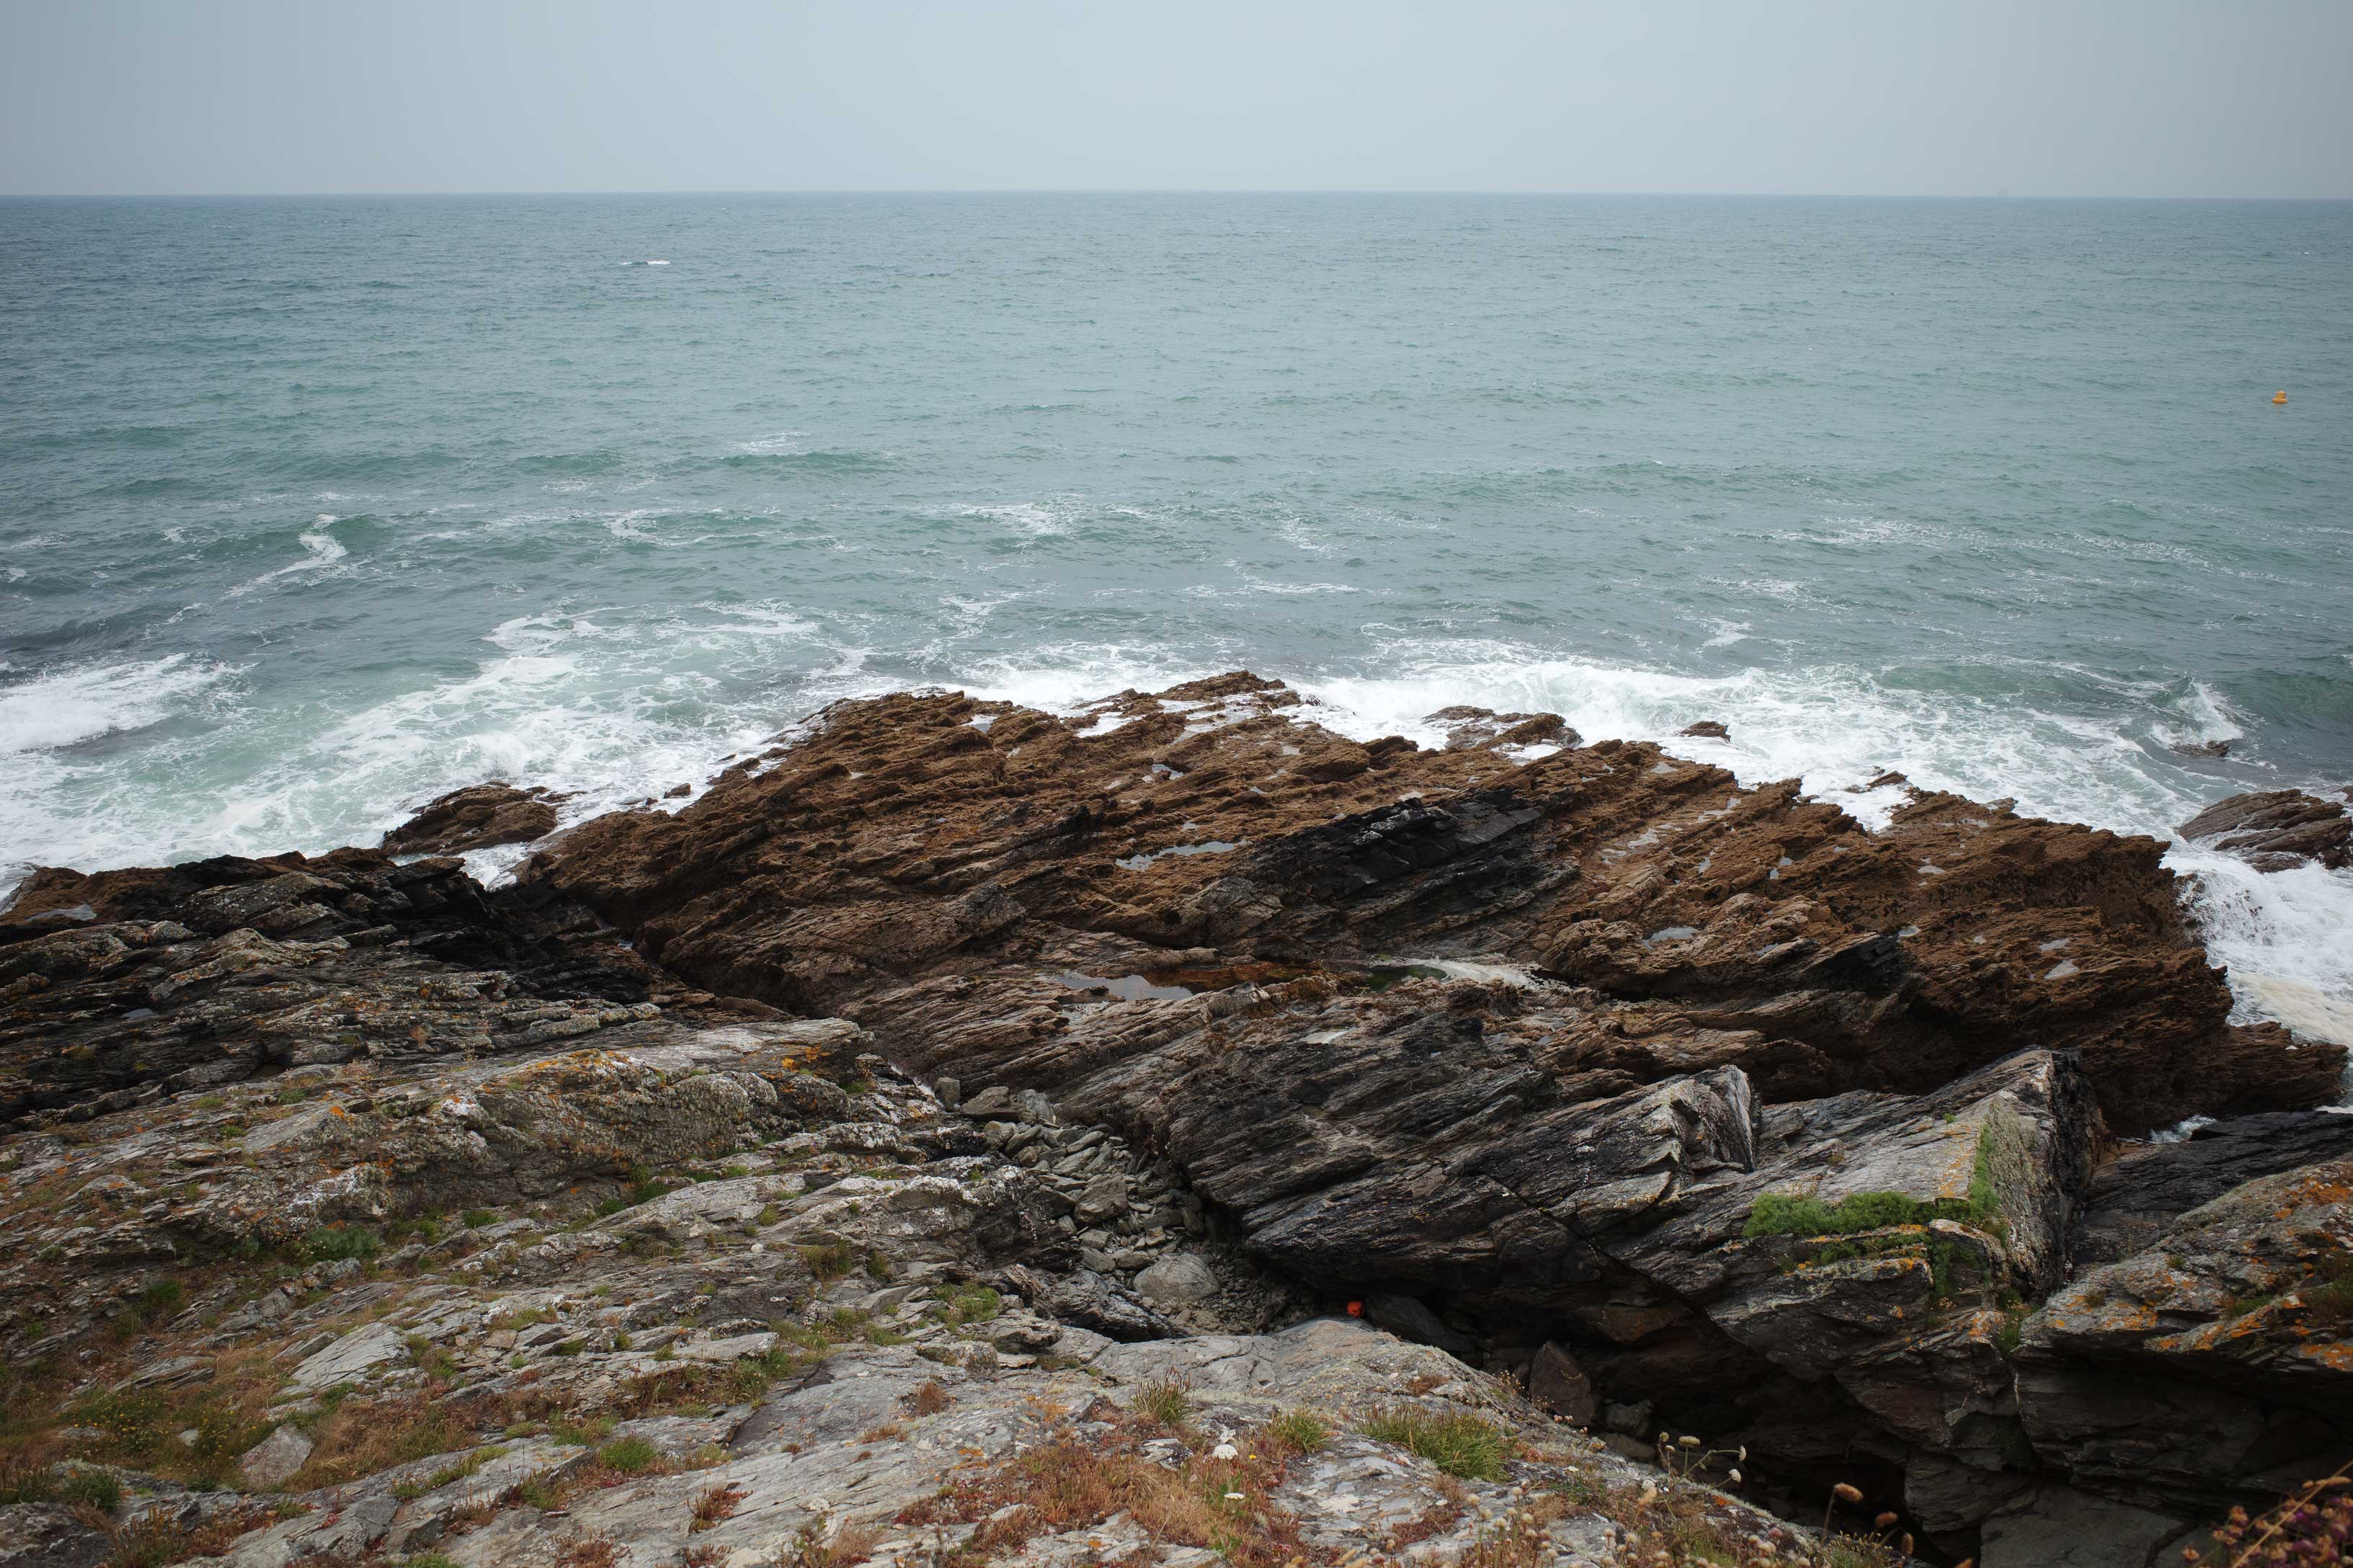
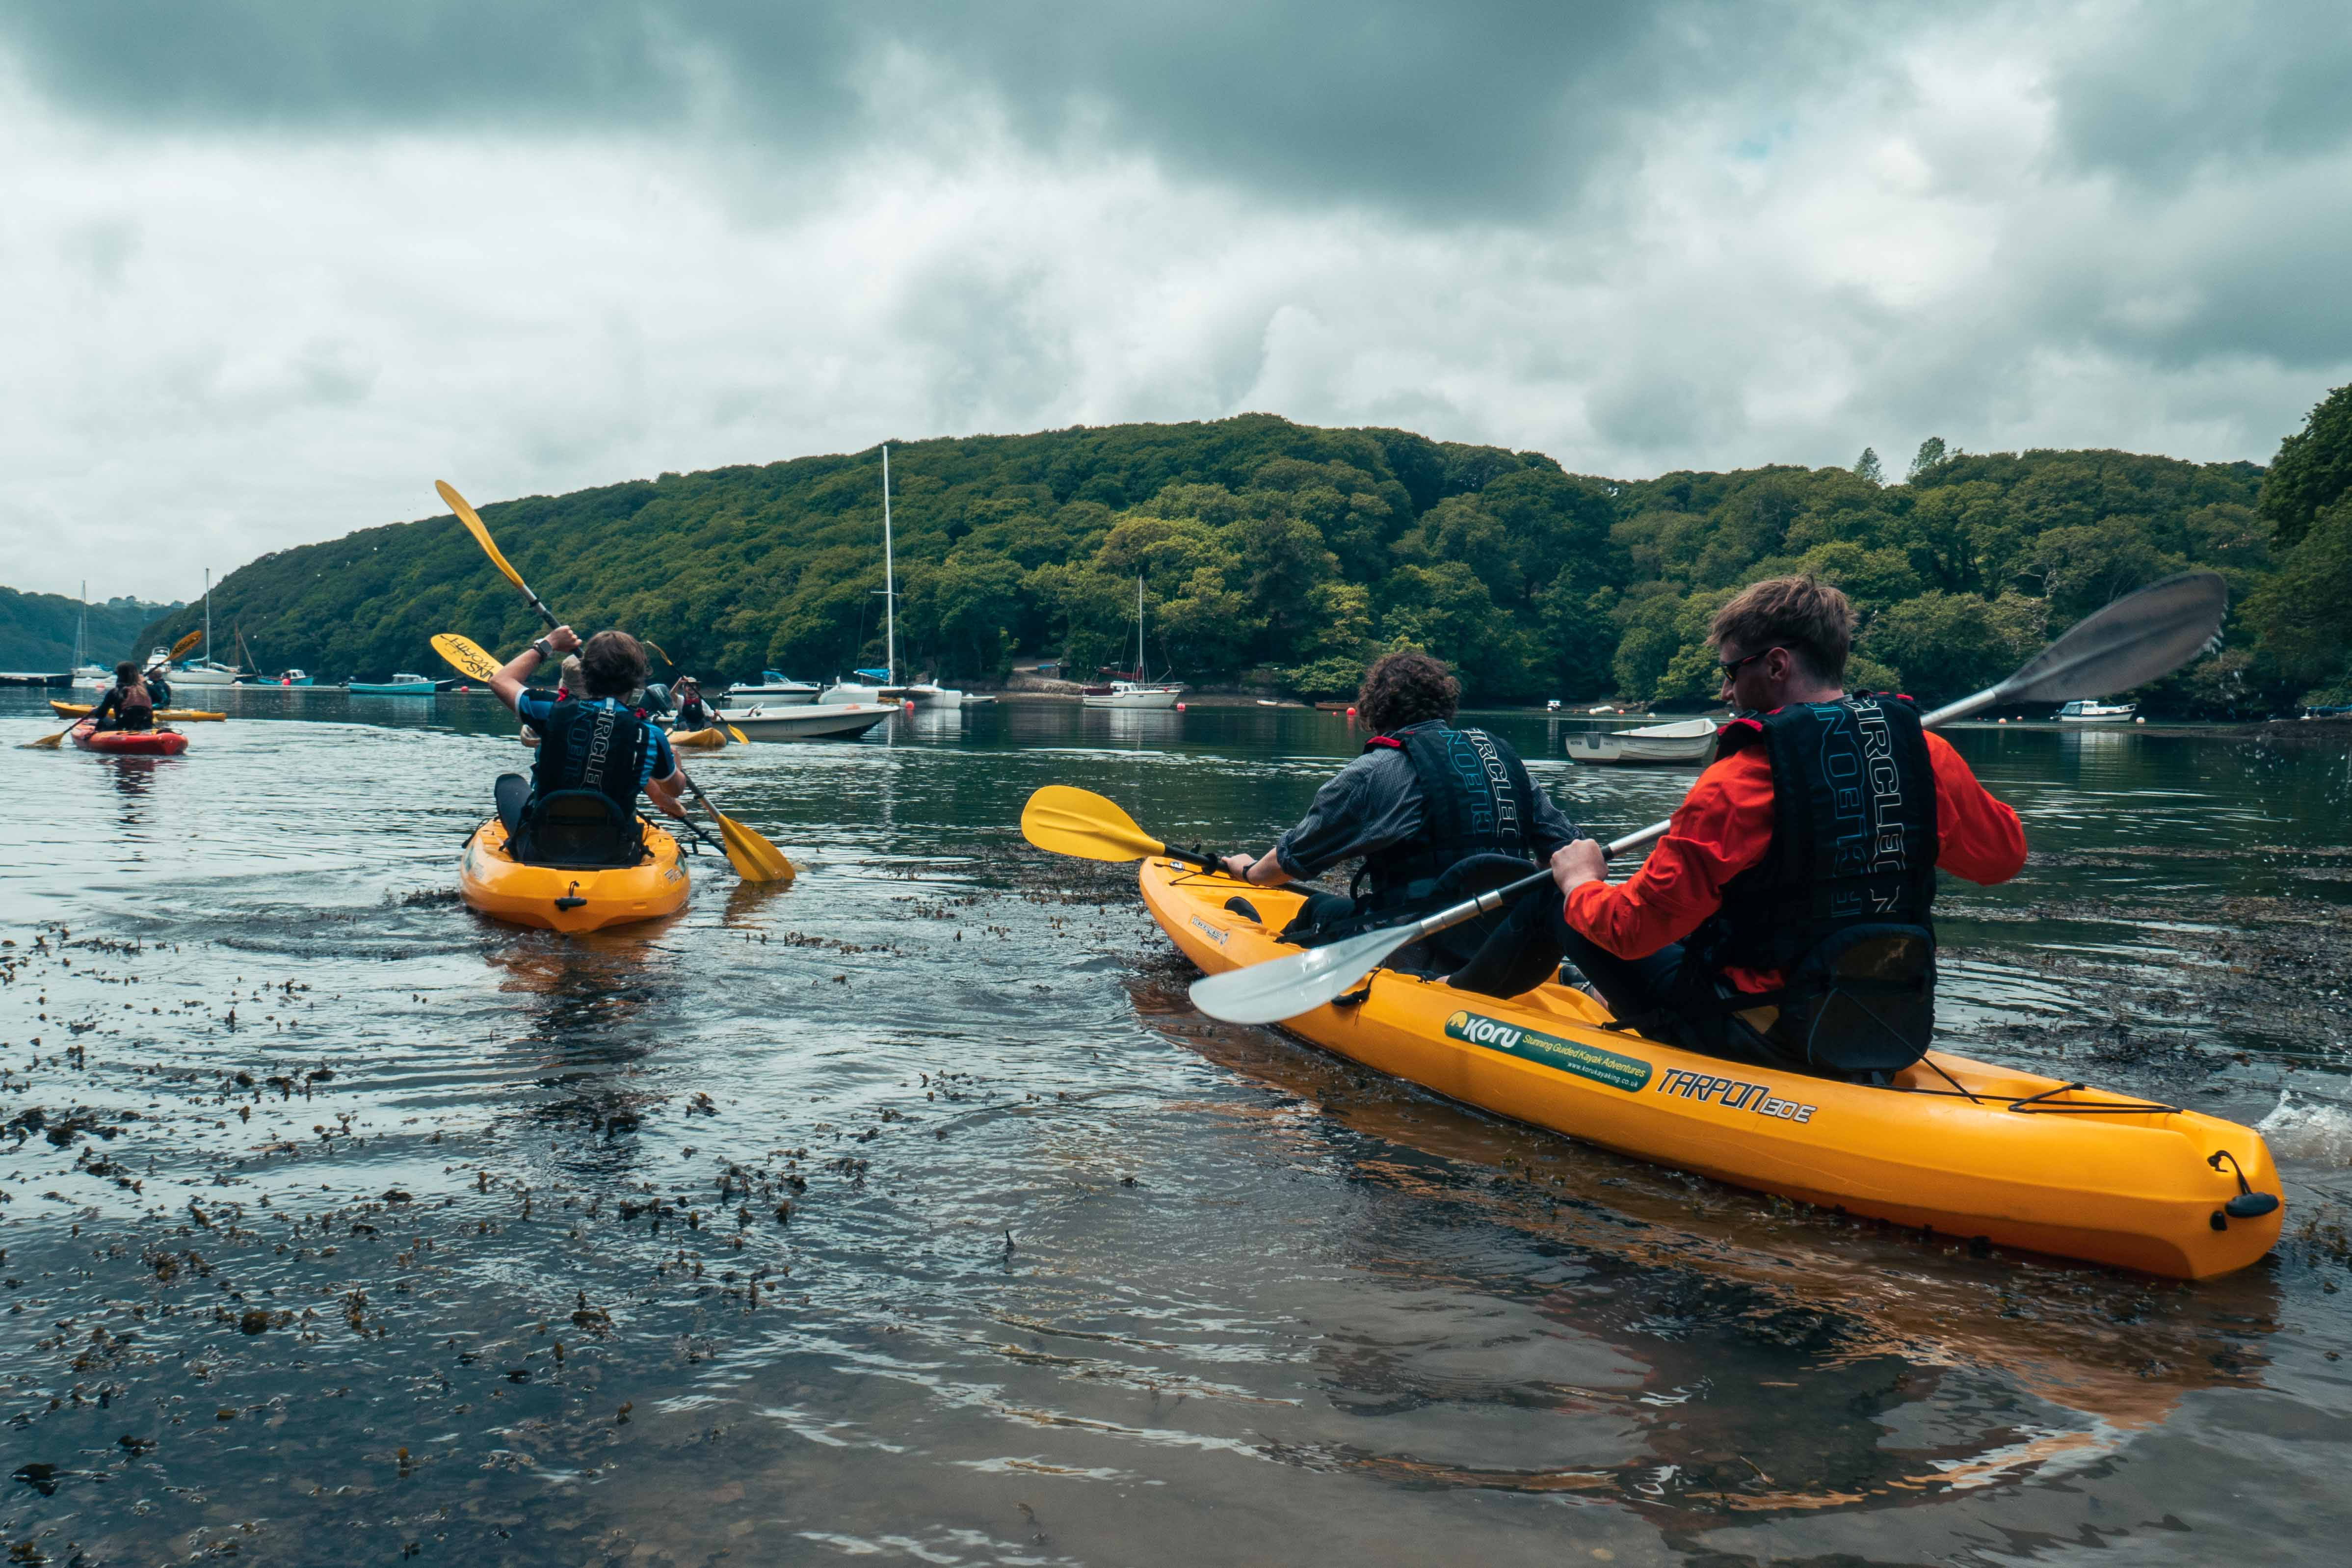
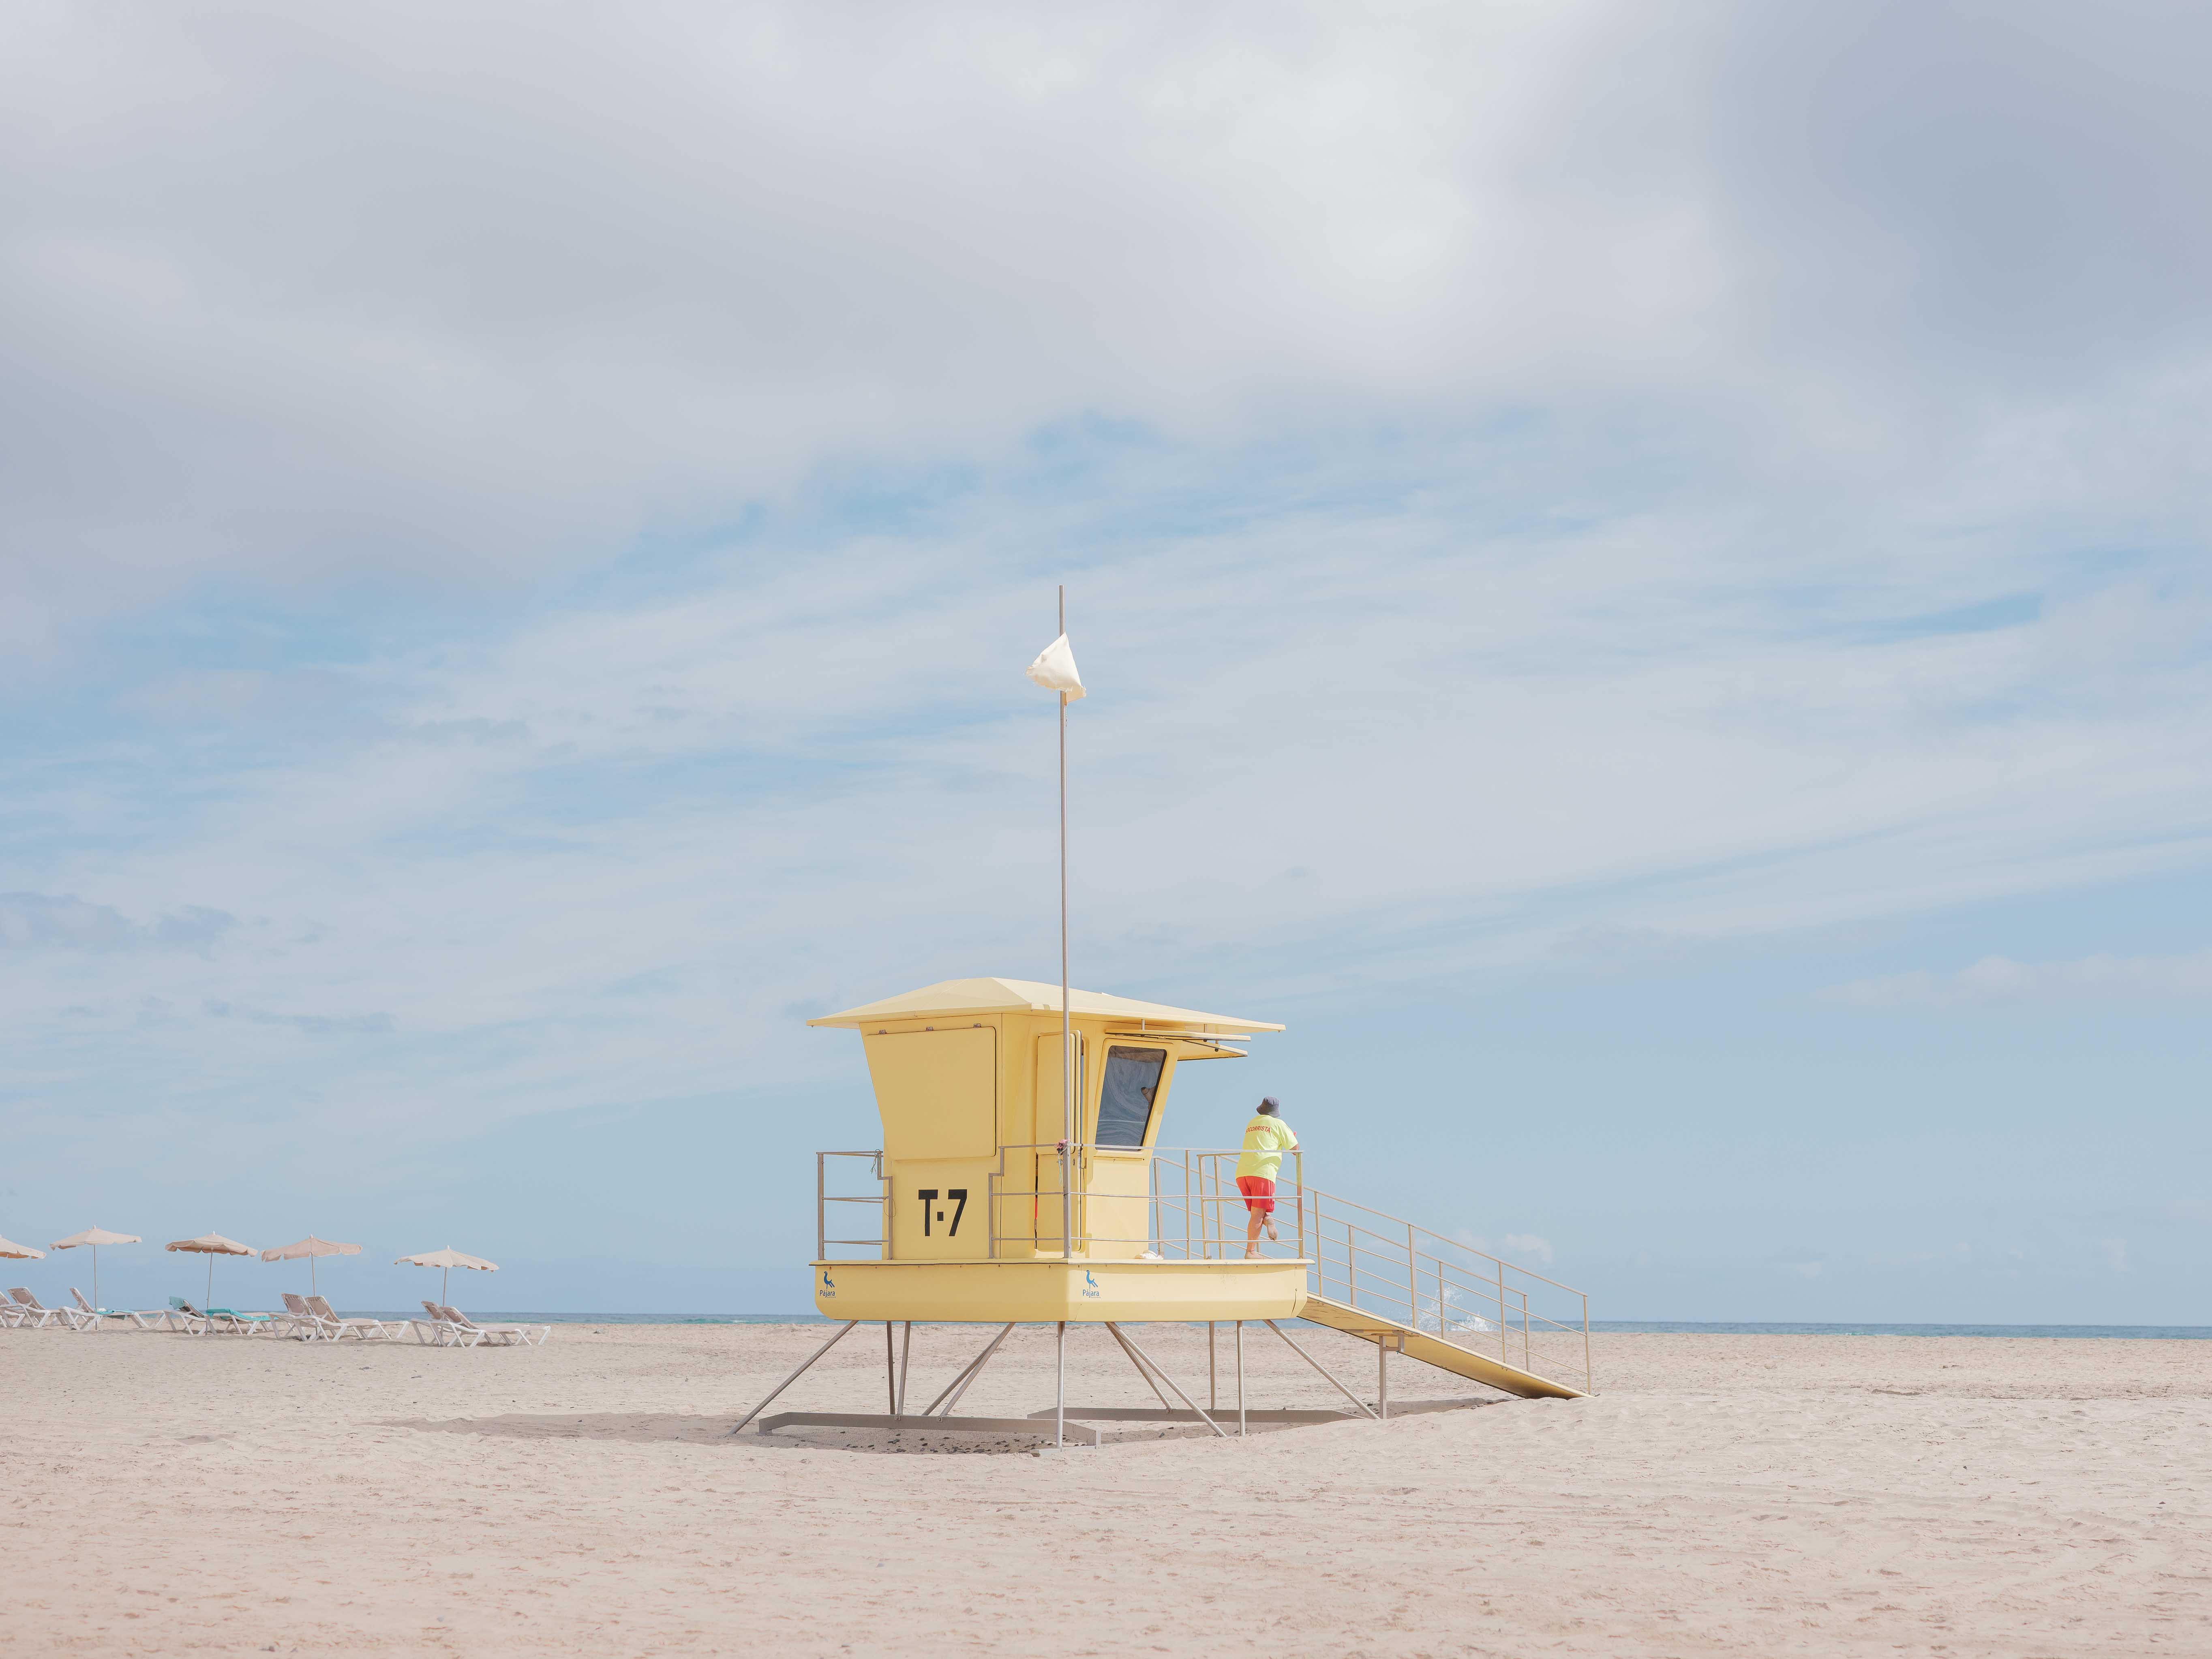
Weather conditions can also add mood to your travel photography. Many photographers love fog for its ability to scatter light, block any background clutter and create more depth. Meanwhile, a cloudy day can reduce direct sunlight, which leads to softer shadows and more pleasing imagery. During rainfall, wet roads can create interesting opportunities to play with reflections. When creating travel photography, your time is usually rather limited. You can’t always wait for the ideal weather conditions. So, the trick is to know how to make those conditions work to your advantage.
Ian Howorth
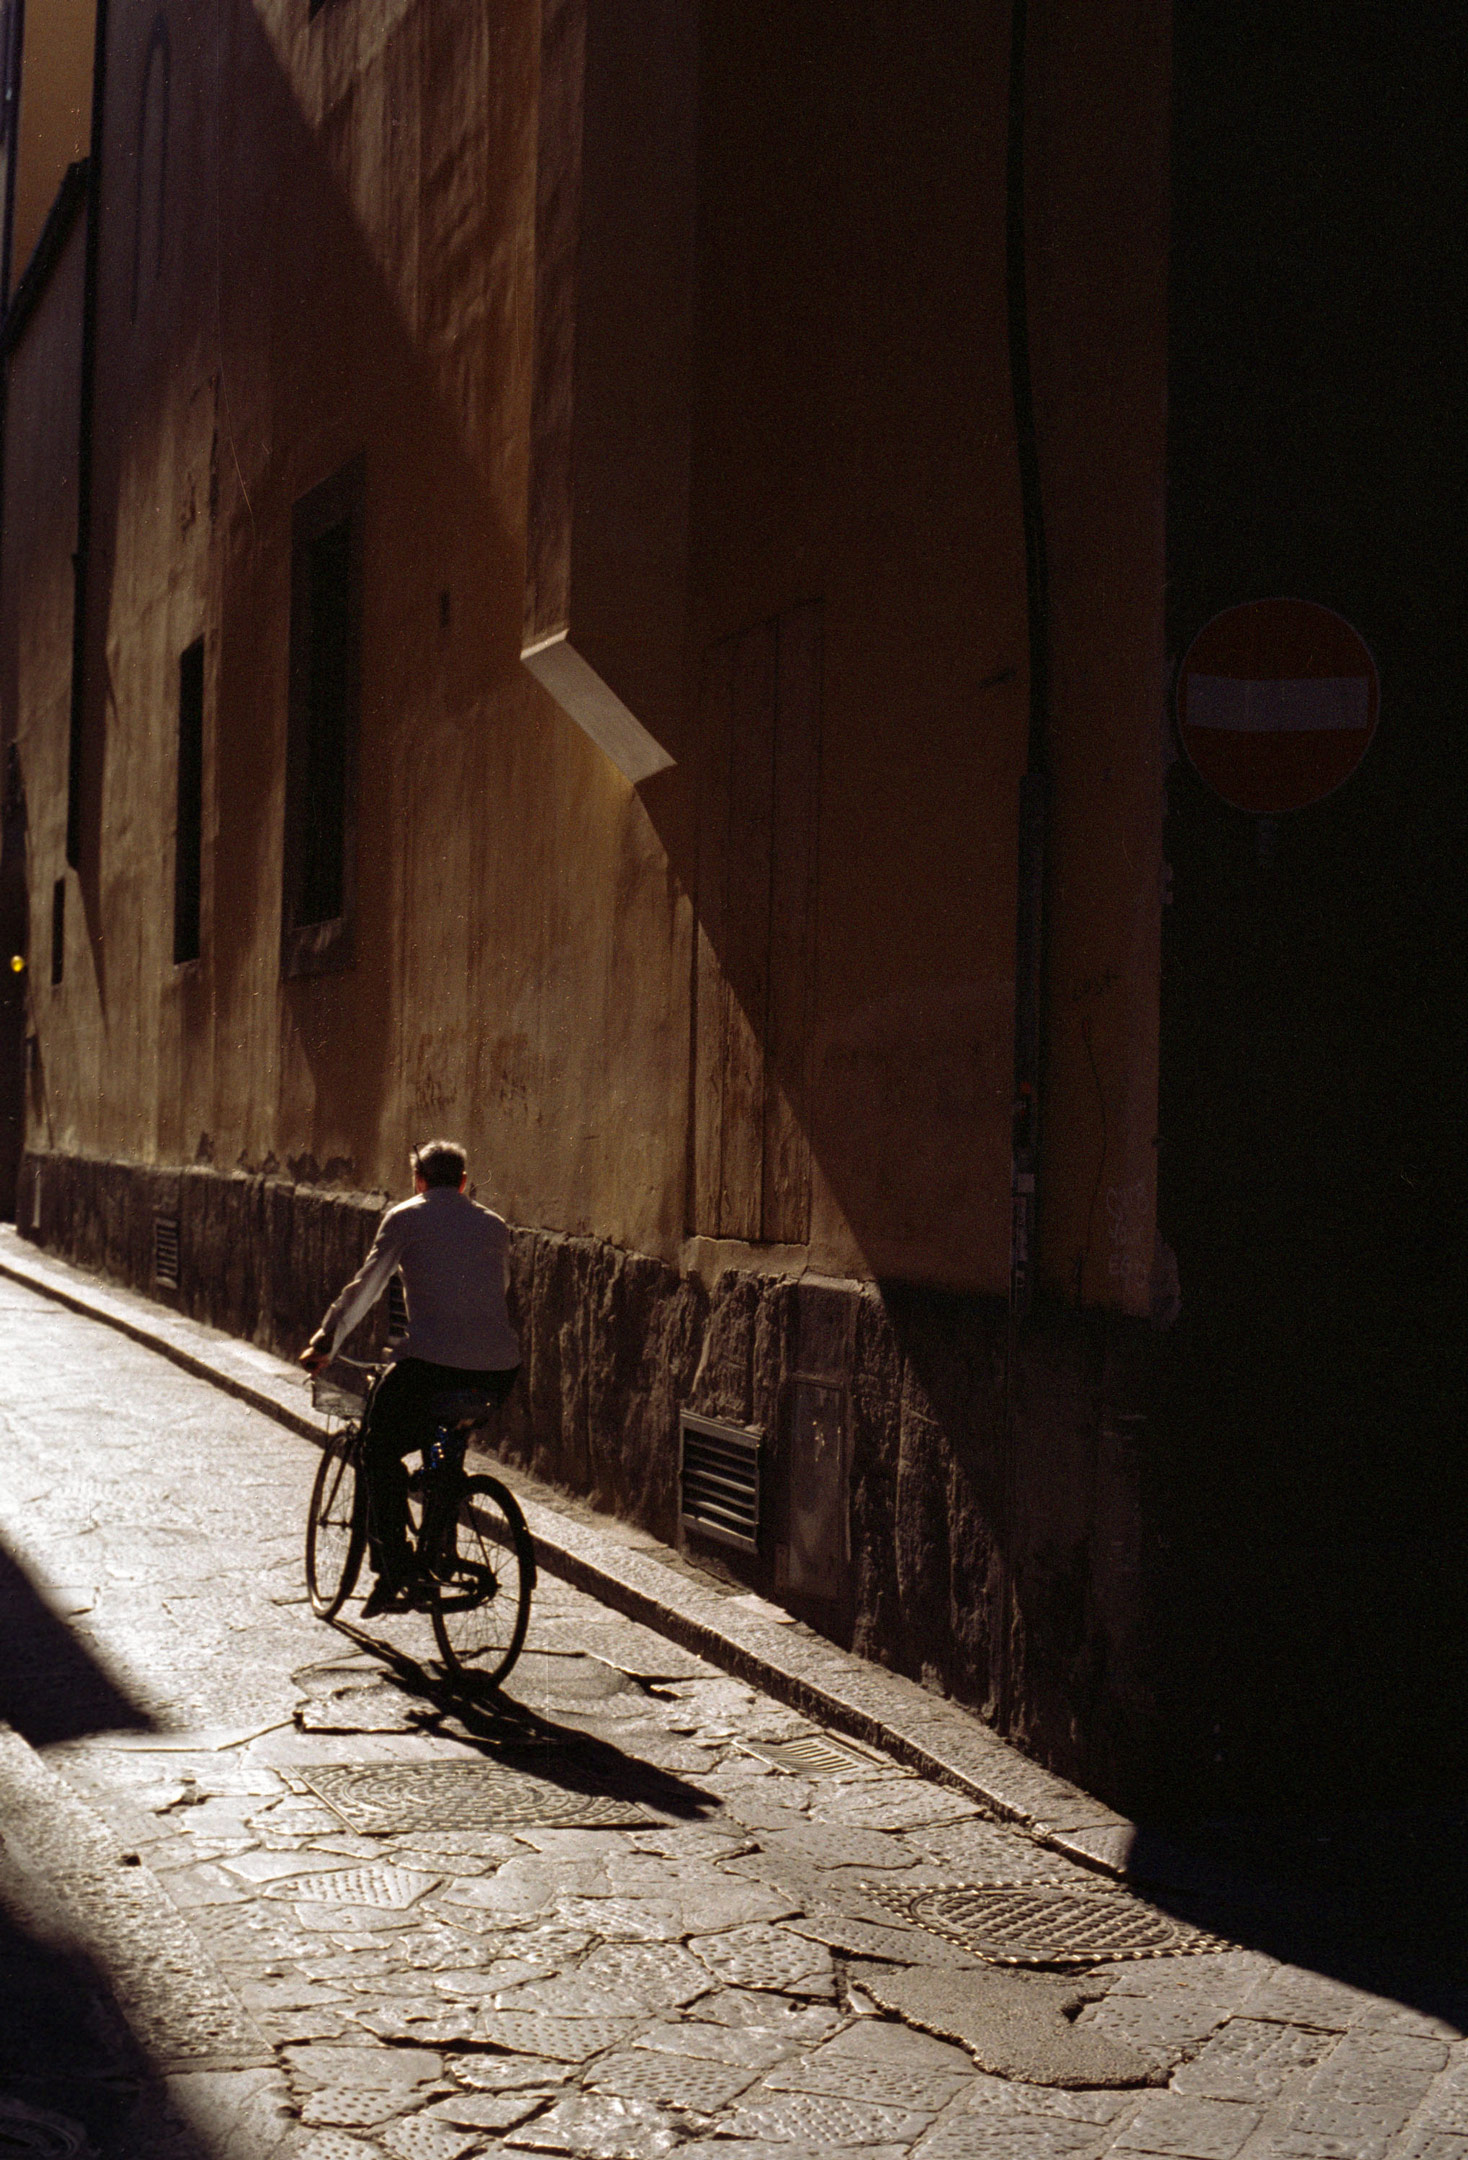
7. Take notes
Sometimes, you might be at the right place at the wrong time. Making a note of the location and the best time to capture the shot you want can mean the difference between a bad shot and a great shot. Sunrise and sunset might both give you perfect light, but the shadows cast in different places—and this might make all the difference in getting the light exactly where you need it.
Ian Howorth | Ricoh GR III | f/5.6 | 1/800 sec | ISO 400
Best Camera Settings for Travel Photography
As travel photography is a genre that involves capturing a wide range of different subjects, you’ll need to be confident in understanding which camera settings to use in any given situation. A breathtaking mountaintop view will require completely different camera settings than a candid street photography snapshot or an impromptu encounter with unexpected wildlife. However, many factors stay true—whatever the sub-genre of travel photography—and this section will cover many of those factors.
Shoot in RAW & edit your photos
Set your camera to shoot in RAW. Remember to get a high-capacity SD card. Some cameras will allow you to shoot in both JPEG and RAW simultaneously, so you can quickly review your images and mark the corresponding RAW files accordingly. RAW files contain much more data, which you can use in your editing software to bring out the best in your photos.
Ian Howorth | Ricoh GR III | f/5.6 | 1/20 sec | ISO 400
Use semi-auto modes first, then manual
It can seem daunting to jump straight into manual mode. At the start, it takes a while to understand the exposure triangle—the relationship between ISO, aperture and shutter speed—let alone how to change the three factors instinctively. As you build your understanding, try using the auto and semi-auto modes first. Even some professional photographers still rely on these, especially aperture priority and auto ISO. Let’s look at the different modes and what they mean for your travel photography.
Automatic mode
There’s no shame in starting with your camera on automatic mode as you get to grips with framing and composition. Auto mode will restrict your creativity and may lead to unintended blur, but it should at least ensure your exposure is correct. Next, you can move on to one of the semi-automatic modes, which allow you to control one or two of the factors while the camera automatically controls the rest.
Remember, if there’s an unmissable moment unfolding in front of you and you don’t have enough time to think about your settings, you can always switch back to auto quickly to make sure you get the shot. Although, with enough practice, you won’t need to.
Aperture Priority mode
Want to use a shallow depth of field to create an out-of-focus background—or bokeh—behind a still subject? Use Aperture Priority mode (‘A’ or ‘Av’ on most cameras) and set your aperture to a lower f-number to widen your aperture.
As more light is now reaching your sensor, your camera will automatically compensate for this by increasing the shutter speed (to reduce the amount of time that light is reaching your sensor) and/or decreasing the ISO value (to make your sensor less sensitive to light).
Likewise, if you’d like the entire scene to be in focus, you can raise your f-number to create a deeper depth of field. Your camera will automatically adjust the ISO and shutter speed to get more light—but you might need to stabilise your camera to allow for the slower shutter speed.
Connor Redmond | Ricoh GR IIIx | f/5.6 | 1/1000 sec | ISO 100
Shutter Priority mode
If you’d like to freeze a fast-moving subject, like a car in motion through Paris’ Arc de Triomphe, you can set your camera to Shutter Priority mode (‘S’) and increase your shutter speed.
Shutter speed is measured in fractions of a second. The smaller the fraction (the bigger the denominator), the faster your shutter opens and closes—and the less light enters your camera.
Your camera will automatically compensate for this by widening your aperture and/or increasing your ISO. But be aware of your focus, as the wider aperture will result in a shallower depth of field. The same applies if you’d like to create motion blur for your subject.
Connor Redmond | Fujifilm GFX 50R | GF 80mm f/1.7 R WR | f/2 | 1/4000 sec | ISO 100
Auto ISO mode
Cameras are becoming more sensitive, creating less noise at higher ISO values. When you’re photographing in changeable light conditions, try setting your camera to a semi-auto mode—like aperture priority—and use Auto ISO to get perfect exposures. Some cameras also allow you to set an upper ISO limit. So, you can simply control your aperture. This is really useful, especially in high-contrast situations. For example, if you’re moving indoors and outdoors, you might not have enough time to change your settings. Auto ISO is your friend.
Connor Redmond | Fujifilm GFX 50R | GF 80mm f/1.7 R WR | f/2.8 | 1/250 sec | ISO 8000
Manual mode
Fully manual mode allows you complete control over your aperture, shutter speed and ISO. While it’ll take time and practice to familiarise yourself with manual mode, eventually, you’ll be able to accurately predict and instinctively change your settings for any given scene.
Connor Redmond | Ricoh GR III | f/5.0 | 1/500 sec | ISO 200
Start with a zoom lens before primes
A zoom lens will allow you to quickly change the focal length and will save on weight over an equivalent set of multiple prime lenses. But the trade-off is that zoom lenses tend to cost more and generally have a narrower maximum aperture—which therefore limits your depth-of-field abilities.
For the first few trips, we’d recommend starting with a versatile zoom lens. Once you’ve downloaded all your photos to your computer, check the metadata for each image. If you can see that you’ve taken most of your best photos using a certain focal length, then perhaps consider trading in your zoom lens for a prime lens of that focal length. You’ll then be able to benefit from a wider maximum aperture and probably save a bit of money and weight too.
There are plenty of reasons why some photographers prefer zoom lenses, some prefer prime lenses, and some use a combination of both. Ultimately, it’s up to you to find the best approach for your back, your budget and your style of photography.
For more specific advice and camera settings for other genres often covered by travel photography, read our guides to wildlife photography and street photography.
Ian Howorth | Ricoh GR III | f/4 | 13 sec | ISO 1600
Best Travel Photography Gear
What’s the best camera equipment for travel photography? Well, it depends on the kind of travel photography you’ll create. So, when you’re just starting out, you’ll probably want a versatile setup that can handle a range of different scenarios. This section will cover compact cameras and full setups for travel photography.
Compact cameras
If low weight and high portability are important to you, then these compact cameras are an excellent choice. While you may need to compromise in terms of features in some areas, many compact cameras offer surprisingly good image quality for their size. Compact cameras are also particularly useful as a secondary point-and-shoot alongside your main setup. Check out our full guide to the best compact travel cameras, or read on for a quick look at our recommended compact cameras for travel photography.
https://youtu.be/TOA8TchoiI8?rel=0Ricoh GR III
Weighing just 257 grams, this diminutive APS-C camera is still packed full of features. The Ricoh GR III punches well above its weight and can rival the image quality of much, much bigger cameras.
However, there are some downsides to consider—the biggest one being the battery life. If you want to shoot all day, then carry a few extra batteries with you. Read our full Ricoh GR III review for travel photography.
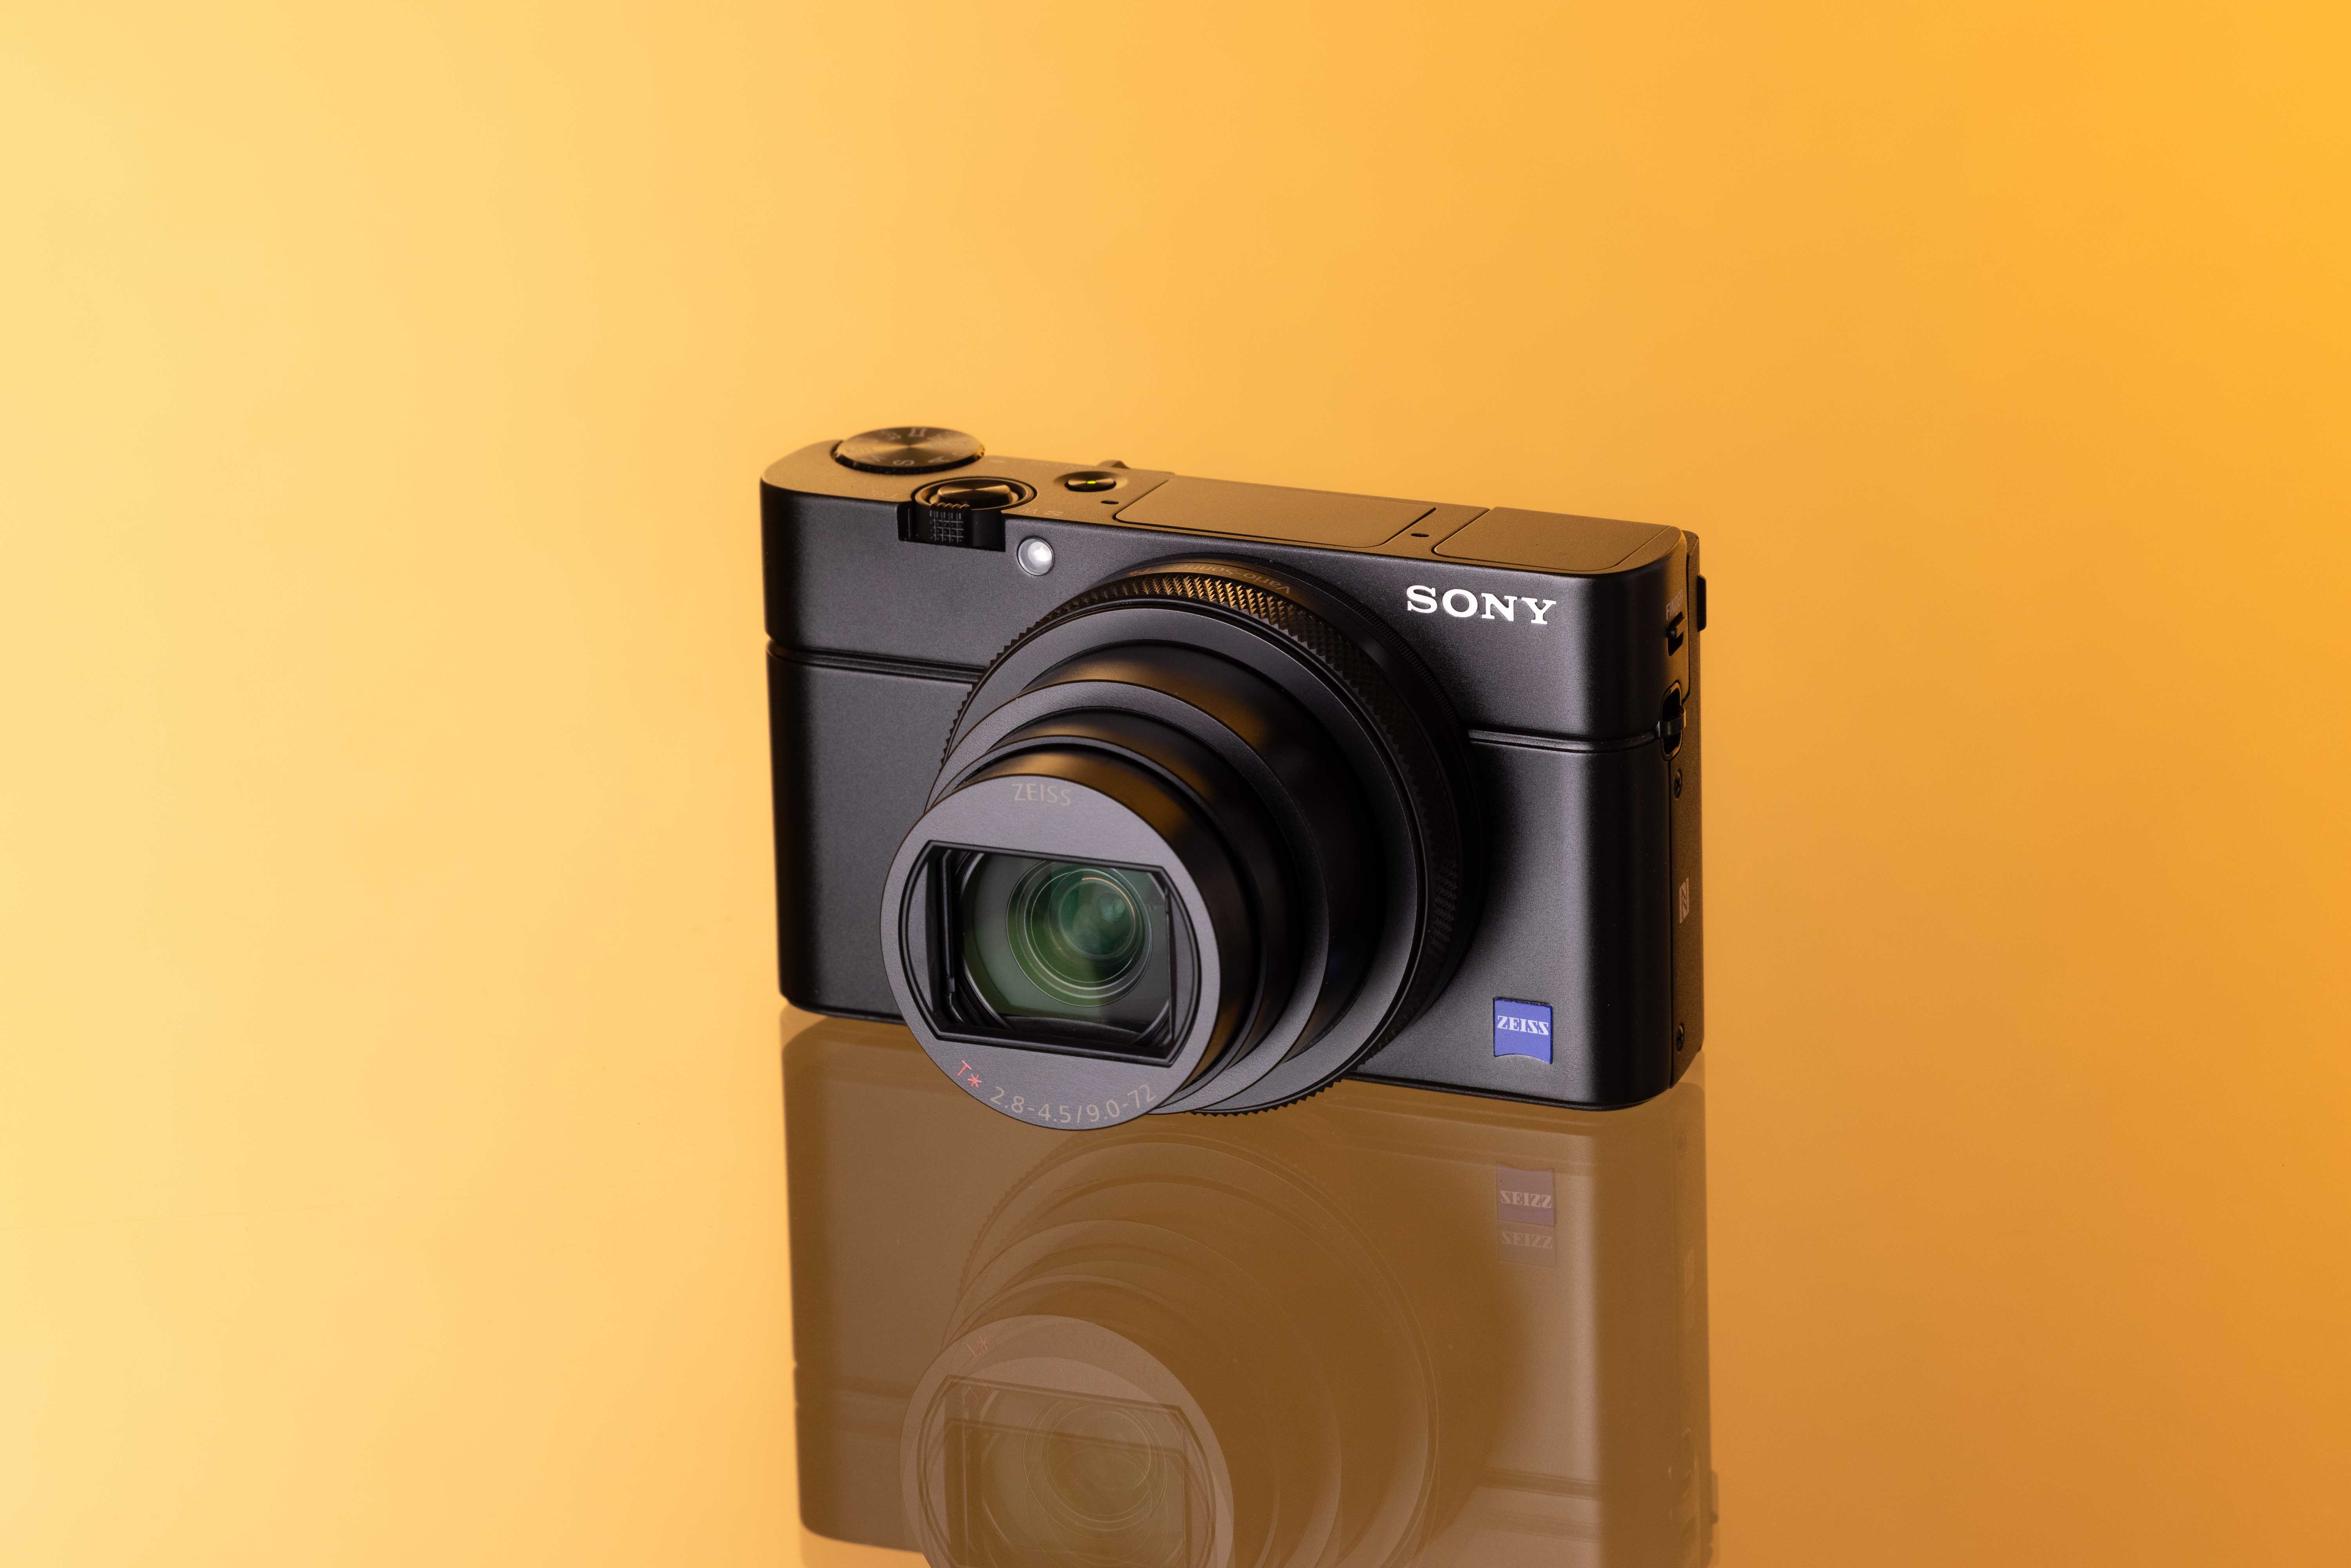
Used Sony RX100 VII
Sony RX100 VII
The Sony RX100 VII packs an incredible number of features into a palm-sized package, including an impressive zoom lens and 4K video.
Connor Redmond | Sony RX100 VII | 13mm | f/11 | 1/250 sec | ISO 100
However, the Sony RX100 VII isn’t the most user-friendly camera. It’s also not at its strongest in low-light situations. But overall, for its size, this is a phenomenal do-it-all camera.
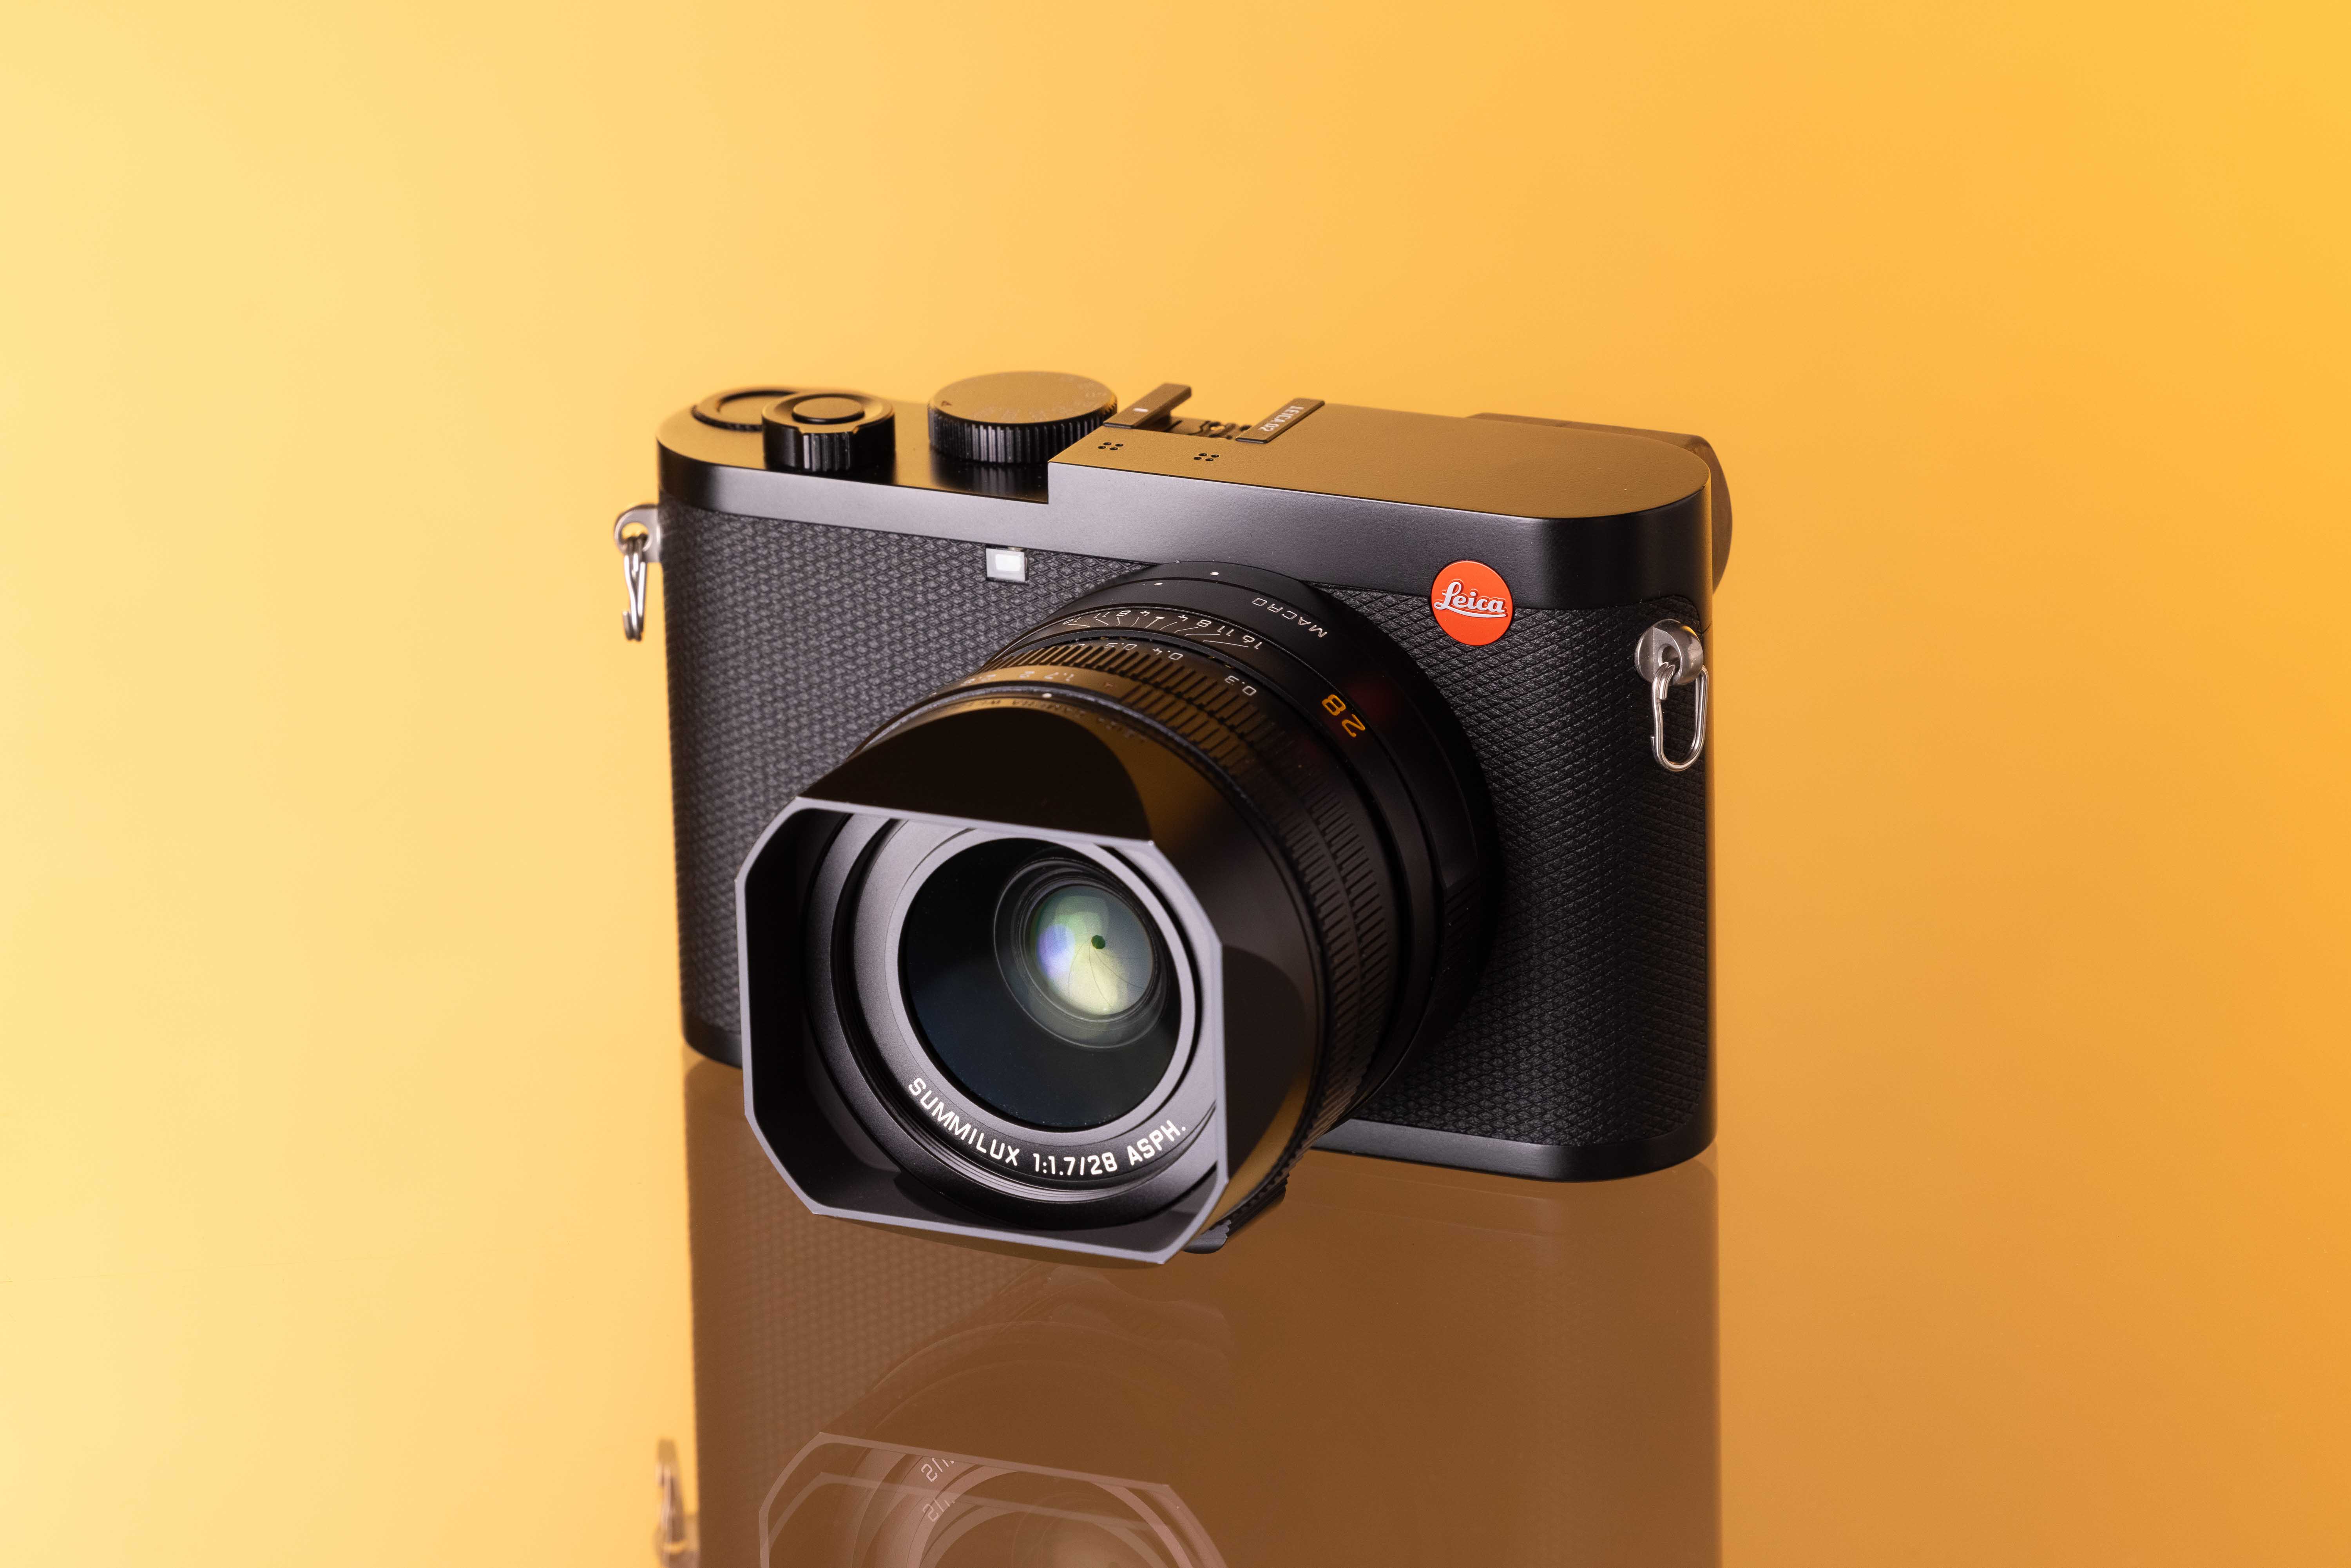
Used Lecia Q2
Leica Q2
While pricey, the Leica Q2 is worth every penny. We wouldn’t recommend this camera to absolute beginners—instead, get a more affordable setup and find your feet first. But if you’re looking for total quality and a full-frame sensor in a compact package, and you’re happy to invest accordingly, then this camera is for you.
Connor Redmond | Leica Q2 | f/2.8 | 28mm | 1/250 sec | ISO 800
The fixed 28mm f/1.7 Summilux lens matches the full-frame sensor perfectly. Together, they create the smoothest, least distracting shooting experience so you can focus on capturing the scene before you.
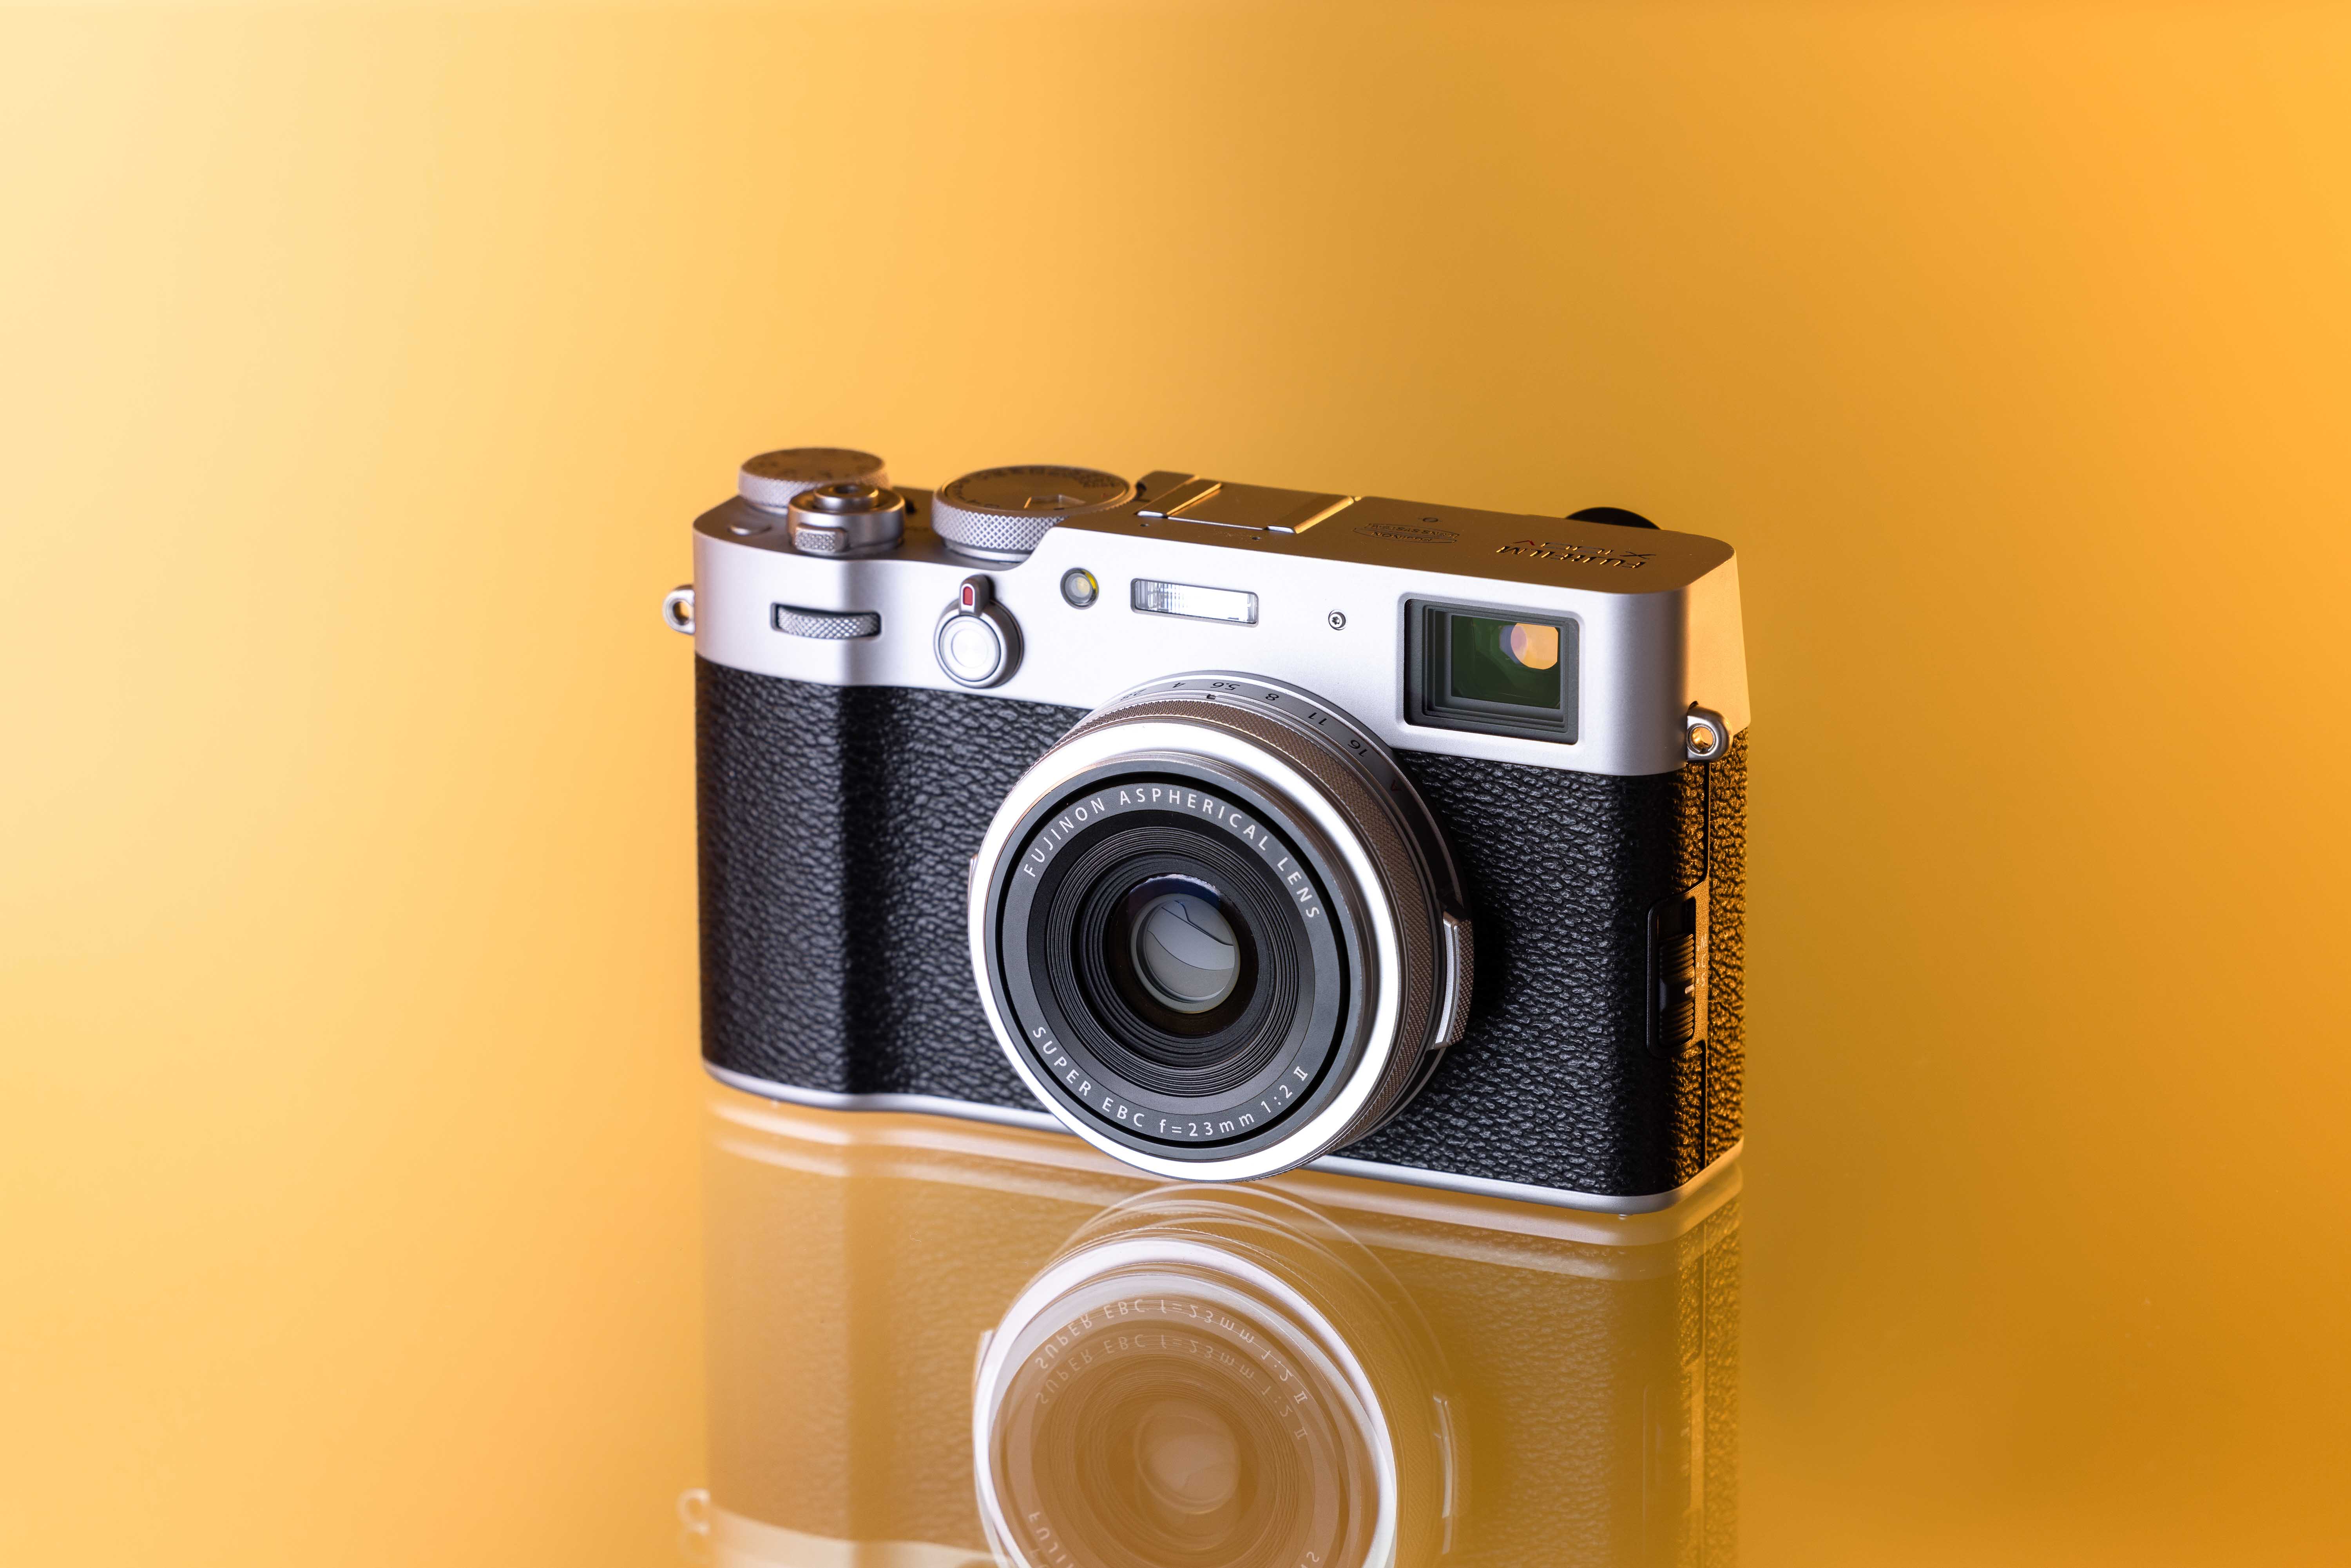
Used Fujifilm X100V
Fujifilm X100V
A superb option for travel photography, and for street photography in particular, the Fujifilm X100V can capture exceptional imagery with its APS-C sensor. Its hybrid optical-electronic viewfinder, tiltable screen and excellent fixed 23mm lens make the X100V a top choice for travel photography.
James Popsys | Fujifilm X100V | 23mm | f/2.0 | 1/60 sec | ISO 320
The X100V is extremely popular, but you can set up a stock alert if it's unavailable. Read our full Fujifilm X100V review, or check out our Fujifilm X100F review for travel.
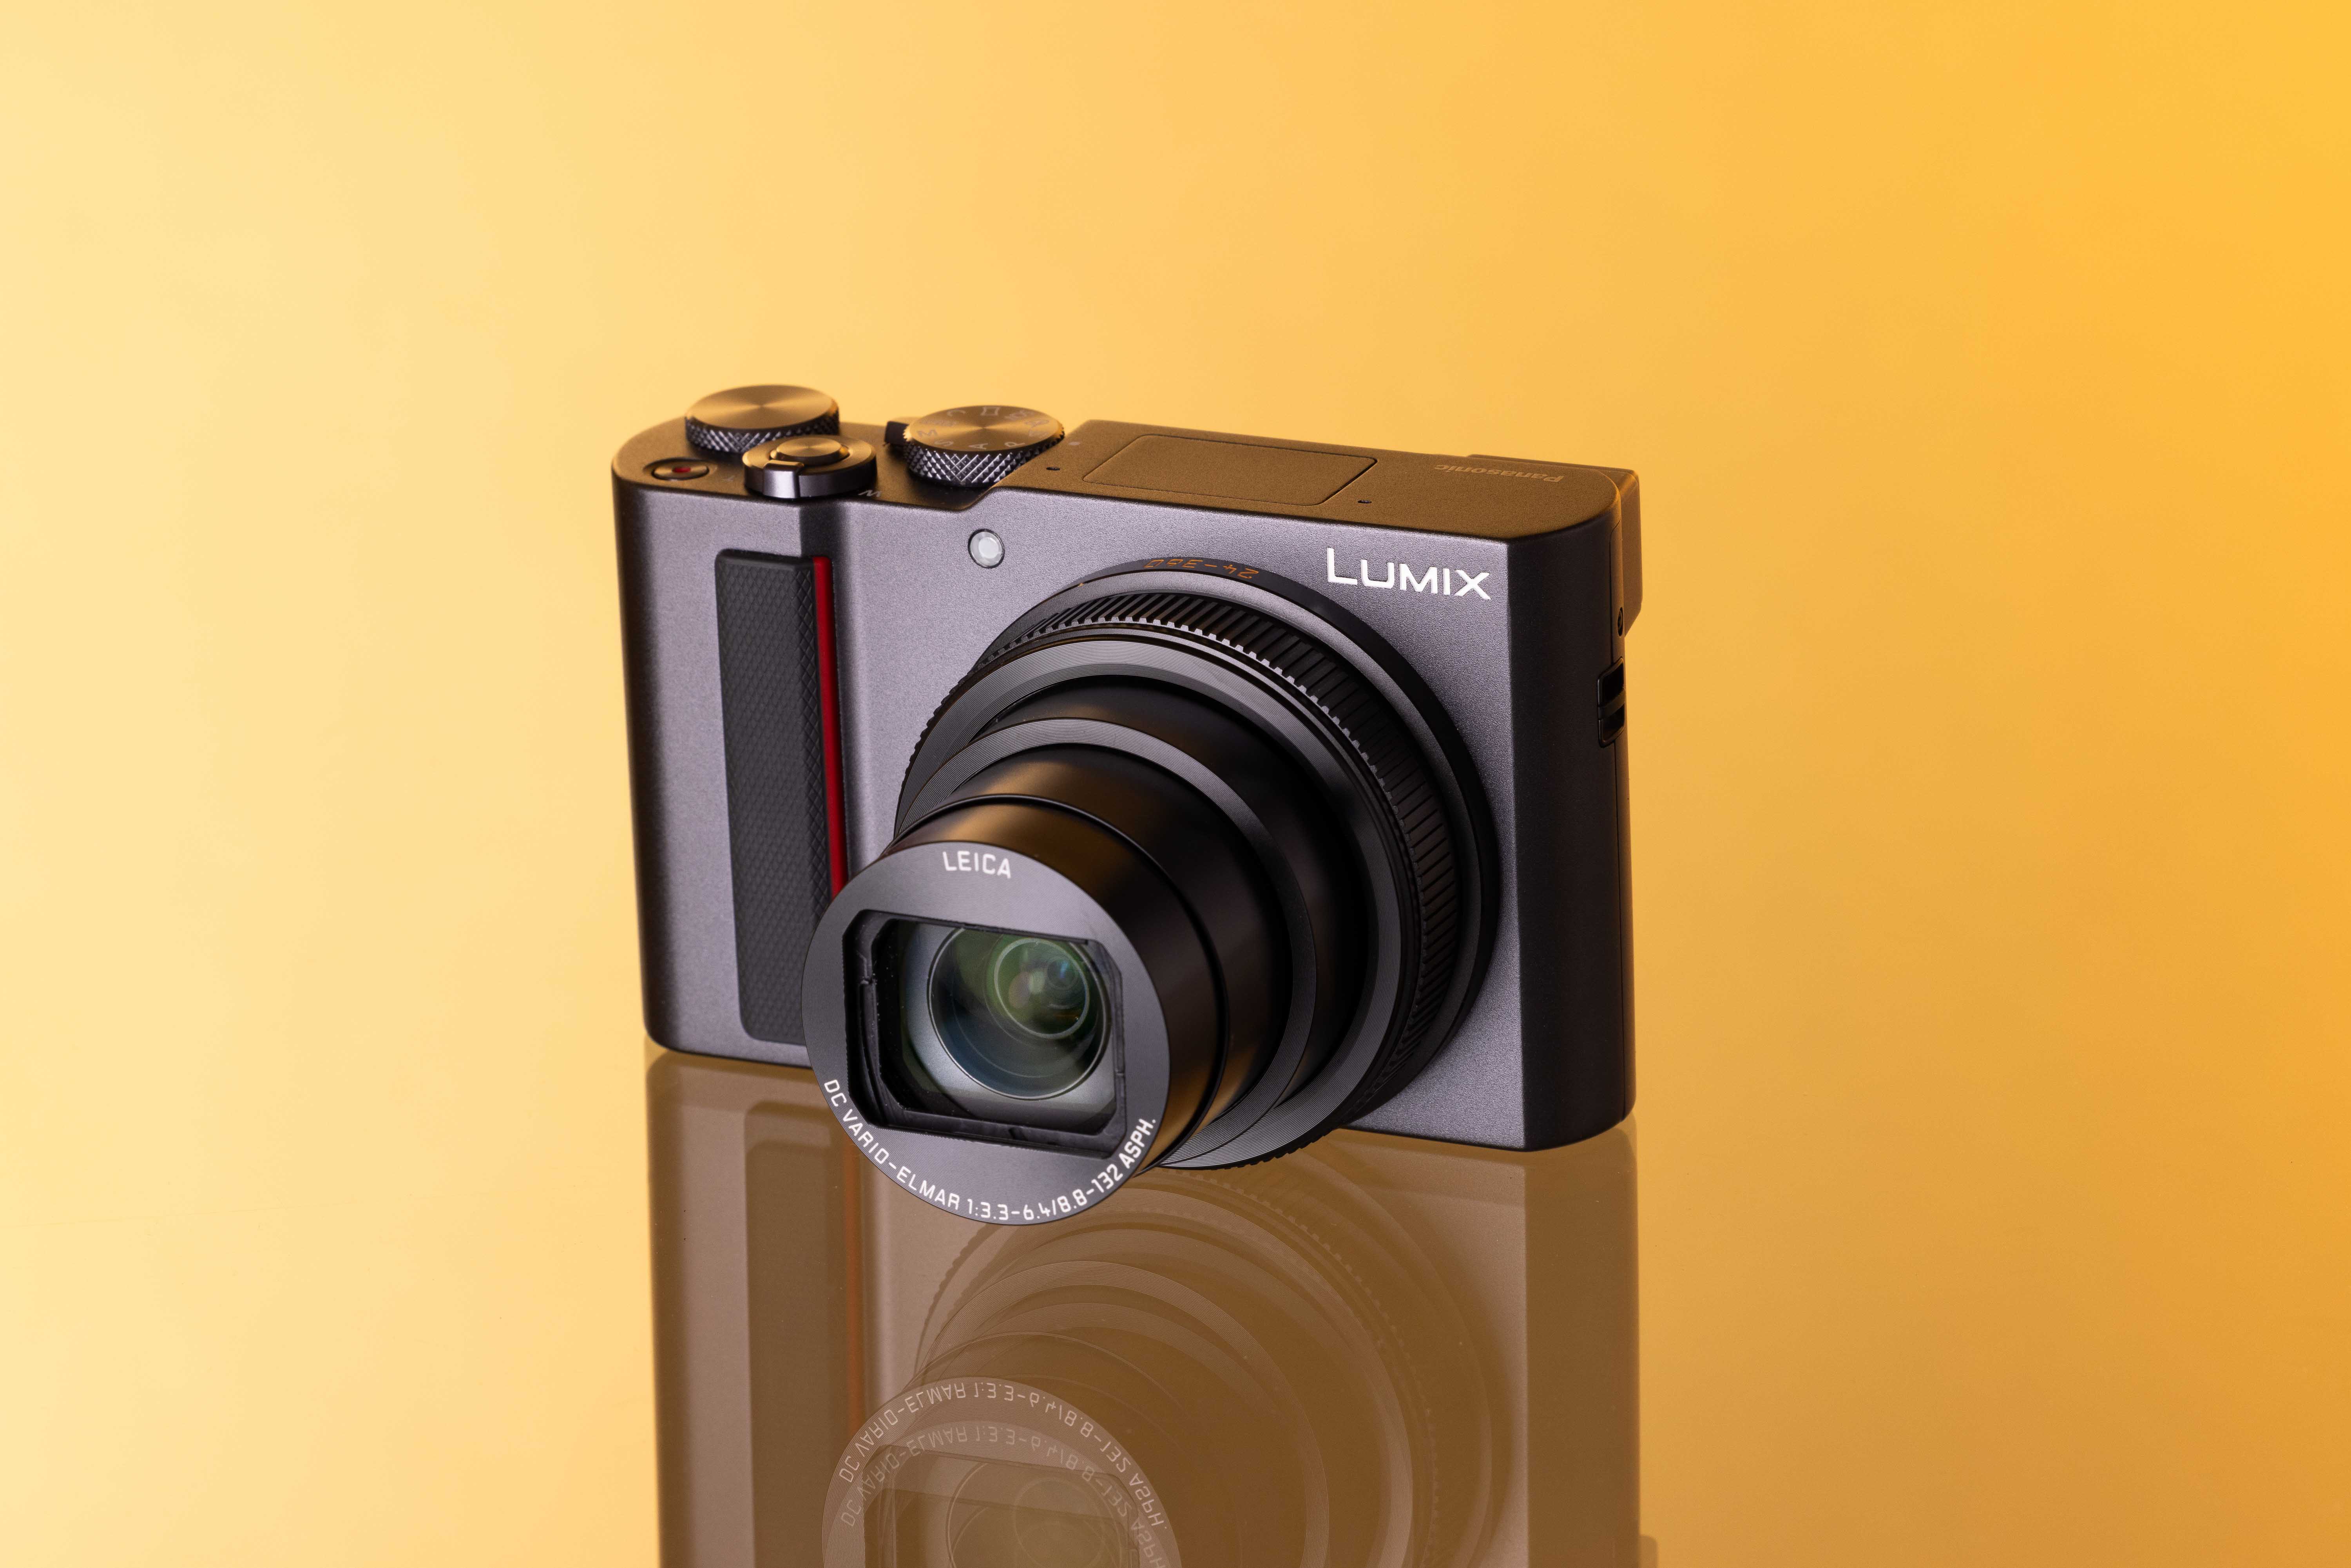
Used Panasonic DMC-TZ200
Panasonic TZ200
Representing excellent value for money, the Panasonic DC-TZ200 is the perfect beginner's travel compact camera—it can do most things to an admirable and acceptable level.
Connor Redmond | Panasonic DMC-TZ200 | 9mm | f/8.0 | 1/320 sec | ISO 125
With an impressive battery life and only a few compromises, the TZ200 is easy to use and versatile. At this price, the TZ200 is worth considering as a starter or backup camera.

Used Panasonic DMC-GX1
Panasonic DMC-GX1
If you’re looking to spend next to nothing on a first-time or secondary setup, the original Panasonic DMC-GX1 is still a surprisingly capable camera.
James Popsys | Panasonic DMC-GX1 | 20mm f/1.7 ASPH II | 20mm | f/1.7 | 1/1000 | ISO 160
If you’re looking for a truly compact camera to hone your skills or carry around anywhere, the GX1 is well worth considering. Read the full Panasonic DMC-GX1 review.
Camera bodies
If you find you need more versatility from your gear, then a traditional camera-and-lens setup might be better for your travel photography needs. Let’s look at a few camera body options for travel photography.
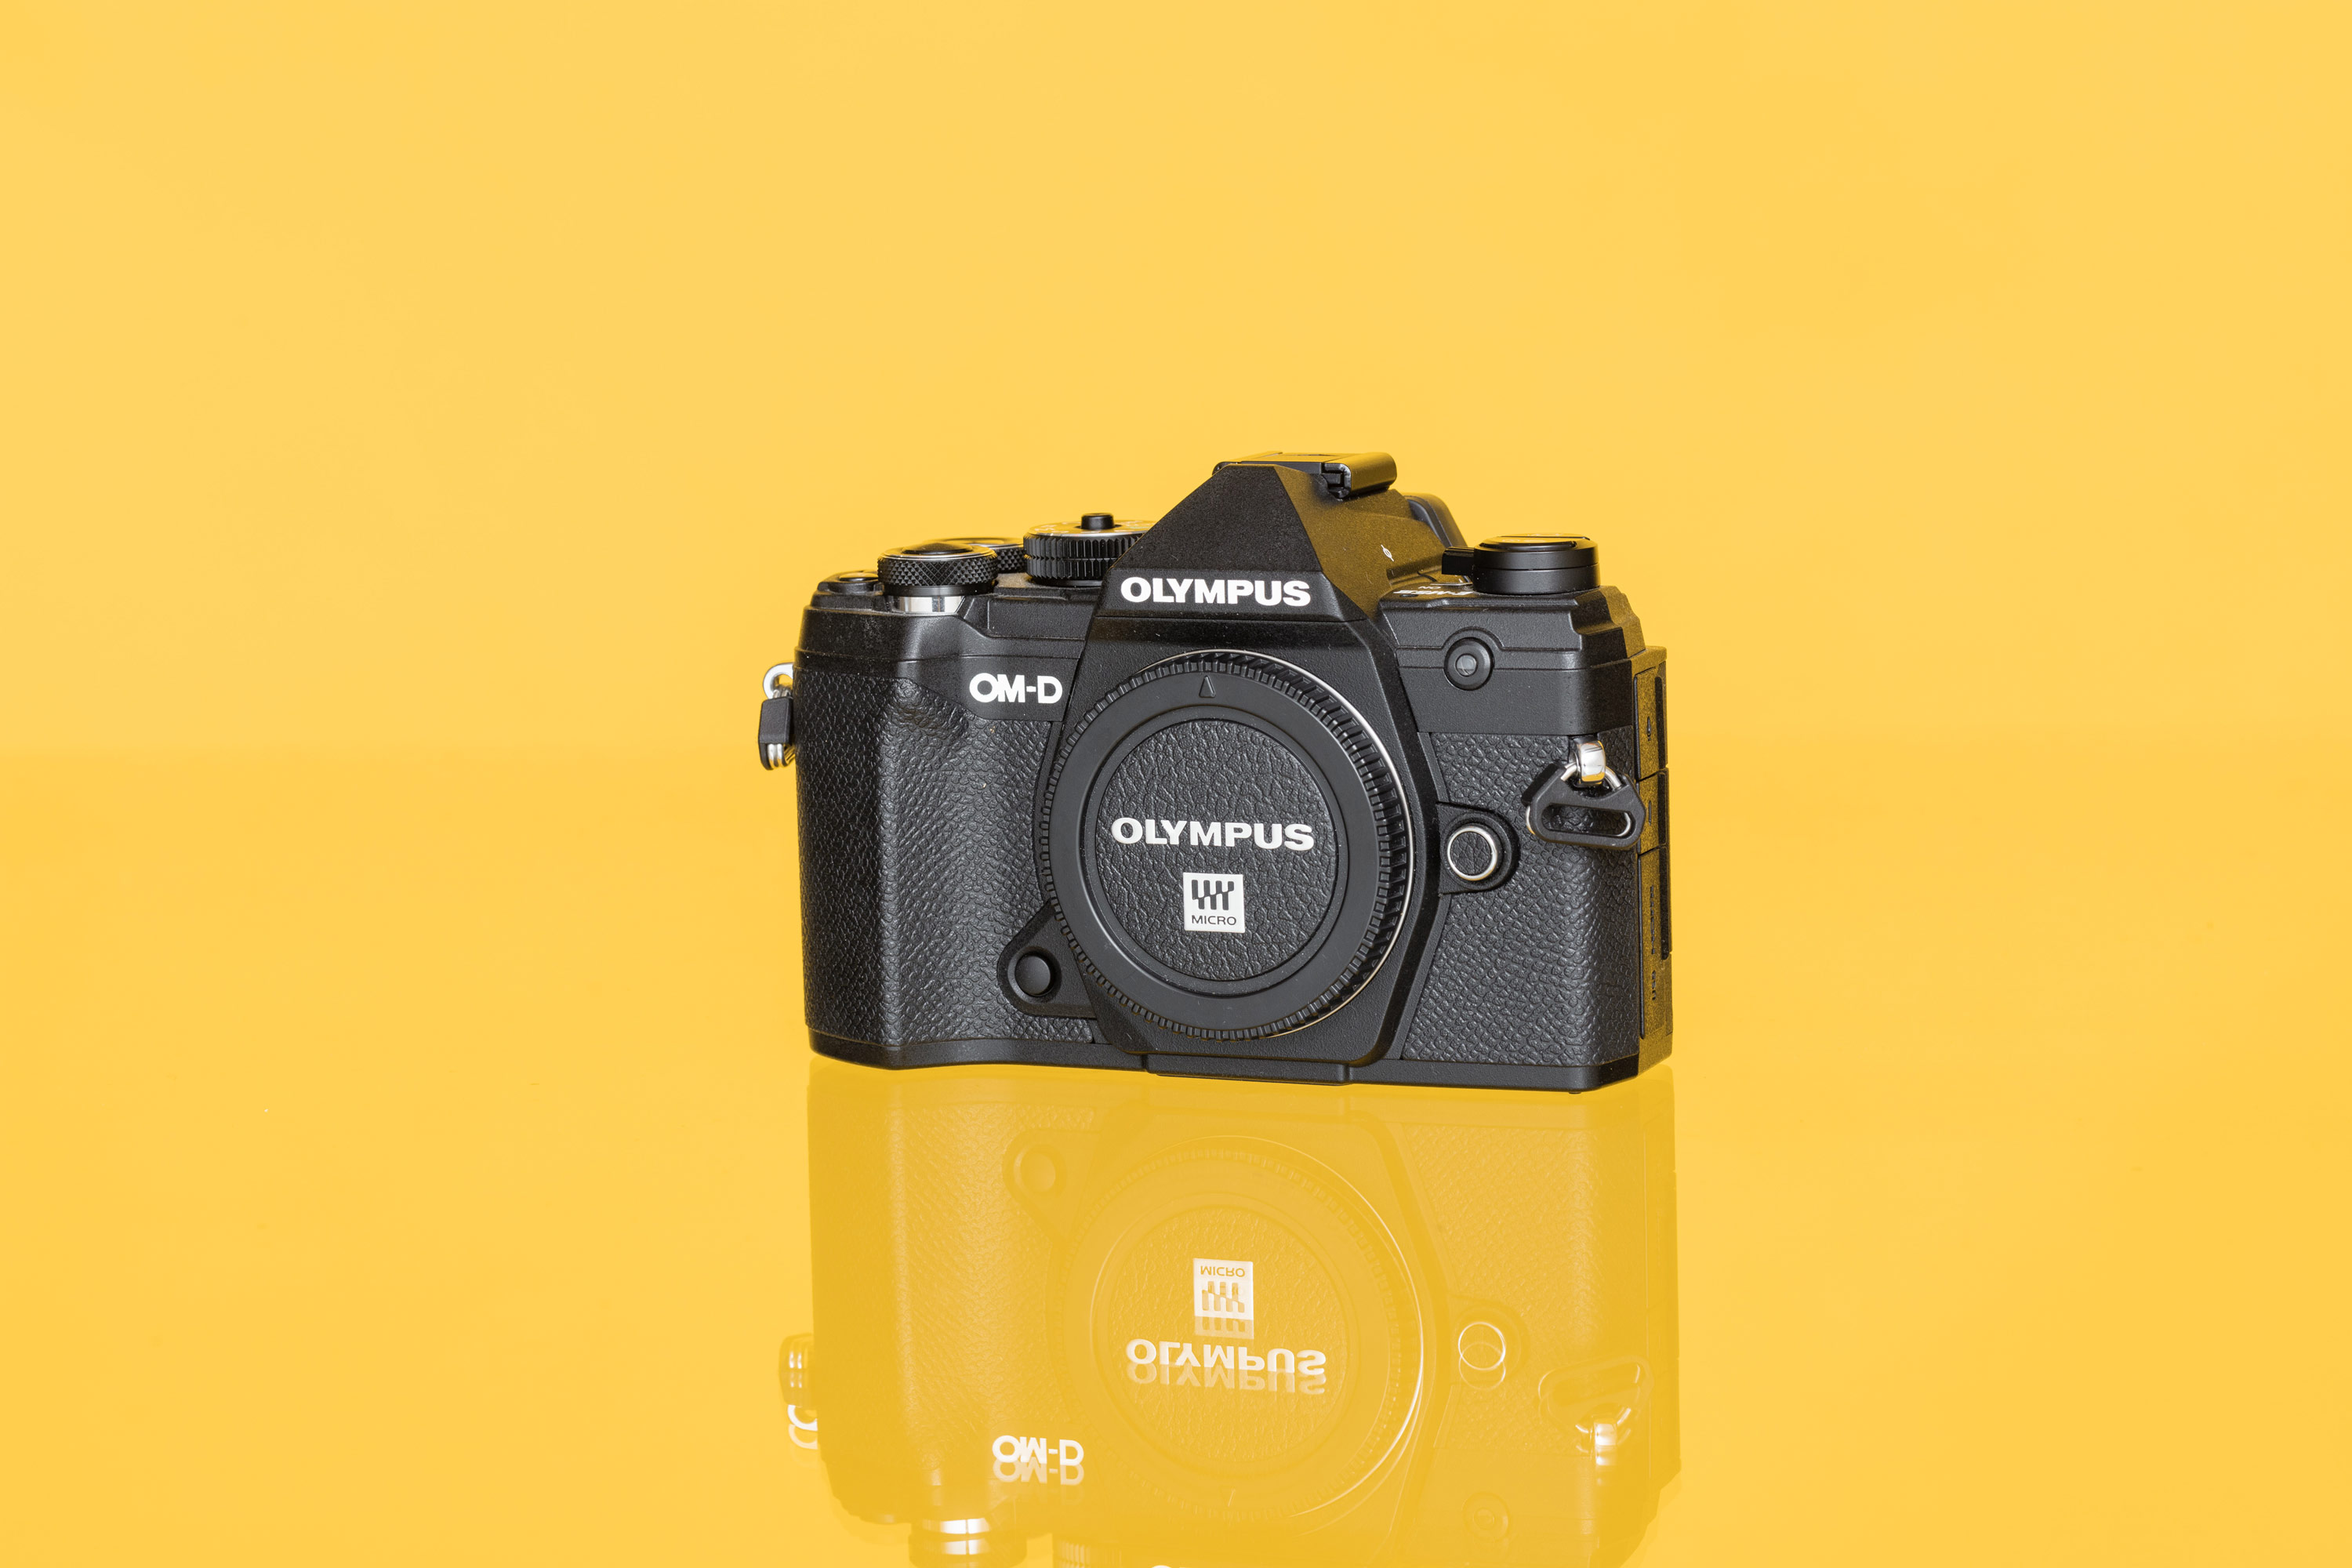
Olympus OM-D E-M5 III
Micro Four Thirds cameras for travel photography
Offering more features than a compact camera, a mirrorless Micro-Four Thirds camera body remains small and lightweight enough to carry around your neck all day. The Olympus OM-D E-M5 Mark III, for example, is a great option for travel photography.
Georgina Lamrock| Olympus E-M5 III | Olympus M.Zuiko Digital ED 12-40mm f/2.8 PRO | 25mm | f/2.8 | 1/200 | ISO 200
After using the formidable Olympus PEN-F for many years, UK photographer Georgina Lamrock wanted to upgrade to a model with 4K video capabilities. An autumn excursion to New York City presented the perfect opportunity to put the Olympus OM-D E-M5 III through its paces. Read the Olympus E-M5 III review for travel photography.
APS-C DSLRs for travel photography
If you’re just starting out with travel photography, we’d recommend starting out with a low-budget DSLR. Crop-sensor DSLRs offer particularly good value for money. While these aren’t as small and lightweight as mirrorless or compact cameras, APS-C DSLRs are strong all-rounder cameras. With the Canon EOS 60D or Nikon D7000, you get some pretty good features at a really low price point. Start with one of these, then work out your creative requirements and upgrade accordingly.

Evangelina Fysa | Canon EOS 6D Mark II
Full-frame DSLRs for travel photography
Generally speaking, a full-frame sensor will offer higher image quality, greater sharpness and a wider field of field. Full-frame DSLRs are a great choice for upgrading your travel photography gear without breaking the bank. However, a lower price means compromising on size and weight. These can get pretty bulky, especially when compared with full-frame mirrorless cameras. However, for the price and quality, you can’t go wrong with the Canon EOS 5D Mark II or the Nikon D700.
Evangelina Fysa | Canon EOS 6D Mark II
APS-C mirrorless cameras for travel photography
If you’re put off by the size and weight of DSLRs, but you want to upgrade from a compact, then an APS-C mirrorless camera might be a good choice for your travel photography. The Fujifilm X-T10, Fujifilm X-T20 and Fujifilm X-T30 are well-respected travel photography cameras. Reminiscent of traditional film SLRs but packed full of tech, these little Fujifilm cameras look good, perform really well and cost relatively little. However, you’ll need to factor in the price of Fujifilm lenses—these tend to cost a little more. But if you’re only using a single prime, or a single zoom, this shouldn’t affect your budget too much.
https://youtu.be/Z_mVY1NmGhg?rel=0If you’d prefer to stick with Canon or Nikon, both brands offer APS-C mirrorless cameras like the Canon EOS M5 or Nikon Z50. In an attempt to compete with Fujifilm, Nikon have released a retro-styled APS-C mirrorless camera—the Nikon Z fc—so this could be a good choice for your travel photography. Read our Nikon Z FC review.
Berta Amelinaite | Canon EOS R5 | 50mm | f/6.3 | 1/160 | ISO 2000
Full-frame mirrorless cameras for travel photography
Since 2018, both Canon and Nikon are now releasing full-frame mirrorless cameras like the Canon EOS R and Nikon Z7. The Canon EOS R5 is particularly well respected for travel photography. If you already have a set of full-frame DSLR lenses, you can still use those via an adaptor. Or, you can trade them all in for native Canon RF lenses or Nikon Z-mount glass.

Jacob Murray | Canon EOS R5 | RF 24-70mm f/2.8
If you want to start afresh, Sony has some really strong options for full-frame mirrorless setups. Start with the Sony A7 or Sony A7C and work your way up to the Sony A7 IV. Alternatively, Panasonic recently made moves with the Panasonic DC-S1.
Jacob Murray | Sony A7 IV | Sigma 35mm f/1.4 DG GN ART | f/1.4 | ISO 4000 | 10 Sec
For travel photography, full-frame mirrorless cameras offer a number of advantages. You get all the benefits of a full-frame sensor in a smaller and more lightweight body than equivalent DSLRs. With mirrorless, you get faster shooting speeds and more intelligent autofocus technology—and an electronic viewfinder. Some travel photographers prefer optical viewfinders, as these present the scene au naturel, while others prefer electronic viewfinders, which show a live view of the resulting image. All this technology, however, means compromising on your battery life. So if you do get a mirrorless camera, remember to get plenty of spare batteries.
Not sure which full-frame mirrorless camera to choose? Check out our Canon R5 vs Sony A7 IV review for travel photography.
Medium-format cameras for travel photography
Traditionally, medium-format cameras weren’t a great choice for travel photography. They were big, bulky and really slow. But now, with the advent of mirrorless technology, medium-format sensors are accessible in relatively lightweight bodies. While these are still slower and generally more expensive than full-frame cameras, medium-format mirrorless cameras offer the ultimate image quality and detail.
Connor Redmond | Fujifilm GFX 50R | GF 80mm f/1.7 R WR | f/4 | 1/4000 sec | ISO 250
The Fujifilm GFX 50S, Fujifilm GFX 50R or Hasselblad X1D-50c are all excellent mirrorless options for medium-format travel photography. Remember to factor in the cost of the lenses, as these will quickly add up. Medium-format probably isn’t the right choice for first-time travel photographers, but these cameras really are exciting.
For double the megapixels, you could go even further into medium-format with the Fujifilm GFX 100 II or Hasselblad X2D 100c for truly deluxe travel photography.
https://youtu.be/4jLO5kPqCt4?rel=0Lenses
When considering which camera body to buy for travel photography, remember to factor in the price of the lenses. In this section, we’ll go through each system and recommend lenses for each. You will also need to double-check compatibility. Let’s explore lens options for Micro Four Thirds mirrorless, APS-C and full-frame DSLRs, and APS-C and full-frame mirrorless.
Used Micro Four Thirds lenses
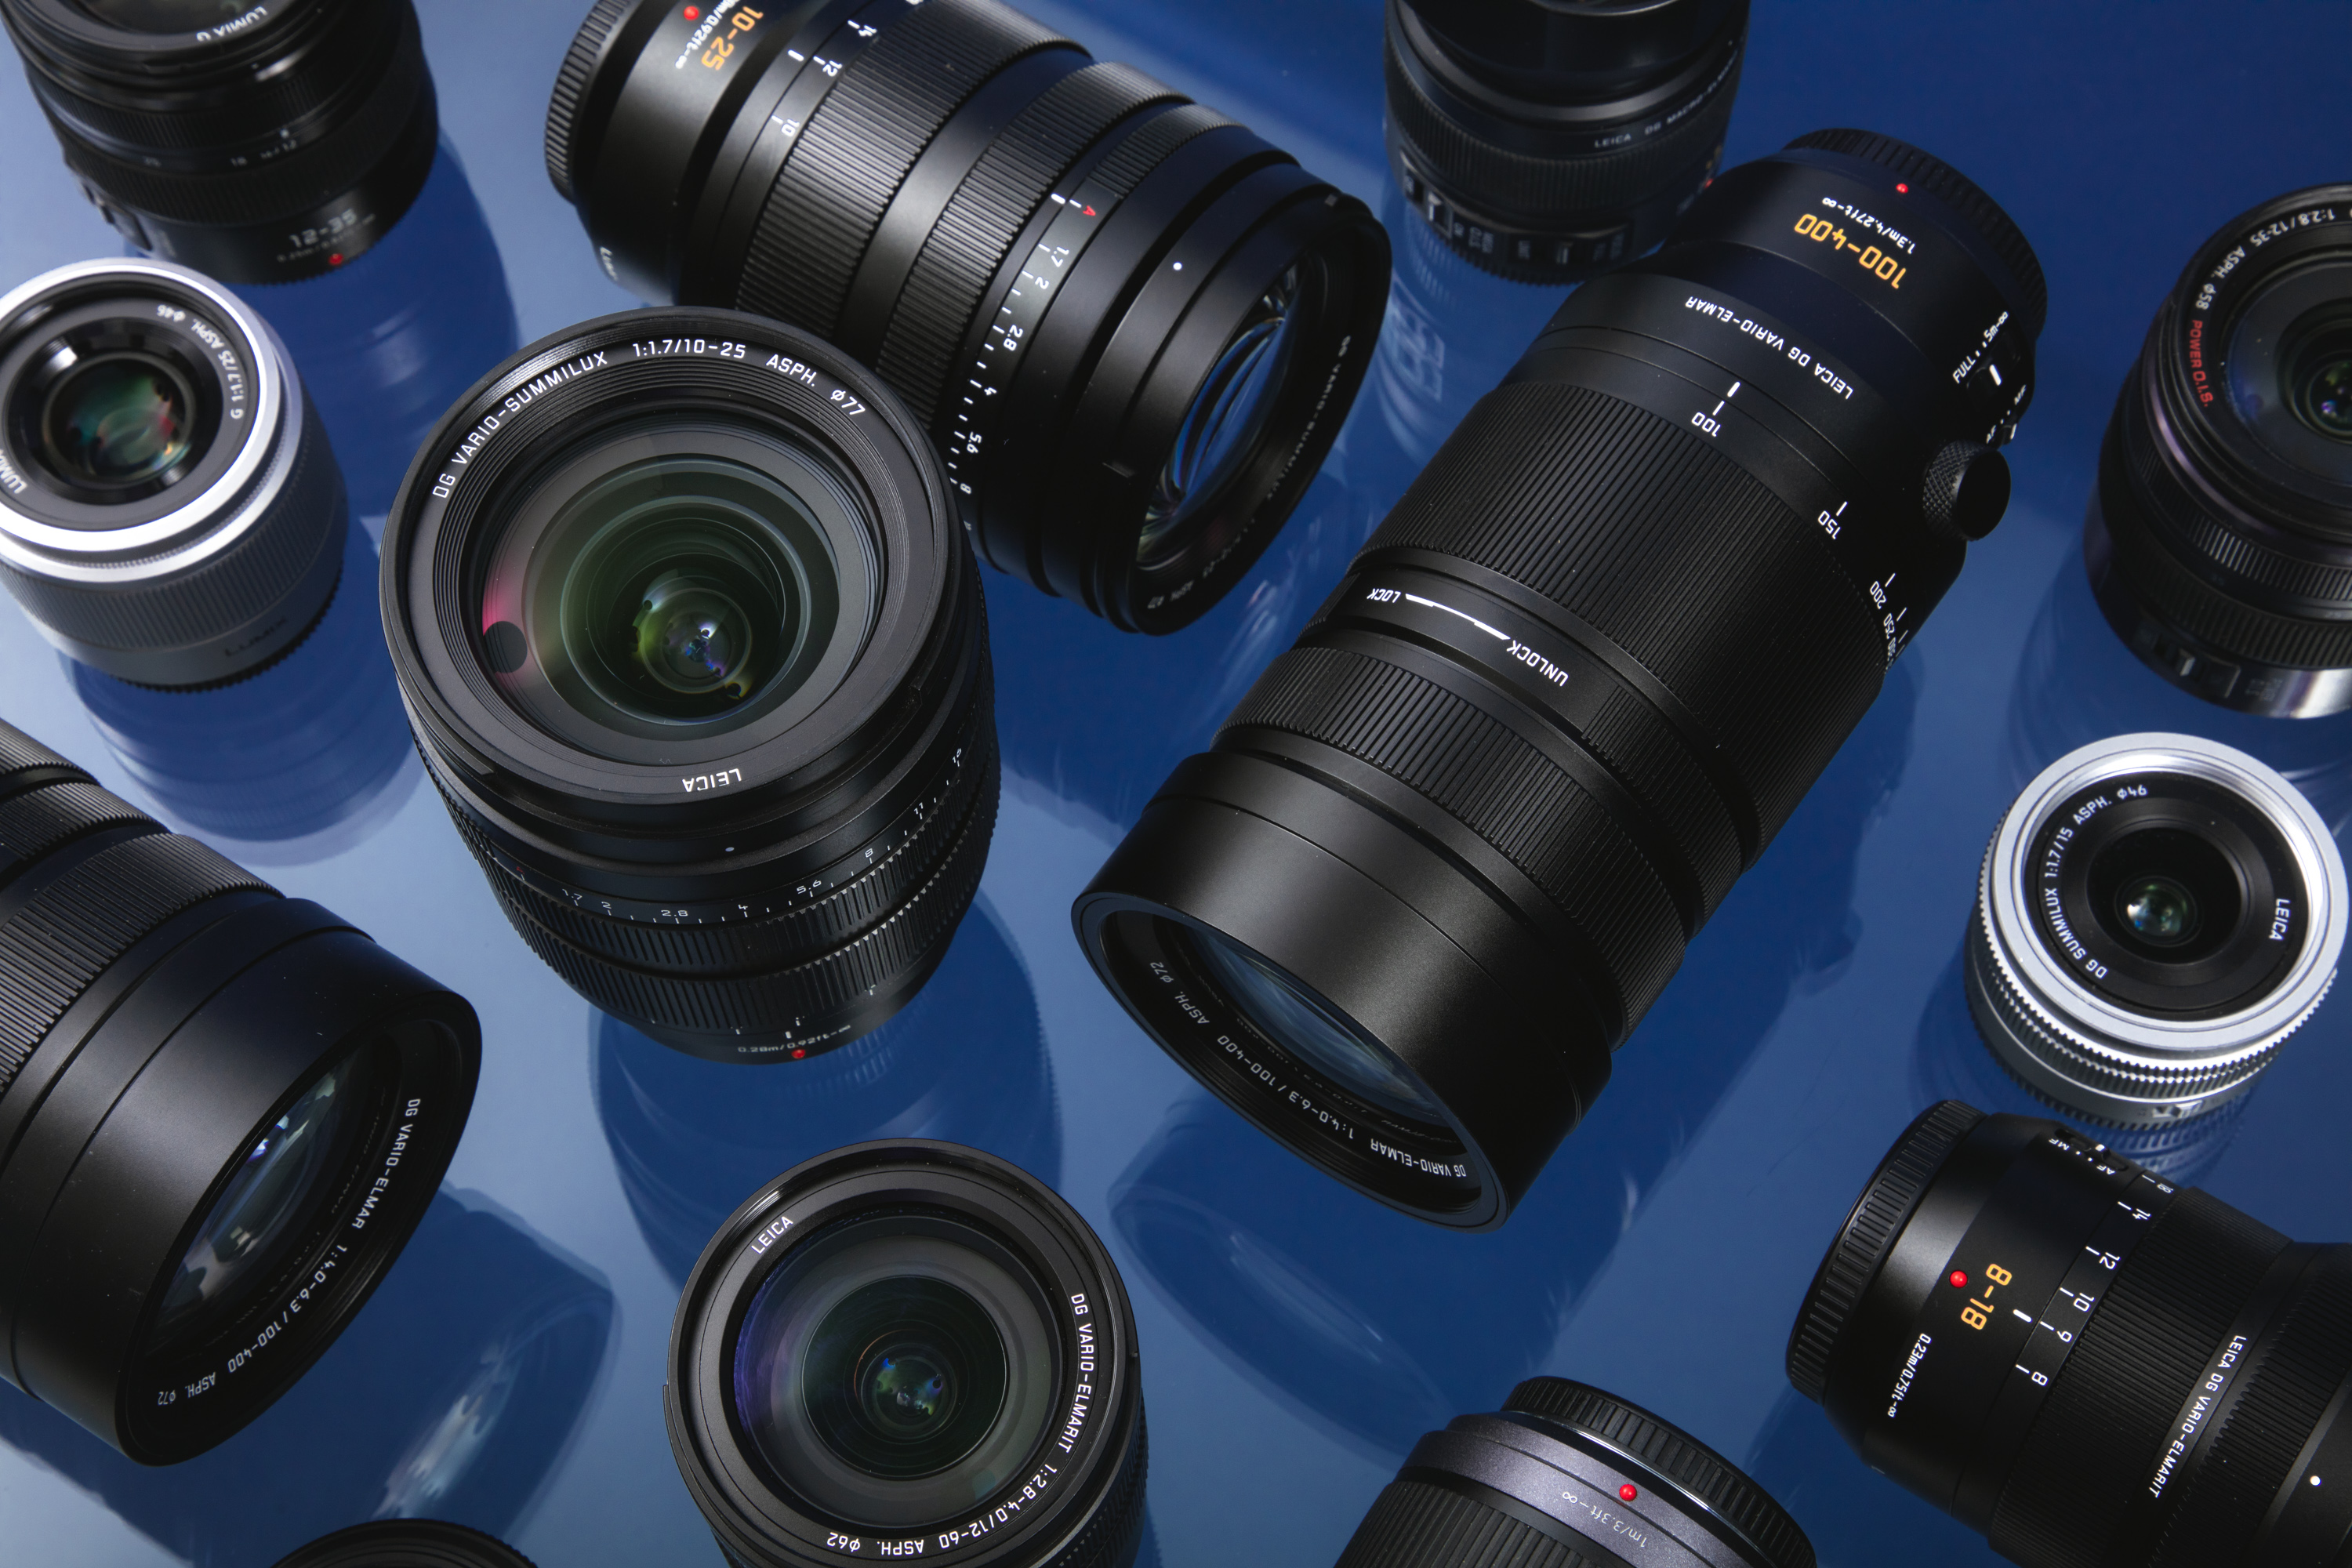
Lenses for Micro Four Thirds
As Micro Four Thirds is a standard, created in partnership between Panasonic and Olympus/OM System, you can mount pretty much any Micro Four Thirds lens on any Micro Four Thirds camera. Other brands, like Voigtländer, Samyang and Sigma, create Micro Four Thirds lenses too. Always double-check to make sure you’re getting the lens with the correct mount.
If you’re looking for quality and versatility from your Micro Four Thirds setup, the Panasonic 10-25mm f/1.7 Leica Vario-Summilux DG ASPH might be perfect for you. Great for capturing big open landscapes, and with a fast aperture, this lens is great even in low light conditions.
For street-style travel photography, you’ll need to shoot quickly and accurately. The OM System 12-40mm f/2.8 PRO II ED offers premium image quality with an ideal focal length for run-and-gun style photography. This lens also offers a wide maximum aperture for creating a shallow depth of field or shooting in challenging light.
What about everyday lifestyle photography? Try the Olympus 12-100mm f/4 IS PRO. You can use this lens in a variety of different environments. With an equivalent focal range of 24-200mm, this lens is the perfect companion for capturing general snaps with beautiful optical quality.

Used Canon EF lenses
Lenses for APS-C DSLR
If you have an APS-C DSLR, you can still use full-frame DSLR lenses—while these are more expensive, they’re a good choice if you plan to upgrade to a full-frame DSLR in the future. Full-frame lenses cover the entire full-frame sensor, so you can also use them on APS-C DSLRs—although the camera will only capture a smaller portion of the frame. But as APS-C lenses only cover the area of an APS-C sensor, you can’t use those on full-frame DSLRs.
For now, let’s take a look at lenses made specifically for APS-C DSLRs. These tend to cost less than full-frame lenses, so they’re a better choice if you’re sure you’re going to stick with APS-C. How can you tell which DSLR lenses are full-frame or APS-C? For Canon DSLR, full-frame lenses are called EF and APS-C lenses are EF-S. For Nikon DSLR, full-frame lenses are called FX and APS-C lenses are DX.
When you’re creating travel photography, sometimes you want to just concentrate on the scene in front of you—and not change lenses. Having a versatile zoom lens can really help save you some valuable time. For everyday travel photography, try the Canon EF-S 18-135mm f/3.5-5.6 IS USM or the Nikon DX 18-200mm f/3.5-5.6G IF-ED VR II.
Leaning more towards a landscape style of travel photography? You’ll want a zoom lens that offers width while providing versatility for different compositions. Try the Canon EF-S 18-55mm f/3.5-5.6 IS STM or the Nikon DX 18-55mm f/3.5-5.6G VR II.
If you’d also like to capture some street-style travel photography, you could also invest in a prime lens. The Canon EF-S 35mm f/2.8 IS STM Macro and Nikon DX 35mm f/1.8G are both good options for this.
Used Nikon fit lenses
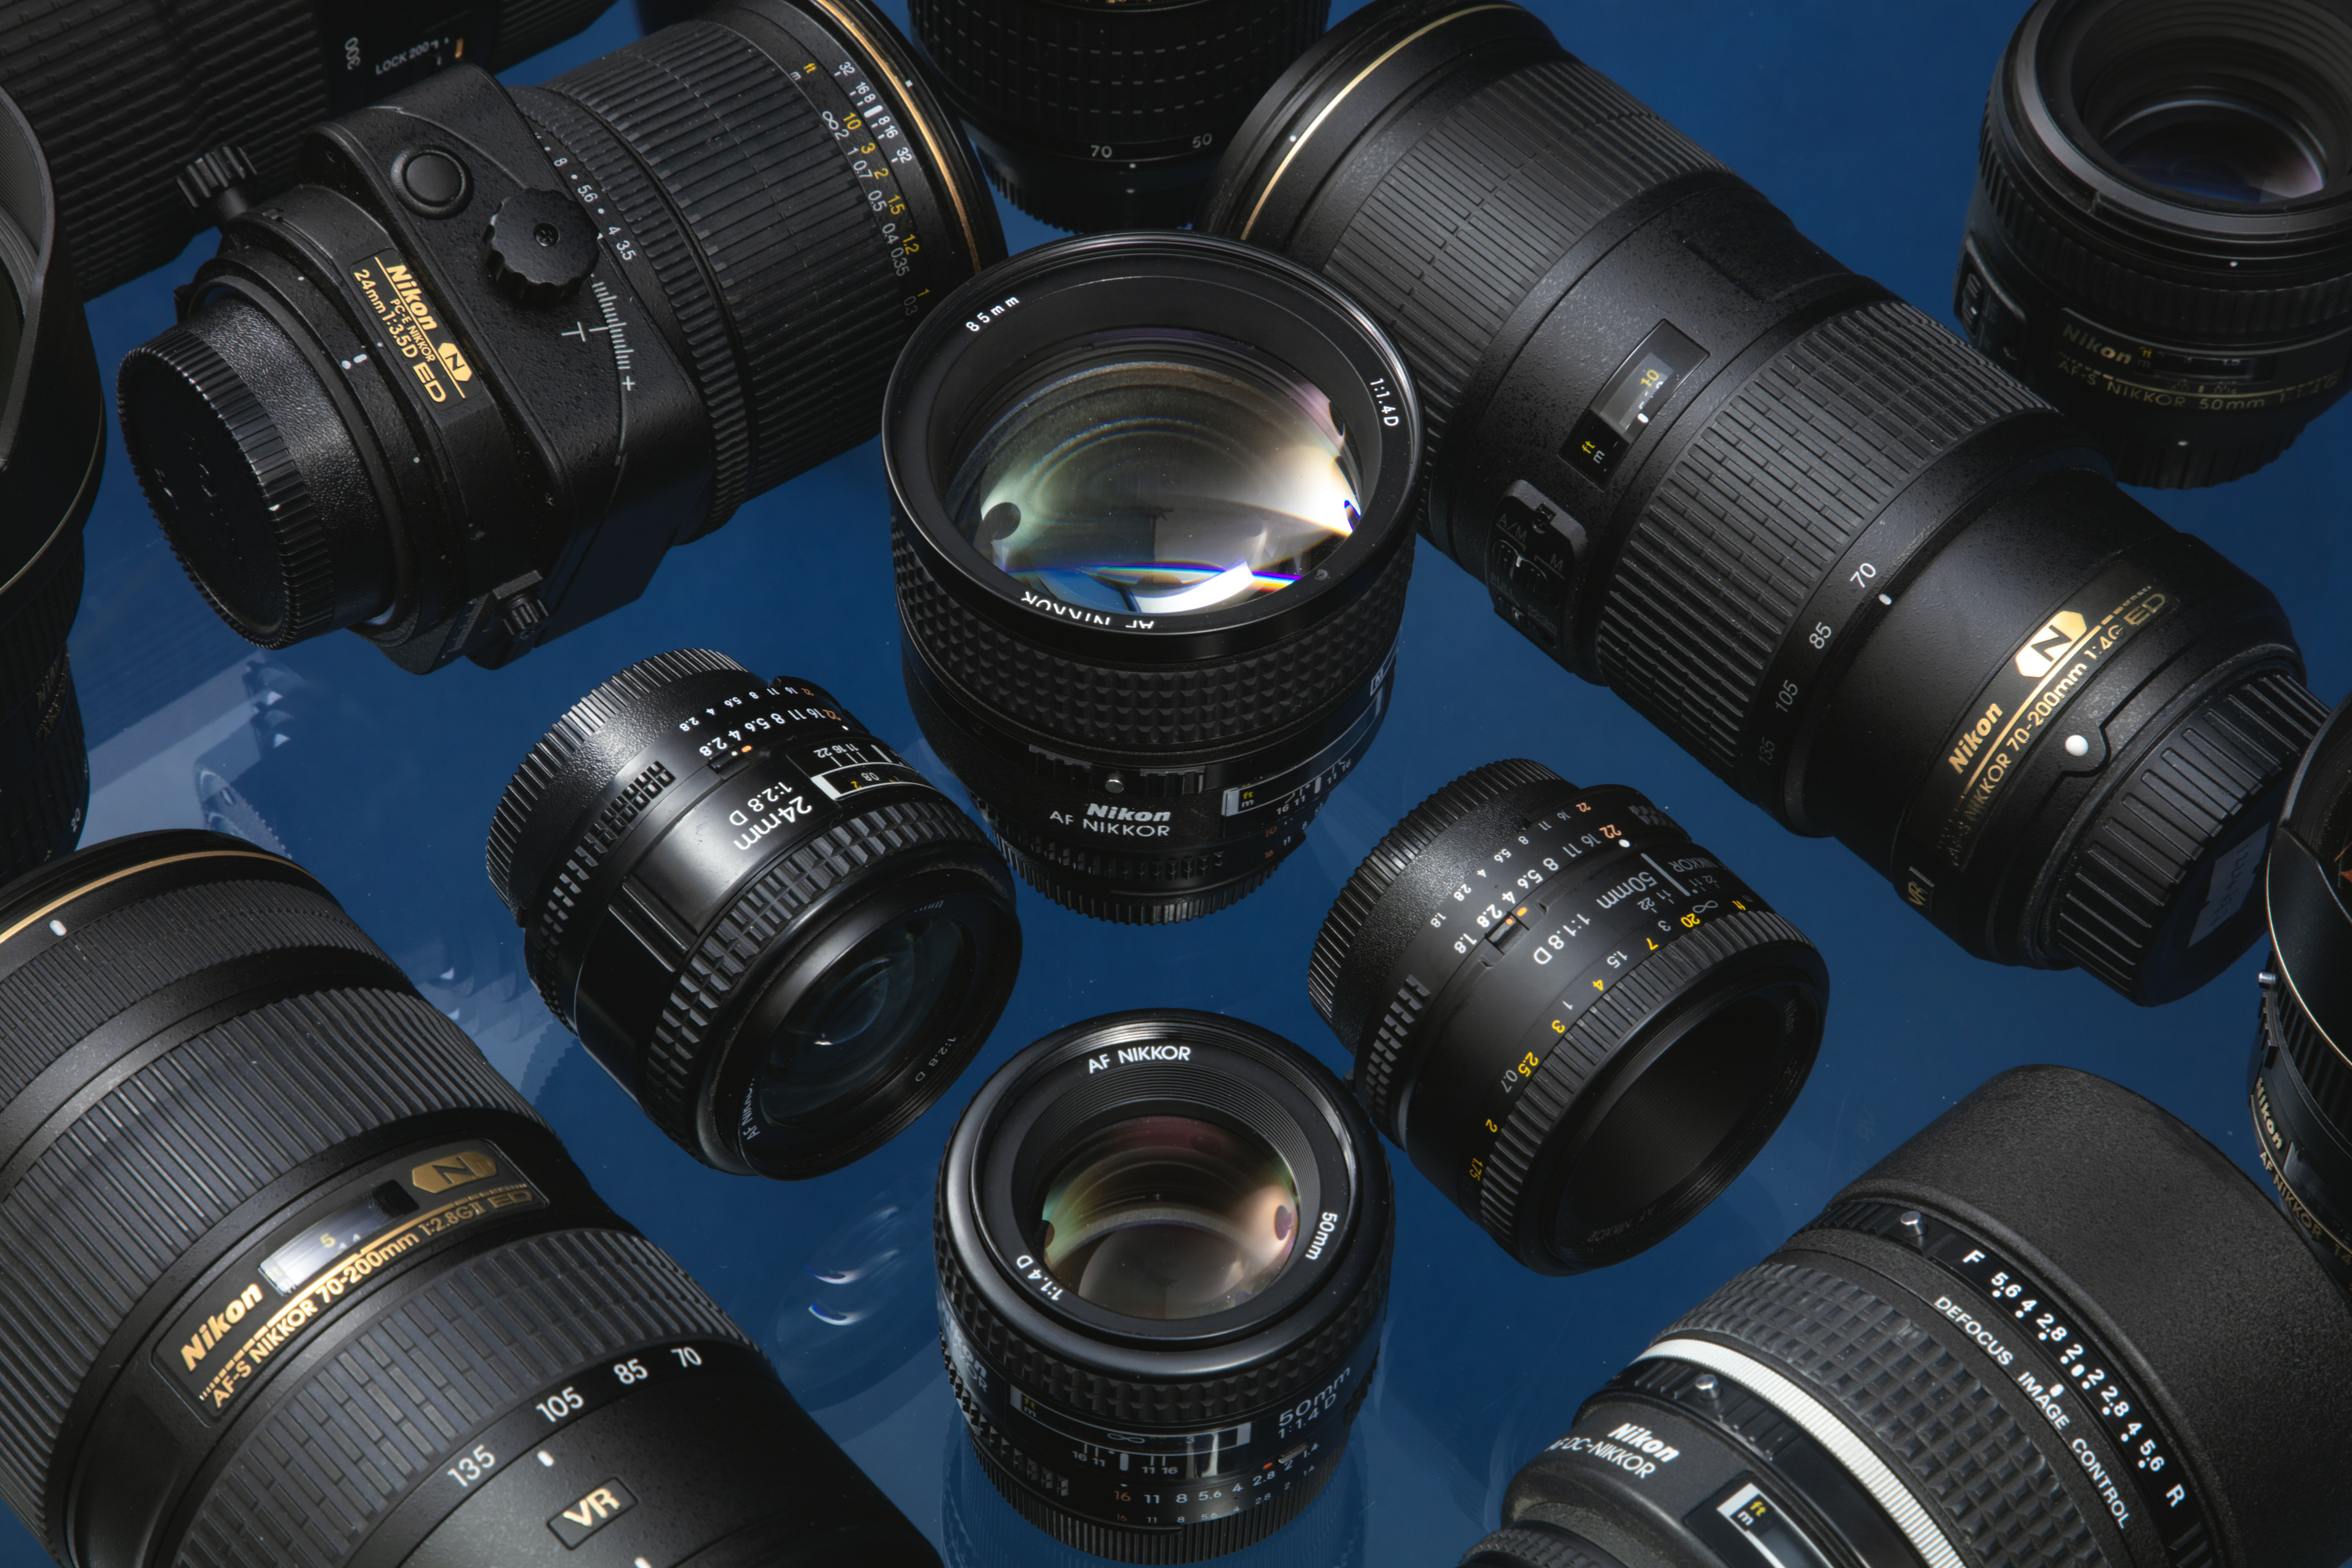
Lenses for full-frame DSLR
As well as full-frame DSLRs, you can mount full-frame DSLR lenses to APS-C DSLRs and—via an adaptor—mirrorless cameras. These full-frame DSLR lenses from Canon and Nikon represent excellent value for money and are all great choices for travel photography.
If you prefer to create a more street and documentary style of travel photography, you can’t go wrong with a 35mm prime lens like the Canon EF 35mm f/1.4 L USM or Nikon 35mm f/1.8G ED. These prime lenses allow you to really concentrate on your subject. And the 35mm focal length is wide enough to get environmental context, but close enough to isolate your subject—without having to physically move too much closer.
When shooting landscape-style travel photography with full-frame cameras, you’ll usually want a wide field of view. While you can use almost any lens to capture stunning landscapes, and some longer zoom lenses can create beautiful images, sometimes it’s easier to shoot super wide and capture that sense of scale. Try the Canon EF 16-35mm f/2.8 L II USM or the Nikon 14-24mm f/2.8G IF-ED.
For general travel photography, start with a 24-70mm zoom lens. Sigma have some really solid third-party lenses both for Canon and Nikon. The Sigma ART 24-70mm f/2.8 DG OS HSM (Nikon fit) or 24-70mm f/2.8 DG OS HSM EF (Canon fit) offer huge flexibility, brilliant optical quality and optical stabilisation, which can really help in low light.
Lenses for APS-C mirrorless
If you’ve bought yourself a Fujifilm APS-C mirrorless camera, you have a few options open to you for travel photography. We recommend the Fujifilm XF 16-55mm f/2.8 R LM WR or 18-120mm f/4 LM PZ WR.
Or, if you’re using Canon or Nikon APS-C mirrorless cameras, try the Canon EF-M 18-55mm f/3.5-5.6 IS STM or Nikon Z DX 16-50mm f/3.5-6.3 VR.
Used Canon RF lenses
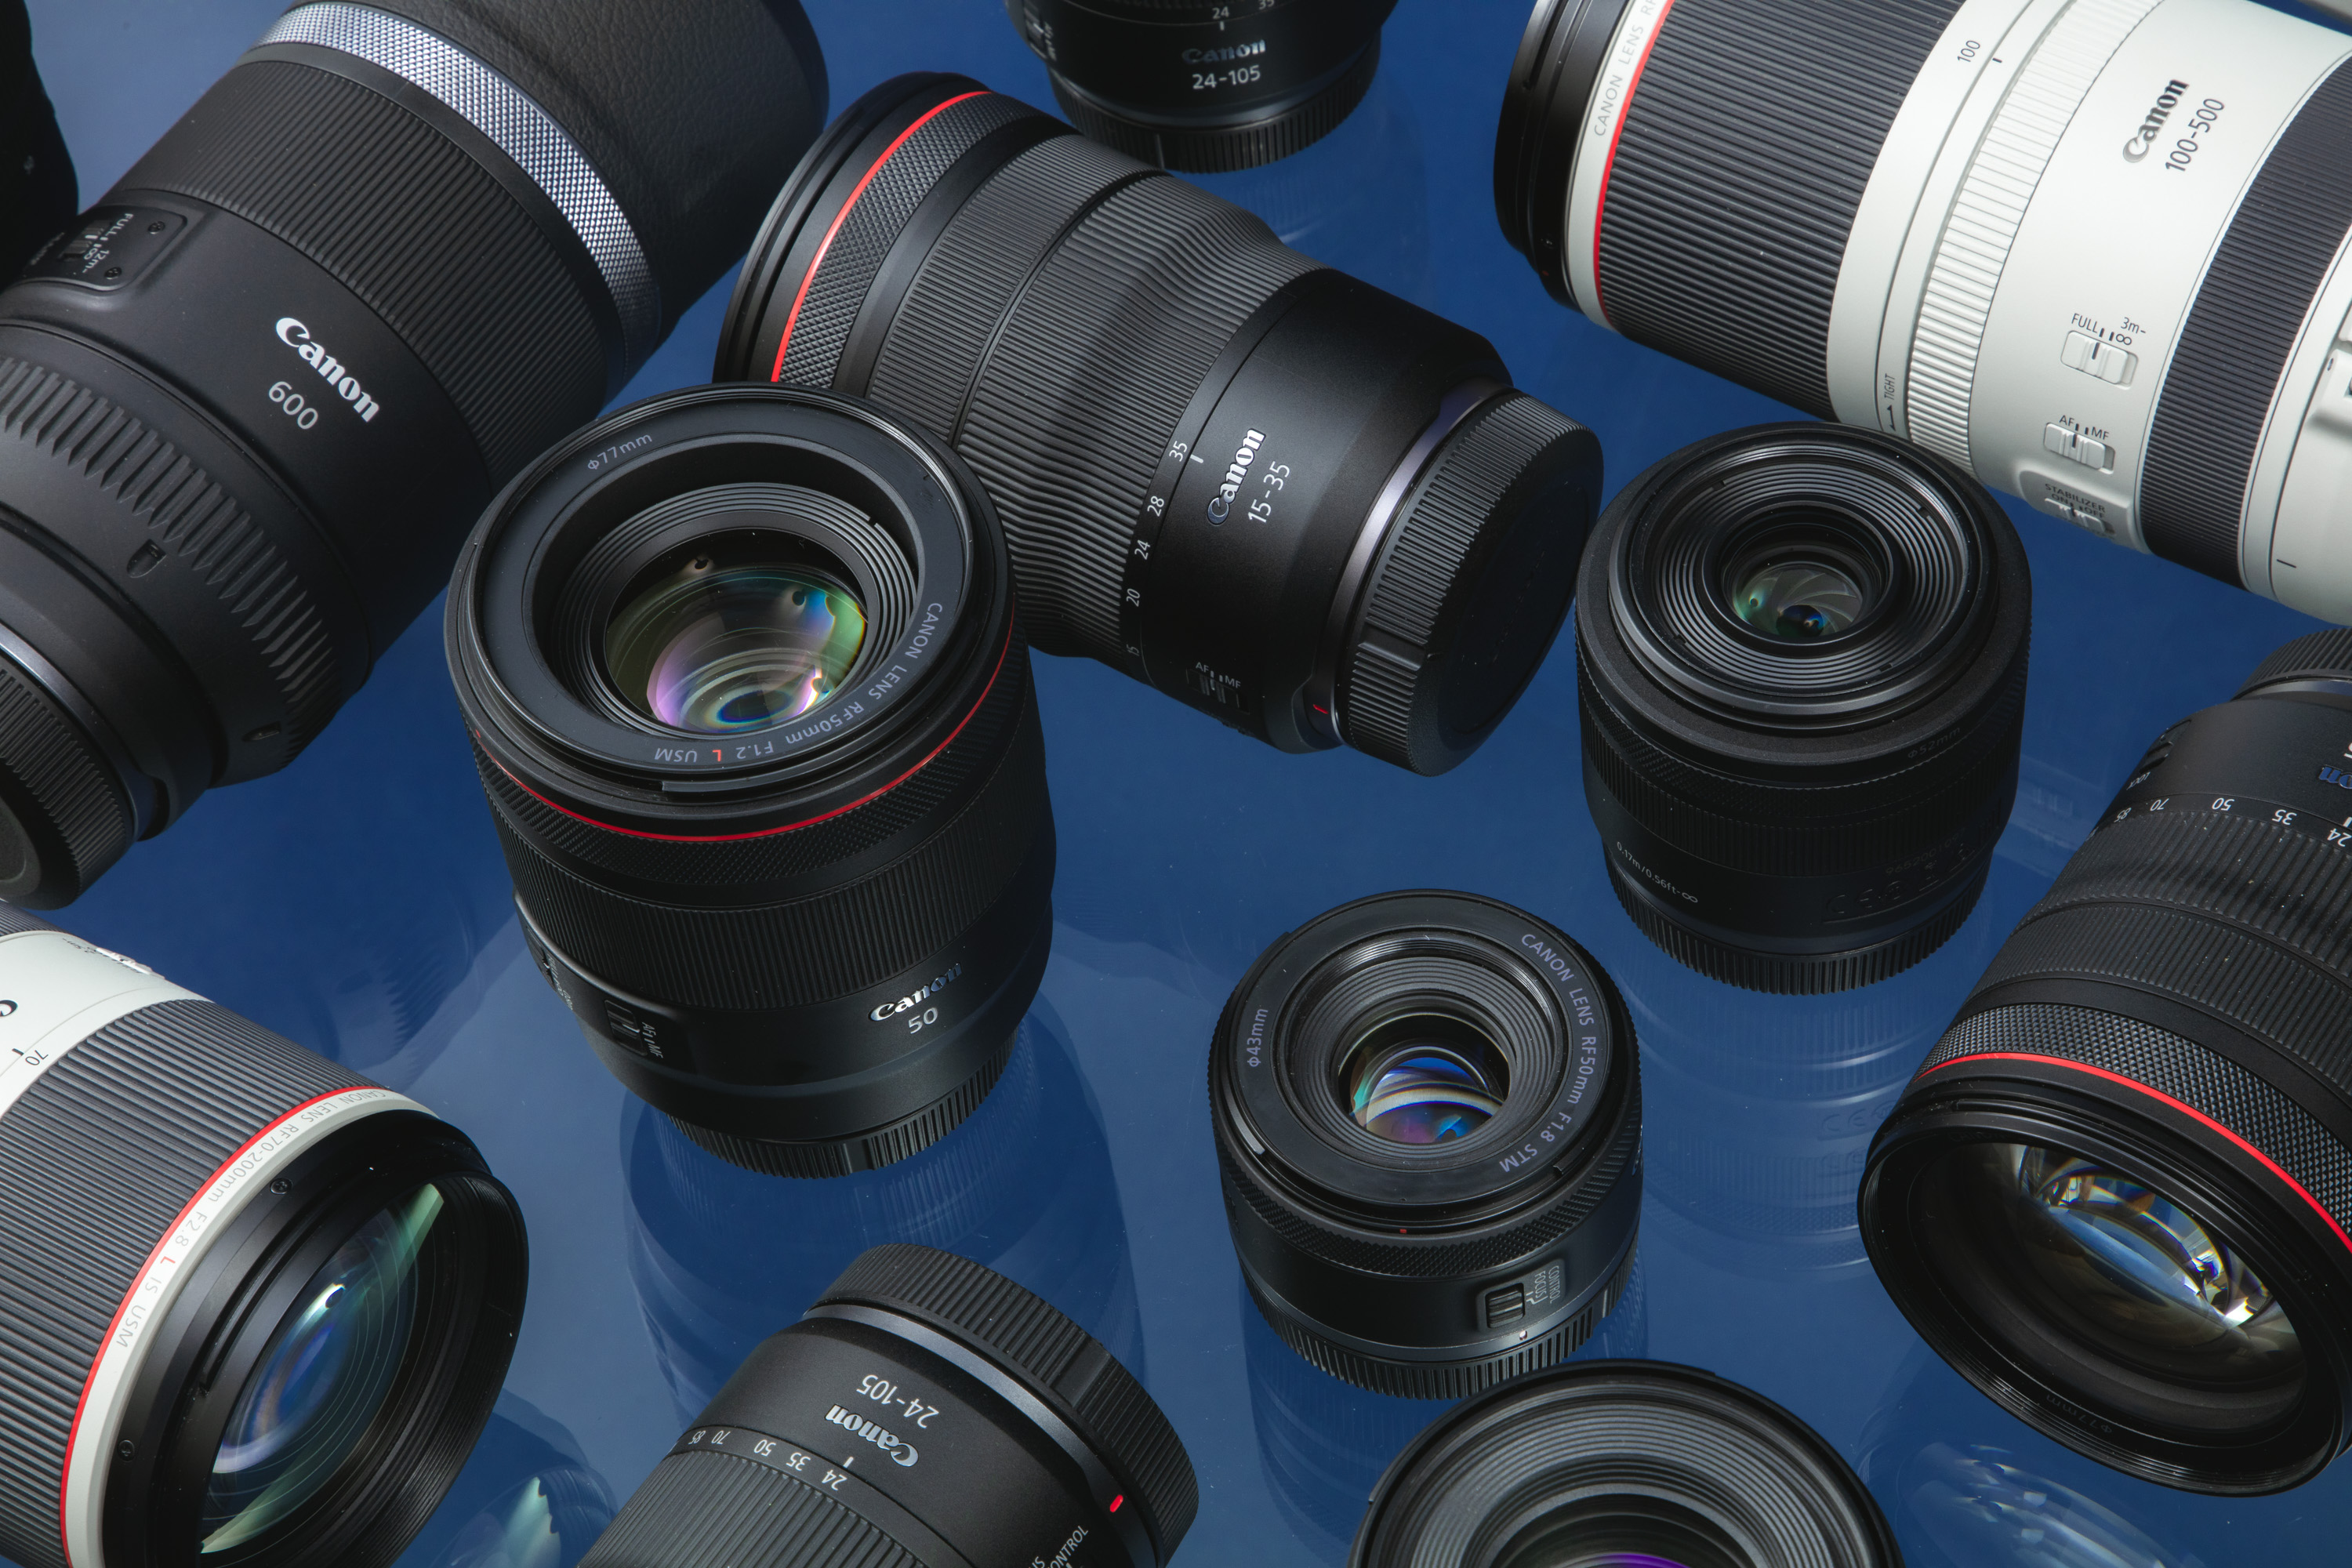
Lenses for full-frame mirrorless
If you prefer to use native glass for your full-frame mirrorless camera, you can choose from Canon RF, Nikon Z and Sony FE lenses. For Panasonic S full-frame mirrorless cameras, you have lens options from any brand in the ‘L-mount alliance’ of Panasonic, Leica and Sigma.
Travel photographers, with a particular focus on street or documentary-style images, will want a quick, high-quality and unintrusive lens. So a 35mm f/1.8 might be the perfect lens for your travel photography. This small, unassuming focal length offers shooters a lot of freedom in tight and busy environments. Try the Canon RF 35mm f/1.8 IS STM Macro, Nikon Z 35mm f/1.8 S, Sony FE 35mm f/1.8 or Panasonic S 35mm f/1.8.
For a more general-purpose travel photography lens, as with full-frame DSLR lenses, start with a 24-70mm. There are a few different options, but we recommend the Canon RF 24-70mm f/2.8 L IS, Nikon Z 24-70mm f/2.8 S, Sony FE 20-70mm f/4 G or Panasonic S PRO 24-70mm f/2.8.
Lenses for medium-format mirrorless
Finally, if you’re splashing out on a medium-format mirrorless camera for travel photography, your first port of call should be the awe-inspiring Fujifilm GF 80mm f/1.7 R WR or Hasselblad XCD 80mm f/1.9.
Used Tripods
Accessories
From storage media and lens filters to travel cases and tripods, accessories are particularly useful for travel photography. In this section, let’s look at the different types of accessories for travel photographers.
Storage media
You can never bring too many SD cards. When you’re on a travel photography trip, you won’t always know how many photographs you’ll create. Even if you’re bringing a laptop to edit your images en route, it’s always a good idea to bring spare in-camera storage media. Remember to check your camera’s maximum write speed and get the right cards accordingly.
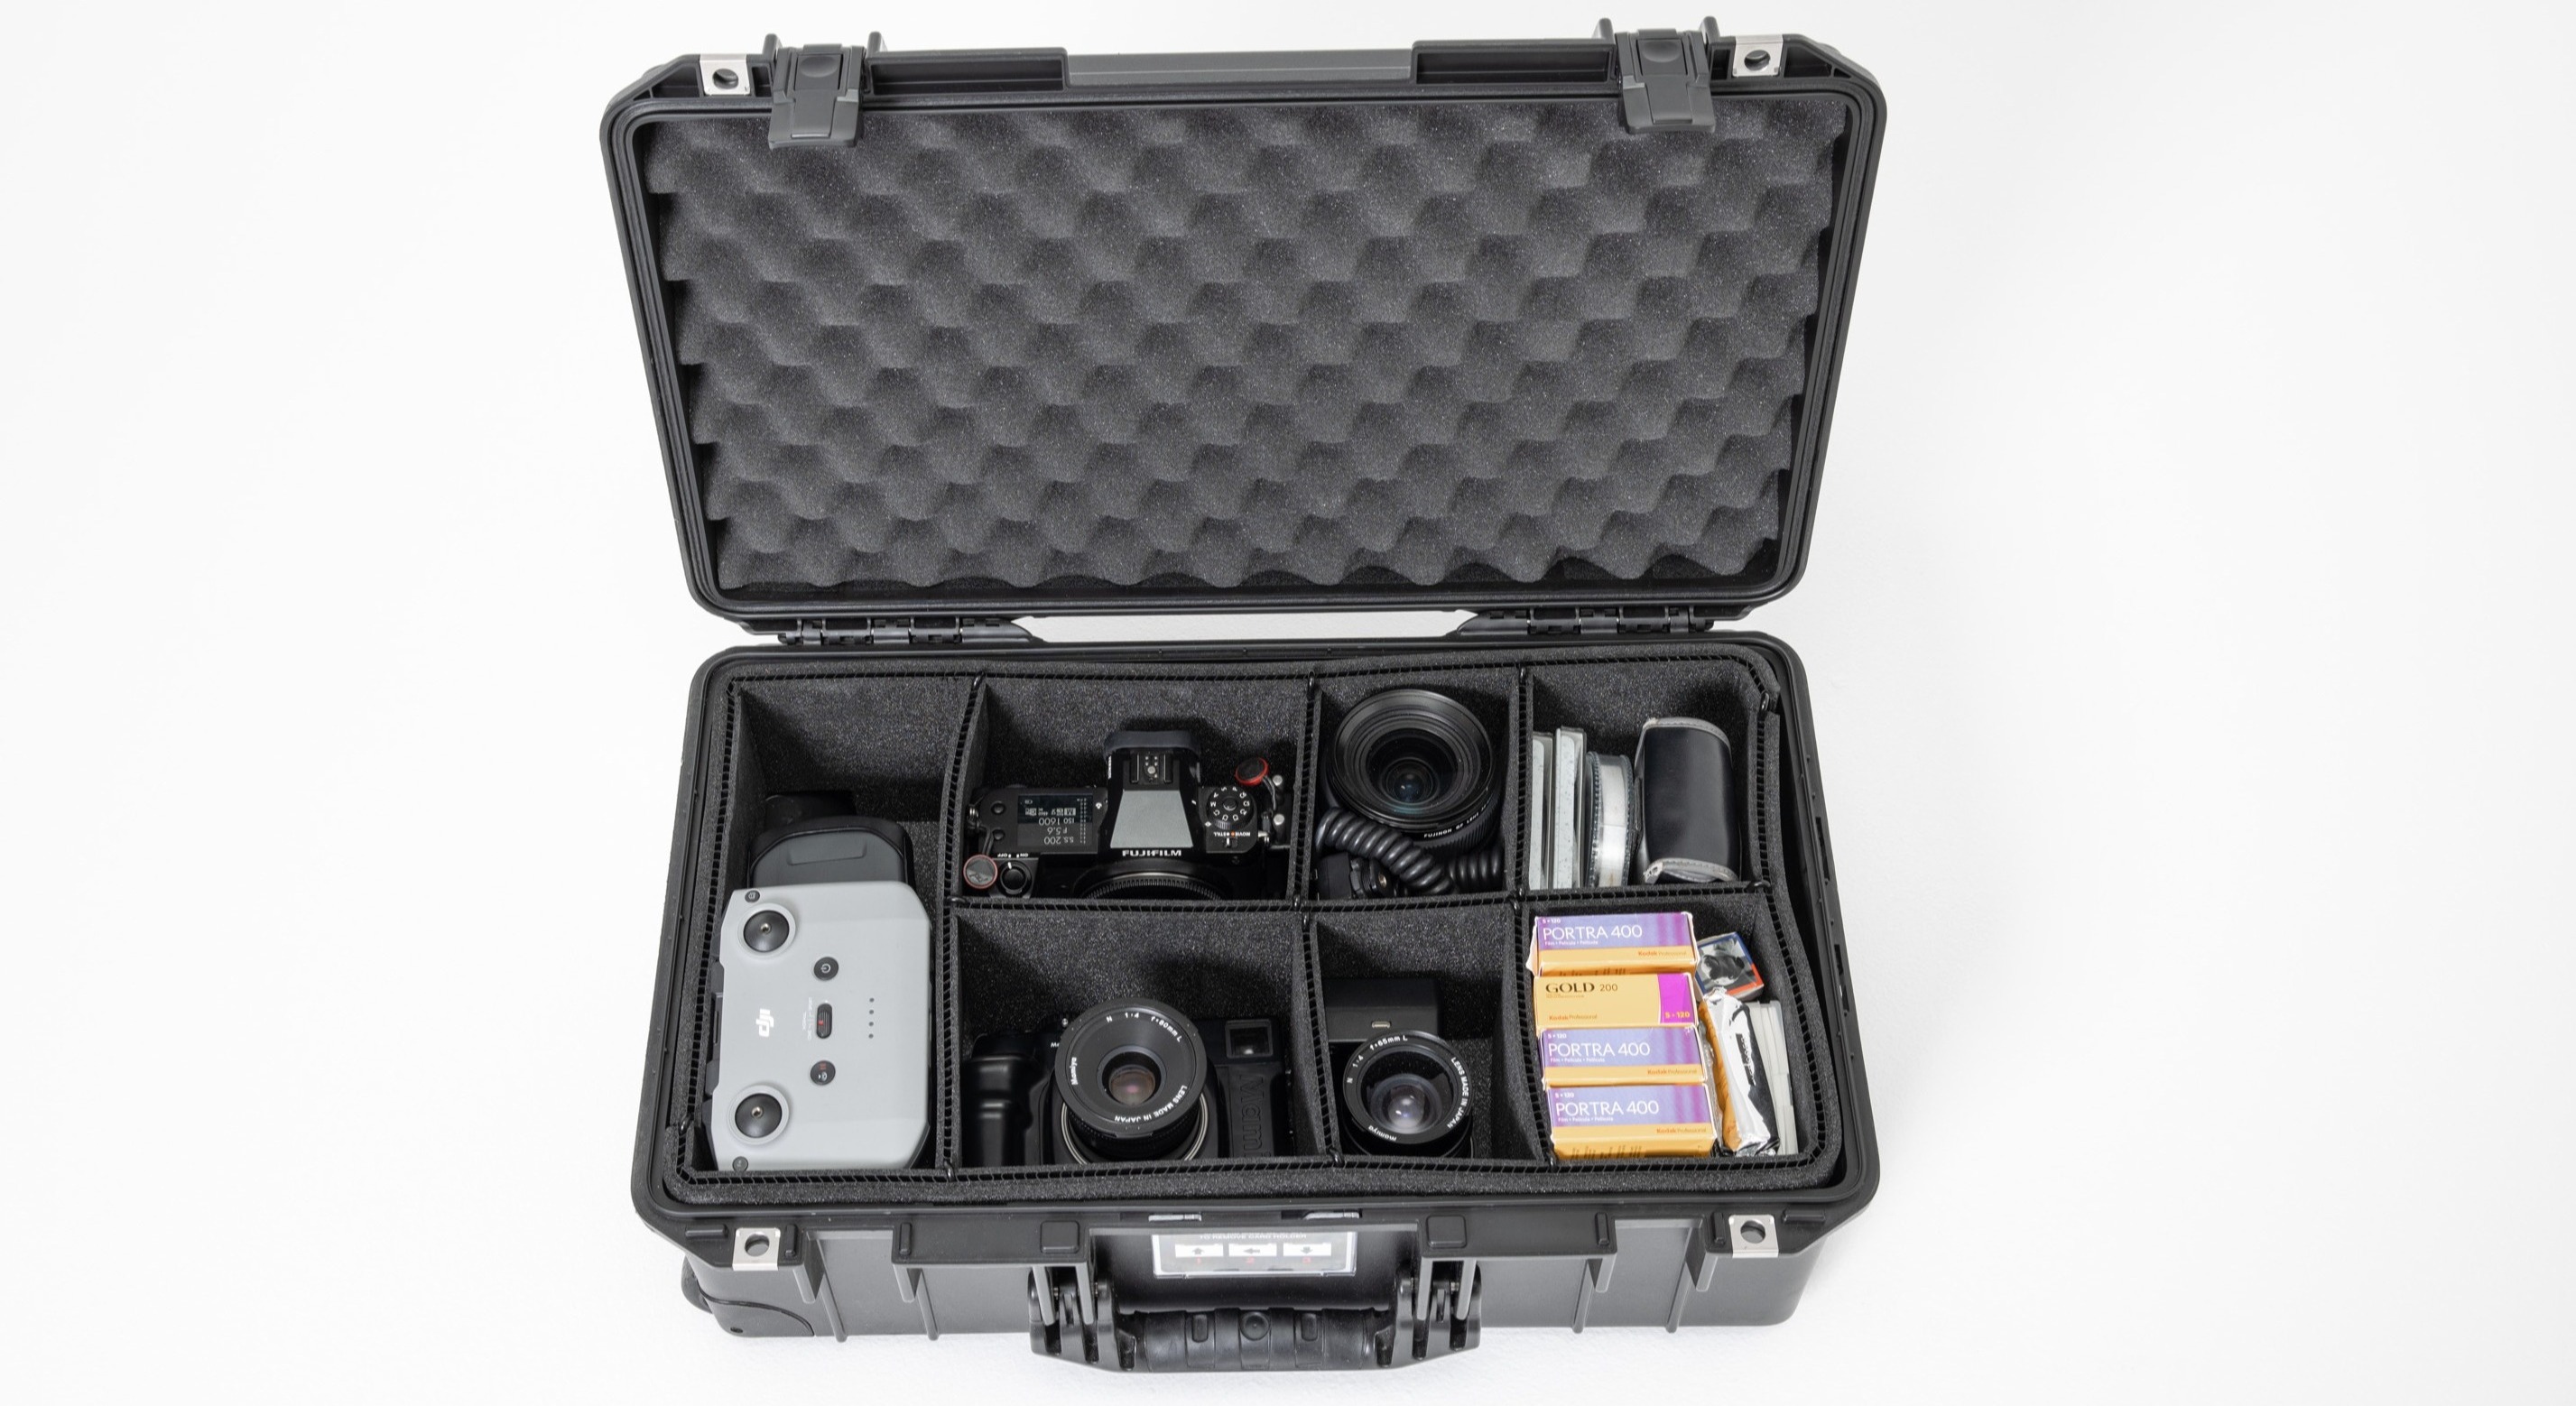
Travel case
Photographers often forget to budget for a reliable and sturdy travel case. We don’t need to explain why it’s important to keep your gear safe—but what are the different options for travel cases? What are the differences between soft and hard cases? Find out more in our article about hard vs soft cases.
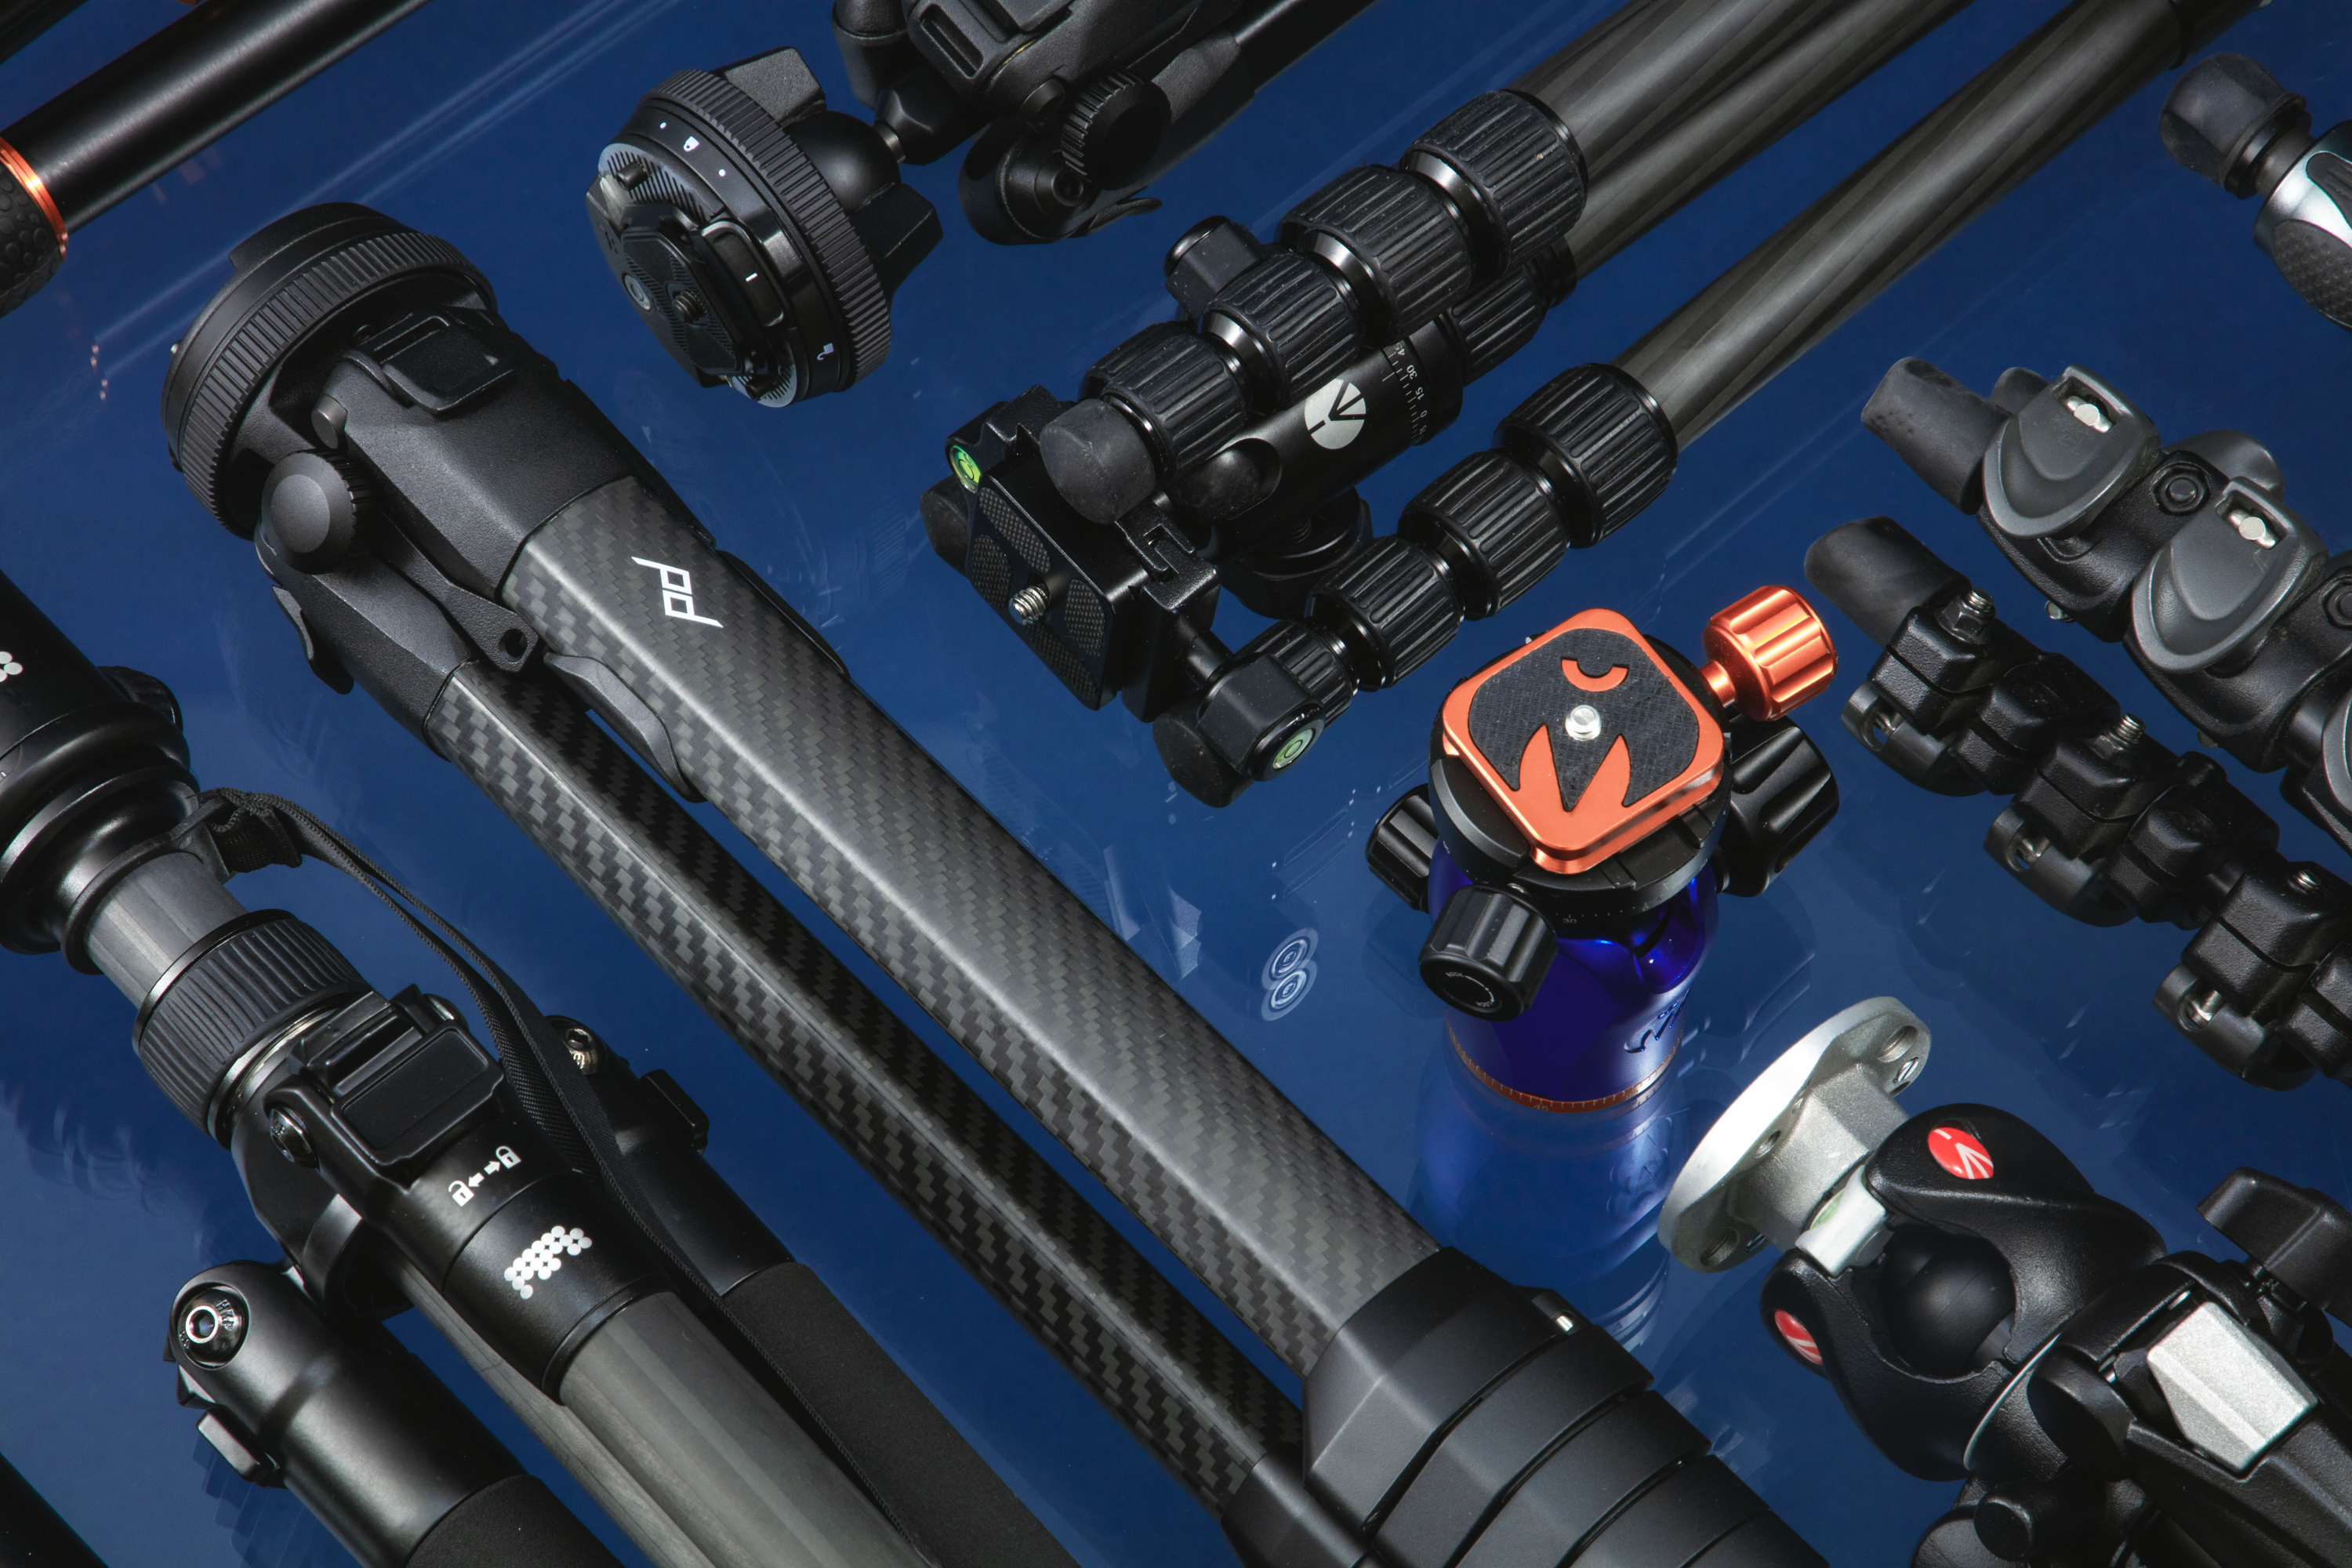
Tripod
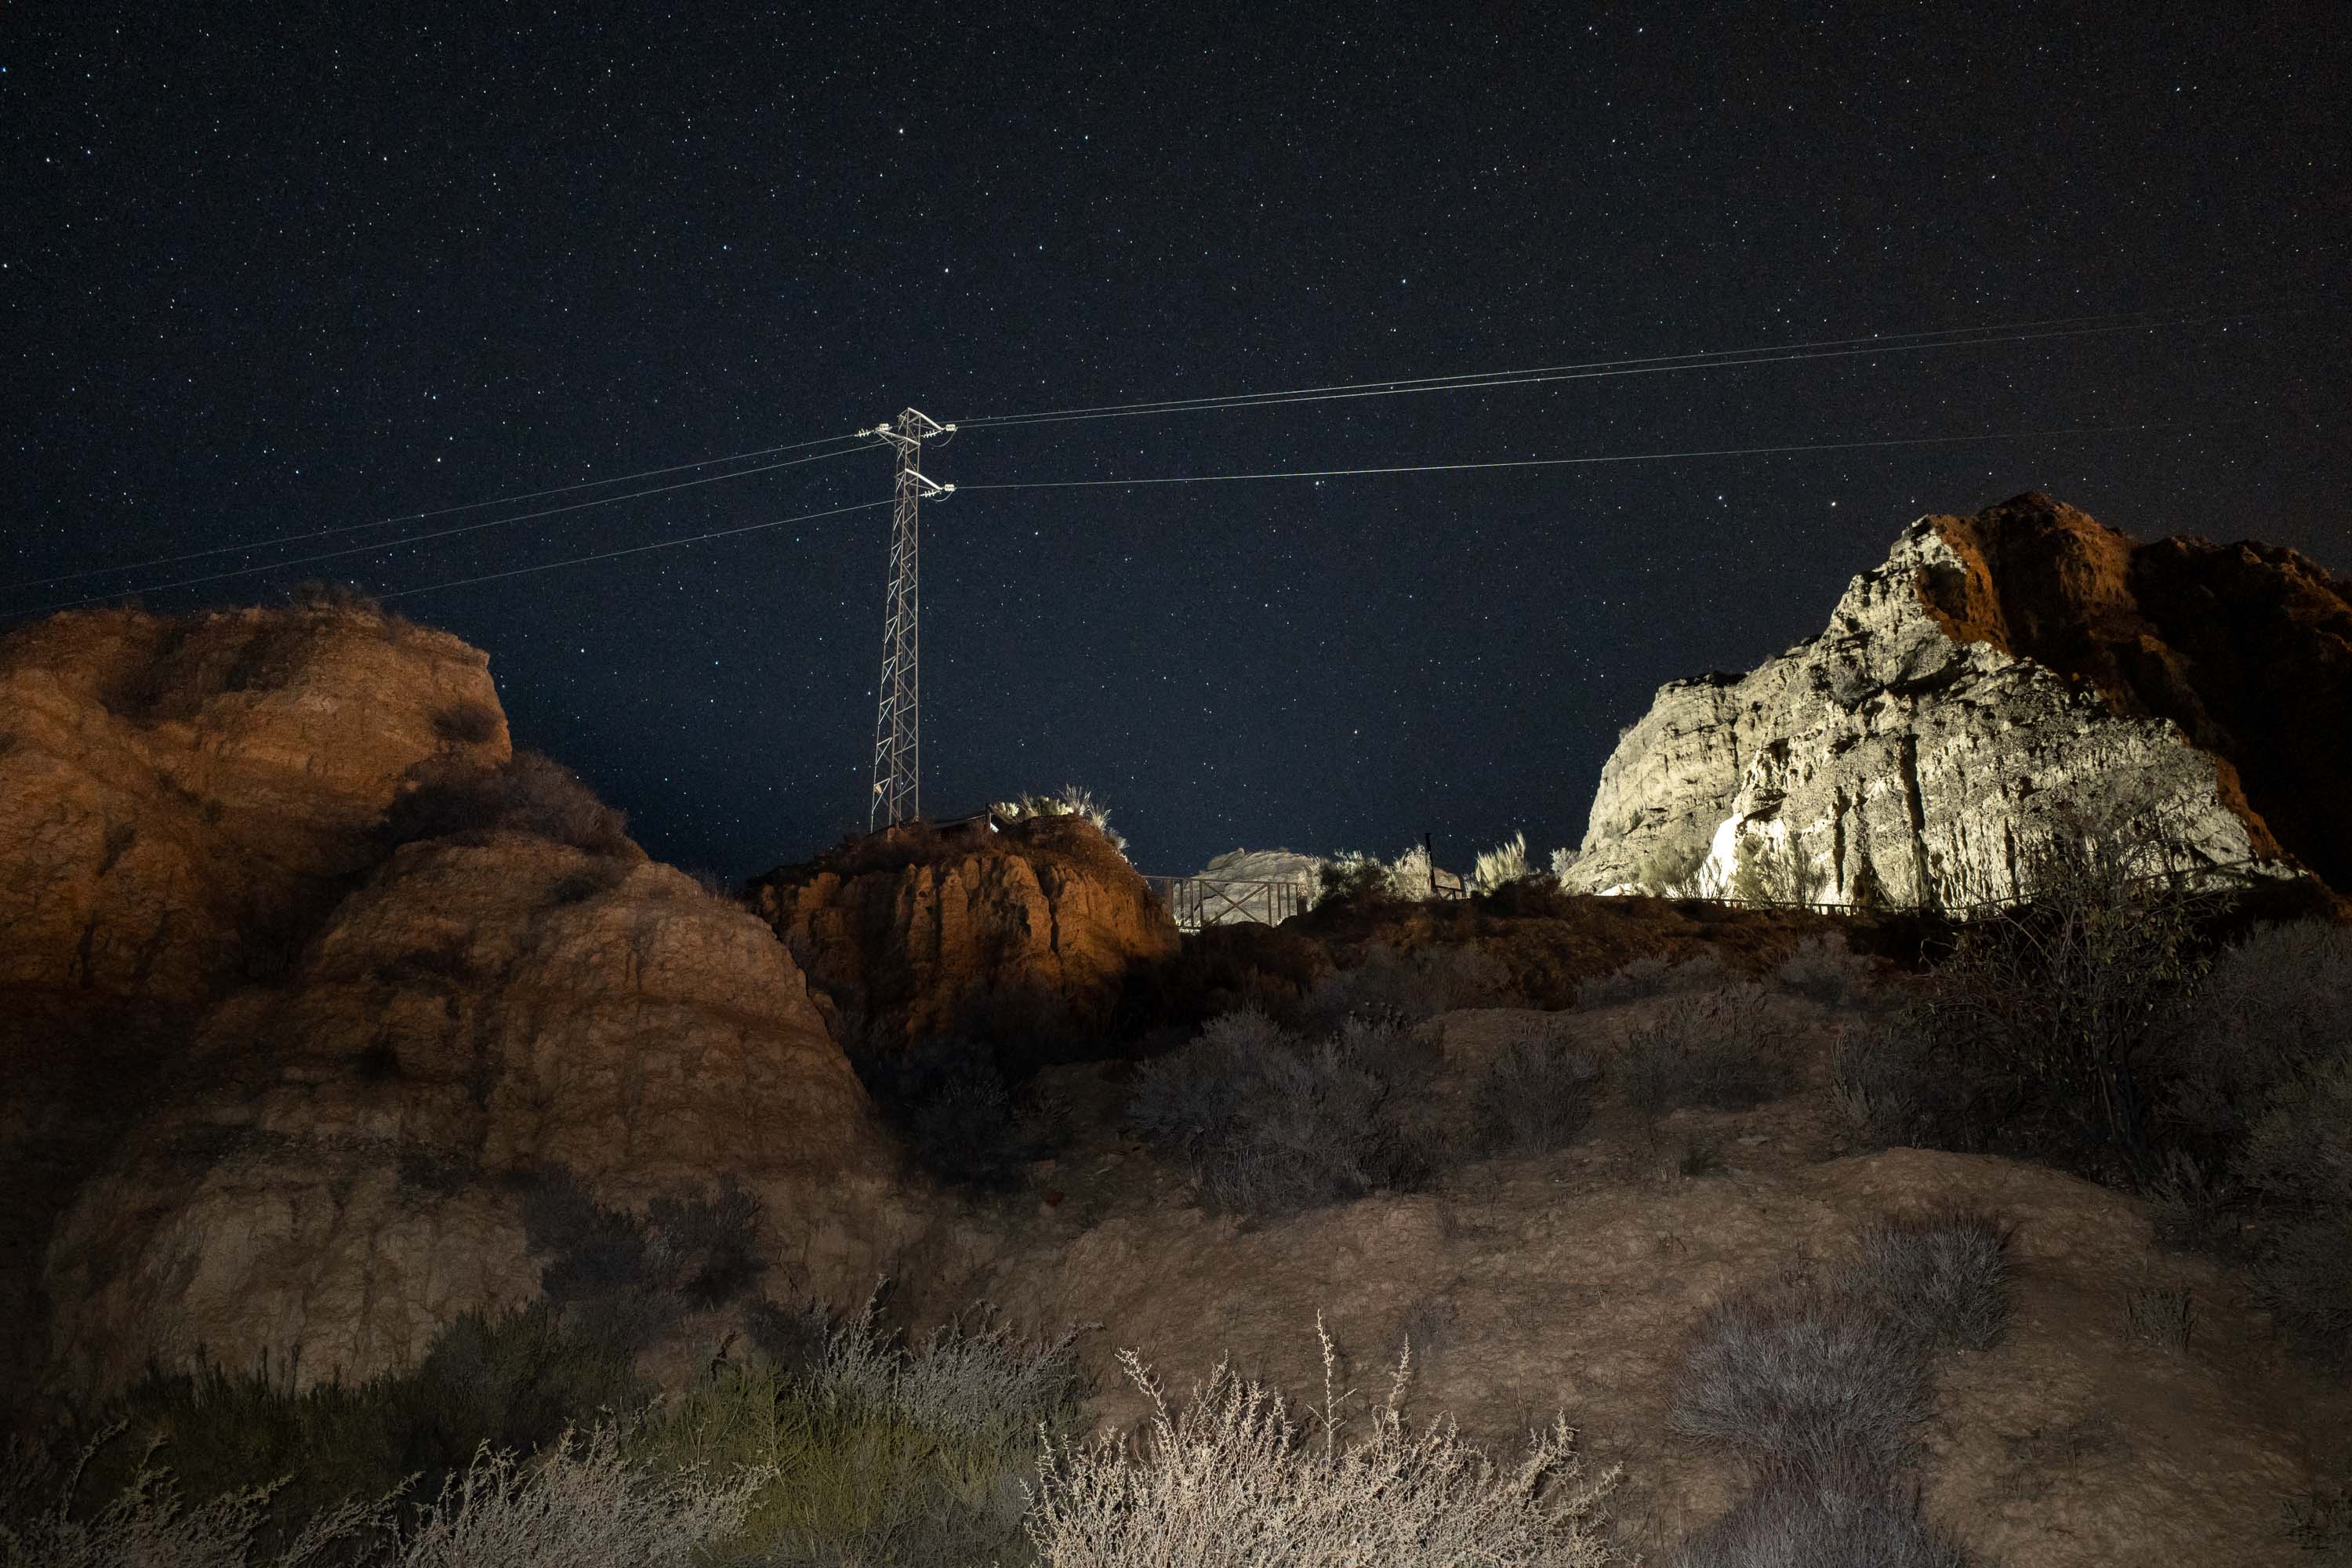
In spite of their size and weight, tripods are still incredibly useful and underrated photography tools. A tripod is invaluable when you want to get a specific shot in low-light situations. Tripods also help you get creative with longer exposure times.
If you’re travelling to a location with beautiful landscapes or a spectacular night sky, then a tripod is a must for your travel photography. It’s better to have it and not need it than potentially missing a once-in-a-lifetime photograph due to a lack of stabilisation. They’re also particularly useful for photographing in cold weather.
The only real downside of a tripod is its bulkiness. Fortunately, there are plenty of light and inexpensive travel tripods available.
Used UV Filter
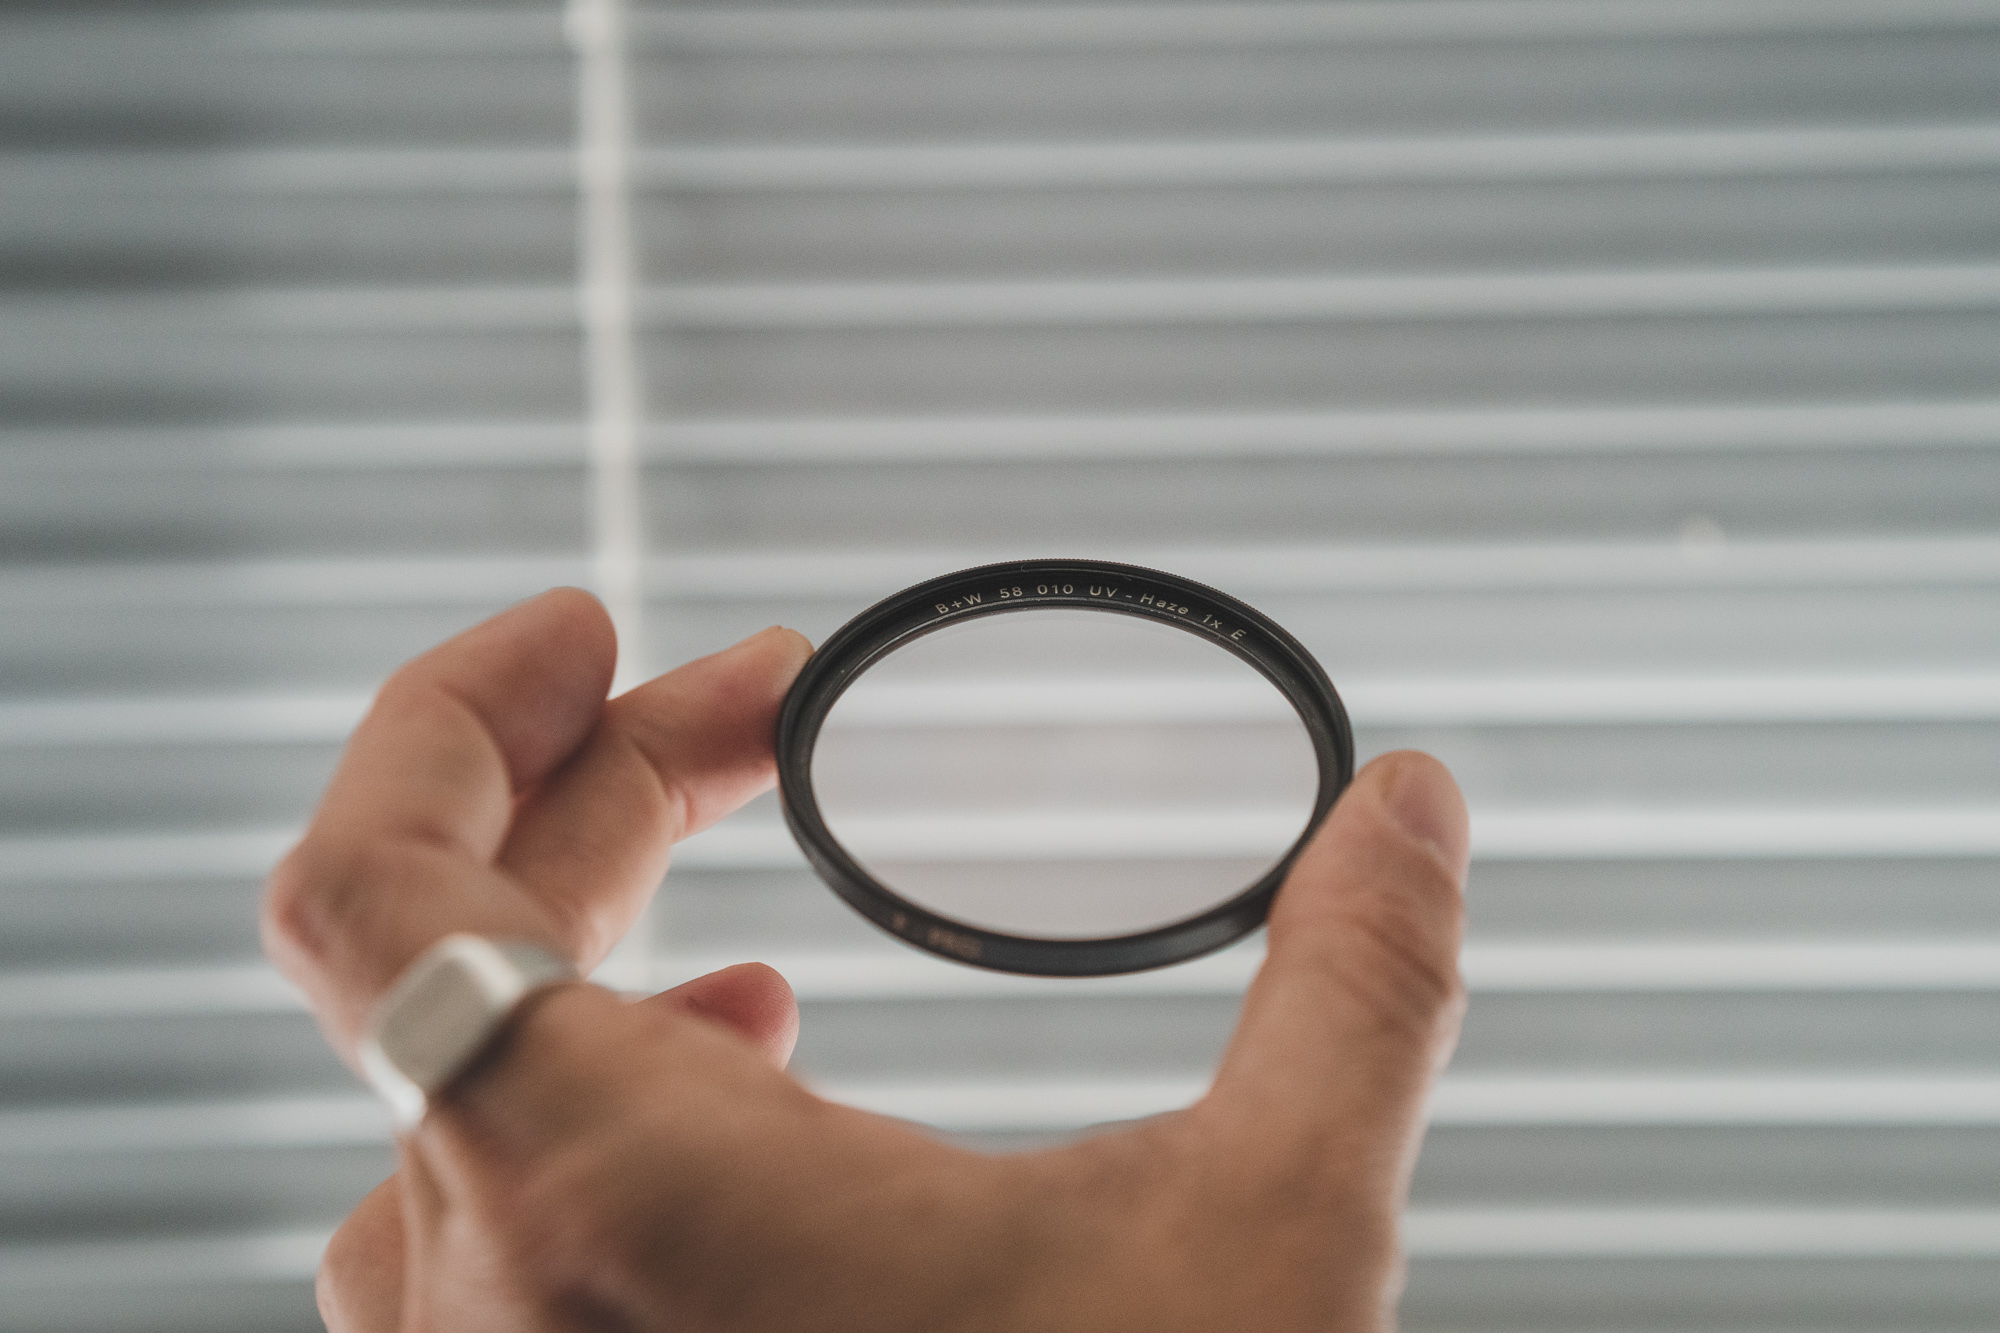
Filters
Many photographers will use UV filters to protect their lens glass. This trick is particularly useful for travel photography. But there are other lens filter types, each of which offer different benefits.
Neutral-density (ND) filters reduce the amount of light entering your lens, allowing you to decrease your exposure beyond your camera’s existing capabilities. For travel photography, ND filters are useful for creating a shallow depth of field in a sunny location. As the ND filter removes some of the light, you can open up your aperture without overexposing your image. The same goes for long exposures, with the ND filter counteracting the light from slower shutter speeds.
ND filters are available in a range of different densities, which dictate the percentage of light transmission, so you can get a set of them to mount on your lens depending on sunlight. Alternatively, you can get a single variable neutral-density filter. As their name suggests, variable ND filters allow you to alter the amount of light passing through the filter—so you only ever need one per lens.
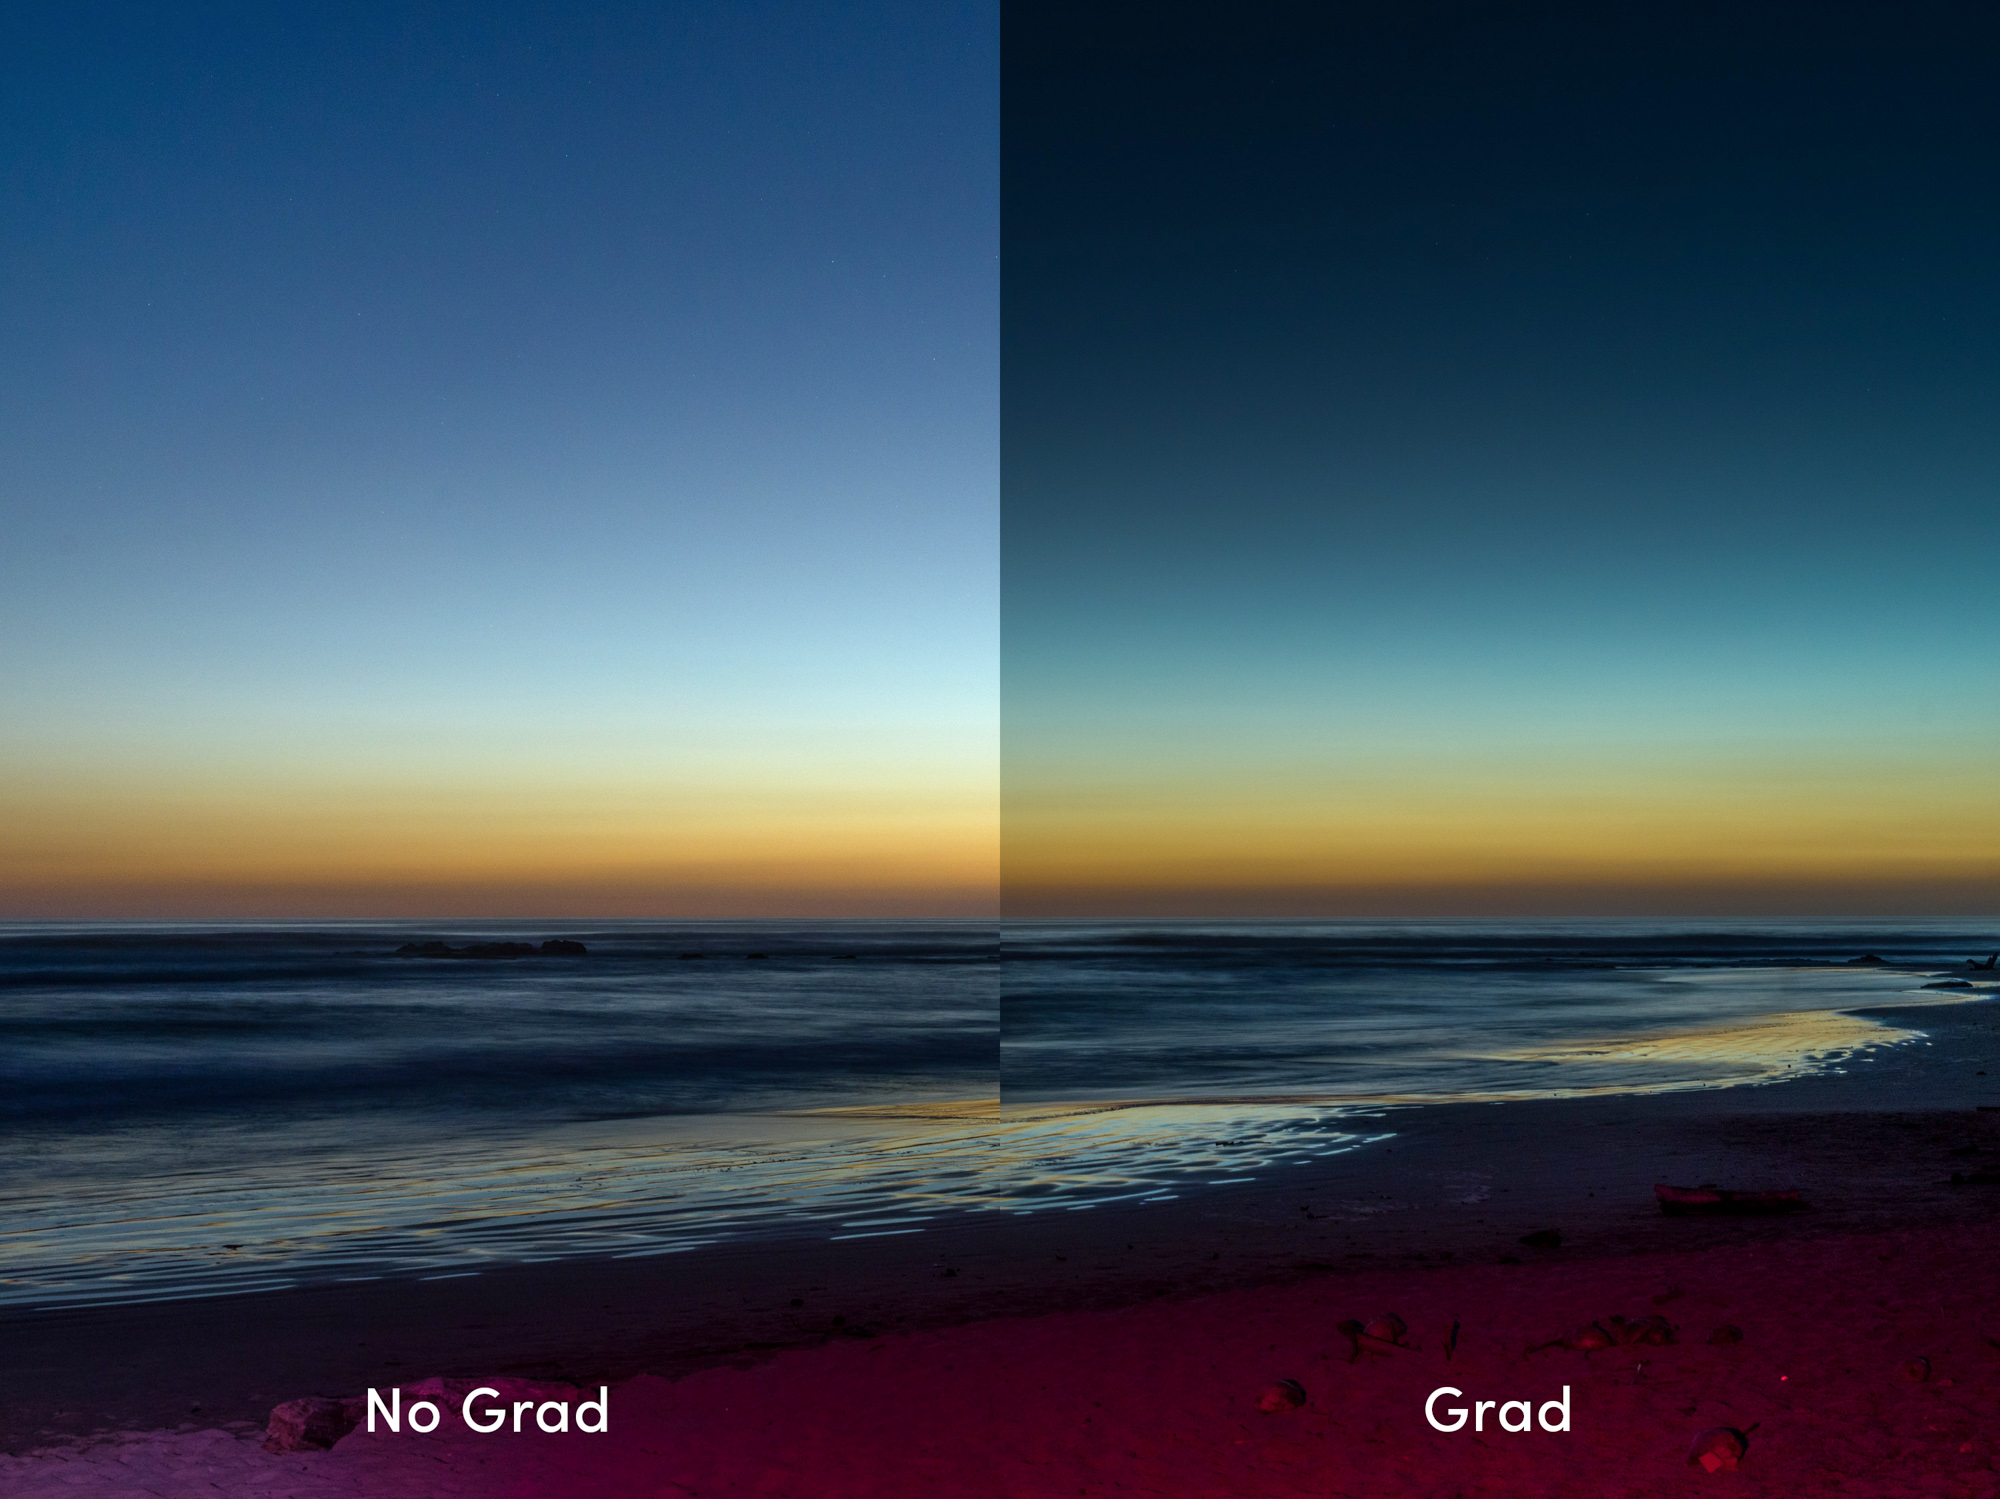
You can also get neutral-density graduated filters, which filter the amount of light in a gradient. ND graduated filters are useful for landscape travel photography as they reduce the brightness of the sky while the ground remains unaffected.
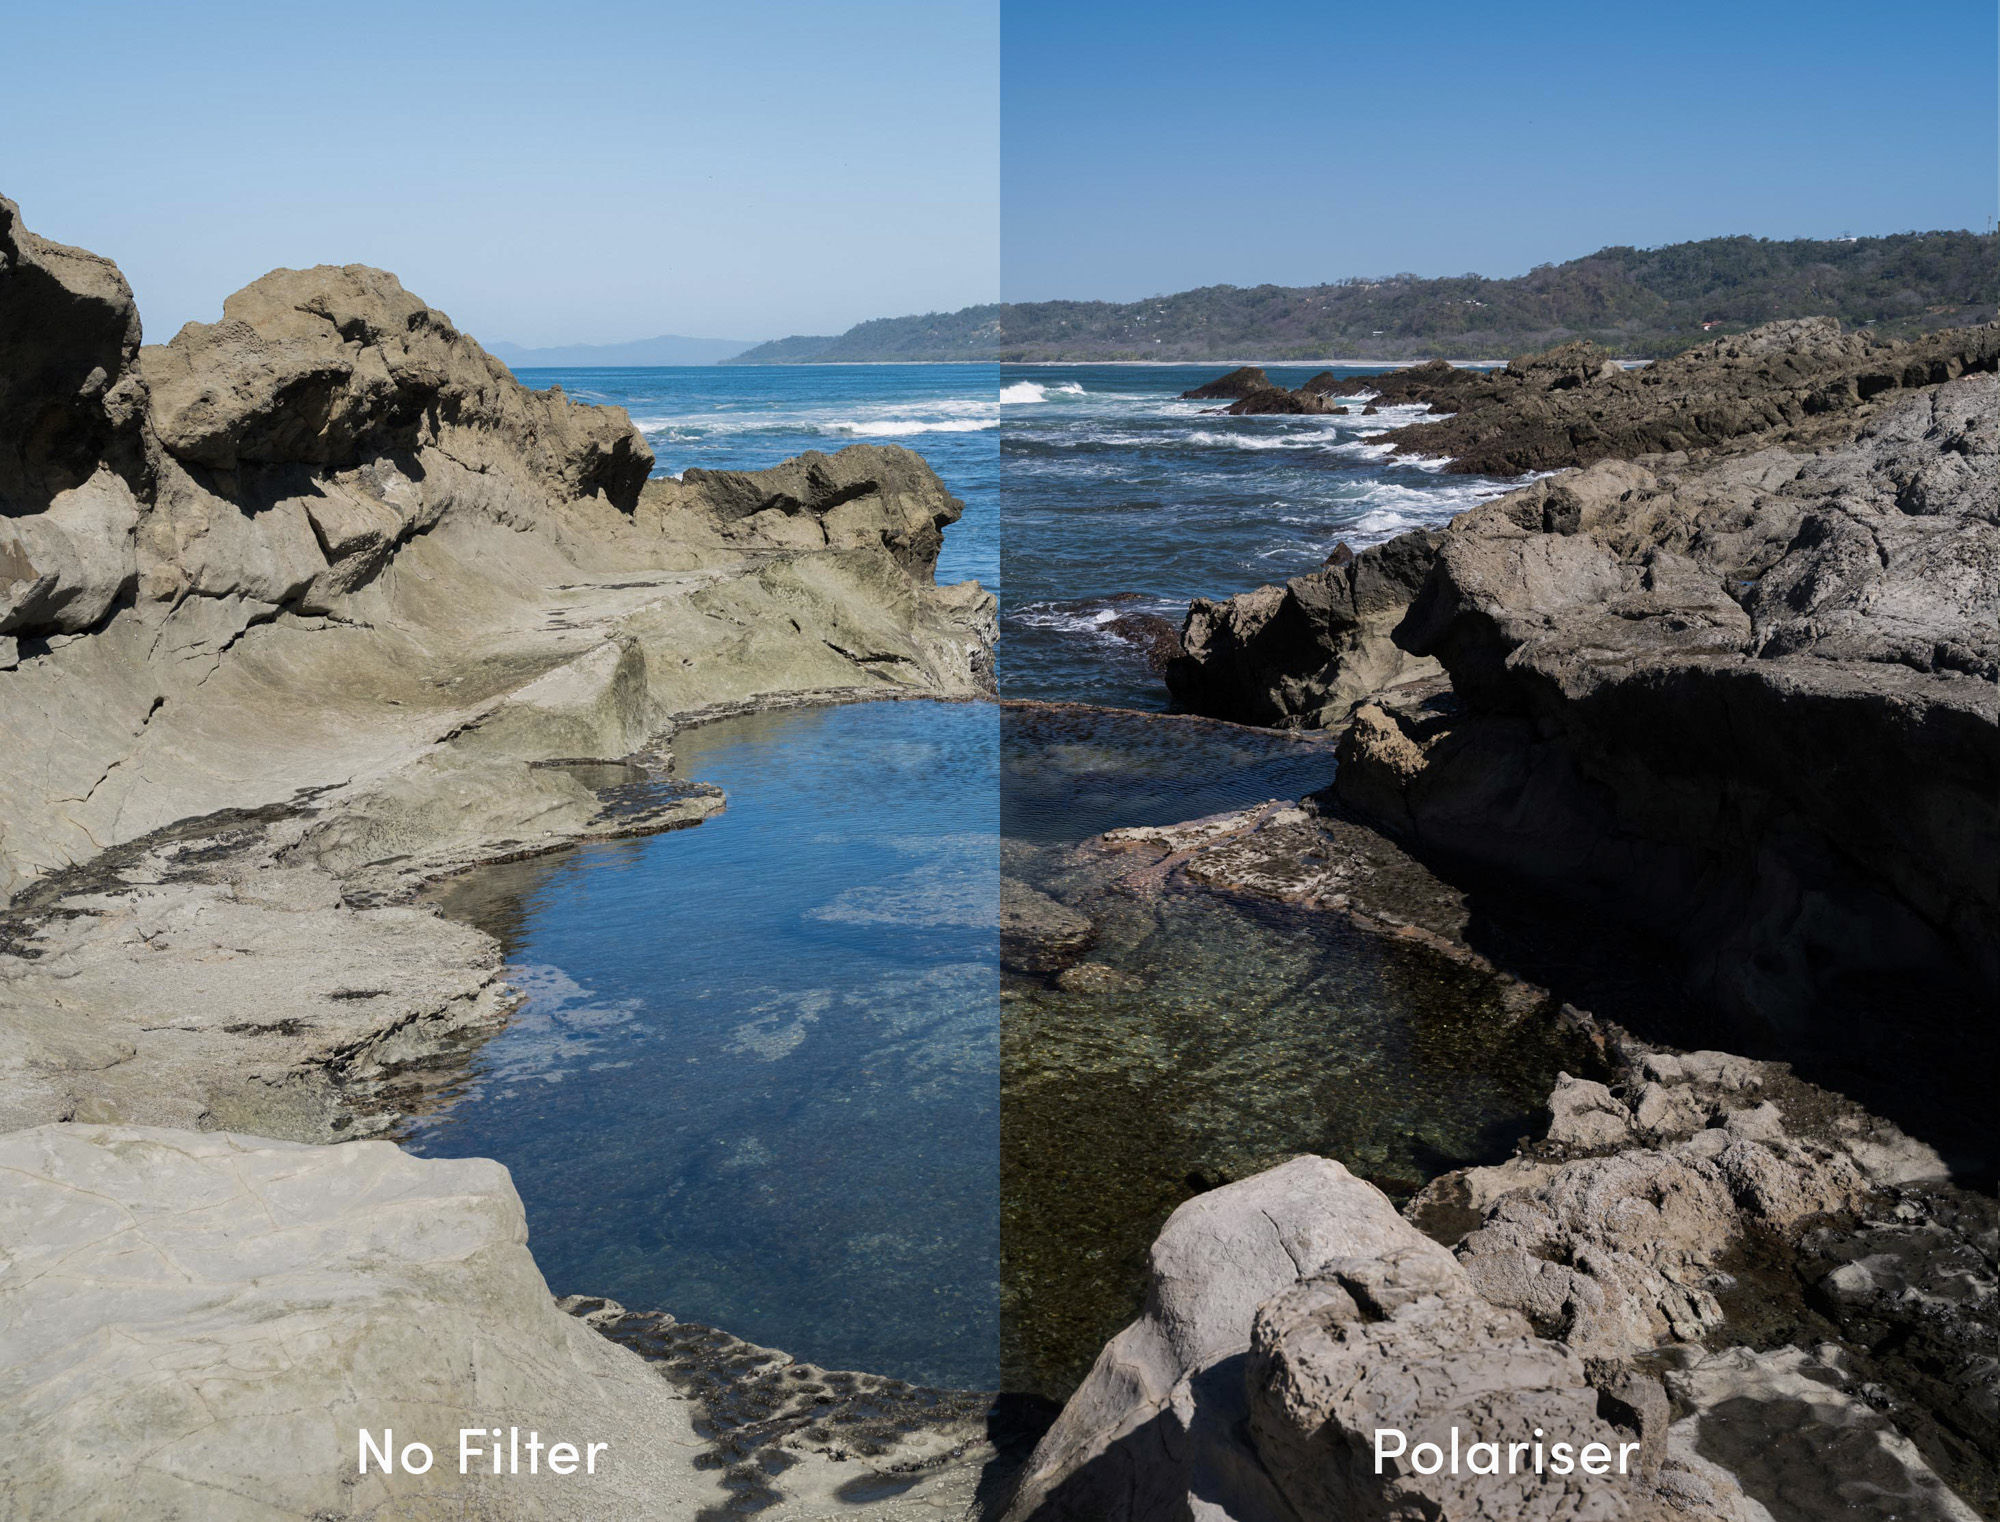
Polarising filters help to bring down highlights, thereby removing unwanted reflections of light on glass or water. They’ll also give you more contrast within skies, drawing more attention to clouds for more dramatic skyscapes. If you’re a travel photographer visiting a seaside location with crystal-clear water, for example, a polarising filter will help remove surface glare so the viewer can see through the water.
Your lens filters will need to match the diameter of your lenses, so remember to check those before you buy. There are other types of filters—including colour filters and softening filters. If you’d like to learn more about these, check out our guide to lens filters.
Choosing Locations for Travel Photography
Before you visit any location for travel photography, make the most of your trip by planning ahead. There are a number of resources you can use. First, get a sense of the geographic region. Is it all built up and urban, or is it rural? Use Google Maps, or even Google Earth, to get the lay of the land.
After you’ve scoured your guidebooks, exhausted your online research and conducted a full reconnaissance of the locations, all you need is a way to link them up. Use a custom Google Maps to plot out photo-walks between locations.
Take time to explore the country along the way, and fantastic photography will soon follow. Sometimes you’ll get your best photos between locations. Follow the traveller’s maxim that life—and photography—is about the journey, not just the destination.
Locations for Travel Photography
Ready to book your tickets and get started with your travel photography? Check out our top photography locations for a number of destinations.
Ian Howorth | Leica Q2 | 28mm | f/8.0 | 1/3200 | ISO 800
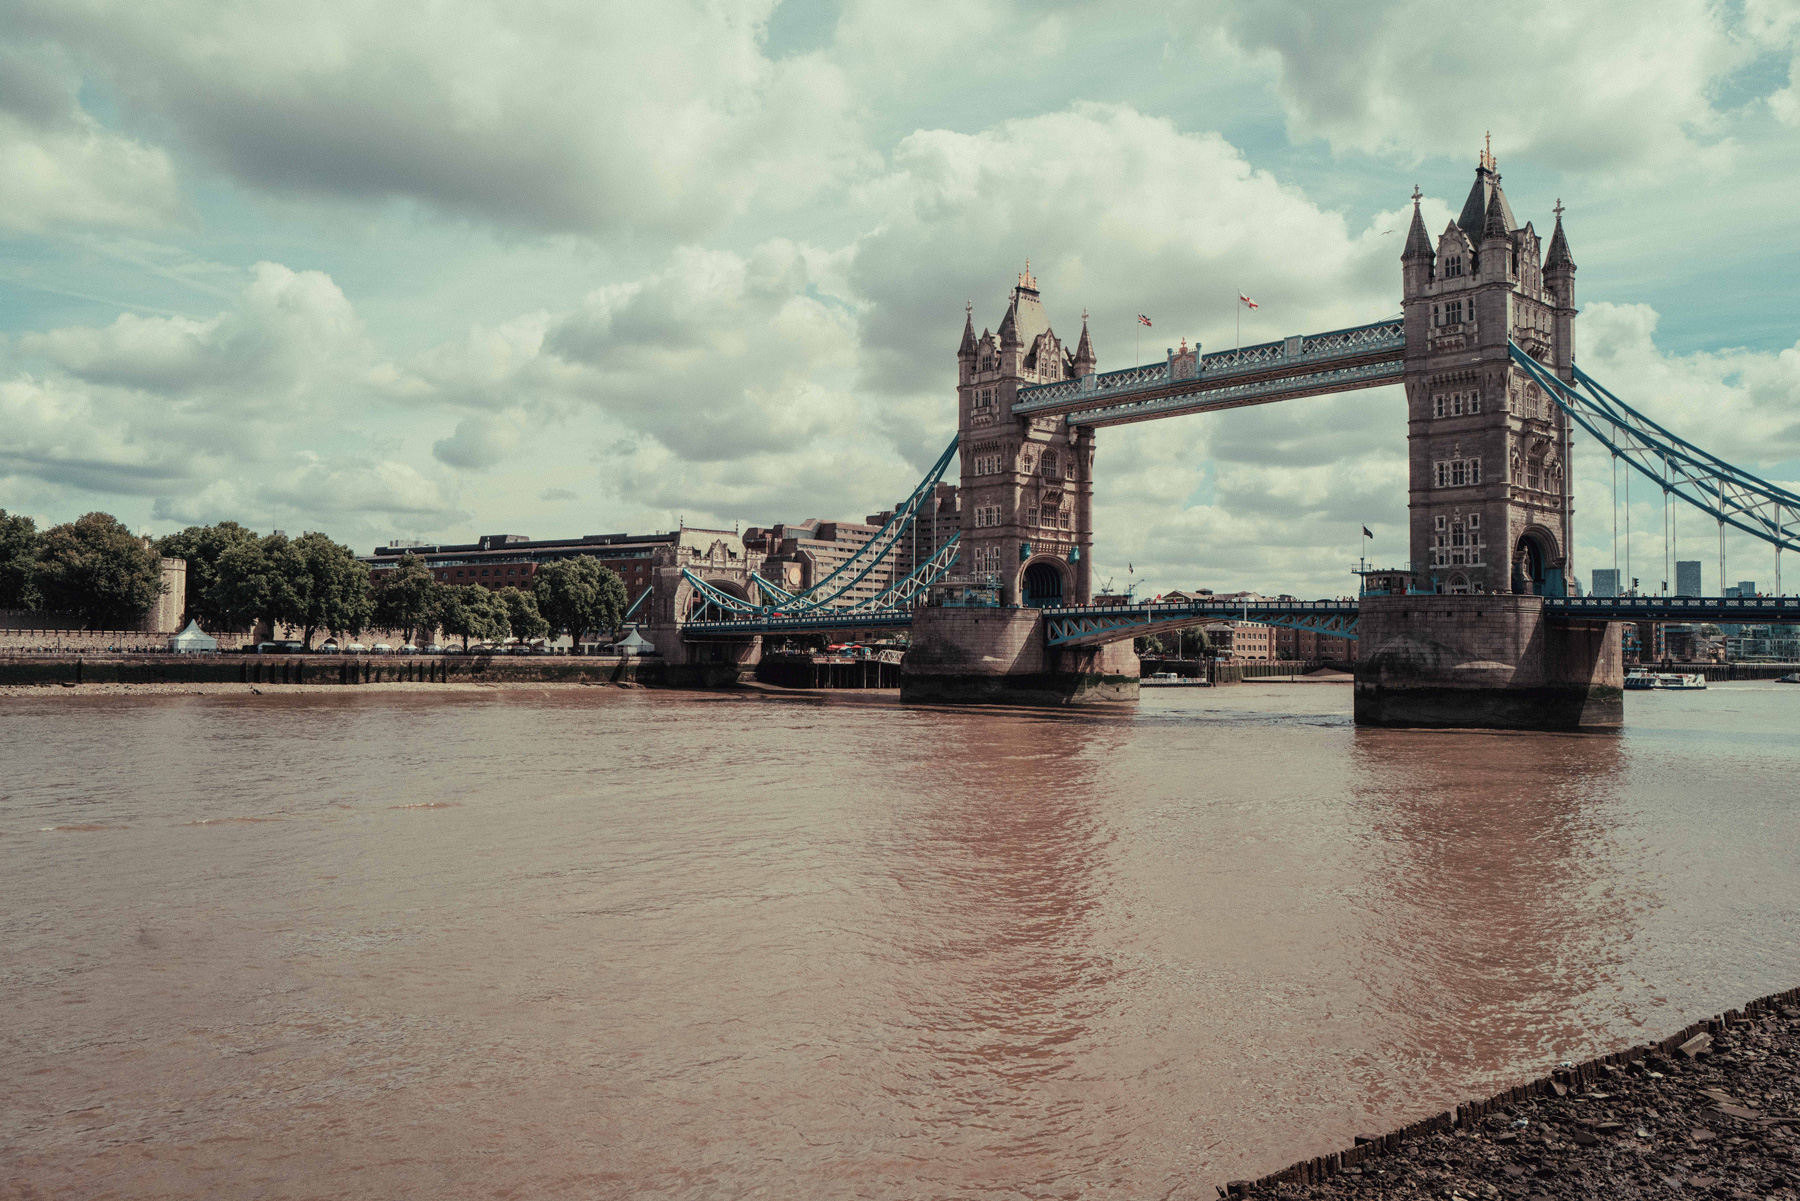
London
The MPB team visits the UK capital to capture five travel photography locations, including Tower Bridge, The Shard, the Tower of London, Elizabeth Tower and the London Eye. Check out our top London photography locations.
Lawrence Bentiné Jr | Sony ILCA-99M2 | 60mm | f/7.1 | 1/250 | ISO 500
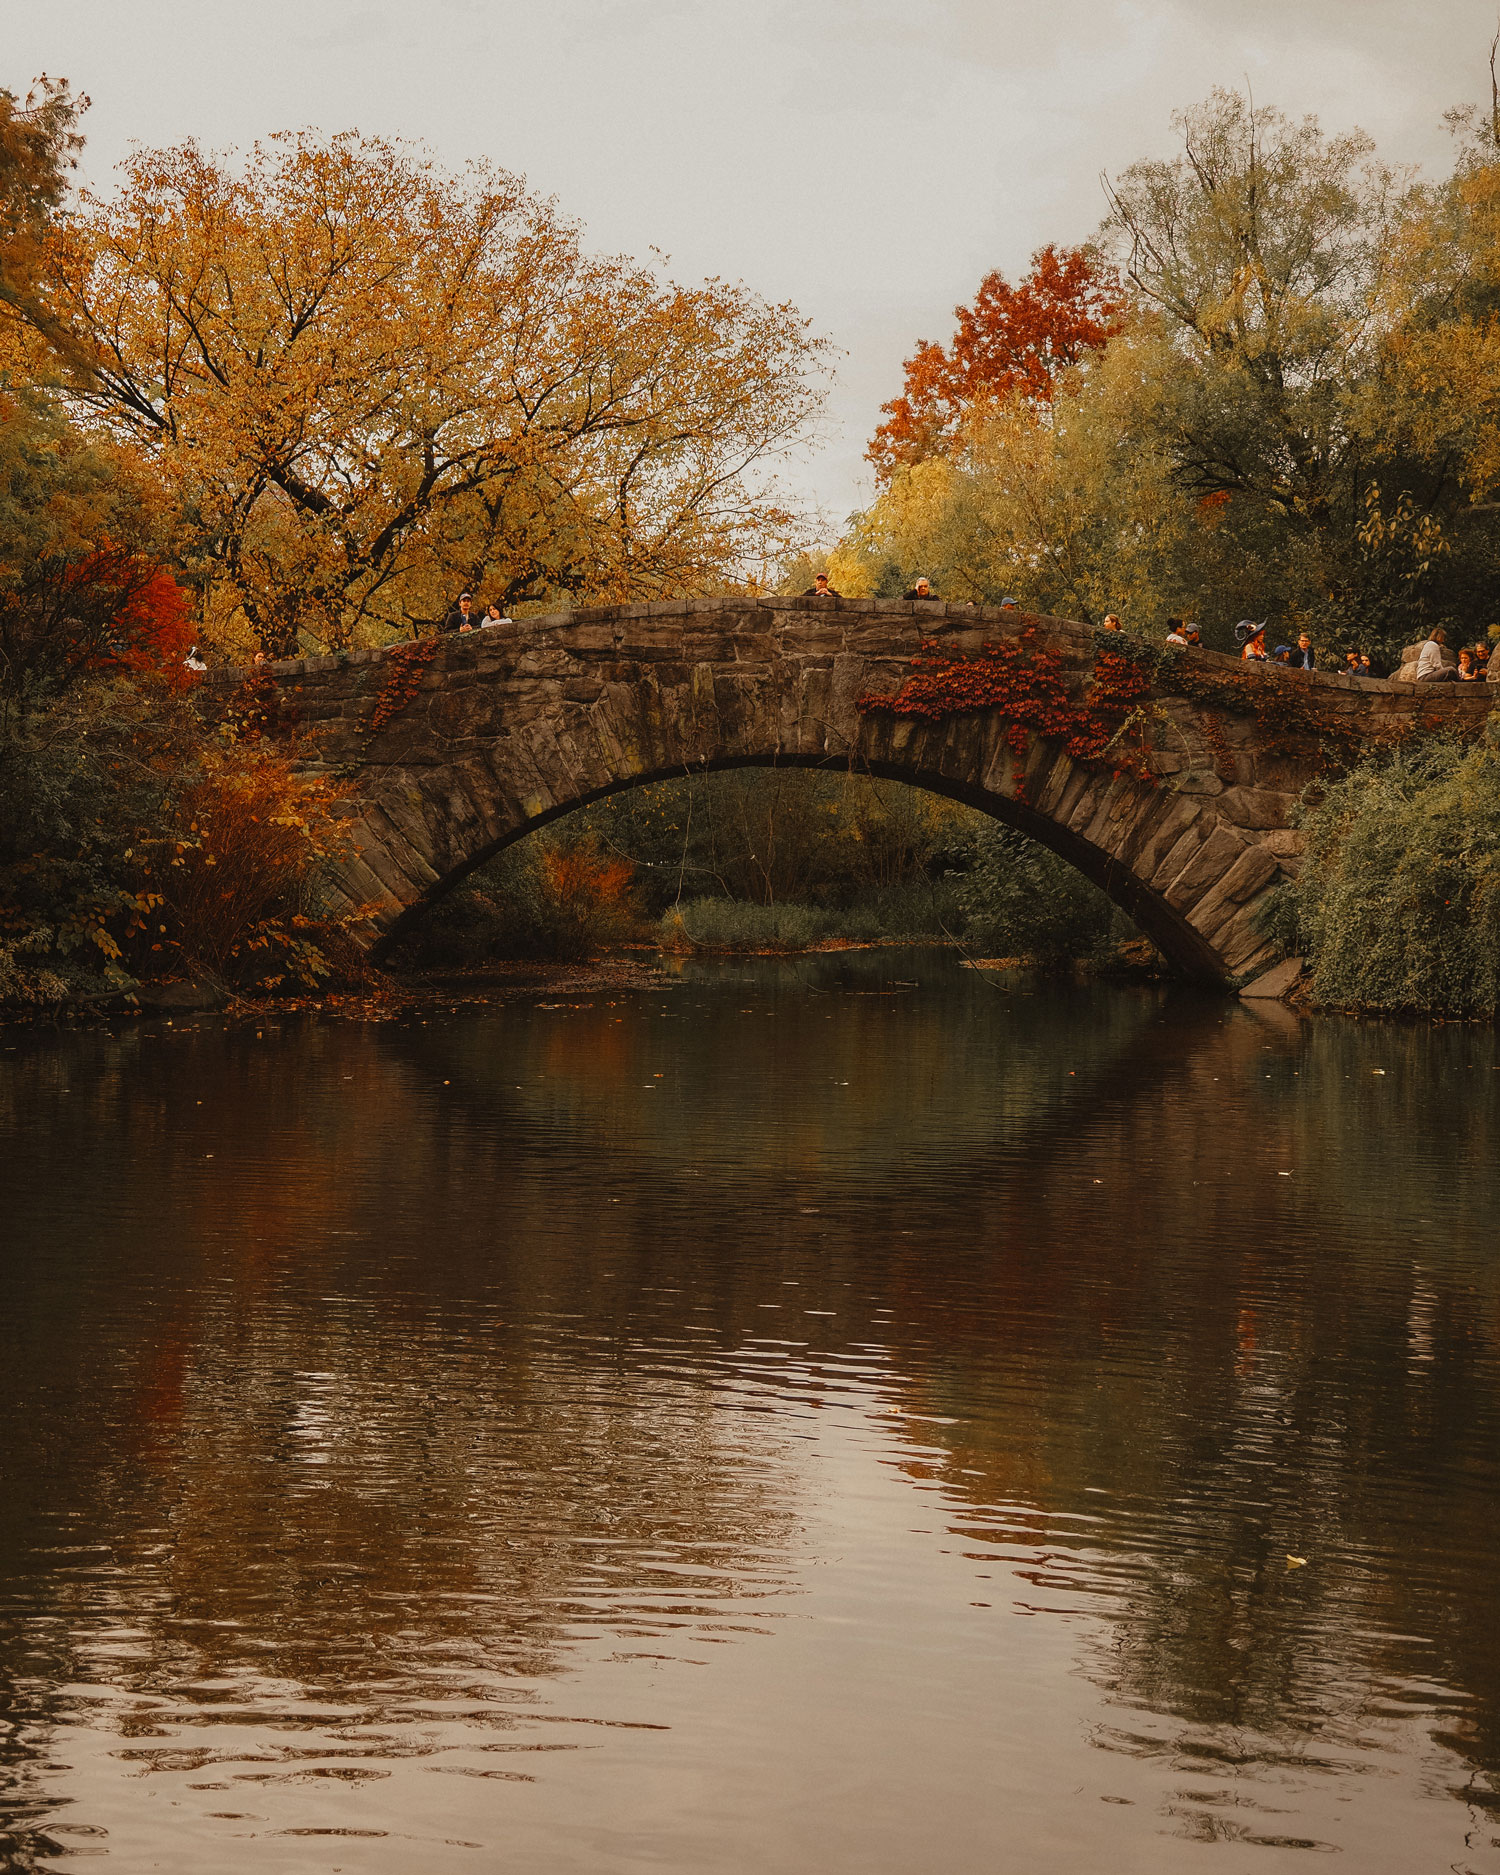
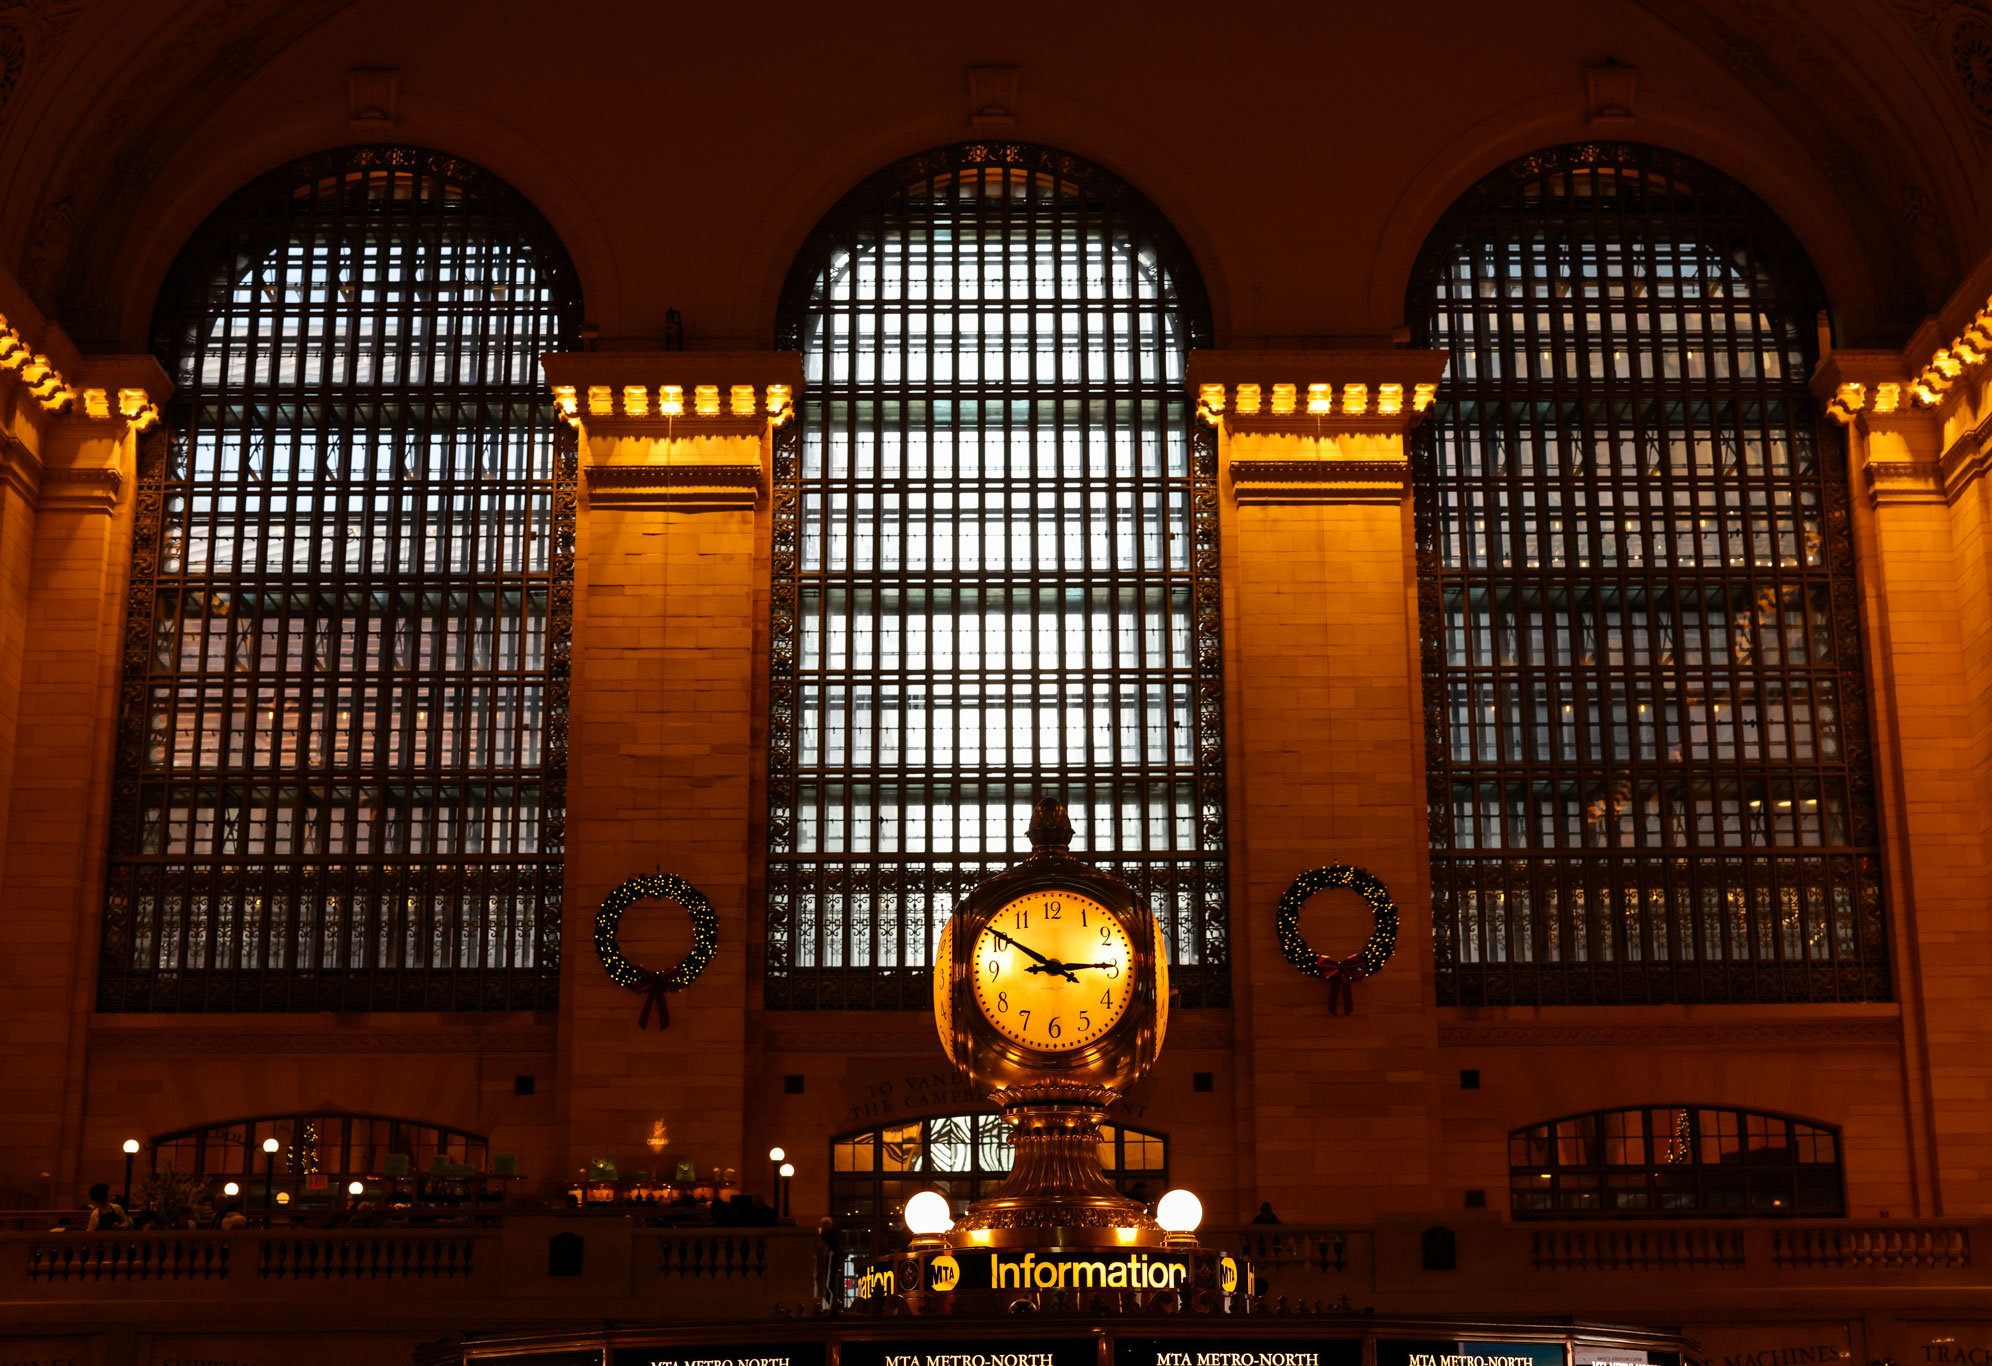
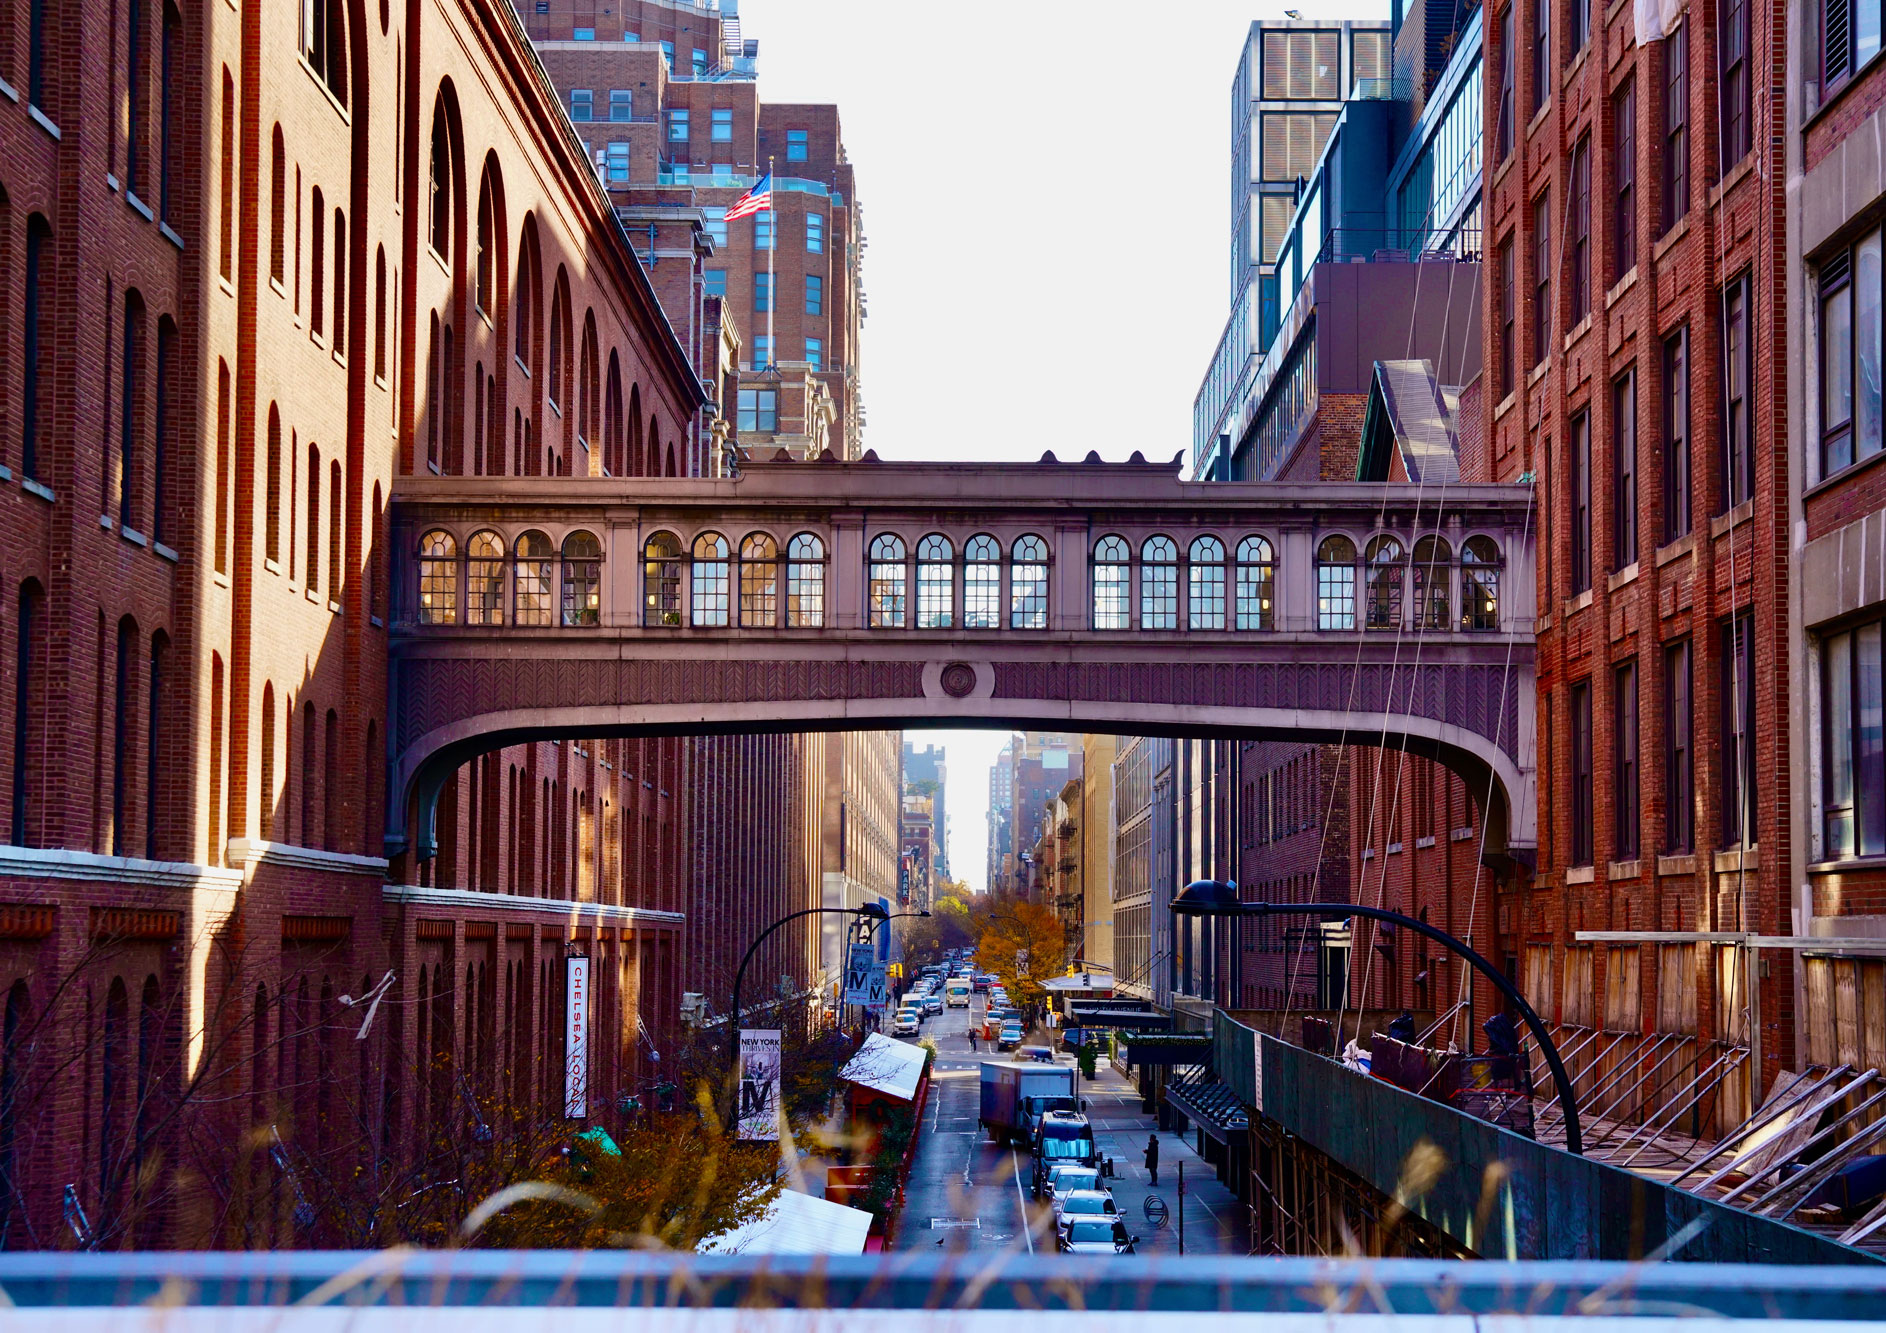
New York City
Our US team ventures out into the Big Apple to share their top NYC photography locations in Washington Square Park, Chinatown, SoHo, Grand Central, Brooklyn Bridge Park, and High Line. And, of course, Central Park—including Bow Bridge, Bethesda Fountain & Terrace, and The Mall. Read our top New York City locations for photography.
Leica Q2 | Summilux 28mm f/1.7 ASPH | f/5.0 | 1/2000 sec | ISO 400
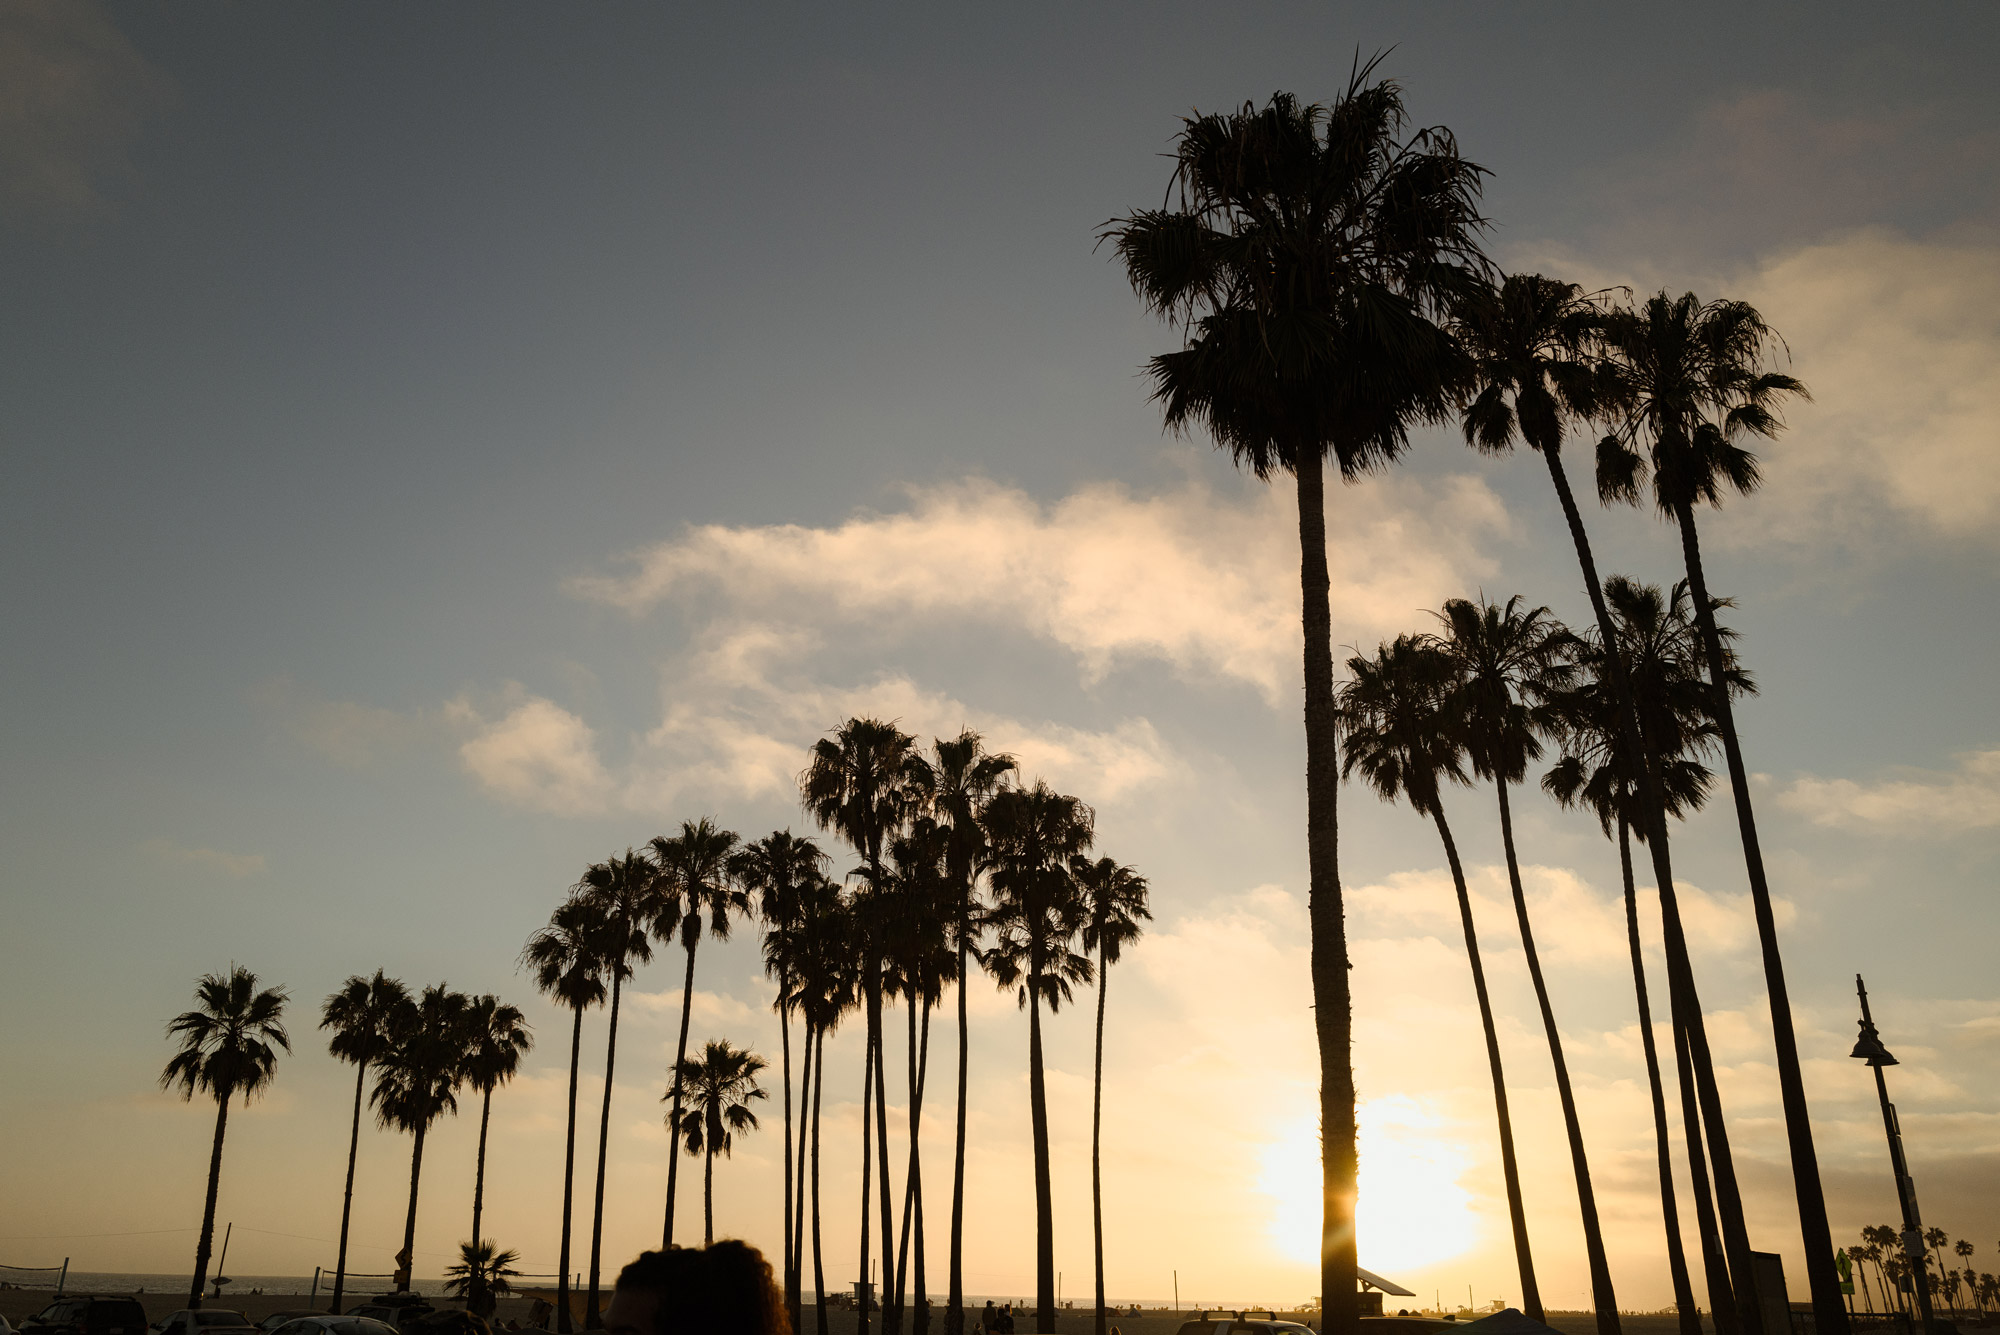
Los Angeles
After Hollywood and Beverly Hills, let’s look at all the big-name LA locations like Venice Beach, Santa Monica and Griffith Observatory. Discover our top Los Angeles photography locations.
Connor Redmond | Ricoh GR IIIx | f/2.8 | 1/2500 sec | ISO 100
FAQs
Let’s get into the finer details. Find out all the answers to any questions you may have about travel photography.
How Can I Become a Travel Photographer?
Anyone can become a travel photographer. All you need is a camera. However, your success will depend entirely on your commitment to creating compelling photographs. Everyone works differently, but just enjoy what you’re doing. Concentrate on what you want your images to say about a place. Experiment, try different things and create a signature look to separate your work from the rest of the field.
How Much Do Travel Photographers Make?
As a career, how much you make from travel photography will depend on the work you create—and your clients, customers or employers. Some travel photographers sell prints online, some become social media influencers and others work for travel magazines or agencies. A handful go on to work for the big names like National Geographic.
Is Travel Photography a Good Career?
If you love travelling and you love photography, then absolutely consider a career as a travel photographer. It provides you with an opportunity to experience the world while allowing others to live vicariously through your photography. It can be a hugely rewarding and exciting life. While there’s a lot of competition, there are opportunities out there. The most important part is just to enjoy creating travel photography. With patience, practice and skill—and perhaps a little luck—the world is your oyster.
Are There Travel Photographer Courses?
There are a number of courses out there. But often, the best experiences are out there in the real world. So book those tickets, grab your camera and start creating travel photography.
Thank you for reading the MPB Guide to Travel Photography, our comprehensive look at the travel photography genre with advice, recommended camera equipment and interviews with some of the most exciting travel photographers today.
Best Compact Travel Cameras
Take a look at our top recommended compact travel cameras with the specs, benefits and drawbacks of each option.
Hard vs Soft Cases for Travelling Photographers
Hard or soft? It’s a tough choice. Which is right for you and your kit? Find out which is best for you on your travels.
Fujifilm X100V vs Sony A7C for Travel Photography
Find out which camera is better for travel photography between Fujifilm X100V and Sony A7C in this detailed comparison by MPB.